Loaf Pan Cheesecake: Prepare to be amazed by the easiest, most decadent dessert you’ll ever bake! Forget fussy water baths and complicated springform pans. This recipe delivers all the creamy, dreamy goodness of a classic cheesecake, but in a simple, straightforward loaf pan.
Cheesecake, in its various forms, has a history stretching back to ancient Greece, where it was even served to athletes during the Olympic Games! Over centuries, it evolved, finding its way into countless cultures and kitchens, each adding their unique twist. While the New York-style cheesecake is perhaps the most famous, known for its rich and dense texture, this loaf pan cheesecake offers a delightful alternative that’s just as satisfying, but far less intimidating to make.
What makes cheesecake so universally loved? It’s the irresistible combination of textures – the smooth, velvety filling against a buttery, crumbly crust. The tangy cream cheese perfectly balances the sweetness, creating a symphony of flavors that dance on your palate. And let’s be honest, who can resist that rich, melt-in-your-mouth sensation? This particular recipe is especially appealing because it simplifies the process, making it perfect for weeknight desserts or when you need a crowd-pleasing treat without spending hours in the kitchen. Get ready to impress your friends and family with this surprisingly simple and utterly delicious loaf pan cheesecake!

Ingredients:
- For the Crust:
- 1 ½ cups graham cracker crumbs (about 12 full sheets)
- 5 tablespoons (70g) unsalted butter, melted
- ¼ cup (50g) granulated sugar
- Pinch of salt
- For the Cheesecake Filling:
- 32 ounces (900g) cream cheese, softened to room temperature
- 1 ½ cups (300g) granulated sugar
- 1 cup (240ml) sour cream, room temperature
- 2 large eggs, room temperature
- 2 large egg yolks, room temperature
- 2 teaspoons vanilla extract
- 1 tablespoon lemon juice
- Pinch of salt
- Optional Toppings:
- Fresh berries (strawberries, blueberries, raspberries)
- Chocolate sauce
- Caramel sauce
- Whipped cream
Preparing the Graham Cracker Crust
- Combine the ingredients: In a medium bowl, combine the graham cracker crumbs, melted butter, granulated sugar, and salt. Mix well until all the crumbs are evenly moistened. The mixture should resemble wet sand.
- Press into the pan: Pour the crumb mixture into a 9×5 inch loaf pan. Use the bottom of a measuring cup or your fingers to firmly press the crumbs evenly across the bottom and slightly up the sides of the pan. Make sure the crust is compact and uniform in thickness. This is important for a stable base.
- Pre-bake the crust: Bake the crust in a preheated oven at 350°F (175°C) for 8-10 minutes. This will help it set and prevent it from becoming soggy. Keep a close eye on it to prevent burning.
- Cool the crust: Remove the pan from the oven and let the crust cool completely while you prepare the cheesecake filling. This cooling period is crucial for the crust to solidify.
Making the Cheesecake Filling
- Beat the cream cheese: In a large mixing bowl (or the bowl of a stand mixer), beat the softened cream cheese on medium speed until smooth and creamy. This usually takes about 3-5 minutes. Make sure there are no lumps! Scrape down the sides of the bowl as needed.
- Add the sugar: Gradually add the granulated sugar to the cream cheese, beating on medium speed until well combined. Again, scrape down the sides of the bowl to ensure everything is incorporated evenly. Over-mixing at this stage can incorporate too much air, which can lead to cracks in the cheesecake.
- Incorporate the sour cream: Add the sour cream and beat on low speed until just combined. Don’t over-mix! Sour cream adds moisture and tang to the cheesecake.
- Add the eggs and yolks: Add the eggs and egg yolks one at a time, beating on low speed after each addition until just combined. It’s vital to avoid over-mixing at this stage. The egg yolks add richness and color to the cheesecake.
- Add the flavorings: Stir in the vanilla extract, lemon juice, and salt. Mix until just combined. The lemon juice brightens the flavor of the cheesecake and helps to balance the sweetness.
Baking the Loaf Pan Cheesecake
- Pour the filling: Pour the cheesecake filling over the cooled graham cracker crust in the loaf pan. Spread the filling evenly.
- Bake in a water bath (recommended): A water bath helps to ensure even baking and prevents the cheesecake from cracking. To create a water bath, wrap the bottom of the loaf pan tightly with heavy-duty aluminum foil (double layer is recommended) to prevent water from seeping in. Place the wrapped loaf pan inside a larger baking pan (like a roasting pan). Pour hot water into the larger pan until it reaches about halfway up the sides of the loaf pan.
- Bake (with or without water bath):
- With water bath: Bake in a preheated oven at 325°F (160°C) for 60-75 minutes, or until the edges are set and the center is slightly jiggly.
- Without water bath: Bake in a preheated oven at 325°F (160°C) for 50-60 minutes, or until the edges are set and the center is slightly jiggly. Keep a close eye on it to prevent over-baking.
- Turn off the oven and let cool: Turn off the oven and crack the oven door slightly. Let the cheesecake cool in the oven for 1 hour. This slow cooling process helps to prevent cracking.
- Refrigerate: Remove the cheesecake from the oven and water bath (if used). Let it cool completely on a wire rack. Then, cover the loaf pan with plastic wrap and refrigerate for at least 6 hours, or preferably overnight. This chilling time is essential for the cheesecake to set properly and develop its flavor.
Serving and Storing
- Unmold the cheesecake: After chilling, gently run a thin knife around the edges of the cheesecake to loosen it from the pan. Invert the loaf pan onto a serving plate. If it doesn’t release easily, you can try warming the bottom of the pan slightly with a hot towel.
- Slice and serve: Slice the cheesecake into desired thickness using a sharp knife. For clean slices, dip the knife in hot water and wipe it clean between each cut.
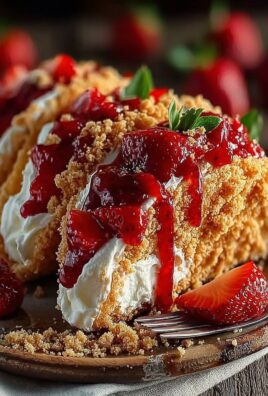
- Add toppings (optional): Top with fresh berries, chocolate sauce, caramel sauce, or whipped cream, if desired.
- Storage: Store leftover cheesecake in an airtight container in the refrigerator for up to 5 days.
Tips for Success
- Room temperature ingredients: Using room temperature cream cheese, sour cream, and eggs is crucial for a smooth and creamy cheesecake. Room temperature ingredients blend together more easily and prevent lumps.
- Don’t over-mix: Over-mixing the cheesecake batter can incorporate too much air, which can cause the cheesecake to crack during baking. Mix only until the ingredients are just combined.
- Water bath: While optional, a water bath is highly recommended for baking cheesecakes. It helps to ensure even baking and prevents cracking.
- Slow cooling: Allowing the cheesecake to cool slowly in the oven after baking is another key to preventing cracks.
- Chilling time: The cheesecake needs to be chilled for at least 6 hours, or preferably overnight, to set properly.
- Variations: Feel free to experiment with different flavors and toppings. You can add lemon zest, orange zest, or other extracts to the filling. You can also top the cheesecake with different types of fruit, sauces, or nuts.
Troubleshooting
- Cracked cheesecake: If your cheesecake cracks, don’t worry! It will still taste delicious. You can cover the cracks with toppings or simply embrace the rustic look. To prevent cracking in the future, try using a water bath, avoiding over-mixing, and cooling the cheesecake slowly.
- Soggy crust: To prevent a soggy crust, pre-bake it before adding the filling. You can also brush the cooled crust with melted chocolate to create a moisture barrier.
- Lumpy filling: If your filling is lumpy, it’s likely because the cream cheese wasn’t softened enough. Make sure to soften the cream cheese to room temperature before using it. You can also try beating the cream cheese on medium speed for a longer period of time to smooth it out.
Conclusion:
This Loaf Pan Cheesecake is truly a must-try, and I’m not just saying that! Its creamy texture, perfectly balanced sweetness, and the sheer ease of preparation make it a winner in my book. Forget spending hours in the kitchen wrestling with water baths and springform pans. This recipe delivers all the classic cheesecake flavor you crave, but in a convenient and approachable format. It’s the perfect dessert for a weeknight treat, a potluck contribution, or even a small, intimate celebration.
What makes this cheesecake so special? It’s the simplicity. The ingredients are readily available, the instructions are straightforward, and the results are consistently delicious. You don’t need to be a seasoned baker to achieve cheesecake perfection with this recipe. It’s forgiving, adaptable, and guaranteed to impress. Plus, the loaf pan presentation is undeniably charming and makes slicing and serving a breeze.
But the best part? The possibilities are endless! While I adore this cheesecake in its classic form, feel free to get creative with your toppings and variations. A simple dusting of powdered sugar is always elegant, but why not try a homemade berry compote for a burst of fruity freshness? Or perhaps a drizzle of salted caramel sauce for a decadent indulgence? For the chocolate lovers out there, a ganache topping or chocolate shavings would be divine.
Serving Suggestions and Variations:
* Berry Bliss: Top with fresh raspberries, blueberries, and strawberries. A light glaze made from melted apricot jam adds a beautiful shine.
* Caramel Craze: Drizzle with homemade or store-bought salted caramel sauce and sprinkle with chopped pecans.
* Chocolate Dream: Cover with a rich chocolate ganache and garnish with chocolate shavings or cocoa powder.
* Lemon Zest: Add lemon zest to the batter for a bright and citrusy twist. Top with a lemon curd for extra zing.
* Coffee Kick: Incorporate a tablespoon of instant espresso powder into the batter for a subtle coffee flavor.
* Seasonal Spice: Add a teaspoon of pumpkin pie spice or cinnamon to the batter for a warm and cozy flavor, perfect for fall.
Don’t be afraid to experiment and make this Loaf Pan Cheesecake your own. Try different extracts, add chopped nuts to the crust, or even swirl in some fruit preserves before baking. The only limit is your imagination!
I truly believe this recipe will become a staple in your baking repertoire. It’s a crowd-pleaser, a time-saver, and a guaranteed source of deliciousness. So, what are you waiting for? Gather your ingredients, preheat your oven, and get ready to experience the joy of homemade cheesecake without the fuss.
I’m so excited for you to try this recipe! Once you’ve baked your own Loaf Pan Cheesecake, please come back and share your experience in the comments below. I’d love to hear about your variations, your successes, and any tips you might have for other bakers. Happy baking! I can’t wait to see your creations! Let me know what you think!
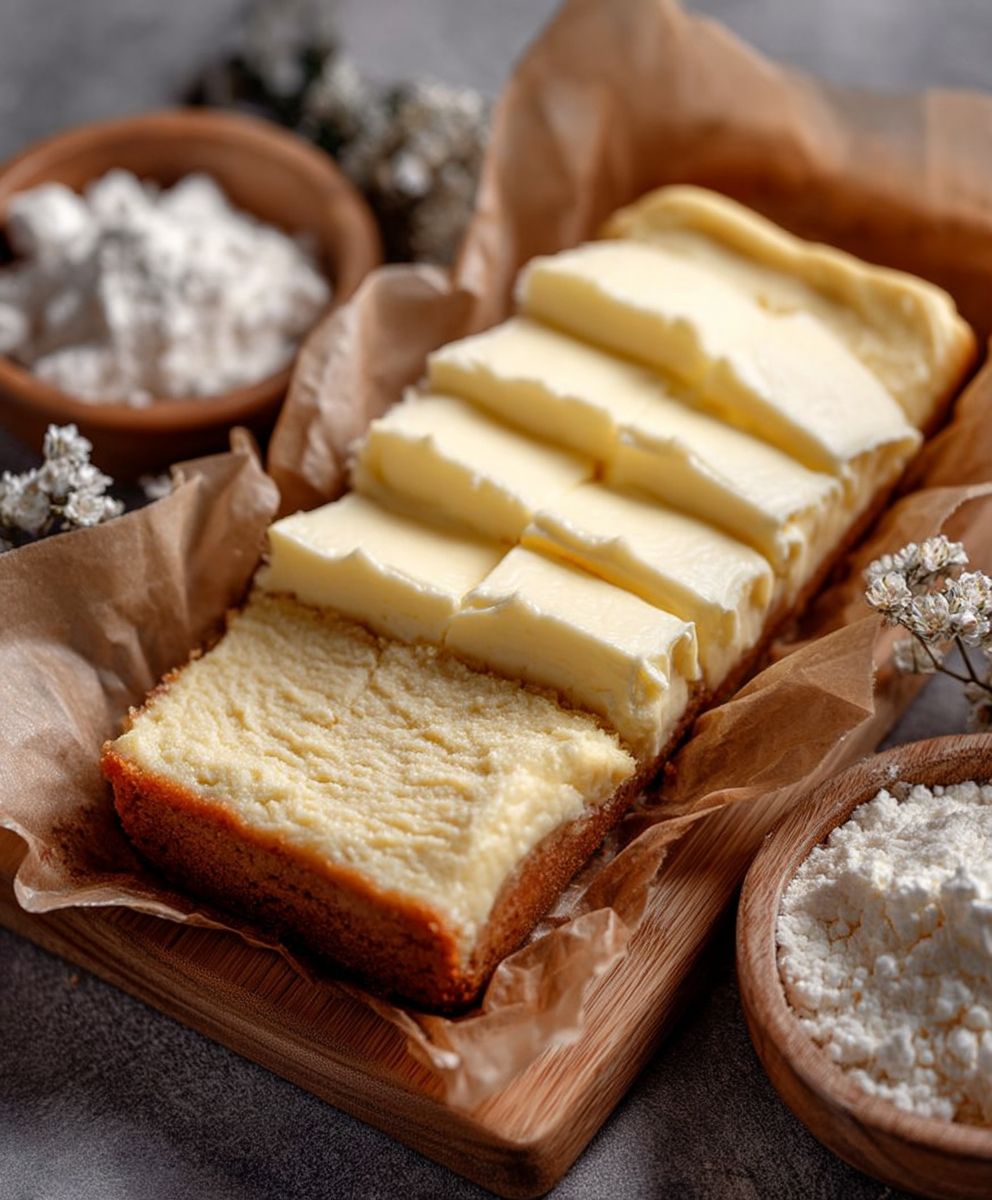
Loaf Pan Cheesecake: The Ultimate Guide to Baking Perfection
Rich and creamy loaf pan cheesecake with a buttery graham cracker crust. Perfect for a smaller gathering or a weeknight treat!
Ingredients
Instructions
Recipe Notes
- Using room temperature cream cheese, sour cream, and eggs is crucial for a smooth and creamy cheesecake. Room temperature ingredients blend together more easily and prevent lumps.
- Over-mixing the cheesecake batter can incorporate too much air, which can cause the cheesecake to crack during baking. Mix only until the ingredients are just combined.
- While optional, a water bath is highly recommended for baking cheesecakes. It helps to ensure even baking and prevents cracking.
- Allowing the cheesecake to cool slowly in the oven after baking is another key to preventing cracks.
- The cheesecake needs to be chilled for at least 6 hours, or preferably overnight, to set properly.
- Feel free to experiment with different flavors and toppings. You can add lemon zest, orange zest, or other extracts to the filling. You can also top the cheesecake with different types of fruit, sauces, or nuts.
- If your cheesecake cracks, don’t worry! It will still taste delicious. You can cover the cracks with toppings or simply embrace the rustic look. To prevent cracking in the future, try using a water bath, avoiding over-mixing, and cooling the cheesecake slowly.
- To prevent a soggy crust, pre-bake it before adding the filling. You can also brush the cooled crust with melted chocolate to create a moisture barrier.
- If your filling is lumpy, it’s likely because the cream cheese wasn’t softened enough. Make sure to soften the cream cheese to room temperature before using it. You can also try beating the cream cheese on medium speed for a longer period of time to smooth it out.