• Skip to primary navigation
  • Skip to main content
  • Skip to primary sidebar
Homesmad

Homesmad

  • Home
  • Breakfast & Brunch
  • Appetizers & Snacks
  • Dinner
  • Dessert
  • About
  • Privacy Policy
  • Contact
Homesmad
  • Home
  • Breakfast & Brunch
  • Appetizers & Snacks
  • Dinner
  • Dessert
  • About
  • Privacy Policy
  • Contact

Best Sticky Garlic Chicken Noodles Recipe for Easy Dinner

September 22, 2025 by Lily author

Sticky Garlic Chicken Noodles – just the name itself conjures images of irresistible, glistening noodles, tender chicken, and that perfect, savory-sweet garlic aroma, doesn’t it? As an avid home cook, I am absolutely thrilled to share my ultimate recipe for a dish that consistently delivers on flavor and pure comfort. This isn’t just another weeknight meal; it’s an experience, transforming simple ingredients into something truly extraordinary that will undoubtedly become a regular request in your home.

While the specific recipe for these delightful noodles might be a modern invention, it draws deeply from the rich tapestry of Asian-inspired cuisine, where stir-fried noodles are a cherished staple, celebrated for their versatility and ability to unite vibrant flavors. Think of the bustling street food markets and cozy family dinners where noodle dishes are the heart of the meal – our rendition captures that spirit of warmth and satisfaction, bringing a piece of that culinary joy straight to your kitchen.

Why You’ll Fall in Love with Sticky Garlic Chicken Noodles

People adore this dish for so many reasons. The chicken is marinated to perfection, ensuring every bite is succulent, while the noodles become beautifully coated in that signature sticky, savory, and slightly sweet garlic sauce. It’s the ideal blend of textures – chewy noodles, tender chicken, and a glossy sauce that clings to everything just right. It’s incredibly satisfying, remarkably easy to prepare, and a guaranteed crowd-pleaser that will have everyone asking for seconds. Get ready to make some truly unforgettable Sticky Garlic Chicken Noodles!

Best Sticky Garlic Chicken Noodles Recipe for Easy Dinner this RECIPE

Ingredients:

  • For the Chicken:
    • 1.5 lbs (about 680g) boneless, skinless chicken thighs or breasts, cut into 1-inch bite-sized pieces. Chicken thighs are my personal favorite for this dish because they stay incredibly juicy and tender, but chicken breast works wonderfully if you prefer a leaner option.
    • 1 tablespoon cooking oil (vegetable, canola, or a light olive oil)
    • ½ teaspoon salt
    • ¼ teaspoon black pepper
  • For the Sticky Garlic Sauce:
    • 10-12 cloves garlic, minced (yes, that’s a lot, but trust me, it’s what makes these Sticky Garlic Chicken Noodles truly shine!)
    • 1-inch piece fresh ginger, grated or minced
    • ½ cup low-sodium soy sauce
    • ¼ cup honey or packed light brown sugar (for that perfect sticky glaze)
    • 2 tablespoons rice vinegar (not seasoned rice vinegar, unless you want extra sweetness)
    • 1 tablespoon sesame oil (toasted sesame oil adds a deeper flavor)
    • ½ cup chicken broth or water
    • 2 tablespoons cornstarch (this is our secret weapon for a thick, glossy sauce)
    • ¼ teaspoon red pepper flakes, optional (for a little kick, adjust to your spice preference)
  • For the Noodles and Vegetables:
    • 12-16 oz (about 340-450g) egg noodles, ramen noodles, or lo mein noodles. Udon noodles also work for a chewier texture.
    • 1 tablespoon cooking oil (for sautéing vegetables)
    • 2 cups mixed stir-fry friendly vegetables, optional (e.g., sliced bell peppers, broccoli florets, shredded carrots, snap peas). I often add colorful bell peppers for visual appeal and a gentle crunch.
  • For Garnish:
    • 3-4 green onions, thinly sliced (both white and green parts)
    • 1 tablespoon sesame seeds (toasted, if possible, for extra aroma)

Preparing the Chicken:

  1. Prepare the Chicken Pieces: Begin by taking your chicken thighs or breasts and placing them on a clean cutting board. Using a sharp knife, carefully cut the chicken into uniform 1-inch bite-sized pieces. Aim for consistency in size, as this ensures that all the chicken cooks evenly at the same rate. Pat the chicken pieces dry with paper towels; this crucial step helps achieve a beautiful sear and prevents the chicken from steaming in the pan, which would hinder that golden-brown crust we’re aiming for.
  2. Season the Chicken: In a medium bowl, toss the dried chicken pieces with ½ teaspoon of salt and ¼ teaspoon of black pepper. Ensure every piece is lightly coated. While a longer marinade isn’t strictly necessary for this recipe due to the intensely flavorful sauce, a quick seasoning now enhances the chicken’s natural taste and provides a foundational layer of flavor.
  3. Sear the Chicken: Heat 1 tablespoon of cooking oil in a large non-stick skillet or wok over medium-high heat. Once the oil is shimmering, carefully add the seasoned chicken pieces to the hot pan in a single layer. Avoid overcrowding the pan; if necessary, cook the chicken in two batches. Overcrowding will lower the pan’s temperature and lead to steaming instead of searing. Cook for 3-5 minutes per side, or until the chicken is beautifully golden brown and cooked through. You’re looking for that delicious caramelized crust on the outside. Once cooked, remove the chicken from the pan and set it aside on a plate. It’s okay if there are some browned bits left in the pan; these are packed with flavor and will contribute wonderfully to our sticky garlic sauce.

Crafting the Sticky Garlic Sauce:

  1. Prepare the Aromatics: While your chicken is searing or resting, you can quickly prepare your aromatics. Mince all 10-12 cloves of garlic. Yes, it sounds like a lot, but this recipe is called Sticky Garlic Chicken Noodles for a reason, and the garlic flavor mellows and sweetens as it cooks, becoming wonderfully fragrant without being overpowering. Grate or finely mince your 1-inch piece of fresh ginger. Fresh ginger adds a bright, zesty counterpoint to the rich garlic.
  2. Whisk Together the Sauce Base: In a medium bowl, whisk together the ½ cup of low-sodium soy sauce, ¼ cup of honey (or brown sugar), 2 tablespoons of rice vinegar, and 1 tablespoon of sesame oil. These form the sweet, savory, and tangy foundation of our sticky glaze. Add the optional ¼ teaspoon of red pepper flakes now if you enjoy a touch of heat in your Asian-inspired dishes.
  3. Create the Cornstarch Slurry: In a small separate bowl or cup, combine the 2 tablespoons of cornstarch with ½ cup of chicken broth (or water). Whisk vigorously until the cornstarch is completely dissolved and there are no lumps. This slurry is essential for thickening our sauce, giving it that luxurious, glossy, and “sticky” texture that coats the noodles and chicken so perfectly. Don’t skip this step!
  4. Sauté Aromatics and Thicken Sauce: Using the same skillet where you cooked the chicken (no need to clean it; those browned bits are flavor gold!), reduce the heat to medium-low. Add the minced garlic and grated ginger to the pan and cook for about 1 minute, stirring constantly, until incredibly fragrant. Be careful not to burn the garlic; burnt garlic can turn bitter. Once fragrant, pour the whisked sauce base (from step 5) into the pan. Stir well to combine, scraping up any delicious browned bits from the bottom of the pan. Bring the mixture to a gentle simmer.

    Building Layers of Flavor for Your Sticky Garlic Chicken Noodles

    Once simmering, slowly pour the cornstarch slurry (from step 6) into the sauce while continuously whisking. Continue to whisk for 1-2 minutes until the sauce thickens to a beautiful, glossy consistency that coats the back of a spoon. It should be thick enough to cling to the chicken and noodles, creating that signature “sticky” texture. If it’s too thick, you can add a tablespoon or two of water or chicken broth until it reaches your desired consistency. Taste the sauce and adjust seasonings if needed – perhaps a tiny pinch more salt if using regular soy sauce, or a touch more honey for sweetness.

Cooking the Noodles and Vegetables:

  1. Cook the Noodles: While the sauce is simmering, bring a large pot of salted water to a rolling boil. Add your chosen noodles (egg noodles, ramen, lo mein, or udon) and cook according to package directions until al dente. This usually takes between 3-7 minutes depending on the noodle type. It’s important not to overcook them, as they will continue to soften slightly when tossed with the hot sauce. Once cooked, drain the noodles thoroughly in a colander. For stir-fry dishes like these Sticky Garlic Chicken Noodles, I often give the drained noodles a quick rinse under cold water to prevent them from sticking together, especially if they’re not going directly into the pan. However, if you’re tossing them immediately with the hot sauce, a rinse isn’t strictly necessary.
  2. Sauté the Optional Vegetables: If you’re adding vegetables, heat 1 tablespoon of cooking oil in a separate large skillet or wok over medium-high heat. Add your mixed stir-fry vegetables (e.g., bell peppers, broccoli, carrots, snap peas). Stir-fry for 3-5 minutes, or until the vegetables are tender-crisp. You want them to retain a little bite, adding a wonderful textural contrast to the soft noodles and tender chicken. Remove them from the heat and set aside.

Bringing It All Together for Your Sticky Garlic Chicken Noodles:

  1. Combine Chicken and Sauce: Return the cooked chicken pieces to the skillet with the thickened sticky garlic sauce. Toss gently to ensure every piece of chicken is thoroughly coated in the rich, glistening sauce. Let it simmer for another minute, allowing the chicken to warm through and absorb even more of that amazing garlic flavor.
  2. Add Noodles and Vegetables: Now, add the drained noodles to the skillet with the chicken and sauce. If you cooked vegetables separately, add them in now as well. Using tongs, gently toss everything together. Ensure the noodles, chicken, and vegetables are all beautifully coated in the thick, glossy Sticky Garlic Chicken Noodles sauce. This step is where the magic truly happens, transforming individual components into a cohesive, incredibly flavorful dish. Continue to toss for 1-2 minutes over low heat, allowing the noodles to fully absorb the sauce and warm through. The aroma filling your kitchen right now will be absolutely irresistible.

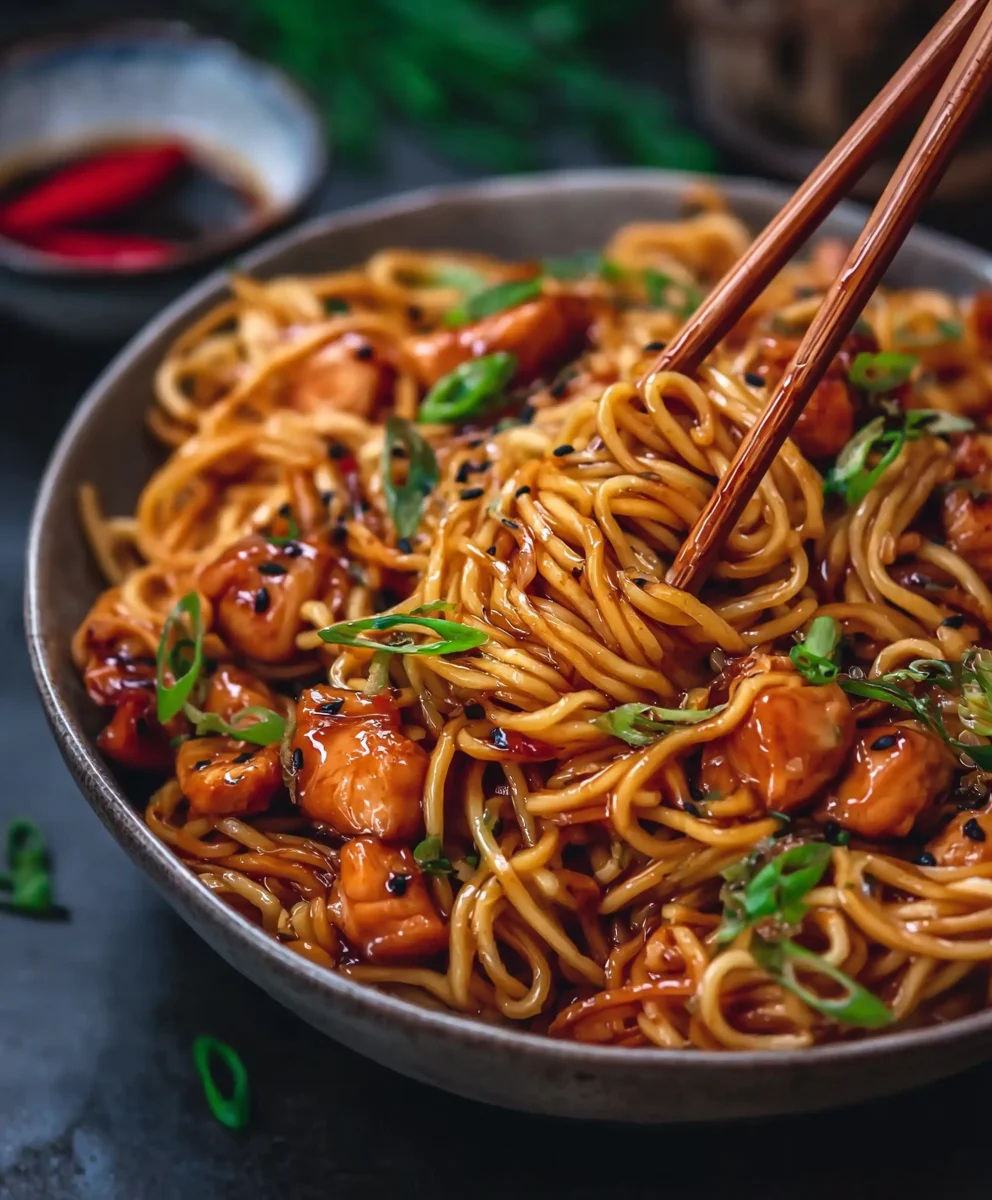
    The Finishing Touch: A Bowl Full of Flavor

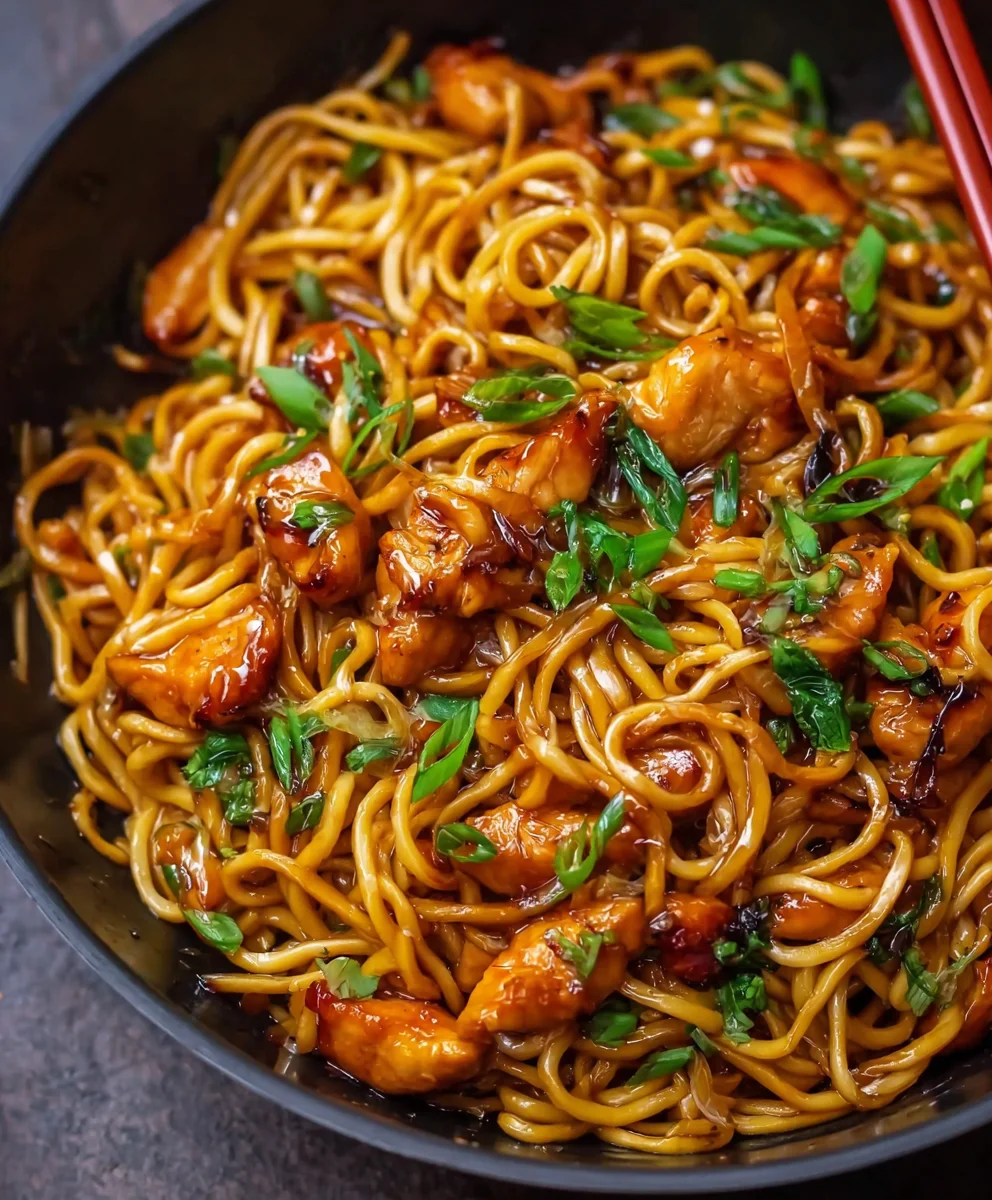
    This is a moment of pure culinary delight. The sweet and savory notes from the honey and soy sauce, the pungent kick of garlic and ginger, and the comforting chewiness of the noodles all come together in perfect harmony. Each strand of noodle should be glistening, each piece of chicken coated in that delectable, sticky glaze. The vibrant colors of the optional vegetables will pop against the rich brown sauce, making the dish as appealing to the eyes as it is to the palate. This truly is a meal that delivers on all fronts – texture, aroma, and a symphony of flavors that will have everyone reaching for seconds.

  3. Garnish and Serve: Once everything is thoroughly combined and heated through, transfer your spectacular Sticky Garlic Chicken Noodles to serving bowls. Generously sprinkle with thinly sliced green onions and a handful of toasted sesame seeds. The green onions add a fresh, pungent finish and a pop of color, while the sesame seeds provide a subtle nutty crunch. Serve immediately and watch how quickly this dish disappears! It’s perfect for a weeknight dinner, but impressive enough for company. Enjoy the fruits of your delicious labor!

Best Sticky Garlic Chicken Noodles Recipe for Easy Dinner

Conclusion:

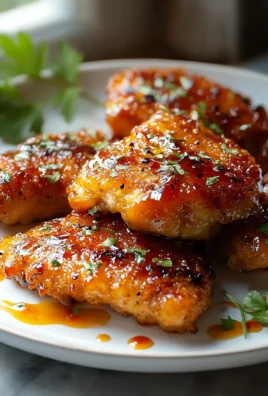
Well, there you have it! We’ve journeyed through the simple steps to create a dish that I truly believe will become a staple in your kitchen. This isn’t just another weeknight meal; it’s an experience, a symphony of savory, sweet, and garlicky notes that dance on your palate with every single bite. I’ve poured my heart into perfecting this recipe because I genuinely want you to taste the magic it brings. Imagine a dish so utterly satisfying, so packed with flavor, yet so deceptively easy to whip up. That’s precisely what we’ve crafted here. This recipe for Sticky Garlic Chicken Noodles isn’t just about feeding your hunger; it’s about nourishing your soul with comfort food at its absolute finest. I promise you, once you try this, you’ll understand why I’m so enthusiastic about it – the golden-brown chicken, coated in that incredible sticky sauce, intertwined with perfectly cooked noodles and vibrant greens, it’s just irresistible.

The beauty of this dish lies not only in its phenomenal taste but also in its incredible versatility and the sheer joy it brings to the dinner table. It’s the kind of meal that silences a room, momentarily, as everyone savors each mouthful, then erupts into satisfied murmurs. The aroma alone, as the garlic and soy caramelize, is enough to get anyone’s mouth watering. It’s a dish that feels incredibly gourmet, yet requires no fancy techniques or hard-to-find ingredients. It’s accessible deliciousness, a true testament to how simple ingredients can create extraordinary flavors. I find myself coming back to this recipe time and time again, whether it’s for a quick solo dinner or when I’m entertaining friends, because it consistently delivers on taste, texture, and pure culinary satisfaction. It’s genuinely one of my all-time favorites, and I’m so excited for you to discover why.

Serving Suggestions and Delicious Variations

Now, while these amazing noodles are utterly fantastic on their own, a simple sprinkle of toasted sesame seeds and some freshly chopped green onions adds a delightful crunch and freshness that truly elevates the dish. If you’re looking to round out the meal, a crisp side salad with a light vinaigrette would be an excellent counterpoint to the richness of the noodles. Alternatively, some steamed broccoli or blanched asparagus makes for a wonderful, healthy accompaniment. For those who enjoy a little extra kick, a drizzle of sriracha or a pinch of red pepper flakes stirred in at the end can transform the flavor profile into something with a more fiery edge. I often serve mine with an extra wedge of lime on the side, as a squeeze of fresh citrus just before eating brightens everything up beautifully.

But the fun doesn’t stop there! This recipe is incredibly adaptable, inviting you to put your own spin on it. Not a fan of chicken? No problem! You could easily swap it out for shrimp, thinly sliced beef, or even firm tofu for a delicious vegetarian option. Just adjust cooking times accordingly. Feel free to experiment with different vegetables too. Snap peas, bell peppers, carrots, mushrooms, or even bok choy would all be fantastic additions, adding more color, texture, and nutrients. For an even more complex flavor, consider adding a dash of rice vinegar or a tiny bit of sesame oil to the sauce mixture – but remember, a little goes a long way with sesame oil! You could also experiment with different noodle types, from thicker udon to thinner vermicelli, depending on your preference for chewiness and mouthfeel. Don’t be afraid to get creative and make this recipe truly your own unique culinary masterpiece.

Your Turn: Try This Incredible Dish!

I’ve shared all my secrets, tips, and enthusiasm for this incredible recipe. Now, it’s your turn to bring this magic into your own kitchen. I genuinely believe that once you take that first bite of your homemade Sticky Garlic Chicken Noodles, you’ll be just as smitten as I am. It’s truly a game-changer for anyone looking for maximum flavor with minimal fuss. So, gather your ingredients, follow the steps, and prepare yourself for an absolutely delicious experience. And please, please, please, when you’ve whipped up your batch, I would absolutely love to hear about it! Share your photos, your triumphs, and any fantastic variations you come up with in the comments below or tag me on social media. Your feedback and creativity inspire me, and I can’t wait to see your amazing creations. Happy cooking, and get ready to enjoy one of the most satisfying noodle dishes you’ll ever make!

FAQs (People Also Ask):

Can I make this recipe vegetarian or vegan?

Absolutely! This recipe is incredibly adaptable. For a vegetarian version, simply omit the chicken and consider replacing it with pan-fried firm tofu or tempeh, cut into cubes. Ensure the tofu is pressed well to remove excess moisture before cooking for best results. For a vegan option, in addition to swapping the chicken for tofu/tempeh, you’ll want to ensure your noodles are egg-free (most rice noodles and some wheat noodles are) and use a vegan-friendly soy sauce. You can also add more vegetables like mushrooms, bell peppers, or broccoli for extra heartiness.

How long do leftovers last and how should I store them?

Leftovers of these delightful noodles are fantastic! Once cooled, store them in an airtight container in the refrigerator for up to 3-4 days. When reheating, you might find the noodles have absorbed some of the sauce. I recommend reheating gently in a microwave or a skillet over medium heat, possibly adding a tiny splash of water or chicken/vegetable broth to loosen them up and refresh the sauce. Avoid over-reheating to maintain the texture of the chicken and noodles.

What kind of noodles are best for this dish?

For this Sticky Garlic Chicken Noodles recipe, I love using medium-thick egg noodles or ramen noodles because they have a great chew and absorb the sauce beautifully. However, you have many options! Udon noodles offer a wonderfully thick, chewy texture, while lo mein noodles are also a fantastic choice. Rice noodles (like wide rice stick noodles or vermicelli) can also work if you prefer a gluten-free option or a lighter feel. Just be sure to cook them according to package directions, typically until al dente, as they will continue to cook slightly when tossed with the hot sauce and chicken.

Can I make this dish spicier?

Definitely! If you love a bit of heat, there are several ways to kick up the spice level. You can add a pinch or two of red pepper flakes along with the garlic in the pan, or directly into the sauce mixture. For a deeper, more consistent heat, consider adding a teaspoon of sriracha or chili garlic sauce to the final sauce blend. Alternatively, you can always drizzle sriracha over your individual serving at the table for a customizable spice experience for everyone.

Can I prepare parts of this recipe in advance?

Yes, absolutely! This recipe is great for a bit of meal prep. You can whisk together the sauce ingredients a day or two in advance and store it in an airtight container in the refrigerator. You can also chop your chicken and vegetables ahead of time, keeping them refrigerated until you’re ready to cook. This significantly speeds up the cooking process on a busy weeknight, making it even easier to enjoy your amazing homemade noodles!


Sticky Garlic Chicken Noodles

Sticky Garlic Chicken Noodles

An irresistible, easy dinner featuring tender chicken and noodles coated in a savory-sweet, sticky garlic sauce, perfect for a satisfying weeknight meal.

Prep Time
15 Minutes

Cook Time
20 Minutes

Total Time
35 Minutes

Servings
4 servings

Ingredients

  • 1 lb boneless, skinless chicken (breast or thighs), cut into bite-sized pieces
  • 1/4 cup soy sauce
  • 3 tbsp honey
  • 4 garlic cloves, minced
  • 1 tsp grated ginger
  • 1/2 tsp red chili flakes (optional)
  • 2 tbsp cornstarch
  • 2 tbsp vegetable oil
  • 8 oz noodles (rice or egg)
  • 2 green onions, chopped
  • 1 tsp sesame seeds (optional)

Instructions

  1. Step 1
    Heat 1 tbsp vegetable oil in a skillet over medium-high heat. Sear chicken pieces 3-5 mins per side until golden and cooked. Remove and set aside.
  2. Step 2
    In a bowl, whisk 1/4 cup soy sauce, 3 tbsp honey, and 1/2 tsp red chili flakes (if using). In a separate small bowl, combine 2 tbsp cornstarch with 2 tbsp water (or a small portion of the soy sauce) to form a slurry.
  3. Step 3
    In the same skillet (medium-low heat, using remaining 1 tbsp oil if pan is dry), add minced garlic and grated ginger; cook 1 minute until fragrant. Pour in the whisked soy sauce mixture. Bring to a simmer, then slowly whisk in the cornstarch slurry. Cook 1-2 minutes until sauce thickens and becomes glossy.
  4. Step 4
    Cook 8 oz noodles according to package directions until al dente. Drain well.
  5. Step 5
    Return cooked chicken to the skillet with sauce; toss to coat. Add drained noodles. Toss everything together over low heat for 1-2 minutes until heated through and coated.
  6. Step 6
    Transfer to serving bowls. Garnish with chopped green onions and sesame seeds (if using). Serve immediately.

Important Information

Nutrition Facts (Per Serving)

It is important to consider this information as approximate and not to use it as definitive health advice.

Allergy Information

Please check ingredients for potential allergens and consult a health professional if in doubt.

« Previous Post
Halloween Candy Crack: The Ultimate Guide to Spooky Sweets
Next Post »
Das Butter Chicken: Rich, Creamy Tomato Chicken Recipe

If you enjoyed this…

Comforting Beef Potsticker Soup: Your Delicious Hug in a Bowl

Best Crispy Baked Hot Honey Chicken – Easy Weeknight Meal

Marry Me Pumpkin Chicken Pasta: Creamy & Delicious!

Primary Sidebar

Browse by Diet

BreakfastDinnerLunchDessertAppetizer

Sweet Peach Yogurt Parfait Delight

One of my fondest memories is from a lazy summer afternoon spent at my grandmother’s house. The sun filtered through the kitchen window, casting a warm glow over the table where she would create her culinary magic. It was during one of those blissful moments that I first tasted her Peach Yogurt Parfait with Honey and Granola. The sweet aroma of ripe peaches mingling with creamy yogurt and the crunch of granola was nothing short of heavenly. It felt like summer captured in a bowl, and I still remember the joy of diving in with a spoon, each layer revealing a new burst of flavor.

When I think about that parfait, I can almost hear the gentle hum of the bees outside, reminding me of the floral notes that honey brings to every bite. The vibrant yellows and soft oranges of the peaches contrast beautifully with the creamy white yogurt and the golden crunch of granola. It’s a dish that not only looks delightful but also tastes like a celebration of fresh, wholesome ingredients.

What makes my version of this Peach Yogurt Parfait special is the careful balance of flavors and textures. I use ripe, juicy peaches, drizzled with locally sourced honey, and a homemade granola that’s bursting with nuts and seeds for an extra crunch. It’s a simple dish, but every layer is crafted with love and attention.

Let me show you exactly how to make this delightful parfait, so you can bring a bit of that summer magic into your kitchen!

Sweet Peach Yogurt Parfait Delight

Why You’ll Love This Recipe

  • Delightfully creamy texture from the Greek yogurt, paired with the juicy sweetness of fresh peaches.
  • Ready in under 20 minutes, making it a quick and satisfying breakfast or snack option.
  • Budget-friendly, using common ingredients that you may already have in your pantry.
  • Customizable with your favorite granola and nuts, allowing you to tailor each parfait to your taste.
  • Perfectly balanced flavors with the bright acidity of lemon juice and the sweetness of honey enhancing the peaches.

Ingredients

  • For the Parfait:
  • 2 cups plain Greek yogurt (or vanilla yogurt for a sweeter option)
  • 2 large ripe peaches, diced (about 2 cups)
  • 1 tablespoon fresh lemon juice (to prevent browning of peaches)
  • 2 tablespoons honey (plus more for drizzling)
  • 1 teaspoon vanilla extract (optional for extra flavor)
  • For the Granola:
  • 1 cup granola (store-bought or homemade; see notes for a simple granola recipe)
  • 1/4 cup sliced almonds (optional for added crunch)
  • 1/4 cup shredded coconut (optional for added flavor)

Let’s dive into some key ingredients that make this Peach Yogurt Parfait so delightful! First, the Greek yogurt is not only creamy but also packed with protein, making it a satisfying option for breakfast or a snack. If you’re looking for a sweeter option, you can easily substitute it with vanilla yogurt, though it may alter the overall flavor balance. Next, the ripe peaches are the star of the show; their natural sweetness shines through, so I recommend choosing peaches that yield slightly to pressure, indicating they’re perfectly ripe. If peaches aren’t in season, feel free to use nectarines or even frozen peaches—just thaw them before use. Finally, honey adds a lovely floral sweetness that ties everything together. If you prefer, maple syrup can serve as a delicious substitute.

Step-by-Step Instructions

  1. Start by preparing the peaches. Wash them thoroughly, then slice and dice them into bite-sized pieces. In a medium bowl, toss the diced peaches with 1 tablespoon of fresh lemon juice to prevent browning. Set aside for about 5 minutes while the lemon juice works its magic.
  2. In a separate bowl, combine the Greek yogurt, 2 tablespoons of honey, and 1 teaspoon of vanilla extract if using. Stir the mixture until smooth and thoroughly blended. This should take about a minute. Avoid overmixing to maintain the creaminess of the yogurt.
  3. Now it’s time to layer your parfait. Grab a clear glass or bowl to showcase your beautiful creation. Start with a generous spoonful of the yogurt mixture at the bottom—about 1/4 cup will do. Use a spoon to spread it evenly.
  4. Add a layer of the diced peaches over the yogurt, ensuring they cover the yogurt completely. You might want to use about half of what you have prepared—roughly 1 cup. This layer should be visually appealing, so arrange the peaches neatly.
  5. Sprinkle 1/4 cup of granola over the peaches. This adds a delightful crunch. Make sure to distribute it evenly to ensure every bite has that satisfying texture. Avoid packing it down too tightly, as you want it to maintain its crunch.
  6. Repeat the layers: spoon in another 1/4 cup of yogurt, followed by another cup of peaches, and another sprinkle of granola. You should have at least two layers, but feel free to add more depending on your glass size.
  7. Finish off your parfait with a drizzle of honey on top for added sweetness and a touch of elegance. If you’re using sliced almonds or shredded coconut, sprinkle them on top now. It adds a lovely visual contrast and extra flavor.
  8. Serve immediately or refrigerate for up to 30 minutes before serving to allow the flavors to meld together. However, I recommend enjoying it fresh to maintain the granola’s crunch.

Pro Tips for the Best Peach Yogurt Parfait With Honey And Granola

  • Make sure to choose ripe peaches for the best flavor and texture. A common mistake is using unripe fruit, which can lead to a less enjoyable parfait. Look for peaches that are fragrant and slightly soft to the touch.
  • Use a clear glass to assemble your parfait; this not only makes for a beautiful presentation but also allows you to see the colorful layers, which adds to the enjoyment of eating it.
  • For an even creamier texture, consider whipping the Greek yogurt with a hand mixer for a couple of minutes before layering. This small adjustment makes a huge difference in mouthfeel.
  • Be mindful of the granola-to-yogurt ratio. Too much granola can overwhelm the parfait, while too little can make it feel too creamy. Aim for about 1/4 cup of granola per layer for the perfect balance.
  • If you’re making this for a gathering, consider preparing the yogurt and peaches ahead of time and layering them just before serving. This ensures the granola stays crunchy!

Variations & Serving Ideas

There are so many ways to get creative with your Peach Yogurt Parfait! For a tropical twist, swap out the peaches for mangoes or pineapples and top with coconut flakes. If you prefer a berry flavor, mix in some blueberries or strawberries with the peaches for added color and taste. For a nutty version, incorporate chopped walnuts or pecans instead of almonds.

As for serving ideas, this parfait pairs beautifully with a side of scrambled eggs for a hearty breakfast or fresh fruit salad for a light lunch. You might also enjoy it alongside whole grain toast with almond butter for an energizing snack. The contrast of flavors and textures will elevate your meal experience!

Storage, Make-Ahead & Reheating

The Peach Yogurt Parfait is best enjoyed fresh, but you can prepare some components ahead of time. Store the layered parfait in an airtight container in the refrigerator for up to 24 hours. However, be cautious; the granola may lose its crunch if stored too long. You can freeze the yogurt and peach mixture for up to 2 months; just remember to thaw it in the refrigerator overnight before serving.

If you plan to enjoy this dish the next day, it can taste even better as the flavors meld together. Just remember to add the granola right before serving to keep its delightful crunch!

Frequently Asked Questions

Can I make Peach Yogurt Parfait With Honey And Granola ahead of time?

Yes — in fact, it tastes even better the next day as the flavors meld. However, I recommend waiting to add the granola until just before serving to maintain its crunch.

What can I substitute for Greek yogurt?

If you prefer a lighter option, you can substitute Greek yogurt with regular yogurt or a dairy-free alternative like coconut yogurt. Just remember that this may alter the creaminess and flavor profile slightly.

Can I use frozen peaches for this parfait?

Absolutely! Just make sure to thaw the frozen peaches before using them. They will still add great flavor, though the texture may be slightly softer than fresh peaches.

How do I make the parfait vegan?

To make a vegan version, substitute the Greek yogurt with a plant-based yogurt alternative, and replace honey with maple syrup or agave nectar. This keeps the parfait sweet while adhering to a vegan diet.

What other fruits can I use in this recipe?

You can mix and match fruits based on your preference. Try using strawberries, blueberries, raspberries, or even bananas. Just make sure to adjust the lemon juice as needed to prevent browning.

Sweet Peach Yogurt Parfait Delight

Final Thoughts

The Peach Yogurt Parfait with Honey and Granola is a delightful blend of creamy yogurt, sweet peaches, and crunchy granola that creates a satisfying and nourishing treat. Each layer bursts with flavor, making it a perfect choice for breakfast or a light dessert.

This is the kind of recipe I come back to again and again, especially when I want something refreshing and wholesome to start my day. The harmony of sweet and tart flavors, combined with the delightful crunch, never fails to lift my spirits!

I encourage you to give this parfait a try and indulge in its comforting goodness. Feel free to share your results or even add your own twist—perhaps a sprinkle of cinnamon or a handful of nuts. Enjoy creating your perfect parfait!

Print
clock clock iconcutlery cutlery iconflag flag iconfolder folder iconinstagram instagram iconpinterest pinterest iconfacebook facebook iconprint print iconsquares squares iconheart heart iconheart solid heart solid icon

Peach Yogurt Parfait


  • Author: Lily author
  • Total Time: 15 minutes
  • Yield: 4 servings 1x
Pin Recipe
Print Recipe

Description

This Peach Yogurt Parfait combines creamy Greek yogurt, juicy peaches, and crunchy granola for a delightful treat. It’s a perfect breakfast or snack that captures the essence of summer in every bite.


Ingredients

Scale
  • For the Parfait:
  • 2 cups plain Greek yogurt (or vanilla yogurt for a sweeter option)
  • 2 large ripe peaches, diced (about 2 cups)
  • 1 tablespoon fresh lemon juice (to prevent browning of peaches)
  • 2 tablespoons honey (plus more for drizzling)
  • 1 teaspoon vanilla extract (optional for extra flavor)
  • For the Granola:
  • 1 cup granola (store-bought or homemade; see notes for a simple granola recipe)
  • 1/4 cup sliced almonds (optional for added crunch)
  • 1/4 cup shredded coconut (optional for added flavor)

Instructions

  1. Start by preparing the peaches. Wash them thoroughly, then slice and dice them into bite-sized pieces. In a medium bowl, toss the diced peaches with 1 tablespoon of fresh lemon juice to prevent browning. Set aside for about 5 minutes while the lemon juice works its magic.
  2. In a separate bowl, combine the Greek yogurt, 2 tablespoons of honey, and 1 teaspoon of vanilla extract if using. Stir the mixture until smooth and thoroughly blended. This should take about a minute. Avoid overmixing to maintain the creaminess of the yogurt.
  3. Now it’s time to layer your parfait. Grab a clear glass or bowl to showcase your beautiful creation. Start with a generous spoonful of the yogurt mixture at the bottom—about 1/4 cup will do. Use a spoon to spread it evenly.
  4. Add a layer of the diced peaches over the yogurt, ensuring they cover the yogurt completely. You might want to use about half of what you have prepared—roughly 1 cup. This layer should be visually appealing, so arrange the peaches neatly.
  5. Sprinkle 1/4 cup of granola over the peaches. This adds a delightful crunch. Make sure to distribute it evenly to ensure every bite has that satisfying texture. Avoid packing it down too tightly, as you want it to maintain its crunch.
  6. Repeat the layers: spoon in another 1/4 cup of yogurt, followed by another cup of peaches, and another sprinkle of granola. You should have at least two layers, but feel free to add more depending on your glass size.
  7. Finish off your parfait with a drizzle of honey on top for added sweetness and a touch of elegance. If you’re using sliced almonds or shredded coconut, sprinkle them on top now. It adds a lovely visual contrast and extra flavor.
  8. Serve immediately or refrigerate for up to 30 minutes before serving to allow the flavors to meld together. However, I recommend enjoying it fresh to maintain the granola’s crunch.
  • Prep Time: 15 mins
  • Cook Time: 0 mins
  • Category: Breakfast
  • Method: No-cook
  • Cuisine: American

Nutrition

  • Serving Size: 1 parfait
  • Calories: 250
  • Sugar: 20 g
  • Sodium: 50 mg
  • Fat: 5 g
  • Saturated Fat: 2 g
  • Unsaturated Fat: 3 g
  • Trans Fat: 0 g
  • Carbohydrates: 40 g
  • Fiber: 3 g
  • Protein: 10 g
  • Cholesterol: 10 mg

Keywords: Choose ripe peaches for the best flavor and texture. Use a clear glass for a beautiful presentation. For creaminess, consider whipping the yogurt before layering. Be mindful of the granola-to-yogurt ratio. Prepare yogurt and peaches ahead of time for gatherings, layering just before serving.

Did you make this recipe?

Share a photo and tag us — we can't wait to see what you've made!

Sun-Kissed Frozen Orange Cream Slush

As a child, summer days felt like they lasted forever. I remember the sticky heat wrapping around me as I played outside, my laughter mingling with the sounds of the neighborhood. But nothing could cool me down quite like the moment I’d spot my grandmother, laboring over her blender, whipping up her famous Frozen Orange Creamsicle Slush. That vibrant orange treat, with its frosty texture and sweet citrus aroma, was like a burst of sunshine in a cup. Just one sip, and I could feel the coolness wash over me, sparking pure joy.

This Frozen Orange Creamsicle Slush has a way of making you feel like a kid again. Its creamy, dreamy consistency is a delightful balance of bright orange and soft vanilla, inviting you to dive right in. The refreshing tang of orange dances on your tongue, while the smooth creaminess envelops you in a comforting embrace. It’s a nostalgic treat that’s perfect for hot summer afternoons or anytime you need a little pick-me-up.

What makes my version of this slush stand out is the addition of a hint of vanilla bean, which elevates the flavor and adds an extra layer of richness. Plus, it’s super easy to whip up with just a few simple ingredients that you probably already have on hand! So, if you’re ready to relive those sun-soaked memories, let me show you exactly how to make it.

Sun-Kissed Frozen Orange Cream Slush

Why You’ll Love This Recipe

  • Each slush is a perfect blend of creamy vanilla and zesty orange, creating a nostalgic flavor reminiscent of summer days.
  • This refreshing treat is ready in under 15 minutes, making it an ideal quick dessert for unexpected guests or hot afternoons.
  • With just 8 simple ingredients, it’s budget-friendly, ensuring you don’t have to break the bank to enjoy a delicious slush.
  • The slush has a perfectly smooth texture, thanks to the combination of ice and ice cream, providing a delightful contrast to the bright citrus flavors.
  • It’s highly customizable; you can easily adjust the sweetness and add fresh herbs for a unique twist that suits your taste.

Ingredients

  • 2 cups orange juice (freshly squeezed or store-bought)
  • 1 cup vanilla ice cream
  • 1 cup crushed ice
  • 1/2 cup milk (whole or 2%)
  • 1/4 cup granulated sugar (adjust based on sweetness preference)
  • 1 teaspoon vanilla extract
  • Zest of 1 orange (for added flavor)
  • Fresh orange slices and mint leaves (for garnish)

The star of this Frozen Orange Creamsicle Slush is the orange juice, which provides the vibrant, citrusy base. Freshly squeezed juice will yield the brightest flavor, but store-bought options can be just as convenient. If you’re opting for store-bought, choose 100% pure juice with no added sugars for the best results. Another essential ingredient is the vanilla ice cream; it adds creaminess and sweetness. You can substitute it with dairy-free ice cream if you’re looking for a vegan option. Whole or 2% milk complements the ice cream, creating a smooth blend. If you want a lower-calorie version, almond or oat milk can be good alternatives.

Lastly, the granulated sugar can be adjusted based on your sweetness preference. If you prefer a more natural sweetener, consider using honey or agave syrup. The orange zest enhances the flavor profile, providing an aromatic pop that brings the whole slush together. Don’t skip it! It adds an extra layer of brightness that makes this slush truly special.

Step-by-Step Instructions

  1. Start by preparing your ingredients. Gather 2 cups of orange juice, 1 cup of vanilla ice cream, and 1 cup of crushed ice. Make sure the ice is finely crushed, as larger chunks can make blending difficult.
  2. In a blender, combine the orange juice, vanilla ice cream, crushed ice, and 1/2 cup of milk. Add 1/4 cup of granulated sugar and 1 teaspoon of vanilla extract. If you like a sweeter slush, consider adding a bit more sugar at this stage.
  3. Add the zest of 1 orange to the blender. This step is crucial for enhancing the citrus flavor of your slush. Make sure not to include the bitter white pith—only the flavorful zest.
  4. Blend the mixture on medium-high speed for about 30-45 seconds. Stop once the ingredients are fully combined and the slush has a smooth, even consistency. If you notice large chunks of ice, blend for an additional 10-15 seconds. Avoid over-blending, as this can make the slush too liquidy.
  5. Once blended, taste the slush. If it needs more sweetness, add a little more sugar and blend for a few more seconds. If it’s too thick, you can add a splash of milk to reach your desired consistency.
  6. Pour the slush into glasses. This recipe typically serves 4, but you can easily double it for larger gatherings. Use a spoon to help guide the slush into the glasses if needed.
  7. Garnish each serving with fresh orange slices and mint leaves. The mint not only adds a pop of color but also a refreshing aroma that complements the citrus flavors beautifully.
  8. Serve immediately and enjoy! If you’ve made extra, you can refrigerate it for a short time, but it’s best enjoyed fresh.

Pro Tips for the Best Frozen Orange Creamsicle Slush

  • Don’t skip the orange zest! It’s a game-changer for flavor. Always zest before juicing to make it easier.
  • Use a high-powered blender for the best texture. A standard blender may struggle with ice, leading to uneven consistency. If you have a food processor, that can work too, but ensure the ice is finely crushed.
  • Adjust the ice-to-liquid ratio carefully. If your slush is too thick, it won’t blend well. Start with less ice and add more until you reach your preferred texture.
  • Be cautious with the sugar! Always start with the lower amount, as you can easily add more, but it’s hard to fix an overly sweet slush.
  • For a fun twist, consider adding a splash of coconut milk or a handful of fresh fruit like strawberries or pineapple. This not only enhances the flavor but also adds a beautiful color contrast.

Variations & Serving Ideas

There are countless ways to put a spin on your Frozen Orange Creamsicle Slush. Consider making a tropical version by adding in some pineapple juice or coconut milk for a delightful tropical twist. If you’re feeling adventurous, try incorporating a handful of frozen mango or peach slices for added sweetness. For a lighter version, swap out the vanilla ice cream for Greek yogurt for a creamy yet tangy alternative.

As for serving ideas, this refreshing slush pairs wonderfully with light summer dishes like grilled chicken skewers, fish tacos, or a simple salad topped with citrus vinaigrette. The bright, zesty flavors of the slush complement these dishes perfectly, making them an ideal pairing for a sunny day.

Storage, Make-Ahead & Reheating

This Frozen Orange Creamsicle Slush is best enjoyed fresh, but if you have leftovers, you can store them in an airtight container in the fridge for up to 2 days. Just keep in mind that the slush may lose some of its texture over time as the ice melts. It doesn’t freeze well, as the ice will turn into a solid block. If you must freeze it, blend again after thawing to restore the slushy consistency. This treat is best the day you make it, as the flavors meld together beautifully overnight, enhancing its deliciousness.

Frequently Asked Questions

Can I make Frozen Orange Creamsicle Slush ahead of time?

Yes — in fact, it tastes even better the next day as the flavors meld. However, it’s best to enjoy it fresh, as the texture can change if stored for too long. If you need to prepare it ahead, keep it in the fridge and re-blend before serving.

What kind of orange juice should I use?

For the best flavor, use freshly squeezed orange juice. However, if you’re short on time, opt for 100% pure store-bought juice without added sugars. This will ensure that your slush remains flavorful and refreshing.

Can I substitute the vanilla ice cream?

Absolutely! If you’re looking for a dairy-free option, coconut milk ice cream or a non-dairy vanilla ice cream can work wonderfully. They will still provide the creamy texture and sweetness you desire.

How can I adjust the sweetness of my slush?

You can easily adjust the sweetness by modifying the amount of sugar added. Start with 1/4 cup and taste the mixture before blending. If you prefer it sweeter, add more sugar gradually until it reaches your desired level.

What should I do if my slush is too thick?

If your slush is too thick, simply add a splash of milk or orange juice and blend again. This will help achieve a more drinkable consistency while maintaining the slushy texture. Adjust gradually to reach your preferred thickness.

Sun-Kissed Frozen Orange Cream Slush

Final Thoughts

The Frozen Orange Creamsicle Slush is a delightful blend of refreshing citrus and creamy goodness, making it a perfect treat for warm days or any time you crave a taste of nostalgia. The way the bright orange flavor dances with the creamy texture truly elevates this slush, transforming it into a satisfying escape from the everyday.

This is the kind of recipe I come back to again and again, especially when I’m looking to cool down or impress guests at a summer gathering. It’s simple to make and always brings smiles all around! I encourage you to try this recipe for yourself—don’t hesitate to share your results or even put your own spin on it. Happy slushing!

Print
clock clock iconcutlery cutlery iconflag flag iconfolder folder iconinstagram instagram iconpinterest pinterest iconfacebook facebook iconprint print iconsquares squares iconheart heart iconheart solid heart solid icon

Frozen Orange Creamsicle Slush


  • Author: Lily author
  • Total Time: 15 minutes
  • Yield: 4 servings 1x
Pin Recipe
Print Recipe

Description

This Frozen Orange Creamsicle Slush is a refreshing treat that combines creamy vanilla and zesty orange flavors. Perfect for hot summer days, it brings back nostalgic memories with every sip.


Ingredients

Scale
  • 2 cups orange juice (freshly squeezed or store-bought)
  • 1 cup vanilla ice cream
  • 1 cup crushed ice
  • 1/2 cup milk (whole or 2%)
  • 1/4 cup granulated sugar (adjust based on sweetness preference)
  • 1 teaspoon vanilla extract
  • Zest of 1 orange (for added flavor)
  • Fresh orange slices and mint leaves (for garnish)

Instructions

  1. Start by preparing your ingredients. Gather 2 cups of orange juice, 1 cup of vanilla ice cream, and 1 cup of crushed ice. Make sure the ice is finely crushed, as larger chunks can make blending difficult.
  2. In a blender, combine the orange juice, vanilla ice cream, crushed ice, and 1/2 cup of milk. Add 1/4 cup of granulated sugar and 1 teaspoon of vanilla extract. If you like a sweeter slush, consider adding a bit more sugar at this stage.
  3. Add the zest of 1 orange to the blender. This step is crucial for enhancing the citrus flavor of your slush. Make sure not to include the bitter white pith—only the flavorful zest.
  4. Blend the mixture on medium-high speed for about 30-45 seconds. Stop once the ingredients are fully combined and the slush has a smooth, even consistency. If you notice large chunks of ice, blend for an additional 10-15 seconds. Avoid over-blending, as this can make the slush too liquidy.
  5. Once blended, taste the slush. If it needs more sweetness, add a little more sugar and blend for a few more seconds. If it’s too thick, you can add a splash of milk to reach your desired consistency.
  6. Pour the slush into glasses. This recipe typically serves 4, but you can easily double it for larger gatherings. Use a spoon to help guide the slush into the glasses if needed.
  7. Garnish each serving with fresh orange slices and mint leaves. The mint not only adds a pop of color but also a refreshing aroma that complements the citrus flavors beautifully.
  8. Serve immediately and enjoy! If you’ve made extra, you can refrigerate it for a short time, but it's best enjoyed fresh.
  • Prep Time: 15 min
  • Cook Time: 0 min
  • Category: Dessert
  • Method: Blending
  • Cuisine: American

Nutrition

  • Serving Size: 1 serving
  • Calories: 200
  • Sugar: 30 g
  • Sodium: 50 mg
  • Fat: 5 g
  • Saturated Fat: 3 g
  • Unsaturated Fat: 2 g
  • Trans Fat: 0 g
  • Carbohydrates: 40 g
  • Fiber: 1 g
  • Protein: 2 g
  • Cholesterol: 20 mg

Keywords: Don't skip the orange zest! It's a game-changer for flavor. Always zest before juicing to make it easier.

Did you make this recipe?

Share a photo and tag us — we can't wait to see what you've made!

Zesty Lemon Poppy Seed Delight

One rainy afternoon, I found myself in my grandmother’s cozy kitchen, the kind that always smelled like warmth and love. She was whipping up her famous Lemon Poppy Seed Loaf, a recipe that had been passed down through generations. As the batter came together, the zesty aroma of fresh lemons filled the air, mingling perfectly with the nutty fragrance of poppy seeds. I can still picture her, apron-clad, as she expertly drizzled a vibrant citrus icing over the loaf, creating a glossy, sun-kissed finish that beckoned us to dive in. It was a moment that sparked my own passion for baking, and this recipe has become a cherished staple in my home ever since.

When you take a bite of this Lemon Poppy Seed Loaf, it’s like a burst of sunshine on your palate. The loaf is beautifully golden, with a tender crumb that melts in your mouth. Each slice is speckled with tiny poppy seeds, adding a delightful crunch that contrasts beautifully with the tangy sweetness of the lemon. And that citrus icing? It’s the finishing touch that elevates this loaf from ordinary to extraordinary, with its bright, zesty flavor dancing on your taste buds.

This recipe stands out because it embraces simplicity while delivering on flavor. I’ve added a hint of vanilla to the batter, enhancing the overall taste and making it even more indulgent. Trust me, once you make this Lemon Poppy Seed Loaf With Citrus Icing, it’ll become a go-to in your baking repertoire.

So, let me show you exactly how to make it!

Zesty Lemon Poppy Seed Delight

Why You’ll Love This Recipe

  • Moist and tender crumb that melts in your mouth, thanks to the perfect balance of butter and buttermilk.
  • Bright, zesty lemon flavor paired with crunchy poppy seeds, creating a delightful texture and taste experience.
  • Easy to whip up in just about an hour, perfect for last-minute gatherings or a cozy afternoon treat.
  • Budget-friendly with everyday ingredients, making it an accessible option for all home bakers.
  • The citrus icing adds a sweet tang that elevates the loaf, turning a simple recipe into a showstopper!

Ingredients

  • 1 ½ cups (190g) all-purpose flour
  • 1 teaspoon baking powder
  • ½ teaspoon baking soda
  • ½ teaspoon salt
  • 3 tablespoons poppy seeds
  • ½ cup (115g) unsalted butter, softened to room temperature
  • 1 cup (200g) granulated sugar
  • 2 large eggs
  • 1 teaspoon vanilla extract
  • 1 teaspoon lemon zest (from about 1 medium lemon)
  • ½ cup (120ml) buttermilk
  • 2 tablespoons fresh lemon juice

For the Citrus Icing:

  • 1 cup (120g) powdered sugar
  • 2 tablespoons fresh lemon juice
  • 1 tablespoon orange juice
  • 1 teaspoon lemon zest (for garnish, optional)

Let’s dive into the key ingredients that make this Lemon Poppy Seed Loaf so special. The all-purpose flour provides the structure and base for the loaf, while the baking powder and baking soda ensure it rises perfectly, giving the loaf a light texture. For a gluten-free variation, you could substitute the flour with a gluten-free all-purpose blend. Poppy seeds not only add a delightful crunch but also contribute to the unique flavor profile that pairs well with the citrus notes.

Unsalted butter is crucial for achieving the buttery richness that makes this loaf so moist. If you’re looking for a dairy-free option, coconut oil or a vegan butter can be used instead. The buttermilk is another essential component, providing acidity that activates the baking soda for a fluffy texture. If you don’t have buttermilk on hand, you can easily make a substitute by mixing ½ cup of milk with 1 tablespoon of vinegar or lemon juice and letting it sit for about 5 minutes.

Step-by-Step Instructions

  1. Preheat your oven to 350°F (175°C). Grease a 9×5-inch loaf pan or line it with parchment paper for easy removal later.
  2. In a medium mixing bowl, whisk together 1 ½ cups of all-purpose flour, 1 teaspoon of baking powder, ½ teaspoon of baking soda, ½ teaspoon of salt, and 3 tablespoons of poppy seeds. This helps to evenly distribute the baking agents and ensures a uniform rise.
  3. In a large mixing bowl, cream together ½ cup of softened unsalted butter and 1 cup of granulated sugar using an electric mixer on medium speed for about 3-4 minutes, until the mixture is light and fluffy. Make sure to scrape down the sides of the bowl occasionally.
  4. Add 2 large eggs, 1 teaspoon of vanilla extract, and 1 teaspoon of lemon zest to the creamed butter and sugar, mixing until fully combined. You want a smooth consistency, so ensure there are no lumps of butter.
  5. In a small bowl, combine ½ cup of buttermilk and 2 tablespoons of fresh lemon juice. Alternately add the dry ingredients and buttermilk mixture to the butter mixture, starting and ending with the dry ingredients. Mix just until combined; do not overmix, as this can lead to a dense loaf.
  6. Pour the batter into the prepared loaf pan. Smooth the top with a spatula, ensuring it’s even. Bake in the preheated oven for 50-60 minutes, or until a toothpick inserted in the center comes out clean. The edges should be lightly golden brown, and the center should feel just set.
  7. Once baked, remove the loaf from the oven and allow it to cool in the pan for about 10 minutes. Then, transfer it to a wire rack to cool completely. Resist the urge to slice too soon, as it will be crumbly if it’s still warm.
  8. While the loaf is cooling, prepare the citrus icing. In a medium bowl, whisk together 1 cup of powdered sugar, 2 tablespoons of fresh lemon juice, and 1 tablespoon of orange juice until smooth. If the icing is too thick, you can add a little more juice to reach your desired consistency.
  9. Once the loaf is completely cool, drizzle the citrus icing over the top. If you like, sprinkle with an additional teaspoon of lemon zest for an extra pop of flavor and color.

Pro Tips for the Best Lemon Poppy Seed Loaf With Citrus Icing

  • Be careful not to overmix your batter; this is a common mistake that can lead to a dense loaf. Mix just until the dry ingredients are incorporated for a light and fluffy texture.
  • Use room temperature ingredients, especially the butter and eggs. This helps to create a smoother batter and ensures even baking. Take your eggs out of the fridge about 30 minutes before you start.
  • For a more pronounced lemon flavor, consider adding a little lemon extract in addition to the zest and juice. Just a half teaspoon can elevate the citrus notes significantly.
  • When measuring your flour, spoon it into the measuring cup and level it off with a knife instead of scooping directly from the bag. This prevents packing and ensures you don’t end up with a dry loaf.
  • Invest in a good quality loaf pan; it makes a difference in heat distribution, which ensures even baking. If your pan is dark-coated, reduce the oven temperature by 25°F to prevent over-browning.

Variations & Serving Ideas

For a delightful twist, consider adding blueberries or raspberries to the batter for a fruity burst of flavor. You can also experiment with different citrus fruits—try lime or grapefruit zest and juice for a refreshing change. For a healthier option, substitute half of the all-purpose flour with whole wheat flour for added fiber without compromising too much on texture.

This Lemon Poppy Seed Loaf pairs beautifully with a light salad, such as a mixed greens salad with a vinaigrette, or a cup of tea for a cozy afternoon treat. It also complements a creamy cheese platter, as the acidity of the loaf balances rich cheeses perfectly. Lastly, a scoop of vanilla ice cream on the side creates a delightful contrast of temperatures and flavors!

Storage, Make-Ahead & Reheating

This Lemon Poppy Seed Loaf can be stored at room temperature for up to 3 days if wrapped tightly in plastic wrap. If you want to keep it longer, it freezes well for up to 3 months. To freeze, wrap the loaf tightly in plastic wrap and then in aluminum foil to prevent freezer burn.

When you’re ready to enjoy it again, simply thaw it in the fridge overnight. Reheat individual slices in the microwave for 15-20 seconds or in a toaster oven until warmed through. Interestingly, many people find that this loaf tastes even better the next day, as the flavors have time to meld!

Frequently Asked Questions

Can I make Lemon Poppy Seed Loaf With Citrus Icing ahead of time?

Yes — in fact, it tastes even better the next day! You can make the loaf a day in advance, allowing the flavors to develop. Just be sure to store it in an airtight container to maintain its moisture.

Can I substitute the poppy seeds?

Absolutely! If you don’t have poppy seeds on hand or prefer an alternative, you can use sesame seeds for a similar crunch or omit them entirely for a smooth loaf.

What can I use instead of buttermilk?

If you don’t have buttermilk, you can easily create a substitute by mixing ½ cup of milk (dairy or plant-based) with 1 tablespoon of vinegar or lemon juice. Let it sit for 5 minutes before using in the recipe.

How can I make this recipe gluten-free?

To make a gluten-free version of this Lemon Poppy Seed Loaf, substitute the all-purpose flour with a gluten-free all-purpose flour blend. Just ensure that the blend contains a binding agent like xanthan gum for the best results.

What is the best way to store leftover loaf?

Leftover Lemon Poppy Seed Loaf should be stored in an airtight container at room temperature for up to 3 days. For longer storage, wrap it tightly and freeze for up to 3 months. Thaw it before serving for the best texture.

Zesty Lemon Poppy Seed Delight

Final Thoughts

The Lemon Poppy Seed Loaf with Citrus Icing is truly a delightful treat that brings a burst of brightness to any occasion. The zesty lemon flavor combined with the subtle crunch of poppy seeds creates a satisfying balance, while the citrus icing adds a touch of sweetness that perfectly complements the loaf’s tanginess.

This is the kind of recipe I come back to again and again, especially when I want to brighten up a gloomy day or celebrate a small victory. The aroma that fills the kitchen as it bakes is absolutely heavenly! I encourage you to give this recipe a try; you might just find it becoming a beloved staple in your home. Don’t forget to share your results or even add your own unique twist—I can’t wait to see what you create!

Print
clock clock iconcutlery cutlery iconflag flag iconfolder folder iconinstagram instagram iconpinterest pinterest iconfacebook facebook iconprint print iconsquares squares iconheart heart iconheart solid heart solid icon

Lemon Poppy Seed Loaf


  • Author: Lily author
  • Total Time: 13 minute
  • Yield: 1 loaf 1x
Pin Recipe
Print Recipe

Description

This Lemon Poppy Seed Loaf is a delightful treat that combines zesty lemon flavor with crunchy poppy seeds. Topped with a citrus icing, it’s perfect for any occasion.


Ingredients

Scale
  • 1 ½ cups (190g) all-purpose flour
  • 1 teaspoon baking powder
  • ½ teaspoon baking soda
  • ½ teaspoon salt
  • 3 tablespoons poppy seeds
  • ½ cup (115g) unsalted butter, softened to room temperature
  • 1 cup (200g) granulated sugar
  • 2 large eggs
  • 1 teaspoon vanilla extract
  • 1 teaspoon lemon zest (from about 1 medium lemon)
  • ½ cup (120ml) buttermilk
  • 2 tablespoons fresh lemon juice
  • 1 cup (120g) powdered sugar
  • 2 tablespoons fresh lemon juice
  • 1 tablespoon orange juice
  • 1 teaspoon lemon zest (for garnish, optional)

Instructions

  1. Preheat your oven to 350°F (175°C). Grease a 9×5-inch loaf pan or line it with parchment paper for easy removal later.
  2. In a medium mixing bowl, whisk together 1 ½ cups of all-purpose flour, 1 teaspoon of baking powder, ½ teaspoon of baking soda, ½ teaspoon of salt, and 3 tablespoons of poppy seeds. This helps to evenly distribute the baking agents and ensures a uniform rise.
  3. In a large mixing bowl, cream together ½ cup of softened unsalted butter and 1 cup of granulated sugar using an electric mixer on medium speed for about 3-4 minutes, until the mixture is light and fluffy. Make sure to scrape down the sides of the bowl occasionally.
  4. Add 2 large eggs, 1 teaspoon of vanilla extract, and 1 teaspoon of lemon zest to the creamed butter and sugar, mixing until fully combined. You want a smooth consistency, so ensure there are no lumps of butter.
  5. In a small bowl, combine ½ cup of buttermilk and 2 tablespoons of fresh lemon juice. Alternately add the dry ingredients and buttermilk mixture to the butter mixture, starting and ending with the dry ingredients. Mix just until combined; do not overmix, as this can lead to a dense loaf.
  6. Pour the batter into the prepared loaf pan. Smooth the top with a spatula, ensuring it’s even. Bake in the preheated oven for 50-60 minutes, or until a toothpick inserted in the center comes out clean. The edges should be lightly golden brown, and the center should feel just set.
  7. Once baked, remove the loaf from the oven and allow it to cool in the pan for about 10 minutes. Then, transfer it to a wire rack to cool completely. Resist the urge to slice too soon, as it will be crumbly if it’s still warm.
  8. While the loaf is cooling, prepare the citrus icing. In a medium bowl, whisk together 1 cup of powdered sugar, 2 tablespoons of fresh lemon juice, and 1 tablespoon of orange juice until smooth. If the icing is too thick, you can add a little more juice to reach your desired consistency.
  9. Once the loaf is completely cool, drizzle the citrus icing over the top. If you like, sprinkle with an additional teaspoon of lemon zest for an extra pop of flavor and color.
  • Prep Time: 15 mins
  • Cook Time: 50-60 mins
  • Category: Dessert
  • Method: Baking
  • Cuisine: American

Nutrition

  • Serving Size: 1 slice
  • Calories: 200
  • Sugar: 15 g
  • Sodium: 150 mg
  • Fat: 8 g
  • Saturated Fat: 5 g
  • Unsaturated Fat: 3 g
  • Trans Fat: 0 g
  • Carbohydrates: 30 g
  • Fiber: 1 g
  • Protein: 3 g
  • Cholesterol: 40 mg

Keywords: Be careful not to overmix your batter; this is a common mistake that can lead to a dense loaf. Use room temperature ingredients for a smoother batter and even baking.

Did you make this recipe?

Share a photo and tag us — we can't wait to see what you've made!

  • Privacy Policy
  • Terms Of Service
  • Contact
  • About
  • GDPR

Copyright © 2025 Homesmad