• Skip to primary navigation
  • Skip to main content
  • Skip to primary sidebar
Homesmad

Homesmad

  • Home
  • Breakfast & Brunch
  • Appetizers & Snacks
  • Dinner
  • Dessert
  • About
  • Privacy Policy
  • Contact
Homesmad
  • Home
  • Breakfast & Brunch
  • Appetizers & Snacks
  • Dinner
  • Dessert
  • About
  • Privacy Policy
  • Contact

Crispy Smashed Carrots: Your New Favorite Side Dish!

October 15, 2025 by Lily author

Smashed Carrots are about to revolutionize your side dish game, transforming a humble root vegetable into an unexpectedly irresistible culinary delight. Forget everything you thought you knew about cooking carrots; this ingenious method unlocks a depth of flavor and a textural symphony that will have everyone at your table asking for seconds, and even thirds!

While the concept of “smashed” vegetables might seem like a contemporary culinary trend, it beautifully echoes centuries-old rustic cooking traditions where simple, wholesome ingredients were prepared with ingenious methods to maximize their inherent deliciousness. There’s a comforting authenticity to taking a basic vegetable and, with a little care, elevating it into something truly special. I’ve always been captivated by how such a straightforward technique can yield such profound results.

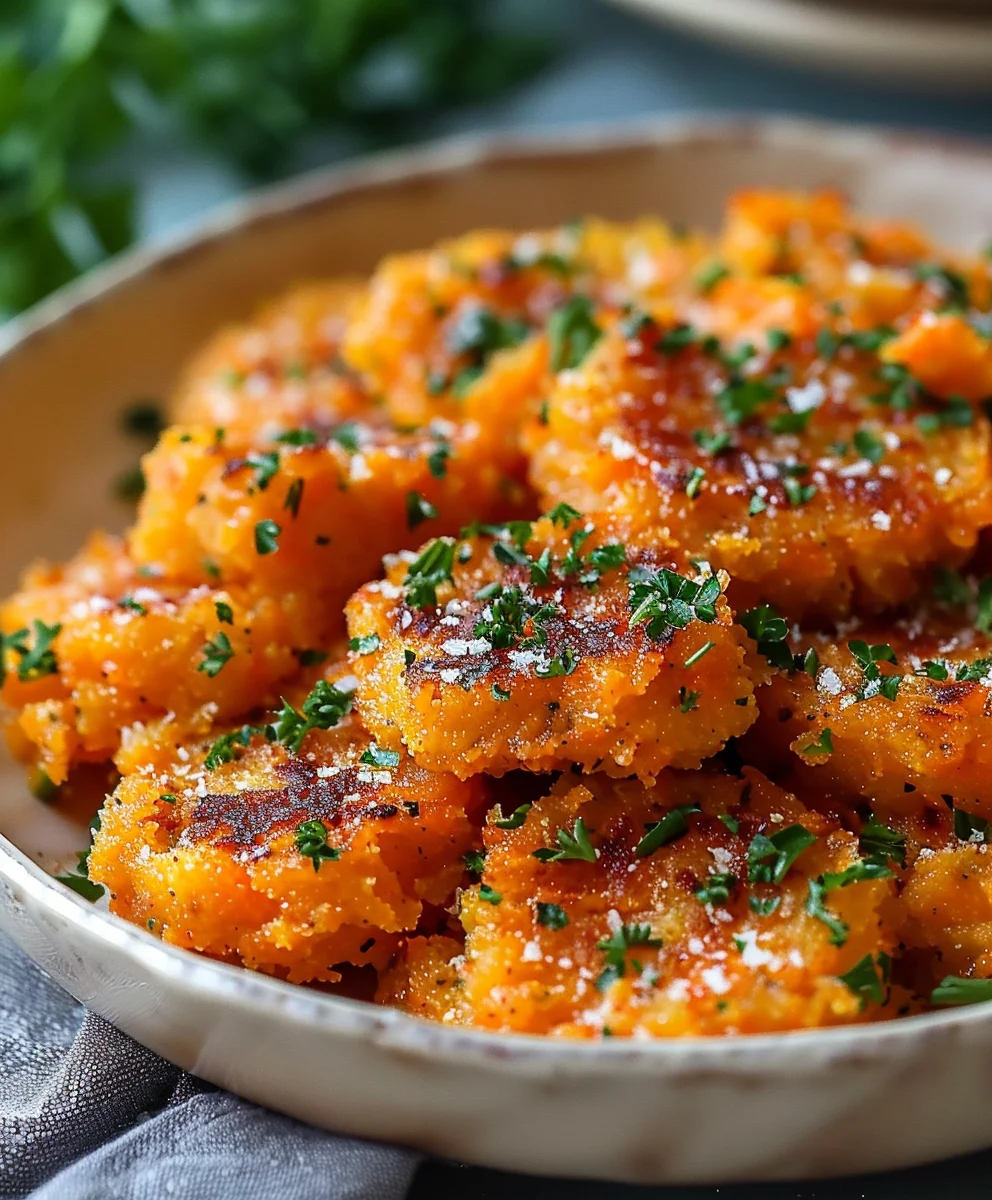
So, what exactly makes people utterly adore Smashed Carrots? It’s that magical, irresistible combination: crispy, beautifully caramelized edges giving way to a tender, sweet interior. The act of gently smashing the cooked carrots creates more surface area, allowing for incredible crispiness and a concentrated burst of savory-sweet flavor in every single bite. They are incredibly versatile, serving as the perfect accompaniment to everything from a hearty Sunday roast to a quick weeknight grilled salmon, offering a delightful and unique departure from your usual steamed or roasted varieties.

Get ready to experience carrots in a whole new, utterly delicious light – a true testament to the power of simple, yet brilliant, cooking.

Crispy Smashed Carrots: Your New Favorite Side Dish! this RECIPE

Ingredients:

  • 2 pounds (about 1 kg) Carrots: I always recommend using fresh, medium-sized carrots. Look for vibrant orange ones with firm texture. Smaller carrots can be used whole for a cuter presentation, while larger ones might need to be halved or quartered lengthwise for more even cooking.
  • 3 tablespoons Olive Oil: A good quality extra virgin olive oil works wonders here, offering a rich, fruity note that complements the sweetness of the carrots.
  • 4-5 cloves Garlic: Fresh garlic is key! You’ll want to mince it finely so it can infuse every nook and cranny of our delicious smashed carrots. If you’re a garlic fiend like me, don’t hesitate to add an extra clove or two.
  • 1 tablespoon Fresh Thyme, chopped: The earthy, slightly peppery notes of fresh thyme are absolutely divine with carrots. You can strip the leaves from the stems easily after washing.
  • 1 teaspoon Fresh Rosemary, chopped: A little goes a long way with rosemary, adding a fragrant, piney aroma that elevates the dish. Make sure to chop it finely to avoid large, woody pieces.
  • ½ cup Freshly Grated Parmesan Cheese: Oh, the glorious, salty, umami goodness of Parmesan! Freshly grated is non-negotiable here; it melts beautifully and creates incredible crispy bits.
  • ½ teaspoon Sea Salt (or to taste): Salt is crucial for bringing out the natural sweetness of the carrots and balancing all the other flavors.
  • ¼ teaspoon Black Pepper (freshly ground, or to taste): A touch of freshly ground black pepper adds a subtle kick and enhances the overall seasoning.
  • For the Optional Balsamic Glaze:
    • ¼ cup Balsamic Vinegar: Choose a good quality balsamic for the best flavor, one that’s a bit thicker and sweeter.
    • 1 tablespoon Brown Sugar (or maple syrup): This helps to sweeten and thicken the glaze, giving it that perfect sticky consistency.

Before we dive into the fun part of making these incredible Smashed Carrots, let’s chat briefly about our star ingredient. When selecting carrots, aim for those that are relatively uniform in size. This ensures they cook evenly. If your carrots vary greatly, you might need to cut the thicker ones in half lengthwise or even into quarters to match the size of the thinner ones. For truly flavorful smashed carrots, I find that a mix of medium and slightly thinner carrots works wonderfully, as they offer different textures once smashed and roasted.

The fresh herbs – thyme and rosemary – are truly the backbone of the aromatic profile for our Smashed Carrots. While dried herbs can be used in a pinch (use about half the amount), nothing compares to the vibrant flavor and fragrance that fresh herbs impart. If you’re not a fan of rosemary, or perhaps prefer another herb like parsley or dill, feel free to experiment! This recipe is incredibly adaptable, and part of the joy of cooking is making it your own.

And let’s not forget the Parmesan cheese! It’s what gives our Smashed Carrots that irresistible golden-brown, cheesy crust. I cannot stress enough the importance of freshly grated Parmesan. The pre-shredded varieties often contain anti-caking agents that prevent them from melting as smoothly and creating that delicious, crispy texture we’re aiming for.

Preparing the Carrots for the Smash

This initial phase is all about getting our carrots perfectly tender so they’re ready for their starring role as Smashed Carrots. The key here is to cook them just enough so they’re soft but not mushy, maintaining their sweet integrity.

  1. Preheat Your Oven: First things first, let’s get that oven roaring! Preheat your oven to a nice and hot 400°F (200°C). A high temperature is crucial for achieving those crispy edges on our Smashed Carrots later on.
  2. Wash and Peel the Carrots: Give your carrots a good wash under cold running water. Then, using a vegetable peeler, carefully peel all the carrots. I always suggest peeling them to ensure a smooth, clean surface, though if you’re using very young, organic carrots, you could simply scrub them well and leave the skins on for extra fiber and rustic charm. Trim off the ends.
  3. Cut the Carrots: If you’re using smaller carrots, you can leave them whole. For medium-sized carrots, which I prefer for a more substantial smash, cut them into 1-inch thick pieces. If you have particularly large carrots, you might want to halve or quarter them lengthwise before cutting them into segments. The goal is to have pieces that are roughly similar in size to ensure even cooking and smashing.
  4. Boil the Carrots to Tenderness: Now, we’re going to par-cook our carrots. Place the cut carrots into a large pot and cover them with cold water. Add about a teaspoon of salt to the water – this helps season the carrots from the inside out and prevents them from tasting bland. Bring the water to a boil over medium-high heat. Once boiling, reduce the heat slightly and let them simmer for about 10-15 minutes, or until they are fork-tender. This is a critical step for perfect Smashed Carrots. You should be able to easily pierce a carrot piece with a fork, but it shouldn’t be so soft that it’s falling apart. Undercooked carrots will be difficult to smash, and overcooked carrots will turn to mush.
  5. Drain Thoroughly: Once tender, carefully drain the carrots in a colander. Let them sit in the colander for a few minutes, shaking gently, to ensure as much excess water as possible drains away. Less water means crispier Smashed Carrots! You can even spread them out on a clean kitchen towel or paper towels for a few minutes to absorb any residual moisture.

The Art of Smashing and Seasoning Your Carrots

This is where the magic truly happens, transforming simple boiled carrots into wonderfully textured, flavor-packed Smashed Carrots. It’s a delightful process that’s both satisfying and essential for the dish’s unique character.

  1. Prepare Your Baking Sheets: While your carrots are draining, line one or two large baking sheets with parchment paper. Using parchment paper is a lifesaver for easy cleanup and prevents the carrots from sticking, especially with the cheesy goodness we’re about to add. Make sure not to overcrowd the pan; if necessary, use two baking sheets to allow enough space for each carrot to get nice and crispy. Overcrowding leads to steaming, not roasting, and we want glorious, crispy Smashed Carrots!
  2. Arrange and Smash: Spread the drained, par-cooked carrots in a single layer on the prepared baking sheet(s). Now for the fun part! Using the bottom of a sturdy drinking glass, a potato masher, or even a large fork, gently but firmly press down on each carrot piece until it flattens and cracks open. Don’t press too hard that they disintegrate, but aim for a flattened disc with some craggy edges. These edges are what will get beautifully crispy in the oven, creating that irresistible texture that makes Smashed Carrots so addictive. I often find a glass works best for individual smashing, giving me good control over the pressure.
  3. Season with Olive Oil and Garlic: Drizzle the smashed carrots generously with the olive oil. Then, scatter the finely minced garlic evenly over all the carrots. Use your hands or a spatula to gently toss and spread the oil and garlic, ensuring every piece is coated. The oil is crucial for achieving that golden-brown crust, and the garlic will infuse a wonderful aroma as it roasts.
  4. Add Herbs, Salt, and Pepper: Sprinkle the chopped fresh thyme and rosemary over the carrots. Season with sea salt and freshly ground black pepper to your preference. Again, give them a gentle toss to distribute the seasonings evenly. The fresh herbs will release their aromatic oils as they roast, permeating the Smashed Carrots with their incredible fragrance.
  5. Introduce the Parmesan: Finally, sprinkle the freshly grated Parmesan cheese generously over all the smashed carrots. Ensure a good, even coating. As it bakes, the Parmesan will melt and then crisp up, forming a savory, golden crust that is utterly delicious. This cheesy layer is a huge part of what makes these Smashed Carrots so incredibly flavorful and texturally appealing.

Roasting for Perfection: Achieving Crispy Smashed Carrots

This stage is where our Smashed Carrots transform from humble vegetables into a show-stopping side dish. The high heat of the oven, combined with the earlier steps, will work wonders to create something truly special.

  1. Bake Until Golden and Crispy: Place the baking sheet(s) into your preheated oven. Roast for 25-35 minutes. The exact timing will depend on your oven and the thickness of your carrots. About halfway through the baking time (around 15-20 minutes in), I like to carefully flip the carrots using a spatula. This helps ensure both sides get a chance to caramelize and crisp up evenly, giving us those fantastic browned edges and tender interiors that define truly excellent Smashed Carrots.
  2. Check for Doneness: Keep an eye on them. You’re looking for the carrots to be beautifully golden brown and caramelized on the edges, with the Parmesan cheese having formed a lovely crispy crust. The centers should be tender and sweet. If they’re not quite crispy enough after the recommended time, you can give them another 5-10 minutes, checking frequently to prevent burning. Don’t rush this step; the crispiness is key!
  3. Remove from Oven: Once they reach that perfect state of golden, crispy, cheesy deliciousness, carefully remove the baking sheet(s) from the oven.

Crafting the Optional Balsamic Glaze

While our Smashed Carrots are absolutely fantastic on their own, a drizzle of homemade balsamic glaze takes them to an entirely new level. It adds a touch of acidity and sweetness that perfectly complements the savory, earthy flavors of the carrots and herbs.

  1. Combine Glaze Ingredients: In a small saucepan, combine the balsamic vinegar and brown sugar (or maple syrup).
  2. Simmer to Reduce: Place the saucepan over medium-low heat. Bring the mixture to a gentle simmer, stirring occasionally, until the sugar has dissolved.
  3. Thicken the Glaze: Continue to simmer the mixture, without stirring too frequently, for about 5-10 minutes, or until the glaze has thickened to a syrupy consistency. It should coat the back of a spoon. Be patient here; it takes a little time for the vinegar to reduce. Keep a close eye on it, as it can go from perfect to burnt very quickly. You want a consistency that’s thick enough to drizzle, but not so thick it’s like tar. Remember, it will thicken a bit more as it cools.
  4. Cool Slightly: Remove the saucepan from the heat and allow the balsamic glaze to cool for a few minutes. As it cools, it will continue to thicken to that perfect drizzle-able consistency.

Serving Your Delectable Smashed Carrots and Customization Ideas

You’ve done it! You’ve created a batch of incredibly flavorful and visually appealing Smashed Carrots. Now it’s time to enjoy the fruits of your labor and perhaps think about how you might customize them for future meals.

  1. Serve Immediately: Transfer the crispy Smashed Carrots to a serving platter. If you made the balsamic glaze, drizzle it artfully over the top just before serving. A garnish of a few extra fresh herb sprigs (like parsley or chives) can add a lovely touch of color and freshness.
  2. Enjoy! These Smashed Carrots are truly best enjoyed hot and fresh from the oven when they are at their crispiest. They make a fantastic side dish for almost any meal, from roasted chicken or fish to a hearty steak or a vegetarian lentil loaf. The combination of sweet, savory, and herbaceous flavors makes them a versatile crowd-pleaser.

Customization and Variations for Your Smashed Carrots:

  • Spice It Up: For those who love a bit of heat, consider adding a pinch of red pepper flakes along with the salt and pepper before roasting.
  • Different Herbs: Feel free to swap out thyme and rosemary for other fresh herbs like chopped fresh dill, chives, or flat-leaf parsley. Each will give a slightly different character to your Smashed Carrots.
  • Citrus Brightness: A squeeze of fresh lemon juice or a sprinkle of lemon zest over the finished carrots can add a wonderful bright, tangy note.
  • Nutty Crunch: A handful of toasted chopped pecans or walnuts sprinkled over the top just before serving would add a delightful textural contrast.
  • Cheesy Alternatives: While Parmesan is my go-to, you could experiment with other hard cheeses like Pecorino Romano or even a sharp aged cheddar for a different flavor profile.

Storage and Reheating:

If you happen to have any leftover Smashed Carrots (a rare occurrence in my house!), you can store them in an airtight container in the refrigerator for up to 3-4 days. To reheat, I highly recommend spreading them out on a baking sheet and warming them in a preheated oven at 350°F (175°C) for about 10-15 minutes, or until heated through and starting to crisp up again. While they won’t be quite as crispy as fresh, this method is far superior to microwaving, which tends to make them soft. You can even pop them under the broiler for a minute or two at the end to bring back some of that lovely crispness, but watch them very carefully to prevent burning!

These Smashed Carrots are more than just a side dish; they’re a flavorful experience that showcases the humble carrot in its most delicious form. I hope you enjoy making and eating them as much as I do!

Crispy Smashed Carrots: Your New Favorite Side Dish!

Conclusion:

And there you have it, my friends! We’ve reached the delicious culmination of our journey with what I genuinely believe will become a staple in your kitchen. This isn’t just another vegetable side dish; it’s a revelation, a testament to how simple ingredients, treated with a little love and a unique technique, can transform into something truly extraordinary. If you’ve been searching for a way to make vegetables exciting again, to delight even the pickiest eaters, then this recipe is your answer. The magic truly happens when those vibrant, sweet carrots are tenderized, then beautifully caramelized on the sheet pan, creating those irresistible crispy edges and a surprisingly creamy, melt-in-your-mouth interior. It’s the perfect balance of texture and flavor, a symphony in every bite that elevates the humble carrot to gourmet status. Trust me when I say, once you try these, you’ll wonder how you ever settled for plain steamed or boiled carrots again. The ease of preparation, combined with the utterly addictive results, makes this recipe an absolute must-try for any home cook looking to impress without stress.

What makes these Smashed Carrots stand out is their incredible versatility, making them the perfect companion to an astonishing array of main courses. Imagine pairing them with a perfectly roasted chicken, where their inherent sweetness and slightly savory seasoning complement the poultry beautifully. They’re equally at home alongside a succulent pan-seared salmon or cod, adding a vibrant burst of color and a delightful textural contrast. For those indulging in a hearty steak or a flavorful lamb chop, the earthy sweetness of the carrots cuts through the richness, creating a wonderfully balanced meal. And for my vegetarian and vegan friends, don’t feel left out! These Smashed Carrots are fantastic with a lentil loaf, a quinoa burger, or even as the star of a vibrant grain bowl. Their robust flavor holds its own, ensuring they never feel like an afterthought on the plate.

But why stop there? The beauty of cooking is experimentation, and this recipe offers a fantastic canvas for your culinary creativity. While the core recipe is utterly fantastic as is, feel free to play around with variations to suit your taste or the occasion. For an herbaceous twist, consider sprinkling fresh rosemary or thyme over the carrots before roasting – their aromatic qualities will infuse beautifully. A pinch of smoked paprika or a dash of cumin can add a wonderful warmth and depth, perfect for a more savory profile. If you’re feeling adventurous, a drizzle of hot honey or a sprinkle of chili flakes post-roasting can introduce a delightful sweet-and-spicy kick. For an extra layer of decadence, crumble some feta or goat cheese over the hot carrots right before serving, allowing it to slightly melt and create creamy pockets of flavor. Toasted nuts like pecans or walnuts can add a lovely crunch, while a sprinkle of fresh parsley or dill at the end brightens everything up with a burst of fresh green.

Seriously, I cannot emphasize enough how much I believe you’re going to love this recipe. It’s simple, it’s wholesome, and it delivers on flavor in spades. This isn’t just about cooking; it’s about discovering joy in simple ingredients and creating memorable meals that gather people around the table. So, please, do yourself a favor: gather your carrots, preheat your oven, and dive into the wonderful world of Smashed Carrots. I am genuinely excited for you to experience the crunchy edges, the tender centers, and the sweet, caramelized goodness that will undoubtedly become a new favorite in your culinary repertoire. Once you’ve whipped up your batch, I would absolutely love to hear about your experience! Did you stick to the recipe, or did you put your own unique spin on it? What did you pair them with? Share your thoughts, your successes, and your delicious moments. Your feedback truly inspires me, and I can’t wait to see how this incredible vegetable side dish transforms your meals. Happy cooking, and even happier eating!


Crispy Smashed Carrots

Crispy Smashed Carrots

Smashed Carrots revolutionize your side dish game, transforming humble carrots into an irresistible culinary delight with crispy, caramelized edges and a tender, sweet interior. This ingenious method unlocks a depth of flavor and a textural symphony that will have everyone asking for more.

Prep Time
40 Minutes

Cook Time
30 Minutes

Total Time
10 Minutes

Servings
4-6 servings

Ingredients

  • 2 lbs Carrots
  • 3 tbsp Olive Oil
  • 4-5 cloves Garlic, minced
  • 1 tbsp Fresh Thyme, chopped
  • 1 tsp Fresh Rosemary, chopped
  • ½ cup Freshly Grated Parmesan Cheese
  • ½ tsp Sea Salt
  • ¼ tsp Black Pepper, freshly ground
  • For the Optional Balsamic Glaze:
  • ¼ cup Balsamic Vinegar
  • 1 tbsp Brown Sugar

Instructions

  1. Step 1
    Preheat oven to 400°F (200°C). Wash, peel, and trim carrots. Cut medium carrots into 1-inch pieces; leave small ones whole.
  2. Step 2
    Place carrots in a pot, cover with salted cold water, and boil for 10-15 minutes until fork-tender. Drain thoroughly.
  3. Step 3
    Line a baking sheet with parchment paper. Spread drained carrots in a single layer and gently smash each piece until flattened.
  4. Step 4
    Drizzle smashed carrots with olive oil, minced garlic, chopped fresh thyme, rosemary, sea salt, and black pepper. Toss to coat.
  5. Step 5
    Sprinkle generously with freshly grated Parmesan cheese.
  6. Step 6
    Bake for 25-35 minutes, flipping halfway, until golden brown, caramelized, and crispy.
  7. Step 7
    (Optional Glaze) Combine ¼ cup balsamic vinegar and 1 tbsp brown sugar in a small saucepan. Simmer over medium-low heat for 5-10 minutes until syrupy. Cool slightly.
  8. Step 8
    Transfer crispy carrots to a platter. Drizzle with optional balsamic glaze and serve immediately.

Important Information

Nutrition Facts (Per Serving)

It is important to consider this information as approximate and not to use it as definitive health advice.

Allergy Information

Please check ingredients for potential allergens and consult a health professional if in doubt.

« Previous Post
Best Parmesan Crusted Chicken Recipe – Crispy & Flavorful!
Next Post »
Best Homemade Loaded Potato Soup: Hearty & Creamy Recipe!

If you enjoyed this…

Coconut Lime Chicken: A Delicious Recipe for Tropical Flavor Lovers

Ricotta Mac and Cheese: The Ultimate Comfort Food Recipe

One Pot Gnocchi Chicken Dish: Easy and Delicious Recipe for Busy Weeknights

Primary Sidebar

Browse by Diet

BreakfastDinnerLunchDessertAppetizer

Sweet Peach Yogurt Parfait Delight

One of my fondest memories is from a lazy summer afternoon spent at my grandmother’s house. The sun filtered through the kitchen window, casting a warm glow over the table where she would create her culinary magic. It was during one of those blissful moments that I first tasted her Peach Yogurt Parfait with Honey and Granola. The sweet aroma of ripe peaches mingling with creamy yogurt and the crunch of granola was nothing short of heavenly. It felt like summer captured in a bowl, and I still remember the joy of diving in with a spoon, each layer revealing a new burst of flavor.

When I think about that parfait, I can almost hear the gentle hum of the bees outside, reminding me of the floral notes that honey brings to every bite. The vibrant yellows and soft oranges of the peaches contrast beautifully with the creamy white yogurt and the golden crunch of granola. It’s a dish that not only looks delightful but also tastes like a celebration of fresh, wholesome ingredients.

What makes my version of this Peach Yogurt Parfait special is the careful balance of flavors and textures. I use ripe, juicy peaches, drizzled with locally sourced honey, and a homemade granola that’s bursting with nuts and seeds for an extra crunch. It’s a simple dish, but every layer is crafted with love and attention.

Let me show you exactly how to make this delightful parfait, so you can bring a bit of that summer magic into your kitchen!

Sweet Peach Yogurt Parfait Delight

Why You’ll Love This Recipe

  • Delightfully creamy texture from the Greek yogurt, paired with the juicy sweetness of fresh peaches.
  • Ready in under 20 minutes, making it a quick and satisfying breakfast or snack option.
  • Budget-friendly, using common ingredients that you may already have in your pantry.
  • Customizable with your favorite granola and nuts, allowing you to tailor each parfait to your taste.
  • Perfectly balanced flavors with the bright acidity of lemon juice and the sweetness of honey enhancing the peaches.

Ingredients

  • For the Parfait:
  • 2 cups plain Greek yogurt (or vanilla yogurt for a sweeter option)
  • 2 large ripe peaches, diced (about 2 cups)
  • 1 tablespoon fresh lemon juice (to prevent browning of peaches)
  • 2 tablespoons honey (plus more for drizzling)
  • 1 teaspoon vanilla extract (optional for extra flavor)
  • For the Granola:
  • 1 cup granola (store-bought or homemade; see notes for a simple granola recipe)
  • 1/4 cup sliced almonds (optional for added crunch)
  • 1/4 cup shredded coconut (optional for added flavor)

Let’s dive into some key ingredients that make this Peach Yogurt Parfait so delightful! First, the Greek yogurt is not only creamy but also packed with protein, making it a satisfying option for breakfast or a snack. If you’re looking for a sweeter option, you can easily substitute it with vanilla yogurt, though it may alter the overall flavor balance. Next, the ripe peaches are the star of the show; their natural sweetness shines through, so I recommend choosing peaches that yield slightly to pressure, indicating they’re perfectly ripe. If peaches aren’t in season, feel free to use nectarines or even frozen peaches—just thaw them before use. Finally, honey adds a lovely floral sweetness that ties everything together. If you prefer, maple syrup can serve as a delicious substitute.

Step-by-Step Instructions

  1. Start by preparing the peaches. Wash them thoroughly, then slice and dice them into bite-sized pieces. In a medium bowl, toss the diced peaches with 1 tablespoon of fresh lemon juice to prevent browning. Set aside for about 5 minutes while the lemon juice works its magic.
  2. In a separate bowl, combine the Greek yogurt, 2 tablespoons of honey, and 1 teaspoon of vanilla extract if using. Stir the mixture until smooth and thoroughly blended. This should take about a minute. Avoid overmixing to maintain the creaminess of the yogurt.
  3. Now it’s time to layer your parfait. Grab a clear glass or bowl to showcase your beautiful creation. Start with a generous spoonful of the yogurt mixture at the bottom—about 1/4 cup will do. Use a spoon to spread it evenly.
  4. Add a layer of the diced peaches over the yogurt, ensuring they cover the yogurt completely. You might want to use about half of what you have prepared—roughly 1 cup. This layer should be visually appealing, so arrange the peaches neatly.
  5. Sprinkle 1/4 cup of granola over the peaches. This adds a delightful crunch. Make sure to distribute it evenly to ensure every bite has that satisfying texture. Avoid packing it down too tightly, as you want it to maintain its crunch.
  6. Repeat the layers: spoon in another 1/4 cup of yogurt, followed by another cup of peaches, and another sprinkle of granola. You should have at least two layers, but feel free to add more depending on your glass size.
  7. Finish off your parfait with a drizzle of honey on top for added sweetness and a touch of elegance. If you’re using sliced almonds or shredded coconut, sprinkle them on top now. It adds a lovely visual contrast and extra flavor.
  8. Serve immediately or refrigerate for up to 30 minutes before serving to allow the flavors to meld together. However, I recommend enjoying it fresh to maintain the granola’s crunch.

Pro Tips for the Best Peach Yogurt Parfait With Honey And Granola

  • Make sure to choose ripe peaches for the best flavor and texture. A common mistake is using unripe fruit, which can lead to a less enjoyable parfait. Look for peaches that are fragrant and slightly soft to the touch.
  • Use a clear glass to assemble your parfait; this not only makes for a beautiful presentation but also allows you to see the colorful layers, which adds to the enjoyment of eating it.
  • For an even creamier texture, consider whipping the Greek yogurt with a hand mixer for a couple of minutes before layering. This small adjustment makes a huge difference in mouthfeel.
  • Be mindful of the granola-to-yogurt ratio. Too much granola can overwhelm the parfait, while too little can make it feel too creamy. Aim for about 1/4 cup of granola per layer for the perfect balance.
  • If you’re making this for a gathering, consider preparing the yogurt and peaches ahead of time and layering them just before serving. This ensures the granola stays crunchy!

Variations & Serving Ideas

There are so many ways to get creative with your Peach Yogurt Parfait! For a tropical twist, swap out the peaches for mangoes or pineapples and top with coconut flakes. If you prefer a berry flavor, mix in some blueberries or strawberries with the peaches for added color and taste. For a nutty version, incorporate chopped walnuts or pecans instead of almonds.

As for serving ideas, this parfait pairs beautifully with a side of scrambled eggs for a hearty breakfast or fresh fruit salad for a light lunch. You might also enjoy it alongside whole grain toast with almond butter for an energizing snack. The contrast of flavors and textures will elevate your meal experience!

Storage, Make-Ahead & Reheating

The Peach Yogurt Parfait is best enjoyed fresh, but you can prepare some components ahead of time. Store the layered parfait in an airtight container in the refrigerator for up to 24 hours. However, be cautious; the granola may lose its crunch if stored too long. You can freeze the yogurt and peach mixture for up to 2 months; just remember to thaw it in the refrigerator overnight before serving.

If you plan to enjoy this dish the next day, it can taste even better as the flavors meld together. Just remember to add the granola right before serving to keep its delightful crunch!

Frequently Asked Questions

Can I make Peach Yogurt Parfait With Honey And Granola ahead of time?

Yes — in fact, it tastes even better the next day as the flavors meld. However, I recommend waiting to add the granola until just before serving to maintain its crunch.

What can I substitute for Greek yogurt?

If you prefer a lighter option, you can substitute Greek yogurt with regular yogurt or a dairy-free alternative like coconut yogurt. Just remember that this may alter the creaminess and flavor profile slightly.

Can I use frozen peaches for this parfait?

Absolutely! Just make sure to thaw the frozen peaches before using them. They will still add great flavor, though the texture may be slightly softer than fresh peaches.

How do I make the parfait vegan?

To make a vegan version, substitute the Greek yogurt with a plant-based yogurt alternative, and replace honey with maple syrup or agave nectar. This keeps the parfait sweet while adhering to a vegan diet.

What other fruits can I use in this recipe?

You can mix and match fruits based on your preference. Try using strawberries, blueberries, raspberries, or even bananas. Just make sure to adjust the lemon juice as needed to prevent browning.

Sweet Peach Yogurt Parfait Delight

Final Thoughts

The Peach Yogurt Parfait with Honey and Granola is a delightful blend of creamy yogurt, sweet peaches, and crunchy granola that creates a satisfying and nourishing treat. Each layer bursts with flavor, making it a perfect choice for breakfast or a light dessert.

This is the kind of recipe I come back to again and again, especially when I want something refreshing and wholesome to start my day. The harmony of sweet and tart flavors, combined with the delightful crunch, never fails to lift my spirits!

I encourage you to give this parfait a try and indulge in its comforting goodness. Feel free to share your results or even add your own twist—perhaps a sprinkle of cinnamon or a handful of nuts. Enjoy creating your perfect parfait!

Print
clock clock iconcutlery cutlery iconflag flag iconfolder folder iconinstagram instagram iconpinterest pinterest iconfacebook facebook iconprint print iconsquares squares iconheart heart iconheart solid heart solid icon

Peach Yogurt Parfait


  • Author: Lily author
  • Total Time: 15 minutes
  • Yield: 4 servings 1x
Pin Recipe
Print Recipe

Description

This Peach Yogurt Parfait combines creamy Greek yogurt, juicy peaches, and crunchy granola for a delightful treat. It’s a perfect breakfast or snack that captures the essence of summer in every bite.


Ingredients

Scale
  • For the Parfait:
  • 2 cups plain Greek yogurt (or vanilla yogurt for a sweeter option)
  • 2 large ripe peaches, diced (about 2 cups)
  • 1 tablespoon fresh lemon juice (to prevent browning of peaches)
  • 2 tablespoons honey (plus more for drizzling)
  • 1 teaspoon vanilla extract (optional for extra flavor)
  • For the Granola:
  • 1 cup granola (store-bought or homemade; see notes for a simple granola recipe)
  • 1/4 cup sliced almonds (optional for added crunch)
  • 1/4 cup shredded coconut (optional for added flavor)

Instructions

  1. Start by preparing the peaches. Wash them thoroughly, then slice and dice them into bite-sized pieces. In a medium bowl, toss the diced peaches with 1 tablespoon of fresh lemon juice to prevent browning. Set aside for about 5 minutes while the lemon juice works its magic.
  2. In a separate bowl, combine the Greek yogurt, 2 tablespoons of honey, and 1 teaspoon of vanilla extract if using. Stir the mixture until smooth and thoroughly blended. This should take about a minute. Avoid overmixing to maintain the creaminess of the yogurt.
  3. Now it’s time to layer your parfait. Grab a clear glass or bowl to showcase your beautiful creation. Start with a generous spoonful of the yogurt mixture at the bottom—about 1/4 cup will do. Use a spoon to spread it evenly.
  4. Add a layer of the diced peaches over the yogurt, ensuring they cover the yogurt completely. You might want to use about half of what you have prepared—roughly 1 cup. This layer should be visually appealing, so arrange the peaches neatly.
  5. Sprinkle 1/4 cup of granola over the peaches. This adds a delightful crunch. Make sure to distribute it evenly to ensure every bite has that satisfying texture. Avoid packing it down too tightly, as you want it to maintain its crunch.
  6. Repeat the layers: spoon in another 1/4 cup of yogurt, followed by another cup of peaches, and another sprinkle of granola. You should have at least two layers, but feel free to add more depending on your glass size.
  7. Finish off your parfait with a drizzle of honey on top for added sweetness and a touch of elegance. If you’re using sliced almonds or shredded coconut, sprinkle them on top now. It adds a lovely visual contrast and extra flavor.
  8. Serve immediately or refrigerate for up to 30 minutes before serving to allow the flavors to meld together. However, I recommend enjoying it fresh to maintain the granola’s crunch.
  • Prep Time: 15 mins
  • Cook Time: 0 mins
  • Category: Breakfast
  • Method: No-cook
  • Cuisine: American

Nutrition

  • Serving Size: 1 parfait
  • Calories: 250
  • Sugar: 20 g
  • Sodium: 50 mg
  • Fat: 5 g
  • Saturated Fat: 2 g
  • Unsaturated Fat: 3 g
  • Trans Fat: 0 g
  • Carbohydrates: 40 g
  • Fiber: 3 g
  • Protein: 10 g
  • Cholesterol: 10 mg

Keywords: Choose ripe peaches for the best flavor and texture. Use a clear glass for a beautiful presentation. For creaminess, consider whipping the yogurt before layering. Be mindful of the granola-to-yogurt ratio. Prepare yogurt and peaches ahead of time for gatherings, layering just before serving.

Did you make this recipe?

Share a photo and tag us — we can't wait to see what you've made!

Sun-Kissed Frozen Orange Cream Slush

As a child, summer days felt like they lasted forever. I remember the sticky heat wrapping around me as I played outside, my laughter mingling with the sounds of the neighborhood. But nothing could cool me down quite like the moment I’d spot my grandmother, laboring over her blender, whipping up her famous Frozen Orange Creamsicle Slush. That vibrant orange treat, with its frosty texture and sweet citrus aroma, was like a burst of sunshine in a cup. Just one sip, and I could feel the coolness wash over me, sparking pure joy.

This Frozen Orange Creamsicle Slush has a way of making you feel like a kid again. Its creamy, dreamy consistency is a delightful balance of bright orange and soft vanilla, inviting you to dive right in. The refreshing tang of orange dances on your tongue, while the smooth creaminess envelops you in a comforting embrace. It’s a nostalgic treat that’s perfect for hot summer afternoons or anytime you need a little pick-me-up.

What makes my version of this slush stand out is the addition of a hint of vanilla bean, which elevates the flavor and adds an extra layer of richness. Plus, it’s super easy to whip up with just a few simple ingredients that you probably already have on hand! So, if you’re ready to relive those sun-soaked memories, let me show you exactly how to make it.

Sun-Kissed Frozen Orange Cream Slush

Why You’ll Love This Recipe

  • Each slush is a perfect blend of creamy vanilla and zesty orange, creating a nostalgic flavor reminiscent of summer days.
  • This refreshing treat is ready in under 15 minutes, making it an ideal quick dessert for unexpected guests or hot afternoons.
  • With just 8 simple ingredients, it’s budget-friendly, ensuring you don’t have to break the bank to enjoy a delicious slush.
  • The slush has a perfectly smooth texture, thanks to the combination of ice and ice cream, providing a delightful contrast to the bright citrus flavors.
  • It’s highly customizable; you can easily adjust the sweetness and add fresh herbs for a unique twist that suits your taste.

Ingredients

  • 2 cups orange juice (freshly squeezed or store-bought)
  • 1 cup vanilla ice cream
  • 1 cup crushed ice
  • 1/2 cup milk (whole or 2%)
  • 1/4 cup granulated sugar (adjust based on sweetness preference)
  • 1 teaspoon vanilla extract
  • Zest of 1 orange (for added flavor)
  • Fresh orange slices and mint leaves (for garnish)

The star of this Frozen Orange Creamsicle Slush is the orange juice, which provides the vibrant, citrusy base. Freshly squeezed juice will yield the brightest flavor, but store-bought options can be just as convenient. If you’re opting for store-bought, choose 100% pure juice with no added sugars for the best results. Another essential ingredient is the vanilla ice cream; it adds creaminess and sweetness. You can substitute it with dairy-free ice cream if you’re looking for a vegan option. Whole or 2% milk complements the ice cream, creating a smooth blend. If you want a lower-calorie version, almond or oat milk can be good alternatives.

Lastly, the granulated sugar can be adjusted based on your sweetness preference. If you prefer a more natural sweetener, consider using honey or agave syrup. The orange zest enhances the flavor profile, providing an aromatic pop that brings the whole slush together. Don’t skip it! It adds an extra layer of brightness that makes this slush truly special.

Step-by-Step Instructions

  1. Start by preparing your ingredients. Gather 2 cups of orange juice, 1 cup of vanilla ice cream, and 1 cup of crushed ice. Make sure the ice is finely crushed, as larger chunks can make blending difficult.
  2. In a blender, combine the orange juice, vanilla ice cream, crushed ice, and 1/2 cup of milk. Add 1/4 cup of granulated sugar and 1 teaspoon of vanilla extract. If you like a sweeter slush, consider adding a bit more sugar at this stage.
  3. Add the zest of 1 orange to the blender. This step is crucial for enhancing the citrus flavor of your slush. Make sure not to include the bitter white pith—only the flavorful zest.
  4. Blend the mixture on medium-high speed for about 30-45 seconds. Stop once the ingredients are fully combined and the slush has a smooth, even consistency. If you notice large chunks of ice, blend for an additional 10-15 seconds. Avoid over-blending, as this can make the slush too liquidy.
  5. Once blended, taste the slush. If it needs more sweetness, add a little more sugar and blend for a few more seconds. If it’s too thick, you can add a splash of milk to reach your desired consistency.
  6. Pour the slush into glasses. This recipe typically serves 4, but you can easily double it for larger gatherings. Use a spoon to help guide the slush into the glasses if needed.
  7. Garnish each serving with fresh orange slices and mint leaves. The mint not only adds a pop of color but also a refreshing aroma that complements the citrus flavors beautifully.
  8. Serve immediately and enjoy! If you’ve made extra, you can refrigerate it for a short time, but it’s best enjoyed fresh.

Pro Tips for the Best Frozen Orange Creamsicle Slush

  • Don’t skip the orange zest! It’s a game-changer for flavor. Always zest before juicing to make it easier.
  • Use a high-powered blender for the best texture. A standard blender may struggle with ice, leading to uneven consistency. If you have a food processor, that can work too, but ensure the ice is finely crushed.
  • Adjust the ice-to-liquid ratio carefully. If your slush is too thick, it won’t blend well. Start with less ice and add more until you reach your preferred texture.
  • Be cautious with the sugar! Always start with the lower amount, as you can easily add more, but it’s hard to fix an overly sweet slush.
  • For a fun twist, consider adding a splash of coconut milk or a handful of fresh fruit like strawberries or pineapple. This not only enhances the flavor but also adds a beautiful color contrast.

Variations & Serving Ideas

There are countless ways to put a spin on your Frozen Orange Creamsicle Slush. Consider making a tropical version by adding in some pineapple juice or coconut milk for a delightful tropical twist. If you’re feeling adventurous, try incorporating a handful of frozen mango or peach slices for added sweetness. For a lighter version, swap out the vanilla ice cream for Greek yogurt for a creamy yet tangy alternative.

As for serving ideas, this refreshing slush pairs wonderfully with light summer dishes like grilled chicken skewers, fish tacos, or a simple salad topped with citrus vinaigrette. The bright, zesty flavors of the slush complement these dishes perfectly, making them an ideal pairing for a sunny day.

Storage, Make-Ahead & Reheating

This Frozen Orange Creamsicle Slush is best enjoyed fresh, but if you have leftovers, you can store them in an airtight container in the fridge for up to 2 days. Just keep in mind that the slush may lose some of its texture over time as the ice melts. It doesn’t freeze well, as the ice will turn into a solid block. If you must freeze it, blend again after thawing to restore the slushy consistency. This treat is best the day you make it, as the flavors meld together beautifully overnight, enhancing its deliciousness.

Frequently Asked Questions

Can I make Frozen Orange Creamsicle Slush ahead of time?

Yes — in fact, it tastes even better the next day as the flavors meld. However, it’s best to enjoy it fresh, as the texture can change if stored for too long. If you need to prepare it ahead, keep it in the fridge and re-blend before serving.

What kind of orange juice should I use?

For the best flavor, use freshly squeezed orange juice. However, if you’re short on time, opt for 100% pure store-bought juice without added sugars. This will ensure that your slush remains flavorful and refreshing.

Can I substitute the vanilla ice cream?

Absolutely! If you’re looking for a dairy-free option, coconut milk ice cream or a non-dairy vanilla ice cream can work wonderfully. They will still provide the creamy texture and sweetness you desire.

How can I adjust the sweetness of my slush?

You can easily adjust the sweetness by modifying the amount of sugar added. Start with 1/4 cup and taste the mixture before blending. If you prefer it sweeter, add more sugar gradually until it reaches your desired level.

What should I do if my slush is too thick?

If your slush is too thick, simply add a splash of milk or orange juice and blend again. This will help achieve a more drinkable consistency while maintaining the slushy texture. Adjust gradually to reach your preferred thickness.

Sun-Kissed Frozen Orange Cream Slush

Final Thoughts

The Frozen Orange Creamsicle Slush is a delightful blend of refreshing citrus and creamy goodness, making it a perfect treat for warm days or any time you crave a taste of nostalgia. The way the bright orange flavor dances with the creamy texture truly elevates this slush, transforming it into a satisfying escape from the everyday.

This is the kind of recipe I come back to again and again, especially when I’m looking to cool down or impress guests at a summer gathering. It’s simple to make and always brings smiles all around! I encourage you to try this recipe for yourself—don’t hesitate to share your results or even put your own spin on it. Happy slushing!

Print
clock clock iconcutlery cutlery iconflag flag iconfolder folder iconinstagram instagram iconpinterest pinterest iconfacebook facebook iconprint print iconsquares squares iconheart heart iconheart solid heart solid icon

Frozen Orange Creamsicle Slush


  • Author: Lily author
  • Total Time: 15 minutes
  • Yield: 4 servings 1x
Pin Recipe
Print Recipe

Description

This Frozen Orange Creamsicle Slush is a refreshing treat that combines creamy vanilla and zesty orange flavors. Perfect for hot summer days, it brings back nostalgic memories with every sip.


Ingredients

Scale
  • 2 cups orange juice (freshly squeezed or store-bought)
  • 1 cup vanilla ice cream
  • 1 cup crushed ice
  • 1/2 cup milk (whole or 2%)
  • 1/4 cup granulated sugar (adjust based on sweetness preference)
  • 1 teaspoon vanilla extract
  • Zest of 1 orange (for added flavor)
  • Fresh orange slices and mint leaves (for garnish)

Instructions

  1. Start by preparing your ingredients. Gather 2 cups of orange juice, 1 cup of vanilla ice cream, and 1 cup of crushed ice. Make sure the ice is finely crushed, as larger chunks can make blending difficult.
  2. In a blender, combine the orange juice, vanilla ice cream, crushed ice, and 1/2 cup of milk. Add 1/4 cup of granulated sugar and 1 teaspoon of vanilla extract. If you like a sweeter slush, consider adding a bit more sugar at this stage.
  3. Add the zest of 1 orange to the blender. This step is crucial for enhancing the citrus flavor of your slush. Make sure not to include the bitter white pith—only the flavorful zest.
  4. Blend the mixture on medium-high speed for about 30-45 seconds. Stop once the ingredients are fully combined and the slush has a smooth, even consistency. If you notice large chunks of ice, blend for an additional 10-15 seconds. Avoid over-blending, as this can make the slush too liquidy.
  5. Once blended, taste the slush. If it needs more sweetness, add a little more sugar and blend for a few more seconds. If it’s too thick, you can add a splash of milk to reach your desired consistency.
  6. Pour the slush into glasses. This recipe typically serves 4, but you can easily double it for larger gatherings. Use a spoon to help guide the slush into the glasses if needed.
  7. Garnish each serving with fresh orange slices and mint leaves. The mint not only adds a pop of color but also a refreshing aroma that complements the citrus flavors beautifully.
  8. Serve immediately and enjoy! If you’ve made extra, you can refrigerate it for a short time, but it's best enjoyed fresh.
  • Prep Time: 15 min
  • Cook Time: 0 min
  • Category: Dessert
  • Method: Blending
  • Cuisine: American

Nutrition

  • Serving Size: 1 serving
  • Calories: 200
  • Sugar: 30 g
  • Sodium: 50 mg
  • Fat: 5 g
  • Saturated Fat: 3 g
  • Unsaturated Fat: 2 g
  • Trans Fat: 0 g
  • Carbohydrates: 40 g
  • Fiber: 1 g
  • Protein: 2 g
  • Cholesterol: 20 mg

Keywords: Don't skip the orange zest! It's a game-changer for flavor. Always zest before juicing to make it easier.

Did you make this recipe?

Share a photo and tag us — we can't wait to see what you've made!

Zesty Lemon Poppy Seed Delight

One rainy afternoon, I found myself in my grandmother’s cozy kitchen, the kind that always smelled like warmth and love. She was whipping up her famous Lemon Poppy Seed Loaf, a recipe that had been passed down through generations. As the batter came together, the zesty aroma of fresh lemons filled the air, mingling perfectly with the nutty fragrance of poppy seeds. I can still picture her, apron-clad, as she expertly drizzled a vibrant citrus icing over the loaf, creating a glossy, sun-kissed finish that beckoned us to dive in. It was a moment that sparked my own passion for baking, and this recipe has become a cherished staple in my home ever since.

When you take a bite of this Lemon Poppy Seed Loaf, it’s like a burst of sunshine on your palate. The loaf is beautifully golden, with a tender crumb that melts in your mouth. Each slice is speckled with tiny poppy seeds, adding a delightful crunch that contrasts beautifully with the tangy sweetness of the lemon. And that citrus icing? It’s the finishing touch that elevates this loaf from ordinary to extraordinary, with its bright, zesty flavor dancing on your taste buds.

This recipe stands out because it embraces simplicity while delivering on flavor. I’ve added a hint of vanilla to the batter, enhancing the overall taste and making it even more indulgent. Trust me, once you make this Lemon Poppy Seed Loaf With Citrus Icing, it’ll become a go-to in your baking repertoire.

So, let me show you exactly how to make it!

Zesty Lemon Poppy Seed Delight

Why You’ll Love This Recipe

  • Moist and tender crumb that melts in your mouth, thanks to the perfect balance of butter and buttermilk.
  • Bright, zesty lemon flavor paired with crunchy poppy seeds, creating a delightful texture and taste experience.
  • Easy to whip up in just about an hour, perfect for last-minute gatherings or a cozy afternoon treat.
  • Budget-friendly with everyday ingredients, making it an accessible option for all home bakers.
  • The citrus icing adds a sweet tang that elevates the loaf, turning a simple recipe into a showstopper!

Ingredients

  • 1 ½ cups (190g) all-purpose flour
  • 1 teaspoon baking powder
  • ½ teaspoon baking soda
  • ½ teaspoon salt
  • 3 tablespoons poppy seeds
  • ½ cup (115g) unsalted butter, softened to room temperature
  • 1 cup (200g) granulated sugar
  • 2 large eggs
  • 1 teaspoon vanilla extract
  • 1 teaspoon lemon zest (from about 1 medium lemon)
  • ½ cup (120ml) buttermilk
  • 2 tablespoons fresh lemon juice

For the Citrus Icing:

  • 1 cup (120g) powdered sugar
  • 2 tablespoons fresh lemon juice
  • 1 tablespoon orange juice
  • 1 teaspoon lemon zest (for garnish, optional)

Let’s dive into the key ingredients that make this Lemon Poppy Seed Loaf so special. The all-purpose flour provides the structure and base for the loaf, while the baking powder and baking soda ensure it rises perfectly, giving the loaf a light texture. For a gluten-free variation, you could substitute the flour with a gluten-free all-purpose blend. Poppy seeds not only add a delightful crunch but also contribute to the unique flavor profile that pairs well with the citrus notes.

Unsalted butter is crucial for achieving the buttery richness that makes this loaf so moist. If you’re looking for a dairy-free option, coconut oil or a vegan butter can be used instead. The buttermilk is another essential component, providing acidity that activates the baking soda for a fluffy texture. If you don’t have buttermilk on hand, you can easily make a substitute by mixing ½ cup of milk with 1 tablespoon of vinegar or lemon juice and letting it sit for about 5 minutes.

Step-by-Step Instructions

  1. Preheat your oven to 350°F (175°C). Grease a 9×5-inch loaf pan or line it with parchment paper for easy removal later.
  2. In a medium mixing bowl, whisk together 1 ½ cups of all-purpose flour, 1 teaspoon of baking powder, ½ teaspoon of baking soda, ½ teaspoon of salt, and 3 tablespoons of poppy seeds. This helps to evenly distribute the baking agents and ensures a uniform rise.
  3. In a large mixing bowl, cream together ½ cup of softened unsalted butter and 1 cup of granulated sugar using an electric mixer on medium speed for about 3-4 minutes, until the mixture is light and fluffy. Make sure to scrape down the sides of the bowl occasionally.
  4. Add 2 large eggs, 1 teaspoon of vanilla extract, and 1 teaspoon of lemon zest to the creamed butter and sugar, mixing until fully combined. You want a smooth consistency, so ensure there are no lumps of butter.
  5. In a small bowl, combine ½ cup of buttermilk and 2 tablespoons of fresh lemon juice. Alternately add the dry ingredients and buttermilk mixture to the butter mixture, starting and ending with the dry ingredients. Mix just until combined; do not overmix, as this can lead to a dense loaf.
  6. Pour the batter into the prepared loaf pan. Smooth the top with a spatula, ensuring it’s even. Bake in the preheated oven for 50-60 minutes, or until a toothpick inserted in the center comes out clean. The edges should be lightly golden brown, and the center should feel just set.
  7. Once baked, remove the loaf from the oven and allow it to cool in the pan for about 10 minutes. Then, transfer it to a wire rack to cool completely. Resist the urge to slice too soon, as it will be crumbly if it’s still warm.
  8. While the loaf is cooling, prepare the citrus icing. In a medium bowl, whisk together 1 cup of powdered sugar, 2 tablespoons of fresh lemon juice, and 1 tablespoon of orange juice until smooth. If the icing is too thick, you can add a little more juice to reach your desired consistency.
  9. Once the loaf is completely cool, drizzle the citrus icing over the top. If you like, sprinkle with an additional teaspoon of lemon zest for an extra pop of flavor and color.

Pro Tips for the Best Lemon Poppy Seed Loaf With Citrus Icing

  • Be careful not to overmix your batter; this is a common mistake that can lead to a dense loaf. Mix just until the dry ingredients are incorporated for a light and fluffy texture.
  • Use room temperature ingredients, especially the butter and eggs. This helps to create a smoother batter and ensures even baking. Take your eggs out of the fridge about 30 minutes before you start.
  • For a more pronounced lemon flavor, consider adding a little lemon extract in addition to the zest and juice. Just a half teaspoon can elevate the citrus notes significantly.
  • When measuring your flour, spoon it into the measuring cup and level it off with a knife instead of scooping directly from the bag. This prevents packing and ensures you don’t end up with a dry loaf.
  • Invest in a good quality loaf pan; it makes a difference in heat distribution, which ensures even baking. If your pan is dark-coated, reduce the oven temperature by 25°F to prevent over-browning.

Variations & Serving Ideas

For a delightful twist, consider adding blueberries or raspberries to the batter for a fruity burst of flavor. You can also experiment with different citrus fruits—try lime or grapefruit zest and juice for a refreshing change. For a healthier option, substitute half of the all-purpose flour with whole wheat flour for added fiber without compromising too much on texture.

This Lemon Poppy Seed Loaf pairs beautifully with a light salad, such as a mixed greens salad with a vinaigrette, or a cup of tea for a cozy afternoon treat. It also complements a creamy cheese platter, as the acidity of the loaf balances rich cheeses perfectly. Lastly, a scoop of vanilla ice cream on the side creates a delightful contrast of temperatures and flavors!

Storage, Make-Ahead & Reheating

This Lemon Poppy Seed Loaf can be stored at room temperature for up to 3 days if wrapped tightly in plastic wrap. If you want to keep it longer, it freezes well for up to 3 months. To freeze, wrap the loaf tightly in plastic wrap and then in aluminum foil to prevent freezer burn.

When you’re ready to enjoy it again, simply thaw it in the fridge overnight. Reheat individual slices in the microwave for 15-20 seconds or in a toaster oven until warmed through. Interestingly, many people find that this loaf tastes even better the next day, as the flavors have time to meld!

Frequently Asked Questions

Can I make Lemon Poppy Seed Loaf With Citrus Icing ahead of time?

Yes — in fact, it tastes even better the next day! You can make the loaf a day in advance, allowing the flavors to develop. Just be sure to store it in an airtight container to maintain its moisture.

Can I substitute the poppy seeds?

Absolutely! If you don’t have poppy seeds on hand or prefer an alternative, you can use sesame seeds for a similar crunch or omit them entirely for a smooth loaf.

What can I use instead of buttermilk?

If you don’t have buttermilk, you can easily create a substitute by mixing ½ cup of milk (dairy or plant-based) with 1 tablespoon of vinegar or lemon juice. Let it sit for 5 minutes before using in the recipe.

How can I make this recipe gluten-free?

To make a gluten-free version of this Lemon Poppy Seed Loaf, substitute the all-purpose flour with a gluten-free all-purpose flour blend. Just ensure that the blend contains a binding agent like xanthan gum for the best results.

What is the best way to store leftover loaf?

Leftover Lemon Poppy Seed Loaf should be stored in an airtight container at room temperature for up to 3 days. For longer storage, wrap it tightly and freeze for up to 3 months. Thaw it before serving for the best texture.

Zesty Lemon Poppy Seed Delight

Final Thoughts

The Lemon Poppy Seed Loaf with Citrus Icing is truly a delightful treat that brings a burst of brightness to any occasion. The zesty lemon flavor combined with the subtle crunch of poppy seeds creates a satisfying balance, while the citrus icing adds a touch of sweetness that perfectly complements the loaf’s tanginess.

This is the kind of recipe I come back to again and again, especially when I want to brighten up a gloomy day or celebrate a small victory. The aroma that fills the kitchen as it bakes is absolutely heavenly! I encourage you to give this recipe a try; you might just find it becoming a beloved staple in your home. Don’t forget to share your results or even add your own unique twist—I can’t wait to see what you create!

Print
clock clock iconcutlery cutlery iconflag flag iconfolder folder iconinstagram instagram iconpinterest pinterest iconfacebook facebook iconprint print iconsquares squares iconheart heart iconheart solid heart solid icon

Lemon Poppy Seed Loaf


  • Author: Lily author
  • Total Time: 28 minute
  • Yield: 1 loaf 1x
Pin Recipe
Print Recipe

Description

This Lemon Poppy Seed Loaf is a delightful treat that combines zesty lemon flavor with crunchy poppy seeds. Topped with a citrus icing, it’s perfect for any occasion.


Ingredients

Scale
  • 1 ½ cups (190g) all-purpose flour
  • 1 teaspoon baking powder
  • ½ teaspoon baking soda
  • ½ teaspoon salt
  • 3 tablespoons poppy seeds
  • ½ cup (115g) unsalted butter, softened to room temperature
  • 1 cup (200g) granulated sugar
  • 2 large eggs
  • 1 teaspoon vanilla extract
  • 1 teaspoon lemon zest (from about 1 medium lemon)
  • ½ cup (120ml) buttermilk
  • 2 tablespoons fresh lemon juice
  • 1 cup (120g) powdered sugar
  • 2 tablespoons fresh lemon juice
  • 1 tablespoon orange juice
  • 1 teaspoon lemon zest (for garnish, optional)

Instructions

  1. Preheat your oven to 350°F (175°C). Grease a 9×5-inch loaf pan or line it with parchment paper for easy removal later.
  2. In a medium mixing bowl, whisk together 1 ½ cups of all-purpose flour, 1 teaspoon of baking powder, ½ teaspoon of baking soda, ½ teaspoon of salt, and 3 tablespoons of poppy seeds. This helps to evenly distribute the baking agents and ensures a uniform rise.
  3. In a large mixing bowl, cream together ½ cup of softened unsalted butter and 1 cup of granulated sugar using an electric mixer on medium speed for about 3-4 minutes, until the mixture is light and fluffy. Make sure to scrape down the sides of the bowl occasionally.
  4. Add 2 large eggs, 1 teaspoon of vanilla extract, and 1 teaspoon of lemon zest to the creamed butter and sugar, mixing until fully combined. You want a smooth consistency, so ensure there are no lumps of butter.
  5. In a small bowl, combine ½ cup of buttermilk and 2 tablespoons of fresh lemon juice. Alternately add the dry ingredients and buttermilk mixture to the butter mixture, starting and ending with the dry ingredients. Mix just until combined; do not overmix, as this can lead to a dense loaf.
  6. Pour the batter into the prepared loaf pan. Smooth the top with a spatula, ensuring it’s even. Bake in the preheated oven for 50-60 minutes, or until a toothpick inserted in the center comes out clean. The edges should be lightly golden brown, and the center should feel just set.
  7. Once baked, remove the loaf from the oven and allow it to cool in the pan for about 10 minutes. Then, transfer it to a wire rack to cool completely. Resist the urge to slice too soon, as it will be crumbly if it’s still warm.
  8. While the loaf is cooling, prepare the citrus icing. In a medium bowl, whisk together 1 cup of powdered sugar, 2 tablespoons of fresh lemon juice, and 1 tablespoon of orange juice until smooth. If the icing is too thick, you can add a little more juice to reach your desired consistency.
  9. Once the loaf is completely cool, drizzle the citrus icing over the top. If you like, sprinkle with an additional teaspoon of lemon zest for an extra pop of flavor and color.
  • Prep Time: 15 mins
  • Cook Time: 50-60 mins
  • Category: Dessert
  • Method: Baking
  • Cuisine: American

Nutrition

  • Serving Size: 1 slice
  • Calories: 200
  • Sugar: 15 g
  • Sodium: 150 mg
  • Fat: 8 g
  • Saturated Fat: 5 g
  • Unsaturated Fat: 3 g
  • Trans Fat: 0 g
  • Carbohydrates: 30 g
  • Fiber: 1 g
  • Protein: 3 g
  • Cholesterol: 40 mg

Keywords: Be careful not to overmix your batter; this is a common mistake that can lead to a dense loaf. Use room temperature ingredients for a smoother batter and even baking.

Did you make this recipe?

Share a photo and tag us — we can't wait to see what you've made!

  • Privacy Policy
  • Terms Of Service
  • Contact
  • About
  • GDPR

Copyright © 2025 Homesmad