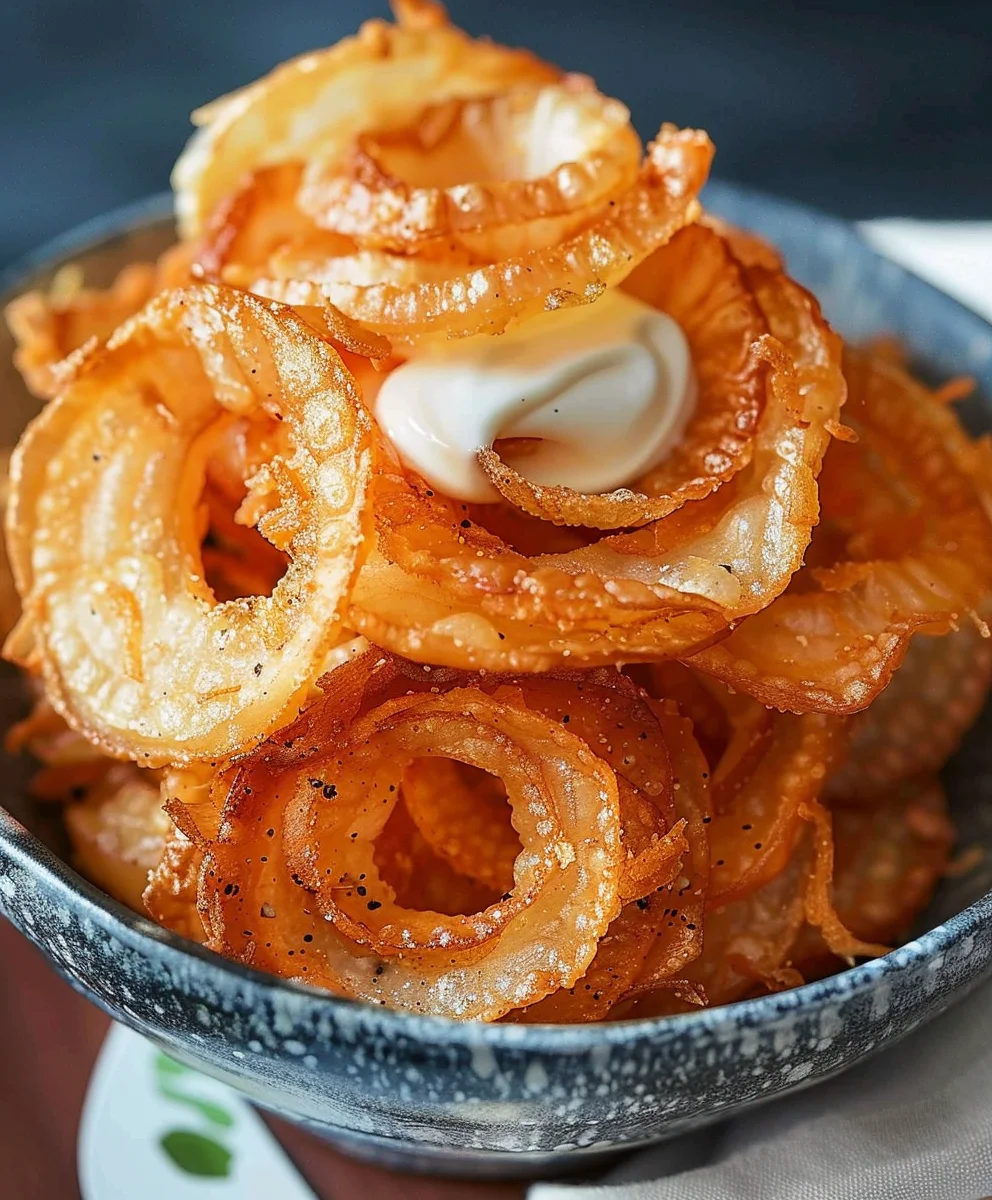
Onion Ring Chips Crispy Snack Recipe is about to revolutionize your snack game. Imagine the irresistible, savory essence of your favorite onion rings, transformed into a delightfully crunchy, light-as-air chip that can be enjoyed anytime, anywhere. This isn’t just another snack; it’s an elevated experience, offering all the satisfying flavor without the traditional fuss or the heavy, greasy aftermath of deep-frying.
For generations, the humble onion ring has held a special place in our hearts and on our plates, evolving from a simple side dish to a standalone comfort food beloved across cultures. Its enduring appeal lies in that perfect marriage of sweet onion and a golden, crisp coating. Now, I am absolutely thrilled to share a method that captures that beloved taste and texture in a uniquely convenient and incredibly addictive form. Forget the heavy batters and the mess of traditional frying; this rendition focuses on delivering an unparalleled crispness that echoes the satisfying crunch of your favorite potato chip, but with a gourmet twist.
Why You’ll Adore This Crispy Snack Recipe
People adore this particular Onion Ring Chips Crispy Snack Recipe because it strikes an ideal balance: it’s effortlessly delicious, surprisingly simple to prepare, and offers a remarkably guilt-free indulgence. The ingenious approach ensures each “chip” is perfectly seasoned and baked to a golden perfection, promising a burst of savory onion flavor with every single bite. It’s the perfect companion for movie nights, a delightful appetizer for gatherings, or simply a fantastic way to satisfy those mid-day cravings. Get ready to discover your new go-to snack sensation!

Ingredients:
Creating the ultimate batch of “Onion Ring Chips Crispy Snack Recipe” starts with gathering the finest ingredients. I’ve found that using fresh, good quality components truly makes a difference in the final taste and texture of these delightful crispy treats. Here’s everything you’ll need:
- For the Onions:
- 3 large yellow onions (about 1.5 to 2 pounds), peeled and sliced into 1/4-inch thick rings. Yellow onions are my go-to for their balanced flavor, but sweet onions can also be a wonderful choice if you prefer a milder taste.
- 1 cup whole milk (or buttermilk for an extra tangy kick and tenderizing effect). I sometimes use a mix of milk and a splash of white vinegar to create a quick homemade buttermilk, which also works wonders.
- For the Dry Batter Mixture:
- 2 cups all-purpose flour. This forms the primary structure of our crispy coating. I recommend sifting it for a smoother batter, but it’s not strictly necessary if you whisk thoroughly.
- 1/2 cup cornstarch. This is my secret weapon for achieving that extra crispiness that truly makes these an “Onion Ring Chips Crispy Snack Recipe.” It helps create a lighter, crunchier crust.
- 2 teaspoons baking powder. This leavening agent contributes to a lighter, airier batter, ensuring our onion rings aren’t too dense.
- 1 tablespoon granulated sugar. A touch of sugar helps with browning and adds a subtle sweetness that balances the onion’s pungency.
- 2 teaspoons fine sea salt, plus more for seasoning after frying. Salt is crucial for flavor, so don’t skimp here!
- 1 teaspoon black pepper, freshly ground. Freshly ground pepper adds a vibrant aroma and a gentle kick.
- 1 teaspoon smoked paprika (optional, but highly recommended for a beautiful color and a smoky depth of flavor). I absolutely love the warmth it brings to the “Onion Ring Chips Crispy Snack Recipe.”
- 1/2 teaspoon garlic powder. A little garlic powder adds a wonderful savory layer without being overpowering.
- 1/4 teaspoon cayenne pepper (optional, for a little heat). If you like a subtle warmth, this is a fantastic addition.
- For the Wet Batter Mixture:
- 1 large egg, lightly beaten. The egg acts as a binder, helping all the ingredients come together smoothly.
- 1 cup very cold sparkling water or club soda. This is another crispiness enhancer! The carbonation creates tiny bubbles in the batter, resulting in a lighter, more delicate crunch when fried. I always keep a bottle in the fridge specifically for this.
- 2 tablespoons vegetable oil (or canola oil). Adding a small amount of oil to the batter itself contributes to a more tender and less oily finished product.
- For Frying:
- 6-8 cups vegetable oil, canola oil, or peanut oil, for deep frying. Choose an oil with a high smoke point. The exact amount will depend on the size of your pot, but you’ll need enough for the onion rings to be fully submerged.
- For Serving (Optional Seasoning & Dipping):
- Extra fine sea salt, for finishing. A sprinkle of flaky sea salt right out of the fryer elevates the flavor.
- Chopped fresh parsley, for garnish. Adds a pop of color and freshness.
- Your favorite dipping sauces (e.g., ketchup, barbecue sauce, ranch, spicy aioli). I often make a quick spicy mayo by mixing mayonnaise, sriracha, and a squeeze of lime.
Preparing the Onions: The Foundation of Our Crispy Snack
The journey to the perfect “Onion Ring Chips Crispy Snack Recipe” begins with proper onion preparation. This step is crucial for both the texture and the flavor.
- Peel and Slice the Onions: First, I carefully peel my three large yellow onions. Then, using a sharp knife or a mandoline (with extreme caution, please!), I slice them into uniform 1/4-inch thick rings. Consistency in thickness is key here, as it ensures even cooking. If some rings are too thin, they’ll burn before the thicker ones are done; too thick, and they might remain a bit too raw inside while the outside browns. Aim for that sweet spot of 1/4 inch.
- Separate the Rings: Once sliced, I gently separate the onion layers into individual rings. This can be a bit tedious, but it’s essential for allowing the batter to fully coat each piece. I discard any very small, inner rings as they tend to get overcooked and become overly crispy, almost brittle. Focus on the larger, more substantial rings.
- The Milk Bath (Optional, but Recommended for Tenderness): Now, for a step I swear by to tenderize the onions and mellow their sharpness: I place all the separated onion rings into a large bowl and pour 1 cup of whole milk over them, ensuring they are mostly submerged. If you’re using homemade buttermilk, this is where it comes in. I let them soak for at least 30 minutes, or even up to an hour, at room temperature. Some people prefer to soak them in ice water, which also works to crisp them up and reduce pungency. The milk bath, however, not only helps with flavor but also gives the subsequent batter something extra to cling to. This initial soak is a small but mighty contributor to the overall delightful experience of this “Onion Ring Chips Crispy Snack Recipe.”
- Drain and Pat Dry: After their milk bath, I thoroughly drain the onion rings in a colander. It’s absolutely vital to then pat them very dry with paper towels. Any excess moisture will prevent the batter from adhering properly and can also cause the oil to splatter dangerously when frying. I usually lay them out on a few layers of paper towels, cover with more, and press gently but firmly. This step is non-negotiable for ultimate crispiness!
Crafting the Crispy Batter: The Heart of the Snack
The batter is where the magic truly happens for this “Onion Ring Chips Crispy Snack Recipe.” Getting the consistency right is paramount for achieving that perfect, airy, and incredibly crunchy coating.
- Combine Dry Ingredients: In a large mixing bowl, I whisk together all the dry ingredients: the all-purpose flour, cornstarch, baking powder, granulated sugar, 2 teaspoons of fine sea salt, black pepper, smoked paprika (if using), garlic powder, and cayenne pepper (if using). I make sure to whisk vigorously for at least 1-2 minutes to ensure everything is thoroughly combined and there are no pockets of baking powder or salt. This thorough mixing helps distribute the leavening and seasoning evenly throughout the batter, which is essential for uniform texture and flavor in our “Onion Ring Chips Crispy Snack Recipe.”
- Prepare Wet Ingredients: In a separate, medium-sized bowl, I gently whisk the large egg until it’s lightly beaten. Then, I pour in the very cold sparkling water (or club soda) and the 2 tablespoons of vegetable oil. I give it a quick whisk to combine these wet components. The cold temperature of the sparkling water is key here; it helps create a thermal shock when it hits the hot oil, contributing significantly to the crispness.
- Combine Wet and Dry Mixtures: Now for the delicate dance of combining. I slowly pour the wet mixture into the dry ingredients, whisking constantly. The goal is to mix until just combined. A few small lumps are perfectly fine and often preferred; overmixing will develop the gluten in the flour, leading to a tough, chewy batter rather than a light and crispy one. I stop whisking as soon as I see no more streaks of dry flour. The batter should be thick enough to coat the back of a spoon but still pourable, with a consistency similar to pancake batter. If it seems too thick, I might add a tiny splash more cold sparkling water; if too thin, a tablespoon of flour. This part often requires a bit of intuition, but generally, less mixing is better for this “Onion Ring Chips Crispy Snack Recipe.”
The Frying Process: Achieving Golden Perfection
Frying is where our “Onion Ring Chips Crispy Snack Recipe” transforms from coated onions into irresistible golden crisps. Safety and temperature control are absolutely essential here.
- Heat the Frying Oil: I pour the vegetable, canola, or peanut oil into a large, heavy-bottomed pot or a Dutch oven. It’s crucial to use a pot with high sides to prevent splattering and boil-overs. I attach a deep-fry thermometer to the side of the pot; this is your best friend for maintaining consistent oil temperature. I then heat the oil over medium-high heat until it reaches a steady 350°F (175°C). Never leave heating oil unattended. If you don’t have a thermometer, you can test the oil by dropping a tiny bit of batter into it; if it sizzles vigorously and floats to the top, the oil is ready. However, I highly recommend a thermometer for best results and safety.
- Batter and Fry in Batches: This is where the action is! Once the oil is at the correct temperature, I begin to work in small batches. Overcrowding the pot will drastically lower the oil temperature, leading to greasy, soggy onion rings instead of the crispy delights we’re aiming for.
- I take a few dried onion rings at a time and dip them into the batter, ensuring they are fully coated. I let any excess batter drip off for a few seconds before carefully lowering each battered ring into the hot oil. I use tongs for this, gently placing them away from me to avoid splashes.
- I fry 4-6 onion rings at a time, depending on the size of my pot. The number of rings per batch is critical for maintaining optimal oil temperature.
- I fry the onion rings for 2-4 minutes per batch, turning them occasionally with tongs, until they are beautifully golden brown and crispy on all sides. They should look light, airy, and inviting. The exact time will vary based on your oil temperature and the size of the rings, so keep a close eye on them.
- Drain and Season: As each batch of “Onion Ring Chips Crispy Snack Recipe” reaches golden perfection, I carefully remove them from the oil using a slotted spoon or spider strainer. I immediately transfer them to a wire rack set over a baking sheet lined with paper towels. The wire rack allows air to circulate, preventing the bottoms from getting soggy, while the paper towels catch any excess oil.
- Season Immediately: This is a crucial step for maximum flavor! While the onion rings are still hot and glistening with oil, I generously sprinkle them with extra fine sea salt. The heat helps the salt adhere, ensuring every bite is perfectly seasoned. If I’m using smoked paprika or other spice blends for extra seasoning, this is also the moment to sprinkle them on.
- Maintain Oil Temperature and Repeat: Between batches, I check the oil temperature and allow it to come back up to 350°F (175°C) before frying the next batch. This ensures consistent results. I continue this process until all the onion rings are fried. It’s a bit of a marathon, but absolutely worth it for a fresh, hot batch of “Onion Ring Chips Crispy Snack Recipe.”
Finishing Touches and Serving: The Ultimate Crispy Snack Experience
Once all the onion rings are fried to golden perfection, it’s time for the final steps to elevate our “Onion Ring Chips Crispy Snack Recipe” into an unforgettable culinary experience.
- Keep Warm (Optional): If you’re frying a very large batch and want to serve them all at once, you can keep the fried onion rings warm and crispy in a preheated oven at 200°F (95°C). I usually place them on a clean wire rack over a baking sheet in the oven while I finish the last few batches. This helps maintain their crispness without overcooking them. However, for the absolute best flavor and texture, I always recommend serving them as soon as possible after frying.
- Final Seasoning and Garnish: Before serving, I often give them one last light sprinkle of sea salt if needed. Sometimes, I’ll also sprinkle a little freshly chopped parsley over the top for a pop of color and a fresh aroma. This makes the “Onion Ring Chips Crispy Snack Recipe” look even more appealing.
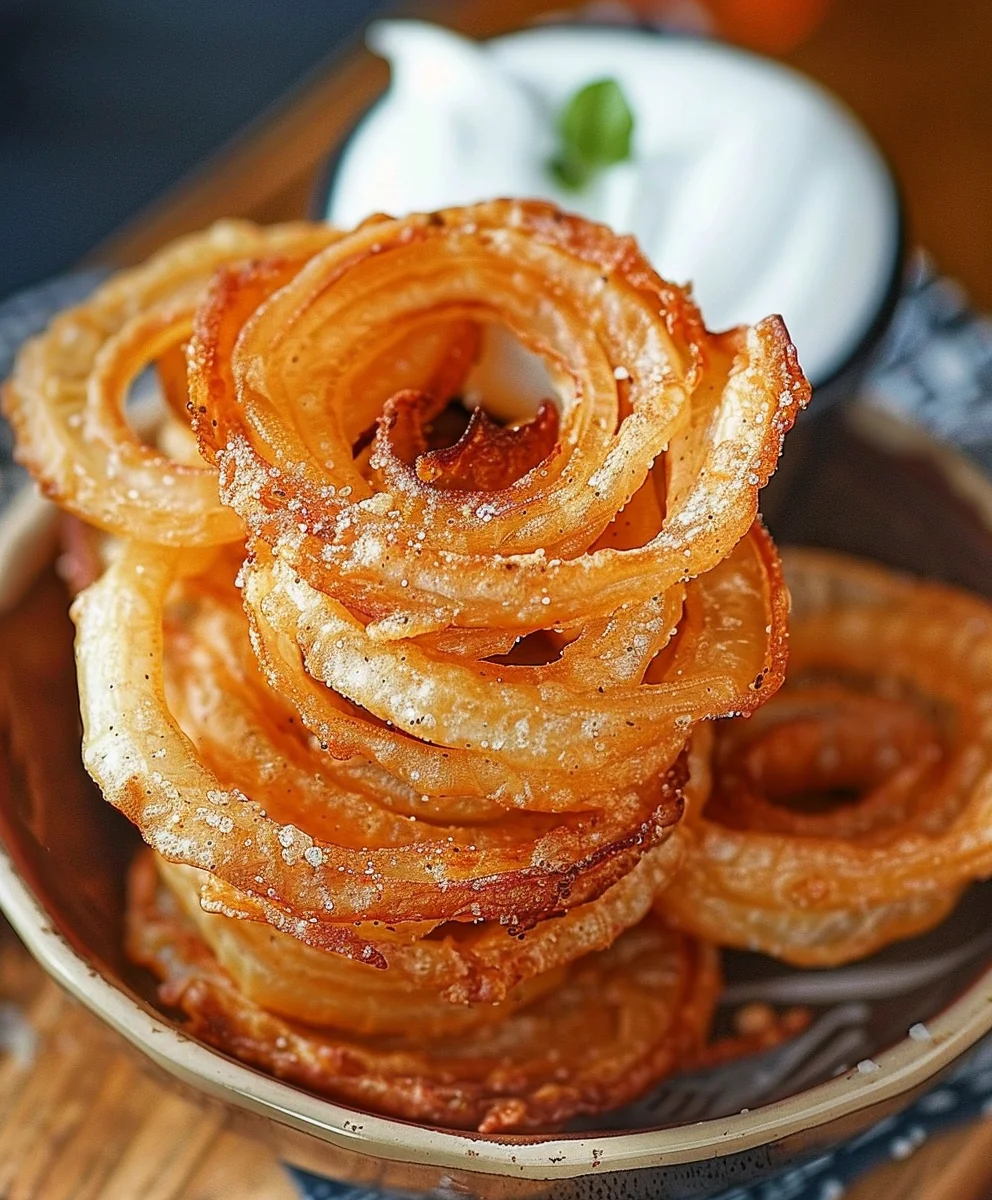
- Serve Immediately: The absolute best way to enjoy these homemade onion rings is immediately after they’ve been fried and seasoned. That’s when they are at their peak crispiness and warmth. They tend to lose some of their crunch the longer they sit, so I always encourage everyone to dive in right away.
- Pair with Dipping Sauces: While they are utterly delicious on their own, “Onion Ring Chips Crispy Snack Recipe” truly shine when paired with your favorite dipping sauces. Ketchup is a classic, but don’t be afraid to experiment! I love serving mine with a homemade spicy aioli, a zesty ranch dressing, or a smoky barbecue sauce. Sometimes, a simple squeeze of fresh lime juice adds a bright counterpoint to the richness. Encourage your guests or family to try a variety of options to find their perfect match.
- Storage (If there are any left!): If by some miracle you have leftovers, they can be stored in an airtight container in the refrigerator for up to 2 days. To reheat and attempt to revive some crispness, I usually place them on a baking sheet in a single layer and bake them in a preheated oven at 375°F (190°C) for about 5-10 minutes, or until heated through and somewhat crisp again. While they won’t be quite as perfect as fresh, they’re still a tasty treat. However, I find that making just enough to be devoured immediately is usually the best approach for this “Onion Ring Chips Crispy Snack Recipe.”
Conclusion:
And there you have it, my friends! We’ve reached the delicious culmination of our culinary journey. After spending time together crafting this incredible snack, I truly hope you’re as excited about it as I am. This isn’t just about frying or baking onions; it’s about transforming a humble vegetable into something utterly extraordinary, a truly unforgettable treat that will have everyone asking for your secret. I’ve found that the sheer delight on people’s faces when they taste these for the first time is incredibly rewarding. It’s that perfect balance of savory onion flavor with an addictively crisp texture that sets it apart from any other snack you might whip up.
What makes this particular recipe a definitive must-try, in my honest opinion, is its unique ability to deliver maximum flavor with a surprisingly simple process. We’re not talking about complicated steps or exotic ingredients here. We’re talking about taking everyday kitchen staples and elevating them into a gourmet-level munchie. The effort-to-reward ratio is off the charts! Imagine that satisfying crunch, followed by the sweet and savory notes of perfectly seasoned onion – it’s a symphony for your taste buds. This isn’t just a good snack; it’s a brilliant one, perfect for curbing those late-night cravings or impressing guests without breaking a sweat. It challenges the conventional idea of what a chip can be, offering a delightful alternative to potato-based options.
Elevate Your Snacking Game: Serving Suggestions & Flavorful Variations
Now, while these delicious morsels are absolutely phenomenal on their own, a true culinary artist always thinks about how to enhance the experience. Let’s talk about how you can serve these beauties. For a classic pairing, a simple bowl of your favorite ketchup or a tangy barbecue sauce works wonders. But if you’re feeling a bit more adventurous, I highly recommend whipping up a quick sriracha mayo for a spicy kick, or even a homemade roasted garlic aioli for an extra layer of gourmet flavor. They also shine brightly alongside a juicy burger or a robust sandwich, providing that much-needed textural contrast. Think of them as the perfect sidekick to any comfort food meal, adding a touch of crispy sophistication. I’ve even served them as a garnish for creamy tomato soup, and trust me, it was a game-changer! Imagine the rich, warm soup with an unexpected, savory crunch – simply divine.
But the fun doesn’t stop there! The beauty of this Onion Ring Chips Crispy Snack Recipe lies in its versatility. You can absolutely play around with the seasonings to create your own signature flavor profiles. For a smoky twist, try adding a pinch of smoked paprika to your flour mixture. If you’re a fan of a cheesy kick, a sprinkle of nutritional yeast or even some finely grated Parmesan cheese mixed into the coating before cooking can transform them into a whole new experience. Chili powder and cumin can give them a Tex-Mex flair, while a dash of dried dill can offer a wonderfully fresh, herbaceous note. Don’t be afraid to experiment with different types of onions too – perhaps a sweeter Vidalia for a milder chip, or a sharper red onion for a more pungent flavor. You could even try slicing them thinner for an even crispier, almost shatter-like texture, or a bit thicker for a more substantial bite. The possibilities are truly endless, limited only by your imagination!
Your Culinary Adventure Awaits: Share Your Success!
So, now it’s your turn. I’ve guided you through the steps, shared my passion, and given you plenty of ideas to make this recipe your own. I wholeheartedly encourage you to roll up your sleeves, gather your ingredients, and dive into making this incredible snack. Don’t just read about it; experience the joy of creating these delightful onion ring chips for yourself. There’s a profound satisfaction that comes from making something so utterly delicious from scratch, something that brings smiles to the faces of those you share it with.
I am genuinely excited for you to discover the magic of this recipe. Once you’ve had a chance to try it, I would absolutely love to hear about your experience. Did you stick to the original, or did you venture into new flavor territories? What dips did you pair them with? Did your family or friends love them as much as mine do? Please, don’t hesitate to share your thoughts, your successes, and even your creative variations in the comments below or wherever you connect with me online. Your feedback and stories are what truly inspire me and help this wonderful community grow. Go forth, create, crunch, and enjoy every single savory, crispy bite!
Crispy Onion Ring Chips
Revolutionize your snack game with irresistible, savory onion rings transformed into delightfully crunchy, light-as-air chips. All the satisfying flavor without the heavy, greasy aftermath of deep-frying.
Ingredients
-
2 large onions, sliced 1/4-inch thick
-
1 cup all-purpose flour
-
1 tsp garlic powder
-
1 tsp paprika
-
1/2 tsp salt
-
1/2 tsp black pepper
-
1 cup buttermilk
-
2 cups panko breadcrumbs
-
Vegetable oil, for frying
Instructions
-
Step 1
Peel and slice 2 large onions into uniform 1/4-inch thick rings. Separate layers into individual rings, discarding very small inner pieces. -
Step 2
Place separated onion rings in a bowl with 1 cup buttermilk. Let soak for 30-60 minutes to tenderize and mellow flavor. Drain thoroughly in a colander, then pat completely dry with paper towels. This step is crucial for crispy results. -
Step 3
In a shallow dish, whisk together 1 cup all-purpose flour, 1 tsp garlic powder, 1 tsp paprika, 1/2 tsp salt, and 1/2 tsp black pepper. In a second shallow dish, place 2 cups panko breadcrumbs. -
Step 4
Pour vegetable oil into a large, heavy-bottomed pot or Dutch oven, ensuring it’s about 3 inches deep. Attach a deep-fry thermometer and heat oil over medium-high heat to a steady 350°F (175°C). Do not leave heating oil unattended. -
Step 5
Working in small batches to avoid overcrowding, dip each dry onion ring into the flour mixture, shaking off excess. Then, transfer to the panko breadcrumbs, pressing gently to ensure a full and even coating. Carefully lower each battered ring into the hot oil using tongs, placing them away from you to prevent splashes. -
Step 6
Fry onion rings for 2-4 minutes per batch, turning occasionally, until they are beautifully golden brown and crispy on all sides. Adjust cooking time as needed, keeping a close eye on the color. -
Step 7
As each batch finishes, remove fried onion rings from the oil using a slotted spoon or spider strainer. Immediately transfer them to a wire rack set over a baking sheet lined with paper towels to drain excess oil. While still hot and glistening, generously sprinkle with extra fine sea salt or other desired seasonings. The heat helps the salt adhere. -
Step 8
Serve the Crispy Onion Ring Chips immediately while they are at their peak crispiness and warmth. Pair with your favorite dipping sauces like ketchup, spicy aioli, or ranch dressing for the ultimate snack experience.
Important Information
Nutrition Facts (Per Serving)
It is important to consider this information as approximate and not to use it as definitive health advice.
Allergy Information
Please check ingredients for potential allergens and consult a health professional if in doubt.