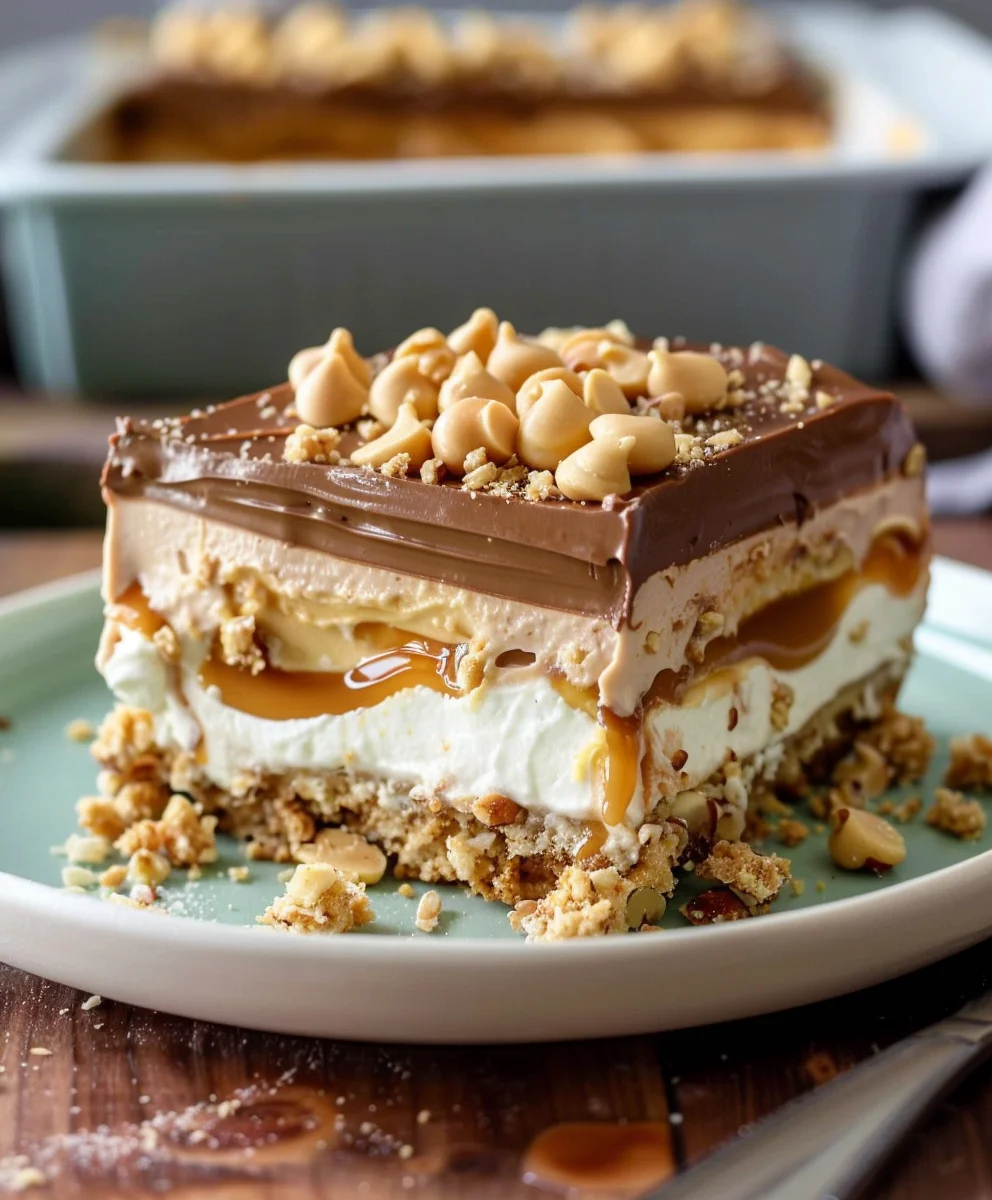
I’m thrilled to share with you a dessert experience that promises to become an instant favorite. The No Bake Peanut Butter Lasagna Recipe is about to revolutionize your dessert game. Imagine a dessert that delivers all the decadent flavor of your favorite peanut butter treats, layered to perfection, and requires absolutely no oven time. This ingenious creation is not only a showstopper but also incredibly simple to assemble, making it the ultimate solution for any occasion, from casual family gatherings to impressive dinner parties.
Why This No-Bake Wonder Captivates Hearts and Palates
While the concept of “lasagna” typically brings to mind savory, pasta-laden dishes, this dessert reimagines the layered format into something truly extraordinary. It perfectly captures the nostalgic joy of classic peanut butter desserts while offering a sophisticated, modern twist. The beauty of this dessert lies in its harmonious blend of textures and flavors: a sturdy, buttery cookie crust providing a delightful crunch, followed by rich, creamy layers of peanut butter and a luscious chocolate topping that brings it all together.
What truly makes people utterly fall in love with this dish? Beyond the undeniable deliciousness, it’s the sheer convenience. You simply cannot beat the ease of a no-bake dessert, especially when summer heats up or when your schedule is packed. This particular No Bake Peanut Butter Lasagna Recipe promises to be a comforting yet exhilarating treat, offering a perfect balance of sweet and salty notes that will leave everyone craving another slice. Get ready to impress with minimal effort and maximum flavor!

Ingredients:
For the Cookie Crust:
- 24 Ounces (about 1 ½ packages) of Chocolate Sandwich Cookies (like Oreos), finely crushed. I usually use a food processor for this to get them super fine, but a Ziploc bag and a rolling pin work wonderfully too!
- 6 Tablespoons (¾ stick) of Unsalted Butter, melted. This binds our delicious crust together.
For the Irresistible Peanut Butter Filling:
- 1 Cup (8 ounces) of Creamy Peanut Butter. Make sure it’s a standard creamy peanut butter, not natural, for the best consistency in our
No Bake Peanut Butter Lasagna Recipe.
- 1 Block (8 ounces) of Cream Cheese, softened to room temperature. This is key for a smooth, lump-free filling.
- 1 Cup of Powdered Sugar (Confectioners’ Sugar). For that perfect touch of sweetness.
- ½ Cup of Cold Milk (any kind, I typically use 2%). Helps to thin out and smooth the mixture.
- 1 Teaspoon of Vanilla Extract. A classic flavor enhancer.
- 1 Container (8 ounces) of Frozen Whipped Topping (like Cool Whip), thawed. This makes our filling incredibly light and airy!
For the Decadent Cream Cheese Layer:
- 1 Block (8 ounces) of Cream Cheese, softened to room temperature. Again, room temperature is non-negotiable for a silky-smooth layer.
- 1 Cup of Powdered Sugar (Confectioners’ Sugar). Sweetness overload, in the best way!
- ¼ Cup of Cold Milk. Just enough to achieve that perfect creamy texture.
- 1 Teaspoon of Vanilla Extract. A touch more vanilla never hurt anyone.
- 1 Container (8 ounces) of Frozen Whipped Topping (like Cool Whip), thawed. This adds volume and that lovely cloud-like texture.
For the Delightful Topping and Garnish:
- 1 Container (8 ounces) of Frozen Whipped Topping (like Cool Whip), thawed. For the beautiful top layer of our
No Bake Peanut Butter Lasagna.
- ½ Cup of Mini Peanut Butter Cups, roughly chopped. The perfect crunch and extra peanut butter kick!
- ¼ Cup of Chocolate Syrup, for drizzling. Optional, but highly recommended for a picture-perfect finish!
- Optional: A sprinkle of extra crushed chocolate sandwich cookies or chopped roasted peanuts for added texture.
Preparing the Chocolate Cookie Crust:
-
Get those Cookies Crushed: First things first, we need to transform our chocolate sandwich cookies into fine crumbs. I find the easiest and most efficient way to do this is by placing them in a food processor and pulsing until they resemble fine sand. If you don’t have a food processor, no worries! You can place the cookies in a large freezer bag, seal it, and then use a rolling pin or the bottom of a heavy pan to crush them. Make sure there are no large chunks left, as this will help our crust set beautifully and create a uniform foundation. This finely crushed texture is crucial for a cohesive and sturdy base for our
No Bake Peanut Butter Lasagna Recipe.
It really ensures every bite of the crust is perfectly crumbly yet firm.
- Melt the Butter: In a microwave-safe bowl, melt the 6 tablespoons of unsalted butter. You can do this in 20-30 second intervals, stirring in between, until it’s completely liquid and clear. Be careful not to overheat it, as burnt butter can impart an undesirable flavor. Alternatively, you can melt it gently on the stovetop over low heat.
- Combine and Press: Pour the melted butter over your crushed cookie crumbs in a medium-sized mixing bowl. Use a spatula or your clean hands to mix everything together until the crumbs are evenly moistened and resemble wet sand. Every single crumb should have a hint of butter; this is what will bind our crust together and prevent it from falling apart when sliced. You’ll notice the crumbs start to clump together slightly when squeezed.
- Form the Base: Transfer the butter-cookie mixture into a 9×13 inch baking dish. Using the bottom of a flat-bottomed measuring cup, a clean drinking glass, or even your clean hands, firmly and evenly press the mixture into the bottom of the dish. You want to create a compact, flat, and uniform layer all the way to the edges. The firmer and more evenly you press, the less likely your crust is to crumble when you serve it, ensuring clean, beautiful slices. Once pressed, place the dish in the refrigerator while we prepare the next layers. This brief chill helps the butter solidify and the crust to set, making it an excellent, stable foundation for our delicious dessert.
Crafting the Irresistible Peanut Butter Filling:
-
Cream the Foundations: In a large mixing bowl, using an electric hand mixer or a stand mixer fitted with the paddle attachment, beat the softened cream cheese and creamy peanut butter together until they are remarkably smooth and well combined. This usually takes about 2-3 minutes on medium speed. We’re looking for a uniform, lump-free mixture that is light and fluffy – a true testament to properly softened cream cheese. This step is vital for the incredibly smooth and luscious texture of the peanut butter layer in our
No Bake Peanut Butter Lasagna Recipe.
Make sure to scrape down the sides of the bowl periodically to ensure everything gets incorporated.
- Sweeten and Smooth: Gradually add the powdered sugar to the peanut butter and cream cheese mixture, beating on low speed until it’s fully incorporated. Powdered sugar has a tendency to fly around, so start slow! Once combined, pour in the cold milk and the fragrant vanilla extract. Increase the speed to medium and beat for another 1-2 minutes until the mixture is completely smooth, thick, and wonderfully creamy. The cold milk helps to achieve a smooth, pourable consistency without making it too runny. Again, scrape down the sides of the bowl as needed to ensure everything is evenly mixed and no pockets of unmixed ingredients remain.
- Lighten it Up: This is where the magic happens for an airy filling! Gently fold in one thawed 8-ounce container of whipped topping. Use a rubber spatula to carefully incorporate the whipped topping into the peanut butter mixture. You want to use a light, folding motion (imagine cutting through the middle of the mixture and lifting the bottom over the top) rather than aggressive stirring. This technique helps to maintain the airy texture that the whipped topping provides. Continue folding until no streaks of white whipped topping remain, and the mixture is uniformly light brown and beautifully fluffy. Be careful not to deflate the whipped topping, as its volume is what makes this layer so delightful.
- Chill and Await Assembly: Once your peanut butter filling is perfectly light and creamy, cover the bowl tightly with plastic wrap and place it in the refrigerator. This allows it to firm up slightly while we prepare the next layer, making it much easier to spread evenly over the crust without disturbing it. A slightly chilled filling is always easier to work with.
Whipping Up the Decadent Cream Cheese Layer:
- Start with Softened Cream Cheese: In another large mixing bowl, beat the second block of softened cream cheese with an electric mixer on medium speed until it’s completely smooth and creamy. This should take about 1-2 minutes, transforming the block into a luxurious, spreadable consistency. Ensuring your cream cheese is at room temperature is absolutely paramount for avoiding any stubborn lumps in this layer, which could detract from the overall smooth texture of our dessert. A perfectly smooth base is what we’re aiming for.
-
Introduce the Sweetness: Slowly add the 1 cup of powdered sugar to the cream cheese, beating on low speed until it’s fully incorporated and no dry sugar remains. Once combined and the mixture is smooth, add the ¼ cup of cold milk and the 1 teaspoon of vanilla extract. Increase the mixer speed to medium and continue beating for another 1-2 minutes until the mixture is wonderfully smooth, visibly thick, and perfectly creamy. The vanilla extract really brightens this layer, providing a lovely aromatic balance. Scrape down the sides of the bowl frequently to ensure no sugar or cream cheese remains unincorporated, guaranteeing a consistent texture throughout. This forms the delightful creamy white layer of our
No Bake Peanut Butter Lasagna Recipe.
- Fold in the Fluff: Just like with the peanut butter layer, gently fold in one thawed 8-ounce container of whipped topping. Use a rubber spatula to carefully incorporate it, using that same gentle bottom-to-top folding motion. This delicate action helps to keep the whipped topping’s volume, resulting in a light, airy, and cloud-like cream cheese layer that truly melts in your mouth. Mix until just combined and no white streaks of whipped topping are visible. Overmixing here can lead to a thinner, less fluffy layer, which we want to avoid for that perfect layered look, so be gentle and stop as soon as it’s homogenous!
- Ready for Layering: Your cream cheese layer is now ready! Give it one final gentle stir with your spatula to ensure its consistency, then keep it nearby as we move on to assembling our spectacular dessert.
Assembling Your No Bake Peanut Butter Lasagna:
-
First Layer – The Peanut Butter Cloud: Retrieve your chilled cookie crust from the refrigerator. It should be firm and ready. Carefully spoon the entire peanut butter filling mixture over the chocolate cookie crust. Using an offset spatula or the back of a large spoon, gently spread the peanut butter layer evenly over the crust, extending all the way to the edges of the dish. Take your time with this step to avoid disturbing the crust below; we want clean, distinct layers. Work from the center outwards, using light, even pressure. This beautiful, thick layer is the heart of our
No Bake Peanut Butter Lasagna Recipe.
- Second Layer – The Creamy Dream: Now, carefully spoon the cream cheese layer over the peanut butter layer. I find it helpful to dollop spoonfuls of the cream cheese mixture over the peanut butter layer first, then gently connect them by spreading. Again, use an offset spatula to gently and evenly spread this white, fluffy layer across the entire surface. Work slowly and patiently to ensure a smooth, beautiful second layer that completely covers the peanut butter. The contrast in color is starting to look absolutely amazing and promises a delightful flavor combination!
- Third Layer – The Whipped Topping Crown: For the final fluffy layer, gently spread the remaining 8-ounce container of thawed whipped topping over the cream cheese layer. This will be the ethereal, cloud-like top of your lasagna, adding a beautiful finish and another layer of lightness. Aim for an even spread that completely covers the entire surface beautifully, making sure to go right to the edges for a neat presentation. This provides a clean, inviting canvas for our garnishes.
Finishing Touches and Chilling Your Masterpiece:
-
Garnish with Delight: Once the whipped topping is smoothly spread and your layered masterpiece is complete, it’s time for the fun part – decorating! Sprinkle the roughly chopped mini peanut butter cups evenly over the top of the lasagna. These add a fantastic textural contrast and an extra burst of peanut butter flavor. You can also add an optional drizzle of chocolate syrup in a decorative pattern over the top – zigzags or swirls work wonderfully! If you like, a few extra crushed cookie crumbs or finely chopped roasted peanuts can add another layer of texture and visual appeal, making this
No Bake Peanut Butter Lasagna Recipe
truly your own. Let your creativity shine!
- The Crucial Chill: This is arguably the most important step for success! Cover the baking dish tightly with plastic wrap, ensuring it doesn’t touch the whipped topping if possible to avoid sticking. Place the assembled No Bake Peanut Butter Lasagna in the refrigerator to chill for at least 4 hours. I highly recommend chilling it overnight for the absolute best results. Chilling allows all the layers to firm up properly, meld their flavors beautifully, and become easy to slice cleanly without making a mess. Rushing this step will result in a messy, unset dessert that lacks the clean layers and firm texture we’re aiming for, and nobody wants that after all your hard work! Patience is key here.
- Serve and Enjoy: Once thoroughly chilled and firm, remove from the refrigerator. Use a sharp knife to cut into neat squares. For the cleanest cuts, I always recommend running your knife under hot water and wiping it clean between each slice – this helps create perfectly defined edges. Serve immediately and watch the smiles appear as everyone enjoys the delightful layers of this incredible dessert! This dessert is best enjoyed cold, so take it out just before serving.
- Storage: Any leftover No Bake Peanut Butter Lasagna can be stored in an airtight container in the refrigerator for up to 3-4 days. While it might slightly lose its super firm texture over time, the flavors will remain absolutely delicious, making for a fantastic treat throughout the week. You might notice the cookie crust soften a little, but the taste will still be stellar!
Conclusion:
And there you have it, my friends! We’ve journeyed through the simple steps of creating what I genuinely believe is one of the most delightful and undeniably effortless desserts you’ll ever whip up. This isn’t just another sweet treat; it’s a revelation for anyone who loves the irresistible combination of peanut butter and chocolate, without the fuss of baking. I truly hope you’re feeling inspired and ready to dive into making this incredible dessert. It’s the kind of recipe that consistently garners rave reviews, and honestly, it’s not hard to see why. The interplay of crunchy cookie crust, sumptuously creamy peanut butter filling, and the dreamy whipped topping, all finished with a sprinkle of chocolate, creates a symphony of textures and flavors that is truly unmatched in its simplicity and deliciousness.
I can confidently say that this dessert is a definite crowd-pleaser, perfect for any occasion. Whether you’re hosting a casual get-together, need a standout dish for a potluck, or simply want to treat yourself and your family to something extraordinary without spending hours in the kitchen, this is your answer. The best part? The sheer satisfaction of pulling a perfectly chilled slice of this decadent dessert from the fridge, knowing you didn’t even have to turn on your oven. It’s truly a testament to the fact that sometimes, the simplest recipes yield the most spectacular results. The vibrant, rich peanut butter flavor shines through, perfectly balanced by the sweet, cool creaminess, making every bite an absolute dream. It’s comforting, indulgent, and surprisingly light all at once, which is a rare and beautiful combination.
Serving Suggestions to Elevate Your Experience
While this dessert is absolutely divine on its own, I love playing around with serving it in various ways to enhance the experience. My personal favorite is serving it impeccably chilled, letting the layers solidify to their perfect consistency. A little dollop of extra homemade whipped cream on top never hurts, or for an extra touch of decadence, a drizzle of warm chocolate fudge or caramel sauce can transform it into an even more luxurious dessert. If you’re feeling particularly fancy, consider a dusting of cocoa powder or a sprinkle of finely chopped roasted peanuts for an added textural crunch. It also pairs wonderfully with a strong cup of coffee or a cold glass of milk, making it a perfect after-dinner indulgence. For a playful twist, try serving smaller slices alongside a scoop of vanilla bean ice cream for a delightful dessert à la mode experience. The contrast of the cool, creamy lasagna with melting ice cream is simply divine, adding another layer of texture and temperature to this already multifaceted treat.
Unleash Your Creativity: Exciting Variations
One of the many reasons I adore this No Bake Peanut Butter Lasagna Recipe is its incredible versatility. Don’t be afraid to make it your own! For the crust, while chocolate sandwich cookies are a classic, imagine the possibilities with crushed graham crackers, vanilla wafers, or even shortbread cookies for a different base flavor. If you want to lean into the chocolate aspect even more, you could use a layer of chocolate pudding or a ganache under the peanut butter filling for an extra rich cocoa punch. For the peanut butter layer itself, feel free to experiment with adding mini chocolate chips, chopped Reese’s Peanut Butter Cups, or even a swirl of hazelnut spread for a Nutella-inspired twist. You could also try a different nut butter if you have dietary restrictions or simply prefer almond or cashew butter – the principle remains the same, delivering that creamy, nutty goodness. Don’t forget the toppings! Beyond the classic chocolate shavings, consider sprinkles, mini M&M’s, or even a layer of chopped bananas for a fun, fruity addition that complements the peanut butter beautifully. This recipe is a fantastic canvas for your culinary imagination, encouraging you to adapt it to your taste preferences and whatever ingredients you have on hand.
So, what are you waiting for? I wholeheartedly encourage you to carve out some time this week and give this recipe a try. I promise you, the smiles and satisfied sighs it elicits will make every moment worth it. It’s truly a dessert that brings joy, comfort, and a touch of effortless magic to any table. And when you do make it – because I know you will – I would absolutely love to hear all about your experience! Did you stick to the classic? Or did you get creative with a unique variation? Share your photos, your triumphs, and your delightful dessert moments with me. Let’s celebrate the sheer deliciousness and ease of this fantastic no-bake creation together. Happy dessert making!
No Bake Peanut Butter Lasagna: Easy, Decadent Dessert!
Indulge in this easy, no-bake layered dessert featuring a crunchy crust made with graham crackers and peanuts, a creamy peanut butter cheesecake layer, smooth chocolate mousse, and a rich chocolate ganache topping. This ingenious creation is not only a showstopper but also incredibly simple to assemble, perfect for any occasion.
Ingredients
-
2 cups crushed graham crackers (or Nutter Butters)
-
½ cup chopped salted peanuts
-
½ cup unsalted butter, melted
-
1 ½ cups semi-sweet chocolate chips
-
¾ cup heavy cream
-
1 cup creamy peanut butter
-
8 oz cream cheese, softened
-
1 cup powdered sugar
-
1 tsp vanilla extract
-
1 ½ cups whipped topping
-
1 (3.9 oz) box instant chocolate pudding mix
Instructions
-
Step 1
Combine 2 cups crushed graham crackers (or Nutter Butters) and ½ cup chopped salted peanuts. Stir in ½ cup melted unsalted butter until moistened. Press the mixture firmly into the bottom of a 9×13 inch baking dish. Place in the refrigerator to chill. -
Step 2
In a large mixing bowl, beat 8 oz softened cream cheese and 1 cup creamy peanut butter until smooth. Add 1 cup powdered sugar and 1 tsp vanilla extract; beat until the mixture is light and creamy. Gently fold in 1 ½ cups whipped topping until fully incorporated. Spread this peanut butter cheesecake mixture evenly over the chilled crust. -
Step 3
Prepare 1 (3.9 oz) box instant chocolate pudding mix according to package directions for pie filling (or for a thick pudding consistency). Carefully spread the prepared chocolate mousse evenly over the peanut butter cheesecake layer. -
Step 4
Place 1 ½ cups semi-sweet chocolate chips in a heatproof bowl. Heat ¾ cup heavy cream in a small saucepan until it just begins to simmer. Pour the hot cream over the chocolate chips, let sit for 5 minutes, then stir until the ganache is smooth and glossy. Pour the ganache evenly over the chocolate mousse layer. -
Step 5
Cover the baking dish tightly with plastic wrap and refrigerate for at least 4 hours, or preferably overnight, to allow all layers to set completely. Once firm, cut into squares and serve cold. For clean slices, wipe your knife with hot water between cuts. -
Step 6
Store any leftover No Bake Peanut Butter Lasagna in an airtight container in the refrigerator for up to 3-4 days.
Important Information
Nutrition Facts (Per Serving)
It is important to consider this information as approximate and not to use it as definitive health advice.
Allergy Information
Please check ingredients for potential allergens and consult a health professional if in doubt.