Chicken Enchiladas With Sour Cream White Sauce is a dish that evokes pure culinary joy, a symphony of flavors and textures that promises to become an instant favorite in your kitchen. Originating from Mexican cuisine, where tortillas are a cornerstone, enchiladas have evolved over centuries from simple rolled tortillas filled with various ingredients to the comforting, hearty meals we adore today. This particular rendition, however, elevates the classic with a unique, luscious sauce that truly sets it apart.
I’ve found that the irresistible combination of tender, seasoned chicken wrapped in soft tortillas, smothered in a rich, tangy sour cream white sauce, creates an experience that is both deeply satisfying and incredibly addictive. It’s the kind of meal that brings smiles to faces, perfect for a casual family dinner or for elegantly entertaining guests.
The creamy, savory notes of our Chicken Enchiladas With Sour Cream White Sauce make it a standout, offering a delightful contrast to more traditional red-sauce versions.
You’ll truly appreciate how the subtle tang of the sour cream perfectly balances the rich, cheesy filling, resulting in a dish that is wonderfully balanced and utterly comforting. Get ready to create a memorable meal that’s both elegant in presentation and wonderfully heartwarming to enjoy. I am so excited for you to try this recipe!

Ingredients:
- 1 ½ pounds boneless, skinless chicken breasts or thighs
- 1 tablespoon olive oil
- ½ cup finely chopped yellow onion
- 2 cloves garlic, minced
- 4 tablespoons unsalted butter, plus extra for greasing the baking dish
- 4 tablespoons all-purpose flour
- 3 cups chicken broth (low sodium is preferred)
- 1 cup sour cream, full-fat for best results
- 1 cup milk (whole milk for creaminess, or 2%)
- 1 teaspoon salt, or to taste
- ½ teaspoon black pepper, freshly ground
- ¼ teaspoon garlic powder
- Pinch of cayenne pepper (optional, for a subtle kick)
- 2 cups shredded Monterey Jack cheese, divided
- 1 cup shredded Colby Jack or mild cheddar cheese, divided
- 10-12 medium flour tortillas (fajita or regular size, about 8-inch diameter)
- Fresh cilantro, chopped, for garnish (optional)
- Diced green onions, for garnish (optional)
Preparing Your Chicken for the Enchiladas
Before we dive into the glorious Chicken Enchiladas With Sour Cream White Sauce, the first thing we need to do is get our chicken ready. I always find that a tender, well-cooked chicken really makes all the difference in these creamy enchiladas.
- Poach the Chicken: Place the boneless, skinless chicken breasts or thighs in a large pot. Cover them with cold water, adding a pinch of salt and maybe a bay leaf or a few peppercorns for extra flavor. Bring the water to a gentle simmer over medium-high heat. Once simmering, reduce the heat to low, cover the pot, and let the chicken cook for about 15-20 minutes, or until it’s thoroughly cooked through and no longer pink in the center. The goal here is tender, moist chicken that’s easy to shred.
- Alternatively, Bake the Chicken: If you prefer baking, preheat your oven to 400°F (200°C). Lightly grease a baking dish. Season the chicken breasts or thighs with a little salt, pepper, and perhaps a touch of garlic powder. Bake for 20-25 minutes, or until an internal temperature of 165°F (74°C) is reached. Baking can sometimes yield a slightly drier chicken, but it’s still perfectly fine for shredding.
- Shred the Chicken: Once your chicken is cooked, carefully remove it from the pot or oven and place it on a cutting board or a shallow dish. Allow it to cool for a few minutes until it’s comfortable enough to handle. Now, grab two forks and begin shredding the chicken into bite-sized pieces. You can also use your hands if you prefer, as it often gives a better texture. I like my chicken enchiladas to have a good amount of chicken in each bite, so I aim for substantial shreds. Set the shredded chicken aside while we prepare the other components of our incredible Chicken Enchiladas With Sour Cream White Sauce.
Crafting the Flavorful Enchilada Filling
Now that our chicken is beautifully shredded, let’s build the heart of our enchiladas: the savory filling. This simple step adds layers of aroma and taste that truly elevate our Chicken Enchiladas With Sour Cream White Sauce.
- Sauté Aromatics: In a medium skillet, heat 1 tablespoon of olive oil over medium heat. Add the finely chopped yellow onion and cook, stirring occasionally, until it softens and becomes translucent, which usually takes about 5-7 minutes. We’re looking for a sweet base here.
- Add Garlic: Stir in the minced garlic and cook for another minute until fragrant. Be careful not to burn the garlic, as burnt garlic can taste bitter. This quick step ensures the garlic’s potent flavor is infused into our filling.
- Combine Filling Ingredients: In a large mixing bowl, combine the shredded chicken, the sautéed onion and garlic mixture, 1 cup of the shredded Monterey Jack cheese, and ½ cup of the shredded Colby Jack/mild cheddar cheese. Mix everything gently until well combined. I sometimes add a tablespoon or two of the white sauce (which we’ll make next!) to the filling at this stage, just to add a bit more moisture and bind it together, but it’s optional. This creates a rich, cheesy, and incredibly satisfying filling for our enchiladas.
Preparing the Signature Sour Cream White Sauce
This is arguably the most crucial component of our dish – the rich, creamy, and utterly delicious Sour Cream White Sauce. It’s what sets these Chicken Enchiladas With Sour Cream White Sauce apart from many other enchilada recipes. Trust me, it’s worth taking your time with this step!
- Melt Butter and Create a Roux: In a large saucepan or a Dutch oven, melt 4 tablespoons of unsalted butter over medium heat. Once the butter is fully melted and slightly foamy, sprinkle in the 4 tablespoons of all-purpose flour. Whisk continuously for about 1-2 minutes, forming a smooth paste called a roux. This roux is vital for thickening our sauce and giving it a beautiful, velvety texture. We want a light golden roux, not too dark, to maintain the sauce’s white color.
- Gradually Whisk in Broth: Slowly pour in the 3 cups of chicken broth, whisking constantly to prevent lumps. It’s important to add the broth gradually, perhaps in three additions, allowing the roux to fully absorb each addition before adding more. This technique ensures a perfectly smooth sauce. Bring the mixture to a gentle simmer, continuing to whisk occasionally, until it thickens to the consistency of a gravy. This usually takes about 5-7 minutes.
- Incorporate Dairy: Reduce the heat to low. Stir in the 1 cup of sour cream and 1 cup of milk. Whisk until the sauce is smooth and creamy. It’s crucial not to boil the sauce once the sour cream is added, as high heat can cause the sour cream to curdle. Just heat it gently until it’s warmed through and fully incorporated.
- Add Cheese and Seasonings: Now, add the remaining 1 cup of Monterey Jack cheese and ½ cup of Colby Jack/mild cheddar cheese to the sauce. Stir continuously until the cheese is completely melted and the sauce is smooth and luxurious. Season with 1 teaspoon of salt, ½ teaspoon of black pepper, ¼ teaspoon of garlic powder, and an optional pinch of cayenne pepper for a subtle warmth. Taste and adjust the seasonings as needed. I always taste mine at this stage to ensure it’s perfectly balanced. This sour cream white sauce should be wonderfully rich, creamy, and flavorful, ready to embrace our chicken enchiladas.
Assembling Your Creamy Chicken Enchiladas
With our chicken shredded, filling prepared, and that glorious Sour Cream White Sauce ready, it’s time for the fun part: assembling our delightful Chicken Enchiladas With Sour Cream White Sauce!
- Preheat Oven and Prepare Dish: Preheat your oven to 375°F (190°C). Lightly grease a 9×13-inch baking dish with butter or cooking spray. I like to spread a very thin layer of the white sauce on the bottom of the baking dish as well; it helps prevent sticking and adds an extra layer of flavor from the get-go.
-
Soften Tortillas: You want your tortillas to be pliable and easy to roll without tearing. There are a few ways to achieve this:
- Microwave Method: Wrap a stack of 3-4 tortillas in a damp paper towel and microwave for 20-30 seconds, or until warm and flexible. Repeat with remaining tortillas.
- Skillet Method: Heat a dry skillet over medium-high heat. Quickly warm each tortilla for about 15-20 seconds per side, until soft and pliable. This often imparts a slightly toasted flavor, which I enjoy.
- Oven Method: Wrap tortillas in aluminum foil and warm them in the preheated oven for about 10-15 minutes.
Important: Do not skip this step! Softening the tortillas is key to preventing them from cracking when you roll them, making for a much smoother assembly process for your homemade chicken enchiladas.
- Fill and Roll the Enchiladas: Take one softened tortilla and lay it flat. Spoon about ¼ cup of the chicken filling down the center of the tortilla. Don’t overfill, or it will be difficult to roll.
- Roll Them Up: Tightly roll the tortilla, starting from one edge, encasing the filling. Place the rolled enchilada seam-side down in your prepared baking dish. Repeat this process with the remaining tortillas and filling, arranging them snugly side-by-side in a single layer in the baking dish. Depending on the size of your tortillas and how tightly you roll, you should get between 10 to 12 enchiladas.
- Pour Sauce and Top with Cheese: Once all the enchiladas are neatly arranged, generously pour the magnificent Sour Cream White Sauce evenly over the top, making sure to cover every single enchilada. We want every bite of these Chicken Enchiladas With Sour Cream White Sauce to be incredibly moist and flavorful. Finally, sprinkle the remaining ½ cup of shredded Monterey Jack cheese and any leftover Colby Jack/mild cheddar cheese evenly over the sauce. This cheese layer will melt into a golden, bubbly topping during baking.
Baking Your Golden-Brown Enchiladas
The moment of truth is here! Baking transforms our assembled components into a bubbling, cheesy, and incredibly comforting dish of Chicken Enchiladas With Sour Cream White Sauce.
- Bake Until Bubbly: Place the baking dish in your preheated 375°F (190°C) oven. Bake for 25-30 minutes, or until the sauce is hot and bubbly around the edges, and the cheese on top is melted and lightly golden. For an extra touch of golden-brown deliciousness, you can switch your oven to broiler mode for the last 2-3 minutes, but watch it very carefully to prevent burning. The aroma filling your kitchen will be absolutely incredible, a true sign of deliciousness to come!
- Rest Before Serving: Once baked, carefully remove the enchiladas from the oven. Let them rest for 5-10 minutes before serving. This short resting period allows the sauce to settle and thicken slightly, making for easier serving and preventing the enchiladas from falling apart. It also ensures the cheese is perfectly set.
Serving Your Delectable Chicken Enchiladas
Now for the best part – enjoying the fruits of your labor! These Chicken Enchiladas With Sour Cream White Sauce are a fantastic meal on their own, but a few simple garnishes can really make them shine.
- Garnish and Serve: Spoon generous portions onto individual plates. If desired, garnish with freshly chopped cilantro and/or diced green onions for a pop of color and fresh flavor. I find the freshness of cilantro really complements the richness of the white sauce.
- Pairing Suggestions: These creamy chicken enchiladas pair wonderfully with a simple side salad, some Mexican rice, or a bowl of refried beans. A dollop of extra sour cream on the side is never a bad idea if you love that tang! This dish is perfect for a cozy family dinner or a gathering with friends. Enjoy every delicious, creamy bite of your homemade Chicken Enchiladas With Sour Cream White Sauce!

Conclusion:
And there you have it, friends! We’ve journeyed through the steps to create a truly unforgettable meal. I genuinely believe that this recipe for Chicken Enchiladas With Sour Cream White Sauce isn’t just another weeknight dinner; it’s an experience, a delightful fusion of textures and flavors that will undoubtedly bring smiles to your dinner table and requests for an encore. I’m incredibly excited for you to discover the magic that happens when all these simple ingredients come together.
Why This Recipe is an Absolute Game-Changer
What makes these enchiladas a non-negotiable addition to your recipe collection? Firstly, it’s the incredible depth of flavor. We’re not relying on a heavy, jarred sauce here; instead, we’ve crafted a homemade sour cream white sauce that is incredibly luxurious, creamy, and possesses a delicate tang that perfectly complements the savory shredded chicken. This sauce, my friends, is truly the star – light enough not to overpower, yet rich enough to feel utterly indulgent. You’ll find it creates an irresistible blanket over the tender chicken and soft tortillas, melding everything into a harmonious bite. It’s this unique sauce that elevates the entire dish, transforming familiar ingredients into something truly special.
Secondly, the convenience and comfort factor are off the charts. While it might seem like a multi-step process, each stage is straightforward, and the end result is a hearty, wholesome dish that warms you from the inside out. It’s the kind of meal that feels special without requiring hours of complicated prep. Think about those evenings when you crave something deeply satisfying and comforting, yet still want that homemade touch – this recipe delivers on all fronts. Plus, it’s remarkably versatile and feeds a crowd beautifully, making it perfect for family gatherings, potlucks, or simply ensuring you have delicious leftovers for busy days. The balance of a creamy sauce with perfectly seasoned chicken tucked into soft tortillas makes every single bite a moment to savor. It’s a testament to how simple ingredients can create something extraordinary, proving that homemade doesn’t have to mean complicated. This dish truly offers that comforting embrace you sometimes need after a long day.
Elevate Your Enchilada Experience: Serving Suggestions & Creative Variations
Once your glorious pan of enchiladas emerges from the oven, bubbling and golden, the serving possibilities are endless. For a classic meal, I love to serve these alongside a simple crisp green salad with a zesty vinaigrette – the freshness cuts beautifully through the richness of the sauce. Another fantastic option is a side of fluffy Mexican rice or perfectly seasoned black beans; these add extra substance and an authentic touch that truly rounds out the meal. Don’t forget the fresh toppings! A sprinkle of chopped fresh cilantro, a dollop of extra sour cream, or even some thinly sliced green onions can add a burst of freshness and color that enhances the experience. A squeeze of fresh lime juice over the top just before serving can also brighten all the flavors beautifully.
But let’s talk about making this recipe truly your own. While the chicken filling is divine as is, feel free to experiment. You could add some finely diced bell peppers or corn to the chicken mixture for extra sweetness and texture. If you’re a fan of a little heat, a dash of your favorite hot sauce into the chicken mixture or even a pinch of cayenne pepper in the white sauce can elevate the spice level to your liking. For those who enjoy a bit of extra cheese, a blend of Monterey Jack and cheddar on top, or even mixed into the filling, would be absolutely delicious. Don’t be afraid to mix in some green chilies for an extra layer of mild heat and flavor. Vegetarian twist? You could easily swap the chicken for a hearty mix of sautéed mushrooms, black beans, and roasted sweet potatoes for an equally satisfying alternative, though the sauce would remain a stellar complement. This recipe is wonderfully forgiving and adaptable, inviting you to play with flavors and ingredients to suit your family’s preferences. It’s designed to be a flexible foundation for countless delicious meals, making it a truly invaluable addition to your cooking repertoire.
Your Turn: Embrace the Enchilada Magic!
Now, it’s your turn to experience the magic of these incredible enchiladas. I wholeheartedly encourage you to set aside some time this week, gather your ingredients, and dive into this rewarding cooking adventure. Don’t be shy – embrace the process, savor the aromas filling your kitchen, and most importantly, enjoy the phenomenal flavors that await you. Once you’ve tasted the delicious results, I would absolutely love to hear about your experience! Did you try any variations? What were your favorite toppings? Share your thoughts, photos, and any tips you discovered in the comments below. Happy cooking, and I can’t wait to hear how much you loved these!
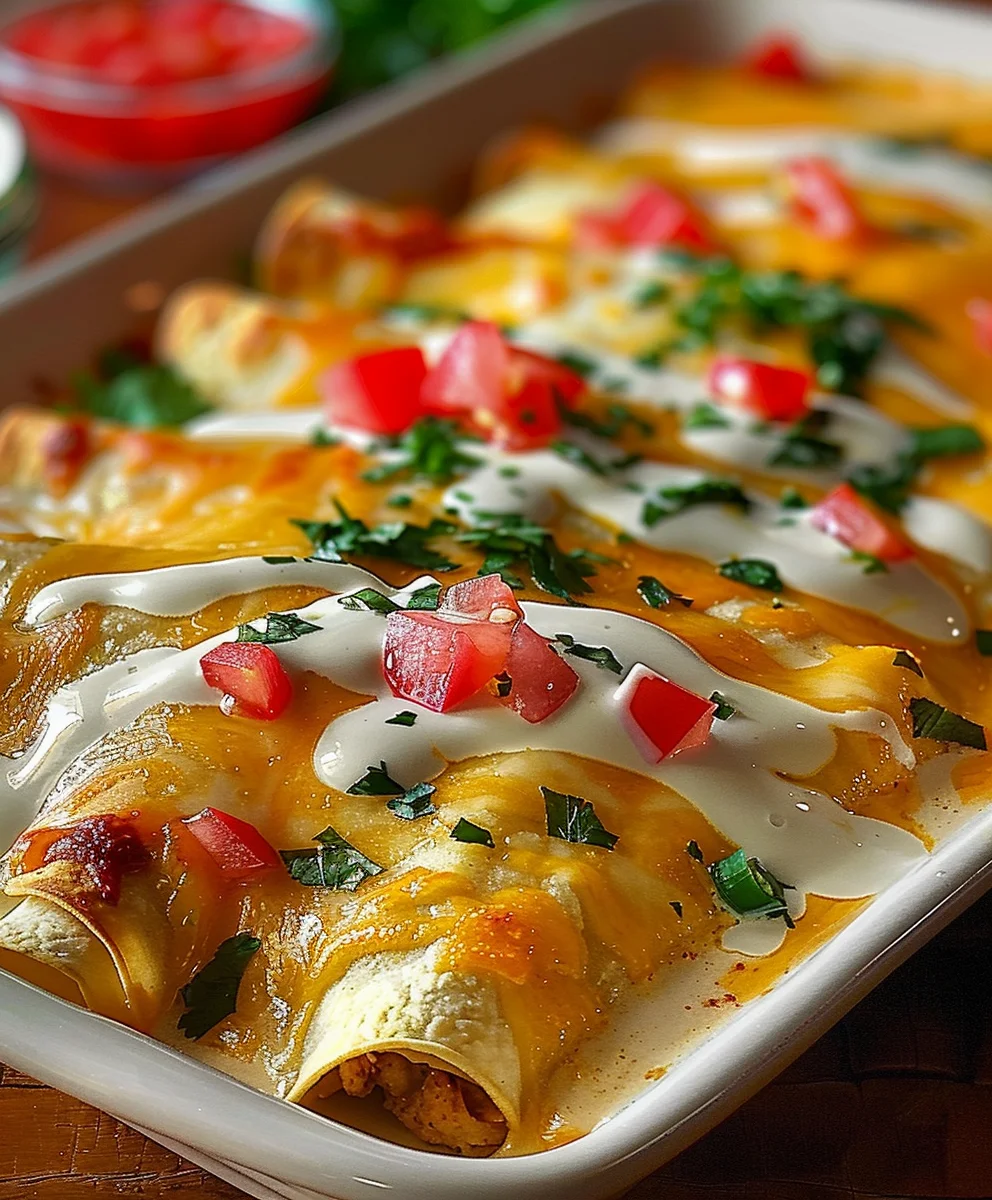
Chicken Enchiladas with Creamy Sour Cream White Sauce
A delightful dish of tender, seasoned chicken wrapped in soft tortillas, smothered in a rich, tangy sour cream white sauce, offering a delicious contrast to traditional red-sauce versions.
Ingredients
-
2 cups shredded cooked chicken
-
8 flour tortillas
-
2 tablespoons butter
-
2 tablespoons all-purpose flour
-
1 1/2 cups chicken broth
-
1 cup sour cream
-
1 (4 oz) can diced green chiles
-
2 cups shredded Monterey Jack cheese
-
1/2 cup diced tomatoes (optional, for topping)
-
1/4 cup chopped fresh cilantro (optional, for topping)
Instructions
-
Step 1
In a medium bowl, combine the 2 cups of shredded cooked chicken with 1 cup of the shredded Monterey Jack cheese. Set aside. -
Step 2
In a large saucepan, melt 2 tablespoons of butter over medium heat. Whisk in 2 tablespoons of all-purpose flour and cook for 1-2 minutes to form a light roux. Gradually whisk in 1 1/2 cups of chicken broth, stirring constantly to prevent lumps, until the sauce thickens to a gravy consistency (about 5-7 minutes). Reduce heat to low, then stir in 1 cup of sour cream and the 1 (4 oz) can of diced green chiles. Heat gently until smooth and creamy; do not bring to a boil. Remove from heat. -
Step 3
Preheat your oven to 375°F (190°C). Lightly grease a 9×13-inch baking dish. Warm the 8 flour tortillas (using microwave or dry skillet method) until pliable. Spoon about ¼ cup of the chicken and cheese filling down the center of each softened tortilla. Roll the tortilla tightly and place it seam-side down in the prepared baking dish, arranging them snugly in a single layer. -
Step 4
Generously pour the prepared sour cream white sauce evenly over all the rolled enchiladas, ensuring they are well covered. Sprinkle the remaining 1 cup of shredded Monterey Jack cheese evenly over the sauce. Bake for 25-30 minutes, or until the sauce is bubbly around the edges and the cheese on top is melted and lightly golden. -
Step 5
Carefully remove the enchiladas from the oven and let them rest for 5-10 minutes before serving. This allows the sauce to set. Garnish with 1/2 cup diced tomatoes and 1/4 cup chopped fresh cilantro, if desired, before serving individual portions.
Important Information
Nutrition Facts (Per Serving)
It is important to consider this information as approximate and not to use it as definitive health advice.
Allergy Information
Please check ingredients for potential allergens and consult a health professional if in doubt.