Cajun Chicken Sloppy Joes offer a delightful and unexpected twist on a beloved American classic, taking your taste buds on an unforgettable journey straight to the heart of Louisiana. I’ve always been captivated by dishes that flawlessly blend comfort food nostalgia with vibrant, bold flavors, and this recipe truly embodies that spirit. While the traditional sloppy joe has a charming history as a simple, hearty meal, often credited to an Iowa cook in the 1930s, we’re elevating it to an entirely new level by infusing it with the rich, complex spices and soulful essence of Cajun cuisine.
Why you’ll fall in love with these Cajun Chicken Sloppy Joes:
People adore this dish for countless reasons. Imagine tender, succulent shredded chicken, generously coated in a robust, savory sauce that balances a gentle warmth with a symphony of aromatic spices—a true celebration of flavor. It’s incredibly satisfying, offering a wonderful contrast of textures with the juicy filling nestled in a soft bun. Furthermore, its convenience makes it a perfect candidate for a quick and flavorful weeknight dinner that doesn’t compromise on taste. This innovative take on Cajun Chicken Sloppy Joes is not just a meal; it’s an experience, promising to become a new family favorite that will have everyone eagerly asking for seconds.

Ingredients:
-
For the Delicious Cajun Chicken Mixture:
- 2 pounds ground chicken: I recommend using a mix of dark and white meat, or even just ground thighs, for the best flavor and moisture. If you only have lean ground chicken breast, don’t worry, we’ll make it work, but you might want to add a tiny bit more oil when browning.
- 2 tablespoons olive oil: Or any neutral cooking oil you prefer, like avocado or canola oil. This is for browning the chicken and sautéing our aromatics.
- 1 large yellow onion: Finely diced. The onion provides a wonderful sweetness and aromatic base for our sloppy joes.
- 1 large green bell pepper: Finely diced. This classic addition brings a touch of freshness and a slight bitterness that balances the richness.
- 2 celery stalks: Finely diced. Often overlooked, celery is crucial for the “holy trinity” of Cajun cooking and adds a subtle crunch and earthy note.
- 4 cloves garlic: Minced. Garlic is the backbone of so many amazing dishes, and our Cajun Chicken Sloppy Joes are no exception.
- 1 (28-ounce) can crushed tomatoes: High-quality crushed tomatoes are key here. They form the rich, thick base of our sauce.
- 1/2 cup chicken broth: Low sodium is preferred so we can control the seasoning ourselves. This helps to loosen the sauce just a bit and marry the flavors.
- 2 tablespoons tomato paste: This little gem adds a deep, concentrated tomato flavor and helps thicken the sauce beautifully.
- 1 tablespoon Worcestershire sauce: A secret weapon for adding umami and depth, really rounding out the savory notes.
- 2 tablespoons apple cider vinegar: Don’t skip this! A little acidity brightens everything up and cuts through the richness of the chicken.
- 1 tablespoon brown sugar: Light or dark, either works. Just a touch to balance the acidity of the tomatoes and vinegar.
- 2 tablespoons homemade or store-bought Cajun seasoning: Ensure it’s a good quality blend. If your blend is salt-heavy, adjust the added salt accordingly. This is where the “Cajun” in our Cajun Chicken Sloppy Joes truly comes alive!
- 1 teaspoon smoked paprika: Adds a lovely smoky depth and a beautiful reddish hue to the sauce.
- 1/2 teaspoon cayenne pepper: Adjust to your heat preference! For a milder version, reduce it; for more kick, add a bit extra.
- Salt and freshly ground black pepper: To taste, for seasoning throughout the cooking process.
- Fresh parsley or green onions: Chopped, for garnish. These add a pop of color and freshness right before serving.
-
For Serving Your Perfect Cajun Chicken Sloppy Joes:
- 8 brioche hamburger buns: Or your favorite sturdy buns. Brioche adds a wonderful richness and slight sweetness that complements the savory filling. Toasting them is a must!
- Optional toppings: Consider sliced dill pickles, pickled jalapeños, shredded sharp cheddar cheese, or even a dollop of cool sour cream or ranch dressing to balance the heat.
Equipment You’ll Need for Cajun Chicken Sloppy Joes:
Having the right tools makes cooking much more enjoyable and efficient. For this recipe, I recommend gathering the following:
- A large, heavy-bottomed Dutch oven or a large skillet (at least 12 inches): This is crucial for browning the chicken evenly and simmering the sauce without it spilling over. A good quality, non-stick or cast-iron option works best.
- Cutting board and sharp chef’s knife: For all your dicing and mincing needs. Safety first, so make sure your knife is sharp!
- Measuring cups and spoons: Essential for accurate ingredient proportions, especially with spices.
- Wooden spoon or sturdy spatula: For stirring and breaking up the ground chicken.
- Can opener: For the crushed tomatoes.
- Small bowls: Handy for mise en place (prepping and organizing your ingredients before you start cooking).
- Toaster or oven for buns: To get those buns perfectly golden and slightly crispy.
Getting Started: Prepping Your Ingredients for Cajun Chicken Sloppy Joes
Before we even think about turning on the stove, let’s get all our ingredients ready. This is what chefs call “mise en place,” and it makes the entire cooking process smooth and enjoyable. Trust me, you don’t want to be scrambling for an ingredient while something is sizzling in the pan.
- First things first, finely dice your yellow onion, green bell pepper, and celery. These three vegetables form the “holy trinity” in Cajun cooking and are the aromatic foundation of our Cajun Chicken Sloppy Joes. Aim for pieces that are roughly the same size to ensure even cooking.
- Next, peel and mince your garlic cloves. You can use a garlic press if you prefer, but I find mincing by hand gives you a better texture.
- Measure out all your sauces, spices, and liquids into separate small bowls or ramekins. This includes the crushed tomatoes, chicken broth, tomato paste, Worcestershire sauce, apple cider vinegar, brown sugar, Cajun seasoning, smoked paprika, and cayenne pepper. Having them ready means you can add them to the pan without interruption.
- If your ground chicken is in a large block, break it up a bit with your hands to make it easier to brown in the pan. Ensure it’s thawed completely if it was frozen.
- Finally, chop your fresh parsley or green onions for garnish later. Store them in a small container in the fridge until you’re ready to serve.
Crafting the Delicious Cajun Chicken Sloppy Joes Sauce Base
This is where the magic begins! Building flavor layers is key to an incredibly rich and satisfying dish. We’re going to create a deeply aromatic and savory base for our Cajun Chicken Sloppy Joes that will have your kitchen smelling absolutely amazing.
- Heat 2 tablespoons of olive oil in your large Dutch oven or skillet over medium-high heat. You want the oil to be shimmering but not smoking.
- Once the oil is hot, add your diced onion, green bell pepper, and celery to the pan. This is our “holy trinity.” Sauté these vegetables for about 8-10 minutes, stirring occasionally, until they are softened and translucent. We’re not looking for any browning here, just a gentle softening that allows their natural sweetness to develop. Patience is a virtue in this step, as properly cooked aromatics lay the groundwork for a truly flavorful sauce.
- Add the minced garlic to the pan and cook for another 1 minute, stirring constantly, until fragrant. Be careful not to let the garlic burn, as burnt garlic can taste bitter and will impact the overall flavor of your Cajun Chicken Sloppy Joes.
- Now, stir in the 2 tablespoons of tomato paste. Cook the tomato paste for 2-3 minutes, stirring it into the vegetables. This step is crucial for developing a deep, complex tomato flavor. Cooking the paste helps to caramelize its sugars and reduces any raw, metallic taste, resulting in a richer, more concentrated base for our sloppy joe sauce.
- Next, sprinkle in the 2 tablespoons of Cajun seasoning, 1 teaspoon of smoked paprika, and 1/2 teaspoon of cayenne pepper. Cook for another 1 minute, stirring constantly, allowing the spices to toast lightly in the hot pan. This blooming of the spices in oil helps to release their full aromatic potential, infusing the entire dish with vibrant Cajun flavors.
Cooking the Chicken to Perfection for Your Cajun Chicken Sloppy Joes
Now that our aromatic base is robust and fragrant, it’s time to introduce our star ingredient: the ground chicken. We want to brown it thoroughly to develop a rich, savory flavor that will stand up to our bold Cajun sauce.
- Push the vegetable and spice mixture to one side of the pan, creating an open space in the center. Add the 2 pounds of ground chicken to the clear side of the pan. Break it up with your wooden spoon or spatula.
- Cook the ground chicken over medium-high heat, stirring and breaking it apart frequently, until it is fully browned and no pink remains. This usually takes about 8-10 minutes. As the chicken cooks, it will release some liquid and fat. We want to cook off most of this liquid so the chicken truly browns rather than steams.
- Once the chicken is browned, stir it together with the sautéed vegetables and spices, ensuring everything is well combined. Season generously with salt and freshly ground black pepper to taste at this stage. Remember, seasoning in layers is what makes a dish truly spectacular.
Bringing It All Together: Simmering the Cajun Chicken Sloppy Joes
With our chicken browned and our aromatics perfected, it’s time to bring all the components together to create that irresistible, saucy filling for our Cajun Chicken Sloppy Joes. This simmering phase allows all the flavors to meld and deepen into a truly cohesive and delicious experience.
- Pour in the 28-ounce can of crushed tomatoes, 1/2 cup of chicken broth, 1 tablespoon of Worcestershire sauce, 2 tablespoons of apple cider vinegar, and 1 tablespoon of brown sugar into the pan with the chicken mixture. Stir everything together thoroughly until all ingredients are evenly distributed.
- Bring the mixture to a gentle simmer. Once simmering, reduce the heat to low, cover the pan partially (leaving a small gap for steam to escape), and let it cook for at least 30-40 minutes. I often let mine go for an hour if I have the time, as the longer it simmers, the more the flavors develop and the sauce thickens to that perfect sloppy consistency. Stir occasionally to prevent sticking and ensure even cooking.
- During the simmer, pay attention to the consistency of your Cajun Chicken Sloppy Joes mixture. If it appears too thick, you can add a splash more chicken broth or even a little water. If it’s too thin, remove the lid for the last 15-20 minutes of simmering to allow more moisture to evaporate. The goal is a rich, spoonable sauce that holds its shape but isn’t dry.
- After simmering, taste the sauce and adjust the seasoning as needed. This is your chance to add more salt, pepper, a pinch more Cajun seasoning, or even a tiny bit more sugar or vinegar if you feel it needs balancing. Don’t be shy here – personalizing the flavor is key!
Assembling and Serving Your Amazing Cajun Chicken Sloppy Joes
The moment has arrived! Your kitchen should be filled with incredible aromas, and your Cajun Chicken Sloppy Joes mixture should be perfectly saucy and flavorful. Now, let’s get them ready for devouring!
- While your sloppy joe mixture is simmering or just before serving, prepare your buns. I highly recommend toasting them! Lightly butter or brush your brioche hamburger buns with olive oil and toast them in a dry skillet, under the broiler, or in a toaster until golden brown and slightly crispy. This creates a barrier that prevents the buns from getting too soggy and adds a wonderful texture and flavor.
- Spoon a generous amount of the hot Cajun Chicken Sloppy Joes mixture onto the toasted bottom half of each bun. Don’t be afraid to pile it high – that’s the “sloppy” part!
- Garnish with a sprinkle of fresh chopped parsley or green onions for a burst of color and fresh flavor.
- Serve immediately with your favorite sides. I love serving these with a crisp coleslaw, some seasoned fries, or even a simple green salad to cut through the richness.
Chef’s Tips and Variations for Your Cajun Chicken Sloppy Joes:
I always encourage you to make a recipe your own! Here are a few ideas to customize your Cajun Chicken Sloppy Joes:
- Spice Level: If you love heat, feel free to increase the cayenne pepper or add a dash of your favorite hot sauce into the mixture while simmering. For a milder version, reduce the cayenne or omit it entirely.
- Vegetable Boost: Want to sneak in more veggies? Finely diced mushrooms, zucchini, or even finely grated carrots can be added with the “holy trinity” to bulk up the dish and add extra nutrients without dramatically altering the flavor of your Cajun Chicken Sloppy Joes.
- Cheese Please: A slice of sharp cheddar, Monterey Jack, or even pepper jack cheese melted over the top of the sloppy joes on the bun would be absolutely delicious. Place the cheese on the bun, then a scoop of hot chicken, and the cheese will melt beautifully.
- Smoky Flavor: For an even deeper smoky flavor, consider adding a very small amount (1/4 teaspoon) of liquid smoke during the last 15 minutes of simmering. A little goes a long way!
- Sweetness Balance: If your tomatoes are particularly acidic, you might find you want a touch more brown sugar. Taste and adjust incrementally until it’s just right for you.
- Make Ahead: This Cajun Chicken Sloppy Joes mixture is fantastic for meal prep! It tastes even better the next day as the flavors have more time to meld. See the storage tips below.
Storage and Reheating Advice for Your Cajun Chicken Sloppy Joes:
One of the best things about this Cajun Chicken Sloppy Joes recipe is how well it stores, making it perfect for busy weeknights or feeding a crowd!
- Refrigeration: Once the sloppy joe mixture has cooled completely, transfer it to an airtight container. It will keep beautifully in the refrigerator for up to 3-4 days. Store the buns separately, of course.
- Freezing: This mixture freezes exceptionally well! Portion the cooled Cajun Chicken Sloppy Joes into freezer-safe bags or containers, ensuring you remove as much air as possible to prevent freezer burn. It can be frozen for up to 3 months. Thaw overnight in the refrigerator before reheating.
- Reheating:
- Stovetop: My preferred method for reheating is on the stovetop. Place the desired amount of mixture in a saucepan over medium-low heat, stirring occasionally, until it’s heated through. If it seems a little dry, add a splash of chicken broth or water to bring it back to the perfect consistency.
- Microwave: For a quick individual serving, you can microwave the sloppy joe mixture in a microwave-safe bowl, stirring every minute or so, until hot.
- Buns: Always toast your buns fresh just before serving, even when reheating the mixture. A fresh, crispy bun is key to a truly satisfying Cajun Chicken Sloppy Joe experience!
Conclusion:
And there you have it, my friends! We’ve journeyed through the creation of a dish that I truly believe will become a staple in your culinary repertoire. This isn’t just another weeknight meal; it’s an experience, a symphony of flavors that will awaken your taste buds and bring a vibrant new energy to your dinner table. I can confidently say that if you’re seeking a recipe that balances unforgettable taste with surprising simplicity, you’ve found your match. The rich, smoky essence of the Cajun spices, perfectly balanced with the tender chicken and savory sauce, all nestled in a soft bun, creates something truly special. It’s comforting, it’s exciting, and it’s remarkably straightforward to prepare, making it ideal for busy evenings when you still crave something extraordinary.
What makes this particular recipe a true game-changer, you ask? It’s the ingenious fusion of two beloved concepts: the comforting, no-fuss appeal of a classic sloppy joe, elevated with the dynamic, fiery spirit of Louisiana’s Cajun cuisine. When I first envisioned the concept of Cajun Chicken Sloppy Joes, I knew it had the potential to be a huge hit, and after countless batches and joyful taste tests, I stand by that conviction. This dish takes the familiar and transforms it into something boldly new, yet utterly approachable. It’s perfect for those who appreciate a good kick of spice but also enjoy the hearty satisfaction of a well-made sandwich. It manages to be both exotic and deeply comforting all at once, a rare and wonderful combination that ensures everyone at the table, from the adventurous eater to the picky palate (with adjusted spice levels, of course!), will find something to love. It’s fast enough for a Tuesday night, but flavorful enough for a weekend gathering, proving that incredible taste doesn’t always demand hours in the kitchen.
Elevate Your Serving Experience:
While the traditional bun is always a fantastic choice, allowing that flavorful sloppy joe mixture to shine, don’t hesitate to get creative with your serving approach. Here are a few of my favorite ways to enjoy this incredible dish, each offering a slightly different texture and experience, proving just how versatile this humble recipe truly is:
- Classic Sandwich: Serve warm on toasted brioche buns, potato rolls, or even sturdy ciabatta bread. A slice of sharp cheddar or Monterey Jack cheese melted on top adds an extra layer of decadence and a beautiful melty finish.
- Lettuce Wraps: For a lighter, low-carb option that still packs all the flavor, spoon the Cajun chicken mixture into crisp lettuce cups, such as butter lettuce or romaine. The refreshing crunch of the lettuce provides a wonderful contrast to the warm, saucy filling.
- Over Rice or Quinoa: Turn it into a satisfying bowl meal! Serve the sloppy joe mixture over a bed of fluffy white rice, aromatic brown rice, or nutritious quinoa. This makes for a complete, incredibly flavorful, and easily customizable dinner.
- Stuffed Sweet Potatoes: Bake a sweet potato until tender, split it open, and generously load it up with the Cajun chicken. The natural sweetness of the potato pairs beautifully with the savory, spicy chicken, creating a delightful harmony of flavors.
- Nachos or Loaded Fries: For an ultimate comfort food experience perfect for game day or a casual get-together, spoon the mixture over crispy tortilla chips or a pile of golden fries, then top with shredded cheese, a dollop of cool sour cream, and fresh cilantro.
- Taco Shells: Fill crispy taco shells or soft tortillas for a Cajun-inspired taco night that will certainly be a crowd-pleaser!
Spice It Up (or Down!) & Personalize Your Plate:
One of the beauties of this Cajun Chicken Sloppy Joes recipe is its incredible versatility and how easily it can be adapted to suit your personal preferences. Don’t be afraid to make it your own and experiment with different additions to truly personalize your meal!
- Heat Level: If you love a serious kick that makes your tongue tingle, feel free to add an extra pinch or two of cayenne pepper, a dash of your favorite Louisiana-style hot sauce, or even some finely diced jalapeños or serrano peppers directly into the mixture during the simmering process. For those who prefer a milder flavor, simply reduce or omit the amount of cayenne pepper entirely.
- Cheese Please: Beyond cheddar, which is always a winner, consider experimenting with pepper jack for an added zing, smoked gouda for a deeper, richer flavor, provolone for a classic melt, or even a sprinkle of crumbled blue cheese for a sophisticated twist that complements the spice beautifully.
- Veggie Boost: While the base recipe includes a wonderful trinity of aromatics, you could easily sneak in finely diced bell peppers (red, yellow, or green), sautéed mushrooms, or even a handful of fresh spinach towards the end of cooking for an extra nutritional punch and textural variety. Corn kernels or black beans also make excellent additions.
- Creaminess Factor: A spoonful of cream cheese, a splash of heavy cream, or even a dollop of Greek yogurt stirred in at the end can add a luxurious creaminess that mellows the spice slightly and enriches the sauce, providing a luscious mouthfeel.
- Garnish Galore: Don’t underestimate the power of a fresh garnish! Freshly chopped cilantro, green onions, or even a squeeze of lime juice can brighten the flavors and add a final flourish to your plate.
I truly hope you’ll give this incredible recipe a try very soon. It’s more than just a meal; it’s an invitation to explore vibrant flavors, embrace culinary creativity, and create memorable moments around your table. I promise you, these Cajun Chicken Sloppy Joes are going to impress, delight, and likely earn a permanent spot in your regular rotation. Once you’ve whipped up a batch, I’d be absolutely thrilled to hear about your experience! Did you stick to the classic bun, or did you venture into serving it over rice? Did you amp up the spice, or keep it mellow? Did you add any unique toppings or side dishes that truly made it sing? Please, share your culinary adventures, your photos, and your feedback in the comments section below. Your insights and creative twists inspire me and the entire community of home cooks. Happy cooking, everyone – I can’t wait to hear how much you loved them!
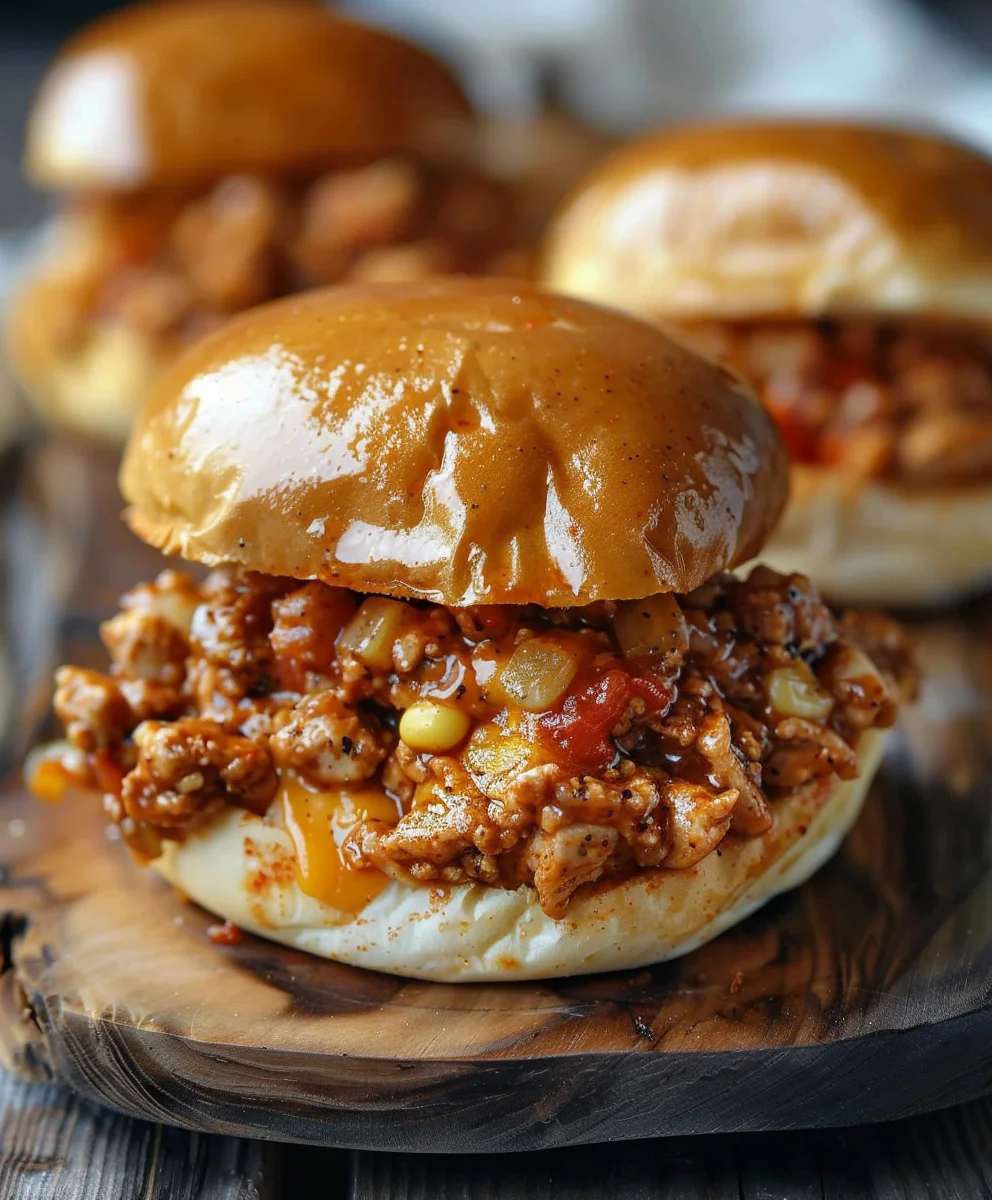
Cajun Chicken Sloppy Joes
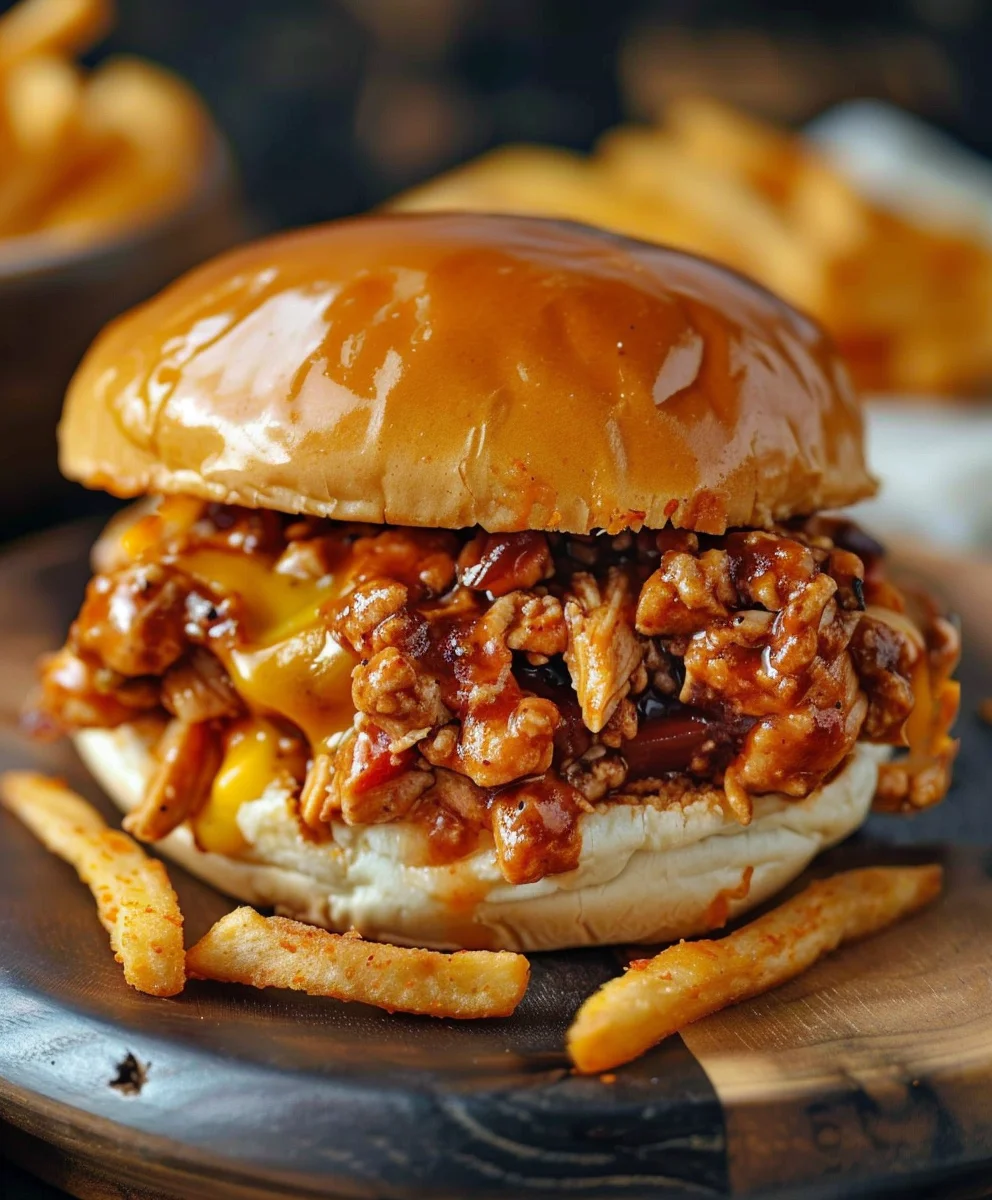
A delightful and unexpected twist on classic sloppy joes, this recipe infuses tender ground chicken with rich Cajun spices and a creamy cheese sauce. It’s a satisfying, flavorful, and quick weeknight meal that brings vibrant Louisiana-inspired comfort to your table.
Ingredients
-
1 tbsp olive oil
-
1 lb ground chicken
-
1 small onion, finely chopped
-
2 cloves garlic, minced
-
2 tbsp Cajun seasoning
-
1 tbsp tomato paste
-
1/2 cup low-sodium chicken broth
-
1/2 cup tomato sauce (canned)
-
1 tbsp Worcestershire sauce
-
1 tsp brown sugar
-
Salt to taste
-
2 tbsp unsalted butter
-
2 tbsp all-purpose flour
-
1 cup whole milk
-
8 oz sharp cheddar or American cheese, freshly shredded
Instructions
-
Step 1
Prepare Ingredients: Finely dice the small onion and mince the garlic cloves. Have all other measured ingredients ready. -
Step 2
Sauté Aromatics: Heat 1 tbsp olive oil in a large skillet or Dutch oven over medium-high heat. Add the diced onion and sauté for 5-7 minutes until softened and translucent. Add the minced garlic and cook for another minute until fragrant, being careful not to burn it. -
Step 3
Bloom Flavors: Stir in 1 tbsp tomato paste and 2 tbsp Cajun seasoning. Cook for 2-3 minutes, stirring constantly, to deepen the flavors and toast the spices. -
Step 4
Brown Chicken: Add 1 lb ground chicken to the skillet. Break it apart with a wooden spoon and cook over medium-high heat until fully browned and no pink remains, about 8-10 minutes. Season generously with salt to taste. -
Step 5
Simmer Sloppy Joe Sauce: Stir in 1/2 cup low-sodium chicken broth, 1/2 cup canned tomato sauce, 1 tbsp Worcestershire sauce, and 1 tsp brown sugar. Bring the mixture to a gentle simmer, then reduce heat to low, cover partially, and let it cook for 20-30 minutes, stirring occasionally, allowing the flavors to meld and the sauce to thicken to a ‘sloppy’ consistency. -
Step 6
Prepare Cheese Sauce: While the sloppy joe mixture simmers, melt 2 tbsp unsalted butter in a separate small saucepan over medium heat. Whisk in 2 tbsp all-purpose flour to form a roux; cook for 1 minute. Gradually whisk in 1 cup whole milk until the sauce is smooth and thickened. Remove from heat, then stir in 8 oz of shredded sharp cheddar or American cheese until melted and smooth. Season the cheese sauce with a pinch of salt. -
Step 7
Combine and Serve: Stir the prepared cheese sauce directly into the simmering Cajun Chicken Sloppy Joe mixture until it’s well combined and creamy. Taste and adjust seasoning if needed. Serve immediately on toasted hamburger buns.
Important Information
Nutrition Facts (Per Serving)
It is important to consider this information as approximate and not to use it as definitive health advice.
Allergy Information
Please check ingredients for potential allergens and consult a health professional if in doubt.