Baked Pumpkin Fritter Bites – what a delightful phrase that instantly brings to mind the crisp air of autumn and the comforting aroma of warm spices. I’m absolutely thrilled to share with you a recipe that captures the essence of fall in every perfect, bite-sized morsel, but with a wonderfully healthier twist. Traditionally, fritters are deep-fried, a method that while undeniably delicious, can sometimes feel a bit heavy. That’s precisely why I set out to create these incredible fritters, baking them to golden perfection.
These little gems aren’t just a treat; they carry a whisper of culinary history, evolving from simple, humble vegetable or fruit fritters found in various global cuisines, often served during harvest seasons. Pumpkin, in particular, has been a staple of autumnal celebrations for centuries, transforming from pies and soups into these delightful snacks.
Why You’ll Adore These Baked Pumpkin Fritter Bites
What makes these Baked Pumpkin Fritter Bites so universally adored? It’s their irresistible combination of a subtly sweet, spiced pumpkin interior and a wonderfully tender exterior, all achieved without a drop of excess oil. They’re incredibly convenient, perfect for a cozy breakfast, a delightful dessert, or a charming addition to any autumn gathering. Get ready to fall in love with a dish that’s not only incredibly flavourful but also brings a touch of warmth and joy to your kitchen.

Ingredients:
Here’s everything you’ll need to create these wonderfully tender and flavorful Baked Pumpkin Fritter Bites. I’ve broken it down to make your shopping and preparation super easy!
For the Baked Pumpkin Fritter Bites:
- 1 ½ cups (180g) all-purpose flour: I always make sure to spoon and level my flour for accuracy. It’s the base that gives our fritters their delightful structure.
- ½ cup (100g) granulated sugar: Just enough sweetness to complement the pumpkin without overpowering it.
- 2 teaspoons baking powder: This little hero helps our fritter bites rise beautifully and become wonderfully fluffy.
- ½ teaspoon baking soda: Working in tandem with the baking powder, this also contributes to a light and tender crumb.
- 1 teaspoon ground cinnamon: A classic warm spice that’s absolutely essential for pumpkin recipes.
- ½ teaspoon ground ginger: Adds a lovely zesty kick that brightens the overall flavor.
- ¼ teaspoon ground nutmeg: For that truly authentic pumpkin spice aroma and taste.
- ⅛ teaspoon ground cloves (optional, but highly recommended!): A tiny pinch makes a big difference, deepening the spice profile.
- ½ teaspoon fine sea salt: Crucial for balancing all the flavors and enhancing the sweetness.
- 1 cup (240g) pumpkin puree: Make sure it’s 100% pure pumpkin, not pie filling! This is the heart of our pumpkin fritters.
- ½ cup (120ml) buttermilk: The acidity in buttermilk reacts with the baking soda, resulting in extra tender fritters. If you don’t have buttermilk, you can make your own by adding 1 tablespoon of white vinegar or lemon juice to a measuring cup, then filling the rest with milk and letting it sit for 5 minutes.
- ¼ cup (60ml) vegetable oil or melted unsalted butter: I often use vegetable oil for a lighter texture, but melted butter adds a rich, decadent flavor. Choose your adventure!
- 1 large egg: Acts as a binder and adds richness to our batter.
- 1 teaspoon pure vanilla extract: A must-have for almost any baked good; it enhances all the other flavors beautifully.
For the Maple Glaze:
- 1 ½ cups (180g) powdered sugar (confectioners’ sugar): Sifted, if possible, to avoid any lumps in your smooth glaze.
- 3 tablespoons maple syrup: Pure maple syrup is best here, as its rich flavor truly shines.
- 2-3 tablespoons milk (any kind): I usually start with 2 tablespoons and add more a little at a time until I reach my desired consistency.
- ½ teaspoon pure vanilla extract: To round out the sweetness of the glaze.
- Pinch of ground cinnamon (optional): If you want to add an extra touch of warmth to your glaze.
Optional Toppings:
- Chopped pecans or walnuts
- A light dusting of extra cinnamon or pumpkin pie spice
- A sprinkle of flaky sea salt (for a sweet and salty contrast!)
Equipment You’ll Need:
Having the right tools makes all the difference when creating these delightful Baked Pumpkin Fritter Bites. Here’s what I typically gather before I begin:
- Two large mixing bowls (one for dry ingredients, one for wet)
- A whisk
- A rubber spatula or wooden spoon
- Measuring cups and spoons (for both dry and liquid)
- A fine-mesh sieve (for flour and powdered sugar, if you’re meticulous like me!)
- Two large baking sheets
- Parchment paper or silicone baking mats
- A small cookie scoop (about 1.5 tablespoons capacity) or a piping bag with a round tip for portioning the batter
- A cooling rack
- A small bowl for mixing the glaze
Preparing the Pumpkin Fritter Batter:
Let’s get started on creating the delicious batter for our Baked Pumpkin Fritter Bites! This is where the magic begins.
- Preheat and Prepare: My first step is always to preheat my oven to a cozy 375°F (190°C). While the oven is warming up, I line two large baking sheets with parchment paper or silicone baking mats. This prevents sticking and makes cleanup a breeze, ensuring our Baked Pumpkin Fritter Bites come off the tray easily.
- Combine Dry Ingredients: In a generously sized mixing bowl, I like to whisk together all of my dry ingredients: the all-purpose flour, granulated sugar, baking powder, baking soda, ground cinnamon, ground ginger, ground nutmeg, optional ground cloves, and the fine sea salt. I give them a really good whisk for about 30 seconds to a minute, making sure everything is evenly distributed. This step is crucial because it ensures the leavening agents and spices are spread throughout the batter, leading to consistent flavor and rise in every single one of our Baked Pumpkin Fritter Bites.
- Mix Wet Ingredients: In a separate, equally large mixing bowl, I pour in my pumpkin puree, buttermilk, vegetable oil (or melted butter), large egg, and pure vanilla extract. I take my whisk and combine these until they are perfectly smooth and homogeneous. This smooth mixture of wet ingredients will ensure our batter is free of lumps and has a wonderful, consistent texture.
- Gently Combine Wet and Dry: Now for the exciting part! I pour the wet ingredient mixture into the bowl with the dry ingredients. Using my rubber spatula or a wooden spoon, I gently fold everything together. This is where patience is key – I mix just until the flour streaks have disappeared. Overmixing can develop the gluten in the flour too much, which would result in tough fritter bites instead of the tender, melt-in-your-mouth texture we’re aiming for. A few small lumps are perfectly fine; in fact, they often lead to a more tender finished product.
- Rest the Batter (Optional but Recommended): If I have a few extra minutes, I’ll cover the bowl with plastic wrap and let the batter rest on the counter for about 10-15 minutes. This little rest allows the flour to fully hydrate and the flavors to meld, often resulting in an even more tender and flavorful Baked Pumpkin Fritter Bite. It’s a small step that can make a noticeable difference!
Baking Your Baked Pumpkin Fritter Bites:
With our perfectly prepared batter ready, it’s time to transform it into those irresistible Baked Pumpkin Fritter Bites we’ve been dreaming about!
- Portioning the Batter: I grab my small cookie scoop (the one that holds about 1.5 tablespoons) and start dropping rounded spoonfuls of batter onto the prepared baking sheets. I make sure to leave about 1 ½ to 2 inches of space between each dollop of batter because these little guys will spread a bit as they bake. If you prefer a more uniform look, you could also transfer the batter to a piping bag fitted with a large round tip and pipe out neat little mounds. Aim for consistent sizes so they bake evenly. Remember, these are meant to be delightful bites, so don’t make them too large!
- Baking to Golden Perfection: I carefully slide the baking sheets into my preheated oven. The baking time will typically be between 10 to 14 minutes. I like to keep an eye on them, looking for a beautiful golden-brown color around the edges. To check for doneness, I gently press on one of the fritter bites – it should spring back slightly. You can also insert a toothpick into the center; if it comes out clean or with just a few moist crumbs attached, they’re ready. My kitchen always smells absolutely divine at this stage, filled with the aroma of warm pumpkin and spices, truly signaling that delicious Baked Pumpkin Fritter Bites are on their way!
- Cooling Time: Once they are perfectly baked, I carefully remove the baking sheets from the oven. I let the Baked Pumpkin Fritter Bites cool on the baking sheets for just about 2-3 minutes. This short rest allows them to firm up slightly before I transfer them. Then, using a spatula, I gently move them to a wire cooling rack to cool completely. It’s important they cool completely before glazing, otherwise, the glaze will simply melt and slide right off.
Crafting the Maple Glaze:
No Baked Pumpkin Fritter Bite is truly complete without a luscious, sweet glaze! This maple glaze is the perfect complement, adding another layer of flavor and a beautiful sheen.
- Whisking the Glaze Ingredients: In a small bowl, I combine the powdered sugar (I always try to sift it first to ensure a lump-free glaze!), pure maple syrup, ½ teaspoon of vanilla extract, and a pinch of optional ground cinnamon.
- Adjusting Consistency: I start by adding 2 tablespoons of milk and whisk everything together thoroughly with a small whisk or fork. I’m looking for a thick, yet pourable consistency – something that will coat the back of a spoon and drip slowly. If the glaze is too thick, I add more milk, about ½ teaspoon at a time, whisking well after each addition until it reaches my desired consistency. If, by chance, it turns out a little too thin, I simply whisk in another tablespoon or two of sifted powdered sugar until it thickens up. Remember, you want it thick enough to cling to the fritter bites but thin enough to drizzle beautifully. This maple glaze elevates our Baked Pumpkin Fritter Bites to an even higher level of deliciousness.
Finishing and Serving Your Baked Pumpkin Fritter Bites:
The moment of truth has arrived! Let’s give our Baked Pumpkin Fritter Bites their beautiful finishing touch.
- Glazing the Fritter Bites: Once the Baked Pumpkin Fritter Bites are completely cool to the touch (this is very important!), it’s time to glaze them. I have a couple of methods I like to use. For a light coating, I gently dip the top of each fritter bite into the maple glaze, letting any excess drip off before placing it back on the wire cooling rack. For a more generous coating, I sometimes just drizzle the glaze liberally over all the fritter bites arranged on the rack, with a sheet of parchment paper placed underneath to catch any drips – it makes cleanup so much easier! You can also use a spoon to artfully drizzle the glaze back and forth over the cooled fritters.
- Adding Optional Toppings: While the glaze is still wet, if I’m feeling fancy, I love to sprinkle on some optional toppings. Finely chopped pecans or walnuts add a delightful crunch and nutty flavor that pairs wonderfully with the pumpkin and maple. A light dusting of extra cinnamon or pumpkin pie spice can enhance the warm flavors, or for a sophisticated touch, a tiny sprinkle of flaky sea salt offers a fantastic sweet and salty contrast. Let the glaze set for about 15-20 minutes, or until it’s firm to the touch, before serving.
- Serving and Storage: These Baked Pumpkin Fritter Bites are truly best enjoyed the day they are made, while they are at their freshest and most tender. They make a fantastic breakfast treat, a delightful afternoon snack with a cup of coffee or tea, or even a charming dessert. If you happen to have any leftovers (which is rare in my house!), you can store them in an airtight container at room temperature for up to 2-3 days. However, I find they are usually devoured long before then! I truly hope you enjoy making and savoring these wonderful, cozy Baked Pumpkin Fritter Bites as much as I do. They are such a comforting treat and a fantastic way to celebrate the flavors of the season!
Conclusion:
As we reach the end of our culinary journey with this delightful recipe, I truly hope you’re as excited as I am about the prospect of bringing these incredible treats into your kitchen. If there’s one recipe I could implore you to try this season, it would undoubtedly be this one. What makes these particular fritters an absolute must-try, you ask? Well, it’s a symphony of textures and flavors that truly sets them apart. Imagine biting into something that is wonderfully crispy on the outside, offering that satisfying initial crunch, yet incredibly soft, moist, and tender on the inside, almost melting in your mouth with every chew. That perfect textural contrast is what we’ve achieved by baking instead of frying, giving you all the joy and none of the guilt often associated with traditional fritters. But it’s not just the texture; the flavor profile is a warm, comforting hug in edible form. The natural sweetness of pumpkin, beautifully enhanced by a harmonious blend of aromatic spices like cinnamon, nutmeg, and a hint of ginger, creates a taste that is quintessentially autumnal and irresistibly cozy. These aren’t just fritters; they are little parcels of seasonal joy, designed to evoke feelings of comfort and nostalgia. They manage to be both incredibly indulgent and surprisingly light, making them suitable for almost any occasion.
I find them to be incredibly versatile, fitting seamlessly into various moments of my day. They are truly fantastic for a leisurely weekend breakfast or brunch, perhaps alongside a cup of freshly brewed coffee or a fragrant herbal tea. They also make an absolutely splendid afternoon snack, offering that perfect pick-me-up without being overly heavy. And let’s not forget their potential as an elegant, yet approachable, dessert. When it comes to serving, the possibilities are wonderfully endless. My personal favorite way to enjoy these is simply dusted with a generous amount of powdered sugar, which adds a lovely visual appeal and an extra touch of sweetness. But don’t stop there! Consider serving them warm with a dollop of freshly whipped cream, perhaps infused with a hint of vanilla or maple. A drizzle of pure maple syrup or golden honey elevates them to another level of decadence, especially when they’re still warm from the oven. For a more sophisticated touch, a scoop of good quality vanilla bean ice cream melting over the warm fritters is simply divine. If you’re feeling adventurous, a side of homemade apple or pear compote would complement the pumpkin beautifully, adding a lovely fruity tang. Or, for a slightly less sweet option, a spoonful of plain Greek yogurt, perhaps with a sprinkle of toasted pecans, can create a wonderful balance.
Exploring Delicious Variations
But the fun doesn’t end with serving suggestions; this recipe is also incredibly adaptable, inviting you to experiment and make it your own. For example, if you want to intensify the spice profile, feel free to add a pinch of allspice or even a tiny amount of ground cloves. For those who love a bit of texture, stirring in some finely chopped walnuts, pecans, or even mini chocolate chips into the batter before baking would be an absolute game-changer. Imagine the delightful crunch of nuts or the gooey burst of chocolate alongside the tender pumpkin! If you’re thinking about a glaze, a simple concoction of powdered sugar, a touch of milk, and a splash of vanilla extract can create a beautiful sheen and an extra layer of sweetness. For a truly indulgent twist, a brown butter glaze would be spectacular, adding a nutty, complex flavor that pairs perfectly with pumpkin. You could even incorporate dried cranberries or golden raisins for little pockets of chewy sweetness. The beauty of these Baked Pumpkin Fritter Bites lies in their adaptability, allowing you to tailor them to your specific preferences and what you have on hand.
Your Culinary Adventure Awaits!
So, now it’s your turn! I genuinely encourage you to set aside some time this week to give this recipe a try. The process is straightforward, the ingredients are accessible, and the reward is truly magnificent. There’s something incredibly satisfying about creating something so delicious from scratch, filling your home with the inviting aromas of fall, and then sharing it with loved ones. Imagine the smiles, the oohs and aahs, as everyone takes their first bite of these delightful treats. I am confident that these fritters will become a cherished part of your seasonal baking repertoire. Don’t be shy about getting creative and putting your own spin on them. Once you’ve experienced the pure joy of making and tasting these fritters, I would absolutely love to hear about your experience. Did you add a unique spice? Did you discover a new favorite topping? Please share your thoughts, your successes, and any fun variations you came up with. Your culinary adventures inspire me, and I can’t wait to hear how these Baked Pumpkin Fritter Bites brighten your day and delight your palate. Happy baking!
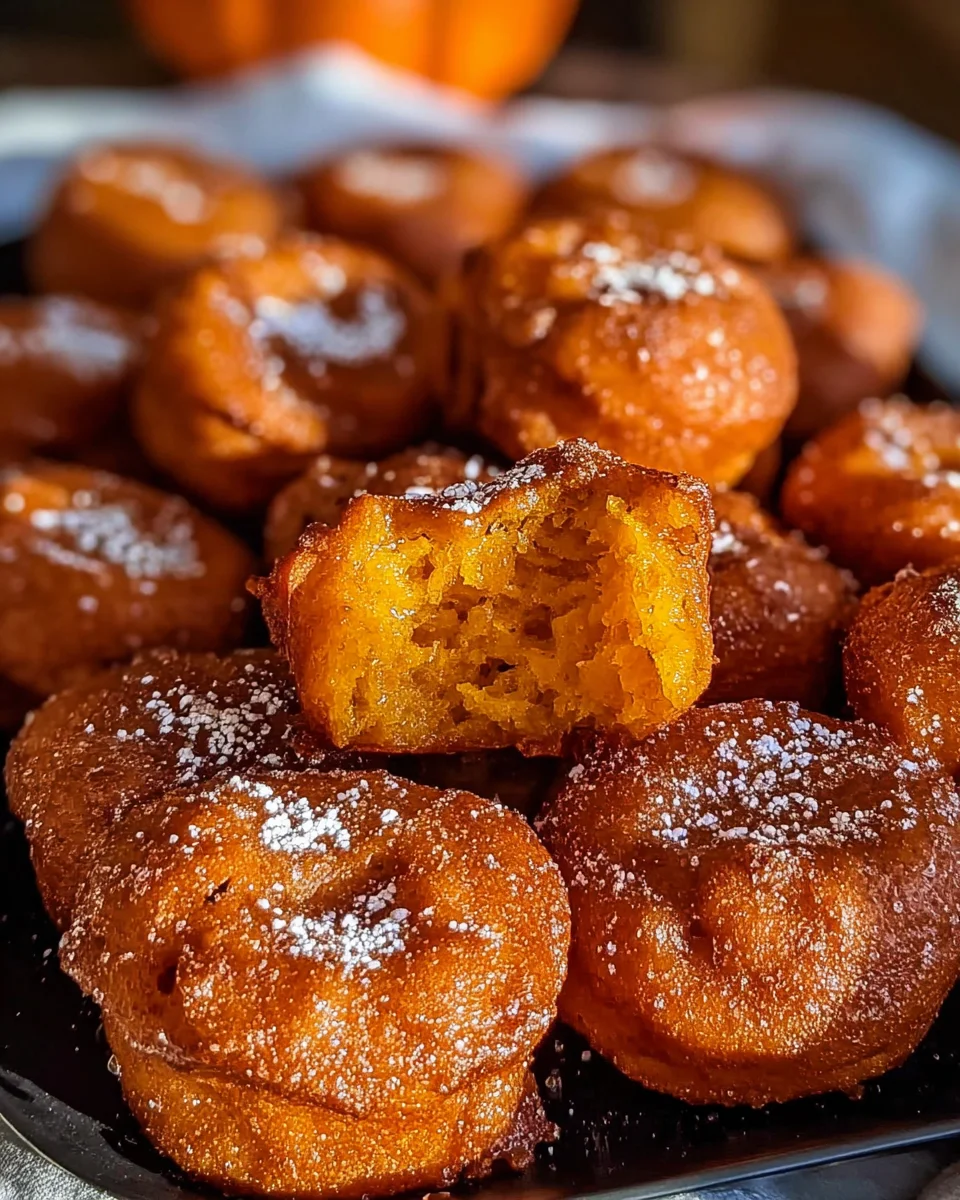
Baked Pumpkin Fritter Bites
Capture the essence of fall with these wonderfully healthier, bite-sized baked pumpkin fritter bites. Enjoy a subtly sweet, spiced pumpkin interior with a tender exterior, all without deep frying.
Ingredients
Instructions
Important Information
Nutrition Facts (Per Serving)
It is important to consider this information as approximate and not to use it as definitive health advice.
Allergy Information
Please check ingredients for potential allergens and consult a health professional if in doubt.