• Skip to primary navigation
  • Skip to main content
  • Skip to primary sidebar
Homesmad

Homesmad

  • Home
  • Breakfast & Brunch
  • Appetizers & Snacks
  • Dinner
  • Dessert
  • About
  • Privacy Policy
  • Contact
Homesmad
  • Home
  • Breakfast & Brunch
  • Appetizers & Snacks
  • Dinner
  • Dessert
  • About
  • Privacy Policy
  • Contact

Irresistible Apple Fritter Waffle Donuts Mashup Recipe

November 21, 2025 by Lily author

Apple Fritter Waffle Donuts The Irresistible Mashup You Never Knew You Needed — have you ever found yourself torn between the cozy, spiced comfort of a classic apple fritter and the playful, dimpled charm of a fresh waffle, all while secretly craving the portability of a donut? Today, I am thrilled to tell you that you no longer have to choose!

Apple fritters, with their rustic appeal and comforting warmth, have graced tables for centuries, often enjoyed as a seasonal treat or a delightful indulgence at fairs. They evoke a sense of nostalgia, a simpler time when freshly fried dough, laden with sweet apple pieces and a hint of cinnamon, was a pure joy. Waffles, too, hold a special place in our hearts, promising crispy edges and fluffy interiors perfect for soaking up syrup or a dusting of sugar.

Experience the Best of All Worlds!

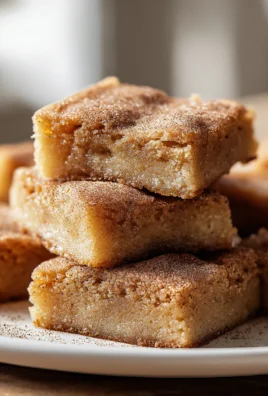
This brilliant fusion brings together the best of all worlds. Imagine the spiced apple goodness and tender chunks of fruit from a fritter, cooked to perfection in a waffle iron for those delightful nooks and crannies, and then shaped into a donut for easy handling. It’s the ultimate combination of crispy, soft, sweet, and utterly satisfying. People adore this dish not just for its incredible taste and texture—that perfect balance of a lightly crisp exterior and a warm, pillowy interior bursting with cinnamon-spiced apples—but also for its sheer ingenuity and the surprising convenience. This truly is Apple Fritter Waffle Donuts The Irresistible Mashup You Never Knew You Needed, offering convenience without sacrificing an ounce of flavor or fun.

Irresistible Apple Fritter Waffle Donuts Mashup Recipe this RECIPE

Ingredients:

  • For the Waffle Donut Batter:

    • 2 cups (240g) all-purpose flour, sifted
    • 1/4 cup (50g) granulated sugar
    • 2 teaspoons baking powder
    • 1/2 teaspoon baking soda
    • 1/2 teaspoon ground cinnamon
    • 1/4 teaspoon ground nutmeg
    • 1/4 teaspoon salt
    • 1 cup (240ml) buttermilk, at room temperature (or 1 cup milk + 1 tablespoon lemon juice/vinegar, let sit 5 minutes)
    • 1/2 cup (120ml) whole milk, at room temperature
    • 1 large egg, at room temperature
    • 1/4 cup (60g) unsalted butter, melted and slightly cooled
    • 1 teaspoon pure vanilla extract
  • For the Apple Filling:

    • 1 large or 2 medium apples (about 1.5 cups diced), Granny Smith, Honeycrisp, or Fuji work wonderfully
    • 1 tablespoon unsalted butter
    • 1 tablespoon light brown sugar, packed
    • 1/2 teaspoon ground cinnamon
    • Pinch of ground nutmeg
  • For the Glaze:

    • 1.5 cups (180g) powdered sugar (confectioners’ sugar), sifted
    • 3-4 tablespoons whole milk or heavy cream
    • 1/2 teaspoon pure vanilla extract
    • Pinch of salt (optional, but enhances flavor!)
  • Equipment You’ll Need:

    • Waffle iron (preferably a Belgian waffle maker for thicker “donuts,” but any type works)
    • Two large mixing bowls
    • Whisk
    • Rubber spatula
    • Small saucepan or microwave-safe bowl for melting butter
    • Measuring cups and spoons
    • Cutting board and sharp knife for apples
    • Small skillet for cooking apples
    • Wire rack for cooling, placed over a baking sheet

Preparing Your Apples for Perfection

  1. Select and Prepare Your Apples: Begin by choosing your apples. I find that a good firm apple with a balance of sweet and tart, like a Granny Smith or Honeycrisp, works beautifully here. Their texture holds up well during cooking and they offer a bright contrast to the rich batter and sweet glaze. You’ll want about one large or two medium apples, which should yield approximately 1.5 cups once diced. Carefully peel the skin using a vegetable peeler, then core them thoroughly. I usually quarter them first, remove the core and seeds, and then proceed with dicing.
  2. Dice the Apples: The size of your dice is important! For the best “Apple Fritter Waffle Donuts The Irresistible Mashup You Never Knew You Needed,” you want small, uniform pieces. Aim for about 1/4-inch dice. This ensures they cook evenly, distribute well throughout the batter, and contribute that delightful fritter-like texture without being too large or chunky in your waffle donut.
  3. Sauté the Apples: In a small skillet, melt 1 tablespoon of unsalted butter over medium heat. Once the butter is shimmering, add your diced apples, 1 tablespoon of light brown sugar, 1/2 teaspoon of ground cinnamon, and a tiny pinch of nutmeg. Stir everything together so the apples are coated evenly with the sugar and spices.
  4. Cook Until Tender-Crisp: Sauté the apples for about 5-7 minutes, stirring occasionally. You’re looking for them to soften slightly but still retain a bit of their bite – we call this “tender-crisp.” They should be fragrant and slightly caramelized, with the brown sugar melting down to create a delicious, sticky coating. This pre-cooking step is crucial; it prevents the apples from making your waffle donuts watery and ensures they have that perfect, yielding texture once baked into the batter. Once they reach this stage, remove the skillet from the heat and set the apples aside to cool completely while you prepare the rest of your ingredients. Don’t skip this cooling step, as hot apples can negatively impact your batter’s texture.

Whipping Up the Waffle Donut Batter

  1. Combine Dry Ingredients: In your first large mixing bowl, whisk together the sifted all-purpose flour, granulated sugar, baking powder, baking soda, ground cinnamon, ground nutmeg, and salt. I always recommend sifting the flour to ensure there are no lumps, which contributes to a smoother, lighter batter. Give this mixture a good whisk for about 30 seconds to a minute, making sure all the dry ingredients are thoroughly combined and evenly distributed. This ensures that the leavening agents (baking powder and soda) are spread throughout, giving you a consistent rise.
  2. Prepare Wet Ingredients: In your second large mixing bowl, whisk together the buttermilk, whole milk, large egg, melted and slightly cooled unsalted butter, and pure vanilla extract. It’s important that your buttermilk, milk, and egg are at room temperature. This helps them incorporate more smoothly into the batter, preventing clumping and ensuring a uniform texture in your final “Apple Fritter Waffle Donuts The Irresistible Mashup You Never Knew You Needed.” Whisk until everything is well combined and the mixture looks homogenous. If your butter isn’t fully cooled, it can curdle the egg, so be mindful of its temperature.
  3. Combine Wet and Dry Ingredients: Now it’s time to bring it all together! Pour the wet ingredients into the bowl with the dry ingredients. Using a rubber spatula, gently fold the ingredients together until they are just combined. The key here is not to overmix! Overmixing develops the gluten in the flour too much, leading to tough, chewy waffle donuts rather than the tender, airy texture we’re aiming for. A few lumps in the batter are perfectly fine, even desirable. Stop mixing as soon as you no longer see streaks of dry flour.
  4. Fold in the Cooled Apples: Gently fold the cooled, sautéed apples into the waffle batter. Stir just enough to evenly distribute the apple pieces throughout the mixture. Again, be gentle and avoid overmixing. The batter should be thick, but pourable, resembling a standard pancake or waffle batter with visible apple bits. This batter is the heart of your Apple Fritter Waffle Donuts, so treat it with care!

Waffle Iron Wizardry: Cooking Your Donut Masterpieces

  1. Preheat Your Waffle Iron: This is a crucial step for achieving perfectly cooked and beautifully golden waffle donuts. Plug in your waffle iron and let it preheat fully. Most waffle irons will have an indicator light that tells you when it’s ready. Don’t rush this step; a properly preheated iron ensures an even cook and a crispy exterior.
  2. Lightly Grease the Waffle Iron: Even if your waffle iron boasts a non-stick surface, I always recommend lightly greasing it with a neutral oil or cooking spray before the first batch, and then as needed between subsequent batches. This helps guarantee that your apple fritter waffle donuts release easily and prevents any sticking calamities. Use a pastry brush or a folded paper towel to spread a thin layer of oil.
  3. Portion the Batter: For a standard waffle iron, you’ll typically need about 1/2 to 3/4 cup of batter per waffle, depending on the size and shape of your machine. For smaller, round waffle makers, you might use closer to 1/3 cup. I like to use a measuring cup or an ice cream scoop to portion the batter directly onto the center of the hot waffle iron. Be careful not to overfill it, as the batter will expand as it cooks. Overfilling can lead to messy overflow and waffle donuts that are too dense in the middle.
  4. Cook to Golden Perfection: Close the lid of your waffle iron and allow the waffle donut to cook. The cooking time will vary based on your specific waffle iron and how crispy you like your waffles, but it generally takes about 3-6 minutes. You’ll know they’re ready when the steam stops escaping from the sides of the iron and the indicator light (if your machine has one) signals completion. For a truly golden brown, slightly crispy exterior, let them cook until they’re deeply golden. The aroma will be absolutely heavenly, a clear sign that these “Apple Fritter Waffle Donuts The Irresistible Mashup You Never Knew You Needed” are coming to life!
  5. Carefully Remove and Cool: Once cooked, gently lift the waffle donut out of the iron using a fork or tongs. Be careful not to scratch the non-stick surface. Transfer the hot waffle donuts to a wire rack placed over a baking sheet. This setup allows air to circulate all around them, preventing them from getting soggy on the bottom and helping them retain their lovely crispy edges while they cool slightly before glazing. Repeat the cooking process with the remaining batter, greasing the waffle iron as necessary.

Crafting the Irresistible Glaze

  1. Prepare Your Glaze Bowl: In a medium-sized bowl, add your sifted powdered sugar. Sifting is important here to ensure a super smooth, lump-free glaze. No one wants a gritty glaze on their beautiful waffle donuts!
  2. Mix in Liquid and Flavorings: Gradually add 3 tablespoons of whole milk or heavy cream to the powdered sugar, along with the vanilla extract and an optional pinch of salt. The salt really helps to balance the sweetness and brings out the vanilla flavor.
  3. Whisk to Desired Consistency: Whisk vigorously until the glaze is completely smooth and creamy. You’re looking for a consistency that is thick enough to coat the back of a spoon but still thin enough to drip elegantly off your waffle donuts. If the glaze is too thick, add more milk or cream a tiny bit at a time (half a teaspoon at a time) until you reach the desired pourable consistency. If it accidentally becomes too thin, simply whisk in a little more sifted powdered sugar. Achieving the right glaze consistency is key for that perfect donut shop finish.

The Grand Finale: Glazing and Serving Your Apple Fritter Waffle Donuts

  1. Glaze the Waffle Donuts: Once your Apple Fritter Waffle Donuts have cooled slightly – they should still be warm, but not piping hot, otherwise the glaze will just melt right off – it’s time for the delicious glaze! You have a few options here:

    • Dipping Method: My preferred way for full coverage is to take each waffle donut and gently dip one side into the bowl of glaze. Lift it out, letting any excess drip back into the bowl. This creates a beautiful, even coating that mimics a classic donut glaze.
    • Drizzling Method: Alternatively, you can place the waffle donuts back on the wire rack and use a spoon to generously drizzle the glaze over them in a crisscross pattern. This gives a more rustic, home-style look.

    Place the glazed waffle donuts back on the wire rack, still over the baking sheet, to allow the glaze to set slightly. This usually takes about 5-10 minutes.

  2. Serve Immediately for Best Experience: While these “Apple Fritter Waffle Donuts The Irresistible Mashup You Never Knew You Needed” are absolutely divine warm with the glaze still a bit soft, they’re also fantastic once the glaze has fully set. You can serve them as is, or with a dusting of extra cinnamon, a dollop of whipped cream, or even a scoop of vanilla bean ice cream for an extra indulgent treat.
  3. Storage: If by some miracle you have leftovers (it’s unlikely, they’re just too good!), store them in an airtight container at room temperature for up to 2 days. While they are best enjoyed fresh, they can be gently reheated in a toaster oven or microwave for a quick revival, though the crispness might diminish slightly.

Irresistible Apple Fritter Waffle Donuts Mashup Recipe

Conclusion:

And there you have it, my friends! We’ve reached the sweet finale of our culinary journey, and I genuinely hope you’re as excited as I am about what we’ve created together. This isn’t just another recipe; it’s an invitation to experience something truly special, a delightful fusion that elevates familiar comforts into an extraordinary treat. From the very first bite, I promise you’ll understand why these utterly unique creations are set to become a firm favorite in your kitchen, gracing your breakfast tables, brunch spreads, and dessert plates with their undeniable charm and incredible flavor. It’s the kind of dish that sparks conversation and brings smiles, turning any ordinary moment into a celebration of taste and creativity. I truly believe this recipe embodies everything wonderful about homemade treats – comforting, exciting, and utterly delicious.

So, why is this particular recipe an absolute must-try? Simply put, it masterfully brings together the rustic charm and irresistible apple-cinnamon goodness of a classic apple fritter with the delightful chewiness and iconic shape of a waffle, all reimagined into a convenient donut form. The result is a symphony of textures and flavors: a beautifully crispy exterior giving way to a tender, cake-like interior studded with soft, spiced apple pieces. You get that beloved donut shape, making them easy to hold and even easier to devour, but with the added bonus of those signature waffle pockets perfect for catching every last drop of glaze or pooling delightful syrups. It’s an innovative twist that satisfies multiple cravings at once, offering a depth of flavor and a playful presentation that sets it apart from any single dessert you might have tried before. This recipe isn’t just about making food; it’s about crafting an experience that excites the palate and warms the soul.

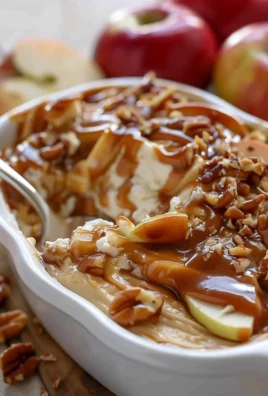
Now, let’s talk about making these beauties even more spectacular! While they are absolutely divine enjoyed warm and plain, straight from the waffle iron, a classic glaze is always a welcome addition. A simple powdered sugar glaze, thinned with a touch of milk or apple cider and a hint of vanilla extract, will add that quintessential donut sweetness and shine. For something a little richer, a maple glaze drizzled generously over the top would be utterly sensational, complementing the apple and cinnamon notes beautifully. Or, imagine a warm caramel sauce cascading into those waffle divots – pure bliss! Don’t shy away from a dusting of cinnamon sugar or even a sprinkle of finely chopped toasted pecans or walnuts for an added textural crunch. Each of these simple additions can transform your creation, making it uniquely yours and perfectly suited to the moment.

But the serving possibilities don’t stop there. Picture these delightful creations as the star of your next brunch spread, perhaps alongside a fresh fruit salad and a steaming pot of coffee. For a truly decadent dessert experience, serve them warm with a scoop of vanilla bean ice cream that slowly melts into the warm pockets, creating an indulgent sauce. A dollop of homemade whipped cream, perhaps infused with a hint of cinnamon or a splash of bourbon, would also be magnificent. If you’re feeling adventurous, you could even create a small “bar” of toppings for your guests – think berry compotes, chocolate sauce, various chopped nuts, or even a sprinkle of flaky sea salt to cut through the sweetness. The versatility of these treats means they can effortlessly transition from a comforting breakfast item to an elegant dessert, making them perfect for any time of day or any special occasion you wish to celebrate.

And for those of you who love to experiment in the kitchen, this recipe offers a fantastic canvas for your creativity. While apples are traditional and utterly delicious, consider swapping them out for other fruits like ripe pears, peaches (canned or fresh), or even mashed bananas for a different flavor profile. You could introduce different spices too – a touch of nutmeg, cardamom, or even a very tiny pinch of ground cloves would add wonderful complexity. Feeling bold? Stir in some miniature chocolate chips or white chocolate chunks into the batter before cooking for an extra layer of sweetness. For a truly autumnal twist, a tiny splash of bourbon or rum in the batter can enhance those warm, spiced notes. These small adjustments can lead to exciting new discoveries, ensuring that this recipe remains fresh and exciting every time you make it.

So, what are you waiting for? It’s time to preheat that waffle iron and dive headfirst into creating Apple Fritter Waffle Donuts The Irresistible Mashup You Never Knew You Needed. I genuinely can’t recommend this recipe enough; it’s a game-changer that combines the best of several worlds into one glorious, incredibly satisfying treat. I encourage you to try it, experiment with your own serving suggestions and variations, and most importantly, enjoy every single delicious bite. Once you’ve whipped up your batch, I would absolutely love to hear about your experience! Share your photos, your favorite glazes, your ingenious toppings, and any creative twists you came up with. Your culinary adventures inspire me, and I can’t wait to see how you make this recipe your own. Happy cooking, and prepare to fall in love!


Apple Fritter Waffle Donuts The Irresistible Mashup You Never Knew You Needed

There’s something magical about the scent of apples and cinnamon wafting through the kitchen, especially when the morning sun is just peeking through the windows. Growing up, apple fritters were a family favorite warm, doughy, and bursting with tart apple chunks. Waffles, on the other hand, were reserved for weekend brunches. But it wasn’t until recently that I discovered the pure joy of combining these two comfort foods into one epic treat: apple fritter waffle donuts. Imagine a golden, crisp waffle with all the spiced apple flavor and a sweet vanilla glaze reminiscent of your favorite bakery donut yet easy enough to make at home. This recipe is a celebration of cozy mornings, childhood memories, and a little bit of indulgence, all rolled into one bite.

Prep Time
30 Minutes
Cook Time
40 Minutes
Total Time
10 Minutes
Servings
8 servings

Ingredients


Instructions


Important Information

Nutrition Facts (Per Serving)

It is important to consider this information as approximate and not to use it as definitive health advice.

Allergy Information

Please check ingredients for potential allergens and consult a health professional if in doubt.

« Previous Post
Refreshing Honeycrisp Apple Broccoli Salad Recipe
Next Post »
Cinnamon Sugar Donut Bread: Easy, Fluffy & Irresistible!

If you enjoyed this…

Indulgent Banana Pudding Brownies Recipe for Sweet Cravings

Apple Crumble Cheesecake: Irresistible & Easy Recipe

Pistachio Cupcakes Recipe: Delightful & Easy Treat

Primary Sidebar

Browse by Diet

BreakfastDinnerLunchDessertAppetizer

Sweet Peach Yogurt Parfait Delight

One of my fondest memories is from a lazy summer afternoon spent at my grandmother’s house. The sun filtered through the kitchen window, casting a warm glow over the table where she would create her culinary magic. It was during one of those blissful moments that I first tasted her Peach Yogurt Parfait with Honey and Granola. The sweet aroma of ripe peaches mingling with creamy yogurt and the crunch of granola was nothing short of heavenly. It felt like summer captured in a bowl, and I still remember the joy of diving in with a spoon, each layer revealing a new burst of flavor.

When I think about that parfait, I can almost hear the gentle hum of the bees outside, reminding me of the floral notes that honey brings to every bite. The vibrant yellows and soft oranges of the peaches contrast beautifully with the creamy white yogurt and the golden crunch of granola. It’s a dish that not only looks delightful but also tastes like a celebration of fresh, wholesome ingredients.

What makes my version of this Peach Yogurt Parfait special is the careful balance of flavors and textures. I use ripe, juicy peaches, drizzled with locally sourced honey, and a homemade granola that’s bursting with nuts and seeds for an extra crunch. It’s a simple dish, but every layer is crafted with love and attention.

Let me show you exactly how to make this delightful parfait, so you can bring a bit of that summer magic into your kitchen!

Sweet Peach Yogurt Parfait Delight

Why You’ll Love This Recipe

  • Delightfully creamy texture from the Greek yogurt, paired with the juicy sweetness of fresh peaches.
  • Ready in under 20 minutes, making it a quick and satisfying breakfast or snack option.
  • Budget-friendly, using common ingredients that you may already have in your pantry.
  • Customizable with your favorite granola and nuts, allowing you to tailor each parfait to your taste.
  • Perfectly balanced flavors with the bright acidity of lemon juice and the sweetness of honey enhancing the peaches.

Ingredients

  • For the Parfait:
  • 2 cups plain Greek yogurt (or vanilla yogurt for a sweeter option)
  • 2 large ripe peaches, diced (about 2 cups)
  • 1 tablespoon fresh lemon juice (to prevent browning of peaches)
  • 2 tablespoons honey (plus more for drizzling)
  • 1 teaspoon vanilla extract (optional for extra flavor)
  • For the Granola:
  • 1 cup granola (store-bought or homemade; see notes for a simple granola recipe)
  • 1/4 cup sliced almonds (optional for added crunch)
  • 1/4 cup shredded coconut (optional for added flavor)

Let’s dive into some key ingredients that make this Peach Yogurt Parfait so delightful! First, the Greek yogurt is not only creamy but also packed with protein, making it a satisfying option for breakfast or a snack. If you’re looking for a sweeter option, you can easily substitute it with vanilla yogurt, though it may alter the overall flavor balance. Next, the ripe peaches are the star of the show; their natural sweetness shines through, so I recommend choosing peaches that yield slightly to pressure, indicating they’re perfectly ripe. If peaches aren’t in season, feel free to use nectarines or even frozen peaches—just thaw them before use. Finally, honey adds a lovely floral sweetness that ties everything together. If you prefer, maple syrup can serve as a delicious substitute.

Step-by-Step Instructions

  1. Start by preparing the peaches. Wash them thoroughly, then slice and dice them into bite-sized pieces. In a medium bowl, toss the diced peaches with 1 tablespoon of fresh lemon juice to prevent browning. Set aside for about 5 minutes while the lemon juice works its magic.
  2. In a separate bowl, combine the Greek yogurt, 2 tablespoons of honey, and 1 teaspoon of vanilla extract if using. Stir the mixture until smooth and thoroughly blended. This should take about a minute. Avoid overmixing to maintain the creaminess of the yogurt.
  3. Now it’s time to layer your parfait. Grab a clear glass or bowl to showcase your beautiful creation. Start with a generous spoonful of the yogurt mixture at the bottom—about 1/4 cup will do. Use a spoon to spread it evenly.
  4. Add a layer of the diced peaches over the yogurt, ensuring they cover the yogurt completely. You might want to use about half of what you have prepared—roughly 1 cup. This layer should be visually appealing, so arrange the peaches neatly.
  5. Sprinkle 1/4 cup of granola over the peaches. This adds a delightful crunch. Make sure to distribute it evenly to ensure every bite has that satisfying texture. Avoid packing it down too tightly, as you want it to maintain its crunch.
  6. Repeat the layers: spoon in another 1/4 cup of yogurt, followed by another cup of peaches, and another sprinkle of granola. You should have at least two layers, but feel free to add more depending on your glass size.
  7. Finish off your parfait with a drizzle of honey on top for added sweetness and a touch of elegance. If you’re using sliced almonds or shredded coconut, sprinkle them on top now. It adds a lovely visual contrast and extra flavor.
  8. Serve immediately or refrigerate for up to 30 minutes before serving to allow the flavors to meld together. However, I recommend enjoying it fresh to maintain the granola’s crunch.

Pro Tips for the Best Peach Yogurt Parfait With Honey And Granola

  • Make sure to choose ripe peaches for the best flavor and texture. A common mistake is using unripe fruit, which can lead to a less enjoyable parfait. Look for peaches that are fragrant and slightly soft to the touch.
  • Use a clear glass to assemble your parfait; this not only makes for a beautiful presentation but also allows you to see the colorful layers, which adds to the enjoyment of eating it.
  • For an even creamier texture, consider whipping the Greek yogurt with a hand mixer for a couple of minutes before layering. This small adjustment makes a huge difference in mouthfeel.
  • Be mindful of the granola-to-yogurt ratio. Too much granola can overwhelm the parfait, while too little can make it feel too creamy. Aim for about 1/4 cup of granola per layer for the perfect balance.
  • If you’re making this for a gathering, consider preparing the yogurt and peaches ahead of time and layering them just before serving. This ensures the granola stays crunchy!

Variations & Serving Ideas

There are so many ways to get creative with your Peach Yogurt Parfait! For a tropical twist, swap out the peaches for mangoes or pineapples and top with coconut flakes. If you prefer a berry flavor, mix in some blueberries or strawberries with the peaches for added color and taste. For a nutty version, incorporate chopped walnuts or pecans instead of almonds.

As for serving ideas, this parfait pairs beautifully with a side of scrambled eggs for a hearty breakfast or fresh fruit salad for a light lunch. You might also enjoy it alongside whole grain toast with almond butter for an energizing snack. The contrast of flavors and textures will elevate your meal experience!

Storage, Make-Ahead & Reheating

The Peach Yogurt Parfait is best enjoyed fresh, but you can prepare some components ahead of time. Store the layered parfait in an airtight container in the refrigerator for up to 24 hours. However, be cautious; the granola may lose its crunch if stored too long. You can freeze the yogurt and peach mixture for up to 2 months; just remember to thaw it in the refrigerator overnight before serving.

If you plan to enjoy this dish the next day, it can taste even better as the flavors meld together. Just remember to add the granola right before serving to keep its delightful crunch!

Frequently Asked Questions

Can I make Peach Yogurt Parfait With Honey And Granola ahead of time?

Yes — in fact, it tastes even better the next day as the flavors meld. However, I recommend waiting to add the granola until just before serving to maintain its crunch.

What can I substitute for Greek yogurt?

If you prefer a lighter option, you can substitute Greek yogurt with regular yogurt or a dairy-free alternative like coconut yogurt. Just remember that this may alter the creaminess and flavor profile slightly.

Can I use frozen peaches for this parfait?

Absolutely! Just make sure to thaw the frozen peaches before using them. They will still add great flavor, though the texture may be slightly softer than fresh peaches.

How do I make the parfait vegan?

To make a vegan version, substitute the Greek yogurt with a plant-based yogurt alternative, and replace honey with maple syrup or agave nectar. This keeps the parfait sweet while adhering to a vegan diet.

What other fruits can I use in this recipe?

You can mix and match fruits based on your preference. Try using strawberries, blueberries, raspberries, or even bananas. Just make sure to adjust the lemon juice as needed to prevent browning.

Sweet Peach Yogurt Parfait Delight

Final Thoughts

The Peach Yogurt Parfait with Honey and Granola is a delightful blend of creamy yogurt, sweet peaches, and crunchy granola that creates a satisfying and nourishing treat. Each layer bursts with flavor, making it a perfect choice for breakfast or a light dessert.

This is the kind of recipe I come back to again and again, especially when I want something refreshing and wholesome to start my day. The harmony of sweet and tart flavors, combined with the delightful crunch, never fails to lift my spirits!

I encourage you to give this parfait a try and indulge in its comforting goodness. Feel free to share your results or even add your own twist—perhaps a sprinkle of cinnamon or a handful of nuts. Enjoy creating your perfect parfait!

Print
clock clock iconcutlery cutlery iconflag flag iconfolder folder iconinstagram instagram iconpinterest pinterest iconfacebook facebook iconprint print iconsquares squares iconheart heart iconheart solid heart solid icon

Peach Yogurt Parfait


  • Author: Lily author
  • Total Time: 15 minutes
  • Yield: 4 servings 1x
Pin Recipe
Print Recipe

Description

This Peach Yogurt Parfait combines creamy Greek yogurt, juicy peaches, and crunchy granola for a delightful treat. It’s a perfect breakfast or snack that captures the essence of summer in every bite.


Ingredients

Scale
  • For the Parfait:
  • 2 cups plain Greek yogurt (or vanilla yogurt for a sweeter option)
  • 2 large ripe peaches, diced (about 2 cups)
  • 1 tablespoon fresh lemon juice (to prevent browning of peaches)
  • 2 tablespoons honey (plus more for drizzling)
  • 1 teaspoon vanilla extract (optional for extra flavor)
  • For the Granola:
  • 1 cup granola (store-bought or homemade; see notes for a simple granola recipe)
  • 1/4 cup sliced almonds (optional for added crunch)
  • 1/4 cup shredded coconut (optional for added flavor)

Instructions

  1. Start by preparing the peaches. Wash them thoroughly, then slice and dice them into bite-sized pieces. In a medium bowl, toss the diced peaches with 1 tablespoon of fresh lemon juice to prevent browning. Set aside for about 5 minutes while the lemon juice works its magic.
  2. In a separate bowl, combine the Greek yogurt, 2 tablespoons of honey, and 1 teaspoon of vanilla extract if using. Stir the mixture until smooth and thoroughly blended. This should take about a minute. Avoid overmixing to maintain the creaminess of the yogurt.
  3. Now it’s time to layer your parfait. Grab a clear glass or bowl to showcase your beautiful creation. Start with a generous spoonful of the yogurt mixture at the bottom—about 1/4 cup will do. Use a spoon to spread it evenly.
  4. Add a layer of the diced peaches over the yogurt, ensuring they cover the yogurt completely. You might want to use about half of what you have prepared—roughly 1 cup. This layer should be visually appealing, so arrange the peaches neatly.
  5. Sprinkle 1/4 cup of granola over the peaches. This adds a delightful crunch. Make sure to distribute it evenly to ensure every bite has that satisfying texture. Avoid packing it down too tightly, as you want it to maintain its crunch.
  6. Repeat the layers: spoon in another 1/4 cup of yogurt, followed by another cup of peaches, and another sprinkle of granola. You should have at least two layers, but feel free to add more depending on your glass size.
  7. Finish off your parfait with a drizzle of honey on top for added sweetness and a touch of elegance. If you’re using sliced almonds or shredded coconut, sprinkle them on top now. It adds a lovely visual contrast and extra flavor.
  8. Serve immediately or refrigerate for up to 30 minutes before serving to allow the flavors to meld together. However, I recommend enjoying it fresh to maintain the granola’s crunch.
  • Prep Time: 15 mins
  • Cook Time: 0 mins
  • Category: Breakfast
  • Method: No-cook
  • Cuisine: American

Nutrition

  • Serving Size: 1 parfait
  • Calories: 250
  • Sugar: 20 g
  • Sodium: 50 mg
  • Fat: 5 g
  • Saturated Fat: 2 g
  • Unsaturated Fat: 3 g
  • Trans Fat: 0 g
  • Carbohydrates: 40 g
  • Fiber: 3 g
  • Protein: 10 g
  • Cholesterol: 10 mg

Keywords: Choose ripe peaches for the best flavor and texture. Use a clear glass for a beautiful presentation. For creaminess, consider whipping the yogurt before layering. Be mindful of the granola-to-yogurt ratio. Prepare yogurt and peaches ahead of time for gatherings, layering just before serving.

Did you make this recipe?

Share a photo and tag us — we can't wait to see what you've made!

Sun-Kissed Frozen Orange Cream Slush

As a child, summer days felt like they lasted forever. I remember the sticky heat wrapping around me as I played outside, my laughter mingling with the sounds of the neighborhood. But nothing could cool me down quite like the moment I’d spot my grandmother, laboring over her blender, whipping up her famous Frozen Orange Creamsicle Slush. That vibrant orange treat, with its frosty texture and sweet citrus aroma, was like a burst of sunshine in a cup. Just one sip, and I could feel the coolness wash over me, sparking pure joy.

This Frozen Orange Creamsicle Slush has a way of making you feel like a kid again. Its creamy, dreamy consistency is a delightful balance of bright orange and soft vanilla, inviting you to dive right in. The refreshing tang of orange dances on your tongue, while the smooth creaminess envelops you in a comforting embrace. It’s a nostalgic treat that’s perfect for hot summer afternoons or anytime you need a little pick-me-up.

What makes my version of this slush stand out is the addition of a hint of vanilla bean, which elevates the flavor and adds an extra layer of richness. Plus, it’s super easy to whip up with just a few simple ingredients that you probably already have on hand! So, if you’re ready to relive those sun-soaked memories, let me show you exactly how to make it.

Sun-Kissed Frozen Orange Cream Slush

Why You’ll Love This Recipe

  • Each slush is a perfect blend of creamy vanilla and zesty orange, creating a nostalgic flavor reminiscent of summer days.
  • This refreshing treat is ready in under 15 minutes, making it an ideal quick dessert for unexpected guests or hot afternoons.
  • With just 8 simple ingredients, it’s budget-friendly, ensuring you don’t have to break the bank to enjoy a delicious slush.
  • The slush has a perfectly smooth texture, thanks to the combination of ice and ice cream, providing a delightful contrast to the bright citrus flavors.
  • It’s highly customizable; you can easily adjust the sweetness and add fresh herbs for a unique twist that suits your taste.

Ingredients

  • 2 cups orange juice (freshly squeezed or store-bought)
  • 1 cup vanilla ice cream
  • 1 cup crushed ice
  • 1/2 cup milk (whole or 2%)
  • 1/4 cup granulated sugar (adjust based on sweetness preference)
  • 1 teaspoon vanilla extract
  • Zest of 1 orange (for added flavor)
  • Fresh orange slices and mint leaves (for garnish)

The star of this Frozen Orange Creamsicle Slush is the orange juice, which provides the vibrant, citrusy base. Freshly squeezed juice will yield the brightest flavor, but store-bought options can be just as convenient. If you’re opting for store-bought, choose 100% pure juice with no added sugars for the best results. Another essential ingredient is the vanilla ice cream; it adds creaminess and sweetness. You can substitute it with dairy-free ice cream if you’re looking for a vegan option. Whole or 2% milk complements the ice cream, creating a smooth blend. If you want a lower-calorie version, almond or oat milk can be good alternatives.

Lastly, the granulated sugar can be adjusted based on your sweetness preference. If you prefer a more natural sweetener, consider using honey or agave syrup. The orange zest enhances the flavor profile, providing an aromatic pop that brings the whole slush together. Don’t skip it! It adds an extra layer of brightness that makes this slush truly special.

Step-by-Step Instructions

  1. Start by preparing your ingredients. Gather 2 cups of orange juice, 1 cup of vanilla ice cream, and 1 cup of crushed ice. Make sure the ice is finely crushed, as larger chunks can make blending difficult.
  2. In a blender, combine the orange juice, vanilla ice cream, crushed ice, and 1/2 cup of milk. Add 1/4 cup of granulated sugar and 1 teaspoon of vanilla extract. If you like a sweeter slush, consider adding a bit more sugar at this stage.
  3. Add the zest of 1 orange to the blender. This step is crucial for enhancing the citrus flavor of your slush. Make sure not to include the bitter white pith—only the flavorful zest.
  4. Blend the mixture on medium-high speed for about 30-45 seconds. Stop once the ingredients are fully combined and the slush has a smooth, even consistency. If you notice large chunks of ice, blend for an additional 10-15 seconds. Avoid over-blending, as this can make the slush too liquidy.
  5. Once blended, taste the slush. If it needs more sweetness, add a little more sugar and blend for a few more seconds. If it’s too thick, you can add a splash of milk to reach your desired consistency.
  6. Pour the slush into glasses. This recipe typically serves 4, but you can easily double it for larger gatherings. Use a spoon to help guide the slush into the glasses if needed.
  7. Garnish each serving with fresh orange slices and mint leaves. The mint not only adds a pop of color but also a refreshing aroma that complements the citrus flavors beautifully.
  8. Serve immediately and enjoy! If you’ve made extra, you can refrigerate it for a short time, but it’s best enjoyed fresh.

Pro Tips for the Best Frozen Orange Creamsicle Slush

  • Don’t skip the orange zest! It’s a game-changer for flavor. Always zest before juicing to make it easier.
  • Use a high-powered blender for the best texture. A standard blender may struggle with ice, leading to uneven consistency. If you have a food processor, that can work too, but ensure the ice is finely crushed.
  • Adjust the ice-to-liquid ratio carefully. If your slush is too thick, it won’t blend well. Start with less ice and add more until you reach your preferred texture.
  • Be cautious with the sugar! Always start with the lower amount, as you can easily add more, but it’s hard to fix an overly sweet slush.
  • For a fun twist, consider adding a splash of coconut milk or a handful of fresh fruit like strawberries or pineapple. This not only enhances the flavor but also adds a beautiful color contrast.

Variations & Serving Ideas

There are countless ways to put a spin on your Frozen Orange Creamsicle Slush. Consider making a tropical version by adding in some pineapple juice or coconut milk for a delightful tropical twist. If you’re feeling adventurous, try incorporating a handful of frozen mango or peach slices for added sweetness. For a lighter version, swap out the vanilla ice cream for Greek yogurt for a creamy yet tangy alternative.

As for serving ideas, this refreshing slush pairs wonderfully with light summer dishes like grilled chicken skewers, fish tacos, or a simple salad topped with citrus vinaigrette. The bright, zesty flavors of the slush complement these dishes perfectly, making them an ideal pairing for a sunny day.

Storage, Make-Ahead & Reheating

This Frozen Orange Creamsicle Slush is best enjoyed fresh, but if you have leftovers, you can store them in an airtight container in the fridge for up to 2 days. Just keep in mind that the slush may lose some of its texture over time as the ice melts. It doesn’t freeze well, as the ice will turn into a solid block. If you must freeze it, blend again after thawing to restore the slushy consistency. This treat is best the day you make it, as the flavors meld together beautifully overnight, enhancing its deliciousness.

Frequently Asked Questions

Can I make Frozen Orange Creamsicle Slush ahead of time?

Yes — in fact, it tastes even better the next day as the flavors meld. However, it’s best to enjoy it fresh, as the texture can change if stored for too long. If you need to prepare it ahead, keep it in the fridge and re-blend before serving.

What kind of orange juice should I use?

For the best flavor, use freshly squeezed orange juice. However, if you’re short on time, opt for 100% pure store-bought juice without added sugars. This will ensure that your slush remains flavorful and refreshing.

Can I substitute the vanilla ice cream?

Absolutely! If you’re looking for a dairy-free option, coconut milk ice cream or a non-dairy vanilla ice cream can work wonderfully. They will still provide the creamy texture and sweetness you desire.

How can I adjust the sweetness of my slush?

You can easily adjust the sweetness by modifying the amount of sugar added. Start with 1/4 cup and taste the mixture before blending. If you prefer it sweeter, add more sugar gradually until it reaches your desired level.

What should I do if my slush is too thick?

If your slush is too thick, simply add a splash of milk or orange juice and blend again. This will help achieve a more drinkable consistency while maintaining the slushy texture. Adjust gradually to reach your preferred thickness.

Sun-Kissed Frozen Orange Cream Slush

Final Thoughts

The Frozen Orange Creamsicle Slush is a delightful blend of refreshing citrus and creamy goodness, making it a perfect treat for warm days or any time you crave a taste of nostalgia. The way the bright orange flavor dances with the creamy texture truly elevates this slush, transforming it into a satisfying escape from the everyday.

This is the kind of recipe I come back to again and again, especially when I’m looking to cool down or impress guests at a summer gathering. It’s simple to make and always brings smiles all around! I encourage you to try this recipe for yourself—don’t hesitate to share your results or even put your own spin on it. Happy slushing!

Print
clock clock iconcutlery cutlery iconflag flag iconfolder folder iconinstagram instagram iconpinterest pinterest iconfacebook facebook iconprint print iconsquares squares iconheart heart iconheart solid heart solid icon

Frozen Orange Creamsicle Slush


  • Author: Lily author
  • Total Time: 15 minutes
  • Yield: 4 servings 1x
Pin Recipe
Print Recipe

Description

This Frozen Orange Creamsicle Slush is a refreshing treat that combines creamy vanilla and zesty orange flavors. Perfect for hot summer days, it brings back nostalgic memories with every sip.


Ingredients

Scale
  • 2 cups orange juice (freshly squeezed or store-bought)
  • 1 cup vanilla ice cream
  • 1 cup crushed ice
  • 1/2 cup milk (whole or 2%)
  • 1/4 cup granulated sugar (adjust based on sweetness preference)
  • 1 teaspoon vanilla extract
  • Zest of 1 orange (for added flavor)
  • Fresh orange slices and mint leaves (for garnish)

Instructions

  1. Start by preparing your ingredients. Gather 2 cups of orange juice, 1 cup of vanilla ice cream, and 1 cup of crushed ice. Make sure the ice is finely crushed, as larger chunks can make blending difficult.
  2. In a blender, combine the orange juice, vanilla ice cream, crushed ice, and 1/2 cup of milk. Add 1/4 cup of granulated sugar and 1 teaspoon of vanilla extract. If you like a sweeter slush, consider adding a bit more sugar at this stage.
  3. Add the zest of 1 orange to the blender. This step is crucial for enhancing the citrus flavor of your slush. Make sure not to include the bitter white pith—only the flavorful zest.
  4. Blend the mixture on medium-high speed for about 30-45 seconds. Stop once the ingredients are fully combined and the slush has a smooth, even consistency. If you notice large chunks of ice, blend for an additional 10-15 seconds. Avoid over-blending, as this can make the slush too liquidy.
  5. Once blended, taste the slush. If it needs more sweetness, add a little more sugar and blend for a few more seconds. If it’s too thick, you can add a splash of milk to reach your desired consistency.
  6. Pour the slush into glasses. This recipe typically serves 4, but you can easily double it for larger gatherings. Use a spoon to help guide the slush into the glasses if needed.
  7. Garnish each serving with fresh orange slices and mint leaves. The mint not only adds a pop of color but also a refreshing aroma that complements the citrus flavors beautifully.
  8. Serve immediately and enjoy! If you’ve made extra, you can refrigerate it for a short time, but it's best enjoyed fresh.
  • Prep Time: 15 min
  • Cook Time: 0 min
  • Category: Dessert
  • Method: Blending
  • Cuisine: American

Nutrition

  • Serving Size: 1 serving
  • Calories: 200
  • Sugar: 30 g
  • Sodium: 50 mg
  • Fat: 5 g
  • Saturated Fat: 3 g
  • Unsaturated Fat: 2 g
  • Trans Fat: 0 g
  • Carbohydrates: 40 g
  • Fiber: 1 g
  • Protein: 2 g
  • Cholesterol: 20 mg

Keywords: Don't skip the orange zest! It's a game-changer for flavor. Always zest before juicing to make it easier.

Did you make this recipe?

Share a photo and tag us — we can't wait to see what you've made!

Zesty Lemon Poppy Seed Delight

One rainy afternoon, I found myself in my grandmother’s cozy kitchen, the kind that always smelled like warmth and love. She was whipping up her famous Lemon Poppy Seed Loaf, a recipe that had been passed down through generations. As the batter came together, the zesty aroma of fresh lemons filled the air, mingling perfectly with the nutty fragrance of poppy seeds. I can still picture her, apron-clad, as she expertly drizzled a vibrant citrus icing over the loaf, creating a glossy, sun-kissed finish that beckoned us to dive in. It was a moment that sparked my own passion for baking, and this recipe has become a cherished staple in my home ever since.

When you take a bite of this Lemon Poppy Seed Loaf, it’s like a burst of sunshine on your palate. The loaf is beautifully golden, with a tender crumb that melts in your mouth. Each slice is speckled with tiny poppy seeds, adding a delightful crunch that contrasts beautifully with the tangy sweetness of the lemon. And that citrus icing? It’s the finishing touch that elevates this loaf from ordinary to extraordinary, with its bright, zesty flavor dancing on your taste buds.

This recipe stands out because it embraces simplicity while delivering on flavor. I’ve added a hint of vanilla to the batter, enhancing the overall taste and making it even more indulgent. Trust me, once you make this Lemon Poppy Seed Loaf With Citrus Icing, it’ll become a go-to in your baking repertoire.

So, let me show you exactly how to make it!

Zesty Lemon Poppy Seed Delight

Why You’ll Love This Recipe

  • Moist and tender crumb that melts in your mouth, thanks to the perfect balance of butter and buttermilk.
  • Bright, zesty lemon flavor paired with crunchy poppy seeds, creating a delightful texture and taste experience.
  • Easy to whip up in just about an hour, perfect for last-minute gatherings or a cozy afternoon treat.
  • Budget-friendly with everyday ingredients, making it an accessible option for all home bakers.
  • The citrus icing adds a sweet tang that elevates the loaf, turning a simple recipe into a showstopper!

Ingredients

  • 1 ½ cups (190g) all-purpose flour
  • 1 teaspoon baking powder
  • ½ teaspoon baking soda
  • ½ teaspoon salt
  • 3 tablespoons poppy seeds
  • ½ cup (115g) unsalted butter, softened to room temperature
  • 1 cup (200g) granulated sugar
  • 2 large eggs
  • 1 teaspoon vanilla extract
  • 1 teaspoon lemon zest (from about 1 medium lemon)
  • ½ cup (120ml) buttermilk
  • 2 tablespoons fresh lemon juice

For the Citrus Icing:

  • 1 cup (120g) powdered sugar
  • 2 tablespoons fresh lemon juice
  • 1 tablespoon orange juice
  • 1 teaspoon lemon zest (for garnish, optional)

Let’s dive into the key ingredients that make this Lemon Poppy Seed Loaf so special. The all-purpose flour provides the structure and base for the loaf, while the baking powder and baking soda ensure it rises perfectly, giving the loaf a light texture. For a gluten-free variation, you could substitute the flour with a gluten-free all-purpose blend. Poppy seeds not only add a delightful crunch but also contribute to the unique flavor profile that pairs well with the citrus notes.

Unsalted butter is crucial for achieving the buttery richness that makes this loaf so moist. If you’re looking for a dairy-free option, coconut oil or a vegan butter can be used instead. The buttermilk is another essential component, providing acidity that activates the baking soda for a fluffy texture. If you don’t have buttermilk on hand, you can easily make a substitute by mixing ½ cup of milk with 1 tablespoon of vinegar or lemon juice and letting it sit for about 5 minutes.

Step-by-Step Instructions

  1. Preheat your oven to 350°F (175°C). Grease a 9×5-inch loaf pan or line it with parchment paper for easy removal later.
  2. In a medium mixing bowl, whisk together 1 ½ cups of all-purpose flour, 1 teaspoon of baking powder, ½ teaspoon of baking soda, ½ teaspoon of salt, and 3 tablespoons of poppy seeds. This helps to evenly distribute the baking agents and ensures a uniform rise.
  3. In a large mixing bowl, cream together ½ cup of softened unsalted butter and 1 cup of granulated sugar using an electric mixer on medium speed for about 3-4 minutes, until the mixture is light and fluffy. Make sure to scrape down the sides of the bowl occasionally.
  4. Add 2 large eggs, 1 teaspoon of vanilla extract, and 1 teaspoon of lemon zest to the creamed butter and sugar, mixing until fully combined. You want a smooth consistency, so ensure there are no lumps of butter.
  5. In a small bowl, combine ½ cup of buttermilk and 2 tablespoons of fresh lemon juice. Alternately add the dry ingredients and buttermilk mixture to the butter mixture, starting and ending with the dry ingredients. Mix just until combined; do not overmix, as this can lead to a dense loaf.
  6. Pour the batter into the prepared loaf pan. Smooth the top with a spatula, ensuring it’s even. Bake in the preheated oven for 50-60 minutes, or until a toothpick inserted in the center comes out clean. The edges should be lightly golden brown, and the center should feel just set.
  7. Once baked, remove the loaf from the oven and allow it to cool in the pan for about 10 minutes. Then, transfer it to a wire rack to cool completely. Resist the urge to slice too soon, as it will be crumbly if it’s still warm.
  8. While the loaf is cooling, prepare the citrus icing. In a medium bowl, whisk together 1 cup of powdered sugar, 2 tablespoons of fresh lemon juice, and 1 tablespoon of orange juice until smooth. If the icing is too thick, you can add a little more juice to reach your desired consistency.
  9. Once the loaf is completely cool, drizzle the citrus icing over the top. If you like, sprinkle with an additional teaspoon of lemon zest for an extra pop of flavor and color.

Pro Tips for the Best Lemon Poppy Seed Loaf With Citrus Icing

  • Be careful not to overmix your batter; this is a common mistake that can lead to a dense loaf. Mix just until the dry ingredients are incorporated for a light and fluffy texture.
  • Use room temperature ingredients, especially the butter and eggs. This helps to create a smoother batter and ensures even baking. Take your eggs out of the fridge about 30 minutes before you start.
  • For a more pronounced lemon flavor, consider adding a little lemon extract in addition to the zest and juice. Just a half teaspoon can elevate the citrus notes significantly.
  • When measuring your flour, spoon it into the measuring cup and level it off with a knife instead of scooping directly from the bag. This prevents packing and ensures you don’t end up with a dry loaf.
  • Invest in a good quality loaf pan; it makes a difference in heat distribution, which ensures even baking. If your pan is dark-coated, reduce the oven temperature by 25°F to prevent over-browning.

Variations & Serving Ideas

For a delightful twist, consider adding blueberries or raspberries to the batter for a fruity burst of flavor. You can also experiment with different citrus fruits—try lime or grapefruit zest and juice for a refreshing change. For a healthier option, substitute half of the all-purpose flour with whole wheat flour for added fiber without compromising too much on texture.

This Lemon Poppy Seed Loaf pairs beautifully with a light salad, such as a mixed greens salad with a vinaigrette, or a cup of tea for a cozy afternoon treat. It also complements a creamy cheese platter, as the acidity of the loaf balances rich cheeses perfectly. Lastly, a scoop of vanilla ice cream on the side creates a delightful contrast of temperatures and flavors!

Storage, Make-Ahead & Reheating

This Lemon Poppy Seed Loaf can be stored at room temperature for up to 3 days if wrapped tightly in plastic wrap. If you want to keep it longer, it freezes well for up to 3 months. To freeze, wrap the loaf tightly in plastic wrap and then in aluminum foil to prevent freezer burn.

When you’re ready to enjoy it again, simply thaw it in the fridge overnight. Reheat individual slices in the microwave for 15-20 seconds or in a toaster oven until warmed through. Interestingly, many people find that this loaf tastes even better the next day, as the flavors have time to meld!

Frequently Asked Questions

Can I make Lemon Poppy Seed Loaf With Citrus Icing ahead of time?

Yes — in fact, it tastes even better the next day! You can make the loaf a day in advance, allowing the flavors to develop. Just be sure to store it in an airtight container to maintain its moisture.

Can I substitute the poppy seeds?

Absolutely! If you don’t have poppy seeds on hand or prefer an alternative, you can use sesame seeds for a similar crunch or omit them entirely for a smooth loaf.

What can I use instead of buttermilk?

If you don’t have buttermilk, you can easily create a substitute by mixing ½ cup of milk (dairy or plant-based) with 1 tablespoon of vinegar or lemon juice. Let it sit for 5 minutes before using in the recipe.

How can I make this recipe gluten-free?

To make a gluten-free version of this Lemon Poppy Seed Loaf, substitute the all-purpose flour with a gluten-free all-purpose flour blend. Just ensure that the blend contains a binding agent like xanthan gum for the best results.

What is the best way to store leftover loaf?

Leftover Lemon Poppy Seed Loaf should be stored in an airtight container at room temperature for up to 3 days. For longer storage, wrap it tightly and freeze for up to 3 months. Thaw it before serving for the best texture.

Zesty Lemon Poppy Seed Delight

Final Thoughts

The Lemon Poppy Seed Loaf with Citrus Icing is truly a delightful treat that brings a burst of brightness to any occasion. The zesty lemon flavor combined with the subtle crunch of poppy seeds creates a satisfying balance, while the citrus icing adds a touch of sweetness that perfectly complements the loaf’s tanginess.

This is the kind of recipe I come back to again and again, especially when I want to brighten up a gloomy day or celebrate a small victory. The aroma that fills the kitchen as it bakes is absolutely heavenly! I encourage you to give this recipe a try; you might just find it becoming a beloved staple in your home. Don’t forget to share your results or even add your own unique twist—I can’t wait to see what you create!

Print
clock clock iconcutlery cutlery iconflag flag iconfolder folder iconinstagram instagram iconpinterest pinterest iconfacebook facebook iconprint print iconsquares squares iconheart heart iconheart solid heart solid icon

Lemon Poppy Seed Loaf


  • Author: Lily author
  • Total Time: 36 minute
  • Yield: 1 loaf 1x
Pin Recipe
Print Recipe

Description

This Lemon Poppy Seed Loaf is a delightful treat that combines zesty lemon flavor with crunchy poppy seeds. Topped with a citrus icing, it’s perfect for any occasion.


Ingredients

Scale
  • 1 ½ cups (190g) all-purpose flour
  • 1 teaspoon baking powder
  • ½ teaspoon baking soda
  • ½ teaspoon salt
  • 3 tablespoons poppy seeds
  • ½ cup (115g) unsalted butter, softened to room temperature
  • 1 cup (200g) granulated sugar
  • 2 large eggs
  • 1 teaspoon vanilla extract
  • 1 teaspoon lemon zest (from about 1 medium lemon)
  • ½ cup (120ml) buttermilk
  • 2 tablespoons fresh lemon juice
  • 1 cup (120g) powdered sugar
  • 2 tablespoons fresh lemon juice
  • 1 tablespoon orange juice
  • 1 teaspoon lemon zest (for garnish, optional)

Instructions

  1. Preheat your oven to 350°F (175°C). Grease a 9×5-inch loaf pan or line it with parchment paper for easy removal later.
  2. In a medium mixing bowl, whisk together 1 ½ cups of all-purpose flour, 1 teaspoon of baking powder, ½ teaspoon of baking soda, ½ teaspoon of salt, and 3 tablespoons of poppy seeds. This helps to evenly distribute the baking agents and ensures a uniform rise.
  3. In a large mixing bowl, cream together ½ cup of softened unsalted butter and 1 cup of granulated sugar using an electric mixer on medium speed for about 3-4 minutes, until the mixture is light and fluffy. Make sure to scrape down the sides of the bowl occasionally.
  4. Add 2 large eggs, 1 teaspoon of vanilla extract, and 1 teaspoon of lemon zest to the creamed butter and sugar, mixing until fully combined. You want a smooth consistency, so ensure there are no lumps of butter.
  5. In a small bowl, combine ½ cup of buttermilk and 2 tablespoons of fresh lemon juice. Alternately add the dry ingredients and buttermilk mixture to the butter mixture, starting and ending with the dry ingredients. Mix just until combined; do not overmix, as this can lead to a dense loaf.
  6. Pour the batter into the prepared loaf pan. Smooth the top with a spatula, ensuring it’s even. Bake in the preheated oven for 50-60 minutes, or until a toothpick inserted in the center comes out clean. The edges should be lightly golden brown, and the center should feel just set.
  7. Once baked, remove the loaf from the oven and allow it to cool in the pan for about 10 minutes. Then, transfer it to a wire rack to cool completely. Resist the urge to slice too soon, as it will be crumbly if it’s still warm.
  8. While the loaf is cooling, prepare the citrus icing. In a medium bowl, whisk together 1 cup of powdered sugar, 2 tablespoons of fresh lemon juice, and 1 tablespoon of orange juice until smooth. If the icing is too thick, you can add a little more juice to reach your desired consistency.
  9. Once the loaf is completely cool, drizzle the citrus icing over the top. If you like, sprinkle with an additional teaspoon of lemon zest for an extra pop of flavor and color.
  • Prep Time: 15 mins
  • Cook Time: 50-60 mins
  • Category: Dessert
  • Method: Baking
  • Cuisine: American

Nutrition

  • Serving Size: 1 slice
  • Calories: 200
  • Sugar: 15 g
  • Sodium: 150 mg
  • Fat: 8 g
  • Saturated Fat: 5 g
  • Unsaturated Fat: 3 g
  • Trans Fat: 0 g
  • Carbohydrates: 30 g
  • Fiber: 1 g
  • Protein: 3 g
  • Cholesterol: 40 mg

Keywords: Be careful not to overmix your batter; this is a common mistake that can lead to a dense loaf. Use room temperature ingredients for a smoother batter and even baking.

Did you make this recipe?

Share a photo and tag us — we can't wait to see what you've made!

  • Privacy Policy
  • Terms Of Service
  • Contact
  • About
  • GDPR

Copyright © 2025 Homesmad