• Skip to primary navigation
  • Skip to main content
  • Skip to primary sidebar
Homesmad

Homesmad

  • Home
  • Breakfast & Brunch
  • Appetizers & Snacks
  • Dinner
  • Dessert
  • About
  • Privacy Policy
  • Contact
Homesmad
  • Home
  • Breakfast & Brunch
  • Appetizers & Snacks
  • Dinner
  • Dessert
  • About
  • Privacy Policy
  • Contact

Crispy, Cheesy Garlic Parmesan Focaccia Bread You’ll Love

November 23, 2025 by Lily author

Crispy And Cheesy Garlic Parmesan Focaccia Bread Youll Love is more than just a mouthful to say; it’s an experience waiting to unfold in your kitchen. Imagine the incredible aroma of garlic and baking bread filling your home, drawing everyone closer. Then, envision pulling apart a warm slice, revealing a soft, airy interior studded with melted Parmesan, all beneath a gloriously golden, crisp crust. This isn’t just any bread; it’s a testament to simple ingredients coming together to create something truly extraordinary and utterly addictive.

Focaccia, with its humble origins rooted deeply in ancient Ligurian cuisine, has long been a beloved Italian staple. Traditionally a simple flatbread drizzled with olive oil and seasoned with salt, it served as an everyday accompaniment and even a rustic breakfast for farmers. Over centuries, it evolved, welcoming various toppings, but its core appeal — a delightful chew and a satisfying crust — remained, making it a timeless classic enjoyed worldwide.

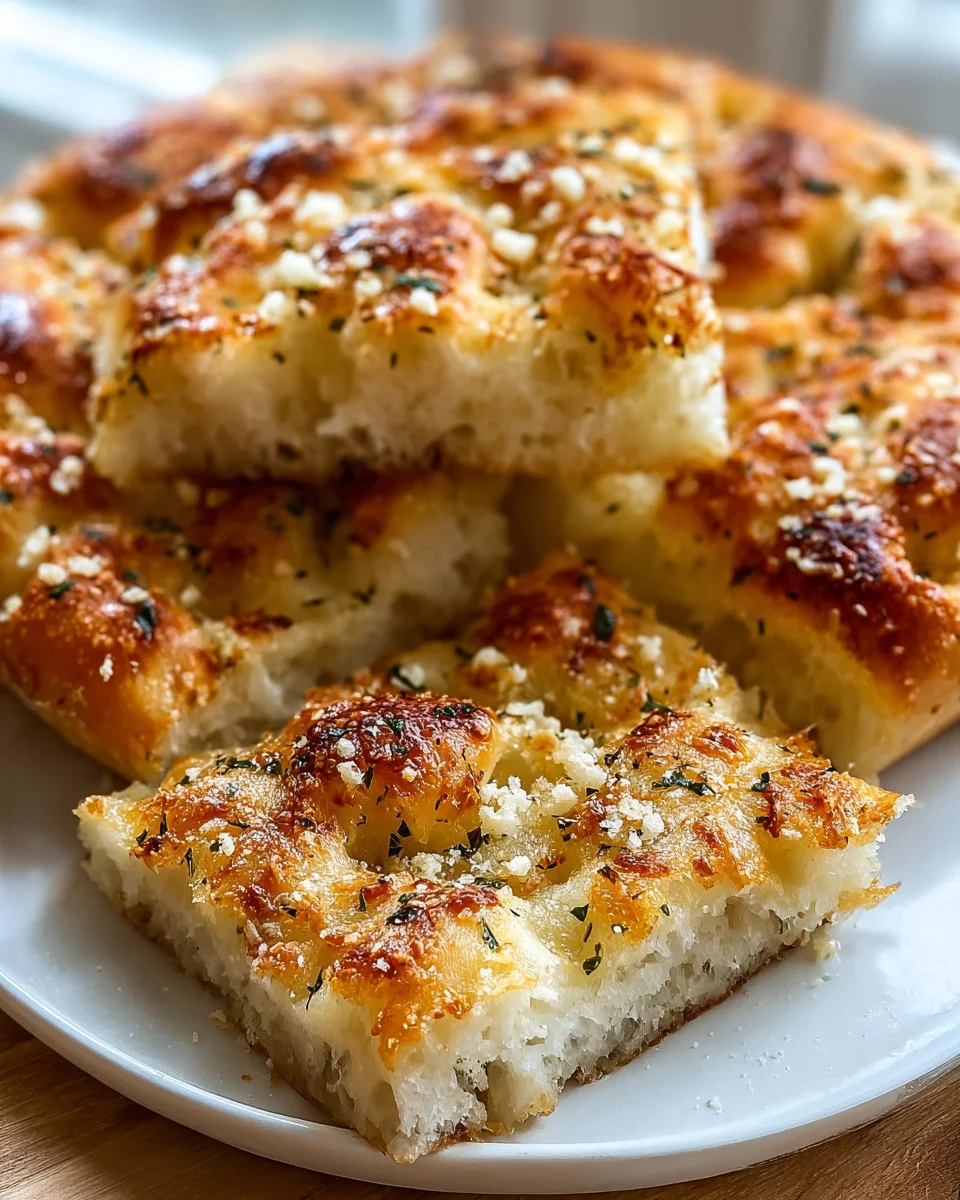
What makes our version so utterly irresistible? It’s the perfect symphony of flavors and textures. We’re talking about the pungent kick of fresh garlic infused into rich olive oil, the savory depth of Parmesan cheese creating those delightful pockets of melty goodness, and that iconic, satisfying crunch on the outside giving way to a pillow-soft, open-crumbed inside. You’ll find that creating this Crispy And Cheesy Garlic Parmesan Focaccia Bread Youll Love at home is surprisingly approachable, promising a delicious reward that’s perfect for dipping into soups, complementing a hearty pasta, or simply enjoying on its own. Get ready to make a bread that will undoubtedly become a new family favorite!

Crispy, Cheesy Garlic Parmesan Focaccia Bread You'll Love this RECIPE

Ingredients:

Crafting your very own batch of Crispy And Cheesy Garlic Parmesan Focaccia Bread Youll Love starts with selecting fresh, quality ingredients. Here’s everything you’ll need to create this incredibly flavorful and satisfying bread:

  • For the Focaccia Dough:
    • 500 grams (approximately 4 cups) unbleached bread flour (you can use all-purpose, but bread flour offers a chewier texture and better gluten development)
    • 400 ml (approximately 1 ⅔ cups) warm water (around 100-105°F or 38-40°C)
    • 7 grams (approximately 2 ¼ teaspoons) active dry yeast or instant yeast
    • 10 grams (approximately 1 ½ teaspoons) fine sea salt
    • 2 tablespoons extra virgin olive oil, plus more for oiling the bowl and pan
    • 1 teaspoon granulated sugar (optional, to help activate yeast if using active dry)
  • For the Garlic Parmesan Butter Topping:
    • 8 tablespoons (1 stick) unsalted butter
    • 6-8 cloves garlic, minced very fine (adjust to your preference for garlic intensity!)
    • ½ cup freshly grated Parmesan cheese, plus extra for sprinkling
    • 2 tablespoons fresh parsley, finely chopped
    • ½ teaspoon red pepper flakes (optional, for a subtle kick)
    • ¼ teaspoon black pepper
  • For Finishing:
    • Flaky sea salt (such as Maldon or Fleur de Sel), for sprinkling
    • Additional extra virgin olive oil, for drizzling before serving

Making the Focaccia Dough: The Foundation of Crispy And Cheesy Garlic Parmesan Focaccia Bread Youll Love

This is where the magic truly begins! Patience and attention to detail during the dough-making process will reward you with an exceptionally light and airy focaccia that forms the perfect base for our cheesy, garlicky topping.

  1. Activate the Yeast:

    If you’re using active dry yeast, pour the warm water (remember, around 100-105°F is ideal – too hot will kill the yeast, too cold won’t activate it) into a large mixing bowl. Sprinkle the yeast and the optional teaspoon of sugar over the water. Give it a gentle stir and let it sit for 5-10 minutes. You should see a foamy layer forming on top, indicating your yeast is alive and ready to work its magic! If using instant yeast, you can skip this step and add it directly to the flour.

  2. Combine Dry Ingredients:

    In a separate, medium-sized bowl, whisk together the bread flour and the fine sea salt. This ensures the salt is evenly distributed throughout the dough, which is crucial for flavor and proper gluten development.

  3. Mix the Dough:

    Pour the yeast mixture (or just the warm water if using instant yeast) into the bowl with the flour and salt. Add the 2 tablespoons of extra virgin olive oil. Using a wooden spoon or a sturdy spatula, mix until all the flour is incorporated and you have a shaggy, somewhat sticky dough. Don’t worry about it being perfectly smooth yet; we’re just getting started. If you’re using a stand mixer, attach the dough hook and mix on low speed for about 2 minutes until everything comes together.

  4. Kneading and Gluten Development:

    This is a critical step for developing the structure and chewiness that makes focaccia so delightful. If using a stand mixer, increase the speed to medium-low and knead for 8-10 minutes. The dough should become smooth, elastic, and pull away cleanly from the sides of the bowl. If kneading by hand, turn the dough out onto a lightly floured surface. Knead for 10-15 minutes, pushing, folding, and stretching the dough. You’ll notice it transforming from a sticky mess into a soft, pliable, and much less sticky ball. A good test for gluten development is the “windowpane test”: gently stretch a small piece of dough. If you can stretch it thin enough to see light through it without tearing, your gluten is well-developed.

  5. First Rise (Bulk Fermentation):

    Lightly oil a large bowl with extra virgin olive oil. Transfer the kneaded dough to the bowl, turning it once to coat all sides with oil. This prevents it from drying out and sticking. Cover the bowl tightly with plastic wrap or a clean kitchen towel. Place it in a warm, draft-free spot (around 75-80°F or 24-27°C is ideal) for 1 to 1.5 hours, or until the dough has roughly doubled in size. The exact time will depend on the temperature of your kitchen. Look for a domed top and a visibly airy texture.

The Overnight Cold Fermentation: Unlocking Deep Flavor and Superior Texture

While you can bake focaccia after its first rise, I wholeheartedly recommend an overnight cold fermentation. This step dramatically enhances the flavor, creating complex notes that simply aren’t present in a quick rise. It also makes the dough much easier to handle and contributes to that incredible open, airy crumb we’re aiming for in our Crispy And Cheesy Garlic Parmesan Focaccia Bread Youll Love.

  1. Prepare for Cold Fermentation:

    Once your dough has doubled in size after the first rise, gently punch it down to release some of the air. Don’t be too aggressive; we want to keep some of that gas. Transfer the dough to a clean, lightly oiled, airtight container. Make sure the container is large enough to allow for further expansion, even in the cold.

  2. Refrigerate:

    Place the covered dough in the refrigerator for at least 12 hours, and up to 48 hours. The cold temperature significantly slows down yeast activity, allowing enzymes in the dough more time to break down starches into sugars, resulting in a more nuanced, deeper flavor profile. This slow fermentation also strengthens the gluten structure, leading to a better texture. This extended rest is a secret weapon for achieving truly artisanal bread.

Preparing for Baking: Shaping and Second Proof

After its beauty sleep, your focaccia dough is ready for its final transformation before hitting the oven. This stage is all about gentle handling and creating those signature focaccia dimples.

  1. Bring Dough to Room Temperature:

    About 2-3 hours before you plan to bake, remove the dough from the refrigerator. Keep it in its covered container and let it sit at room temperature. This allows the dough to relax, become more pliable, and start actively fermenting again. Attempting to work with cold, stiff dough will be frustrating and yield a less airy result.

  2. Prepare the Baking Pan:

    While the dough is coming to temperature, generously drizzle 2-3 tablespoons of extra virgin olive oil into a 9×13-inch baking pan (a metal pan is excellent for achieving a crispy bottom). Use your hands to spread the oil evenly across the entire bottom and up the sides of the pan. Don’t be shy with the oil here; it’s essential for preventing sticking, contributing to the crispy crust, and adding flavor.

  3. Transfer and Gently Stretch:

    Once the dough has relaxed and warmed up, carefully transfer it from its container into the prepared baking pan. It will likely be a bit sticky, but that’s normal. Gently press and stretch the dough to fill the pan. If the dough resists stretching, cover it with plastic wrap and let it rest for 10-15 minutes, then try again. This rest period allows the gluten to relax, making it easier to work with. Don’t force it; patience is key here to avoid tearing the delicate structure you’ve built.

  4. The Signature Dimples:

    Once the dough roughly fills the pan, lightly oil your fingertips with a little olive oil. Press your fingers straight down into the dough, creating deep indentations all over the surface. These dimples are not just for aesthetics; they create pockets for the delicious garlic Parmesan butter topping to nestle into, and they help control where the air pockets form in the bread, contributing to its iconic texture. Ensure you press firmly but not so hard that you tear through to the bottom of the pan.

  5. Second Rise (Proofing in the Pan):

    Cover the baking pan loosely with plastic wrap or a clean kitchen towel. Let the focaccia proof at room temperature for another 45-60 minutes, or until it looks visibly puffy and airy, and has expanded to fill the pan completely. You should see some air bubbles forming on the surface. This final proof is crucial for achieving a light and open crumb.

Crafting the Crispy And Cheesy Garlic Parmesan Topping and Butter

The topping is what truly elevates this focaccia into a Crispy And Cheesy Garlic Parmesan Focaccia Bread Youll Love. It’s an explosion of savory, pungent, and rich flavors that will make your taste buds sing!

  1. Prepare the Garlic Parmesan Butter:

    While your focaccia is undergoing its second rise, prepare the glorious garlic Parmesan butter. In a small saucepan, melt the 8 tablespoons of unsalted butter over medium-low heat. Add the minced garlic and cook gently for 2-3 minutes, stirring frequently, until the garlic is fragrant and slightly softened, but not browned. We want to infuse the butter with that wonderful garlic aroma without burning it, which would make it bitter.

  2. Finish the Topping Mixture:

    Remove the saucepan from the heat. Stir in the ½ cup of freshly grated Parmesan cheese, the finely chopped fresh parsley, the optional red pepper flakes, and the black pepper. Mix everything until well combined. The residual heat from the butter will help melt the Parmesan slightly, creating a rich, spreadable mixture. Set this aside; we’ll apply it right before baking.

Baking Your Crispy And Cheesy Garlic Parmesan Focaccia Bread

The moment of truth! Baking is quick and hot, designed to create that perfect golden-brown crust and a tender, airy interior. Get ready for your kitchen to smell absolutely divine!

  1. Preheat the Oven:

    About 20 minutes before you’re ready to bake, preheat your oven to a blazing 425°F (220°C). If you have a baking stone or steel, place it in the oven during preheating to help create an even crispier bottom crust, though it’s not strictly necessary. A hot oven is key for that initial burst of oven spring and a beautifully golden exterior.

  2. Apply the Topping:

    Once your focaccia has fully proofed in the pan and the oven is preheated, it’s time for the crowning glory. Generously brush or spoon the prepared garlic Parmesan butter mixture evenly over the entire surface of the focaccia dough. Make sure to get some of that deliciousness down into all the dimples you created earlier. The more butter and garlic in those nooks and crannies, the more flavorful your final bread will be! Sprinkle with an additional generous pinch of flaky sea salt and a little more grated Parmesan cheese for extra visual appeal and flavor.

  3. Bake the Focaccia:

    Carefully transfer the baking pan to the preheated oven. Bake for 20-25 minutes. The baking time can vary slightly depending on your oven. Look for a focaccia that is deeply golden brown on top, with visibly crispy edges, and a firm but springy center. If it’s browning too quickly, you can loosely tent it with foil for the last few minutes. The bottom should also be golden and crispy – lift a corner to check.

  4. Cooling:

    Once baked to perfection, remove the focaccia from the oven. Immediately and carefully transfer the hot focaccia out of the baking pan and onto a wire rack. This is crucial for allowing air to circulate around the bottom, preventing it from becoming soggy and ensuring that coveted crispy crust remains intact. If you leave it in the hot pan, condensation will form, and you’ll lose that crispiness. Let it cool on the wire rack for at least 15-20 minutes before slicing. This allows the internal structure to set and the flavors to fully meld.

The Grand Finale: Enjoying Your Crispy And Cheesy Garlic Parmesan Focaccia Bread

You’ve done it! Your kitchen is filled with an intoxicating aroma, and a masterpiece of bread lies before you. Now for the best part!

  1. Final Drizzle and Serve:

    Before serving, for an extra touch of richness and flavor, drizzle a little more high-quality extra virgin olive oil over the warm focaccia. Slice into squares or rectangles and serve immediately. This Crispy And Cheesy Garlic Parmesan Focaccia Bread Youll Love is fantastic on its own, perfect for dipping into marinara or your favorite soup, or as a side to any Italian meal. The contrast between the crispy exterior, the fluffy, airy interior, and the bursting garlic Parmesan flavor is truly irresistible.

  2. Storage (if there are leftovers!):

    While focaccia is best enjoyed fresh from the oven, if you happen to have any leftovers, store them at room temperature in an airtight container for up to 2 days. To refresh, simply pop a slice into a toaster oven or conventional oven at 350°F (175°C) for a few minutes until warmed through and re-crisped.

Crispy, Cheesy Garlic Parmesan Focaccia Bread You'll Love

Conclusion:

So, we’ve journeyed through the delightful process of creating something truly extraordinary in your own kitchen. I genuinely believe that if you try this recipe, you will discover the magic of homemade bread in a way that feels both achievable and incredibly rewarding. This isn’t just any focaccia; it’s an experience, a symphony of textures and flavors designed to impress and satisfy. From the moment the aroma of baking garlic and Parmesan fills your home, you’ll know you’re in for a treat. The golden, dimpled surface promises a crisp exterior, giving way to an unbelievably soft and airy crumb that’s generously infused with savory goodness. It’s truly a standout, offering that perfect balance of crunch, chew, and melt-in-your-mouth delight.

What makes this particular recipe an absolute must-try, in my humble opinion, is its irresistible combination of simplicity and gourmet appeal. You don’t need to be a seasoned baker to achieve spectacular results. The dough comes together beautifully, and the baking process is straightforward, leading to a consistently perfect loaf every single time. Imagine pulling this magnificent creation from your oven: the sight of the bubbling, golden-brown cheese, the glistening olive oil, and the vibrant flecks of herbs and garlic is truly a feast for the eyes. But the real magic happens when you take that first bite. The savory depth of roasted garlic, the salty, nutty punch of Parmesan, and the light, airy texture of the focaccia itself create a harmonious explosion of flavor. It’s utterly addictive, profoundly comforting, and surprisingly versatile, making it an ideal candidate for almost any meal or occasion. Trust me, once you experience the sheer joy of this bake, you’ll understand why I’m so excited about it. This is more than just a recipe; it’s an invitation to elevate your culinary game and treat yourself, and your loved ones, to something truly special.

Now, let’s talk about how you can best enjoy this incredible bread. While it’s absolutely phenomenal on its own, perhaps dipped in a little extra virgin olive oil or a balsamic glaze, its versatility truly shines when paired with other dishes. For a simple yet elegant appetizer, slice it into generous wedges and serve alongside a charcuterie board featuring cured meats, artisanal cheeses, and marinated olives. It makes an outstanding accompaniment to a hearty bowl of tomato soup on a chilly evening, soaking up all the delicious broth. It’s also perfect for mopping up sauces from pasta dishes, turning a simple weeknight meal into a gourmet experience. Consider using it to elevate your sandwich game; a slice of this focaccia makes for a truly decadent base for a grilled vegetable sandwich or even a sophisticated chicken pesto creation. And for those who love to entertain, imagine serving freshly baked slices of this focaccia as guests arrive – the aroma alone will set a welcoming and sophisticated tone for your gathering. It pairs beautifully with a crisp white wine, like a Sauvignon Blanc, or a light-bodied red such as a Pinot Noir, enhancing the flavors of both the bread and your chosen beverage. Don’t forget brunch, either! A slice alongside scrambled eggs and a side of fresh fruit offers a delightful start to your day.

Endless Customization: Your Focaccia, Your Way

One of the aspects I adore about this focaccia is how easily it can be adapted to suit your personal tastes or whatever ingredients you have on hand. While the foundational Crispy And Cheesy Garlic Parmesan Focaccia Bread Youll Love is already perfect, feel free to get creative with toppings! Before baking, you could press some plump cherry tomatoes into the dough for a burst of juicy sweetness, or scatter some pitted Kalamata olives for a briny, Mediterranean twist. Fresh rosemary sprigs are a classic addition that adds an aromatic, woodsy note, while a sprinkle of red pepper flakes can introduce a subtle warmth for those who enjoy a hint of spice. You might also experiment with different cheeses; a blend of mozzarella and provolone could offer a gooey, stretchier texture, or a sharp cheddar could add a different dimension of cheesy flavor. Caramelized onions are another fantastic topping, bringing a deep, sweet savoriness that complements the garlic and Parmesan beautifully. Don’t be afraid to make this recipe truly your own; that’s where the real fun of home baking lies. You could even drizzle a touch of honey over the focaccia after it comes out of the oven for a surprising sweet and savory combination that is absolutely divine, especially if you’re serving it with a cheese course. The possibilities are genuinely endless, limited only by your imagination and the contents of your pantry.

So, my friends, I truly hope you’re feeling inspired to roll up your sleeves and give this incredible recipe a try. There’s an immense sense of satisfaction that comes from creating something so delicious from scratch, and I promise you, the effort is minimal compared to the incredible reward. This focaccia is more than just bread; it’s a centerpiece, a conversation starter, and a true testament to the simple joys of homemade food. When you do bake it, I would absolutely love to hear about your experience! Did you stick to the original recipe, or did you venture into some exciting variations? How did your family and friends react to this delightful creation? Please, share your stories, your photos, and any brilliant tweaks you discovered along the way. Your feedback truly inspires me and the entire community. Don’t just read about it; bake it, savor it, and share the joy! Happy baking, and I can’t wait to see what deliciousness you bring to life in your kitchen.


Crispy And Cheesy Garlic Parmesan Focaccia Bread

Experience the ultimate focaccia: a gloriously golden, crisp crust gives way to a soft, airy interior, studded with melted Parmesan and infused with rich garlic flavor. This homemade bread is surprisingly approachable and utterly addictive.

Prep Time
45 Minutes
Cook Time
25 Minutes
Total Time
20 Minutes
Servings
1 (9×13 inch) focaccia

Ingredients


Instructions


Important Information

Nutrition Facts (Per Serving)

It is important to consider this information as approximate and not to use it as definitive health advice.

Allergy Information

Please check ingredients for potential allergens and consult a health professional if in doubt.

« Previous Post
Delicious Apple Goat Cheese Croissant Sandwich Recipe
Next Post »
Delicious No-Bake White Chocolate Rice Krispie Balls

If you enjoyed this…

Best Spicy Sriracha Homemade Mayo – Flavor Explosion!

Pineapple Cowboy Candy: A Sweet & Spicy Homemade Recipe

Cheesy Buffalo Ranch Chicken Bombs: Easy & Delicious Recipe

Primary Sidebar

Browse by Diet

BreakfastDinnerLunchDessertAppetizer

Sweet Peach Yogurt Parfait Delight

One of my fondest memories is from a lazy summer afternoon spent at my grandmother’s house. The sun filtered through the kitchen window, casting a warm glow over the table where she would create her culinary magic. It was during one of those blissful moments that I first tasted her Peach Yogurt Parfait with Honey and Granola. The sweet aroma of ripe peaches mingling with creamy yogurt and the crunch of granola was nothing short of heavenly. It felt like summer captured in a bowl, and I still remember the joy of diving in with a spoon, each layer revealing a new burst of flavor.

When I think about that parfait, I can almost hear the gentle hum of the bees outside, reminding me of the floral notes that honey brings to every bite. The vibrant yellows and soft oranges of the peaches contrast beautifully with the creamy white yogurt and the golden crunch of granola. It’s a dish that not only looks delightful but also tastes like a celebration of fresh, wholesome ingredients.

What makes my version of this Peach Yogurt Parfait special is the careful balance of flavors and textures. I use ripe, juicy peaches, drizzled with locally sourced honey, and a homemade granola that’s bursting with nuts and seeds for an extra crunch. It’s a simple dish, but every layer is crafted with love and attention.

Let me show you exactly how to make this delightful parfait, so you can bring a bit of that summer magic into your kitchen!

Sweet Peach Yogurt Parfait Delight

Why You’ll Love This Recipe

  • Delightfully creamy texture from the Greek yogurt, paired with the juicy sweetness of fresh peaches.
  • Ready in under 20 minutes, making it a quick and satisfying breakfast or snack option.
  • Budget-friendly, using common ingredients that you may already have in your pantry.
  • Customizable with your favorite granola and nuts, allowing you to tailor each parfait to your taste.
  • Perfectly balanced flavors with the bright acidity of lemon juice and the sweetness of honey enhancing the peaches.

Ingredients

  • For the Parfait:
  • 2 cups plain Greek yogurt (or vanilla yogurt for a sweeter option)
  • 2 large ripe peaches, diced (about 2 cups)
  • 1 tablespoon fresh lemon juice (to prevent browning of peaches)
  • 2 tablespoons honey (plus more for drizzling)
  • 1 teaspoon vanilla extract (optional for extra flavor)
  • For the Granola:
  • 1 cup granola (store-bought or homemade; see notes for a simple granola recipe)
  • 1/4 cup sliced almonds (optional for added crunch)
  • 1/4 cup shredded coconut (optional for added flavor)

Let’s dive into some key ingredients that make this Peach Yogurt Parfait so delightful! First, the Greek yogurt is not only creamy but also packed with protein, making it a satisfying option for breakfast or a snack. If you’re looking for a sweeter option, you can easily substitute it with vanilla yogurt, though it may alter the overall flavor balance. Next, the ripe peaches are the star of the show; their natural sweetness shines through, so I recommend choosing peaches that yield slightly to pressure, indicating they’re perfectly ripe. If peaches aren’t in season, feel free to use nectarines or even frozen peaches—just thaw them before use. Finally, honey adds a lovely floral sweetness that ties everything together. If you prefer, maple syrup can serve as a delicious substitute.

Step-by-Step Instructions

  1. Start by preparing the peaches. Wash them thoroughly, then slice and dice them into bite-sized pieces. In a medium bowl, toss the diced peaches with 1 tablespoon of fresh lemon juice to prevent browning. Set aside for about 5 minutes while the lemon juice works its magic.
  2. In a separate bowl, combine the Greek yogurt, 2 tablespoons of honey, and 1 teaspoon of vanilla extract if using. Stir the mixture until smooth and thoroughly blended. This should take about a minute. Avoid overmixing to maintain the creaminess of the yogurt.
  3. Now it’s time to layer your parfait. Grab a clear glass or bowl to showcase your beautiful creation. Start with a generous spoonful of the yogurt mixture at the bottom—about 1/4 cup will do. Use a spoon to spread it evenly.
  4. Add a layer of the diced peaches over the yogurt, ensuring they cover the yogurt completely. You might want to use about half of what you have prepared—roughly 1 cup. This layer should be visually appealing, so arrange the peaches neatly.
  5. Sprinkle 1/4 cup of granola over the peaches. This adds a delightful crunch. Make sure to distribute it evenly to ensure every bite has that satisfying texture. Avoid packing it down too tightly, as you want it to maintain its crunch.
  6. Repeat the layers: spoon in another 1/4 cup of yogurt, followed by another cup of peaches, and another sprinkle of granola. You should have at least two layers, but feel free to add more depending on your glass size.
  7. Finish off your parfait with a drizzle of honey on top for added sweetness and a touch of elegance. If you’re using sliced almonds or shredded coconut, sprinkle them on top now. It adds a lovely visual contrast and extra flavor.
  8. Serve immediately or refrigerate for up to 30 minutes before serving to allow the flavors to meld together. However, I recommend enjoying it fresh to maintain the granola’s crunch.

Pro Tips for the Best Peach Yogurt Parfait With Honey And Granola

  • Make sure to choose ripe peaches for the best flavor and texture. A common mistake is using unripe fruit, which can lead to a less enjoyable parfait. Look for peaches that are fragrant and slightly soft to the touch.
  • Use a clear glass to assemble your parfait; this not only makes for a beautiful presentation but also allows you to see the colorful layers, which adds to the enjoyment of eating it.
  • For an even creamier texture, consider whipping the Greek yogurt with a hand mixer for a couple of minutes before layering. This small adjustment makes a huge difference in mouthfeel.
  • Be mindful of the granola-to-yogurt ratio. Too much granola can overwhelm the parfait, while too little can make it feel too creamy. Aim for about 1/4 cup of granola per layer for the perfect balance.
  • If you’re making this for a gathering, consider preparing the yogurt and peaches ahead of time and layering them just before serving. This ensures the granola stays crunchy!

Variations & Serving Ideas

There are so many ways to get creative with your Peach Yogurt Parfait! For a tropical twist, swap out the peaches for mangoes or pineapples and top with coconut flakes. If you prefer a berry flavor, mix in some blueberries or strawberries with the peaches for added color and taste. For a nutty version, incorporate chopped walnuts or pecans instead of almonds.

As for serving ideas, this parfait pairs beautifully with a side of scrambled eggs for a hearty breakfast or fresh fruit salad for a light lunch. You might also enjoy it alongside whole grain toast with almond butter for an energizing snack. The contrast of flavors and textures will elevate your meal experience!

Storage, Make-Ahead & Reheating

The Peach Yogurt Parfait is best enjoyed fresh, but you can prepare some components ahead of time. Store the layered parfait in an airtight container in the refrigerator for up to 24 hours. However, be cautious; the granola may lose its crunch if stored too long. You can freeze the yogurt and peach mixture for up to 2 months; just remember to thaw it in the refrigerator overnight before serving.

If you plan to enjoy this dish the next day, it can taste even better as the flavors meld together. Just remember to add the granola right before serving to keep its delightful crunch!

Frequently Asked Questions

Can I make Peach Yogurt Parfait With Honey And Granola ahead of time?

Yes — in fact, it tastes even better the next day as the flavors meld. However, I recommend waiting to add the granola until just before serving to maintain its crunch.

What can I substitute for Greek yogurt?

If you prefer a lighter option, you can substitute Greek yogurt with regular yogurt or a dairy-free alternative like coconut yogurt. Just remember that this may alter the creaminess and flavor profile slightly.

Can I use frozen peaches for this parfait?

Absolutely! Just make sure to thaw the frozen peaches before using them. They will still add great flavor, though the texture may be slightly softer than fresh peaches.

How do I make the parfait vegan?

To make a vegan version, substitute the Greek yogurt with a plant-based yogurt alternative, and replace honey with maple syrup or agave nectar. This keeps the parfait sweet while adhering to a vegan diet.

What other fruits can I use in this recipe?

You can mix and match fruits based on your preference. Try using strawberries, blueberries, raspberries, or even bananas. Just make sure to adjust the lemon juice as needed to prevent browning.

Sweet Peach Yogurt Parfait Delight

Final Thoughts

The Peach Yogurt Parfait with Honey and Granola is a delightful blend of creamy yogurt, sweet peaches, and crunchy granola that creates a satisfying and nourishing treat. Each layer bursts with flavor, making it a perfect choice for breakfast or a light dessert.

This is the kind of recipe I come back to again and again, especially when I want something refreshing and wholesome to start my day. The harmony of sweet and tart flavors, combined with the delightful crunch, never fails to lift my spirits!

I encourage you to give this parfait a try and indulge in its comforting goodness. Feel free to share your results or even add your own twist—perhaps a sprinkle of cinnamon or a handful of nuts. Enjoy creating your perfect parfait!

Print
clock clock iconcutlery cutlery iconflag flag iconfolder folder iconinstagram instagram iconpinterest pinterest iconfacebook facebook iconprint print iconsquares squares iconheart heart iconheart solid heart solid icon

Peach Yogurt Parfait


  • Author: Lily author
  • Total Time: 15 minutes
  • Yield: 4 servings 1x
Pin Recipe
Print Recipe

Description

This Peach Yogurt Parfait combines creamy Greek yogurt, juicy peaches, and crunchy granola for a delightful treat. It’s a perfect breakfast or snack that captures the essence of summer in every bite.


Ingredients

Scale
  • For the Parfait:
  • 2 cups plain Greek yogurt (or vanilla yogurt for a sweeter option)
  • 2 large ripe peaches, diced (about 2 cups)
  • 1 tablespoon fresh lemon juice (to prevent browning of peaches)
  • 2 tablespoons honey (plus more for drizzling)
  • 1 teaspoon vanilla extract (optional for extra flavor)
  • For the Granola:
  • 1 cup granola (store-bought or homemade; see notes for a simple granola recipe)
  • 1/4 cup sliced almonds (optional for added crunch)
  • 1/4 cup shredded coconut (optional for added flavor)

Instructions

  1. Start by preparing the peaches. Wash them thoroughly, then slice and dice them into bite-sized pieces. In a medium bowl, toss the diced peaches with 1 tablespoon of fresh lemon juice to prevent browning. Set aside for about 5 minutes while the lemon juice works its magic.
  2. In a separate bowl, combine the Greek yogurt, 2 tablespoons of honey, and 1 teaspoon of vanilla extract if using. Stir the mixture until smooth and thoroughly blended. This should take about a minute. Avoid overmixing to maintain the creaminess of the yogurt.
  3. Now it’s time to layer your parfait. Grab a clear glass or bowl to showcase your beautiful creation. Start with a generous spoonful of the yogurt mixture at the bottom—about 1/4 cup will do. Use a spoon to spread it evenly.
  4. Add a layer of the diced peaches over the yogurt, ensuring they cover the yogurt completely. You might want to use about half of what you have prepared—roughly 1 cup. This layer should be visually appealing, so arrange the peaches neatly.
  5. Sprinkle 1/4 cup of granola over the peaches. This adds a delightful crunch. Make sure to distribute it evenly to ensure every bite has that satisfying texture. Avoid packing it down too tightly, as you want it to maintain its crunch.
  6. Repeat the layers: spoon in another 1/4 cup of yogurt, followed by another cup of peaches, and another sprinkle of granola. You should have at least two layers, but feel free to add more depending on your glass size.
  7. Finish off your parfait with a drizzle of honey on top for added sweetness and a touch of elegance. If you’re using sliced almonds or shredded coconut, sprinkle them on top now. It adds a lovely visual contrast and extra flavor.
  8. Serve immediately or refrigerate for up to 30 minutes before serving to allow the flavors to meld together. However, I recommend enjoying it fresh to maintain the granola’s crunch.
  • Prep Time: 15 mins
  • Cook Time: 0 mins
  • Category: Breakfast
  • Method: No-cook
  • Cuisine: American

Nutrition

  • Serving Size: 1 parfait
  • Calories: 250
  • Sugar: 20 g
  • Sodium: 50 mg
  • Fat: 5 g
  • Saturated Fat: 2 g
  • Unsaturated Fat: 3 g
  • Trans Fat: 0 g
  • Carbohydrates: 40 g
  • Fiber: 3 g
  • Protein: 10 g
  • Cholesterol: 10 mg

Keywords: Choose ripe peaches for the best flavor and texture. Use a clear glass for a beautiful presentation. For creaminess, consider whipping the yogurt before layering. Be mindful of the granola-to-yogurt ratio. Prepare yogurt and peaches ahead of time for gatherings, layering just before serving.

Did you make this recipe?

Share a photo and tag us — we can't wait to see what you've made!

Sun-Kissed Frozen Orange Cream Slush

As a child, summer days felt like they lasted forever. I remember the sticky heat wrapping around me as I played outside, my laughter mingling with the sounds of the neighborhood. But nothing could cool me down quite like the moment I’d spot my grandmother, laboring over her blender, whipping up her famous Frozen Orange Creamsicle Slush. That vibrant orange treat, with its frosty texture and sweet citrus aroma, was like a burst of sunshine in a cup. Just one sip, and I could feel the coolness wash over me, sparking pure joy.

This Frozen Orange Creamsicle Slush has a way of making you feel like a kid again. Its creamy, dreamy consistency is a delightful balance of bright orange and soft vanilla, inviting you to dive right in. The refreshing tang of orange dances on your tongue, while the smooth creaminess envelops you in a comforting embrace. It’s a nostalgic treat that’s perfect for hot summer afternoons or anytime you need a little pick-me-up.

What makes my version of this slush stand out is the addition of a hint of vanilla bean, which elevates the flavor and adds an extra layer of richness. Plus, it’s super easy to whip up with just a few simple ingredients that you probably already have on hand! So, if you’re ready to relive those sun-soaked memories, let me show you exactly how to make it.

Sun-Kissed Frozen Orange Cream Slush

Why You’ll Love This Recipe

  • Each slush is a perfect blend of creamy vanilla and zesty orange, creating a nostalgic flavor reminiscent of summer days.
  • This refreshing treat is ready in under 15 minutes, making it an ideal quick dessert for unexpected guests or hot afternoons.
  • With just 8 simple ingredients, it’s budget-friendly, ensuring you don’t have to break the bank to enjoy a delicious slush.
  • The slush has a perfectly smooth texture, thanks to the combination of ice and ice cream, providing a delightful contrast to the bright citrus flavors.
  • It’s highly customizable; you can easily adjust the sweetness and add fresh herbs for a unique twist that suits your taste.

Ingredients

  • 2 cups orange juice (freshly squeezed or store-bought)
  • 1 cup vanilla ice cream
  • 1 cup crushed ice
  • 1/2 cup milk (whole or 2%)
  • 1/4 cup granulated sugar (adjust based on sweetness preference)
  • 1 teaspoon vanilla extract
  • Zest of 1 orange (for added flavor)
  • Fresh orange slices and mint leaves (for garnish)

The star of this Frozen Orange Creamsicle Slush is the orange juice, which provides the vibrant, citrusy base. Freshly squeezed juice will yield the brightest flavor, but store-bought options can be just as convenient. If you’re opting for store-bought, choose 100% pure juice with no added sugars for the best results. Another essential ingredient is the vanilla ice cream; it adds creaminess and sweetness. You can substitute it with dairy-free ice cream if you’re looking for a vegan option. Whole or 2% milk complements the ice cream, creating a smooth blend. If you want a lower-calorie version, almond or oat milk can be good alternatives.

Lastly, the granulated sugar can be adjusted based on your sweetness preference. If you prefer a more natural sweetener, consider using honey or agave syrup. The orange zest enhances the flavor profile, providing an aromatic pop that brings the whole slush together. Don’t skip it! It adds an extra layer of brightness that makes this slush truly special.

Step-by-Step Instructions

  1. Start by preparing your ingredients. Gather 2 cups of orange juice, 1 cup of vanilla ice cream, and 1 cup of crushed ice. Make sure the ice is finely crushed, as larger chunks can make blending difficult.
  2. In a blender, combine the orange juice, vanilla ice cream, crushed ice, and 1/2 cup of milk. Add 1/4 cup of granulated sugar and 1 teaspoon of vanilla extract. If you like a sweeter slush, consider adding a bit more sugar at this stage.
  3. Add the zest of 1 orange to the blender. This step is crucial for enhancing the citrus flavor of your slush. Make sure not to include the bitter white pith—only the flavorful zest.
  4. Blend the mixture on medium-high speed for about 30-45 seconds. Stop once the ingredients are fully combined and the slush has a smooth, even consistency. If you notice large chunks of ice, blend for an additional 10-15 seconds. Avoid over-blending, as this can make the slush too liquidy.
  5. Once blended, taste the slush. If it needs more sweetness, add a little more sugar and blend for a few more seconds. If it’s too thick, you can add a splash of milk to reach your desired consistency.
  6. Pour the slush into glasses. This recipe typically serves 4, but you can easily double it for larger gatherings. Use a spoon to help guide the slush into the glasses if needed.
  7. Garnish each serving with fresh orange slices and mint leaves. The mint not only adds a pop of color but also a refreshing aroma that complements the citrus flavors beautifully.
  8. Serve immediately and enjoy! If you’ve made extra, you can refrigerate it for a short time, but it’s best enjoyed fresh.

Pro Tips for the Best Frozen Orange Creamsicle Slush

  • Don’t skip the orange zest! It’s a game-changer for flavor. Always zest before juicing to make it easier.
  • Use a high-powered blender for the best texture. A standard blender may struggle with ice, leading to uneven consistency. If you have a food processor, that can work too, but ensure the ice is finely crushed.
  • Adjust the ice-to-liquid ratio carefully. If your slush is too thick, it won’t blend well. Start with less ice and add more until you reach your preferred texture.
  • Be cautious with the sugar! Always start with the lower amount, as you can easily add more, but it’s hard to fix an overly sweet slush.
  • For a fun twist, consider adding a splash of coconut milk or a handful of fresh fruit like strawberries or pineapple. This not only enhances the flavor but also adds a beautiful color contrast.

Variations & Serving Ideas

There are countless ways to put a spin on your Frozen Orange Creamsicle Slush. Consider making a tropical version by adding in some pineapple juice or coconut milk for a delightful tropical twist. If you’re feeling adventurous, try incorporating a handful of frozen mango or peach slices for added sweetness. For a lighter version, swap out the vanilla ice cream for Greek yogurt for a creamy yet tangy alternative.

As for serving ideas, this refreshing slush pairs wonderfully with light summer dishes like grilled chicken skewers, fish tacos, or a simple salad topped with citrus vinaigrette. The bright, zesty flavors of the slush complement these dishes perfectly, making them an ideal pairing for a sunny day.

Storage, Make-Ahead & Reheating

This Frozen Orange Creamsicle Slush is best enjoyed fresh, but if you have leftovers, you can store them in an airtight container in the fridge for up to 2 days. Just keep in mind that the slush may lose some of its texture over time as the ice melts. It doesn’t freeze well, as the ice will turn into a solid block. If you must freeze it, blend again after thawing to restore the slushy consistency. This treat is best the day you make it, as the flavors meld together beautifully overnight, enhancing its deliciousness.

Frequently Asked Questions

Can I make Frozen Orange Creamsicle Slush ahead of time?

Yes — in fact, it tastes even better the next day as the flavors meld. However, it’s best to enjoy it fresh, as the texture can change if stored for too long. If you need to prepare it ahead, keep it in the fridge and re-blend before serving.

What kind of orange juice should I use?

For the best flavor, use freshly squeezed orange juice. However, if you’re short on time, opt for 100% pure store-bought juice without added sugars. This will ensure that your slush remains flavorful and refreshing.

Can I substitute the vanilla ice cream?

Absolutely! If you’re looking for a dairy-free option, coconut milk ice cream or a non-dairy vanilla ice cream can work wonderfully. They will still provide the creamy texture and sweetness you desire.

How can I adjust the sweetness of my slush?

You can easily adjust the sweetness by modifying the amount of sugar added. Start with 1/4 cup and taste the mixture before blending. If you prefer it sweeter, add more sugar gradually until it reaches your desired level.

What should I do if my slush is too thick?

If your slush is too thick, simply add a splash of milk or orange juice and blend again. This will help achieve a more drinkable consistency while maintaining the slushy texture. Adjust gradually to reach your preferred thickness.

Sun-Kissed Frozen Orange Cream Slush

Final Thoughts

The Frozen Orange Creamsicle Slush is a delightful blend of refreshing citrus and creamy goodness, making it a perfect treat for warm days or any time you crave a taste of nostalgia. The way the bright orange flavor dances with the creamy texture truly elevates this slush, transforming it into a satisfying escape from the everyday.

This is the kind of recipe I come back to again and again, especially when I’m looking to cool down or impress guests at a summer gathering. It’s simple to make and always brings smiles all around! I encourage you to try this recipe for yourself—don’t hesitate to share your results or even put your own spin on it. Happy slushing!

Print
clock clock iconcutlery cutlery iconflag flag iconfolder folder iconinstagram instagram iconpinterest pinterest iconfacebook facebook iconprint print iconsquares squares iconheart heart iconheart solid heart solid icon

Frozen Orange Creamsicle Slush


  • Author: Lily author
  • Total Time: 15 minutes
  • Yield: 4 servings 1x
Pin Recipe
Print Recipe

Description

This Frozen Orange Creamsicle Slush is a refreshing treat that combines creamy vanilla and zesty orange flavors. Perfect for hot summer days, it brings back nostalgic memories with every sip.


Ingredients

Scale
  • 2 cups orange juice (freshly squeezed or store-bought)
  • 1 cup vanilla ice cream
  • 1 cup crushed ice
  • 1/2 cup milk (whole or 2%)
  • 1/4 cup granulated sugar (adjust based on sweetness preference)
  • 1 teaspoon vanilla extract
  • Zest of 1 orange (for added flavor)
  • Fresh orange slices and mint leaves (for garnish)

Instructions

  1. Start by preparing your ingredients. Gather 2 cups of orange juice, 1 cup of vanilla ice cream, and 1 cup of crushed ice. Make sure the ice is finely crushed, as larger chunks can make blending difficult.
  2. In a blender, combine the orange juice, vanilla ice cream, crushed ice, and 1/2 cup of milk. Add 1/4 cup of granulated sugar and 1 teaspoon of vanilla extract. If you like a sweeter slush, consider adding a bit more sugar at this stage.
  3. Add the zest of 1 orange to the blender. This step is crucial for enhancing the citrus flavor of your slush. Make sure not to include the bitter white pith—only the flavorful zest.
  4. Blend the mixture on medium-high speed for about 30-45 seconds. Stop once the ingredients are fully combined and the slush has a smooth, even consistency. If you notice large chunks of ice, blend for an additional 10-15 seconds. Avoid over-blending, as this can make the slush too liquidy.
  5. Once blended, taste the slush. If it needs more sweetness, add a little more sugar and blend for a few more seconds. If it’s too thick, you can add a splash of milk to reach your desired consistency.
  6. Pour the slush into glasses. This recipe typically serves 4, but you can easily double it for larger gatherings. Use a spoon to help guide the slush into the glasses if needed.
  7. Garnish each serving with fresh orange slices and mint leaves. The mint not only adds a pop of color but also a refreshing aroma that complements the citrus flavors beautifully.
  8. Serve immediately and enjoy! If you’ve made extra, you can refrigerate it for a short time, but it's best enjoyed fresh.
  • Prep Time: 15 min
  • Cook Time: 0 min
  • Category: Dessert
  • Method: Blending
  • Cuisine: American

Nutrition

  • Serving Size: 1 serving
  • Calories: 200
  • Sugar: 30 g
  • Sodium: 50 mg
  • Fat: 5 g
  • Saturated Fat: 3 g
  • Unsaturated Fat: 2 g
  • Trans Fat: 0 g
  • Carbohydrates: 40 g
  • Fiber: 1 g
  • Protein: 2 g
  • Cholesterol: 20 mg

Keywords: Don't skip the orange zest! It's a game-changer for flavor. Always zest before juicing to make it easier.

Did you make this recipe?

Share a photo and tag us — we can't wait to see what you've made!

Zesty Lemon Poppy Seed Delight

One rainy afternoon, I found myself in my grandmother’s cozy kitchen, the kind that always smelled like warmth and love. She was whipping up her famous Lemon Poppy Seed Loaf, a recipe that had been passed down through generations. As the batter came together, the zesty aroma of fresh lemons filled the air, mingling perfectly with the nutty fragrance of poppy seeds. I can still picture her, apron-clad, as she expertly drizzled a vibrant citrus icing over the loaf, creating a glossy, sun-kissed finish that beckoned us to dive in. It was a moment that sparked my own passion for baking, and this recipe has become a cherished staple in my home ever since.

When you take a bite of this Lemon Poppy Seed Loaf, it’s like a burst of sunshine on your palate. The loaf is beautifully golden, with a tender crumb that melts in your mouth. Each slice is speckled with tiny poppy seeds, adding a delightful crunch that contrasts beautifully with the tangy sweetness of the lemon. And that citrus icing? It’s the finishing touch that elevates this loaf from ordinary to extraordinary, with its bright, zesty flavor dancing on your taste buds.

This recipe stands out because it embraces simplicity while delivering on flavor. I’ve added a hint of vanilla to the batter, enhancing the overall taste and making it even more indulgent. Trust me, once you make this Lemon Poppy Seed Loaf With Citrus Icing, it’ll become a go-to in your baking repertoire.

So, let me show you exactly how to make it!

Zesty Lemon Poppy Seed Delight

Why You’ll Love This Recipe

  • Moist and tender crumb that melts in your mouth, thanks to the perfect balance of butter and buttermilk.
  • Bright, zesty lemon flavor paired with crunchy poppy seeds, creating a delightful texture and taste experience.
  • Easy to whip up in just about an hour, perfect for last-minute gatherings or a cozy afternoon treat.
  • Budget-friendly with everyday ingredients, making it an accessible option for all home bakers.
  • The citrus icing adds a sweet tang that elevates the loaf, turning a simple recipe into a showstopper!

Ingredients

  • 1 ½ cups (190g) all-purpose flour
  • 1 teaspoon baking powder
  • ½ teaspoon baking soda
  • ½ teaspoon salt
  • 3 tablespoons poppy seeds
  • ½ cup (115g) unsalted butter, softened to room temperature
  • 1 cup (200g) granulated sugar
  • 2 large eggs
  • 1 teaspoon vanilla extract
  • 1 teaspoon lemon zest (from about 1 medium lemon)
  • ½ cup (120ml) buttermilk
  • 2 tablespoons fresh lemon juice

For the Citrus Icing:

  • 1 cup (120g) powdered sugar
  • 2 tablespoons fresh lemon juice
  • 1 tablespoon orange juice
  • 1 teaspoon lemon zest (for garnish, optional)

Let’s dive into the key ingredients that make this Lemon Poppy Seed Loaf so special. The all-purpose flour provides the structure and base for the loaf, while the baking powder and baking soda ensure it rises perfectly, giving the loaf a light texture. For a gluten-free variation, you could substitute the flour with a gluten-free all-purpose blend. Poppy seeds not only add a delightful crunch but also contribute to the unique flavor profile that pairs well with the citrus notes.

Unsalted butter is crucial for achieving the buttery richness that makes this loaf so moist. If you’re looking for a dairy-free option, coconut oil or a vegan butter can be used instead. The buttermilk is another essential component, providing acidity that activates the baking soda for a fluffy texture. If you don’t have buttermilk on hand, you can easily make a substitute by mixing ½ cup of milk with 1 tablespoon of vinegar or lemon juice and letting it sit for about 5 minutes.

Step-by-Step Instructions

  1. Preheat your oven to 350°F (175°C). Grease a 9×5-inch loaf pan or line it with parchment paper for easy removal later.
  2. In a medium mixing bowl, whisk together 1 ½ cups of all-purpose flour, 1 teaspoon of baking powder, ½ teaspoon of baking soda, ½ teaspoon of salt, and 3 tablespoons of poppy seeds. This helps to evenly distribute the baking agents and ensures a uniform rise.
  3. In a large mixing bowl, cream together ½ cup of softened unsalted butter and 1 cup of granulated sugar using an electric mixer on medium speed for about 3-4 minutes, until the mixture is light and fluffy. Make sure to scrape down the sides of the bowl occasionally.
  4. Add 2 large eggs, 1 teaspoon of vanilla extract, and 1 teaspoon of lemon zest to the creamed butter and sugar, mixing until fully combined. You want a smooth consistency, so ensure there are no lumps of butter.
  5. In a small bowl, combine ½ cup of buttermilk and 2 tablespoons of fresh lemon juice. Alternately add the dry ingredients and buttermilk mixture to the butter mixture, starting and ending with the dry ingredients. Mix just until combined; do not overmix, as this can lead to a dense loaf.
  6. Pour the batter into the prepared loaf pan. Smooth the top with a spatula, ensuring it’s even. Bake in the preheated oven for 50-60 minutes, or until a toothpick inserted in the center comes out clean. The edges should be lightly golden brown, and the center should feel just set.
  7. Once baked, remove the loaf from the oven and allow it to cool in the pan for about 10 minutes. Then, transfer it to a wire rack to cool completely. Resist the urge to slice too soon, as it will be crumbly if it’s still warm.
  8. While the loaf is cooling, prepare the citrus icing. In a medium bowl, whisk together 1 cup of powdered sugar, 2 tablespoons of fresh lemon juice, and 1 tablespoon of orange juice until smooth. If the icing is too thick, you can add a little more juice to reach your desired consistency.
  9. Once the loaf is completely cool, drizzle the citrus icing over the top. If you like, sprinkle with an additional teaspoon of lemon zest for an extra pop of flavor and color.

Pro Tips for the Best Lemon Poppy Seed Loaf With Citrus Icing

  • Be careful not to overmix your batter; this is a common mistake that can lead to a dense loaf. Mix just until the dry ingredients are incorporated for a light and fluffy texture.
  • Use room temperature ingredients, especially the butter and eggs. This helps to create a smoother batter and ensures even baking. Take your eggs out of the fridge about 30 minutes before you start.
  • For a more pronounced lemon flavor, consider adding a little lemon extract in addition to the zest and juice. Just a half teaspoon can elevate the citrus notes significantly.
  • When measuring your flour, spoon it into the measuring cup and level it off with a knife instead of scooping directly from the bag. This prevents packing and ensures you don’t end up with a dry loaf.
  • Invest in a good quality loaf pan; it makes a difference in heat distribution, which ensures even baking. If your pan is dark-coated, reduce the oven temperature by 25°F to prevent over-browning.

Variations & Serving Ideas

For a delightful twist, consider adding blueberries or raspberries to the batter for a fruity burst of flavor. You can also experiment with different citrus fruits—try lime or grapefruit zest and juice for a refreshing change. For a healthier option, substitute half of the all-purpose flour with whole wheat flour for added fiber without compromising too much on texture.

This Lemon Poppy Seed Loaf pairs beautifully with a light salad, such as a mixed greens salad with a vinaigrette, or a cup of tea for a cozy afternoon treat. It also complements a creamy cheese platter, as the acidity of the loaf balances rich cheeses perfectly. Lastly, a scoop of vanilla ice cream on the side creates a delightful contrast of temperatures and flavors!

Storage, Make-Ahead & Reheating

This Lemon Poppy Seed Loaf can be stored at room temperature for up to 3 days if wrapped tightly in plastic wrap. If you want to keep it longer, it freezes well for up to 3 months. To freeze, wrap the loaf tightly in plastic wrap and then in aluminum foil to prevent freezer burn.

When you’re ready to enjoy it again, simply thaw it in the fridge overnight. Reheat individual slices in the microwave for 15-20 seconds or in a toaster oven until warmed through. Interestingly, many people find that this loaf tastes even better the next day, as the flavors have time to meld!

Frequently Asked Questions

Can I make Lemon Poppy Seed Loaf With Citrus Icing ahead of time?

Yes — in fact, it tastes even better the next day! You can make the loaf a day in advance, allowing the flavors to develop. Just be sure to store it in an airtight container to maintain its moisture.

Can I substitute the poppy seeds?

Absolutely! If you don’t have poppy seeds on hand or prefer an alternative, you can use sesame seeds for a similar crunch or omit them entirely for a smooth loaf.

What can I use instead of buttermilk?

If you don’t have buttermilk, you can easily create a substitute by mixing ½ cup of milk (dairy or plant-based) with 1 tablespoon of vinegar or lemon juice. Let it sit for 5 minutes before using in the recipe.

How can I make this recipe gluten-free?

To make a gluten-free version of this Lemon Poppy Seed Loaf, substitute the all-purpose flour with a gluten-free all-purpose flour blend. Just ensure that the blend contains a binding agent like xanthan gum for the best results.

What is the best way to store leftover loaf?

Leftover Lemon Poppy Seed Loaf should be stored in an airtight container at room temperature for up to 3 days. For longer storage, wrap it tightly and freeze for up to 3 months. Thaw it before serving for the best texture.

Zesty Lemon Poppy Seed Delight

Final Thoughts

The Lemon Poppy Seed Loaf with Citrus Icing is truly a delightful treat that brings a burst of brightness to any occasion. The zesty lemon flavor combined with the subtle crunch of poppy seeds creates a satisfying balance, while the citrus icing adds a touch of sweetness that perfectly complements the loaf’s tanginess.

This is the kind of recipe I come back to again and again, especially when I want to brighten up a gloomy day or celebrate a small victory. The aroma that fills the kitchen as it bakes is absolutely heavenly! I encourage you to give this recipe a try; you might just find it becoming a beloved staple in your home. Don’t forget to share your results or even add your own unique twist—I can’t wait to see what you create!

Print
clock clock iconcutlery cutlery iconflag flag iconfolder folder iconinstagram instagram iconpinterest pinterest iconfacebook facebook iconprint print iconsquares squares iconheart heart iconheart solid heart solid icon

Lemon Poppy Seed Loaf


  • Author: Lily author
  • Total Time: 25 minute
  • Yield: 1 loaf 1x
Pin Recipe
Print Recipe

Description

This Lemon Poppy Seed Loaf is a delightful treat that combines zesty lemon flavor with crunchy poppy seeds. Topped with a citrus icing, it’s perfect for any occasion.


Ingredients

Scale
  • 1 ½ cups (190g) all-purpose flour
  • 1 teaspoon baking powder
  • ½ teaspoon baking soda
  • ½ teaspoon salt
  • 3 tablespoons poppy seeds
  • ½ cup (115g) unsalted butter, softened to room temperature
  • 1 cup (200g) granulated sugar
  • 2 large eggs
  • 1 teaspoon vanilla extract
  • 1 teaspoon lemon zest (from about 1 medium lemon)
  • ½ cup (120ml) buttermilk
  • 2 tablespoons fresh lemon juice
  • 1 cup (120g) powdered sugar
  • 2 tablespoons fresh lemon juice
  • 1 tablespoon orange juice
  • 1 teaspoon lemon zest (for garnish, optional)

Instructions

  1. Preheat your oven to 350°F (175°C). Grease a 9×5-inch loaf pan or line it with parchment paper for easy removal later.
  2. In a medium mixing bowl, whisk together 1 ½ cups of all-purpose flour, 1 teaspoon of baking powder, ½ teaspoon of baking soda, ½ teaspoon of salt, and 3 tablespoons of poppy seeds. This helps to evenly distribute the baking agents and ensures a uniform rise.
  3. In a large mixing bowl, cream together ½ cup of softened unsalted butter and 1 cup of granulated sugar using an electric mixer on medium speed for about 3-4 minutes, until the mixture is light and fluffy. Make sure to scrape down the sides of the bowl occasionally.
  4. Add 2 large eggs, 1 teaspoon of vanilla extract, and 1 teaspoon of lemon zest to the creamed butter and sugar, mixing until fully combined. You want a smooth consistency, so ensure there are no lumps of butter.
  5. In a small bowl, combine ½ cup of buttermilk and 2 tablespoons of fresh lemon juice. Alternately add the dry ingredients and buttermilk mixture to the butter mixture, starting and ending with the dry ingredients. Mix just until combined; do not overmix, as this can lead to a dense loaf.
  6. Pour the batter into the prepared loaf pan. Smooth the top with a spatula, ensuring it’s even. Bake in the preheated oven for 50-60 minutes, or until a toothpick inserted in the center comes out clean. The edges should be lightly golden brown, and the center should feel just set.
  7. Once baked, remove the loaf from the oven and allow it to cool in the pan for about 10 minutes. Then, transfer it to a wire rack to cool completely. Resist the urge to slice too soon, as it will be crumbly if it’s still warm.
  8. While the loaf is cooling, prepare the citrus icing. In a medium bowl, whisk together 1 cup of powdered sugar, 2 tablespoons of fresh lemon juice, and 1 tablespoon of orange juice until smooth. If the icing is too thick, you can add a little more juice to reach your desired consistency.
  9. Once the loaf is completely cool, drizzle the citrus icing over the top. If you like, sprinkle with an additional teaspoon of lemon zest for an extra pop of flavor and color.
  • Prep Time: 15 mins
  • Cook Time: 50-60 mins
  • Category: Dessert
  • Method: Baking
  • Cuisine: American

Nutrition

  • Serving Size: 1 slice
  • Calories: 200
  • Sugar: 15 g
  • Sodium: 150 mg
  • Fat: 8 g
  • Saturated Fat: 5 g
  • Unsaturated Fat: 3 g
  • Trans Fat: 0 g
  • Carbohydrates: 30 g
  • Fiber: 1 g
  • Protein: 3 g
  • Cholesterol: 40 mg

Keywords: Be careful not to overmix your batter; this is a common mistake that can lead to a dense loaf. Use room temperature ingredients for a smoother batter and even baking.

Did you make this recipe?

Share a photo and tag us — we can't wait to see what you've made!

  • Privacy Policy
  • Terms Of Service
  • Contact
  • About
  • GDPR

Copyright © 2025 Homesmad