• Skip to primary navigation
  • Skip to main content
  • Skip to primary sidebar
Homesmad

Homesmad

  • Home
  • Breakfast & Brunch
  • Appetizers & Snacks
  • Dinner
  • Dessert
  • About
  • Privacy Policy
  • Contact
Homesmad
  • Home
  • Breakfast & Brunch
  • Appetizers & Snacks
  • Dinner
  • Dessert
  • About
  • Privacy Policy
  • Contact

Turkey Cranberry Sliders: Easy Holiday Appetizer Recipe!

December 2, 2025 by Lily author

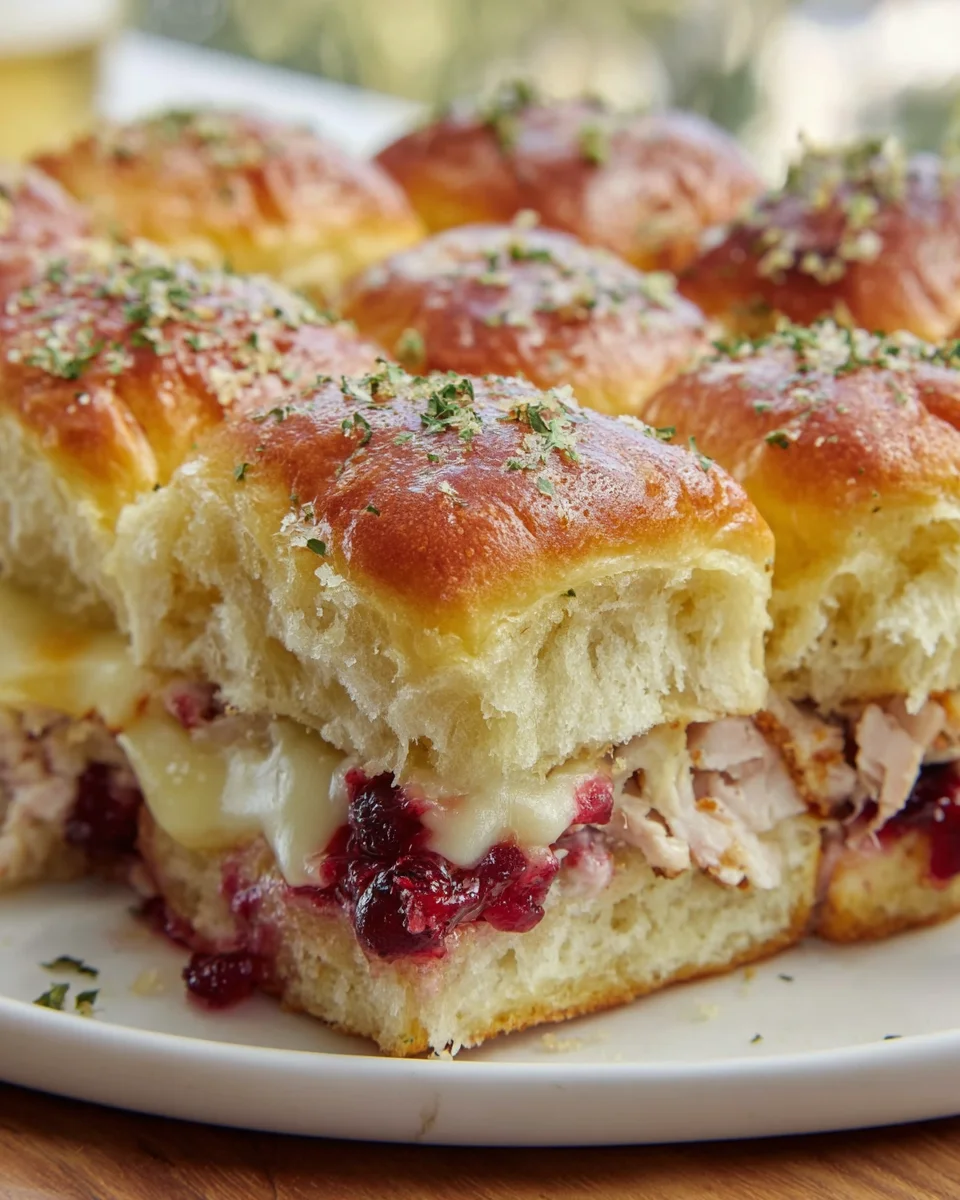
Turkey Cranberry Sliders are more than just a dish; they’re a delightful symphony of seasonal flavors packed into a convenient, irresistible bite. Imagine the festive cheer of Thanksgiving or Christmas, perfectly encapsulated in a warm, savory-sweet morsel that will undoubtedly become the star of your next gathering. I’m absolutely thrilled to share with you a recipe that transforms humble ingredients into a spectacular crowd-pleaser, guaranteed to bring smiles all around.

This incredible combination isn’t entirely new; the pairing of succulent turkey with tart cranberry has long been a hallmark of holiday feasts and celebratory meals, a tradition passed down through generations. These sliders take that beloved duo and elevate it into a modern, easy-to-manage format. People absolutely adore these Turkey Cranberry Sliders because they hit all the right notes: the tender, juicy turkey, the vibrant tang of cranberry sauce, often complemented by melty cheese and a hint of something savory like stuffing or a touch of herbs, all nestled between soft, buttery slider buns. They’re incredibly versatile, perfect for utilizing those delicious holiday leftovers, or simply for whipping up a quick, impressive appetizer for game day or a casual get-together. Get ready to experience a burst of comfort and joy with every single bite!

Turkey Cranberry Sliders: Easy Holiday Appetizer Recipe! this RECIPE

Ingredients:

  • 12-pack (15 oz) Hawaiian Sweet Rolls: These soft, slightly sweet rolls are the foundation of our sliders, providing the perfect balance to the savory fillings. Their pillowy texture and mild sweetness are absolutely essential for authentic Turkey Cranberry Sliders.
  • 1 lb thinly sliced deli turkey: I prefer a good quality, oven-roasted turkey for this recipe, but honey-roasted or smoked turkey can also work beautifully, adding different nuances to your Turkey Cranberry Sliders. Make sure it’s sliced thin enough to layer easily without making the sliders too bulky.
  • 8 oz sliced Swiss cheese: Swiss cheese melts wonderfully and has a nutty, slightly sweet flavor that complements both turkey and cranberry. However, feel free to experiment with provolone, white cheddar, or even a mild Havarti if you prefer a different cheesy profile for your Turkey Cranberry Sliders.
  • 1 can (14 oz) whole berry cranberry sauce: The star flavor for our cranberry component! I always opt for whole berry for that delightful texture and burst of natural sweetness and tartness. If you’re feeling ambitious, homemade cranberry sauce works exceptionally well here and often provides a fresher, less sweet flavor, perfect for elevating these festive Turkey Cranberry Sliders.
  • ½ cup (1 stick) unsalted butter, melted: This forms the rich, flavorful base of our topping. Unsalted butter gives us control over the final seasoning.
  • 2 tablespoons Dijon mustard: This adds a lovely tangy kick and a subtle depth of flavor to the butter topping, cutting through the sweetness of the rolls and cranberry sauce beautifully.
  • 1 teaspoon Worcestershire sauce: A secret weapon for umami! It adds a savory, complex note that truly elevates the overall flavor profile of these Turkey Cranberry Sliders, making them irresistibly moreish.
  • ½ teaspoon garlic powder: For that essential aromatic warmth.
  • ½ teaspoon onion powder: Enhances the savory notes and provides a comforting depth.
  • 1 teaspoon dried parsley: Adds a touch of herbaceous freshness and visual appeal to the topping.
  • ¼ teaspoon black pepper: Freshly ground black pepper adds a subtle spice and aromatic quality.
  • Pinch of salt: To balance and enhance all the flavors in the butter topping.
  • 1 tablespoon poppy seeds (optional): For a classic slider look and a delightful textural crunch on top of your finished Turkey Cranberry Sliders.

Preparing Your Workstation and Essential Ingredients for Turkey Cranberry Sliders

  1. Preheat Your Oven and Prepare Your Baking Dish:
    Let’s get started by preheating your oven to a cozy 350°F (175°C). While the oven is warming up, grab a 9×13-inch baking dish. You can either lightly grease it with cooking spray or a thin layer of butter, or if you prefer a super easy cleanup, line it with parchment paper. This simple step ensures that your magnificent Turkey Cranberry Sliders won’t stick and will lift out beautifully when they’re ready to serve. Taking a moment to prepare your workspace and tools really sets the stage for a smooth cooking experience.
  2. Mastering the Rolls:
    This is a critical step for perfectly uniform sliders! Take your entire slab of Hawaiian sweet rolls and, using a long serrated knife, carefully slice the entire block of rolls horizontally through the middle, separating the tops from the bottoms. It’s important to keep them connected as one unit as much as possible, as this makes the layering process incredibly efficient and ensures your Turkey Cranberry Sliders stay together during assembly. Resist the urge to pull them apart into individual rolls just yet; we’re aiming for a seamless, layered masterpiece.

Assembling the Turkey Cranberry Sliders: Layer by Layer Perfection

  1. Laying the Foundation & First Layer of Cheese:
    Carefully place the entire bottom slab of the Hawaiian rolls into your prepared 9×13-inch baking dish. Make sure it sits snugly in the bottom. Now, it’s time for our first layer of gooey goodness! Arrange about half of your sliced Swiss cheese evenly over the bottom rolls. I like to slightly overlap the slices to ensure full coverage, guaranteeing that every bite of your Turkey Cranberry Sliders will have that delightful cheesy pull. Placing cheese directly on the bread helps create a barrier, preventing the bread from getting too soggy from the other fillings.
  2. Adding the Savory Turkey:
    Next, layer your thinly sliced deli turkey over the cheese. Don’t just plop it all in one lump; take a moment to gently separate the slices and arrange them evenly across the entire surface. I often fold the turkey slices to create a bit of height and texture, ensuring a substantial, satisfying bite in every single Turkey Cranberry Slider. Aim for an even distribution so that each slider gets a generous portion of savory turkey.
  3. Spreading the Cranberry Goodness:
    Now for the star of the show – the cranberry sauce! Open your can of whole berry cranberry sauce and, using a spoon or an offset spatula, carefully spread it evenly over the layer of turkey. Be gentle but thorough, making sure to reach all the way to the edges. The vibrant color and sweet-tart flavor of the cranberry sauce are what truly define these Turkey Cranberry Sliders and give them their festive, unique taste. If your cranberry sauce is particularly thick, you might gently warm it for a few seconds in the microwave to make it easier to spread smoothly.
  4. The Final Cheese Blanket:
    Top the cranberry layer with the remaining half of your sliced Swiss cheese. This second layer of cheese isn’t just for extra flavor; it also acts as a wonderful “glue,” helping to hold all the delicious components together once the sliders are baked. It ensures maximum meltiness and a beautiful presentation for your finished Turkey Cranberry Sliders. Again, overlap slightly to cover as much surface area as possible.
  5. Capping it Off:
    Finally, carefully place the top slab of the Hawaiian rolls over the assembled layers. Gently press down on the rolls with your hands to make sure everything is compact and well-nested. This firm but gentle press ensures the layers are snug, setting the stage for perfectly integrated flavors once baked. Your Turkey Cranberry Sliders are now fully built and ready for their flavorful topping!

Crafting the Flavorful Butter Topping for Your Turkey Cranberry Sliders

  1. Melting the Butter:
    In a small microwave-safe bowl or a small saucepan over low heat, melt your ½ cup of unsalted butter. You want it fully liquid but not sizzling hot. The aroma of melting butter always signals that something delicious is about to happen, and for these Turkey Cranberry Sliders, it’s the beginning of their glorious transformation.
  2. Building the Flavor Bomb:
    Once the butter is melted, remove it from the heat if using a saucepan. Add the Dijon mustard, Worcestershire sauce, garlic powder, onion powder, dried parsley, ¼ teaspoon black pepper, and a pinch of salt to the melted butter.

    Why each ingredient is crucial:

    • Dijon Mustard: Beyond just tang, Dijon adds a complex, slightly pungent note that cuts through the richness of the butter and sweet rolls, providing a beautiful counterpoint to the cranberry. It’s what gives the topping a sophisticated edge.
    • Worcestershire Sauce: This ingredient is a secret weapon. It brings a deep, savory, umami flavor that rounds out the entire profile, making the topping incredibly addictive. It adds a subtle complexity that you might not immediately identify but would definitely miss if it were gone.
    • Garlic and Onion Powders: These pantry staples provide a consistent, mellow aromatic base that permeates the rolls and fillings, infusing every bite of your Turkey Cranberry Sliders with comforting savory notes. They offer flavor without the harshness or texture of fresh minced garlic or onion.
    • Dried Parsley: While primarily for visual appeal, the parsley also contributes a mild, fresh herbaceousness that brightens the rich topping. It makes the sliders look even more appetizing.
    • Salt and Pepper: These are fundamental for seasoning. The salt enhances all the other flavors, making them pop, while the pepper adds a subtle warmth and aroma. Always season to taste, but these initial measurements are a great starting point.

    Whisk all these ingredients together vigorously until they are thoroughly combined. You want a homogenous mixture, ensuring that every drop of this glorious topping carries all those fantastic flavors.

  3. Coating Your Sliders with the Flavorful Topping:
    Now for the magic! Evenly pour the entire butter mixture over the tops of your assembled Turkey Cranberry Sliders. Take your time to spoon it over every single roll top, ensuring that the delicious liquid seeps into all the crevices between the rolls. This step is absolutely key, as the butter mixture will absorb into the rolls during the resting and baking process, creating an incredibly flavorful, slightly crispy, and golden-brown crust. If you’re using poppy seeds, sprinkle them evenly over the top at this stage. They add a lovely visual appeal and a delicate crunch.
  4. The Crucial Resting Period:
    Once the topping is applied, cover the baking dish tightly with aluminum foil. This isn’t just to keep it warm; it’s a vital part of the process. Allow the sliders to rest at room temperature for at least 15-30 minutes. This resting period is incredibly important for several reasons: it allows the bread to fully absorb the butter mixture, resulting in much more flavorful and moist rolls. It also gives the flavors a chance to meld and deepen, ensuring that when your Turkey Cranberry Sliders finally hit the oven, they’re packed with maximum deliciousness. You can even prepare these ahead of time and refrigerate them for several hours or overnight at this stage; just bring them back to room temperature for about 30 minutes before baking if doing so.

Baking the Turkey Cranberry Sliders to Golden Perfection

  1. Initial Bake (Covered):
    With the oven still at 350°F (175°C), place the foil-covered baking dish into the preheated oven. Bake for 20 minutes. During this initial covered bake, several wonderful things are happening. The foil traps steam, which helps to warm the turkey and cranberry sauce through evenly, ensuring a moist and tender interior. More importantly, it allows the cheese to melt into a wonderfully gooey, irresistible layer without the rolls browning too quickly. This stage is all about internal warmth and melty goodness, preparing your Turkey Cranberry Sliders for their grand finale.
  2. The Uncovered Bake for Golden Tops:
    After 20 minutes, carefully remove the foil from the baking dish. Return the uncovered sliders to the oven and continue baking for another 5-10 minutes, or until the tops of the rolls are beautifully golden brown and the cheese is bubbly and thoroughly melted around the edges. Keep a close eye on them during this phase, as ovens can vary, and you want that perfect balance of golden crust without over-browning. This final uncovered bake creates that irresistible, slightly crispy texture on top of your Turkey Cranberry Sliders and provides a stunning visual appeal. The aroma filling your kitchen will be absolutely incredible at this point!
  3. The Essential Resting Period (Post-Bake):
    Once your Turkey Cranberry Sliders emerge from the oven, golden and fragrant, resist the immediate urge to slice and serve. Transfer the baking dish to a wire rack and let them rest for 5-10 minutes. This short resting period is crucial. It allows the melted cheese to set slightly, preventing it from oozing out excessively when you cut the sliders. It also lets the internal temperatures equalize, ensuring that every bite is perfectly warm and cohesive. This small wait makes a big difference in the overall enjoyment and neatness of your serving experience.

Serving Your Delicious Turkey Cranberry Sliders

  1. Slicing and Presenting:
    After the brief rest, use that same long serrated knife to cut the sliders along the lines of the individual rolls. This will give you 12 perfect, pull-apart Turkey Cranberry Sliders. You can serve them directly from the baking dish, which keeps them warm, or transfer them to a serving platter for a more elegant presentation. These sliders are designed to be served warm, straight from the oven, when the cheese is at its gooey best and the rolls are perfectly soft and flavorful.
  2. Enjoying Your Creation:
    These Turkey Cranberry Sliders are absolutely perfect as an appetizer for game day, a festive holiday gathering, or a fun, easy weeknight meal. The blend of savory turkey, sweet-tart cranberry, gooey Swiss cheese, and the irresistible buttery-herb topping makes for a truly unforgettable bite. They are incredibly satisfying and have a wonderful balance of textures and flavors. I often find myself making a double batch because they disappear so quickly! Consider serving them alongside a simple green salad or a bowl of creamy tomato soup for a complete and comforting meal.
  3. Storing Leftovers:
    If, by some miracle, you have any leftover Turkey Cranberry Sliders, they can be stored in an airtight container in the refrigerator for up to 2-3 days. To reheat, you can pop them back into a preheated oven at 300°F (150°C) for about 10-15 minutes, or until warmed through, or microwave them briefly for a quicker option, though the oven will help retain the crispiness of the topping. Enjoy your amazing homemade Turkey Cranberry Sliders!

Turkey Cranberry Sliders: Easy Holiday Appetizer Recipe!

Conclusion:


I truly hope you’re as excited about these incredible Turkey Cranberry Sliders as I am! What makes this recipe an absolute triumph is its impeccable balance of flavors – the savory, tender turkey, the bright, tart burst of cranberry, the sweet glaze, and the creamy melted cheese all nestled in soft, buttery rolls. It’s a symphony for your taste buds, effortlessly transforming simple ingredients into something truly special. But beyond the deliciousness, these sliders are a true game-changer for entertaining or even just a fun weeknight meal. They’re incredibly easy to assemble, making them perfect for busy hosts who want to impress without stress. Whether you’re hosting a holiday gathering, a casual game-day party, or looking for a delightful lunchbox idea, these sliders deliver on all fronts: flavor, convenience, and pure comfort. I’ve seen them disappear from platters faster than I can put them out, and it’s always met with rave reviews. Trust me, this isn’t just another slider recipe; it’s a culinary experience waiting to become a new favorite in your kitchen.

Now, let’s talk about making these even more spectacular with some serving suggestions and variations. While they are undoubtedly fantastic on their own, pairing them with the right sides can elevate the entire meal. Imagine serving these warm, gooey delights alongside a crisp, vibrant mixed green salad with a light vinaigrette to cut through the richness. Or, for a heartier meal, a bowl of creamy coleslaw or a classic potato salad would be absolutely divine. During the cooler months, a comforting butternut squash soup or a delicate cream of mushroom soup could make for an elegant and satisfying pairing. And if you’re aiming for a more casual, fun vibe, a platter of sweet potato fries or even some homemade onion rings would be a fantastic companion.

But the fun doesn’t stop there! This recipe is wonderfully adaptable, allowing for countless variations to suit your palate or what you have on hand. For a different cheese profile, consider swapping out the Swiss for sharp cheddar, smoky provolone, or even creamy Havarti. Each cheese brings its own unique character, offering a subtle twist to the overall flavor. If you’re feeling adventurous, try adding a thin slice of crispy bacon to each slider for an extra layer of smoky, salty goodness – bacon always makes everything better, doesn’t it? Another delightful variation involves caramelizing some onions until they’re sweet and tender, then layering them under the turkey and cranberry for an incredible depth of flavor. You could also experiment with different types of rolls; while Hawaiian rolls are a classic for their sweetness, brioche buns offer a richer, more luxurious texture, and pretzel rolls would introduce a wonderful savory chewiness.

If you want to play with the cranberry element, a spicier cranberry relish or a cranberry jam with a hint of orange zest could add an exciting new dimension. For those who enjoy a bit of heat, a light drizzle of sriracha mayo or a sprinkle of red pepper flakes within the sliders could provide a delightful kick. And don’t forget the greens! A small leaf of arugula or spinach can add a fresh, peppery note and a lovely bit of color. For a vegetarian twist, consider replacing the turkey with grilled portobello mushrooms or sweet potato patties, maintaining that sweet and savory cranberry profile in a meat-free format. This versatility ensures that you can truly make this recipe your own, adapting it to any occasion or dietary preference while still enjoying that core, irresistible flavor combination.

I truly hope this detailed guide has inspired you to get into the kitchen and create your own batch of these delightful sliders.

Don’t hesitate, give this recipe a try this week!

I promise you, the joy of biting into one of these warm, savory-sweet morsels is unmatched. They are designed to bring smiles to faces and warmth to hearts, making any gathering feel a little more special. Once you’ve made them, I would absolutely love to hear about your experience! Did you stick to the original recipe, or did you venture into some exciting variations? What sides did you choose? Please share your thoughts, your photos, and any creative tweaks you made in the comments below. Your feedback and personal touches not only inspire me but also help other home cooks discover new ways to enjoy this fantastic dish. Let’s build a community around delicious food, starting with these unforgettable sliders. Happy cooking!


Turkey Cranberry Sliders: Easy Holiday Appetizer Recipe!

Turkey Cranberry Sliders are a delightful symphony of seasonal flavors packed into a convenient, irresistible bite. This recipe transforms humble ingredients into a spectacular crowd-pleaser, perfect for holiday gatherings, game day, or utilizing leftovers. Experience a burst of comfort and joy with every single bite!

Prep Time
15 Minutes
Cook Time
30 Minutes
Total Time
25 Minutes
Servings
12 servings

Ingredients


Instructions


Important Information

Nutrition Facts (Per Serving)

It is important to consider this information as approximate and not to use it as definitive health advice.

Allergy Information

Please check ingredients for potential allergens and consult a health professional if in doubt.

« Previous Post
Ultimate Cucumber Ranch Crack Salad: So Fresh & Addictive!
Next Post »
Best Crockpot Chicken Parmesan Soup | Simple Comfort Food

If you enjoyed this…

Bacon Bombs: The Ultimate Guide to Delicious, Smoky Perfection

Southern Comeback Sauce: The Ultimate Guide to This Mississippi Staple

Best Crispy Chicken Taquitos – Perfect Party Appetizer

Primary Sidebar

Browse by Diet

BreakfastDinnerLunchDessertAppetizer

Sweet Peach Yogurt Parfait Delight

One of my fondest memories is from a lazy summer afternoon spent at my grandmother’s house. The sun filtered through the kitchen window, casting a warm glow over the table where she would create her culinary magic. It was during one of those blissful moments that I first tasted her Peach Yogurt Parfait with Honey and Granola. The sweet aroma of ripe peaches mingling with creamy yogurt and the crunch of granola was nothing short of heavenly. It felt like summer captured in a bowl, and I still remember the joy of diving in with a spoon, each layer revealing a new burst of flavor.

When I think about that parfait, I can almost hear the gentle hum of the bees outside, reminding me of the floral notes that honey brings to every bite. The vibrant yellows and soft oranges of the peaches contrast beautifully with the creamy white yogurt and the golden crunch of granola. It’s a dish that not only looks delightful but also tastes like a celebration of fresh, wholesome ingredients.

What makes my version of this Peach Yogurt Parfait special is the careful balance of flavors and textures. I use ripe, juicy peaches, drizzled with locally sourced honey, and a homemade granola that’s bursting with nuts and seeds for an extra crunch. It’s a simple dish, but every layer is crafted with love and attention.

Let me show you exactly how to make this delightful parfait, so you can bring a bit of that summer magic into your kitchen!

Sweet Peach Yogurt Parfait Delight

Why You’ll Love This Recipe

  • Delightfully creamy texture from the Greek yogurt, paired with the juicy sweetness of fresh peaches.
  • Ready in under 20 minutes, making it a quick and satisfying breakfast or snack option.
  • Budget-friendly, using common ingredients that you may already have in your pantry.
  • Customizable with your favorite granola and nuts, allowing you to tailor each parfait to your taste.
  • Perfectly balanced flavors with the bright acidity of lemon juice and the sweetness of honey enhancing the peaches.

Ingredients

  • For the Parfait:
  • 2 cups plain Greek yogurt (or vanilla yogurt for a sweeter option)
  • 2 large ripe peaches, diced (about 2 cups)
  • 1 tablespoon fresh lemon juice (to prevent browning of peaches)
  • 2 tablespoons honey (plus more for drizzling)
  • 1 teaspoon vanilla extract (optional for extra flavor)
  • For the Granola:
  • 1 cup granola (store-bought or homemade; see notes for a simple granola recipe)
  • 1/4 cup sliced almonds (optional for added crunch)
  • 1/4 cup shredded coconut (optional for added flavor)

Let’s dive into some key ingredients that make this Peach Yogurt Parfait so delightful! First, the Greek yogurt is not only creamy but also packed with protein, making it a satisfying option for breakfast or a snack. If you’re looking for a sweeter option, you can easily substitute it with vanilla yogurt, though it may alter the overall flavor balance. Next, the ripe peaches are the star of the show; their natural sweetness shines through, so I recommend choosing peaches that yield slightly to pressure, indicating they’re perfectly ripe. If peaches aren’t in season, feel free to use nectarines or even frozen peaches—just thaw them before use. Finally, honey adds a lovely floral sweetness that ties everything together. If you prefer, maple syrup can serve as a delicious substitute.

Step-by-Step Instructions

  1. Start by preparing the peaches. Wash them thoroughly, then slice and dice them into bite-sized pieces. In a medium bowl, toss the diced peaches with 1 tablespoon of fresh lemon juice to prevent browning. Set aside for about 5 minutes while the lemon juice works its magic.
  2. In a separate bowl, combine the Greek yogurt, 2 tablespoons of honey, and 1 teaspoon of vanilla extract if using. Stir the mixture until smooth and thoroughly blended. This should take about a minute. Avoid overmixing to maintain the creaminess of the yogurt.
  3. Now it’s time to layer your parfait. Grab a clear glass or bowl to showcase your beautiful creation. Start with a generous spoonful of the yogurt mixture at the bottom—about 1/4 cup will do. Use a spoon to spread it evenly.
  4. Add a layer of the diced peaches over the yogurt, ensuring they cover the yogurt completely. You might want to use about half of what you have prepared—roughly 1 cup. This layer should be visually appealing, so arrange the peaches neatly.
  5. Sprinkle 1/4 cup of granola over the peaches. This adds a delightful crunch. Make sure to distribute it evenly to ensure every bite has that satisfying texture. Avoid packing it down too tightly, as you want it to maintain its crunch.
  6. Repeat the layers: spoon in another 1/4 cup of yogurt, followed by another cup of peaches, and another sprinkle of granola. You should have at least two layers, but feel free to add more depending on your glass size.
  7. Finish off your parfait with a drizzle of honey on top for added sweetness and a touch of elegance. If you’re using sliced almonds or shredded coconut, sprinkle them on top now. It adds a lovely visual contrast and extra flavor.
  8. Serve immediately or refrigerate for up to 30 minutes before serving to allow the flavors to meld together. However, I recommend enjoying it fresh to maintain the granola’s crunch.

Pro Tips for the Best Peach Yogurt Parfait With Honey And Granola

  • Make sure to choose ripe peaches for the best flavor and texture. A common mistake is using unripe fruit, which can lead to a less enjoyable parfait. Look for peaches that are fragrant and slightly soft to the touch.
  • Use a clear glass to assemble your parfait; this not only makes for a beautiful presentation but also allows you to see the colorful layers, which adds to the enjoyment of eating it.
  • For an even creamier texture, consider whipping the Greek yogurt with a hand mixer for a couple of minutes before layering. This small adjustment makes a huge difference in mouthfeel.
  • Be mindful of the granola-to-yogurt ratio. Too much granola can overwhelm the parfait, while too little can make it feel too creamy. Aim for about 1/4 cup of granola per layer for the perfect balance.
  • If you’re making this for a gathering, consider preparing the yogurt and peaches ahead of time and layering them just before serving. This ensures the granola stays crunchy!

Variations & Serving Ideas

There are so many ways to get creative with your Peach Yogurt Parfait! For a tropical twist, swap out the peaches for mangoes or pineapples and top with coconut flakes. If you prefer a berry flavor, mix in some blueberries or strawberries with the peaches for added color and taste. For a nutty version, incorporate chopped walnuts or pecans instead of almonds.

As for serving ideas, this parfait pairs beautifully with a side of scrambled eggs for a hearty breakfast or fresh fruit salad for a light lunch. You might also enjoy it alongside whole grain toast with almond butter for an energizing snack. The contrast of flavors and textures will elevate your meal experience!

Storage, Make-Ahead & Reheating

The Peach Yogurt Parfait is best enjoyed fresh, but you can prepare some components ahead of time. Store the layered parfait in an airtight container in the refrigerator for up to 24 hours. However, be cautious; the granola may lose its crunch if stored too long. You can freeze the yogurt and peach mixture for up to 2 months; just remember to thaw it in the refrigerator overnight before serving.

If you plan to enjoy this dish the next day, it can taste even better as the flavors meld together. Just remember to add the granola right before serving to keep its delightful crunch!

Frequently Asked Questions

Can I make Peach Yogurt Parfait With Honey And Granola ahead of time?

Yes — in fact, it tastes even better the next day as the flavors meld. However, I recommend waiting to add the granola until just before serving to maintain its crunch.

What can I substitute for Greek yogurt?

If you prefer a lighter option, you can substitute Greek yogurt with regular yogurt or a dairy-free alternative like coconut yogurt. Just remember that this may alter the creaminess and flavor profile slightly.

Can I use frozen peaches for this parfait?

Absolutely! Just make sure to thaw the frozen peaches before using them. They will still add great flavor, though the texture may be slightly softer than fresh peaches.

How do I make the parfait vegan?

To make a vegan version, substitute the Greek yogurt with a plant-based yogurt alternative, and replace honey with maple syrup or agave nectar. This keeps the parfait sweet while adhering to a vegan diet.

What other fruits can I use in this recipe?

You can mix and match fruits based on your preference. Try using strawberries, blueberries, raspberries, or even bananas. Just make sure to adjust the lemon juice as needed to prevent browning.

Sweet Peach Yogurt Parfait Delight

Final Thoughts

The Peach Yogurt Parfait with Honey and Granola is a delightful blend of creamy yogurt, sweet peaches, and crunchy granola that creates a satisfying and nourishing treat. Each layer bursts with flavor, making it a perfect choice for breakfast or a light dessert.

This is the kind of recipe I come back to again and again, especially when I want something refreshing and wholesome to start my day. The harmony of sweet and tart flavors, combined with the delightful crunch, never fails to lift my spirits!

I encourage you to give this parfait a try and indulge in its comforting goodness. Feel free to share your results or even add your own twist—perhaps a sprinkle of cinnamon or a handful of nuts. Enjoy creating your perfect parfait!

Print
clock clock iconcutlery cutlery iconflag flag iconfolder folder iconinstagram instagram iconpinterest pinterest iconfacebook facebook iconprint print iconsquares squares iconheart heart iconheart solid heart solid icon

Peach Yogurt Parfait


  • Author: Lily author
  • Total Time: 15 minutes
  • Yield: 4 servings 1x
Pin Recipe
Print Recipe

Description

This Peach Yogurt Parfait combines creamy Greek yogurt, juicy peaches, and crunchy granola for a delightful treat. It’s a perfect breakfast or snack that captures the essence of summer in every bite.


Ingredients

Scale
  • For the Parfait:
  • 2 cups plain Greek yogurt (or vanilla yogurt for a sweeter option)
  • 2 large ripe peaches, diced (about 2 cups)
  • 1 tablespoon fresh lemon juice (to prevent browning of peaches)
  • 2 tablespoons honey (plus more for drizzling)
  • 1 teaspoon vanilla extract (optional for extra flavor)
  • For the Granola:
  • 1 cup granola (store-bought or homemade; see notes for a simple granola recipe)
  • 1/4 cup sliced almonds (optional for added crunch)
  • 1/4 cup shredded coconut (optional for added flavor)

Instructions

  1. Start by preparing the peaches. Wash them thoroughly, then slice and dice them into bite-sized pieces. In a medium bowl, toss the diced peaches with 1 tablespoon of fresh lemon juice to prevent browning. Set aside for about 5 minutes while the lemon juice works its magic.
  2. In a separate bowl, combine the Greek yogurt, 2 tablespoons of honey, and 1 teaspoon of vanilla extract if using. Stir the mixture until smooth and thoroughly blended. This should take about a minute. Avoid overmixing to maintain the creaminess of the yogurt.
  3. Now it’s time to layer your parfait. Grab a clear glass or bowl to showcase your beautiful creation. Start with a generous spoonful of the yogurt mixture at the bottom—about 1/4 cup will do. Use a spoon to spread it evenly.
  4. Add a layer of the diced peaches over the yogurt, ensuring they cover the yogurt completely. You might want to use about half of what you have prepared—roughly 1 cup. This layer should be visually appealing, so arrange the peaches neatly.
  5. Sprinkle 1/4 cup of granola over the peaches. This adds a delightful crunch. Make sure to distribute it evenly to ensure every bite has that satisfying texture. Avoid packing it down too tightly, as you want it to maintain its crunch.
  6. Repeat the layers: spoon in another 1/4 cup of yogurt, followed by another cup of peaches, and another sprinkle of granola. You should have at least two layers, but feel free to add more depending on your glass size.
  7. Finish off your parfait with a drizzle of honey on top for added sweetness and a touch of elegance. If you’re using sliced almonds or shredded coconut, sprinkle them on top now. It adds a lovely visual contrast and extra flavor.
  8. Serve immediately or refrigerate for up to 30 minutes before serving to allow the flavors to meld together. However, I recommend enjoying it fresh to maintain the granola’s crunch.
  • Prep Time: 15 mins
  • Cook Time: 0 mins
  • Category: Breakfast
  • Method: No-cook
  • Cuisine: American

Nutrition

  • Serving Size: 1 parfait
  • Calories: 250
  • Sugar: 20 g
  • Sodium: 50 mg
  • Fat: 5 g
  • Saturated Fat: 2 g
  • Unsaturated Fat: 3 g
  • Trans Fat: 0 g
  • Carbohydrates: 40 g
  • Fiber: 3 g
  • Protein: 10 g
  • Cholesterol: 10 mg

Keywords: Choose ripe peaches for the best flavor and texture. Use a clear glass for a beautiful presentation. For creaminess, consider whipping the yogurt before layering. Be mindful of the granola-to-yogurt ratio. Prepare yogurt and peaches ahead of time for gatherings, layering just before serving.

Did you make this recipe?

Share a photo and tag us — we can't wait to see what you've made!

Sun-Kissed Frozen Orange Cream Slush

As a child, summer days felt like they lasted forever. I remember the sticky heat wrapping around me as I played outside, my laughter mingling with the sounds of the neighborhood. But nothing could cool me down quite like the moment I’d spot my grandmother, laboring over her blender, whipping up her famous Frozen Orange Creamsicle Slush. That vibrant orange treat, with its frosty texture and sweet citrus aroma, was like a burst of sunshine in a cup. Just one sip, and I could feel the coolness wash over me, sparking pure joy.

This Frozen Orange Creamsicle Slush has a way of making you feel like a kid again. Its creamy, dreamy consistency is a delightful balance of bright orange and soft vanilla, inviting you to dive right in. The refreshing tang of orange dances on your tongue, while the smooth creaminess envelops you in a comforting embrace. It’s a nostalgic treat that’s perfect for hot summer afternoons or anytime you need a little pick-me-up.

What makes my version of this slush stand out is the addition of a hint of vanilla bean, which elevates the flavor and adds an extra layer of richness. Plus, it’s super easy to whip up with just a few simple ingredients that you probably already have on hand! So, if you’re ready to relive those sun-soaked memories, let me show you exactly how to make it.

Sun-Kissed Frozen Orange Cream Slush

Why You’ll Love This Recipe

  • Each slush is a perfect blend of creamy vanilla and zesty orange, creating a nostalgic flavor reminiscent of summer days.
  • This refreshing treat is ready in under 15 minutes, making it an ideal quick dessert for unexpected guests or hot afternoons.
  • With just 8 simple ingredients, it’s budget-friendly, ensuring you don’t have to break the bank to enjoy a delicious slush.
  • The slush has a perfectly smooth texture, thanks to the combination of ice and ice cream, providing a delightful contrast to the bright citrus flavors.
  • It’s highly customizable; you can easily adjust the sweetness and add fresh herbs for a unique twist that suits your taste.

Ingredients

  • 2 cups orange juice (freshly squeezed or store-bought)
  • 1 cup vanilla ice cream
  • 1 cup crushed ice
  • 1/2 cup milk (whole or 2%)
  • 1/4 cup granulated sugar (adjust based on sweetness preference)
  • 1 teaspoon vanilla extract
  • Zest of 1 orange (for added flavor)
  • Fresh orange slices and mint leaves (for garnish)

The star of this Frozen Orange Creamsicle Slush is the orange juice, which provides the vibrant, citrusy base. Freshly squeezed juice will yield the brightest flavor, but store-bought options can be just as convenient. If you’re opting for store-bought, choose 100% pure juice with no added sugars for the best results. Another essential ingredient is the vanilla ice cream; it adds creaminess and sweetness. You can substitute it with dairy-free ice cream if you’re looking for a vegan option. Whole or 2% milk complements the ice cream, creating a smooth blend. If you want a lower-calorie version, almond or oat milk can be good alternatives.

Lastly, the granulated sugar can be adjusted based on your sweetness preference. If you prefer a more natural sweetener, consider using honey or agave syrup. The orange zest enhances the flavor profile, providing an aromatic pop that brings the whole slush together. Don’t skip it! It adds an extra layer of brightness that makes this slush truly special.

Step-by-Step Instructions

  1. Start by preparing your ingredients. Gather 2 cups of orange juice, 1 cup of vanilla ice cream, and 1 cup of crushed ice. Make sure the ice is finely crushed, as larger chunks can make blending difficult.
  2. In a blender, combine the orange juice, vanilla ice cream, crushed ice, and 1/2 cup of milk. Add 1/4 cup of granulated sugar and 1 teaspoon of vanilla extract. If you like a sweeter slush, consider adding a bit more sugar at this stage.
  3. Add the zest of 1 orange to the blender. This step is crucial for enhancing the citrus flavor of your slush. Make sure not to include the bitter white pith—only the flavorful zest.
  4. Blend the mixture on medium-high speed for about 30-45 seconds. Stop once the ingredients are fully combined and the slush has a smooth, even consistency. If you notice large chunks of ice, blend for an additional 10-15 seconds. Avoid over-blending, as this can make the slush too liquidy.
  5. Once blended, taste the slush. If it needs more sweetness, add a little more sugar and blend for a few more seconds. If it’s too thick, you can add a splash of milk to reach your desired consistency.
  6. Pour the slush into glasses. This recipe typically serves 4, but you can easily double it for larger gatherings. Use a spoon to help guide the slush into the glasses if needed.
  7. Garnish each serving with fresh orange slices and mint leaves. The mint not only adds a pop of color but also a refreshing aroma that complements the citrus flavors beautifully.
  8. Serve immediately and enjoy! If you’ve made extra, you can refrigerate it for a short time, but it’s best enjoyed fresh.

Pro Tips for the Best Frozen Orange Creamsicle Slush

  • Don’t skip the orange zest! It’s a game-changer for flavor. Always zest before juicing to make it easier.
  • Use a high-powered blender for the best texture. A standard blender may struggle with ice, leading to uneven consistency. If you have a food processor, that can work too, but ensure the ice is finely crushed.
  • Adjust the ice-to-liquid ratio carefully. If your slush is too thick, it won’t blend well. Start with less ice and add more until you reach your preferred texture.
  • Be cautious with the sugar! Always start with the lower amount, as you can easily add more, but it’s hard to fix an overly sweet slush.
  • For a fun twist, consider adding a splash of coconut milk or a handful of fresh fruit like strawberries or pineapple. This not only enhances the flavor but also adds a beautiful color contrast.

Variations & Serving Ideas

There are countless ways to put a spin on your Frozen Orange Creamsicle Slush. Consider making a tropical version by adding in some pineapple juice or coconut milk for a delightful tropical twist. If you’re feeling adventurous, try incorporating a handful of frozen mango or peach slices for added sweetness. For a lighter version, swap out the vanilla ice cream for Greek yogurt for a creamy yet tangy alternative.

As for serving ideas, this refreshing slush pairs wonderfully with light summer dishes like grilled chicken skewers, fish tacos, or a simple salad topped with citrus vinaigrette. The bright, zesty flavors of the slush complement these dishes perfectly, making them an ideal pairing for a sunny day.

Storage, Make-Ahead & Reheating

This Frozen Orange Creamsicle Slush is best enjoyed fresh, but if you have leftovers, you can store them in an airtight container in the fridge for up to 2 days. Just keep in mind that the slush may lose some of its texture over time as the ice melts. It doesn’t freeze well, as the ice will turn into a solid block. If you must freeze it, blend again after thawing to restore the slushy consistency. This treat is best the day you make it, as the flavors meld together beautifully overnight, enhancing its deliciousness.

Frequently Asked Questions

Can I make Frozen Orange Creamsicle Slush ahead of time?

Yes — in fact, it tastes even better the next day as the flavors meld. However, it’s best to enjoy it fresh, as the texture can change if stored for too long. If you need to prepare it ahead, keep it in the fridge and re-blend before serving.

What kind of orange juice should I use?

For the best flavor, use freshly squeezed orange juice. However, if you’re short on time, opt for 100% pure store-bought juice without added sugars. This will ensure that your slush remains flavorful and refreshing.

Can I substitute the vanilla ice cream?

Absolutely! If you’re looking for a dairy-free option, coconut milk ice cream or a non-dairy vanilla ice cream can work wonderfully. They will still provide the creamy texture and sweetness you desire.

How can I adjust the sweetness of my slush?

You can easily adjust the sweetness by modifying the amount of sugar added. Start with 1/4 cup and taste the mixture before blending. If you prefer it sweeter, add more sugar gradually until it reaches your desired level.

What should I do if my slush is too thick?

If your slush is too thick, simply add a splash of milk or orange juice and blend again. This will help achieve a more drinkable consistency while maintaining the slushy texture. Adjust gradually to reach your preferred thickness.

Sun-Kissed Frozen Orange Cream Slush

Final Thoughts

The Frozen Orange Creamsicle Slush is a delightful blend of refreshing citrus and creamy goodness, making it a perfect treat for warm days or any time you crave a taste of nostalgia. The way the bright orange flavor dances with the creamy texture truly elevates this slush, transforming it into a satisfying escape from the everyday.

This is the kind of recipe I come back to again and again, especially when I’m looking to cool down or impress guests at a summer gathering. It’s simple to make and always brings smiles all around! I encourage you to try this recipe for yourself—don’t hesitate to share your results or even put your own spin on it. Happy slushing!

Print
clock clock iconcutlery cutlery iconflag flag iconfolder folder iconinstagram instagram iconpinterest pinterest iconfacebook facebook iconprint print iconsquares squares iconheart heart iconheart solid heart solid icon

Frozen Orange Creamsicle Slush


  • Author: Lily author
  • Total Time: 15 minutes
  • Yield: 4 servings 1x
Pin Recipe
Print Recipe

Description

This Frozen Orange Creamsicle Slush is a refreshing treat that combines creamy vanilla and zesty orange flavors. Perfect for hot summer days, it brings back nostalgic memories with every sip.


Ingredients

Scale
  • 2 cups orange juice (freshly squeezed or store-bought)
  • 1 cup vanilla ice cream
  • 1 cup crushed ice
  • 1/2 cup milk (whole or 2%)
  • 1/4 cup granulated sugar (adjust based on sweetness preference)
  • 1 teaspoon vanilla extract
  • Zest of 1 orange (for added flavor)
  • Fresh orange slices and mint leaves (for garnish)

Instructions

  1. Start by preparing your ingredients. Gather 2 cups of orange juice, 1 cup of vanilla ice cream, and 1 cup of crushed ice. Make sure the ice is finely crushed, as larger chunks can make blending difficult.
  2. In a blender, combine the orange juice, vanilla ice cream, crushed ice, and 1/2 cup of milk. Add 1/4 cup of granulated sugar and 1 teaspoon of vanilla extract. If you like a sweeter slush, consider adding a bit more sugar at this stage.
  3. Add the zest of 1 orange to the blender. This step is crucial for enhancing the citrus flavor of your slush. Make sure not to include the bitter white pith—only the flavorful zest.
  4. Blend the mixture on medium-high speed for about 30-45 seconds. Stop once the ingredients are fully combined and the slush has a smooth, even consistency. If you notice large chunks of ice, blend for an additional 10-15 seconds. Avoid over-blending, as this can make the slush too liquidy.
  5. Once blended, taste the slush. If it needs more sweetness, add a little more sugar and blend for a few more seconds. If it’s too thick, you can add a splash of milk to reach your desired consistency.
  6. Pour the slush into glasses. This recipe typically serves 4, but you can easily double it for larger gatherings. Use a spoon to help guide the slush into the glasses if needed.
  7. Garnish each serving with fresh orange slices and mint leaves. The mint not only adds a pop of color but also a refreshing aroma that complements the citrus flavors beautifully.
  8. Serve immediately and enjoy! If you’ve made extra, you can refrigerate it for a short time, but it's best enjoyed fresh.
  • Prep Time: 15 min
  • Cook Time: 0 min
  • Category: Dessert
  • Method: Blending
  • Cuisine: American

Nutrition

  • Serving Size: 1 serving
  • Calories: 200
  • Sugar: 30 g
  • Sodium: 50 mg
  • Fat: 5 g
  • Saturated Fat: 3 g
  • Unsaturated Fat: 2 g
  • Trans Fat: 0 g
  • Carbohydrates: 40 g
  • Fiber: 1 g
  • Protein: 2 g
  • Cholesterol: 20 mg

Keywords: Don't skip the orange zest! It's a game-changer for flavor. Always zest before juicing to make it easier.

Did you make this recipe?

Share a photo and tag us — we can't wait to see what you've made!

Zesty Lemon Poppy Seed Delight

One rainy afternoon, I found myself in my grandmother’s cozy kitchen, the kind that always smelled like warmth and love. She was whipping up her famous Lemon Poppy Seed Loaf, a recipe that had been passed down through generations. As the batter came together, the zesty aroma of fresh lemons filled the air, mingling perfectly with the nutty fragrance of poppy seeds. I can still picture her, apron-clad, as she expertly drizzled a vibrant citrus icing over the loaf, creating a glossy, sun-kissed finish that beckoned us to dive in. It was a moment that sparked my own passion for baking, and this recipe has become a cherished staple in my home ever since.

When you take a bite of this Lemon Poppy Seed Loaf, it’s like a burst of sunshine on your palate. The loaf is beautifully golden, with a tender crumb that melts in your mouth. Each slice is speckled with tiny poppy seeds, adding a delightful crunch that contrasts beautifully with the tangy sweetness of the lemon. And that citrus icing? It’s the finishing touch that elevates this loaf from ordinary to extraordinary, with its bright, zesty flavor dancing on your taste buds.

This recipe stands out because it embraces simplicity while delivering on flavor. I’ve added a hint of vanilla to the batter, enhancing the overall taste and making it even more indulgent. Trust me, once you make this Lemon Poppy Seed Loaf With Citrus Icing, it’ll become a go-to in your baking repertoire.

So, let me show you exactly how to make it!

Zesty Lemon Poppy Seed Delight

Why You’ll Love This Recipe

  • Moist and tender crumb that melts in your mouth, thanks to the perfect balance of butter and buttermilk.
  • Bright, zesty lemon flavor paired with crunchy poppy seeds, creating a delightful texture and taste experience.
  • Easy to whip up in just about an hour, perfect for last-minute gatherings or a cozy afternoon treat.
  • Budget-friendly with everyday ingredients, making it an accessible option for all home bakers.
  • The citrus icing adds a sweet tang that elevates the loaf, turning a simple recipe into a showstopper!

Ingredients

  • 1 ½ cups (190g) all-purpose flour
  • 1 teaspoon baking powder
  • ½ teaspoon baking soda
  • ½ teaspoon salt
  • 3 tablespoons poppy seeds
  • ½ cup (115g) unsalted butter, softened to room temperature
  • 1 cup (200g) granulated sugar
  • 2 large eggs
  • 1 teaspoon vanilla extract
  • 1 teaspoon lemon zest (from about 1 medium lemon)
  • ½ cup (120ml) buttermilk
  • 2 tablespoons fresh lemon juice

For the Citrus Icing:

  • 1 cup (120g) powdered sugar
  • 2 tablespoons fresh lemon juice
  • 1 tablespoon orange juice
  • 1 teaspoon lemon zest (for garnish, optional)

Let’s dive into the key ingredients that make this Lemon Poppy Seed Loaf so special. The all-purpose flour provides the structure and base for the loaf, while the baking powder and baking soda ensure it rises perfectly, giving the loaf a light texture. For a gluten-free variation, you could substitute the flour with a gluten-free all-purpose blend. Poppy seeds not only add a delightful crunch but also contribute to the unique flavor profile that pairs well with the citrus notes.

Unsalted butter is crucial for achieving the buttery richness that makes this loaf so moist. If you’re looking for a dairy-free option, coconut oil or a vegan butter can be used instead. The buttermilk is another essential component, providing acidity that activates the baking soda for a fluffy texture. If you don’t have buttermilk on hand, you can easily make a substitute by mixing ½ cup of milk with 1 tablespoon of vinegar or lemon juice and letting it sit for about 5 minutes.

Step-by-Step Instructions

  1. Preheat your oven to 350°F (175°C). Grease a 9×5-inch loaf pan or line it with parchment paper for easy removal later.
  2. In a medium mixing bowl, whisk together 1 ½ cups of all-purpose flour, 1 teaspoon of baking powder, ½ teaspoon of baking soda, ½ teaspoon of salt, and 3 tablespoons of poppy seeds. This helps to evenly distribute the baking agents and ensures a uniform rise.
  3. In a large mixing bowl, cream together ½ cup of softened unsalted butter and 1 cup of granulated sugar using an electric mixer on medium speed for about 3-4 minutes, until the mixture is light and fluffy. Make sure to scrape down the sides of the bowl occasionally.
  4. Add 2 large eggs, 1 teaspoon of vanilla extract, and 1 teaspoon of lemon zest to the creamed butter and sugar, mixing until fully combined. You want a smooth consistency, so ensure there are no lumps of butter.
  5. In a small bowl, combine ½ cup of buttermilk and 2 tablespoons of fresh lemon juice. Alternately add the dry ingredients and buttermilk mixture to the butter mixture, starting and ending with the dry ingredients. Mix just until combined; do not overmix, as this can lead to a dense loaf.
  6. Pour the batter into the prepared loaf pan. Smooth the top with a spatula, ensuring it’s even. Bake in the preheated oven for 50-60 minutes, or until a toothpick inserted in the center comes out clean. The edges should be lightly golden brown, and the center should feel just set.
  7. Once baked, remove the loaf from the oven and allow it to cool in the pan for about 10 minutes. Then, transfer it to a wire rack to cool completely. Resist the urge to slice too soon, as it will be crumbly if it’s still warm.
  8. While the loaf is cooling, prepare the citrus icing. In a medium bowl, whisk together 1 cup of powdered sugar, 2 tablespoons of fresh lemon juice, and 1 tablespoon of orange juice until smooth. If the icing is too thick, you can add a little more juice to reach your desired consistency.
  9. Once the loaf is completely cool, drizzle the citrus icing over the top. If you like, sprinkle with an additional teaspoon of lemon zest for an extra pop of flavor and color.

Pro Tips for the Best Lemon Poppy Seed Loaf With Citrus Icing

  • Be careful not to overmix your batter; this is a common mistake that can lead to a dense loaf. Mix just until the dry ingredients are incorporated for a light and fluffy texture.
  • Use room temperature ingredients, especially the butter and eggs. This helps to create a smoother batter and ensures even baking. Take your eggs out of the fridge about 30 minutes before you start.
  • For a more pronounced lemon flavor, consider adding a little lemon extract in addition to the zest and juice. Just a half teaspoon can elevate the citrus notes significantly.
  • When measuring your flour, spoon it into the measuring cup and level it off with a knife instead of scooping directly from the bag. This prevents packing and ensures you don’t end up with a dry loaf.
  • Invest in a good quality loaf pan; it makes a difference in heat distribution, which ensures even baking. If your pan is dark-coated, reduce the oven temperature by 25°F to prevent over-browning.

Variations & Serving Ideas

For a delightful twist, consider adding blueberries or raspberries to the batter for a fruity burst of flavor. You can also experiment with different citrus fruits—try lime or grapefruit zest and juice for a refreshing change. For a healthier option, substitute half of the all-purpose flour with whole wheat flour for added fiber without compromising too much on texture.

This Lemon Poppy Seed Loaf pairs beautifully with a light salad, such as a mixed greens salad with a vinaigrette, or a cup of tea for a cozy afternoon treat. It also complements a creamy cheese platter, as the acidity of the loaf balances rich cheeses perfectly. Lastly, a scoop of vanilla ice cream on the side creates a delightful contrast of temperatures and flavors!

Storage, Make-Ahead & Reheating

This Lemon Poppy Seed Loaf can be stored at room temperature for up to 3 days if wrapped tightly in plastic wrap. If you want to keep it longer, it freezes well for up to 3 months. To freeze, wrap the loaf tightly in plastic wrap and then in aluminum foil to prevent freezer burn.

When you’re ready to enjoy it again, simply thaw it in the fridge overnight. Reheat individual slices in the microwave for 15-20 seconds or in a toaster oven until warmed through. Interestingly, many people find that this loaf tastes even better the next day, as the flavors have time to meld!

Frequently Asked Questions

Can I make Lemon Poppy Seed Loaf With Citrus Icing ahead of time?

Yes — in fact, it tastes even better the next day! You can make the loaf a day in advance, allowing the flavors to develop. Just be sure to store it in an airtight container to maintain its moisture.

Can I substitute the poppy seeds?

Absolutely! If you don’t have poppy seeds on hand or prefer an alternative, you can use sesame seeds for a similar crunch or omit them entirely for a smooth loaf.

What can I use instead of buttermilk?

If you don’t have buttermilk, you can easily create a substitute by mixing ½ cup of milk (dairy or plant-based) with 1 tablespoon of vinegar or lemon juice. Let it sit for 5 minutes before using in the recipe.

How can I make this recipe gluten-free?

To make a gluten-free version of this Lemon Poppy Seed Loaf, substitute the all-purpose flour with a gluten-free all-purpose flour blend. Just ensure that the blend contains a binding agent like xanthan gum for the best results.

What is the best way to store leftover loaf?

Leftover Lemon Poppy Seed Loaf should be stored in an airtight container at room temperature for up to 3 days. For longer storage, wrap it tightly and freeze for up to 3 months. Thaw it before serving for the best texture.

Zesty Lemon Poppy Seed Delight

Final Thoughts

The Lemon Poppy Seed Loaf with Citrus Icing is truly a delightful treat that brings a burst of brightness to any occasion. The zesty lemon flavor combined with the subtle crunch of poppy seeds creates a satisfying balance, while the citrus icing adds a touch of sweetness that perfectly complements the loaf’s tanginess.

This is the kind of recipe I come back to again and again, especially when I want to brighten up a gloomy day or celebrate a small victory. The aroma that fills the kitchen as it bakes is absolutely heavenly! I encourage you to give this recipe a try; you might just find it becoming a beloved staple in your home. Don’t forget to share your results or even add your own unique twist—I can’t wait to see what you create!

Print
clock clock iconcutlery cutlery iconflag flag iconfolder folder iconinstagram instagram iconpinterest pinterest iconfacebook facebook iconprint print iconsquares squares iconheart heart iconheart solid heart solid icon

Lemon Poppy Seed Loaf


  • Author: Lily author
  • Total Time: 38 minute
  • Yield: 1 loaf 1x
Pin Recipe
Print Recipe

Description

This Lemon Poppy Seed Loaf is a delightful treat that combines zesty lemon flavor with crunchy poppy seeds. Topped with a citrus icing, it’s perfect for any occasion.


Ingredients

Scale
  • 1 ½ cups (190g) all-purpose flour
  • 1 teaspoon baking powder
  • ½ teaspoon baking soda
  • ½ teaspoon salt
  • 3 tablespoons poppy seeds
  • ½ cup (115g) unsalted butter, softened to room temperature
  • 1 cup (200g) granulated sugar
  • 2 large eggs
  • 1 teaspoon vanilla extract
  • 1 teaspoon lemon zest (from about 1 medium lemon)
  • ½ cup (120ml) buttermilk
  • 2 tablespoons fresh lemon juice
  • 1 cup (120g) powdered sugar
  • 2 tablespoons fresh lemon juice
  • 1 tablespoon orange juice
  • 1 teaspoon lemon zest (for garnish, optional)

Instructions

  1. Preheat your oven to 350°F (175°C). Grease a 9×5-inch loaf pan or line it with parchment paper for easy removal later.
  2. In a medium mixing bowl, whisk together 1 ½ cups of all-purpose flour, 1 teaspoon of baking powder, ½ teaspoon of baking soda, ½ teaspoon of salt, and 3 tablespoons of poppy seeds. This helps to evenly distribute the baking agents and ensures a uniform rise.
  3. In a large mixing bowl, cream together ½ cup of softened unsalted butter and 1 cup of granulated sugar using an electric mixer on medium speed for about 3-4 minutes, until the mixture is light and fluffy. Make sure to scrape down the sides of the bowl occasionally.
  4. Add 2 large eggs, 1 teaspoon of vanilla extract, and 1 teaspoon of lemon zest to the creamed butter and sugar, mixing until fully combined. You want a smooth consistency, so ensure there are no lumps of butter.
  5. In a small bowl, combine ½ cup of buttermilk and 2 tablespoons of fresh lemon juice. Alternately add the dry ingredients and buttermilk mixture to the butter mixture, starting and ending with the dry ingredients. Mix just until combined; do not overmix, as this can lead to a dense loaf.
  6. Pour the batter into the prepared loaf pan. Smooth the top with a spatula, ensuring it’s even. Bake in the preheated oven for 50-60 minutes, or until a toothpick inserted in the center comes out clean. The edges should be lightly golden brown, and the center should feel just set.
  7. Once baked, remove the loaf from the oven and allow it to cool in the pan for about 10 minutes. Then, transfer it to a wire rack to cool completely. Resist the urge to slice too soon, as it will be crumbly if it’s still warm.
  8. While the loaf is cooling, prepare the citrus icing. In a medium bowl, whisk together 1 cup of powdered sugar, 2 tablespoons of fresh lemon juice, and 1 tablespoon of orange juice until smooth. If the icing is too thick, you can add a little more juice to reach your desired consistency.
  9. Once the loaf is completely cool, drizzle the citrus icing over the top. If you like, sprinkle with an additional teaspoon of lemon zest for an extra pop of flavor and color.
  • Prep Time: 15 mins
  • Cook Time: 50-60 mins
  • Category: Dessert
  • Method: Baking
  • Cuisine: American

Nutrition

  • Serving Size: 1 slice
  • Calories: 200
  • Sugar: 15 g
  • Sodium: 150 mg
  • Fat: 8 g
  • Saturated Fat: 5 g
  • Unsaturated Fat: 3 g
  • Trans Fat: 0 g
  • Carbohydrates: 30 g
  • Fiber: 1 g
  • Protein: 3 g
  • Cholesterol: 40 mg

Keywords: Be careful not to overmix your batter; this is a common mistake that can lead to a dense loaf. Use room temperature ingredients for a smoother batter and even baking.

Did you make this recipe?

Share a photo and tag us — we can't wait to see what you've made!

  • Privacy Policy
  • Terms Of Service
  • Contact
  • About
  • GDPR

Copyright © 2025 Homesmad