Irresistible Geode Cookies Colorful Delicious Treats have taken the baking world by storm, and for good reason! Have you ever dreamt of creating edible art that not only dazzles the eyes but also delights the palate with every single bite? Imagine the gasps of delight as you present a plate of cookies that shimmer and sparkle, each one revealing a unique, crystalline center reminiscent of a precious geode stone. This isn’t just a cookie; it’s a miniature masterpiece, a conversation starter, and an absolute joy to share with friends and family.
While these stunning cookies might seem like a recent phenomenon in the culinary landscape, their charm taps into a long-standing human fascination with nature’s hidden beauty and the desire to infuse everyday items with a touch of magic. Modern bakers worldwide have enthusiastically embraced the challenge of replicating the earth’s raw, glittering treasures in sugary form, skillfully turning a simple sugar cookie into a canvas for vibrant, edible crystals. It’s a contemporary culinary trend that beautifully celebrates creativity and the sheer wonder of transforming food into art.
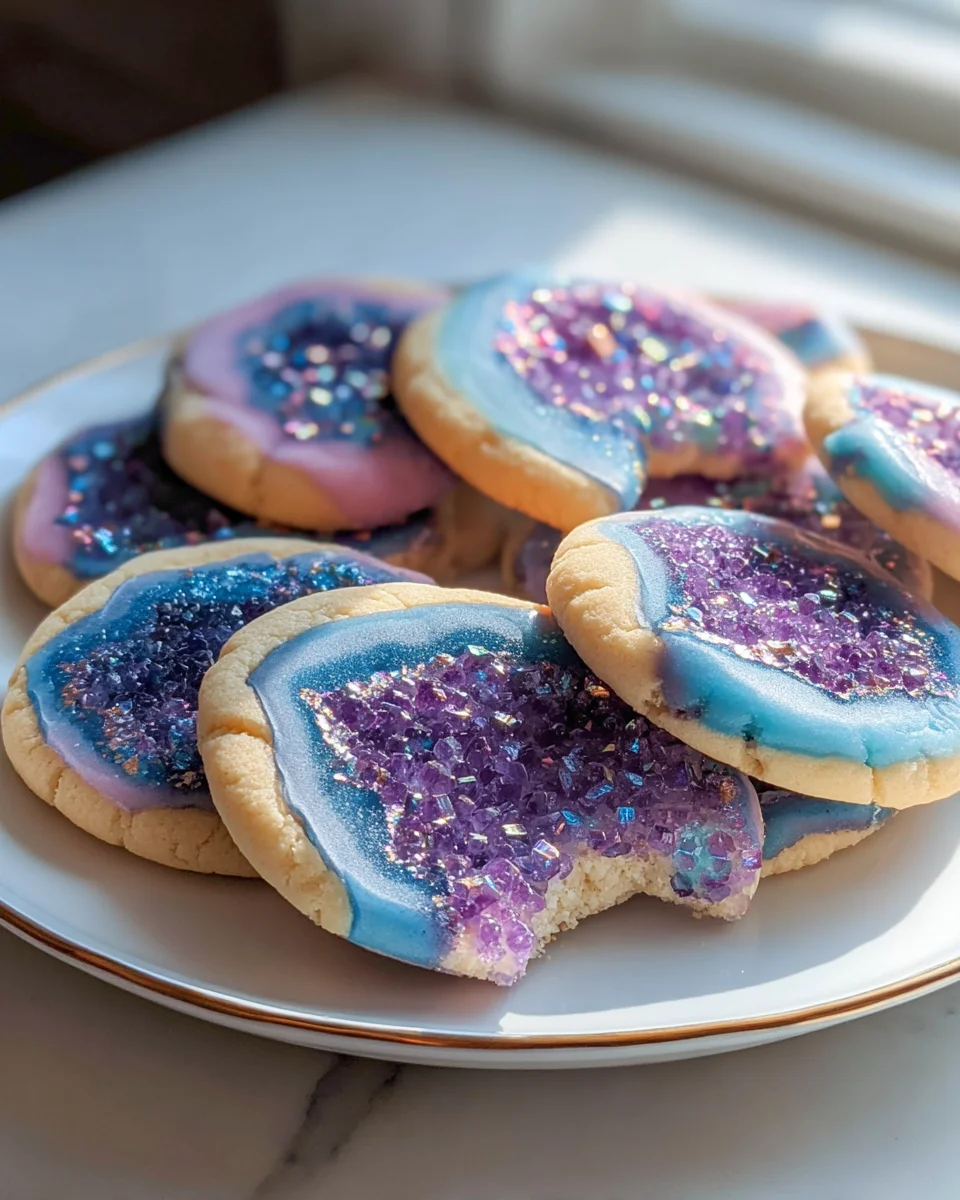
People absolutely adore these beautiful bakes not just for their breathtaking appearance, but for the delightful experience they offer from the first glance to the last crumb. The satisfying crunch of the sugar crystals gives way to a perfectly tender cookie beneath, creating a truly delightful textural contrast that keeps you coming back for more. Their vivid, sparkling colors make them a perfect, eye-catching addition to any celebration, from birthdays to festive holidays, making them truly Irresistible Geode Cookies Colorful Delicious Treats that promise a memorable baking and tasting adventure. Get ready to impress everyone with these edible gems!

Ingredients:
-
For the Irresistible Sugar Cookies:
- 1 cup (2 sticks or 226g) unsalted butter, softened to room temperature
- 1 ½ cups (300g) granulated sugar
- 2 large eggs, room temperature
- 2 teaspoons pure vanilla extract
- 3 ½ cups (420g) all-purpose flour, plus more for dusting
- 1 teaspoon baking powder
- ½ teaspoon salt
-
For the Royal Icing (Your Edible Mortar):
- 4 cups (480g) powdered sugar (confectioners’ sugar), sifted
- 3 tablespoons meringue powder
- ½ teaspoon pure vanilla extract (clear vanilla if you want pure white icing)
- ½ – ¾ cup warm water, divided
- Gel food coloring (various shades of blue, purple, pink, green – choose your favorite geode colors!)
-
For the Colorful Geode Crystals:
- Assorted rock candy crystals (crushed or small pieces, various colors like amethyst, sapphire, emerald, ruby)
- Light corn syrup or edible piping gel (for adhesion)
- Optional: Edible glitter (gold, silver, or iridescent) for extra sparkle
- Optional: Edible gold or silver paint/dust mixed with a little clear extract for outlining
-
Equipment You’ll Need:
- Electric mixer (stand mixer or hand mixer)
- Large mixing bowls
- Rubber spatulas
- Rolling pin
- Cookie cutters (round, oval, or organic shapes work best)
- Baking sheets
- Parchment paper or silicone baking mats
- Piping bags and small round tips (#1, #2, or #3)
- Small clean paintbrushes (food-grade only)
- Small bowls or ramekins for icing colors
- Toothpicks or scribe tool
Making the Sugar Cookie Dough: The Foundation of Your Geode Masterpiece
Crafting the perfect cookie base is the first step to creating our Irresistible Geode Cookies Colorful Delicious Treats. This dough is incredibly forgiving and holds its shape beautifully.
- Cream the Butter and Sugar: In the bowl of your electric mixer, fitted with the paddle attachment, cream together the softened unsalted butter and granulated sugar on medium-high speed until the mixture is light, fluffy, and pale in color. This usually takes about 3-5 minutes. This step is crucial for incorporating air and ensuring tender cookies. Scrape down the sides of the bowl as needed to make sure everything is well combined.
- Add Wet Ingredients: Reduce the mixer speed to low and add the two large eggs, one at a time, mixing well after each addition. Once both eggs are fully incorporated, stir in the pure vanilla extract. Mix until just combined; do not overmix at this stage.
- Combine Dry Ingredients: In a separate medium bowl, whisk together the all-purpose flour, baking powder, and salt. Make sure these dry ingredients are thoroughly combined to ensure even leavening throughout your cookies.
- Gradually Add Dry to Wet: With the mixer on low speed, slowly add the dry ingredient mixture to the wet ingredients, a little at a time. Mix only until the flour is just incorporated and a soft dough forms. Be careful not to overmix the dough, as this can lead to tough cookies. The dough should come together easily and not be overly sticky.
- Chill the Dough: Divide the dough into two equal portions. Flatten each portion into a disc, wrap tightly in plastic wrap, and refrigerate for at least 1-2 hours, or preferably overnight. Chilling the dough is an essential step that prevents the cookies from spreading too much in the oven, ensuring your cut-out shapes remain crisp and defined. This also makes the dough much easier to roll out.
Baking the Cookie Bases: Perfect Canvas for Colorful Crystals
Once your dough is perfectly chilled, it’s time to transform it into the canvases for your vibrant geode creations. The goal is a sturdy, yet tender, cookie.
- Preheat and Prepare: Preheat your oven to 375°F (190°C). Line several baking sheets with parchment paper or silicone baking mats. This will prevent sticking and make cleanup a breeze.
- Roll Out the Dough: On a lightly floured surface, unwrap one disc of chilled dough. Using your rolling pin, roll the dough out to an even thickness of about ¼ inch. If the dough becomes too warm and sticky, return it to the refrigerator for 10-15 minutes. Consistency in thickness is key for even baking!
- Cut Out Shapes: Use your desired cookie cutters (round, oval, or organic shapes work wonderfully for geode cookies) to cut out your cookie shapes. Place the cut-out cookies about 1 inch apart on the prepared baking sheets. Gather any dough scraps, gently re-roll them, and cut out more cookies until all the dough is used.
- Bake to Perfection: Bake the cookies for 8-12 minutes, depending on their size and your oven, or until the edges are lightly golden and the centers are just set. They should still be slightly soft in the middle when you take them out. Keep a close eye on them to prevent over-baking, which can make them dry.
- Cool Completely: Let the cookies cool on the baking sheets for about 5 minutes before carefully transferring them to a wire rack to cool completely. It’s absolutely vital that the cookies are fully cooled before you even think about decorating them; warm cookies will melt your icing!
Preparing the Royal Icing: Your Edible Mortar
Royal icing is the magical medium that will outline your cookies and secure your beautiful geode crystals. Getting the consistency right is crucial for perfect results.
- Combine Ingredients: In the bowl of your electric mixer, fitted with the whisk attachment, combine the sifted powdered sugar and meringue powder. Meringue powder is essential for structure and shine.
- Add Water and Vanilla: Gradually add ½ cup of warm water and the vanilla extract. Start mixing on low speed, then increase to medium-high. Beat until the icing is thick, glossy, and holds stiff peaks. This usually takes about 5-7 minutes. The icing should be very firm at this stage – this is your outline consistency. If it’s too thick, add a tiny bit more water (½ teaspoon at a time) until it reaches the desired stiffness for outlining.
- Achieve Outline Consistency: The perfect outline consistency should be thick enough to hold its shape when piped, but not so stiff that it’s difficult to squeeze from the bag. If you run a spoon through it, the line should slowly disappear after 15-20 seconds. Transfer about half of this stiff icing into a piping bag fitted with a small round tip (#1 or #2). This will be for outlining your cookies.
- Create Flood Consistency: To the remaining icing in the mixer bowl, gradually add more warm water, about ½ teaspoon at a time, mixing on low speed. You’re aiming for a “flood” consistency, which means when you drizzle a spoonful of icing back into the bowl, it should disappear and become smooth again within 8-10 seconds. This consistency is perfect for filling in sections of your cookie smoothly.
- Color Your Icing: Divide the flood consistency icing into several small bowls. Using gel food coloring (gel colors are best as they don’t thin the icing as much as liquid colors), tint each bowl to a different shade that complements your geode theme – think purples, blues, pinks, or even a soft white or grey. These colors will form the concentric rings around your geode crystals, adding depth and realism to your Irresistible Geode Cookies. Transfer these colored icings into piping bags (you can cut a small hole at the tip or use a #3 round tip).
Creating the Geode Cavity: Where the Magic Begins
Now that your cookies are cool and your icing is ready, it’s time to start forming the magical geode effect. This step requires a steady hand and a little patience.
- Outline Your Cookies: Using the piping bag with the stiff, uncolored royal icing (outline consistency) and a small round tip, carefully pipe a border around the edge of each cooled cookie. Let this border dry for about 10-15 minutes to set up. This will create a dam to hold your flood icing.
- Create the Geode Opening: Now, pipe another outline inside the first border, but don’t close it off. Instead, leave a small gap in the center. Imagine you’re drawing a slightly smaller, imperfect shape inside your cookie. This is where your geode cavity will be.
- Flood the Inner Ring: Take one of your colored flood icings (e.g., a dark blue or purple) and carefully fill the space between your outer border and your inner “geode opening.” Use a toothpick or scribe tool to gently spread the icing to the edges and pop any air bubbles. Let this layer dry partially for about 20-30 minutes.
- Scoop Out the Center (The Cavity): Once the flood icing has set slightly, but is still pliable, use a small, clean spoon or the tip of a small paring knife to gently scoop out a shallow, irregular cavity in the very center of the cookie, within your inner border. Be careful not to go all the way through the cookie! This indentation will hold your rock candy crystals and give the geode its signature depth.
- Layer More Colors (Optional but Recommended): If you want multiple colored rings, you can pipe a slightly lighter shade of flood icing around the inside edge of your scooped-out cavity, creating another concentric ring. Allow each layer to set for about 15-20 minutes before adding the next. This layering really enhances the “Colorful Delicious Treats” aspect of your geodes.
Adhering the Crystals: Building Your Irresistible Geode Cookies
This is where your cookies truly begin to transform into stunning, sparkling geode masterpieces. The rock candy crystals are the stars!
- Prepare Your Crystals: If your rock candy comes in large chunks, you might need to gently crush some of it into smaller, varied pieces. You want a mix of sizes for a realistic geode effect. Arrange your different colored crystals in separate small bowls so they are easy to access.
- Apply Adhesive: Using a small, clean paintbrush, apply a thin layer of light corn syrup or edible piping gel directly into the scooped-out cavity of your cookie. Don’t overdo it; a thin, even layer is all you need for the crystals to adhere.
-
Place the Crystals: Immediately after applying the adhesive, start placing your rock candy crystals into the cavity. Begin with larger pieces to establish the main structure, then fill in gaps with smaller pieces.
Pro Tip: For a more authentic geode look, concentrate darker, more intensely colored crystals (like deep purples or blues) towards the very center of the cavity. As you work your way outwards, you can gradually incorporate lighter shades or different colors (pinks, clear, iridescent) to create a beautiful gradient effect. You can use a toothpick to gently arrange the crystals exactly where you want them.
Don’t be afraid to mix and match colors! This is what makes your Irresistible Geode Cookies so vibrant and unique. - Build Up the Layers: Continue adding crystals, building them up slightly to create a three-dimensional effect that mimics real geodes. You want them to sparkle and catch the light. Press them gently into the corn syrup to ensure they stick well.
Finishing Touches and Drying: Revealing Your Colorful Delicious Treats
The final steps bring all the elements together, adding that extra touch of magic and ensuring your Irresistible Geode Cookies are ready to impress.
- Optional: Add Edible Glitter: For an extra dazzling effect, lightly sprinkle edible glitter (iridescent, gold, or silver works beautifully) over the rock candy crystals while the corn syrup is still tacky. This will give them an even more realistic, shimmering geode appearance.
- Optional: Edible Gold/Silver Outline: If you’re feeling extra fancy, mix a little edible gold or silver dust with a few drops of clear vanilla extract or vodka to create a paint. Using a very fine, clean paintbrush, carefully paint a thin line around the very edge of your geode cavity, or even around the outer border of the royal icing. This metallic touch truly elevates the look of your Colorful Delicious Treats.
- Allow to Dry Completely: Once all the crystals are in place and any optional finishing touches are added, gently transfer the cookies back to a clean wire rack. Allow them to dry undisturbed for at least 8-12 hours, or preferably overnight. This drying time is crucial for the royal icing to harden completely and for the corn syrup to fully set, ensuring your crystals are securely attached and your cookies are stable.
- Storage: Once completely dry, store your Irresistible Geode Cookies in an airtight container at room temperature for up to 5-7 days. Layer them carefully between sheets of parchment paper to protect the delicate geode decorations.
- Enjoy Your Creation: Step back and admire your stunning Irresistible Geode Cookies Colorful Delicious Treats! They are not only a feast for the eyes but also a delightful treat for the taste buds, with the crunch of the rock candy perfectly complementing the sweet sugar cookie base and royal icing. Share them with friends and family, or keep them all to yourself – you’ve earned it!
Conclusion:
And just like that, we’ve come to the delicious end of our creative baking adventure! I truly hope you’ve enjoyed unraveling the simple secrets behind these stunning treats as much as I’ve enjoyed sharing them with you. What we’ve crafted here isn’t just another cookie; it’s a miniature edible masterpiece, a testament to how a little imagination and a few basic ingredients can transform into something truly extraordinary and memorable. These cookies stand out in a sea of ordinary confections, promising not just a delightful taste but also a visual spectacle that captivates anyone who lays eyes on them.
Why These Cookies Are a Must-Try Culinary Delight
Allow me to reiterate why this recipe is an absolute gem and a definite must-try for bakers of all skill levels. Firstly, there’s the undeniable “wow” factor. Imagine the gasps of delight when you present a platter of these dazzling creations. Each cookie is a unique work of art, a miniature geological wonder, showcasing vibrant, sparkling crystal formations that truly resemble nature’s own geodes. They are a conversation starter, an Instagram sensation waiting to happen, and a surefire way to impress guests at any gathering, from casual tea parties to elaborate celebrations. Beyond their stunning visual appeal, the texture contrast is simply divine. The crisp, buttery cookie base perfectly complements the satisfying crunch of the sugary crystals, creating a symphony of textures in every bite. And the flavor? Absolutely heavenly! The delicate sweetness of the cookie combined with the pure sugar joy of the crystals makes for an unforgettable taste experience. This isn’t just baking; it’s art, it’s science, and it’s pure fun rolled into one delightfully digestible package. The process itself is incredibly rewarding, offering a therapeutic escape and a wonderful opportunity to express your creativity. There’s a profound sense of accomplishment in seeing these beautiful geodes emerge from your oven, knowing you’ve created something so visually arresting and incredibly tasty. Seriously, they are the very definition of Irresistible Geode Cookies Colorful Delicious Treats, promising a magical moment with every single bite.
Creative Serving Suggestions and Exciting Variations
Now that you’ve mastered the art of creating these beauties, let’s talk about how to showcase them and even push the boundaries of their delicious potential. For serving, these cookies are perfect on their own with a cup of freshly brewed coffee or a soothing herbal tea, making for an elegant afternoon snack. They make spectacular dessert table centerpieces for birthdays, bridal showers, baby showers, or holiday gatherings, instantly elevating the aesthetic of your spread. Packaged elegantly in clear cellophane bags with a beautiful ribbon, they transform into thoughtful, personalized gifts that truly stand out, showing just how much care and creativity you poured into them. Imagine gifting a box of these unique delights to friends, family, or even colleagues – they’re guaranteed to bring a smile!
Feeling adventurous with variations? The possibilities are truly endless! Try experimenting with different flavor extracts in your cookie dough – a touch of almond, lemon zest, or even a hint of mint could provide an exciting twist. You can also play with the colors of your crystals; instead of a single hue, try layering two complementary colors for a more complex, multi-dimensional geode effect. Think sapphire blue merging into emerald green, or amethyst purple blending into rose quartz pink. For an extra touch of sparkle, gently dust the finished geodes with edible glitter before they fully set. You could even explore different types of sugar crystals for varied textures and appearances, from finer granulated sugars to larger, more irregular rock candy chunks for a truly rustic geode look. Don’t forget seasonal adaptations! For autumn, consider warm spice-flavored cookie dough with amber and deep red crystals. For winter, peppermint-flavored dough with icy blue and white crystals could be absolutely breathtaking. The base recipe is incredibly versatile, making it easy to adapt to any occasion or personal preference. Don’t be afraid to let your imagination run wild!
Your Turn to Create and Share!
My greatest hope is that this recipe inspires you to step into your kitchen, roll up your sleeves, and embark on this delightful journey. There’s something profoundly satisfying about baking, and even more so when the result is as stunning and delicious as these geode cookies. Don’t worry about perfection on your first try; the beauty of these cookies lies in their organic, natural variation. Each one will be uniquely beautiful, just like real geodes! I strongly encourage you to embrace the process, have fun with the colors, and truly make them your own. Once you’ve created your batch of these mesmerizing treats, I would absolutely love to hear about your experience! Share your photos, tell me about your favorite color combinations, or any unique variations you came up with. Connecting with fellow bakers and seeing your wonderful creations is one of the joys of sharing recipes. So, go ahead, gather your ingredients, unleash your inner artist, and prepare to be amazed by the delicious, sparkling wonders you’re about to bring to life. Happy baking, my friends!
Irresistible Geode Cookies: Colorful Delicious Treats!
Experience the magic of Irresistible Geode Cookies! These edible masterpieces shimmer and sparkle, revealing a unique, crystalline center reminiscent of a precious geode stone. A delightful textural contrast of crunchy crystals and tender cookie makes them a truly memorable treat, perfect for any celebration.
Ingredients
Instructions
Important Information
Nutrition Facts (Per Serving)
It is important to consider this information as approximate and not to use it as definitive health advice.
Allergy Information
Please check ingredients for potential allergens and consult a health professional if in doubt.