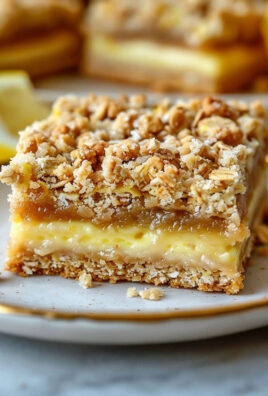
White Chocolate Candy Cane Cookies
Oh, get ready to experience a little holiday magic in every bite! When I think about what makes a cookie truly special during the festive season, these White Chocolate Candy Cane Cookies immediately spring to mind. What makes them so uniquely wonderful? It’s that irresistible dance between the rich, creamy sweetness of white chocolate and the refreshing, cool crunch of peppermint candy canes. This isn’t just another cookie; it’s a celebration! You’ll absolutely adore how they fill your home with a sweet, minty aroma while they bake, and how perfectly they capture the spirit of winter wonder. Imagine a soft, chewy cookie base, generously studded with luscious chunks of melted white chocolate and vibrant flecks of crushed red and white candy canes, giving them a delightful texture and a burst of refreshing flavor. They’re visually stunning too, making them a perfect addition to your holiday dessert table or a thoughtful homemade gift. Trust me, these cookies are a absolute must-bake this season!

Ingredient Notes
Creating the perfect batch of White Chocolate Candy Cane Cookies starts with understanding the role each ingredient plays. I’ve found that high-quality ingredients truly make a difference in the final taste and texture of these festive treats.
- Unsalted Butter: I always opt for unsalted butter because it gives me full control over the salt content in my cookies. Make sure it’s softened to room temperature – this is crucial for creaming it properly with the sugars, resulting in a wonderfully fluffy dough. If you only have salted butter, you can use it, but I’d recommend reducing the added salt in the recipe by about a quarter teaspoon to avoid overly salty cookies.
- Granulated Sugar & Brown Sugar: The combination of both sugars is key here. Granulated sugar contributes to crisp edges, while brown sugar adds moisture, chewiness, and a subtle caramel note. I prefer light brown sugar for a balanced flavor, but dark brown sugar would lend a richer, deeper taste if you like that. Don’t skimp on these; they’re vital for both flavor and structure.
- Eggs: Large eggs, at room temperature, bind the dough together and add richness. Room temperature eggs emulsify better with the butter and sugar, leading to a smoother, more uniform dough. If you forget to take them out ahead of time, a quick trick is to place them in a bowl of warm (not hot!) water for 5-10 minutes.
- Vanilla Extract: I consider vanilla extract a non-negotiable flavor enhancer. A good quality pure vanilla extract really makes all the other flavors sing. In these cookies, it complements the white chocolate beautifully.
- All-Purpose Flour: Standard all-purpose flour is what I use for these cookies. It provides the necessary structure without making them too dense. While I haven’t personally experimented with gluten-free flours for this specific recipe, if you’re going that route, I’d suggest a 1:1 gluten-free baking blend that contains xanthan gum for the best chance at a similar texture.
- Baking Soda: This is our leavening agent, giving the cookies a lovely lift and contributing to their soft chewiness. Make sure your baking soda is fresh for optimal results.
- Salt: A pinch of salt balances the sweetness and enhances all the other flavors. Even in sweet recipes, salt is incredibly important!
- White Chocolate Chips or Chunks: This is where the “white chocolate” in the name comes from! I can’t stress enough how much difference good quality white chocolate makes. Look for white chocolate that contains cocoa butter as its primary fat, not just vegetable oil. Chips work perfectly, but I love the random pockets of melted white chocolate you get from roughly chopped white chocolate bars or chunks. While you could use milk or dark chocolate, it would completely change the identity of these cookies, so for true White Chocolate Candy Cane Cookies, stick with white.
- Candy Canes: The star of the show for that peppermint crunch! You’ll want to crush these. I prefer classic red and white peppermint candy canes for their iconic look and flavor. Make sure you crush them into varying sizes – some finer bits for color and some slightly larger pieces for a delightful crunch. If you don’t have candy canes, a very small amount of peppermint extract (start with ¼ teaspoon) can be added to the dough, but you’ll lose the characteristic crunchy texture and visual appeal that crushed candy canes provide. You could potentially use other hard peppermint candies, but candy canes are definitely my top choice.
Step-by-Step Instructions
Making White Chocolate Candy Cane Cookies is a delightful process, and I’m going to guide you through my tried-and-true method for perfect results every time. Follow these steps, and you’ll have a batch of festive, delicious cookies ready in no time!
- Prepare Your Workspace: First things first, preheat your oven to 375°F (190°C). I always line my baking sheets with parchment paper or silicone baking mats – this prevents sticking and makes cleanup so much easier.
- Cream Butter and Sugars: In a large mixing bowl, using an electric mixer, beat the softened unsalted butter with both the granulated sugar and brown sugar. Beat on medium speed until the mixture is light, fluffy, and pale in color, usually about 2-3 minutes. This step incorporates air, which is key for a tender cookie.
- Add Eggs and Vanilla: Scrape down the sides of the bowl. Then, beat in the eggs one at a time, mixing well after each addition. Once the eggs are incorporated, stir in the vanilla extract. The mixture should look smooth and creamy.
- Combine Dry Ingredients: In a separate medium bowl, whisk together the all-purpose flour, baking soda, and salt. Whisking ensures these ingredients are evenly distributed, so you don’t get pockets of baking soda in your cookies.
- Gradually Add Dry to Wet: With the mixer on low speed, gradually add the dry ingredient mixture to the wet ingredients. Mix just until combined – be careful not to overmix! Overmixing develops the gluten in the flour, which can lead to tough cookies. As soon as you see no more streaks of flour, stop mixing.
- Fold in White Chocolate and Candy Canes: Now comes the fun part! Gently fold in the white chocolate chips (or chunks) and about three-quarters of your crushed candy canes. I save some of the crushed candy canes for pressing onto the cookies after they bake, which really makes them pop visually.
- Chill the Dough (Optional but Recommended): For the best texture and to prevent the cookies from spreading too much, I highly recommend chilling the dough for at least 30 minutes, or even up to an hour. If you’re in a hurry, you can skip this, but a chilled dough yields a superior cookie.
- Scoop and Bake: Drop rounded tablespoons of dough onto your prepared baking sheets, leaving about 2 inches between each cookie. I like to use a cookie scoop for uniform size, which ensures even baking.
- Bake to Perfection: Bake for 9-11 minutes, or until the edges are lightly golden brown and the centers are still soft and slightly underbaked. Remember, cookies continue to cook for a minute or two after they come out of the oven.
- Decorate While Warm: As soon as you pull the cookies out of the oven, and while they are still warm and soft, gently press the remaining crushed candy canes onto the tops of each cookie. This helps them adhere beautifully and gives a lovely fresh peppermint crunch.
- Cool Completely: Let the cookies cool on the baking sheets for 5 minutes before transferring them to a wire rack to cool completely. This prevents them from breaking and allows them to set up properly.
Tips & Suggestions
I’ve learned a few tricks over the years that can elevate your White Chocolate Candy Cane Cookies from good to absolutely phenomenal. Here are my top tips and suggestions to help you achieve cookie perfection:
- Don’t Overmix the Dough: This is a golden rule for most cookies! Once you add the flour, mix only until just combined. Overmixing develops gluten, which can make your cookies tough instead of delightfully tender. I stop as soon as I no longer see streaks of dry flour.
- Chill Your Dough: While tempting to skip, chilling the dough for at least 30 minutes (or up to an hour) is a game-changer. It helps the flavors meld, prevents the cookies from spreading too much, and results in a thicker, chewier cookie with a richer taste. If your kitchen is warm, this step is even more crucial.
- The Art of Crushing Candy Canes: For the best texture, I aim for a mix of fine dust and small chunks. My favorite method is to place candy canes in a sturdy freezer bag, seal it, and then gently tap them with a rolling pin or the flat side of a meat mallet. Avoid pulverizing them into a fine powder, as you’ll lose that satisfying crunch.
- Timing is Everything for Candy Canes: To get the vibrant color and distinct crunch of the candy canes without them completely melting into the cookie, I always mix about three-quarters of them into the dough and then press the remaining quarter onto the cookies immediately after they come out of the oven, while they’re still warm. This trick also makes the cookies look extra festive!
- Don’t Overbake: These cookies are best when they are soft and chewy in the center with slightly crispy edges. Pull them out of the oven when the edges are set and lightly golden, but the centers still look a little soft. They will continue to set as they cool on the baking sheet.
- Quality White Chocolate Matters: Just like with any chocolate, the quality of your white chocolate chips or chunks will significantly impact the taste. Opt for a brand that tastes good on its own, preferably one made with real cocoa butter.
- Add a Peppermint Boost: If you’re a true peppermint lover, you can add a tiny splash (I’m talking ¼ to ½ teaspoon) of pure peppermint extract to the wet ingredients along with the vanilla. Be very careful, as a little goes a long way and too much can make the cookies taste like toothpaste!
- Even Scooping: Using a cookie scoop helps ensure all your cookies are roughly the same size. This leads to more even baking and a beautiful, consistent batch.
Storage
Proper storage is essential to keep your White Chocolate Candy Cane Cookies fresh and delicious for as long as possible. I want you to enjoy every last crumb, so here’s how I store mine:
- At Room Temperature: Once completely cooled, I store my cookies in an airtight container at room temperature. A cookie jar or a plastic container with a tight-fitting lid works perfectly. They will stay wonderfully fresh for up to 3-5 days. I usually place a slice of bread in the container with them; it miraculously helps keep the cookies soft by transferring its moisture.
- Dealing with Candy Canes: Keep in mind that crushed candy canes can become a bit sticky or slightly melt if exposed to high humidity or if stored with cookies that are still warm. Always ensure your cookies are completely cool before storing, and try to keep the container in a cool, dry place.
- Freezing Baked Cookies: These cookies freeze beautifully! Once fully cooled, I arrange them in a single layer on a baking sheet and pop them in the freezer for about an hour until firm. Then, I transfer them to an airtight, freezer-safe container or a heavy-duty freezer bag, layering them with parchment paper if stacking. They’ll keep well in the freezer for up to 2-3 months. To thaw, simply take them out and let them come to room temperature on the counter.
- Freezing Cookie Dough: You can also freeze the unbaked cookie dough. After preparing the dough, scoop it into individual balls and place them on a parchment-lined baking sheet. Freeze until solid, then transfer the frozen dough balls to an airtight freezer bag. They can be stored for up to 3 months. When you’re ready to bake, you can bake them directly from frozen; just add an extra 2-4 minutes to the baking time.

Final Thoughts
There’s something truly magical about these White Chocolate Candy Cane Cookies, and I promise you, they are an absolute delight. The creamy, luxurious sweetness of white chocolate perfectly complements the refreshing, cool burst of peppermint from the crushed candy canes, creating a symphony of festive flavors in every chewy bite. This isn’t just any cookie; it’s a little piece of holiday cheer, a visually stunning treat that tastes as good as it looks.
I truly believe these White Chocolate Candy Cane Cookies are a must-try recipe because they capture the essence of the season in such a simple, yet irresistible way. Whether you’re baking for a holiday party, a cozy night in, or as a thoughtful homemade gift, these cookies are guaranteed to spread smiles. Go on, give them a try – I’m certain they’ll become a cherished part of your baking tradition!

White Chocolate Candy Cane Cookies – Festive & Delicious!
- Total Time: 26 minutes
- Yield: 24 cookies 1x
Description
Experience the magic of the holidays with these White Chocolate Candy Cane Cookies, featuring a delightful blend of creamy white chocolate and refreshing peppermint. Perfect for your holiday dessert table or as a thoughtful gift, these cookies are sure to spread joy this season!
Ingredients
- 1 cup Unsalted Butter, softened
- 3/4 cup Granulated Sugar
- 3/4 cup Brown Sugar
- 2 Large Eggs, at room temperature
- 2 teaspoons Vanilla Extract
- 2 1/4 cups All-Purpose Flour
- 1 teaspoon Baking Soda
- 1/2 teaspoon Salt
- 1 1/2 cups White Chocolate Chips or Chunks
- 1 cup Candy Canes, crushed
Instructions
- Preheat your oven to 375°F (190°C) and line your baking sheets with parchment paper or silicone baking mats.
- In a large mixing bowl, beat the softened unsalted butter with both the granulated sugar and brown sugar on medium speed until light, fluffy, and pale in color, about 2-3 minutes.
- Scrape down the sides of the bowl and beat in the eggs one at a time, mixing well after each addition. Stir in the vanilla extract until the mixture is smooth and creamy.
- In a separate medium bowl, whisk together the all-purpose flour, baking soda, and salt until evenly distributed.
- With the mixer on low speed, gradually add the dry ingredient mixture to the wet ingredients, mixing just until combined.
- Gently fold in the white chocolate chips (or chunks) and about three-quarters of the crushed candy canes.
- Chill the dough for at least 30 minutes, or up to an hour for the best texture.
- Drop rounded tablespoons of dough onto the prepared baking sheets, leaving about 2 inches between each cookie.
- Bake for 9-11 minutes, or until the edges are lightly golden brown and the centers are still soft.
- Press the remaining crushed candy canes onto the tops of each cookie as soon as they come out of the oven.
- Let the cookies cool on the baking sheets for 5 minutes before transferring them to a wire rack to cool completely.
- Prep Time: 15 mins
- Cook Time: 11 mins
- Category: Dessert
- Method: Baking
- Cuisine: American
Nutrition
- Serving Size: 1 cookie
- Calories: 150
- Sugar: 10 g
- Sodium: 100 mg
- Fat: 7 g
- Saturated Fat: 4 g
- Unsaturated Fat: 2 g
- Trans Fat: 0 g
- Carbohydrates: 20 g
- Fiber: 0 g
- Protein: 1 g
- Cholesterol: 30 mg
Keywords: Avoid overmixing the dough to keep cookies tender. Chilling the dough enhances flavor and texture. Use high-quality white chocolate for the best results.