Hey there, fellow dessert lovers! I’m absolutely thrilled to share my secret to a truly spectacular dessert: Creamy Classic Cheesecake With No Cracks (quick + Easy). You know that moment of dread when you pull a cheesecake from the oven, only to see it sporting a giant, disheartening crack? Well, those days are officially over! This isn’t just another cheesecake recipe; it’s the recipe you’ll turn to time and time again for flawless results.
What makes this Creamy Classic Cheesecake With No Cracks (quick + Easy) so special, you ask? It’s all in the name! We’re talking about a lusciously rich and velvety smooth cream cheese filling, resting on a buttery, crisp graham cracker crust, all baked to perfection without a single blemish on its beautiful surface. I’ve developed a method that eliminates the usual stress of water baths and overly complicated cooling processes, making it surprisingly quick and incredibly easy to achieve bakery-quality results right in your own kitchen.
You are going to absolutely adore this recipe because it delivers on every single promise. Imagine presenting a dessert that looks utterly professional and tastes unbelievably good, knowing you whipped it up with minimal fuss. It’s the perfect showstopper for any gathering, a comforting treat for a quiet evening, or just because you deserve something truly delicious and beautiful. Get ready to bake a cheesecake that not only tastes incredible but also looks like a work of art, boosting your baking confidence sky-high!

Ingredient Notes
Crafting the perfect Creamy Classic Cheesecake with no cracks truly begins with understanding your ingredients. For this recipe, we’re focusing on quality and temperature, as these are your secret weapons for that dreamy, smooth finish!
- Full-Fat Cream Cheese: This is non-negotiable for a truly creamy, rich cheesecake. I always recommend using two (8-ounce) blocks, and critically, make sure it’s at room temperature. Cold cream cheese will result in lumps and requires more mixing to become smooth, which can introduce too much air – a major culprit for cracks! If you’re in a hurry, you can unwrap it and microwave it for 10-15 seconds per block, checking frequently until it’s just softened.
- Granulated Sugar: Standard white granulated sugar is perfect here. It sweetens the cheesecake and helps achieve that classic smooth texture. No fancy sugars needed!
- Large Eggs: Just like the cream cheese, your eggs absolutely must be at room temperature. This helps them emulsify smoothly into the batter without overmixing. Cold eggs can cause the batter to seize up slightly and create a less uniform texture. I often take mine out an hour or two before I plan to bake, or if I forget, a quick 5-minute soak in warm (not hot!) water does the trick.
- Full-Fat Sour Cream: This ingredient is a game-changer for a super creamy, slightly tangy cheesecake. It adds moisture, richness, and helps prevent cracks by creating a more tender crumb. Again, room temperature is key. If you can’t find full-fat sour cream, full-fat Greek yogurt (plain, unsweetened) is a decent substitute, though it might lend a slightly more pronounced tang.
- Vanilla Extract: Use a good quality pure vanilla extract for the best flavor. It really enhances the classic profile of the cheesecake. If you have vanilla bean paste, that’s an even more luxurious option, adding those beautiful flecks of vanilla bean.
- Graham Cracker Crumbs: For the classic crust! You can buy pre-crushed crumbs or crush your own graham crackers. About 1 ½ cups will give you a good base. As a substitution, digestive biscuits, vanilla wafers, or even shortbread cookies crushed finely work wonderfully.
- Melted Unsalted Butter: This binds your crust together. Unsalted butter allows you to control the amount of salt in the recipe. Make sure it’s melted, but not hot.
Step-by-Step Instructions
Let’s get baking! Follow these steps carefully for a smooth, creamy cheesecake every single time.
- Prepare the Crust:
- Preheat your oven to 350°F (175°C).
- In a medium bowl, combine 1 ½ cups graham cracker crumbs with ¼ cup granulated sugar.
- Pour in 6 tablespoons of melted unsalted butter and mix well until the crumbs are evenly moistened and resemble wet sand.
- Press the mixture firmly and evenly into the bottom of a 9-inch springform pan. You can use the bottom of a glass or your fingers.
- Bake the crust for 8-10 minutes until lightly golden. Remove from the oven and let cool slightly while you prepare the filling. Reduce oven temperature to 325°F (160°C).
- Prepare the Water Bath (Crucial for No Cracks!):
- While the crust cools, prepare your springform pan for the water bath. Tightly wrap the outside of the springform pan (bottom and sides) with two layers of heavy-duty aluminum foil. Make sure there are no gaps for water to seep in.
- Place the foil-wrapped springform pan inside a larger roasting pan.
- Make the Cheesecake Filling:
- In a large bowl, using an electric mixer (stand mixer with paddle attachment or hand mixer) on low speed, beat two 8-ounce blocks of room temperature full-fat cream cheese until completely smooth, about 2-3 minutes. Scrape down the sides of the bowl frequently to ensure no lumps remain.
- Gradually add 1 cup of granulated sugar to the cream cheese, beating on low speed until just combined and smooth, about 2 more minutes. Again, scrape down the bowl.
- Stir in ½ cup of room temperature full-fat sour cream and 1 teaspoon of vanilla extract. Mix on low speed until just incorporated.
- Add 2 large room temperature eggs, one at a time, mixing on the lowest speed possible just until each egg is incorporated. This is critical! Overmixing at this stage introduces too much air, which expands during baking and contracts during cooling, leading to cracks. Stop mixing as soon as the yolk disappears.
- Pour the smooth cheesecake batter evenly over the cooled crust in the prepared springform pan.
- Bake the Cheesecake:
- Carefully pour hot water into the larger roasting pan, around the springform pan, until the water comes about halfway up the sides of the springform pan.
- Carefully transfer the roasting pan with the cheesecake to the preheated oven.
- Bake for 60-75 minutes. The cheesecake is done when the edges are set, but the center still has a slight wobble (like firm Jell-O). Avoid overbaking, as this is another common cause of cracks.
- Cool Slowly (The Ultimate Crack Prevention!):
- Once baked, turn off the oven but leave the cheesecake inside with the oven door propped open slightly (using a wooden spoon) for 1 hour. This allows for a very gradual cooling, preventing thermal shock.
- After 1 hour, carefully remove the roasting pan from the oven. Remove the springform pan from the water bath, unwrap the foil, and place it on a wire rack to cool completely at room temperature for another 2-3 hours.
- Once completely cooled to room temperature, cover the cheesecake loosely with plastic wrap and refrigerate for at least 6 hours, but ideally overnight. Chilling is essential for firming up the texture and making it easy to slice.
- Serve:
- Before serving, run a thin knife around the edge of the cheesecake to ensure it releases cleanly from the pan. Unclasp the springform pan and remove the sides. Slice with a hot, clean knife (wiping it between each slice). Enjoy!
Tips & Suggestions
Achieving a crack-free, creamy classic cheesecake is totally within your reach! Here are my top tips and suggestions to ensure your success:
- Room Temperature is King: I can’t stress this enough! Cream cheese, eggs, and sour cream all need to be at room temperature. This ensures your batter is incredibly smooth, lump-free, and requires minimal mixing. Cold ingredients resist blending and will force you to overmix, incorporating air that leads to cracks.
- Don’t Overmix the Batter: This is arguably the most crucial tip for preventing cracks. Once the cream cheese and sugar are smooth, and the sour cream and vanilla are incorporated, add the eggs one at a time on the lowest speed. Mix only until the yolk disappears. Overmixing incorporates air into the batter, which expands during baking and then dramatically contracts upon cooling, causing those dreaded fissures. Think gentle and brief!
- The Water Bath is Your Best Friend: A water bath creates a moist, even-heat environment in your oven. This gentle cooking prevents the edges of the cheesecake from setting too quickly and drying out while the center is still baking. The result is a uniformly cooked, creamy, and crack-free cheesecake. Double-wrap your springform pan with heavy-duty foil to prevent any water from seeping in!
- Slow and Steady Cooling Wins the Race: Resist the urge to pull your cheesecake straight out of the hot oven. The rapid change in temperature is a major cause of cracks. The gradual cooling process – first in the turned-off oven with the door ajar, then on a wire rack at room temperature – allows the cheesecake to settle slowly and gently, preventing any sudden contraction that would lead to cracks.
- Don’t Open the Oven Door Too Much: Peeking constantly releases heat and can disrupt the delicate cooking process, especially in the initial stages. Trust your oven and the timings!
- Scrape Down the Bowl: Regularly scrape the sides and bottom of your mixing bowl while preparing the filling. This ensures all ingredients are fully incorporated and prevents any unmixed lumps, contributing to a truly smooth and creamy texture.
- For a Truly Easy Release: After the cheesecake has completely chilled, before you release the springform, you can dip a thin knife in hot water, wipe it clean, and run it gently around the inner edge of the pan. This helps ensure a super clean release.
- Topping Ideas: While this classic cheesecake is delicious on its own, feel free to get creative! Fresh berries (strawberries, blueberries, raspberries) are always a beautiful and fresh accompaniment. A simple fruit compote, chocolate ganache, caramel sauce, or a dollop of fresh whipped cream can elevate your presentation and flavor.
Storage
You’ve put in the effort to create a beautiful, crack-free cheesecake – now let’s make sure it stays fresh and delicious!
- Refrigerator: Your cheesecake needs to be stored in the refrigerator. Once it’s completely chilled and firm, you can remove the sides of the springform pan. Place the cheesecake (still on its base, if possible) in an airtight container or cover it tightly with plastic wrap. Stored this way, it will stay fresh and delicious for up to 5-7 days. I find it tastes even better on the second and third day once the flavors have fully melded!
- Freezer: Yes, you can freeze cheesecake! It’s a great way to prepare ahead or save leftovers.
- Whole Cheesecake: Ensure the cheesecake is completely chilled. Place it uncovered in the freezer for about 1 hour until firm. Then, wrap the entire cheesecake (still on its base) tightly with several layers of plastic wrap, followed by a layer of aluminum foil. This double layer protects it from freezer burn.
- Individual Slices: For easy portioning, slice the chilled cheesecake first. Place the slices on a baking sheet lined with parchment paper and freeze for 1-2 hours until firm. Then, individually wrap each slice tightly in plastic wrap and then foil. You can store these wrapped slices in a freezer-safe container or bag.
- Thawing: When you’re ready to enjoy, transfer the frozen cheesecake (whole or slices) to the refrigerator and let it thaw overnight (6-8 hours for slices, 12-24 hours for a whole cake). Do not thaw at room temperature, as this can affect the texture.
- Shelf Life: Frozen cheesecake will maintain its quality for up to 1-2 months. Beyond that, it’s still safe to eat but might start to lose some of its optimal texture and flavor.
Final Thoughts
There’s something truly magical about a perfect cheesecake, isn’t there? That smooth, rich texture and sweet, tangy flavor can elevate any meal or simply make a moment feel special. And I’m thrilled to tell you that achieving that perfection is now easier than ever before!
I truly believe my Creamy Classic Cheesecake With No Cracks (quick + Easy) is a recipe you absolutely need in your repertoire. Forget about the intimidation often associated with baking cheesecakes; this method is designed to be straightforward and stress-free. You’ll be amazed at how effortlessly you can create a cheesecake that boasts that coveted creamy consistency and, most importantly, a flawless, crack-free top that will impress everyone.
So go ahead, gather your ingredients and prepare to experience the joy of baking a beautiful dessert without the fuss. I promise you, this quick and easy approach will have you serving up slices of pure bliss in no time. Get ready to fall in love with your new go-to cheesecake recipe!
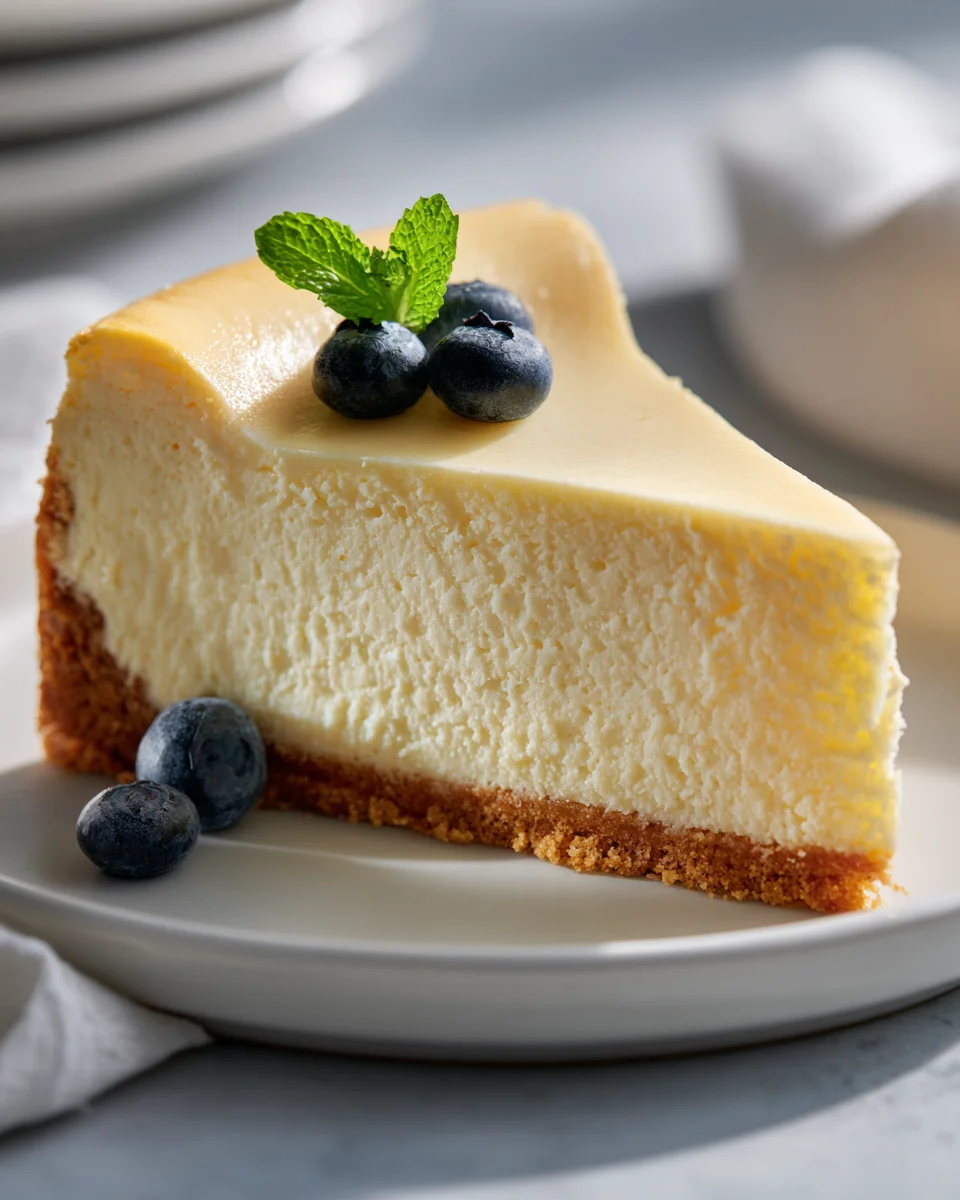
Creamy Classic Cheesecake: Quick, Easy & No Cracks!
- Total Time: 1 hour 30 minutes
- Yield: 8 servings 1x
Description
This Creamy Classic Cheesecake is your go-to recipe for a rich and velvety dessert that comes out perfectly smooth and crack-free every time. Impress your guests with this easy-to-make cheesecake that looks and tastes like it came from a bakery!
Ingredients
- 2 (8-ounce) blocks full-fat cream cheese, at room temperature
- 1 cup granulated sugar
- 2 large eggs, at room temperature
- ½ cup full-fat sour cream, at room temperature
- 1 teaspoon vanilla extract
- 1 ½ cups graham cracker crumbs
- ¼ cup granulated sugar (for crust)
- 6 tablespoons melted unsalted butter
Instructions
- Preheat your oven to 350°F (175°C).
- In a medium bowl, combine 1 ½ cups graham cracker crumbs with ¼ cup granulated sugar.
- Pour in 6 tablespoons of melted unsalted butter and mix well until the crumbs are evenly moistened and resemble wet sand.
- Press the mixture firmly and evenly into the bottom of a 9-inch springform pan.
- Bake the crust for 8-10 minutes until lightly golden. Remove from the oven and let cool slightly while you prepare the filling. Reduce oven temperature to 325°F (160°C).
- While the crust cools, prepare your springform pan for the water bath by tightly wrapping the outside with two layers of heavy-duty aluminum foil.
- Place the foil-wrapped springform pan inside a larger roasting pan.
- In a large bowl, using an electric mixer on low speed, beat two 8-ounce blocks of room temperature full-fat cream cheese until completely smooth, about 2-3 minutes.
- Gradually add 1 cup of granulated sugar to the cream cheese, beating on low speed until just combined and smooth, about 2 more minutes.
- Stir in ½ cup of room temperature full-fat sour cream and 1 teaspoon of vanilla extract. Mix on low speed until just incorporated.
- Add 2 large room temperature eggs, one at a time, mixing on the lowest speed possible just until each egg is incorporated.
- Pour the smooth cheesecake batter evenly over the cooled crust in the prepared springform pan.
- Carefully pour hot water into the larger roasting pan, around the springform pan, until the water comes about halfway up the sides of the springform pan.
- Carefully transfer the roasting pan with the cheesecake to the preheated oven.
- Bake for 60-75 minutes. The cheesecake is done when the edges are set, but the center still has a slight wobble.
- Once baked, turn off the oven but leave the cheesecake inside with the oven door propped open slightly for 1 hour.
- After 1 hour, carefully remove the roasting pan from the oven. Remove the springform pan from the water bath, unwrap the foil, and place it on a wire rack to cool completely at room temperature for another 2-3 hours.
- Once completely cooled to room temperature, cover the cheesecake loosely with plastic wrap and refrigerate for at least 6 hours, but ideally overnight.
- Before serving, run a thin knife around the edge of the cheesecake to ensure it releases cleanly from the pan. Unclasp the springform pan and remove the sides. Slice with a hot, clean knife.
- Prep Time: 15 mins
- Cook Time: 75 mins
- Category: Dessert
- Method: Baking
- Cuisine: American
Nutrition
- Serving Size: 1 slice
- Calories: 350
- Sugar: 25 g
- Sodium: 250 mg
- Fat: 24 g
- Saturated Fat: 15 g
- Unsaturated Fat: 8 g
- Trans Fat: 0 g
- Carbohydrates: 30 g
- Fiber: 1 g
- Protein: 6 g
- Cholesterol: 90 mg
Keywords: Ensure all ingredients are at room temperature for a smooth batter. Avoid overmixing to prevent cracks, and use a water bath for even baking.