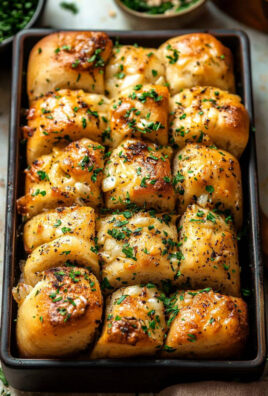
Mozzarella And Beef Prosciutto Crostini
I am so excited to share one of my absolute favorite, unbelievably easy, yet incredibly impressive appetizers with you: Mozzarella And Beef Prosciutto Crostini! This isn’t just another snack; it’s a little bite of pure culinary joy that I know you’ll fall in love with. What makes these crostini truly special is the harmonious dance of textures and flavors. Imagine the satisfying crunch of perfectly toasted bread, yielding to the warm, gooey embrace of melted mozzarella, all wonderfully complemented by the delicate saltiness and rich, savory notes of thinly sliced beef prosciutto.
I adore making these because they strike that perfect balance between gourmet elegance and effortless preparation. You don’t need a culinary degree to whip up something truly memorable! This dish is a guaranteed crowd-pleaser, perfect for impressing guests at your next gathering, or simply treating yourself to a sophisticated, quick indulgence. It’s a testament to how incredible simple, high-quality ingredients can be when brought together thoughtfully, promising an unforgettable taste experience in every single bite.

Ingredient Notes
Creating delicious Mozzarella and Beef Prosciutto Crostini is all about selecting fantastic ingredients. For me, the beauty of this dish lies in its simplicity, meaning the quality of each component really shines through. Here’s a breakdown of what you’ll need and some thoughts on substitutions.
- Bread: I always reach for a good quality baguette. French baguettes, especially those that are a day old, are perfect for crostini because they get wonderfully crisp when toasted without becoming too hard. You’ll want to slice it into ½-inch thick rounds. If a baguette isn’t available, a rustic artisan loaf like a ciabatta or a crusty sourdough can work beautifully, just be sure to slice it relatively thin.
- Fresh Mozzarella: This is non-negotiable for me! Fresh mozzarella, whether it’s a large ball, smaller bocconcini, or even tiny ciliegine, offers that creamy, milky texture that contrasts so well with the crisp bread and savory beef. Burrata is also an incredible option if you want an even creamier, richer experience. The most important tip here is to drain your mozzarella really well. I usually pat it dry with a paper towel after slicing or tearing it to prevent any excess moisture from making the crostini soggy.
- Beef Prosciutto (Bresaola): This is the star meat component, and I specifically chose beef prosciutto for its delicate, savory, and slightly sweet flavor profile. It’s air-dried, thinly sliced cured beef, often seasoned with herbs and spices, making it a fantastic alternative to traditional pork-based cured meats. Its deep red color and tender texture are perfect. Arrange it artfully, perhaps slightly ruffled, on top of the mozzarella. If you can’t find beef prosciutto, another thinly sliced, high-quality cured beef like a good bresaola will offer a similar delightful experience.
- Extra Virgin Olive Oil: A good quality extra virgin olive oil is essential. I use it generously to brush the baguette slices before toasting; it adds flavor and helps them crisp up beautifully. A final drizzle over the assembled crostini right before serving also adds a lovely fruity note.
- Fresh Basil or Arugula: For that pop of fresh, herbaceous flavor and a vibrant green garnish, fresh basil leaves are my go-to. Their peppery sweetness complements the beef and mozzarella perfectly. If you prefer a slightly more bitter, peppery kick, a few tender arugula leaves tucked under the prosciutto would also be fantastic.
- Balsamic Glaze: This is where the magic really happens for me. The sweet and tangy reduction of balsamic vinegar cuts through the richness of the mozzarella and the saltiness of the beef prosciutto, creating a balanced flavor profile. You can buy pre-made balsamic glaze, which is very convenient, or easily make your own by simmering good quality balsamic vinegar until it reduces and thickens to a syrupy consistency.
- Salt and Freshly Ground Black Pepper: Simple seasonings are all you need to enhance the natural flavors of the ingredients. A little flaky sea salt can add a nice textural crunch.
Step-by-Step Instructions
Assembling these Mozzarella and Beef Prosciutto Crostini is incredibly straightforward, making them a perfect appetizer for any gathering or a delightful snack. Here’s how I like to put them together for the best results:
- Prepare Your Bread: First things first, let’s get that baguette ready. I preheat my oven to around 375°F (190°C). Then, I take my baguette and slice it into ½-inch thick rounds. It’s important to keep the slices relatively uniform so they toast evenly. Lay these slices out in a single layer on a baking sheet.
- Brush and Season the Bread: Now for the flavor! I gently brush each baguette slice with a good quality extra virgin olive oil. Don’t be shy, but don’t drench them either – a light, even coat is perfect. Then, I sprinkle them lightly with a pinch of salt and a grind of fresh black pepper.
- Toast the Crostini: Pop the baking sheet into your preheated oven. I usually toast them for about 8-12 minutes, or until the edges are nicely golden brown and the bread feels crisp. Keep a close eye on them, as ovens can vary, and you want them crisp, not burnt! Once toasted, remove them from the oven and let them cool slightly on the baking sheet or a wire rack. Cooling is important; it helps them stay crisp.
- Prepare the Mozzarella: While the bread is toasting, I get the mozzarella ready. If you’re using a large ball of fresh mozzarella, I like to slice it into thin rounds or tear it into rustic, bite-sized pieces. If you have bocconcini or ciliegine, simply pat them very dry. Remember, draining and patting the mozzarella dry is a crucial step to avoid soggy crostini.
- Assemble the Crostini: This is the fun part! Once the toasted baguette slices are cool enough to handle, I start assembling. Place a slice of mozzarella on top of each toasted bread round. I usually try to cover most of the bread without it completely hanging off the sides.
- Add the Beef Prosciutto: Next, I take a slice of beef prosciutto and gently lay it over the mozzarella. I often like to slightly ruffle the prosciutto, or fold it once or twice, to give it some visual appeal and a bit more body.
- Garnish and Finish: To finish, I drizzle a little balsamic glaze over each crostini. This provides that essential sweet and tangy counterpoint. Finally, I tuck a small fresh basil leaf or a few tiny arugula leaves on top for a burst of fresh flavor and vibrant color.
- Serve Immediately: Crostini are best enjoyed fresh! Serve them right away to ensure the bread remains perfectly crisp.
Tips & Suggestions
Making crostini is a simple pleasure, but a few insider tips can elevate your Mozzarella and Beef Prosciutto Crostini from good to absolutely unforgettable. Here’s what I’ve learned along the way:
- Don’t Overload: Crostini are meant to be elegant, bite-sized appetizers. Resist the urge to pile on too many ingredients. Each component should have its moment to shine, and you want your guests to be able to enjoy it in one or two neat bites.
- Serve Promptly: This is probably the most crucial tip for any crostini. The moment the liquid from the mozzarella or balsamic glaze hits that crisp bread, the clock starts ticking. For the best texture, always assemble your crostini right before you plan to serve them. Soggy crostini are a culinary crime!
- Room Temperature Ingredients: I always recommend letting your fresh mozzarella and beef prosciutto come to room temperature for about 15-20 minutes before assembling. Ingredients are often at their most flavorful when not chilled, allowing their nuances to truly come through.
- Rub with Garlic: For an extra layer of savory flavor, try this trick: after your bread slices come out of the oven and are still warm, lightly rub the cut side of a raw garlic clove over each one. It imparts a subtle, aromatic garlic essence without being overpowering.
- Flavor Boosters: Don’t be afraid to experiment with other elements. A tiny sprinkle of red pepper flakes can add a lovely subtle heat. A thin slice of fig or a dab of fig jam under the prosciutto can introduce a wonderful sweetness that pairs incredibly well with the beef and mozzarella. Or, if you enjoy a hint of citrus, a tiny squeeze of fresh lemon juice over the mozzarella just before adding the prosciutto can brighten everything up beautifully.
- Consider Your Olive Oil: Since olive oil is such a prominent flavor, use the best quality extra virgin olive oil you can find. It truly makes a difference in the overall taste profile.
Storage
As much as I love these Mozzarella and Beef Prosciutto Crostini, they are definitely a dish that’s meant to be enjoyed fresh. Unfortunately, assembled crostini do not store well at all, primarily due to the moisture from the mozzarella and balsamic glaze softening the toasted bread.
My strongest recommendation is to prepare and serve them immediately. However, if you’re looking to get a head start or have some components left over, here’s how I advise storing the individual elements:
- Toasted Baguette Slices: These can be stored ahead of time. Once completely cooled, place the toasted bread rounds in an airtight container at room temperature. They should keep well for 1-2 days. If they lose a bit of their crispness, you can pop them back in a toaster oven or a regular oven for a few minutes to revive them before assembling.
- Fresh Mozzarella: Any leftover fresh mozzarella should be stored in its original brine or in a container with a bit of water to keep it moist. Keep it refrigerated and use within a few days of opening. Before using, remember to drain it very well and pat it dry again.
- Beef Prosciutto: Leftover beef prosciutto should be tightly wrapped in plastic wrap or placed in an airtight container to prevent it from drying out. Store it in the refrigerator and consume within the manufacturer’s recommended timeframe after opening.
- Balsamic Glaze: If you’ve made your own balsamic glaze, store it in a clean, airtight container at room temperature. It will keep for several weeks, or even longer, essentially like a condiment. Store-bought glaze will have its own instructions, usually also recommending room temperature storage.
- Fresh Herbs: Fresh basil or arugula are best used immediately. If you have extra, store them as you normally would – basil at room temperature with stems in water, or arugula loosely wrapped in a damp paper towel in the fridge.
In essence, think of this dish as a “construct on demand” appetizer. Preparing the components individually allows you to assemble a fresh batch quickly whenever the craving strikes!

`
Final Thoughts
`
`
There you have it! I truly hope you’re feeling inspired to create this delightful ``Mozzarella And Beef Prosciutto Crostini``. What I love most about this dish is its brilliant simplicity – it proves that you don’t need a complicated list of ingredients or hours in the kitchen to achieve something truly spectacular. The harmonious marriage of the creamy, delicate mozzarella with the rich, savory notes of the beef prosciutto, all balanced on a perfectly crisp crostini, creates an appetizer that’s both elegant and utterly irresistible.
`
`
This ``Mozzarella And Beef Prosciutto Crostini`` isn’t just a snack; it’s an experience. It’s perfect for elevating any gathering, from a casual get-together with friends to a more sophisticated dinner party. I promise, the ease of preparation combined with the impressive flavor profile will make this a treasured recipe in your collection. So go ahead, give it a try – your taste buds will thank you!
`

Delicious Mozzarella & Beef Prosciutto Crostini Recipe
- Total Time: 27 minutes
- Yield: 4 servings 1x
Description
This Mozzarella And Beef Prosciutto Crostini is an impressively easy appetizer that combines the satisfying crunch of toasted bread with the creamy texture of fresh mozzarella and the savory notes of beef prosciutto. Perfect for gatherings or a quick indulgence, this dish showcases the beauty of high-quality ingredients.
Ingredients
- 1 French baguette, sliced into ½-inch thick rounds
- Fresh mozzarella, drained and patted dry
- Beef prosciutto (Bresaola), thinly sliced
- Extra virgin olive oil
- Fresh basil leaves or arugula
- Balsamic glaze
- Salt
- Freshly ground black pepper
Instructions
- Preheat your oven to around 375°F (190°C). Slice the baguette into ½-inch thick rounds and lay them out in a single layer on a baking sheet.
- Brush each baguette slice with extra virgin olive oil, then sprinkle lightly with salt and black pepper.
- Toast the baguette slices in the preheated oven for about 8-12 minutes, or until golden brown and crisp. Let them cool slightly.
- Prepare the mozzarella by slicing it into thin rounds or tearing it into bite-sized pieces, ensuring it is well-drained and patted dry.
- Assemble the crostini by placing a slice of mozzarella on each toasted bread round.
- Add a slice of beef prosciutto over the mozzarella, slightly ruffling or folding it for visual appeal.
- Drizzle balsamic glaze over each crostini and garnish with fresh basil or arugula leaves.
- Serve immediately to enjoy the crisp texture of the bread.
- Prep Time: 15 mins
- Cook Time: 12 mins
- Category: Appetizer
- Method: Baking
- Cuisine: Italian
Nutrition
- Serving Size: 1 crostini
- Calories: 150
- Sugar: 2 g
- Sodium: 300 mg
- Fat: 8 g
- Saturated Fat: 2 g
- Unsaturated Fat: 5 g
- Trans Fat: 0 g
- Carbohydrates: 15 g
- Fiber: 1 g
- Protein: 7 g
- Cholesterol: 10 mg
Keywords: For best results, assemble the crostini right before serving to prevent sogginess. Consider letting the mozzarella and prosciutto come to room temperature before assembly for enhanced flavor.