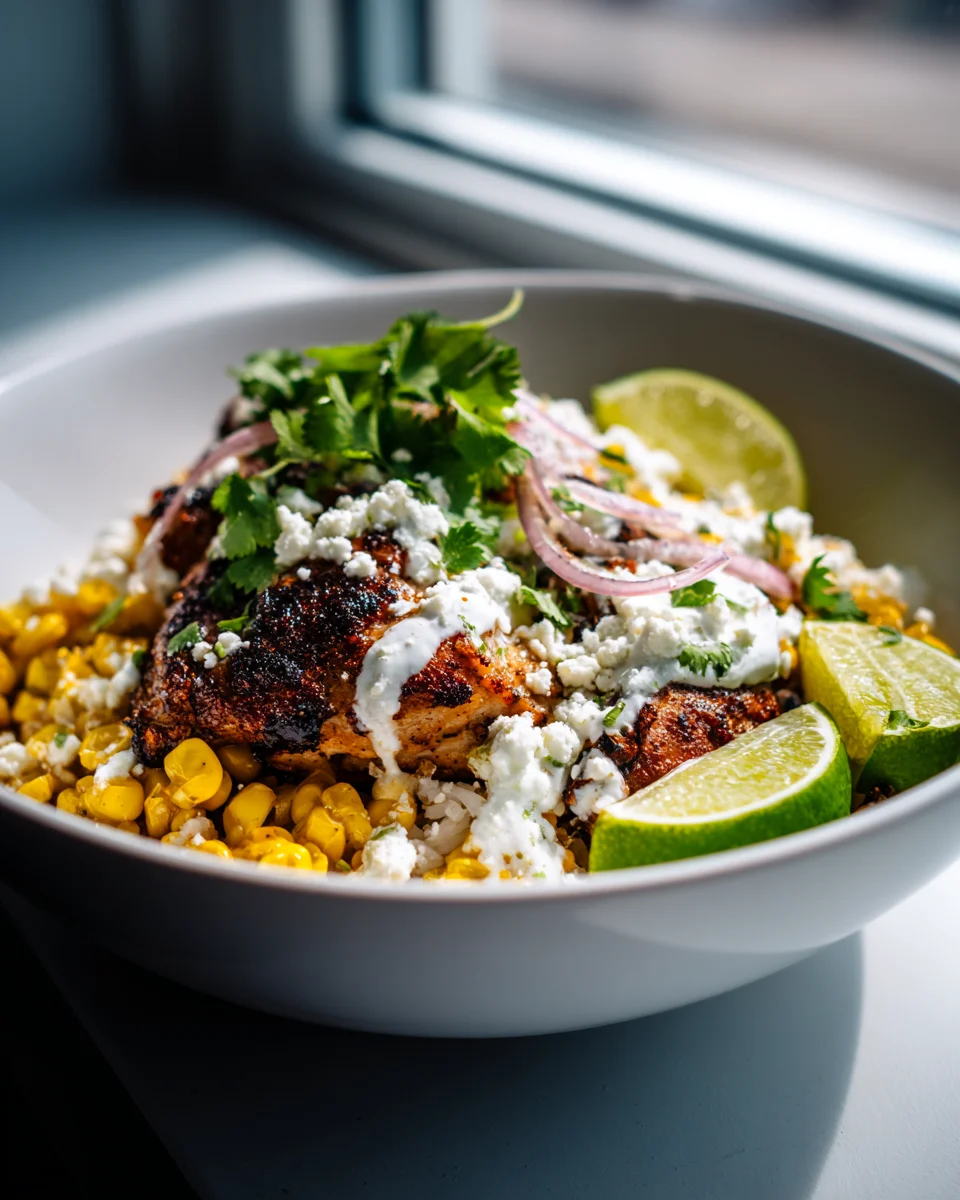
Tasty Street Corn Chicken Bowl
Have you ever craved that vibrant, tangy, and utterly addictive flavor of Mexican street corn, but wished you could turn it into a full, satisfying meal? Well, get ready because my Tasty Street Corn Chicken Bowl is here to make all your culinary dreams come true! This isn’t just another chicken dish; it’s a celebration of bold flavors and textures, all brought together in one delightful bowl.
What makes this recipe so special is how it masterfully transforms the beloved street food into a wholesome, easy-to-make dinner that truly pops with personality. I promise you, every spoonful is a party for your taste buds. You’ll love how simple it is to whip up this flavorful masterpiece that feels like a gourmet meal but comes together with ease. It’s quick enough for a busy weeknight, impressive enough for guests, and so incredibly versatile, it might just become your new favorite go-to.
Imagine juicy, perfectly seasoned chicken mingling with a creamy, zesty street corn mixture – bursting with the sweetness of corn, a hint of smoky chili, bright lime, and fresh cilantro. Served over a bed of fluffy rice or your favorite grain, and perhaps topped with a few slices of creamy avocado, it’s a complete meal that’s both comforting and exciting, leaving you feeling satisfied and smiling. Get ready to fall in love!

Hey there, fellow food lovers! Get ready to dive into one of my absolute favorite weeknight meals: the Tasty Street Corn Chicken Bowl. This dish takes all the vibrant, zesty flavors of classic Mexican street corn and transforms them into a hearty, satisfying bowl meal. It’s perfect for a quick dinner, a delicious lunch, or even meal prepping. I love how the creamy, tangy street corn perfectly complements the seasoned, tender chicken, all layered over a comforting base. Let’s get cooking!
Ingredient Notes
Crafting the perfect Tasty Street Corn Chicken Bowl starts with understanding your ingredients. While I’ll give you my go-to list, remember that cooking is all about making it your own!
- For the Chicken: I usually reach for boneless, skinless chicken breasts, cut into bite-sized cubes or strips. Chicken thighs also work wonderfully, offering a bit more richness and staying super moist. You can either pan-sear them for a quick cook or grill them for an extra smoky flavor. For seasoning, I like a simple blend of chili powder, cumin, smoked paprika, garlic powder, salt, and black pepper. This gives the chicken a fantastic base flavor that pairs beautifully with the street corn. If you’re looking for a vegetarian alternative, firm tofu or black beans would be excellent protein swaps.
- For the Street Corn: This is the star of the show!
- Corn: Fresh corn on the cob, cut off the cob, is always my top choice when it’s in season. If not, high-quality frozen corn works incredibly well – just make sure to thaw it first. You can also use canned corn, thoroughly drained, in a pinch. The key here is to get some nice char on the corn kernels, either by sautéing them in a hot skillet or roasting them.
- Creamy Base: My secret weapon for that irresistible street corn creaminess is a combination of mayonnaise and sour cream. You can absolutely use plain Greek yogurt instead of sour cream for a lighter, tangier profile, or even a mix of all three.
- Cheese: Cotija cheese is traditional and my absolute favorite for its salty, crumbly texture. If you can’t find cotija, crumbled feta cheese or queso fresco are fantastic substitutes that will give you a similar salty, tangy kick.
- Flavor Boosters: Fresh lime juice is non-negotiable – it brightens everything up! Chili powder and a touch of smoked paprika add warmth and depth. Fresh cilantro, finely chopped, provides a burst of freshness and color.
- For the Base: This is where you can truly customize your bowl. White rice or brown rice are classic choices that soak up all the delicious juices. Quinoa is a fantastic high-protein, gluten-free option. For a lighter bowl, consider a bed of mixed greens or even cauliflower rice.
- Optional Toppings: These truly elevate your Tasty Street Corn Chicken Bowl! Sliced avocado or a dollop of guacamole add creamy richness. A sprinkle of extra fresh cilantro, a few dashes of your favorite hot sauce, or even some pickled red onions can add fantastic layers of flavor and texture.
Step-by-Step Instructions
Making a Tasty Street Corn Chicken Bowl is simpler than you might think! Just follow these steps, and you’ll have a flavor-packed meal ready in no time.
- Prepare Your Chicken:
- If using chicken breasts or thighs, pat them dry and cut them into bite-sized pieces or strips.
- In a medium bowl, toss the chicken with 1 tablespoon of olive oil, 1 teaspoon chili powder, 1 teaspoon cumin, ½ teaspoon smoked paprika, ½ teaspoon garlic powder, ½ teaspoon onion powder, ½ teaspoon salt, and ¼ teaspoon black pepper. Make sure the chicken is evenly coated.
- Heat 1 tablespoon of olive oil in a large skillet over medium-high heat. Add the seasoned chicken in a single layer, ensuring not to overcrowd the pan. Cook for 5-7 minutes, flipping occasionally, until the chicken is golden brown and cooked through (internal temperature reaches 165°F or 74°C). Remove the chicken from the skillet and set aside.
- Cook the Corn:
- If using fresh or frozen corn, add it to the same skillet you used for the chicken (no need to clean it – those browned bits are flavor!). Cook over medium-high heat for 5-8 minutes, stirring occasionally, until the corn kernels are tender with some nice charred spots. If using canned corn, simply drain and add to the skillet to warm through and get a little color. Transfer the cooked corn to a large bowl.
- Make the Creamy Street Corn Mixture:
- To the bowl with the cooked corn, add ¼ cup mayonnaise, ¼ cup sour cream (or Greek yogurt), 2 tablespoons fresh lime juice, ½ teaspoon chili powder, and a pinch of smoked paprika. Stir until everything is well combined and the corn is coated in the creamy mixture.
- Crumble ½ cup of cotija cheese (or feta/queso fresco) into the corn mixture. Add ¼ cup of fresh chopped cilantro. Stir gently to combine. Taste and adjust seasonings – you might want a little more lime juice, chili powder, or salt.
- Assemble Your Tasty Street Corn Chicken Bowls:
- Divide your cooked base (rice, quinoa, or greens) among your serving bowls.
- Next, artfully arrange the cooked chicken over the base.
- Generously scoop the creamy street corn mixture alongside the chicken.
- Finish with any desired toppings like sliced avocado, extra cilantro, a lime wedge for squeezing, or a drizzle of hot sauce.
- Serve immediately and enjoy your vibrant, flavorful Tasty Street Corn Chicken Bowl!
Tips & Suggestions
I’ve made this Tasty Street Corn Chicken Bowl countless times, and I’ve picked up a few tricks along the way to make it even better. Here’s what I recommend:
- Amp Up the Corn Flavor: For an extra layer of smoky flavor, try roasting your fresh corn on the cob directly over a gas burner or under the broiler until lightly charred before cutting off the kernels. This really deepens the street corn experience.
- Marinade Your Chicken: While the basic seasoning is great, you can take your chicken to the next level by marinating it for at least 30 minutes (or up to 4 hours) in a mixture of lime juice, olive oil, chili powder, cumin, garlic powder, and a touch of non-alcoholic hot sauce. This will tenderize the chicken and infuse it with even more flavor.
- Spice It Up (or Down!): If you love heat, feel free to add a pinch of cayenne pepper or a finely minced jalapeño to your street corn mixture. If you prefer it milder, simply reduce the amount of chili powder.
- Make it a Meal Prep Star: This Tasty Street Corn Chicken Bowl is fantastic for meal prepping! Cook your chicken and base, prepare the street corn mixture, and store them in separate containers. When you’re ready to eat, simply combine and add fresh toppings. This keeps everything fresh and prevents the ingredients from getting soggy.
- Serve with a Crunch: Sometimes I like to serve my bowls with a side of tortilla chips or even a few crumbled on top for an extra textural element. It adds a satisfying crunch that complements the creamy components perfectly.
Storage
One of the best things about the Tasty Street Corn Chicken Bowl is how well its components can be stored, making it an ideal candidate for delicious leftovers or meal prep. Proper storage ensures you can enjoy these vibrant flavors for days!
- Individual Components are Key: For the best quality and freshness, I always recommend storing the main components of your Tasty Street Corn Chicken Bowl separately.
- Cooked Chicken: Store the cooked chicken in an airtight container in the refrigerator for up to 3-4 days.
- Street Corn Mixture: The creamy street corn mixture should also be stored in an airtight container in the refrigerator. It will stay fresh for about 2-3 days. Because of the lime juice and creamy base, it’s best enjoyed sooner rather than later to maintain its optimal texture and tang.
- Cooked Base: Your cooked rice, quinoa, or other grain base can be stored in a separate airtight container in the refrigerator for up to 4-5 days.
- Reheating Advice:
- When you’re ready to enjoy, you can gently reheat the chicken and the base in the microwave or a skillet until warmed through.
- The street corn mixture is often best served at room temperature or slightly chilled, so I usually don’t reheat it with the other components. If you prefer it warm, heat it very gently and briefly to avoid separating the creamy sauce.
- Freezing: I generally don’t recommend freezing the assembled Tasty Street Corn Chicken Bowl or the street corn mixture itself due to the dairy content and fresh vegetables, which can become watery and lose their texture upon thawing. However, the cooked chicken can be frozen for up to 2-3 months in an airtight, freezer-safe container. Thaw overnight in the refrigerator before reheating.
- Assembling Leftovers: When assembling a leftover bowl, start with your reheated base and chicken, then add a fresh scoop of the chilled street corn mixture and any desired fresh toppings like avocado or cilantro right before serving. This ensures the best eating experience!
Final Thoughts
And there you have it! I truly hope you give the Tasty Street Corn Chicken Bowl a try. What I love most about this dish is how it perfectly captures that vibrant, irresistible street food energy and transforms it into a wholesome, incredibly satisfying meal right in your own kitchen. From the tender, flavorful chicken to the creamy, zesty street corn topping, every spoonful is an absolute delight.
It’s a meal that’s bursting with fresh flavors, textures, and that undeniable “wow” factor, making it an instant favorite for weeknight dinners or casual gatherings. Trust me, the unique combination of sweet corn, tangy lime, a hint of spice, and succulent chicken in this Tasty Street Corn Chicken Bowl isn’t just good; it’s an experience. Prepare to impress yourself and anyone you share it with – I know you’re going to adore it!

Delicious Street Corn Chicken Bowl Recipe – Flavorful & Fresh
- Total Time: 45 minutes
- Yield: 4 servings 1x
Description
This Tasty Street Corn Chicken Bowl combines the vibrant flavors of Mexican street corn with juicy, seasoned chicken for a satisfying meal. Perfect for busy weeknights or impressing guests, this dish is both comforting and exciting.
Ingredients
- Boneless, skinless chicken breasts or thighs, cut into bite-sized cubes or strips
- 1 tablespoon olive oil (for chicken)
- 1 teaspoon chili powder (for chicken)
- 1 teaspoon cumin (for chicken)
- ½ teaspoon smoked paprika (for chicken)
- ½ teaspoon garlic powder (for chicken)
- ½ teaspoon onion powder (for chicken)
- ½ teaspoon salt (for chicken)
- ¼ teaspoon black pepper (for chicken)
- 1 tablespoon olive oil (for cooking corn)
- Fresh corn on the cob, cut off the cob or high-quality frozen corn, thawed or canned corn, thoroughly drained
- ¼ cup mayonnaise
- ¼ cup sour cream or plain Greek yogurt
- 2 tablespoons fresh lime juice
- ½ teaspoon chili powder (for corn mixture)
- A pinch of smoked paprika (for corn mixture)
- ½ cup cotija cheese, crumbled (or feta/queso fresco)
- ¼ cup fresh chopped cilantro
- White rice, brown rice, quinoa, mixed greens, or cauliflower rice (for base)
- Sliced avocado or guacamole (optional topping)
- Extra fresh cilantro (optional topping)
- Hot sauce (optional topping)
- Pickled red onions (optional topping)
Instructions
- Prepare Your Chicken: If using chicken breasts or thighs, pat them dry and cut them into bite-sized pieces or strips.
- In a medium bowl, toss the chicken with 1 tablespoon of olive oil, 1 teaspoon chili powder, 1 teaspoon cumin, ½ teaspoon smoked paprika, ½ teaspoon garlic powder, ½ teaspoon onion powder, ½ teaspoon salt, and ¼ teaspoon black pepper. Make sure the chicken is evenly coated.
- Heat 1 tablespoon of olive oil in a large skillet over medium-high heat. Add the seasoned chicken in a single layer, ensuring not to overcrowd the pan. Cook for 5-7 minutes, flipping occasionally, until the chicken is golden brown and cooked through (internal temperature reaches 165°F or 74°C). Remove the chicken from the skillet and set aside.
- Cook the Corn: If using fresh or frozen corn, add it to the same skillet you used for the chicken (no need to clean it – those browned bits are flavor!). Cook over medium-high heat for 5-8 minutes, stirring occasionally, until the corn kernels are tender with some nice charred spots. If using canned corn, simply drain and add to the skillet to warm through and get a little color. Transfer the cooked corn to a large bowl.
- Make the Creamy Street Corn Mixture: To the bowl with the cooked corn, add ¼ cup mayonnaise, ¼ cup sour cream (or Greek yogurt), 2 tablespoons fresh lime juice, ½ teaspoon chili powder, and a pinch of smoked paprika. Stir until everything is well combined and the corn is coated in the creamy mixture.
- Crumble ½ cup of cotija cheese (or feta/queso fresco) into the corn mixture. Add ¼ cup of fresh chopped cilantro. Stir gently to combine. Taste and adjust seasonings – you might want a little more lime juice, chili powder, or salt.
- Assemble Your Tasty Street Corn Chicken Bowls: Divide your cooked base (rice, quinoa, or greens) among your serving bowls.
- Next, artfully arrange the cooked chicken over the base.
- Generously scoop the creamy street corn mixture alongside the chicken.
- Finish with any desired toppings like sliced avocado, extra cilantro, a lime wedge for squeezing, or a drizzle of hot sauce.
- Serve immediately and enjoy your vibrant, flavorful Tasty Street Corn Chicken Bowl!
- Prep Time: 15 mins
- Cook Time: 30 mins
- Category: Dinner
- Method: Skillet cooking
- Cuisine: Mexican
Nutrition
- Serving Size: 1 bowl
- Calories: 550
- Sugar: 5 g
- Sodium: 800 mg
- Fat: 30 g
- Saturated Fat: 8 g
- Unsaturated Fat: 20 g
- Trans Fat: 0 g
- Carbohydrates: 45 g
- Fiber: 5 g
- Protein: 30 g
- Cholesterol: 90 mg
Keywords: For an extra layer of smoky flavor, try roasting your fresh corn on the cob directly over a gas burner or under the broiler until lightly charred. Marinating your chicken for at least 30 minutes in a mixture of lime juice, olive oil, chili powder, cumin, garlic powder, and a touch of non-alcoholic hot sauce can enhance the flavor.