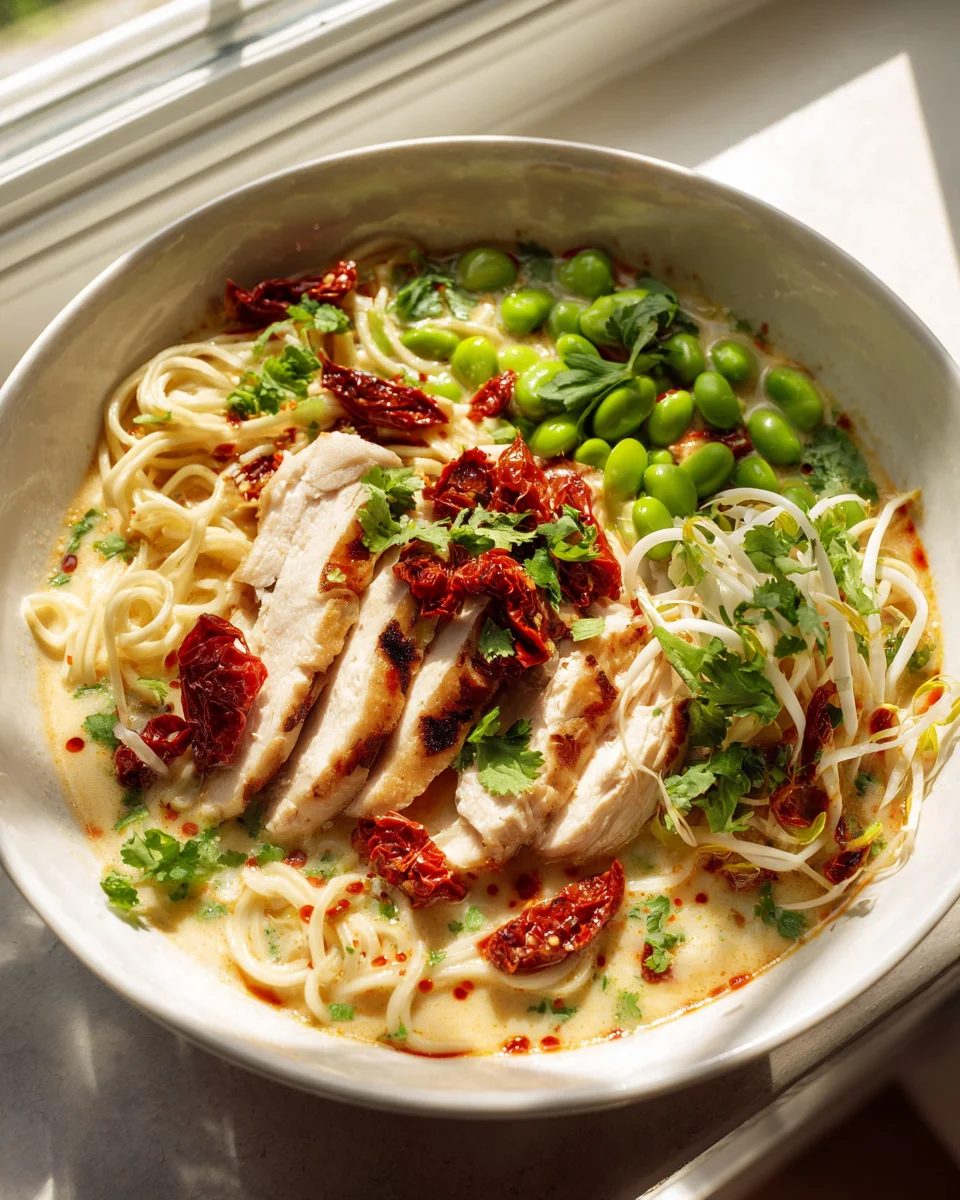
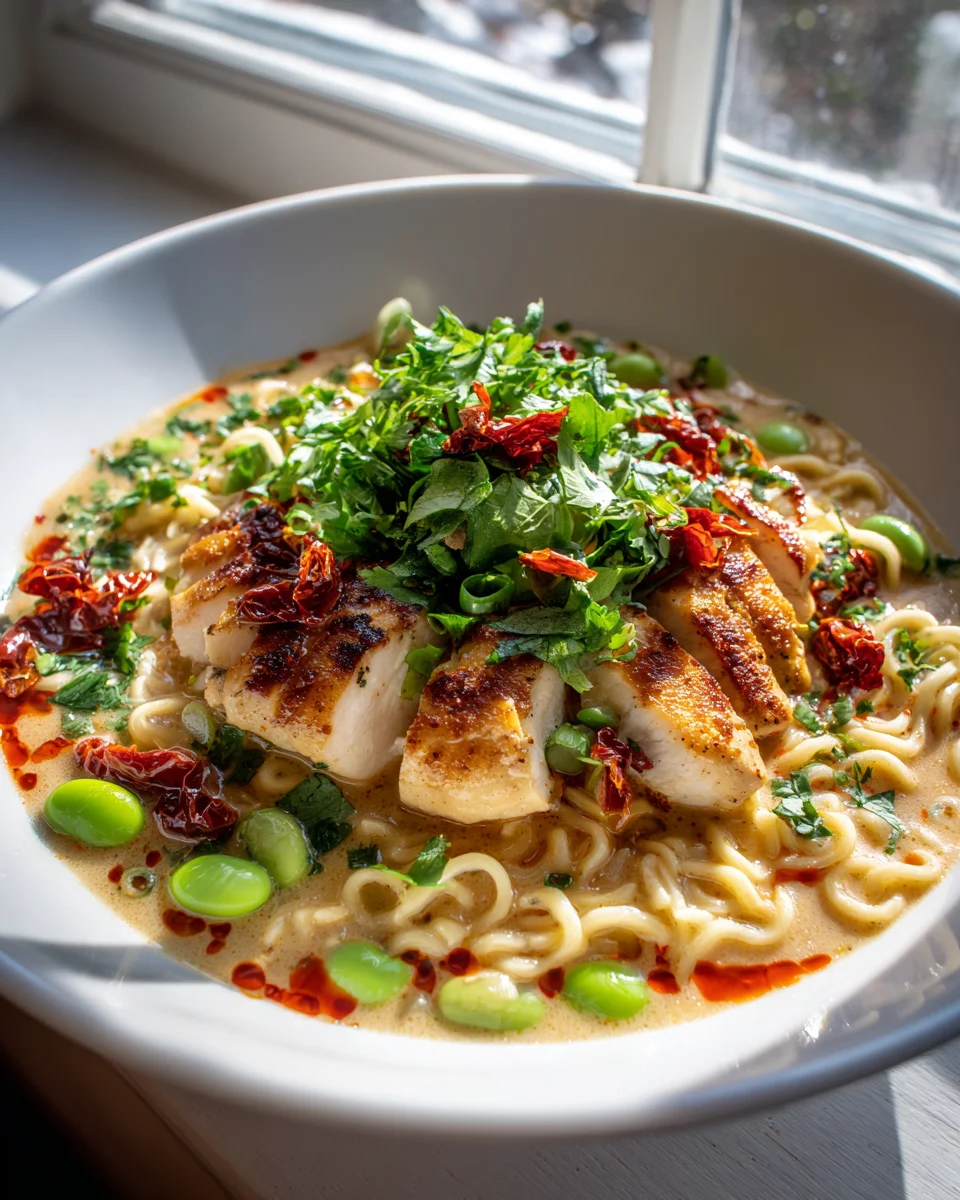
Creamy Marry Me Chicken Ramen
Oh, prepare yourselves, because you’re about to fall head over heels for a dish that truly lives up to its name: Creamy Marry Me Chicken Ramen! If you’ve ever dreamt of a ramen dish that’s so unbelievably comforting, so utterly flavorful, and so deeply satisfying it might just inspire a marriage proposal, well, my friend, you’ve found it.
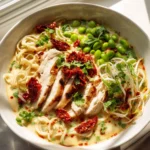
What makes this particular recipe so special, you ask? We’re taking the beloved concept of “Marry Me Chicken” – known for its incredibly rich, often sun-dried tomato and Parmesan-infused creamy sauce – and artfully fusing it with the delightful slurp-ability of ramen noodles. This isn’t just your average bowl; it’s an elevated experience. Imagine perfectly cooked, tender chicken, bathed in a velvety, non-alcohol cream sauce, mingling with chewy ramen noodles, all brought together in a harmonious, unforgettable symphony of flavors.
You are going to absolutely adore this recipe because it’s the ultimate comfort food with a gourmet twist, yet it’s surprisingly simple to create in your own kitchen. It’s perfect for a cozy night in, impressive enough to serve when you have company, and guaranteed to warm you from the inside out. Get ready to dive into a bowl of pure bliss that combines the best of creamy chicken dishes with the soul-soothing magic of ramen. Trust me, your taste buds are in for a treat!
Ingredient Notes
Oh, get ready for something truly special! This “Creamy Marry Me Chicken Ramen” isn’t just a meal; it’s an experience. We’re taking that beloved creamy, dreamy chicken dish and giving it a fantastic ramen twist. Here’s what you’ll need to create this culinary masterpiece and a few notes on why these ingredients are so important, plus some handy substitutions.
- Chicken: I always reach for boneless, skinless chicken thighs for this recipe because they stay incredibly juicy and tender, even with a little simmering. Chicken breasts work wonderfully too, just be careful not to overcook them, as they can dry out faster. If you’re looking for an alternative, thinly sliced beef sirloin or even tender strips of beef can be a delicious substitute, offering a richer flavor profile.
- The Creamy Sauce Base: This is where the magic happens!
- Heavy Cream: This is non-negotiable for that luxurious, velvety texture we’re after. For a lighter touch, you could use half-and-half, but the richness won’t be quite the same. If you’re exploring dairy-free options, a good quality full-fat coconut milk (the kind in a can, not a carton) or a rich cashew cream can provide a similar creamy mouthfeel, though the flavor will naturally shift.
- Chicken Broth: I prefer a low-sodium chicken broth so I can control the seasoning myself. It provides the essential liquid for our sauce and a foundational savory flavor.
- Sun-Dried Tomatoes (packed in oil): These are key to the “Marry Me” flavor! They bring an intense, sweet-tart, umami punch that really defines the dish. Don’t skip them! I usually chop them finely so their flavor is evenly distributed throughout the sauce. If you absolutely can’t find them, a tablespoon of tomato paste, cooked into the aromatics, can offer some depth, but it won’t be the same bright, tangy burst.
- Aromatics: Garlic and Onion: Fresh minced garlic and finely diced yellow onion are the foundation of almost any great sauce. They build incredible depth of flavor.
- Parmesan Cheese: Freshly grated Parmesan adds a salty, nutty, cheesy goodness that thickens the sauce and enhances its savory profile. For a dairy-free option, nutritional yeast can offer a similar cheesy umami, or use a good quality plant-based Parmesan alternative.
- Seasonings: We’ll be using a blend of Italian seasoning, paprika (for color and mild pepperiness), red pepper flakes (optional, but I love the little kick they add), salt, and black pepper. Taste as you go!
- Ramen Noodles: Since this is a “Ramen” dish, this is obviously critical! I usually grab a few packs of good quality instant ramen noodles (discarding the seasoning packets, or saving them for another use if you prefer) or use fresh ramen noodles if I can find them. The key is to get that springy, chewy texture that ramen is known for. You can, of course, use other noodle types like udon, egg noodles, or even fettuccine in a pinch, but for that authentic ramen experience, stick to ramen noodles.
- Fresh Herbs & Greens:
- Fresh Basil: Absolutely essential for the “Marry Me Chicken” component! Its sweet, aromatic notes cut through the richness of the cream sauce beautifully. Don’t use dried basil here; it won’t give you the same vibrant flavor.
- Fresh Spinach: This wilts down into the sauce, adding a lovely touch of green and some extra nutrients without overpowering the dish.
- Green Onions: Sliced green onions are a perfect fresh garnish, adding a mild oniony bite and a pop of color right before serving.
- Optional Toppings: Soft-boiled eggs are a classic ramen topping and pair wonderfully here, adding richness and protein. Sautéed mushrooms can also be a fantastic addition, providing an earthy depth.
Step-by-Step Instructions
Alright, let’s get cooking! This recipe is surprisingly straightforward, marrying the comfort of creamy chicken with the satisfying slurp of ramen.
- Prepare and Sear the Chicken:
- Pat your chicken thighs (or breasts) thoroughly dry with paper towels. Season generously on both sides with salt, black pepper, Italian seasoning, and paprika.
- Heat a large, deep skillet or Dutch oven over medium-high heat. Add a tablespoon of olive oil. Once shimmering, carefully place the chicken into the hot pan.
- Sear for about 5-7 minutes per side, until deeply golden brown and cooked through. If using thicker breasts, you might need a minute or two more, or finish them in the sauce later. Once cooked, remove the chicken from the skillet and set it aside on a cutting board to rest.
- Build the Creamy “Marry Me” Sauce:
- Reduce the heat to medium. If there isn’t much oil left in the pan, add another splash. Add the diced onion and cook, stirring occasionally, until softened and translucent, about 3-5 minutes.
- Stir in the minced garlic and chopped sun-dried tomatoes. Cook for another minute until fragrant, being careful not to burn the garlic.
- Pour in the chicken broth. Use a wooden spoon to scrape up any browned bits from the bottom of the pan – that’s flavor! Let it simmer for a minute or two. (If you prefer to include a non-alcoholic white wine alternative here, this is where you’d add a splash and let it reduce slightly before adding broth).
- Stir in the heavy cream and red pepper flakes (if using). Bring the sauce to a gentle simmer, then reduce the heat to low and stir in the grated Parmesan cheese. Continue to stir until the cheese is melted and the sauce is smooth and slightly thickened. Taste and adjust seasonings with more salt and pepper as needed.
- Combine Chicken and Sauce:
- While the sauce is simmering, slice the rested chicken into bite-sized pieces or strips.
- Add the sliced chicken back into the creamy sauce. Stir in the fresh spinach and allow it to wilt down into the sauce, which usually takes just a minute or two.
- Cook the Ramen Noodles:
- In a separate pot, cook your ramen noodles according to package directions. Most instant ramen noodles only take about 2-3 minutes to cook.
- Drain the noodles thoroughly.
- Assemble and Serve:
- Divide the cooked ramen noodles among serving bowls.
- Ladle a generous amount of the creamy “Marry Me” chicken and sauce over the noodles in each bowl.
- Garnish generously with fresh basil leaves and sliced green onions. If you’re using optional toppings like soft-boiled eggs or sautéed mushrooms, now’s the time to add them.
- Serve immediately and prepare for happy sighs!
Tips & Suggestions
To make your Creamy Marry Me Chicken Ramen absolutely unforgettable, here are a few of my go-to tips:
- Don’t Overcook the Chicken: While chicken thighs are forgiving, chicken breasts can become dry if cooked for too long. Sear them until just golden and cooked through, then let them finish absorbing flavor in the simmering sauce.
- Perfecting the Sauce Consistency: If your sauce seems too thick, a splash more chicken broth will thin it out perfectly. If it’s a bit too thin for your liking, let it simmer gently for a few extra minutes to reduce, or stir in a tiny bit more Parmesan cheese. The goal is a lush, coating consistency.
- Noodle Nuance: Ramen noodles are best when they’re al dente, meaning they still have a slight bite to them. Be careful not to overcook them, as they’ll continue to soften once they hit the hot sauce. I recommend cooking them just before serving to maintain that perfect texture.
- Fresh Herbs are a Must: Seriously, the fresh basil is not just a garnish; it’s integral to the “Marry Me” flavor profile. Don’t skimp on it! It brightens the whole dish.
- A Hint of Brightness: A tiny squeeze of fresh lemon juice stirred into the finished sauce right before serving can really lift and brighten all the rich flavors. It’s a game-changer!
- Spice it Up (or Down): If you love heat, feel free to add more red pepper flakes, or even a drizzle of chili oil over your bowl when serving. If you’re sensitive to spice, omit the red pepper flakes entirely.
- Umami Boost: A dash of fish sauce (just a tiny one!) can deepen the savory, umami notes of the sauce without making it taste fishy. It’s my secret weapon for adding complexity.
- Get Creative with Veggies: Feel free to add other quick-cooking vegetables like sliced mushrooms, bell peppers, or even kale along with the spinach. Just sauté them briefly before adding the broth and cream.
Storage
While this Creamy Marry Me Chicken Ramen is absolutely best enjoyed fresh, I understand that sometimes you’ll have leftovers or want to prep ahead. Here’s how I recommend storing it to maintain its deliciousness:
- Separate is Best: The absolute best way to store this dish is to keep the creamy chicken sauce separate from the cooked ramen noodles. Ramen noodles, like most pasta, will absorb a lot of liquid and can become mushy if left soaking in the sauce for too long.
- Chicken and Sauce: Transfer the creamy chicken and sauce to an airtight container. It will keep beautifully in the refrigerator for up to 3-4 days.
- Cooked Noodles: If you have leftover cooked noodles, store them in a separate airtight container in the refrigerator for 1-2 days. They might clump a bit.
- Reheating the Sauce:
- Gently reheat the creamy chicken sauce in a saucepan over medium-low heat, stirring occasionally, until it’s warmed through. If the sauce has thickened too much in the fridge, you can add a splash of chicken broth or a little more cream to loosen it up to your desired consistency. Avoid boiling vigorously, as cream sauces can sometimes split.
- You can also reheat individual portions in the microwave, using short bursts and stirring in between, until hot.
- Reheating Noodles:
- If you have leftover cooked noodles, you can quickly refresh them by dipping them in boiling water for about 30 seconds, then draining them well. This helps separate them and warms them up without making them too soggy.
- For the best texture, I honestly prefer to cook fresh ramen noodles each time I want to enjoy this dish, even if I’m reheating the sauce. It makes a huge difference!
- Freezing:
- I generally don’t recommend freezing the full dish. Cream-based sauces can sometimes change texture or split upon thawing and reheating. The noodles definitely won’t freeze well.
- If you must, you could try freezing just the chicken and sauce (without the noodles) in an airtight, freezer-safe container for up to 1-2 months. Thaw overnight in the refrigerator before reheating gently. You might need to vigorously whisk it or add a little more cream/broth during reheating to bring back its original texture.
Final Thoughts
And there you have it! I truly hope you’ve enjoyed this culinary journey. What makes Creamy Marry Me Chicken Ramen so special isn’t just its incredible flavor, but the sheer comfort and joy it brings to the table. From the very first spoonful, you’ll be enveloped in a luxurious creaminess, perfectly balanced with tender chicken and those irresistible ramen noodles.
This isn’t just another ramen dish; it’s an experience designed to impress and delight. It’s the kind of meal that sparks conversations, brings smiles, and yes, might even elicit a heartfelt compliment that sounds suspiciously like a proposal! I promise you, once you taste the harmonious blend of rich flavors and comforting textures in this Creamy Marry Me Chicken Ramen, you’ll understand exactly why it earned its charming name. It’s a must-try, a new favorite waiting to happen, and I encourage you to whip up a batch soon. Happy cooking!
Creamy Marry Me Chicken Ramen: Your New Favorite!
- Total Time: 45 minutes
- Yield: 4 servings
Description
This Creamy Marry Me Chicken Ramen combines the rich flavors of creamy chicken with the delightful slurp of ramen noodles, creating a dish that’s both comforting and gourmet. Perfect for a cozy night in or impressing guests, it’s a bowl of pure bliss!
Ingredients
- Boneless, skinless chicken thighs or breasts
- Heavy cream
- Low-sodium chicken broth
- Sun-dried tomatoes (packed in oil)
- Fresh minced garlic
- Finely diced yellow onion
- Freshly grated Parmesan cheese
- Italian seasoning
- Paprika
- Red pepper flakes (optional)
- Salt
- Black pepper
- Instant ramen noodles or fresh ramen noodles
- Fresh basil
- Fresh spinach
- Sliced green onions
- Soft-boiled eggs (optional)
- Sautéed mushrooms (optional)
- Olive oil
Instructions
- Pat your chicken thighs (or breasts) thoroughly dry with paper towels. Season generously on both sides with salt, black pepper, Italian seasoning, and paprika.
- Heat a large, deep skillet or Dutch oven over medium-high heat. Add a tablespoon of olive oil. Once shimmering, carefully place the chicken into the hot pan.
- Sear for about 5-7 minutes per side, until deeply golden brown and cooked through. If using thicker breasts, you might need a minute or two more, or finish them in the sauce later. Once cooked, remove the chicken from the skillet and set it aside on a cutting board to rest.
- Reduce the heat to medium. If there isn't much oil left in the pan, add another splash. Add the diced onion and cook, stirring occasionally, until softened and translucent, about 3-5 minutes.
- Stir in the minced garlic and chopped sun-dried tomatoes. Cook for another minute until fragrant, being careful not to burn the garlic.
- Pour in the chicken broth. Use a wooden spoon to scrape up any browned bits from the bottom of the pan – that's flavor! Let it simmer for a minute or two.
- Stir in the heavy cream and red pepper flakes (if using). Bring the sauce to a gentle simmer, then reduce the heat to low and stir in the grated Parmesan cheese. Continue to stir until the cheese is melted and the sauce is smooth and slightly thickened. Taste and adjust seasonings with more salt and pepper as needed.
- While the sauce is simmering, slice the rested chicken into bite-sized pieces or strips.
- Add the sliced chicken back into the creamy sauce. Stir in the fresh spinach and allow it to wilt down into the sauce, which usually takes just a minute or two.
- In a separate pot, cook your ramen noodles according to package directions. Most instant ramen noodles only take about 2-3 minutes to cook.
- Drain the noodles thoroughly.
- Divide the cooked ramen noodles among serving bowls.
- Ladle a generous amount of the creamy 'Marry Me' chicken and sauce over the noodles in each bowl.
- Garnish generously with fresh basil leaves and sliced green onions. If you're using optional toppings like soft-boiled eggs or sautéed mushrooms, now's the time to add them.
- Serve immediately and prepare for happy sighs!
- Prep Time: 15 mins
- Cook Time: 30 mins
- Category: Dinner
- Method: Cooking
- Cuisine: Fusion
Nutrition
- Serving Size: 1 bowl
- Calories: 650
- Sugar: 5 g
- Sodium: 800 mg
- Fat: 35 g
- Saturated Fat: 20 g
- Unsaturated Fat: 10 g
- Trans Fat: 0 g
- Carbohydrates: 60 g
- Fiber: 3 g
- Protein: 30 g
- Cholesterol: 150 mg
Keywords: Don't overcook the chicken to prevent dryness. Adjust the sauce consistency with chicken broth if too thick, and remember that fresh herbs are essential for flavor. A squeeze of lemon juice can brighten the dish, and a dash of fish sauce can enhance umami without a fishy taste.