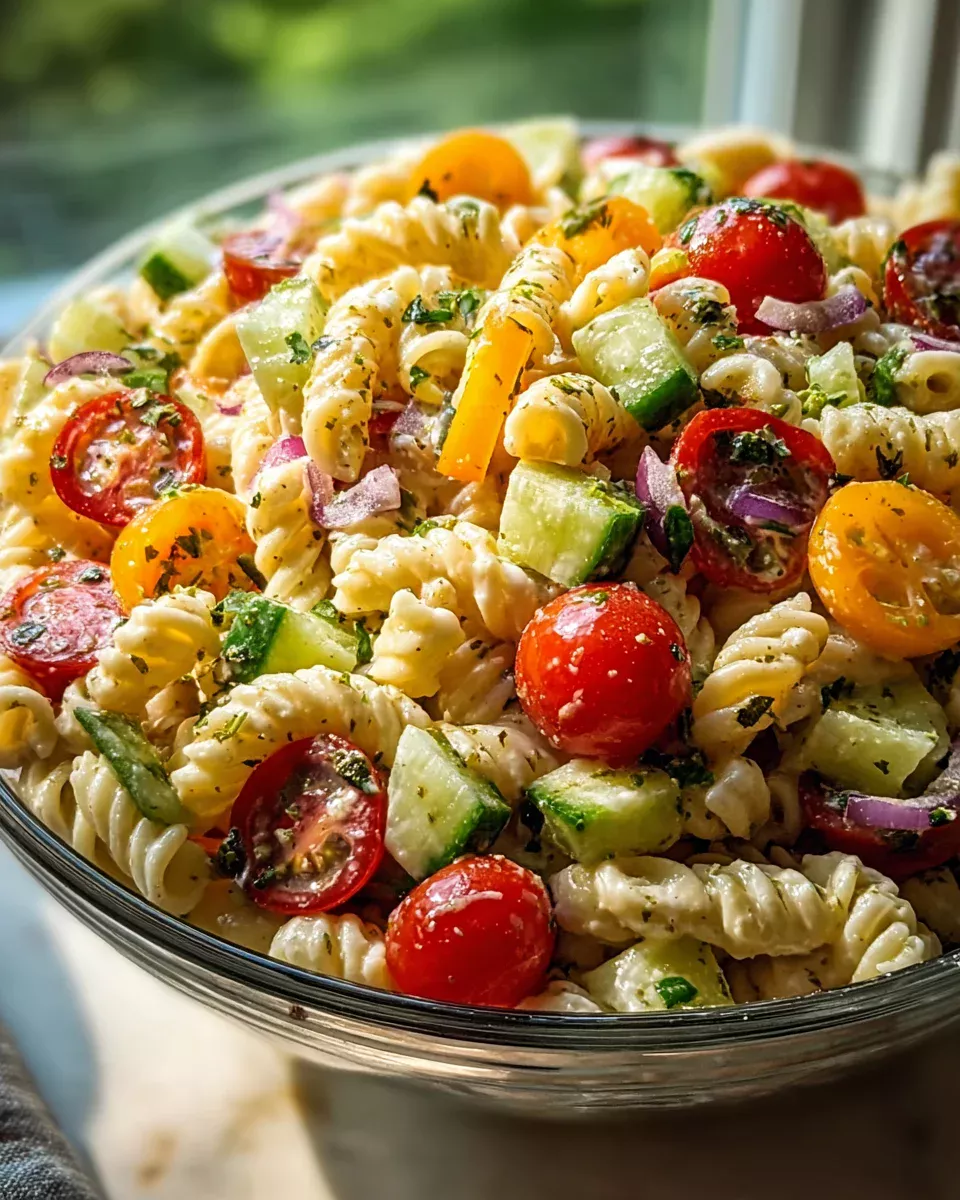
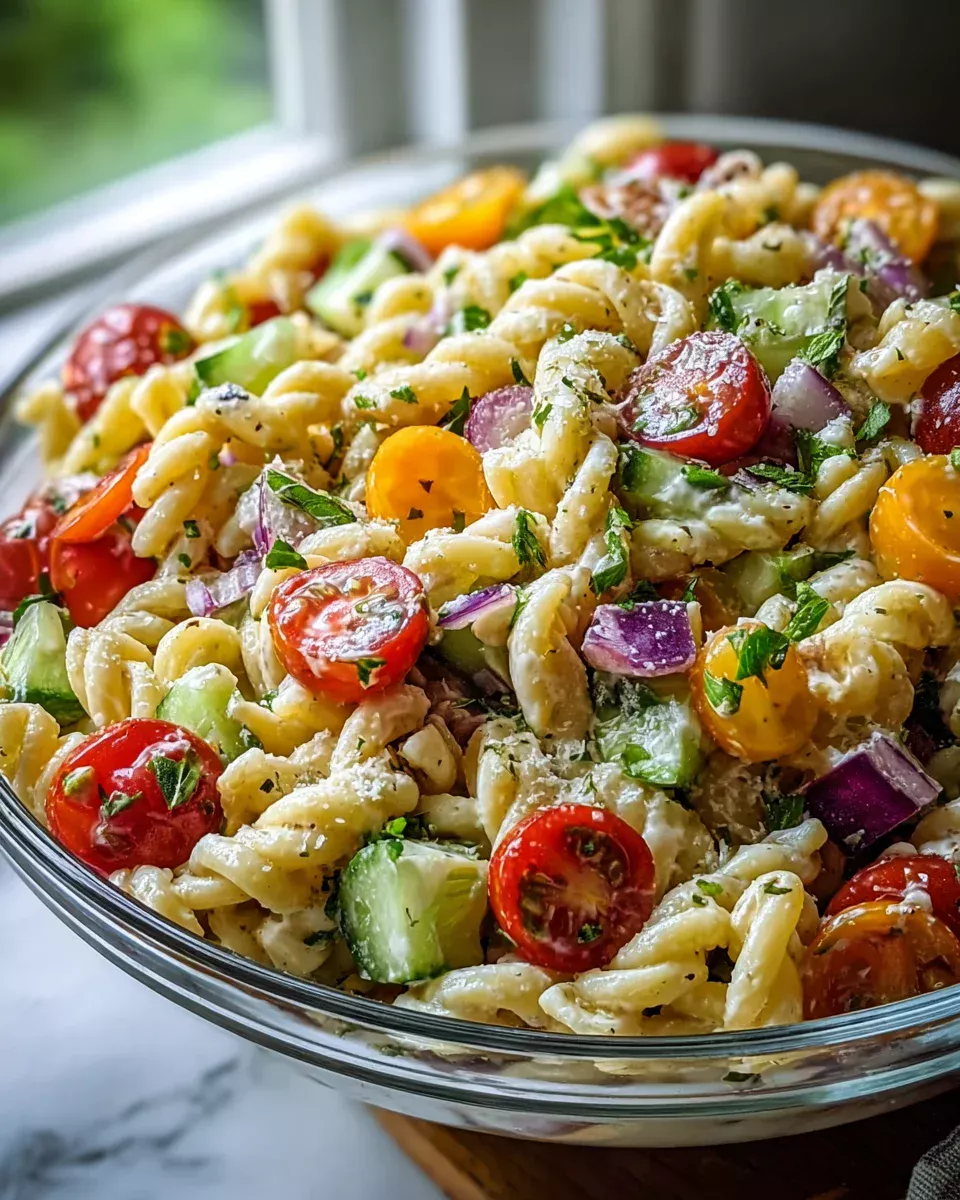
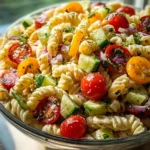
Addictive Crack Pasta Salad
Oh my goodness, where do I even begin with this one? This isn’t just any pasta salad, friends; this is THE pasta salad that will disappear faster than you can say ‘seconds.’ I’m talking about a dish so ridiculously delicious, so perfectly balanced, that you’ll understand exactly why we call it ‘addictive.’ Every single bite is a burst of savory goodness, a little tang, and just the right amount of creaminess that makes you crave another spoonful. It’s the ultimate potluck hero, the perfect side dish for any barbecue, or honestly, just a fantastic meal on its own when you want something incredibly satisfying and easy. We’re talking tender pasta mingling with crisp vegetables, delicious beef bits, and a mind-blowingly good non-alcoholic dressing that ties it all together into a symphony of flavor. Get ready to fall head over heels, because once you try this, there’s no going back!
Ingredient Notes
Oh boy, get ready because this “Addictive Crack Pasta Salad” lives up to its name! It’s that perfect blend of savory, creamy, and crunchy that you just can’t get enough of. When I’m whipping up this glorious dish, I pay special attention to a few key ingredients to ensure it hits all the right notes every single time. Here’s what you’ll need to make this magic happen:
- The Pasta: For a truly excellent pasta salad, the type of pasta matters! I usually reach for something with nooks and crannies to really grab onto that incredible dressing. Rotini, fusilli, or even small shells work beautifully. The most important thing? Cook it perfectly al dente. We want a little bite, not mushy, sad pasta. After cooking, a quick rinse under cold water is crucial to stop the cooking process and prevent stickiness.
- Crispy Beef Bacon: Forget about regular bacon; for this recipe, crispy beef bacon is an absolute must! It brings that incredible salty, smoky, and utterly addictive crunch that makes this salad truly special. Trust me, it’s a game-changer. If you don’t have beef bacon readily available, you could use a high-quality, lean ground beef cooked until very crumbly and seasoned well, but the beef bacon really does elevate it.
- The Cheeses: I love a good blend of cheeses here. Sharp cheddar, with its bold flavor, is non-negotiable. Then, I like to pair it with Monterey Jack for a milder, creamier counterpoint. Cubing the cheese rather than shredding it gives you delightful little pockets of cheesy goodness in every bite.
- Fresh Veggies for Crunch and Color: To balance out the richness, we need some vibrant, crunchy veggies!
- Red Onion: A little finely diced red onion adds a welcome zesty bite. If you find raw red onion too strong, give it a quick soak in ice water for about 10-15 minutes, then drain thoroughly.
- Celery: For that essential crisp texture.
- Bell Peppers: I often use a mix of red and yellow bell peppers for visual appeal and a touch of sweetness.
- Cherry Tomatoes: Halved cherry tomatoes add a burst of juicy freshness and a pop of color.
- Green Onions: A sprinkling of sliced green onions at the end adds a mild oniony flavor and a fresh garnish.
- The “Crack” Dressing Base: This is where the magic truly happens!
- Mayonnaise & Sour Cream: The creamy foundation. I use a combination for the perfect richness and tang. Full-fat versions are best for flavor and texture.
- Buttermilk: Thins out the dressing just enough and adds a crucial tangy note. If you don’t have buttermilk, you can make a quick substitute by adding a tablespoon of white vinegar or lemon juice to regular milk and letting it sit for 5 minutes.
- Dry Ranch Seasoning Mix: This is THE secret weapon. The blend of herbs and spices in ranch mix is what gives this salad its undeniably addictive quality. Do not skip this!
- Apple Cider Vinegar: Adds a bright, tangy zing that cuts through the richness and enhances all the other flavors.
- A Touch of Sugar: Just a pinch to balance the tanginess and savory notes.
- Garlic Powder & Onion Powder: Boosts the savory depth.
- Salt & Freshly Ground Black Pepper: Season to taste, as the ranch mix and beef bacon already contribute salt.
Step-by-Step Instructions
Making this Addictive Crack Pasta Salad is incredibly straightforward, but following these steps will ensure you get that perfect, irresistible result. Let’s get cooking (and chilling)!
- Cook the Pasta: Bring a large pot of salted water to a rolling boil. Add your chosen pasta (rotini, fusilli, or shells work best) and cook according to package directions until it’s perfectly al dente. This means it should be tender but still have a slight bite to it – no mushy pasta allowed! Once cooked, immediately drain the pasta in a colander and rinse it thoroughly under cold running water. This stops the cooking process and prevents the pasta from sticking together. Drain it very, very well, shaking out as much excess water as possible. Set aside to cool completely.
- Crisp Up the Beef Bacon: While the pasta is cooking or cooling, prepare your beef bacon. Cook it in a large skillet over medium heat until it’s deliciously crispy. This might take a few minutes, so be patient for that perfect crunch. Once crispy, transfer the beef bacon to a plate lined with paper towels to drain any excess fat. Once cooled slightly, crumble the crispy beef bacon into small, bite-sized pieces.
- Chop the Veggies and Cheese: Now it’s time for some chopping! Dice your red onion, celery, and bell peppers into small, uniform pieces. Halve your cherry tomatoes, and thinly slice the green onions. Cube your cheddar and Monterey Jack cheeses. Having all your ingredients prepped and ready to go makes assembly a breeze.
- Whip Up the Dressing: In a large mixing bowl, combine all the dressing ingredients: mayonnaise, sour cream (or Greek yogurt), buttermilk (or your homemade substitute), dry ranch seasoning mix, apple cider vinegar, a pinch of sugar, garlic powder, onion powder, salt, and black pepper. Whisk everything together until the dressing is completely smooth and creamy. Taste and adjust seasonings if needed – remember, this is your “crack” sauce, so make it perfect for your palate!
- Combine Everything: In a very large mixing bowl (the biggest one you have!), add the cooled and well-drained pasta, the crispy crumbled beef bacon, the cubed cheeses, and all your chopped vegetables (red onion, celery, bell peppers, and cherry tomatoes).
- Dress and Toss: Pour the creamy, addictive dressing generously over all the ingredients in the large bowl. Using a large spoon or spatula, gently but thoroughly toss everything together until every piece of pasta, every veggie, and every bit of beef bacon is coated in that glorious dressing. Make sure to scrape the bottom of the bowl to get all the dressing mixed in.
- Chill for Flavor Melding: This step is CRITICAL for an “addictive” pasta salad! Cover the bowl tightly with plastic wrap and refrigerate the pasta salad for at least 4 hours, but ideally overnight. This chilling time allows all those incredible flavors to meld together and deepen, making the salad even more delicious. The pasta will also absorb some of the dressing, making it incredibly flavorful.
- Serve It Up: Before serving, give the pasta salad another good stir. If it seems a little thick after chilling, you can add a splash more buttermilk or milk to reach your desired consistency. Garnish with the sliced green onions, and get ready for rave reviews!
Tips & Suggestions
Making this Addictive Crack Pasta Salad is fantastic, but a few extra tips can elevate it from great to absolutely legendary. I’ve learned these tricks over time, and they really make a difference!
- Don’t Rush the Chill: I cannot stress this enough – the longer this pasta salad chills, the better it tastes! Aim for at least 4 hours, but I promise you, an overnight stay in the fridge transforms it. The flavors have time to truly meld, and the pasta gets saturated with that amazing dressing.
- Perfect Pasta is Key: Always cook your pasta al dente. Overcooked pasta turns mushy and loses its texture, which is a real disappointment in a cold salad. Rinsing with cold water immediately after draining is crucial to stop cooking and prevent sticking. This keeps your pasta firm and separate.
- Seasoning is Personal: The dry ranch seasoning provides a lot of salt, as does the beef bacon. So, when you’re seasoning the dressing, taste it before adding extra salt. You can always add more, but you can’t take it away! Freshly ground black pepper, however, can be generous.
- Customize Your Crunch: While I love the veggies listed, feel free to get creative! Canned corn (drained well), frozen peas (thawed), black olives (sliced), or even finely diced pickles can add extra texture and flavor. Just be mindful of additions that might make the salad watery.
- Make it Your Own: If you’re a fan of fresh herbs, a handful of finely chopped fresh dill or parsley stirred in before serving can add a lovely brightness and a herbaceous note that complements the ranch flavor beautifully.
- Dressing Consistency Check: After chilling, the pasta salad might thicken up as the pasta absorbs some of the liquid. If it seems too dry or thick for your liking, don’t hesitate to stir in a splash of additional buttermilk or milk to bring it back to that perfect creamy consistency.
- Perfect for Potlucks and Parties: This pasta salad is a total crowd-pleaser and travels incredibly well. It’s my go-to for barbecues, picnics, and family gatherings because it can be made ahead of time and always gets devoured!
Storage
Once you’ve made a batch of this Addictive Crack Pasta Salad, you’ll want to make sure you store it properly so you can enjoy it for days to come. Here’s what I do:
- Refrigeration is Essential: Always store any leftover pasta salad in an airtight container in the refrigerator. This keeps it fresh and prevents it from drying out or absorbing other odors from your fridge.
- Shelf Life: When stored correctly, this pasta salad will stay fresh and delicious for about 3-4 days in the refrigerator. Beyond that, the pasta can start to get a bit soft, and the vegetables might lose some of their crispness.
- Revitalize if Needed: If you find that the pasta salad has thickened up a bit too much after a day or two in the fridge, don’t worry! You can easily bring it back to life by stirring in a splash of fresh buttermilk, milk, or even a little extra mayonnaise before serving. This will restore its creamy texture.
- Freezing is Not Recommended: Unfortunately, pasta salads with creamy dressings and fresh vegetables generally do not freeze well. The texture of the pasta and vegetables will become mushy upon thawing, and the dressing can separate. It’s best to enjoy this salad fresh within a few days of making it.
- When Serving Outdoors: If you’re bringing this to a picnic or outdoor gathering, remember it’s a mayonnaise-based salad. Keep it chilled in a cooler with ice packs, and avoid leaving it out at room temperature for more than 2 hours to ensure food safety.
Final Thoughts
And there you have it, folks! My absolute favorite, the one and only Addictive Crack Pasta Salad. I truly believe this isn’t just another pasta salad; it’s an experience that will redefine your expectations. From the very first forkful, you’ll understand why I’ve given it such a bold name. The magical blend of creamy textures, tangy notes, and savory delights, combined with just the right amount of delightful crunch, creates a symphony of flavors that will have everyone reaching for seconds, and then thirds! It’s the perfect dish for gatherings, celebrations, or simply when you want to treat yourself to something truly special. Trust me, once you try the Addictive Crack Pasta Salad, you’ll find yourself craving it again and again. It’s incredibly easy to whip up, remarkably satisfying, and absolutely guaranteed to be a showstopper. So go ahead, make a batch and prepare to fall head over heels!
Addictive Crack Pasta Salad: Your New Go-To Side Dish!
- Total Time: 45 minutes
- Yield: 8 servings
Description
This Addictive Crack Pasta Salad is a delicious blend of savory, creamy, and crunchy flavors that will have everyone reaching for seconds. Perfect for potlucks, barbecues, or as a satisfying meal on its own!
Ingredients
- Rotini, fusilli, or small shells pasta
- Crispy beef bacon
- Sharp cheddar cheese
- Monterey Jack cheese
- Red onion
- Celery
- Red bell pepper
- Yellow bell pepper
- Cherry tomatoes
- Green onions
- Mayonnaise
- Sour cream
- Buttermilk
- Dry ranch seasoning mix
- Apple cider vinegar
- Sugar
- Garlic powder
- Onion powder
- Salt
- Freshly ground black pepper
Instructions
- Cook the Pasta: Bring a large pot of salted water to a rolling boil. Add your chosen pasta and cook according to package directions until it's perfectly al dente. Drain the pasta in a colander and rinse it thoroughly under cold running water. Set aside to cool completely.
- Crisp Up the Beef Bacon: Cook the beef bacon in a large skillet over medium heat until it’s crispy. Transfer the beef bacon to a plate lined with paper towels to drain any excess fat. Once cooled slightly, crumble the crispy beef bacon into small, bite-sized pieces.
- Chop the Veggies and Cheese: Dice your red onion, celery, and bell peppers into small, uniform pieces. Halve your cherry tomatoes, and thinly slice the green onions. Cube your cheddar and Monterey Jack cheeses.
- Whip Up the Dressing: In a large mixing bowl, combine mayonnaise, sour cream, buttermilk, dry ranch seasoning mix, apple cider vinegar, sugar, garlic powder, onion powder, salt, and black pepper. Whisk everything together until the dressing is completely smooth and creamy.
- Combine Everything: In a very large mixing bowl, add the cooled and well-drained pasta, the crispy crumbled beef bacon, the cubed cheeses, and all your chopped vegetables.
- Dress and Toss: Pour the creamy dressing generously over all the ingredients in the large bowl. Gently but thoroughly toss everything together until every piece is coated in the dressing.
- Chill for Flavor Melding: Cover the bowl tightly with plastic wrap and refrigerate the pasta salad for at least 4 hours, ideally overnight.
- Serve It Up: Before serving, give the pasta salad another good stir. If it seems a little thick after chilling, add a splash more buttermilk or milk to reach your desired consistency. Garnish with sliced green onions.
- Prep Time: 30 mins
- Cook Time: 15 mins
- Category: Side Dish
- Method: Mixing
- Cuisine: American
Nutrition
- Serving Size: 1 cup
- Calories: 320
- Sugar: 3 g
- Sodium: 600 mg
- Fat: 22 g
- Saturated Fat: 8 g
- Unsaturated Fat: 12 g
- Trans Fat: 0 g
- Carbohydrates: 24 g
- Fiber: 2 g
- Protein: 10 g
- Cholesterol: 30 mg
Keywords: The longer this pasta salad chills, the better it tastes! Aim for at least 4 hours, but overnight is best. Customize your veggies and seasonings to your liking.