Introduction
The charm of handmade crafts adds a personal touch to the holiday season, and there’s something special about creating your own decorations. Crochet Granny Square Christmas Tree Ornaments are not only a delightful project for experienced crocheters but also an excellent opportunity for beginners to explore their skills. This guide will walk you through every step, from gathering the materials to creating and assembling your festive ornaments. So grab your yarn and crochet hook, and let’s dive into this creative journey!
Introduction to Crochet Granny Square Christmas Tree Ornaments
The holiday season is about joy, creativity, and making memories. And what better way to capture that spirit than with handmade decorations? Granny square Christmas tree ornaments are the perfect mix of simplicity and elegance. These ornaments can be whipped up in a matter of hours and tailored to fit any holiday theme with your favorite colors and embellishments.
Why Choose Granny Square Ornaments?
Granny squares are beloved in the crochet community for their versatility. They’re easy to learn, even for beginners, and can be transformed into a wide variety of items—from blankets to, yes, ornaments! For Christmas, they offer endless opportunities for personalization.
Not only are these ornaments visually appealing, but they’re also budget-friendly. You can use leftover yarn from other projects, repurpose old buttons, or add sparkle with beads and bows. These ornaments make fantastic gifts, tree decorations, or even unique package toppers!
The Allure of Handmade Holiday Décor
In today’s fast-paced world, slowing down to create something with your hands feels almost magical. Handmade items, like crochet ornaments, carry sentimental value, bringing warmth and charm to any Christmas tree. They’re a reflection of care, effort, and creativity, making them cherished by family and friends alike.
So, whether you’re crocheting for fun or to create lasting holiday keepsakes, these granny square Christmas ornaments are a delightful addition to your festive season. And the best part? You’ll enjoy every step of the process, from the first stitch to the final touch.
What You’ll Need to Get Started
Before diving into creating your Crochet Granny Square Christmas Tree Ornaments, it’s essential to gather the right materials and tools. Having everything ready will make your crochet journey seamless and enjoyable.
Yarn Types and Colors
When selecting yarn for your project, opt for materials that are easy to work with and durable enough to last through many holiday seasons. Popular choices include cotton yarn, which provides a neat, defined texture, or acrylic yarn for its versatility and vibrant color options. Using sparkly or metallic yarn can add a festive touch to your ornaments.
For a traditional Christmas look, use colors like red, green, and white. However, don’t be afraid to get creative—gold, silver, or even pastel shades can create a modern aesthetic. If you’re new to crochet, consider medium-weight yarns, as they’re easier to handle.

Essential Tools
Here’s a quick list of the must-have tools for this project:
- Crochet Hooks: A 4mm hook is commonly used for granny squares, but check your yarn label for the recommended size.
- Scissors: Small, sharp scissors will help trim yarn ends neatly.
- Tapestry Needle: This is indispensable for weaving in yarn ends and sewing the ornament together.
- Measuring Tape: Ensures consistent sizing of your granny squares.
Optional Add-ons for a Festive Flair
Take your ornaments to the next level by incorporating embellishments such as:
- Beads or Buttons: Use these to decorate the center of your granny squares or as accents on your Christmas tree design【10】.
- Ribbon or Bows: Attach them to the top for added elegance.
- Tiny Bells or Stars: These elements can make your ornament stand out and add a little jingle to your tree!
A Note on Sustainability
This project is also an excellent opportunity to repurpose leftover yarn from previous crochet projects. Not only does this save money, but it’s also a step towards sustainable crafting.
Now that you have all your supplies, you’re ready to start crocheting! In the next section, we’ll cover how to create the basic granny square—the building block of your ornament masterpiece.
Step-by-Step Guide to Crochet a Basic Granny Square
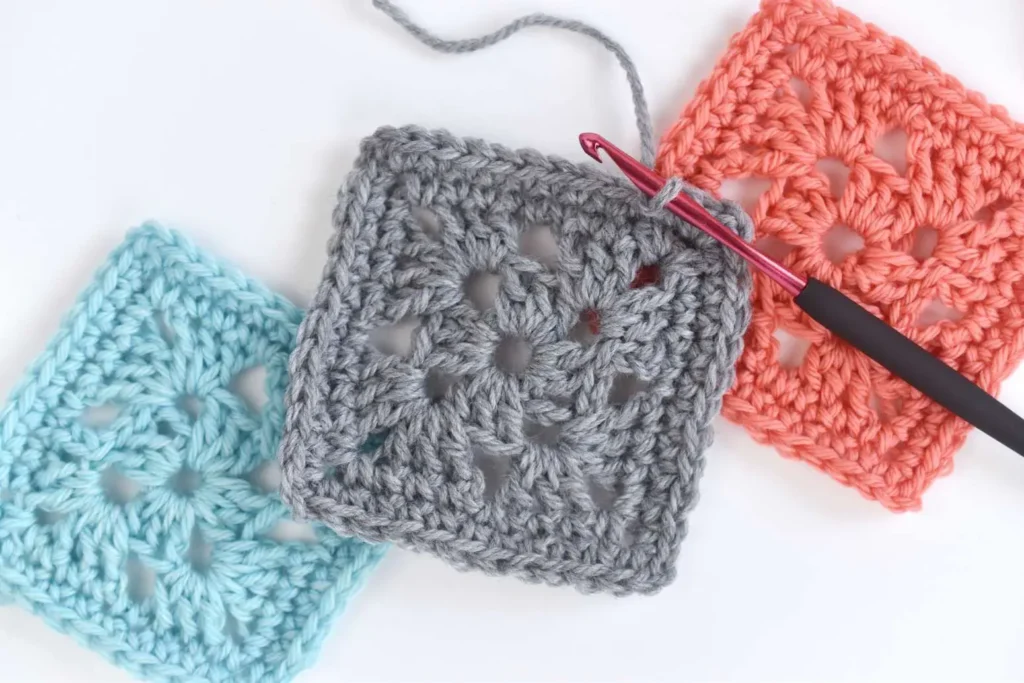
The granny square is the foundation of your Christmas tree ornament, and learning this classic pattern will unlock endless creative possibilities. Here’s a detailed guide to help you create perfect granny squares with ease.
Classic Granny Square Pattern
1: The Beginning
- Start with a slip knot on your hook.
- Chain 4 (ch4), then join into a circle with a slip stitch (sl st). This forms the base ring.
- Chain 3 (ch3) to count as your first treble crochet (tr) stitch.
- Work 2 treble crochets into the ring.
- Chain 2 (ch2) to form a corner.
- Repeat 3 treble crochets into the ring, followed by ch2. Repeat this sequence 2 more times until you have 4 clusters separated by chains.
- Slip stitch into the top of the initial chain 3 to close the round.
2: Building the Layers
- Slip stitch to the next corner space (ch2 space).
- Chain 3 (counts as the first treble crochet), then work 2 trebles, chain 2, and 3 trebles into the same corner space.
- Chain 1 (ch1) and move to the next corner space. Repeat (3 trebles, ch2, 3 trebles) in each corner.
- Continue until all corners are worked, ending with a slip stitch to close the round.
3: Expanding the Square
- Slip stitch to the next corner space as before.
- For each corner, repeat (3 trebles, ch2, 3 trebles). In the chain-1 spaces between corners, work 3 trebles.
- Repeat around the square, closing the round with a slip stitch.
Tips for Consistency
- Use a measuring tape to ensure all your squares are the same size.
- Keep your stitches even and tension steady for a neat finish.
- Don’t forget to weave in loose ends using a tapestry needle after finishing each square.
Variations for a Festive Look
To make your granny squares uniquely Christmassy:
- Alternate rows with red, green, and white yarn to mimic traditional holiday colors.
- Use a glittery yarn to add sparkle to your tree ornament.
- Incorporate beads into the corners for extra flair【10】.
With your basic squares complete, you’re one step closer to crafting a beautiful ornament. Next, we’ll explore how to transform these squares into a stunning Christmas tree shape!
Turning Granny Squares into Christmas Trees
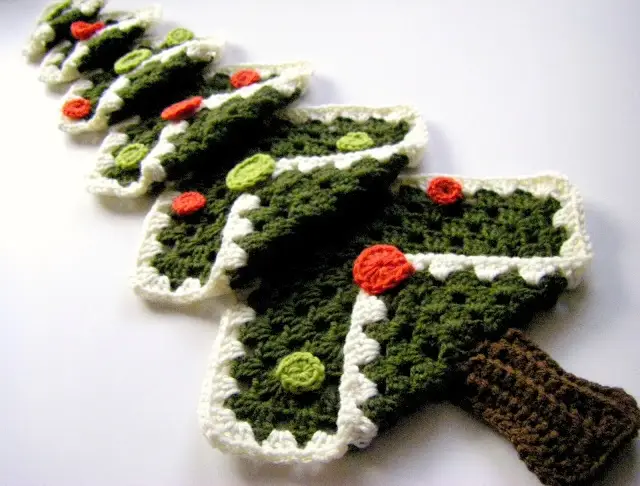
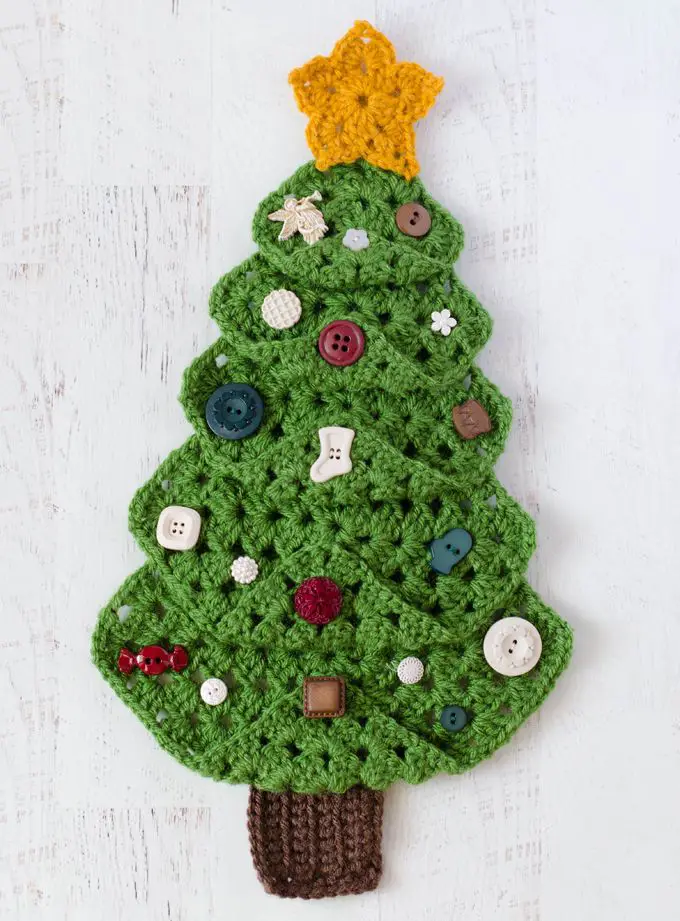
Once you’ve completed your granny squares, the magic begins! This section will guide you through assembling your squares into a delightful Crochet Granny Square Christmas Tree Ornament.
Arranging Granny Squares
Step 1: Planning the Layout
- Start by visualizing your Christmas tree design. Typically, you’ll need three granny squares in graduated sizes: large for the base, medium for the middle, and small for the top.
- Lay the squares out in a triangle formation, with the smallest on top. This layout ensures a balanced and symmetrical tree.
Step 2: Connecting the Squares
- Use a tapestry needle and matching yarn to join the squares. Stitch the edges where each square overlaps slightly.
- Keep your stitches secure but not overly tight to maintain the ornament’s flexibility.
- For a more decorative look, consider using contrasting yarn for the seams to create a festive border.
Adding the Tree Trunk
- Crochet the Trunk:
- Using brown yarn, chain 12.
- Work a row of single crochet (sc) into each chain. Repeat this row until you reach your desired trunk length. Typically, 5–7 rows should suffice.
- Fasten off and weave in loose ends.
- Attach the Trunk:
- Sew the trunk to the bottom edge of the largest square. Ensure it’s centered for a realistic tree look.
Decorating and Final Touches
Adding Embellishments
- Attach buttons or beads to the granny squares to represent ornaments【10】.
- Sew a tiny star or bow to the top square to serve as the tree topper.
Creating the Hanging Loop
- Use a piece of yarn or ribbon to form a loop at the top of the ornament. This makes it easy to hang on your Christmas tree or any festive display.
Shaping the Ornament
- Lightly block the assembled ornament to ensure the squares lay flat and the tree maintains its shape. Blocking also helps stitches look more polished.
With your squares now transformed into a festive Christmas tree, you’ve created a charming handmade decoration that’s sure to impress! Next, we’ll explore creative ways to use your ornament beyond the tree.

Beyond Ornaments—Creative Applications
While these Crochet Granny Square Christmas Tree Ornaments are perfect for decorating your holiday tree, their versatility extends far beyond that. Let your creativity flow and consider these unique applications for your handmade granny squares.
Gift Toppers with a Personal Touch
Transform your ornaments into thoughtful gift toppers! Tie one to a wrapped present with a ribbon for an extra layer of holiday cheer. This thoughtful addition turns a simple gift into something truly special.
Festive Garlands
Combine several ornaments to create a stunning Christmas garland. Simply string your granny square trees onto twine or ribbon, leaving enough space between each for a balanced look. Hang this garland on your mantel, staircase, or wall for a cozy holiday vibe.
Wall Décor or Door Hangers
Mount a larger version of your granny square tree onto a wooden or fabric backing to make a festive wall hanging. Alternatively, add a sturdy loop to create a door hanger that warmly welcomes guests.
Holiday Table Settings
Use mini granny square trees as napkin rings or place card holders for a charming, handmade touch to your holiday table. Attach each to a small clip or loop them around napkins for a cohesive table décor theme.
Unique Holiday Keepsakes
Because these ornaments are handmade, they carry sentimental value. Consider creating a new set each year, incorporating different color schemes or embellishments. Over time, these pieces can become cherished family heirlooms.
By thinking beyond the tree, you can fully maximize the potential of your granny square creations. With just a little imagination, these ornaments can brighten every corner of your home and bring joy to all who see them. Stay tuned for Part 6, where we’ll discuss troubleshooting and tips for beginners!
Troubleshooting and Tips for Beginners
Even seasoned crocheters run into snags occasionally, and beginners may feel a bit daunted by their first few projects. Don’t worry—crocheting your granny square Christmas tree ornaments should be a fun and rewarding experience. Here are common issues you might face and tips to help you avoid or resolve them.
Troubleshooting Common Issues
Uneven Edges
- The Problem: Your granny square edges may look wavy or inconsistent.
- The Fix: Check your stitch count at the end of each round. Uneven edges often result from skipping a stitch or accidentally adding extras. Use stitch markers to keep track of corners and edges.
Squares That Curl or Warp
- The Problem: The squares don’t lay flat, making the ornament harder to assemble.
- The Fix: This is often due to uneven tension. Practice keeping your stitches loose and uniform. Blocking your granny squares after completing them can also help shape them properly.
Loose Ends Popping Out
- The Problem: Yarn ends stick out after finishing.
- The Fix: Use a tapestry needle to weave ends securely into the square’s stitches. For extra security, weave them in two directions before trimming.
Tips for Beginners
Start Small and Practice First
Before diving into your ornament, practice making a few basic granny squares. Familiarize yourself with stitches like treble crochet and learn how to maintain a consistent tension.
Choose the Right Yarn and Hook
For beginners, medium-weight yarn and a 4mm crochet hook are the ideal combination. These are easier to handle and make your stitches more visible as you work.
Watch Video Tutorials
If written instructions feel tricky, watch a few crochet tutorials online. Many videos break down granny square techniques step-by-step. A great resource is the Beginner’s Guide to Crochet, which provides visual aids and helpful tips for new crocheters.
Take Breaks
Crocheting is a relaxing hobby, but long sessions can lead to hand fatigue. Take short breaks to stretch your hands and wrists.
Experiment with Color Changes
Switching yarn colors between rounds can elevate your design. If changing colors feels intimidating, practice securing and weaving in new yarn before starting your main project.
Encouragement for First-Time Makers
Don’t get discouraged if your first few granny squares aren’t perfect! Each stitch is a step closer to mastering this timeless craft. Remember, even the most experienced crocheters started where you are today.
With these troubleshooting tips and beginner-friendly advice, you’re well-equipped to enjoy a smooth and stress-free crochet journey. Up next, we’ll answer some frequently asked questions about creating these festive ornaments.

FAQs
1. Can I Use Leftover Yarn for This Project?
Yes, absolutely! One of the best things about granny square ornaments is their versatility. Leftover yarn works wonderfully, allowing you to create unique, multicolored ornaments. Just ensure that the yarns are of similar weight and texture for a consistent look.
2. How Do I Block My Granny Squares?
Blocking is essential for giving your granny squares a polished and professional finish. Here’s how you can block your squares:
- Pin them to a flat surface like a foam board, ensuring the edges are even.
- Lightly mist with water using a spray bottle.
- Allow them to dry completely before removing the pins.
For delicate or sparkly yarns, always test a small piece first to ensure the blocking process doesn’t damage the material.
3. Can I Customize the Size of the Ornament?
Yes! Adjusting the number of rounds in your granny squares is the easiest way to resize your ornaments. Fewer rounds create smaller ornaments, while adding rounds makes larger ones. Just ensure all squares in one ornament match in size for proper assembly.
4. How Do I Add Decorations Like Beads or Buttons?
You can sew beads or buttons onto your granny squares after completing them. Use a sturdy sewing needle and thread, matching the colors for a seamless finish. For added stability, ensure the embellishments are attached before assembling your ornament.
Conclusion
Crocheting Granny Square Christmas Tree Ornaments is more than just a holiday craft—it’s a celebration of creativity, tradition, and personal expression. These ornaments allow you to blend classic crochet techniques with modern flair, creating decorations that are as unique as your holiday memories.
Whether you’re a seasoned crocheter or just starting out, this project offers an opportunity to make something beautiful while improving your skills. From decorating your tree to gifting handmade treasures, these ornaments bring warmth, charm, and a touch of nostalgia to any festive setting.
By following this guide and adding your own personal touches, you can craft ornaments that brighten your home and make the holidays truly special. So grab your yarn and hook, and let the holiday magic begin—happy crafting! 🎄

