Introduction
Crocheting isn’t just for blankets and scarves anymore—it’s a gateway to creating custom, stylish accessories like sandals that fit your unique vibe. Whether you’re craving barefoot bohemian designs or practical footwear for summer strolls, Learn to Crochet Sandals can be a rewarding and sustainable craft.
In this article, we’ll walk you through everything from gathering materials and mastering techniques to crafting advanced patterns and personalizing your designs. By the end, you’ll have all the tools you need to create stunning, handmade crochet sandals that are not only fashionable but also tailored to your taste. Let’s dive in!
Introduction to Crocheting Sandals
What Are Crochet Sandals?
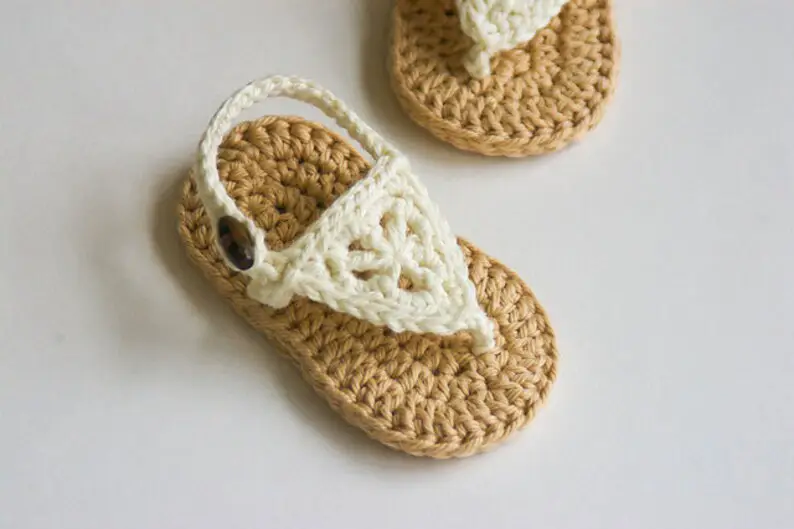
Crochet sandals are lightweight, breathable footwear crafted using yarn, a crochet hook, and a lot of creativity. They can range from simple thong-style designs to intricate gladiator or espadrille-inspired styles. Popular for their blend of comfort and style, these sandals are perfect for beach outings, casual gatherings, or even lounging at home.
Why Crochet Sandals?
Making your own crochet sandals is more than just a fun pastime—it’s a chance to design shoes that reflect your personal style while being eco-conscious. By reusing old flip-flop soles or experimenting with sustainable yarns, you can create durable, affordable alternatives to store-bought sandals. Plus, learning to crochet offers therapeutic benefits like reduced stress and improved focus.
What You’ll Learn in This Guide
- How to select the right materials and tools for your project.
- Techniques to craft beginner and advanced crochet sandal patterns.
- Tips for customizing and maintaining your creations for long-lasting wear.
So grab your hooks, pick a pattern, and let’s explore this creative journey together!

Materials and Preparation
Materials You’ll Need
Before diving into crocheting your own sandals, assembling the right materials is essential. Here’s a rundown of what you’ll need to get started:
- Yarn: Opt for sturdy materials like cotton or nylon yarn, as they offer durability and breathability—ideal for footwear that lasts. Consider brands specifically designed for crochet sandals for better comfort and strength.
- Crochet Hook: Choose a hook that complements the thickness of your yarn. Generally, a 3.5mm to 5mm hook works well for sandal projects.
- Flip-Flop Soles: Recycle old flip-flops or purchase new ones with durable rubber soles. These provide a strong foundation for your sandals.
- Additional Tools:
- Sharp scissors for clean cuts.
- A tapestry needle to weave in ends.
- Measuring tape to ensure accuracy in sizing.
- Beads or charms for decoration, if you want to add a touch of personality.
Tip: If you’re unsure about where to find quality materials, check out crochet tools and materials for beginners for guidance
Preparing Your Sole
The sole is the base of your sandal, so preparing it properly is critical for comfort and longevity. Here’s how:
- Trim Old Straps: If you’re repurposing old flip-flops, carefully cut away the straps with scissors, leaving a smooth surface. Retain the toe plug if you plan to reuse it for added security.
- Mark Your Holes: Using a ruler or printable sole template, mark holes around the edge of the sole, spaced about ⅜ inch apart. These holes will be where you crochet into the sole.
- Punch Holes: Use a sharp awl or a similar tool to pierce the marked spots at a slight angle. This helps avoid tearing the rubber and ensures the yarn stays securely in place.
- Test for Consistency: Double-check that the spacing between the holes is even. This creates a professional finish and ensures that your stitches align perfectly.
Note: If you’re looking for detailed visuals and tips on this process, refer to how to crochet espadrilles with flip-flop soles for a comprehensive guide
Basic Techniques and Patterns
Learning the Basics
Before you jump into crafting your crochet sandals, it’s essential to understand the basic techniques that form the foundation of this art. Here’s what you need to know:
- Chain Stitch (ch): This is the starting point for most crochet patterns. It creates a flexible base and connects your work to the sole.
- Single Crochet (sc): A tight and sturdy stitch, perfect for footwear. It provides strength and durability to your sandals.
- Double Crochet (dc): This stitch adds height and texture, commonly used for decorative designs or straps.
- Working in the Round: Since sandals often involve circular or oval shapes, mastering this technique is key to shaping soles and straps seamlessly.
Tip: Keep your stitches tighter than usual when crocheting footwear. This prevents the sandals from stretching excessively and ensures durability.
Step-by-Step Beginner Sandal Pattern
Ready to create your first pair of simple crochet sandals? Follow these steps for a classic thong-style design:
- Start with the Sole:
Attach the yarn to one of the holes on the sole using a slipknot. Work single crochet stitches around the edge of the sole, inserting the hook through each punched hole. This creates a sturdy base for your sandal. - Create the Toe Loop:
After completing the sole edge, chain 10 stitches to form a loop. Join the chain back to the sole with a single crochet to create the toe hold. Adjust the loop size as needed for comfort. - Make the Straps:
Work single or double crochet stitches from one side of the sole to the other, creating straps that secure the sandal to your foot. Attach each strap securely to the holes in the sole. - Add Decorative Elements (Optional):
Embellish your sandal with beads, tassels, or small crochet flowers for a personalized touch.
Advanced Sandal Patterns
If you’re feeling adventurous, try these designs to up your crochet game:
- Gladiator-Style Sandals:
Create multiple straps that wrap around the ankle for a chic, bohemian vibe. Use double crochet stitches for flexibility and adjust the length based on your desired height. - Espadrille-Inspired Sandals:
Combine a crochet upper with a durable flip-flop sole. These sandals mimic the classic espadrille look and are perfect for casual summer outings.
For detailed inspiration and free patterns, check out how to crochet espadrilles with easy-to-follow instructions

Customizing Your Crochet Sandals
Adding Personal Touches
One of the best things about crocheting your own sandals is the freedom to customize them to your heart’s desire. With some creativity, you can transform simple designs into stunning, one-of-a-kind footwear.
- Play with Colors: Experiment with vibrant or pastel shades of yarn to match your outfit or mood. You can even use color-blocking techniques to add trendy patterns to your sandals.
- Decorative Embellishments: Add beads, buttons, or crochet flowers for a touch of elegance or whimsy. Incorporate charms or small seashells for a bohemian, beach-inspired look.
- Mix and Match Materials: Combine crochet with leather, faux suede, or ribbons to give your sandals a unique texture and style.
Tip: Use lightweight and durable embellishments to maintain comfort and functionality.
Adjusting for Comfort and Fit
Getting the perfect fit is crucial for sandals that are not only stylish but also comfortable. Follow these tips to ensure your sandals fit like a glove:
- Measure Your Foot:
Before starting, trace your foot on paper and measure its length and width. Use this as a guide to adjust your pattern accordingly. - Modify Strap Length:
If the pattern calls for fixed straps, test their fit by trying on the sandals mid-project. Adjust the length of the straps to accommodate the unique shape of your foot. - Add Padding:
For extra comfort, insert foam or soft fabric under the crochet sole before stitching it to the base. This works especially well for designs meant for extended wear.
Make Them Occasion-Ready
Tailor your crochet sandals for different occasions:
- Casual Days: Stick to simple patterns and neutral yarn colors.
- Beach Trips: Opt for bright hues and waterproof yarn.
- Special Events: Embellish with sparkling beads or metallic threads for a formal touch.
By customizing your sandals, you not only enhance their visual appeal but also ensure they reflect your personality.
Care and Maintenance
Keeping Your Crochet Sandals in Top Shape
Crochet sandals are a labor of love, and with proper care, they can remain stylish and functional for a long time. Here’s how to maintain their look and longevity:
Cleaning Your Crochet Sandals
Since sandals often come into contact with dirt and sweat, keeping them clean is essential.
- Hand Washing:
Use lukewarm water mixed with a mild detergent. Gently scrub the crochet portions with a soft toothbrush or sponge to avoid fraying the yarn. - Drying Properly:
Avoid tossing them in a dryer, as heat can weaken the yarn. Instead, reshape them and let them air-dry on a flat surface. Keep them out of direct sunlight to prevent fading. - Spot Cleaning:
For quick touch-ups, dab stains with a damp cloth soaked in soapy water. Pat dry immediately to avoid soaking the yarn.
Repairing Wear and Tear
Over time, even the sturdiest handmade sandals may require minor repairs.
- Loose Stitches: Use a tapestry needle and matching yarn to tighten or replace loose stitches.
- Worn-Out Soles: Reinforce the base by gluing an extra rubber layer or adding foam padding.
- Frayed Edges: Trim frayed yarn carefully and apply a small amount of fabric glue to seal the ends.
Storing Your Sandals
Proper storage can significantly extend the life of your crochet sandals:
- Keep them in a cool, dry place to prevent mold or mildew.
- Use a shoe bag or wrap them in tissue paper to avoid dust buildup.
- Avoid stacking heavy items on top of them to maintain their shape.
Tip: Rotate your crochet sandals with other footwear to minimize wear and tear from daily use.
FAQs
How long does it take to crochet a pair of sandals?
The time required depends on the complexity of the pattern and your skill level. A beginner working on a simple design might take 4–6 hours, while more intricate patterns like gladiator-style sandals could take up to 10–12 hours.
What type of yarn is best for sandals?
Durable yarns like cotton, nylon, or polyester are ideal for sandals. These materials provide the strength and flexibility needed for footwear. Avoid overly stretchy or delicate yarns, as they may lose shape with wear.
Can I use recycled materials for the soles?
Absolutely! Repurposing old flip-flop soles is a popular choice. They provide a sturdy foundation and help reduce waste. Just ensure the soles are in good condition and free of cracks or wear.
How do I make sure my sandals are durable?
Durability hinges on tight stitching, high-quality yarn, and a solid sole. Use reinforced stitches for straps and ensure the yarn is securely fastened to the sole. For added strength, consider lining the sole with adhesive foam or fabric.
Conclusion
Crocheting sandals is not just a craft—it’s an opportunity to express your creativity, embrace sustainable fashion, and design something truly unique. Whether you’re a beginner eager to try your first project or a seasoned crocheter exploring new patterns, this guide has provided all the essential steps, tips, and inspiration to help you create stylish and durable crochet sandals.
From mastering basic stitches to customizing designs and maintaining your creations, every part of this journey offers its own rewards. With practice, you’ll soon be crafting footwear that reflects your personal style and stands the test of time.
Now’s the time to unleash your imagination, pick up your crochet hook, and start crafting sandals that make every step a fashionable statement!
So, are you ready to “learn to crochet sandals” and start your creative adventure? Let the magic of crochet take you to new heights!

