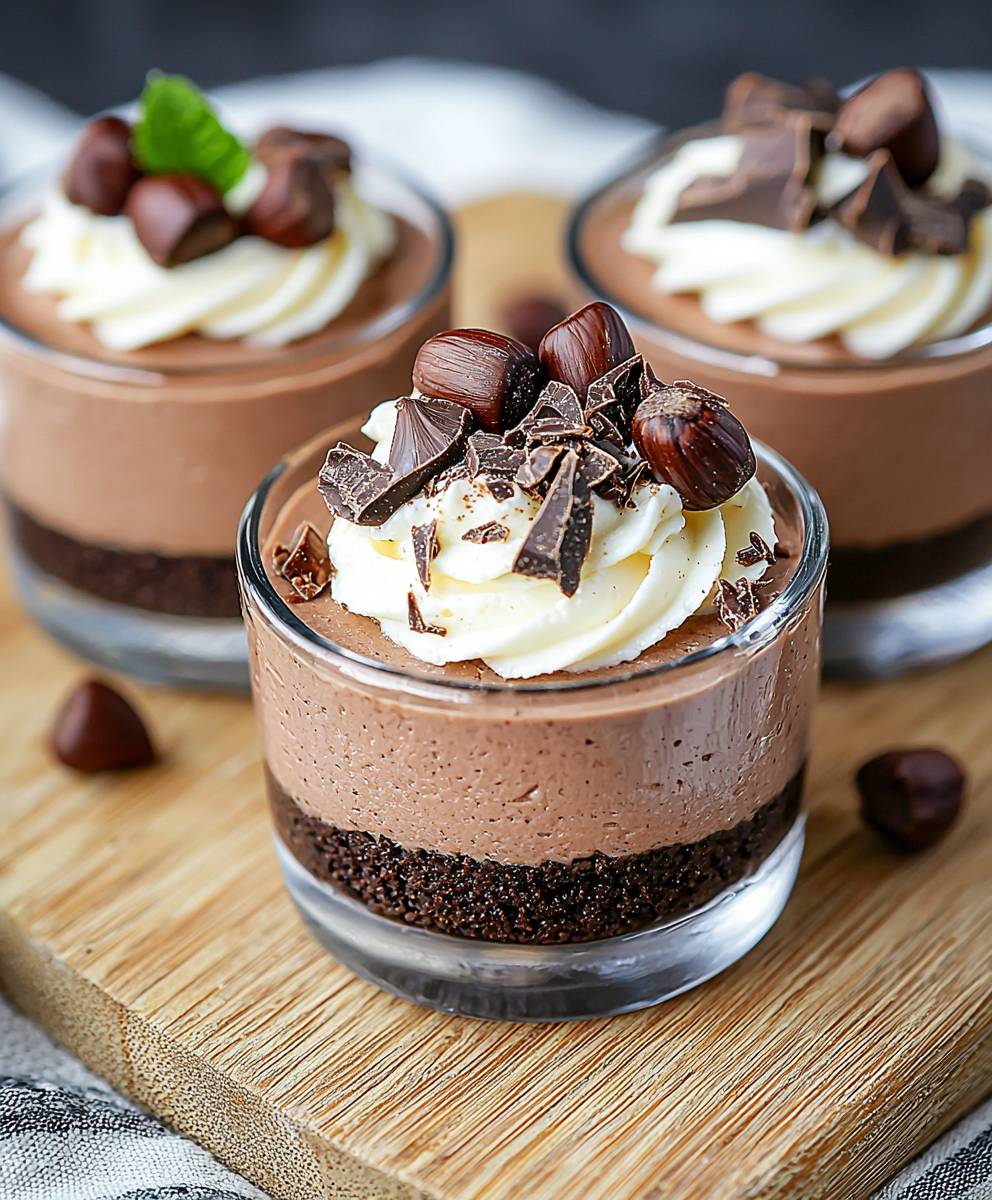
Chocolate Hazelnut Cups are a delightful treat that perfectly blend the rich, creamy taste of chocolate with the nutty crunch of hazelnuts. As a lover of all things sweet, I can confidently say that these little cups are not just a dessert; they are an experience. Originating from the classic combination of chocolate and hazelnut that has been celebrated in various cultures, these cups have become a favorite for many, especially in European confections. The smooth texture of the chocolate paired with the satisfying crunch of hazelnuts creates a symphony of flavors that dance on your palate.
People adore Chocolate Hazelnut Cups not only for their irresistible taste but also for their convenience. They are easy to make and perfect for any occasion, whether it’s a cozy night in or a festive gathering. With just a few simple ingredients, you can whip up a batch that will impress your friends and family. Join me as we dive into this delicious recipe that promises to satisfy your sweet tooth and bring a touch of joy to your day!
Ingredients:
- 1 cup hazelnuts, toasted and skins removed
- 1 cup dark chocolate chips (at least 70% cocoa)
- 1/2 cup milk chocolate chips
- 1/4 cup powdered sugar
- 1/4 cup cocoa powder
- 1/2 teaspoon vanilla extract
- 1/4 teaspoon sea salt
- 1/2 cup heavy cream
- 1 tablespoon coconut oil (optional, for a smoother chocolate)
Preparing the Hazelnut Filling
First things first, let’s get our hazelnut filling ready. This is the heart of our chocolate hazelnut cups, and it’s super easy to make!
- In a food processor, add the toasted hazelnuts. Pulse them until they turn into a fine meal. Be patient; it may take a few minutes. You want to get them to a point where they start to release their oils and become creamy.
- Once you have a smooth hazelnut butter, add the powdered sugar, cocoa powder, vanilla extract, and sea salt. Pulse again until everything is well combined. Taste it and adjust the sweetness if needed. If you want a little more chocolate flavor, feel free to add a bit more cocoa powder!
- Transfer the hazelnut mixture to a bowl and set it aside. We’ll use this delicious filling in our cups shortly.
Preparing the Chocolate Coating
Now, let’s move on to the chocolate coating. This is what makes our cups so indulgent and delightful!
- In a microwave-safe bowl, combine the dark chocolate chips, milk chocolate chips, and coconut oil (if using). The coconut oil helps to give the chocolate a nice sheen and makes it easier to work with.
- Microwave the chocolate in 30-second intervals, stirring in between, until it’s completely melted and smooth. Be careful not to overheat it, as chocolate can seize up if it gets too hot.
- Once melted, let the chocolate cool for a few minutes. We want it to be warm but not hot, as we’ll be using it to coat our cups.
Assembling the Chocolate Hazelnut Cups
Now comes the fun part—assembling our chocolate hazelnut cups! This is where you can really get creative.
- Line a muffin tin with cupcake liners. This will make it easy to remove the cups once they’re set.
- Using a spoon or a small ladle, pour a thin layer of melted chocolate into the bottom of each cupcake liner. Use the back of the spoon to spread it up the sides a bit, creating a little cup. Aim for about 1/4 inch thick.
- Place the muffin tin in the refrigerator for about 10-15 minutes, or until the chocolate is set. This step is crucial, as it will help the cups hold their shape.
- Once the chocolate is set, take the muffin tin out of the fridge. Now, it’s time to add the hazelnut filling! Spoon about a teaspoon of the hazelnut mixture into each chocolate cup. Don’t overfill; you want to leave some space for the top layer of chocolate.
- After adding the filling, return the muffin tin to the fridge for another 10 minutes to let the filling firm up a bit.
- Once the filling is set, pour another layer of melted chocolate over the top of each cup, covering the hazelnut filling completely. Use the back of the spoon to smooth it out if needed.
- Return the muffin tin to the fridge one last time for about 30 minutes, or until the chocolate is fully set.
Serving and Storing
Now that our chocolate hazelnut cups are ready, it’s time to enjoy them!
- Carefully peel away the cupcake liners from each cup. You’ll be left with beautiful, shiny chocolate hazelnut cups that are just begging to be devoured!
- Serve them on a platter, and watch as your friends and family marvel at your creation. These cups are perfect for parties, gifts, or just

Conclusion:
In summary, these Chocolate Hazelnut Cups are an absolute must-try for anyone who loves a delightful combination of rich chocolate and nutty flavors. They are not only easy to make but also incredibly satisfying, making them the perfect treat for any occasion. Whether you’re hosting a gathering, looking for a sweet snack, or simply want to indulge yourself, these cups will surely impress your family and friends. For serving suggestions, consider pairing these delectable treats with a scoop of vanilla ice cream or a dollop of whipped cream for an extra touch of indulgence. You can also experiment with variations by adding a sprinkle of sea salt on top for a sweet and salty contrast or incorporating different nuts like almonds or pecans for a unique twist. If you’re feeling adventurous, try adding a hint of espresso powder to the chocolate mixture for a mocha flavor that will elevate your dessert experience. I encourage you to give this recipe a try and share your experience with me! I would love to hear how your Chocolate Hazelnut Cups turn out and any creative variations you come up with. Remember, the joy of cooking is not just in the final product but also in the process and the memories you create along the way. So roll up your sleeves, gather your ingredients, and let’s make some delicious Chocolate Hazelnut Cups together! Print
Chocolate Hazelnut Cups: Indulge in a Decadent Treat You Can Make at Home
- Total Time: 50 minutes
- Yield: 12 cups 1x
Description
Indulge in these delightful chocolate hazelnut cups, featuring a creamy hazelnut filling encased in rich dark and milk chocolate. Perfect for parties or a sweet treat at home!
Ingredients
- 1 cup hazelnuts, toasted and skins removed
- 1 cup dark chocolate chips (at least 70% cocoa)
- 1/2 cup milk chocolate chips
- 1/4 cup powdered sugar
- 1/4 cup cocoa powder
- 1/2 teaspoon vanilla extract
- 1/4 teaspoon sea salt
- 1/2 cup heavy cream
- 1 tablespoon coconut oil (optional, for a smoother chocolate)
Instructions
- In a food processor, add the toasted hazelnuts. Pulse them until they turn into a fine meal.
- Once you have a smooth hazelnut butter, add the powdered sugar, cocoa powder, vanilla extract, and sea salt. Pulse again until everything is well combined.
- Transfer the hazelnut mixture to a bowl and set it aside.
- In a microwave-safe bowl, combine the dark chocolate chips, milk chocolate chips, and coconut oil (if using).
- Microwave the chocolate in 30-second intervals, stirring in between, until it’s completely melted and smooth.
- Once melted, let the chocolate cool for a few minutes.
- Line a muffin tin with cupcake liners.
- Using a spoon or a small ladle, pour a thin layer of melted chocolate into the bottom of each cupcake liner.
- Place the muffin tin in the refrigerator for about 10-15 minutes, or until the chocolate is set.
- Spoon about a teaspoon of the hazelnut mixture into each chocolate cup.
- Return the muffin tin to the fridge for another 10 minutes to let the filling firm up a bit.
- Pour another layer of melted chocolate over the top of each cup, covering the hazelnut filling completely.
- Return the muffin tin to the fridge one last time for about 30 minutes, or until the chocolate is fully set.
- Carefully peel away the cupcake liners from each cup.
- Serve them on a platter, and enjoy! Store any leftovers in an airtight container in the refrigerator for up to a week.
Notes
- For a smoother chocolate coating, the addition of coconut oil is optional but recommended.
- Adjust the sweetness of the hazelnut filling to your taste by adding more powdered sugar or cocoa powder.
- These cups can be made ahead of time and stored in the refrigerator for a quick treat.
- Prep Time: 20 minutes
- Cook Time: 30 minutes