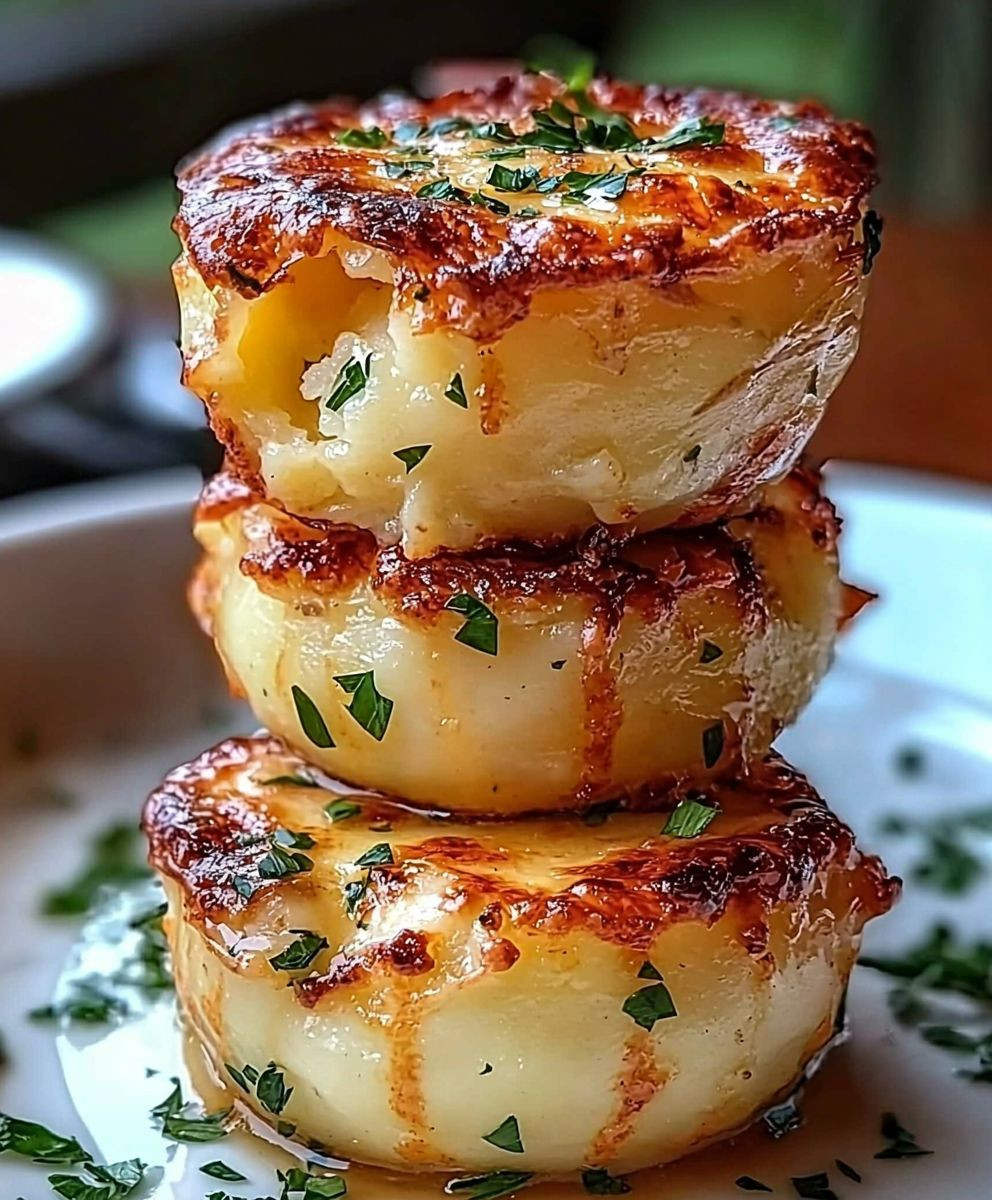
Cheesy Mashed Potato Puffs are a delightful twist on a classic comfort food that brings warmth and joy to any table. As someone who has always cherished the creamy goodness of mashed potatoes, I can confidently say that these puffs elevate the humble spud to new heights. Originating from various culinary traditions, the concept of transforming mashed potatoes into a crispy, cheesy delight has become a beloved favorite in many households.
What makes Cheesy Mashed Potato Puffs so irresistible is their perfect balance of flavors and textures. The creamy interior, infused with rich cheese, contrasts beautifully with the golden, crispy exterior. They are not only delicious but also incredibly convenient, making them an ideal side dish for family dinners or a fun appetizer for gatherings. Once you try these Cheesy Mashed Potato Puffs, you’ll understand why they have captured the hearts (and taste buds) of so many food lovers!
Ingredients:
- 2 pounds of russet potatoes
- 1 cup shredded cheddar cheese
- 1/2 cup grated Parmesan cheese
- 1/2 cup sour cream
- 1/4 cup milk
- 1/4 cup unsalted butter, melted
- 2 large eggs
- 1 teaspoon garlic powder
- 1 teaspoon onion powder
- Salt and pepper to taste
- 1 cup breadcrumbs (for coating)
- Cooking spray or additional melted butter (for greasing)
Preparing the Potatoes
1. Start by peeling the russet potatoes. I find that using a vegetable peeler makes this task quick and easy. Once peeled, cut the potatoes into evenly sized chunks, about 1-2 inches. This helps them cook evenly. 2. Place the potato chunks in a large pot and cover them with cold water. Add a generous pinch of salt to the water. This will help season the potatoes as they cook. 3. Bring the pot to a boil over high heat. Once boiling, reduce the heat to medium and let the potatoes simmer for about 15-20 minutes, or until they are fork-tender. You can test this by poking a piece with a fork; it should slide in easily. 4. Once cooked, drain the potatoes in a colander and let them sit for a few minutes to allow excess moisture to evaporate. This step is crucial for achieving fluffy mashed potatoes.Making the Mashed Potato Mixture
5. In a large mixing bowl, add the drained potatoes. Using a potato masher or a fork, mash the potatoes until they are smooth and creamy. I prefer a potato ricer for an ultra-smooth texture, but a masher works just fine. 6. Next, add the melted butter, sour cream, and milk to the mashed potatoes. Mix well until everything is combined. The butter adds richness, while the sour cream and milk contribute to a creamy consistency. 7. Now, it’s time to add the cheeses! Stir in the shredded cheddar cheese and grated Parmesan cheese. The cheddar gives a nice sharp flavor, while the Parmesan adds a touch of nuttiness. 8. Crack the eggs into the mixture and add the garlic powder, onion powder, salt, and pepper. Mix everything together until well combined. The eggs will help bind the mixture and give the puffs a lovely texture.Shaping the Puffs
9. Preheat your oven to 400°F (200°C). While the oven is heating, prepare a baking sheet by lining it with parchment paper or lightly greasing it with cooking spray or melted butter. 10. Using a cookie scoop or your hands, take a generous amount of the potato mixture and form it into small balls, about the size of a golf ball. I like to make them a bit smaller so they cook evenly and are easy to pop in your mouth! 11. Once you have shaped all the potato mixture into balls, roll each ball in breadcrumbs to coat them evenly. This will give the puffs a deliciously crispy exterior when baked. 12. Place the coated potato puffs on the prepared baking sheet, leaving some space between each puff to allow for even cooking.Baking the Potato Puffs
13. Once your oven is preheated, place the baking sheet in the oven and bake the potato puffs for about 20-25 minutes, or until they are golden brown and crispy on the outside. I like to turn them halfway through baking to ensure they brown evenly. 14. Keep an eye on them during the last few minutes of baking. You want them to be perfectly golden, but not burnt. The aroma wafting through your kitchen will be irresistible!Serving the Cheesy Mashed Potato Puffs
15. Once baked, remove the puffs from the oven and let them cool for a few minutes on the baking sheet. This will help them firm up a bit more. 16. Serve the cheesy mashed potato puffs warm, either on their own or with your favorite dipping sauce. I love serving them with a side of ranch dressing or a spicy aioli for an extra kick. 17. These puffs are perfect as a side dish, appetizer, or even a snack. They are sure to be a hit at any gathering or family dinner!Storage and Reheating Tips
18. If you have any leftovers (which is rare in my house!), you can store them in an airtight container in the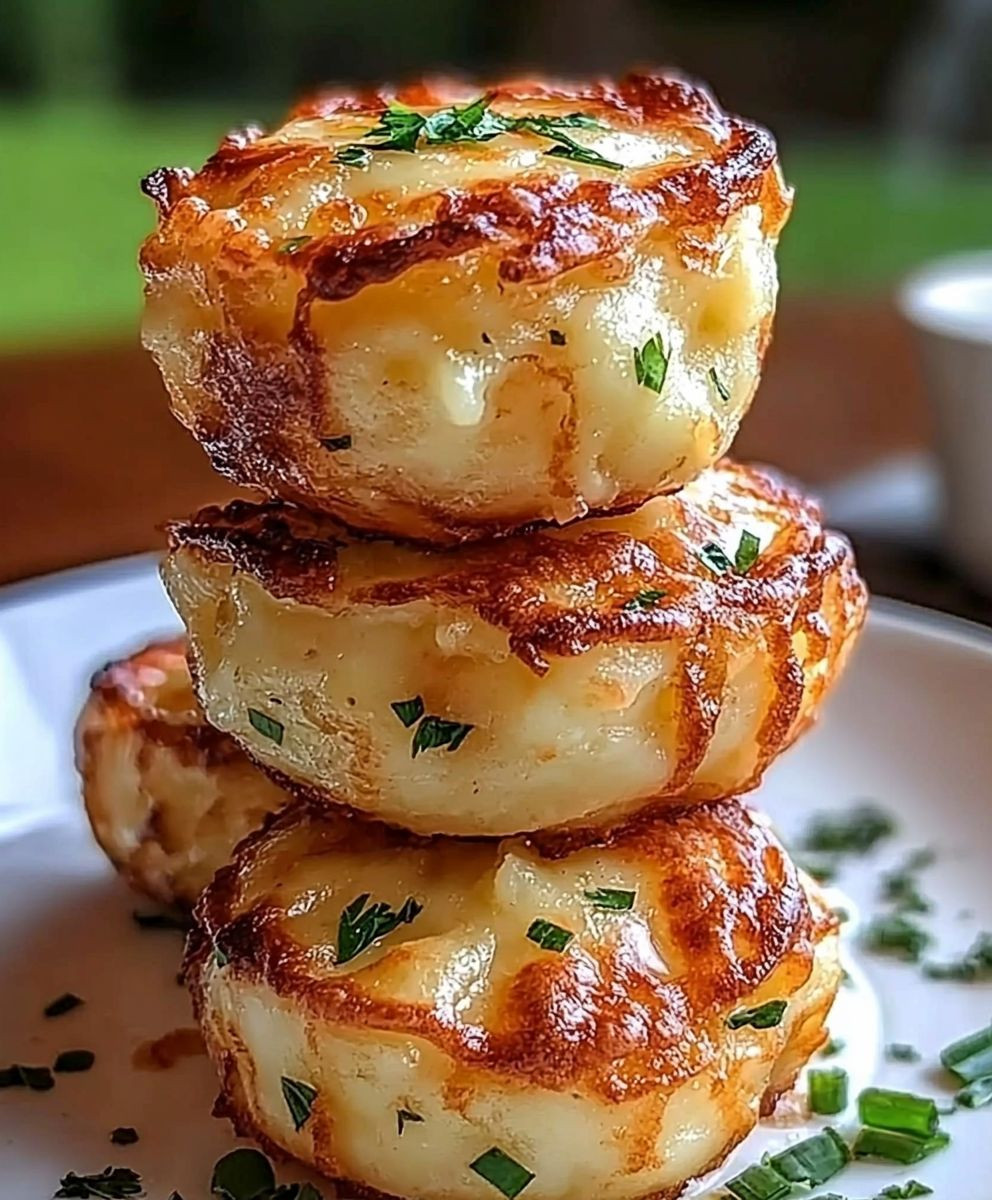
Conclusion:
In summary, these Cheesy Mashed Potato Puffs are an absolute must-try for anyone looking to elevate their side dish game. With their crispy exterior and creamy, cheesy interior, they are the perfect blend of comfort food and gourmet flair. Whether you’re serving them alongside a juicy steak, a fresh salad, or even as a fun appetizer at your next gathering, these puffs are sure to impress your family and friends. Feel free to get creative with your serving suggestions! You can pair them with a tangy dipping sauce, sprinkle some fresh herbs on top for a pop of color, or even experiment with different types of cheese to suit your taste. If you’re feeling adventurous, try adding in some cooked bacon bits or sautéed vegetables for an extra flavor boost. The possibilities are endless! I encourage you to give this recipe a try and share your experience with me. I’d love to hear how your Cheesy Mashed Potato Puffs turn out and any unique twists you put on the recipe. Cooking is all about experimenting and having fun, so don’t hesitate to make it your own. Happy cooking! Print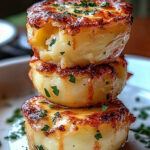
Cheesy Mashed Potato Puffs: The Ultimate Comfort Food Recipe
- Total Time: 45 minutes
- Yield: 24 puffs 1x
Description
These Cheesy Mashed Potato Puffs are a deliciously crispy and creamy treat, perfect for any occasion. Made with a blend of cheeses and seasoned to perfection, they make an excellent appetizer, side dish, or snack that will impress your guests!
Ingredients
- 2 pounds of russet potatoes
- 1 cup shredded cheddar cheese
- 1/2 cup grated Parmesan cheese
- 1/2 cup sour cream
- 1/4 cup milk
- 1/4 cup unsalted butter, melted
- 2 large eggs
- 1 teaspoon garlic powder
- 1 teaspoon onion powder
- Salt and pepper to taste
- 1 cup breadcrumbs (for coating)
- Cooking spray or additional melted butter (for greasing)
Instructions
- Peel the russet potatoes and cut them into evenly sized chunks (1-2 inches).
- Place the potato chunks in a large pot, cover with cold water, and add a pinch of salt.
- Bring to a boil over high heat, then reduce to medium and simmer for 15-20 minutes until fork-tender.
- Drain the potatoes and let them sit in the colander for a few minutes to evaporate excess moisture.
- In a large mixing bowl, mash the drained potatoes until smooth and creamy.
- Add melted butter, sour cream, and milk to the mashed potatoes, mixing until combined.
- Stir in shredded cheddar and grated Parmesan cheese.
- Add eggs, garlic powder, onion powder, salt, and pepper, mixing until well combined.
- Preheat the oven to 400°F (200°C) and prepare a baking sheet with parchment paper or cooking spray.
- Form the potato mixture into small balls (about the size of a golf ball).
- Roll each ball in breadcrumbs to coat evenly.
- Place the coated potato puffs on the prepared baking sheet, leaving space between each.
- Bake in the preheated oven for 20-25 minutes until golden brown and crispy, turning halfway through.
- Keep an eye on them during the last few minutes to avoid burning.
- Remove from the oven and let cool for a few minutes on the baking sheet.
- Serve warm with your favorite dipping sauce, such as ranch dressing or spicy aioli.
- Enjoy these puffs as a side dish, appetizer, or snack!
Notes
- For an ultra-smooth texture, consider using a potato ricer.
- Feel free to experiment with different cheeses or add herbs for extra flavor.
- These puffs can be made ahead of time and frozen before baking for a quick snack later.
- Prep Time: 20 minutes
- Cook Time: 25 minutes