Knapperige Zoete Chilikip Een Geweldig Ultiem Recept Voor Iedere Keuken
Oh boy, do I have something truly special for you today! Forget those takeout menus, because I’m about to introduce you to a dish that will absolutely revolutionize your weeknight dinners and impress every guest you ever have over. We’re talking about Knapperige Zoete Chilikip Een Geweldig Ultiem Recept Voor Iedere Keuken – and yes, it lives up to its wonderfully descriptive name!
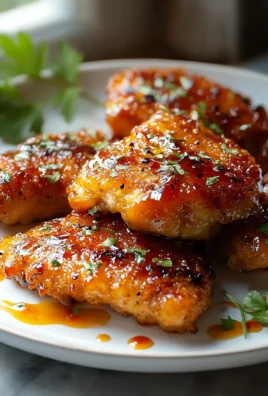
What makes this particular recipe so incredibly special, you ask? Well, it’s all in the magnificent combination of textures and flavors. Imagine perfectly crispy, golden-fried pieces of chicken – a satisfying crunch with every bite – generously coated in a shimmering, vibrant, homemade sweet chili sauce that hits all the right notes: a delightful sweetness, a gentle warmth from the chili, and just the right tang. It’s not just “sweet chili chicken”; it’s the sweet chili chicken, crafted to perfection right in your own kitchen.
You are absolutely going to adore this recipe because it delivers on every single promise. It’s incredibly satisfying, bursting with flavor, and surprisingly straightforward to make. That beloved crispy texture stays glorious, even after being tossed in the glossy sauce, creating a culinary masterpiece that feels both comforting and exciting. This isn’t just another chicken dish; it’s an experience – a truly “ultimate recipe for every kitchen” that will have you coming back for seconds (and thirds!). Serve it over fluffy rice, alongside some steamed greens, and prepare for rave reviews. Trust me, once you try this, you’ll wonder how you ever lived without it!

Ingredient Notes
For truly exceptional Knapperige Zoete Chilikip Een Geweldig Ultiem Recept Voor Iedere Keuken, the right ingredients are your best friends. I always say that a great dish starts with great components, and this recipe is no exception. Let me walk you through what I consider essential and where you can get creative with substitutions.
The Chicken: For me, boneless, skinless chicken thighs are the ultimate choice for this dish. They stay incredibly juicy and flavorful, even after frying, and are more forgiving if you accidentally overcook them a touch. I cut them into bite-sized pieces, roughly 1-inch cubes, for even cooking and easy eating. If you prefer chicken breast, it works perfectly fine too, but be mindful not to overcook it, as it can dry out faster. Just ensure whatever cut you choose is patted super dry with paper towels before you start; this is a critical step for achieving that coveted crispiness!
The Crispy Coating: This is where the magic happens for the “knapperige” (crispy) part of our Knapperige Zoete Chilikip. My secret weapon is cornstarch. It creates an incredibly light and airy crust that gets wonderfully crisp when fried. I sometimes mix in a tiny bit of baking powder with the cornstarch; it helps the coating get even puffier and crunchier. A little salt and pepper in the coating mix ensures every piece of chicken is seasoned through and through.
The Sweet Chili Sauce Base: The heart of the “zoete chili” lies in a good sweet chili sauce. You can use your favorite store-bought brand – I always keep a bottle handy! To elevate it, I combine it with a few key ingredients: good quality soy sauce (use tamari for a gluten-free option), rice vinegar for a touch of tang that balances the sweetness, a hint of sugar to boost that “zoete” factor, and of course, freshly grated ginger and minced garlic. These aromatics infuse the sauce with an incredible depth of flavor that a plain bottle of sweet chili sauce simply can’t achieve on its own.
Oil for Frying: You’ll need a neutral oil with a high smoke point for frying. Vegetable oil, canola oil, or peanut oil are all excellent choices. Don’t skimp on the oil; you want enough to allow the chicken to fry evenly without overcrowding the pan.
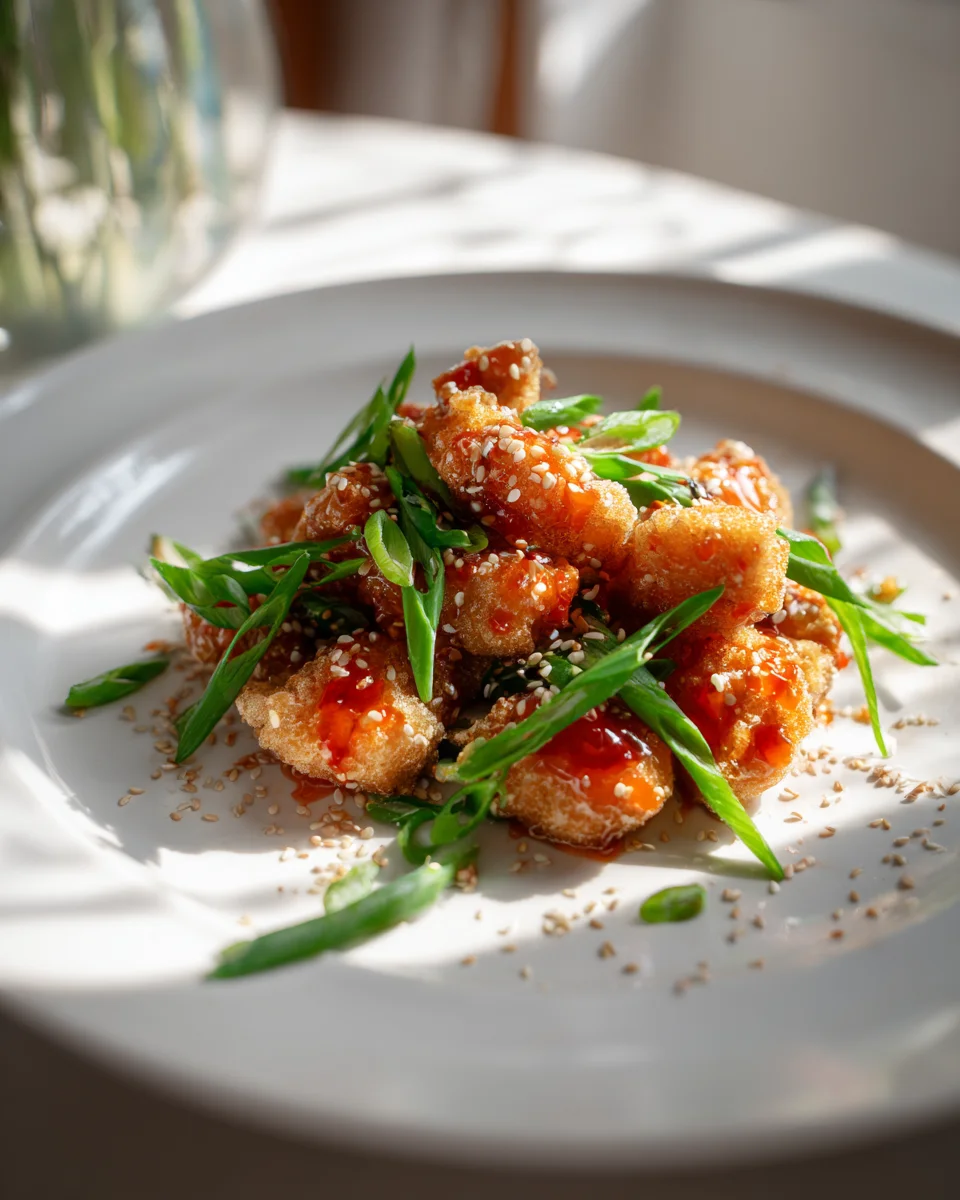
Garnish: To finish off your magnificent Knapperige Zoete Chilikip, I love to sprinkle toasted sesame seeds and thinly sliced spring onions over the top. They add a lovely visual appeal, a hint of nutty flavor, and a fresh, aromatic finish.
Substitutions:
- Chicken Alternatives: If you’re looking for a vegetarian or vegan version, firm tofu or tempeh, cut into cubes and pressed to remove excess water, can be coated and fried just like the chicken. The texture is fantastic!
- Soy Sauce: As mentioned, tamari is a perfect gluten-free substitute. For a lower sodium option, choose a reduced-sodium soy sauce.
- Rice Vinegar: While rice vinegar has a distinct mildness, apple cider vinegar can be used in a pinch, though I’d suggest using slightly less as its flavor is a bit stronger.
- Sweet Chili Sauce Heat: If you love extra spice, feel free to add a dash of sriracha, a pinch of red pepper flakes, or a thinly sliced fresh red chili to your sauce. Adjust to your personal preference!
Step-by-Step Instructions
Making Knapperige Zoete Chilikip Een Geweldig Ultiem Recept Voor Iedere Keuken is a truly satisfying process, and I promise you, the results are worth every step! Here’s how I bring this dish to life in my kitchen:
Step 1: Prepare the Chicken
First things first, let’s get that chicken ready. I start by cutting my boneless, skinless chicken thighs (or breast, if that’s what you’re using) into uniform, bite-sized pieces, about 1-inch cubes. The more uniform they are, the more evenly they’ll cook. This next part is crucial for crispiness: I lay the chicken pieces out on a plate lined with paper towels and firmly pat them dry. Then, I season them lightly with a pinch of salt and black pepper.
Step 2: Coat the Chicken
In a medium bowl, I whisk together the cornstarch (and a tiny bit of baking powder if I’m feeling extra crispy), along with another small pinch of salt and pepper. I then add the seasoned chicken pieces to this bowl and toss them thoroughly until every piece is evenly coated. Make sure there are no dry patches of cornstarch; if there are, you can mist the chicken lightly with water to help it adhere better.
Step 3: Fry the Chicken
Now, for the fun part! I heat about 1-2 inches of neutral oil in a large, heavy-bottomed skillet or Dutch oven over medium-high heat. You’re looking for the oil to reach around 350-375°F (175-190°C). If you don’t have a thermometer, a good test is to drop a tiny pinch of the cornstarch coating into the oil; if it immediately sizzles vigorously, it’s ready. I fry the chicken in batches, making sure not to overcrowd the pan. Overcrowding drops the oil temperature and leads to soggy, not crispy, chicken. Fry each batch for about 4-6 minutes, turning occasionally, until it’s golden brown and beautifully crispy. Once cooked, I use a slotted spoon to transfer the crispy chicken to a wire rack set over a baking sheet to drain any excess oil. Repeat with the remaining chicken, letting the oil come back up to temperature between batches.
Step 4: Prepare the Sweet Chili Sauce
While the chicken is resting, I make the sauce. In a separate saucepan or a clean skillet, I heat a tablespoon of oil over medium heat. Add the minced garlic and grated ginger and sauté for about 30 seconds until fragrant – be careful not to burn them! Then, I pour in the sweet chili sauce, soy sauce (or tamari), rice vinegar, and a touch of sugar. I bring the mixture to a gentle simmer, stirring frequently. If I want a thicker sauce, I’ll quickly whisk together a teaspoon of cornstarch with a tablespoon of cold water to create a slurry, then gradually stir it into the simmering sauce until it reaches my desired consistency. Let it simmer for another minute or two, allowing the flavors to meld.
Step 5: Combine and Serve
Once the sauce is ready, I add the crispy fried chicken directly into the saucepan with the sauce. I toss gently but quickly to ensure every piece of that glorious crispy chicken is thoroughly coated in the sweet and sticky chili sauce. The key here is to move fast so the chicken retains its crispiness for as long as possible!
I immediately transfer the coated chicken to a serving platter. For the perfect finishing touch, I love to garnish my Knapperige Zoete Chilikip Een Geweldig Ultiem Recept Voor Iedere Keuken with a generous sprinkle of toasted sesame seeds and a handful of thinly sliced fresh spring onions. Serve hot and enjoy!
Tips & Suggestions
Over the years of making countless batches of Knapperige Zoete Chilikip Een Geweldig Ultiem Recept Voor Iedere Keuken, I’ve picked up a few tricks that I’m excited to share. These tips will help you achieve the absolute best results every single time and make this dish truly shine in your kitchen!
- Pat, Pat, Pat That Chicken Dry! I cannot stress this enough – moisture is the enemy of crispiness. Before coating, make absolutely sure your chicken pieces are thoroughly patted dry with paper towels. Any residual moisture will create steam during frying, resulting in a less crispy, sometimes even soggy, crust. This is my #1 tip for “knapperige” success!
- Don’t Overcrowd the Pan: This is a golden rule for frying. Frying in batches might take a little longer, but it’s essential. Overcrowding the pan dramatically drops the oil temperature, leading to steamed chicken rather than fried, and a limp coating. Give each piece space to breathe and crisp up beautifully.
- Double Fry for Ultimate Crispiness: If you’re chasing restaurant-level crispiness (and who isn’t?), consider a double fry. Fry the chicken once until lightly golden and cooked through. Remove it to a wire rack and let it rest for 5-10 minutes. Then, increase the oil temperature slightly and fry the chicken a second time for 1-2 minutes until deeply golden brown and incredibly crisp. This extra step is a game-changer for texture!
- Serve Immediately: This dish is at its absolute peak right after the crispy chicken is coated in the warm, sticky sauce. The longer it sits, the more the sauce will soften the crust. So, have your sides ready and serve your Knapperige Zoete Chilikip straight away!
- Taste and Adjust the Sauce: My recipe provides a fantastic base for the sweet chili sauce, but I always encourage you to make it your own. Taste the sauce after simmering. Does it need a little more tang from rice vinegar? A touch more sweetness from sugar? Or perhaps a kick of heat from a pinch of red pepper flakes or a dash of sriracha? Trust your palate!
- Prep Your Sides in Advance: To ensure you can serve this dish immediately, have your accompanying sides ready. I love serving Knapperige Zoete Chilikip with fluffy steamed jasmine rice or perfectly cooked egg noodles. A simple side of blanched or stir-fried green vegetables like broccoli or snap peas also makes a wonderful fresh contrast.
- Experiment with Garnishes: While sesame seeds and spring onions are my go-to, feel free to get creative! A sprinkle of chopped cilantro adds a fresh herbaceous note, or a few thinly sliced red chilies can bring an extra visual pop and a burst of heat.
Storage
While Knapperige Zoete Chilikip Een Geweldig Ultiem Recept Voor Iedere Keuken is truly best enjoyed fresh off the stove, I understand that sometimes you might have leftovers, or you might want to prepare certain components ahead of time. Here’s how I handle storage and reheating to get the best out of this delicious dish:
Storing Leftovers:
If you find yourself with any extra Knapperige Zoete Chilikip (which is a rare occurrence in my house!), I recommend transferring it to an airtight container as soon as it has cooled down to room temperature. Store it in the refrigerator for up to 2-3 days. Please note that the “knapperige” (crispy) quality of the chicken will inevitably diminish once it’s been coated in the sauce and refrigerated. The sauce will soften the crust over time, but the flavor will still be fantastic!
Reheating for Best Results:
I find that reheating Knapperige Zoete Chilikip in the microwave is usually a recipe for disappointment, as it tends to make the chicken even softer and sometimes rubbery. For the best chance of regaining some texture and warmth, I prefer these methods:
- Oven: Preheat your oven to 350°F (175°C). Spread the leftover chicken in a single layer on a baking sheet. Heat for about 10-15 minutes, or until the chicken is heated through and the sauce is bubbling. This method helps to crisp up the coating a little, though it won’t be as crunchy as fresh.
- Air Fryer: If you have an air fryer, this is my top recommendation for reheating! Preheat your air fryer to 375°F (190°C). Place the chicken in a single layer in the air fryer basket (you might need to work in batches). Air fry for 5-8 minutes, shaking the basket halfway through, until the chicken is hot and the coating has crisped up again. This method comes closest to recreating that initial crispiness.
Freezing:
I generally do not recommend freezing the fully prepared Knapperige Zoete Chilikip. The texture of the chicken and the sauce can change quite a bit upon thawing and reheating, often becoming watery and losing its desired consistency and crispiness.
Making Ahead (Partial Prep):
If you want to save some time, I suggest preparing the sauce ahead of time. You can make the sweet chili sauce up to 2-3 days in advance and store it in an airtight container in the refrigerator. When you’re ready to cook, simply fry the chicken fresh and then gently reheat the sauce before tossing everything together. This way, you get to enjoy the incredible fresh crispiness of the chicken with the convenience of a pre-made sauce!
Final Thoughts
I genuinely hope you’re feeling as excited as I am about what I truly believe is a spectacular culinary creation. The Knapperige Zoete Chilikip Een Geweldig Ultiem Recept Voor Iedere Keuken is more than just a meal; it’s an absolute game-changer for your kitchen. That incredible balance of perfectly crispy chicken enveloped in a sweet and subtly spicy chili glaze is simply divine. It’s the kind of dish that elevates any occasion, making a simple weeknight dinner feel like a special treat, and it’s guaranteed to impress anyone you share it with. This recipe truly lives up to its promise of being an “ultiem recept voor iedere keuken” – it’s approachable, unbelievably flavorful, and brings a fantastic zest to your dining table. Trust me, once you try this, you’ll be adding it to your regular rotation!

Amazing Crispy Sweet Chili Chicken Recipe – Ultimate Flavor
- Total Time: 45 minutes
- Yield: 4 servings 1x
Description
This Amazing Crispy Sweet Chili Chicken is a game-changer for weeknight dinners, delivering a perfect balance of crispy chicken and a flavorful sweet chili sauce. Impress your guests with this easy-to-make dish that guarantees rave reviews!
Ingredients
- 1 lb boneless, skinless chicken thighs (or chicken breast)
- 1 cup cornstarch
- 1 tsp baking powder (optional)
- Salt
- Black pepper
- Vegetable oil, canola oil, or peanut oil (for frying)
- 1/2 cup sweet chili sauce
- 2 tbsp soy sauce (or tamari for gluten-free)
- 1 tbsp rice vinegar
- 1 tsp sugar
- 1 tbsp freshly grated ginger
- 2 cloves minced garlic
- Toasted sesame seeds (for garnish)
- Thinly sliced spring onions (for garnish)
Instructions
- Cut the boneless, skinless chicken thighs into uniform, bite-sized pieces, about 1-inch cubes. Pat them dry with paper towels and season lightly with salt and black pepper.
- In a medium bowl, whisk together the cornstarch, baking powder (if using), salt, and pepper. Add the seasoned chicken pieces and toss until evenly coated.
- Heat about 1-2 inches of neutral oil in a large skillet or Dutch oven over medium-high heat until it reaches 350-375°F (175-190°C). Fry the chicken in batches for 4-6 minutes until golden brown and crispy, then transfer to a wire rack to drain excess oil.
- In a separate saucepan, heat a tablespoon of oil over medium heat. Add minced garlic and grated ginger, sauté for about 30 seconds. Pour in the sweet chili sauce, soy sauce, rice vinegar, and sugar. Bring to a gentle simmer, stirring frequently.
- If a thicker sauce is desired, whisk together a teaspoon of cornstarch with a tablespoon of cold water and stir it into the sauce until it reaches the desired consistency. Let it simmer for another minute.
- Add the crispy fried chicken to the saucepan with the sauce and toss gently to coat. Transfer to a serving platter and garnish with toasted sesame seeds and sliced spring onions. Serve hot.
- Prep Time: 15 mins
- Cook Time: 30 mins
- Category: Dinner
- Method: Frying
- Cuisine: Asian
Nutrition
- Serving Size: 1 plate
- Calories: 450
- Sugar: 10 g
- Sodium: 800 mg
- Fat: 20 g
- Saturated Fat: 3 g
- Unsaturated Fat: 15 g
- Trans Fat: 0 g
- Carbohydrates: 40 g
- Fiber: 1 g
- Protein: 30 g
- Cholesterol: 100 mg
Keywords: Ensure the chicken is patted dry for maximum crispiness. You can substitute chicken with firm tofu or tempeh for a vegetarian option. Adjust the sauce to your taste by adding more vinegar for tang or sugar for sweetness.