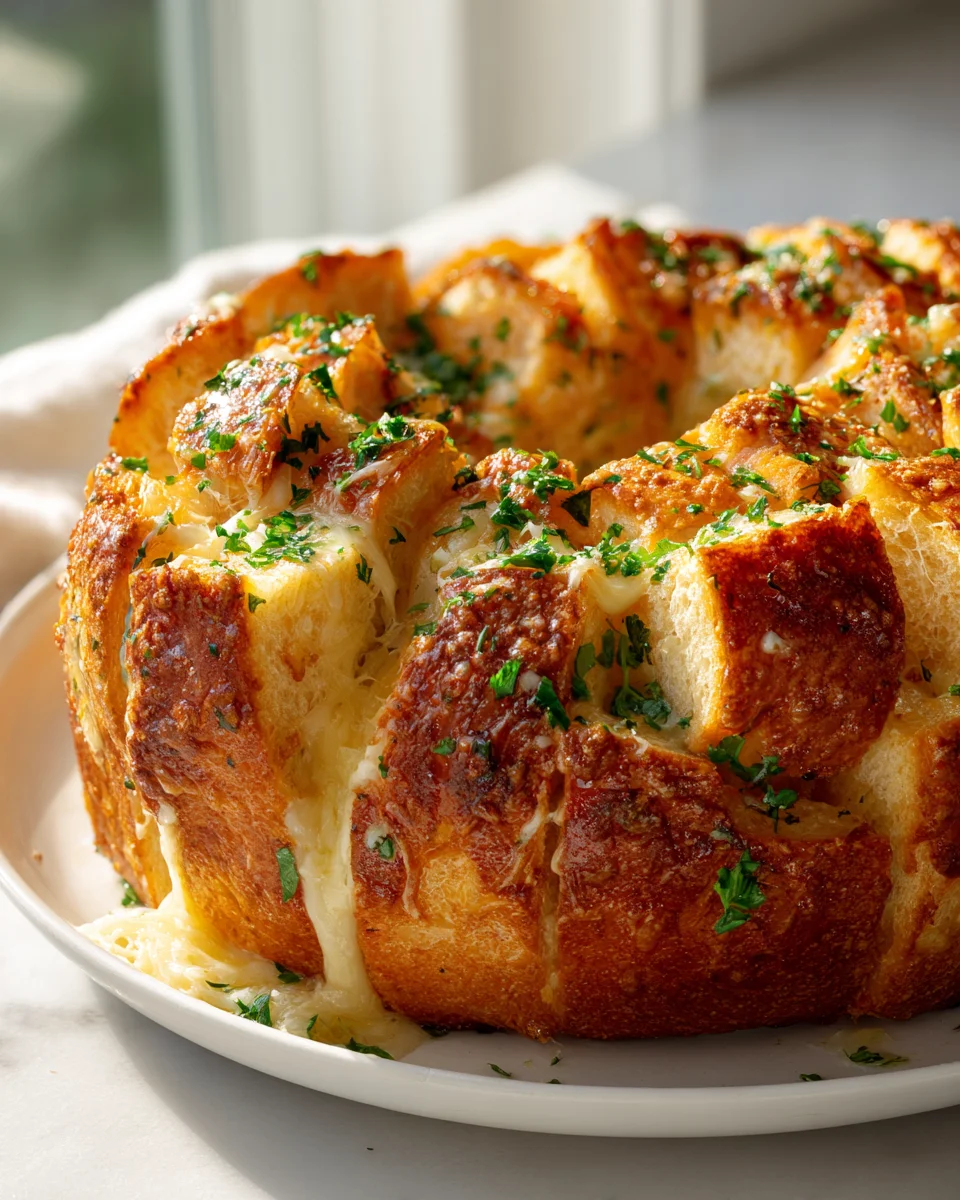
Pull Apart Garlic Cheese Bread For Sharing
Oh boy, have I got a treat for you today! When I think of the ultimate crowd-pleaser, something that makes everyone’s eyes light up and hands reach out, my mind immediately goes to Pull Apart Garlic Cheese Bread For Sharing. This isn’t just any garlic bread; it’s an experience! What makes it so special, you ask? Well, it’s all in the name – the “pull apart” aspect makes it incredibly fun and interactive, perfect for gathering around with friends and family. No need for knives or individual servings; just dig in and tear off a warm, gooey piece!
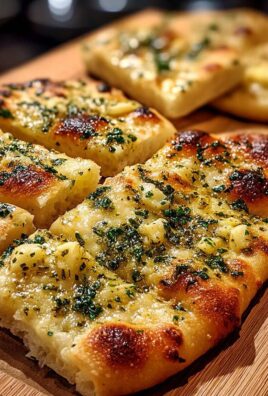
You’re absolutely going to love this recipe because it combines everything wonderful in one irresistible dish: the aromatic punch of garlic, the rich, melty embrace of cheese, and the comforting chew of a perfectly baked bread. It’s the kind of dish that disappears almost as fast as you can pull it out of the oven, leaving smiles and satisfied groans in its wake. Imagine a loaf of crusty bread, generously slathered with a fragrant garlic-herb butter, then stuffed with an abundance of ooey-gooey cheese, all baked together until golden brown and utterly irresistible. Each segment is a little pocket of pure joy, waiting to be pulled apart and devoured. Trust me, this is going to be your new go-to for any get-together!
Ingredient Notes
Oh, this Pull Apart Garlic Cheese Bread is an absolute crowd-pleaser, and for good reason! It’s all about those simple, quality ingredients coming together to create something truly magical and utterly irresistible. Here’s a rundown of what you’ll need and some thoughts on substitutions to make it your own.
The Bread
- Crusty Loaf: My absolute favorite for this dish is a good quality, unsliced sourdough or an Italian boule. The crust holds up beautifully, and the interior becomes wonderfully soft and infused with flavor. The key is a round or oval loaf that’s easy to cut into a grid pattern without going all the way through the bottom.
- Substitutions: You can absolutely experiment! A French baguette works well if you’re looking for smaller portions, though you’d likely need two. Even a loaf of brioche can be surprisingly delicious for a richer, sweeter take, though I usually stick to a more savory bread for this recipe. If you’re really short on time, a few cans of refrigerated biscuit dough (the larger kind) arranged in a baking dish can work in a pinch for a very different, softer texture. Just cut each biscuit in half and arrange them upright.
The Cheese
- Low-Moisture Mozzarella: This is the superstar for that epic cheese pull! It melts beautifully and has a mild flavor that lets the garlic shine. I prefer to buy a block and shred it myself, as pre-shredded cheese often has anti-caking agents that can slightly inhibit its melt.
- Parmesan Cheese: A sprinkle of freshly grated Parmesan adds a wonderful salty, umami depth that complements the mozzarella perfectly. Don’t skip it if you can help it!
- Substitutions: Feel free to mix and match your cheeses! Monterey Jack is another fantastic melting cheese. Provolone or a sharp white cheddar can also bring great flavor. For a more adventurous twist, a little crumbled feta or goat cheese could be added sparingly, but make sure to keep mozzarella as the primary melting agent for that iconic pull.
The Garlic Butter
- Unsalted Butter: This forms the rich base for our flavor bomb. Using unsalted butter allows you to control the salt content later.
- Fresh Garlic: And I mean fresh! Finely minced garlic is essential here. The aroma and flavor are unparalleled. For a loaf this size, I typically use a generous amount – think 6-8 cloves, depending on their size.
- Fresh Parsley: Chopped fresh parsley adds a pop of color and a lovely fresh, herbaceous note that cuts through the richness.
- Substitutions: While fresh garlic is non-negotiable for me in this recipe, if you are truly in a bind, a teaspoon or two of granulated garlic powder could be used in the butter mixture, though the flavor won’t be as vibrant. For other herbs, dried oregano or a good quality Italian seasoning blend can be used in place of or in addition to parsley. For a dairy-free version, a good quality olive oil or vegan butter can be used, though the flavor profile will shift slightly.
Step-by-Step Instructions
Get ready to create some serious magic! This recipe is surprisingly simple, but the payoff is huge. Here’s how I make my Pull Apart Garlic Cheese Bread for sharing.
Step 1: Prep Your Bread
- First things first, preheat your oven to 375°F (190°C). You’ll also want to line a sturdy baking sheet with parchment paper or foil for easy cleanup, then place your loaf of bread on it.
- Now for the fun part: grab a sharp serrated knife. You’re going to cut the bread into a crosshatch pattern, making slices about 1-inch apart in both directions. The crucial tip here is to cut almost all the way through to the bottom crust, but not completely. You want the loaf to remain intact at the base so it stays together for that glorious pull-apart experience.
Step 2: Prepare the Garlic Butter
- In a small microwave-safe bowl, melt your unsalted butter. You can also do this gently on the stovetop.
- To the melted butter, add your finely minced fresh garlic, chopped fresh parsley, a pinch of salt, and a good crack of black pepper. Stir everything together until it’s well combined. Oh, that aroma alone is going to get your taste buds tingling!
Step 3: Stuff with Cheese
- Gently pry open the cuts in your bread. This is where you’ll tuck in all that delicious cheese! I like to use a mix of shredded low-moisture mozzarella and a good helping of grated Parmesan.
- Stuff the cheese generously into every single crevice and cut. Don’t be shy! Make sure to get it deep down into the cuts, as well as sprinkle some on top. The more cheese, the better the pull.
Step 4: Drench with Garlic Butter
- Now, spoon or brush your fragrant garlic butter mixture all over the top of the bread. Make sure it drips down into all those cheese-filled cracks. You want every single piece of bread to be infused with that garlicy goodness. I sometimes use my fingers to gently open the cuts a bit more to ensure the butter really gets in there.
Step 5: Bake to Perfection
- Carefully wrap the entire loaf tightly in foil. This initial steaming helps the cheese melt beautifully without the bread getting too dark too quickly.
- Bake for 20 minutes with the foil on.
- After 20 minutes, remove the foil. The cheese should be mostly melted, and the bread starting to warm.
- Continue baking for another 10-15 minutes, or until the cheese is bubbling, golden, and the bread is toasted to your liking. Keep a close eye on it during this stage to prevent burning.
Step 6: Serve and Share!
- Once it’s out of the oven, let it rest for just a minute or two. The cheese will be molten hot!
- Transfer the baking sheet directly to your serving table (carefully!) or slide the bread onto a large platter. Garnish with a little extra fresh parsley, if you like.
- Watch everyone dive in and pull apart those cheesy, garlic-infused pieces. It’s truly a communal eating experience!
Tips & Suggestions
Making this Pull Apart Garlic Cheese Bread is an experience in itself, and I’ve picked up a few tricks over the years to ensure it’s always a showstopper. Here are my favorite tips to help you achieve cheesy, garlicky perfection every time:
Go Generous with Garlic and Butter
- Don’t skimp on the garlic: Seriously, this is garlic bread. Use fresh garlic, and don’t be afraid to add an extra clove or two beyond what the recipe suggests if you’re a garlic lover like me. The flavor mellows beautifully in the oven.
- Butter coverage is key: Make sure that every single cut and crevice gets a good drizzle of that amazing garlic butter. You want the butter to seep down and infuse the entire loaf, not just sit on top. A pastry brush can be helpful here, or just tilt the bread gently to help the butter flow.
Cheese, glorious cheese!
- Layer your cheese: Instead of just stuffing one type of cheese, try layering it. I like to get a base of mozzarella deep into the cuts, then sprinkle Parmesan over that, and finish with a bit more mozzarella on top. This creates a more complex flavor and ensures maximum melty goodness.
- Vary your cheese blend: While mozzarella and Parmesan are my go-tos, don’t be afraid to get creative. A little smoked provolone can add a fantastic depth, or a touch of shredded fontina for an even gooier texture. Just ensure at least half of your cheese is a good melting variety like mozzarella or Monterey Jack.
Perfect Baking for that Pull-Apart Texture
- The foil trick: Baking the bread wrapped in foil for the first 20 minutes is critical. It creates a steamy environment that melts the cheese perfectly and warms the bread through without drying it out or burning the crust. This is how you get that incredible, stringy, pull-apart texture.
- Uncover and crisp: After removing the foil, watch the bread closely. You want the cheese on top to get bubbly and slightly golden, and the bread to achieve a bit of crispness. If it’s browning too fast, you can loosely tent it with foil for the last few minutes.
Make Ahead & Serving Ideas
- Prep ahead: You can assemble the entire loaf – cutting, stuffing with cheese, and drenching with garlic butter – up to a few hours in advance. Wrap it tightly in plastic wrap and refrigerate. When ready to bake, just unwrap and proceed with the baking instructions, perhaps adding an extra 5-10 minutes to the foil-covered baking time since it’s starting cold.
- Serving suggestions: This bread is a meal in itself, but it’s also fabulous alongside pasta dishes, chili, or even a simple green salad. A warm bowl of marinara sauce for dipping is an absolute must in my book! It adds another layer of flavor and makes the experience even more delightful.
Storage
While I highly doubt you’ll have much left over once this Pull Apart Garlic Cheese Bread hits the table, it’s good to know how to store it just in case! It’s definitely best enjoyed fresh from the oven, but leftovers are still pretty delicious.
Storing Leftovers
- Airtight container: Once the bread has cooled completely to room temperature, transfer any remaining pieces or the entire loaf (if it’s still mostly intact) to an airtight container or wrap it tightly in aluminum foil or plastic wrap. This prevents the bread from drying out and the garlic flavor from diminishing.
- Refrigeration: Store the wrapped bread in the refrigerator. It will keep well for up to 2-3 days.
Reheating
- Oven is best: To bring it back to its cheesy, warm glory, reheating in the oven is your best bet. Preheat your oven to 300-325°F (150-160°C).
- Foil wrap: Place the leftover bread on a baking sheet and wrap it loosely in foil. This helps to retain moisture and ensures the cheese melts without the bread becoming too hard.
- Reheat time: Bake for about 10-15 minutes, or until the cheese is melted and gooey again, and the bread is warmed through. If you like a bit of crispness, you can remove the foil for the last 2-3 minutes.
- Air Fryer: An air fryer can also work wonders for reheating smaller portions! Place a few pieces in the air fryer basket at 300°F (150°C) for 3-5 minutes, checking often, until heated through and crispy.
- Avoid the microwave: While you can technically microwave it, I don’t recommend it for this dish. The bread tends to get chewy and the cheese can become rubbery, losing that delightful pull-apart texture.
Final Thoughts
And there you have it! My absolute favorite way to bring warmth, flavor, and pure joy to any gathering. Pull Apart Garlic Cheese Bread For Sharing isn’t just a dish; it’s an invitation to connect, to laugh, and to simply enjoy really good food together. The magic is in that delightful pull, the irresistible combination of golden-brown crust, gooey melted cheese, and aromatic garlic butter that makes every bite an experience. I truly believe this recipe is a must-try because it consistently delivers on taste, fun, and that special feeling of homemade comfort. Go ahead, bake a batch, and watch it disappear as everyone eagerly tears off their piece. I promise, it’ll be a resounding hit and quickly become a cherished staple in your home!
Amazing Pull Apart Garlic Cheese Bread – Perfect For Sharing
- Total Time: 45 minutes
- Yield: 8 servings 1x
Description
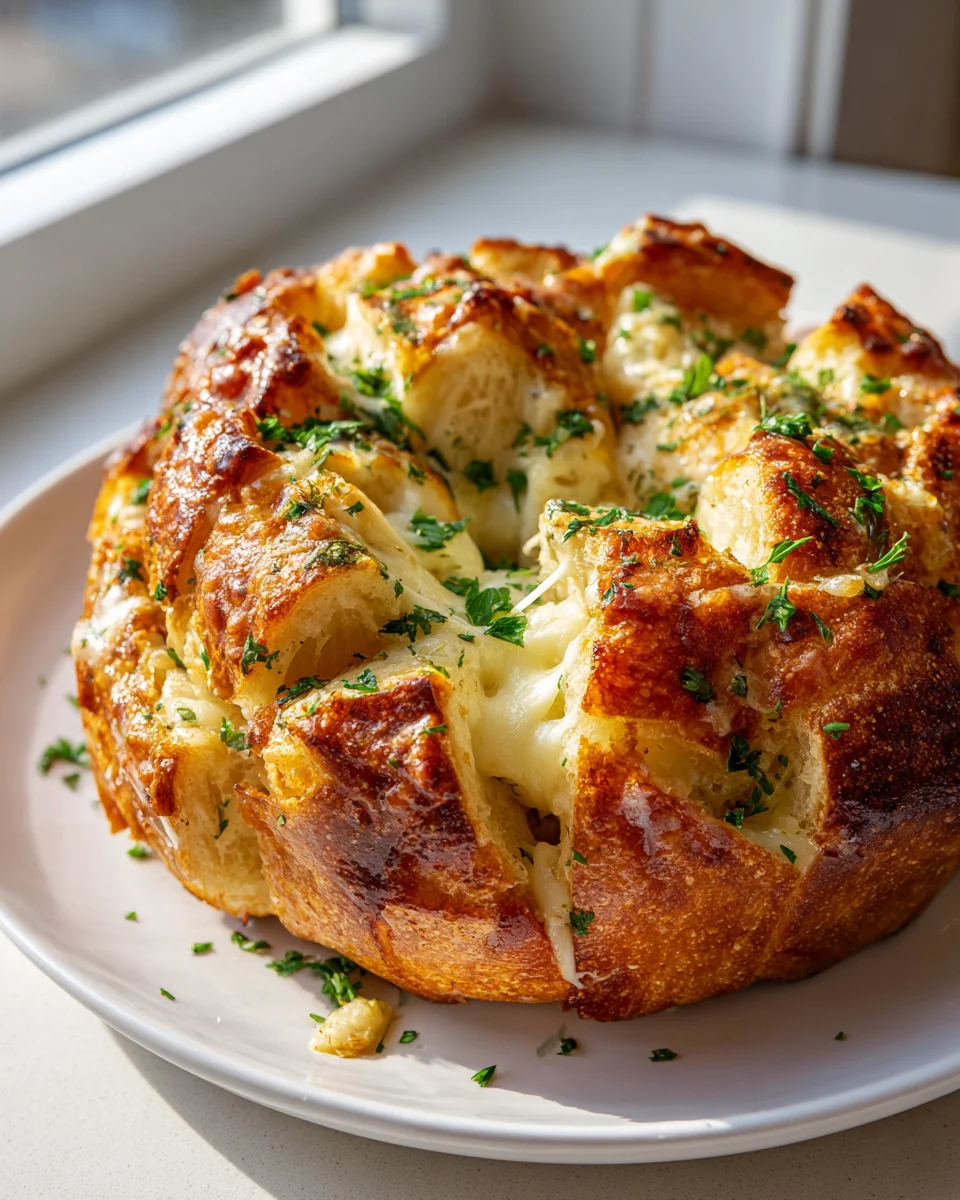
This Pull Apart Garlic Cheese Bread is a crowd-pleaser that combines the aromatic punch of garlic, rich melty cheese, and perfectly baked bread. It’s an interactive dish that invites everyone to dig in and enjoy warm, gooey pieces together.
Ingredients
- 1 Crusty Loaf (sourdough or Italian boule)
- 2 cups Low-Moisture Mozzarella (shredded)
- 1/2 cup Parmesan Cheese (freshly grated)
- 1/2 cup Unsalted Butter
- 6–8 cloves Fresh Garlic (finely minced)
- 1/4 cup Fresh Parsley (chopped)
- Salt (to taste)
- Black Pepper (to taste)
Instructions
- Preheat your oven to 375°F (190°C) and line a sturdy baking sheet with parchment paper or foil.
- Cut the bread into a crosshatch pattern, making slices about 1-inch apart in both directions, ensuring the loaf remains intact at the base.
- In a small microwave-safe bowl, melt the unsalted butter. Add the minced garlic, chopped parsley, a pinch of salt, and black pepper to the melted butter and stir until well combined.
- Gently pry open the cuts in the bread and stuff the cheese generously into every crevice and cut.
- Spoon or brush the garlic butter mixture all over the top of the bread, ensuring it seeps into the cuts.
- Wrap the entire loaf tightly in foil and bake for 20 minutes.
- After 20 minutes, remove the foil and continue baking for another 10-15 minutes, or until the cheese is bubbling and golden.
- Let it rest for a minute or two before serving, then transfer to a serving table or platter and garnish with extra parsley.
- Prep Time: 15 mins
- Cook Time: 30 mins
- Category: Appetizer
- Method: Baking
- Cuisine: Italian
Nutrition
- Serving Size: 1 piece
- Calories: 250
- Sugar: 1 g
- Sodium: 350 mg
- Fat: 15 g
- Saturated Fat: 9 g
- Unsaturated Fat: 4 g
- Trans Fat: 0 g
- Carbohydrates: 24 g
- Fiber: 1 g
- Protein: 8 g
- Cholesterol: 30 mg
Keywords: Use fresh garlic for the best flavor. You can experiment with different cheeses like Monterey Jack or Provolone. For a dairy-free version, substitute with olive oil or vegan butter.