Apple Crumble Cheesecake – just hearing those words evokes a sense of pure dessert bliss, doesn’t it? Imagine a culinary masterpiece where the warm, comforting embrace of a classic apple crumble meets the smooth, tangy sophistication of a creamy cheesecake. I truly believe this dish is more than just a dessert; it’s an experience, a symphony of flavors and textures designed to captivate your senses and leave an indelible mark on your palate. It’s the ultimate convergence of two beloved comfort foods, creating something uniquely extraordinary.
While both cheesecake and apple crumble hold revered places in dessert history – cheesecake tracing its lineage to ancient Greece and apple crumble being a quintessential British comfort – this innovative creation beautifully fuses their best attributes. It eliminates the need to choose between two beloved classics, offering a unified, extraordinary delight that consistently surprises and pleases. People adore this dish for its incredible balance: the tender, spiced apples providing a familiar warmth, the rich and airy cheesecake offering a cool, creamy counterpoint, and the buttery, crunchy oat crumble delivering that satisfying textural finish. Every forkful is a journey through layers of creamy, fruity, and crisp perfection. Get ready to discover why the Apple Crumble Cheesecake has become a true star in the world of modern desserts, promising to become a cherished addition to your recipe repertoire.

Ingredients:
-
For the Crust:
- 1 ½ cups (about 180g) graham cracker crumbs: These are the foundation of our delightful Apple Crumble Cheesecake, providing a sweet, buttery base.
- ¼ cup (50g) granulated sugar: Just enough to sweeten the crust without overpowering the other layers.
- ½ teaspoon ground cinnamon: A subtle hint of warmth that perfectly complements the apple and crumble flavors, tying everything together from the start.
- 6 tablespoons (85g) unsalted butter, melted: This binds our crumbs together, creating a sturdy yet tender crust that can hold up to the luscious fillings.
-
For the Apple Filling:
- 3 medium-sized (about 450-500g) baking apples: I love using a mix of Granny Smith for tartness and Honeycrisp or Fuji for sweetness and firm texture. Peel them, core them, and dice them into ½-inch pieces – consistency is key for even cooking.
- 2 tablespoons unsalted butter: For sautéing the apples, adding richness and helping them soften beautifully.
- ¼ cup (50g) granulated sugar: Adjust this based on the sweetness of your chosen apples and your personal preference.
- 1 tablespoon all-purpose flour: This acts as a thickener, ensuring our apple filling isn’t watery but wonderfully jammy and cohesive.
- ½ teaspoon ground cinnamon: The classic pairing with apples, adding that comforting autumnal spice.
- ¼ teaspoon ground nutmeg: Another warm spice that enhances the apple flavor profile.
- Pinch of ground cloves (optional): For an extra layer of fragrant warmth if you’re feeling adventurous!
- 1 tablespoon fresh lemon juice: A splash of brightness that prevents the apples from browning and cuts through the sweetness, balancing the flavors perfectly.
-
For the Cheesecake Filling:
- 3 (8-ounce/226g each) packages full-fat cream cheese, softened to room temperature: This is the star of our cheesecake! Room temperature cream cheese is absolutely critical for a smooth, lump-free batter.
- 1 cup (200g) granulated sugar: Sweetens the creamy base, creating that irresistible classic cheesecake flavor.
- 2 teaspoons pure vanilla extract: A must-have for depth of flavor; I always opt for pure vanilla for the best taste.
- ¼ teaspoon salt: Balances the sweetness and enhances all the other flavors in the cheesecake. Don’t skip it!
- 3 large eggs, at room temperature: Eggs provide structure and richness to the cheesecake. Just like the cream cheese, room temperature eggs integrate more smoothly into the batter.
- ¼ cup (60ml) sour cream or full-fat Greek yogurt, at room temperature: This secret ingredient adds an incredible tang and contributes to the cheesecake’s signature silky-smooth, dense texture. Make sure it’s also at room temperature!
-
For the Crumble Topping:
- ¾ cup (95g) all-purpose flour: The base for our buttery, crisp crumble.
- ½ cup (100g) packed light brown sugar: Adds a lovely molasses note and helps create that desirable chewy-crisp texture.
- ½ teaspoon ground cinnamon: More warming spice, marrying beautifully with the apple filling and the overall Apple Crumble Cheesecake theme.
- Pinch of salt: Essential for balancing sweetness and enhancing flavor in the crumble.
- ½ cup (113g) unsalted butter, very cold and cut into small cubes: This is key for a truly crumbly, flaky topping. The cold butter prevents overmixing and creates pockets of steam during baking, leading to that wonderful texture.
-
Optional Garnish:
- Caramel sauce: A decadent drizzle that elevates the apple and crumble flavors.
- Whipped cream: A light, airy contrast to the rich cheesecake.
- A dusting of powdered sugar: Simple, elegant, and adds a touch of extra sweetness.
Preparing the Crust: The Foundation of Flavor
- Preheat your oven to 350°F (175°C). Take a moment to lightly grease a 9-inch springform pan. This simple step will make it much easier to release your magnificent Apple Crumble Cheesecake later.
- In a medium-sized mixing bowl, combine the graham cracker crumbs, granulated sugar, and ground cinnamon. Stir them together really well with a spoon or whisk until you see that everything is evenly distributed. You want every bite of your crust to have that lovely hint of cinnamon.
- Next, pour in the melted butter. Give it a good mix, either with a fork or your hands, until all the crumbs are thoroughly moistened. The mixture should resemble wet sand – easily clumped together when squeezed, but still crumbly. This consistency is your indicator that it’s ready to form a stable crust.
- Now, transfer this buttery crumb mixture into the prepared springform pan. Using the bottom of a flat-bottomed glass, a measuring cup, or even just your clean fingers, press the mixture down firmly and evenly across the bottom of the pan. I like to create a slight lip up the sides, about ½ inch high; this acts as a little barrier for the cheesecake filling and adds to the rustic charm of our Apple Crumble Cheesecake. A well-compacted crust is crucial to prevent it from crumbling apart when sliced.
- Bake the crust for 8-10 minutes. Keep an eye on it until it’s lightly golden around the edges and you can smell that wonderful, sweet graham cracker aroma filling your kitchen. This pre-baking step helps to set the crust and makes it nice and sturdy, preventing it from becoming soggy once the creamy cheesecake filling is added. Once baked, remove it from the oven and set it aside to cool slightly while you prepare the fillings. Don’t forget to keep your oven preheated, as we’ll be needing it again soon!
Crafting the Apple Filling: A Sweet & Tangy Layer
- Grab a medium saucepan and melt the 2 tablespoons of unsalted butter over medium heat. Once shimmering, add your beautifully diced apples. Give them a stir to ensure each piece is coated in that lovely butter – this helps them cook evenly and absorb all the forthcoming flavors.
- Sprinkle in the ¼ cup granulated sugar, 1 tablespoon all-purpose flour, ½ teaspoon ground cinnamon, ¼ teaspoon ground nutmeg, and if you’re using it, that pinch of ground cloves. Stir everything together until the apples are thoroughly coated with the spices and the flour. The flour here is our little helper; it will work to thicken the delicious juices that the apples release as they cook, preventing our Apple Crumble Cheesecake from having a watery apple layer.
- Continue to cook the apples for about 8-12 minutes, stirring occasionally. You’re looking for them to soften just slightly, but still retain a bit of their bite and texture. We don’t want them to turn into applesauce at this stage, as they will continue to cook further when the whole cheesecake bakes. Right before removing from the heat, stir in the fresh lemon juice. This not only brightens the flavor profile of the apples but also helps prevent them from browning too much.
- Once cooked to perfection, remove the apple filling from the heat and transfer it to a separate bowl or plate to cool completely. This step is absolutely critical! Adding warm or hot apple filling to the cheesecake batter can disrupt the delicate temperature balance of the cream cheese mixture, potentially leading to a grainy texture or even cracks in your finished Apple Crumble Cheesecake. Patience here will be rewarded!
Mixing the Crumble Topping: The Golden Crown
- In a medium bowl, whisk together the all-purpose flour, light brown sugar, ground cinnamon, and a pinch of salt. Whisking ensures that all these dry ingredients are perfectly combined and evenly distributed, so you get a consistent flavor and texture in every bite of your crumble.
- Now, add your very cold, cubed unsalted butter to the dry ingredients. The colder the butter, the better! This is a fundamental rule for achieving a truly flaky, tender, and distinct crumble topping.
- Using your fingertips, a pastry blender, or even a fork, begin to cut the butter into the flour mixture. Work quickly to prevent the butter from melting too much from the heat of your hands. You want to continue until the mixture forms coarse crumbs with some larger, pea-sized pieces of butter still visible. The varying sizes of crumbs are what create that delightful, varied texture in your finished Apple Crumble Cheesecake topping – some parts will be crisp, others delightfully chewy. Remember, do not overmix! Overmixing will melt the butter, leading to a tough, cookie-like topping instead of a crumbly one.
- Once your crumble is perfectly textured, place the bowl in the refrigerator while you prepare the cheesecake filling. Keeping it cold is essential; it helps the butter stay firm, which in turn ensures a fantastic, separate crumble texture during baking rather than melting into the cheesecake.
Preparing the Creamy Cheesecake Filling: The Heart of the Cheesecake
- Before you even begin, let me emphasize this: Ensure your cream cheese, eggs, and sour cream are all at absolute room temperature. This is not just a suggestion; it’s a golden rule for making a perfect cheesecake! Cold ingredients will stubbornly refuse to combine smoothly, leading to lumps in your batter and forcing you to overmix, which can introduce too much air and cause cracks during baking. I usually take them out of the fridge at least 1-2 hours before I start baking.
- In a large mixing bowl, using an electric mixer (a stand mixer with the paddle attachment is ideal, but a hand mixer works beautifully too), beat the softened cream cheese on medium speed for about 2-3 minutes. Your goal here is to achieve a texture that is completely smooth, airy, and free of any lumps. It should look incredibly creamy. Make sure to stop and scrape down the sides and bottom of the bowl frequently with a rubber spatula to ensure everything is getting evenly mixed.
- Gradually add the granulated sugar to the cream cheese, beating on low speed until it’s just combined and smooth. Again, scrape down the bowl. At this stage, we want to dissolve the sugar without incorporating too much air. Excess air can cause your Apple Crumble Cheesecake to puff up dramatically in the oven and then fall and crack as it cools.
- Next, beat in the pure vanilla extract and the salt until they are just combined. These ingredients enhance the overall flavor profile, adding depth and richness.
- Now, add the eggs, but do so one at a time. After each egg, beat on low speed just until the yolk is broken and combined into the batter. This is another crucial point: Do not overmix the eggs! Overmixing after the eggs are added is the primary culprit behind cracked cheesecakes. We’re aiming to emulsify, not aerate. The goal is to gently incorporate them, nothing more.
- Finally, with the mixer off, gently fold in the room temperature sour cream (or Greek yogurt) using your spatula until it’s just incorporated. The sour cream provides that signature tang and contributes significantly to the incredibly silky-smooth, dense, and luxurious texture that makes this Apple Crumble Cheesecake so irresistible. Be gentle and avoid overmixing here as well; we want to preserve that perfect creamy consistency.
Assembling and Baking Your Apple Crumble Cheesecake: The Grand Finale
- Prepare for the Water Bath: This step is non-negotiable for a crack-free, perfectly cooked cheesecake! Take your pre-baked crust in the springform pan and wrap the bottom and sides tightly with several layers of heavy-duty aluminum foil. Ensure there are no gaps for water to sneak in. This foil shield is absolutely critical to prevent any water from the water bath from seeping into the pan and making your beautiful crust soggy.
- Layer the Fillings: Evenly spread your completely cooled apple filling over the pre-baked graham cracker crust in the foil-wrapped springform pan. Make sure it’s an even layer so every slice gets a good portion of that delicious spiced apple.
- Carefully pour the creamy cheesecake batter over the apple layer. Take your time to distribute it evenly. Once poured, gently tap the springform pan on your kitchen counter a few times. This helps to release any large air bubbles trapped in the batter, which can otherwise create imperfections in your cheesecake’s surface.
- Generously sprinkle the chilled crumble topping evenly over the top of the cheesecake batter. Don’t be shy here! This crumble is what gives our Apple Crumble Cheesecake its fantastic texture contrast and an extra layer of flavor. Try to get good coverage, as it will bake into a beautiful golden-brown, crispy layer.
- Baking with a Water Bath: Carefully place the foil-wrapped springform pan, now fully loaded, into a larger roasting pan. Now, carefully pour hot water into the roasting pan, ensuring it comes about halfway up the sides of the springform pan. The magic of the water bath lies in creating a moist, even baking environment in your oven. This gentle, consistent heat prevents the cheesecake from overbaking too quickly around the edges (which can lead to cracks) and ensures an incredibly silky-smooth, evenly cooked texture for your Apple Crumble Cheesecake.
- With great care, transfer the roasting pan, complete with its precious cargo, to your preheated 350°F (175°C) oven.
- Bake for 60-75 minutes. How do you know when it’s done? The edges of the cheesecake should appear set, but the center (about a 2-3 inch circle in the middle) should still have a slight, gentle wobble when you carefully jiggle the pan. If you have an instant-read thermometer, the internal temperature should register around 150°F (65°C). It is crucial not to overbake your cheesecake, as this is a common cause of dry, crumbly textures and unsightly cracks on the surface. The cheesecake will continue to set as it cools. As it bakes, your kitchen will be filled with the most heavenly aroma of apples, cinnamon, and sweet cream – truly a joy!
Cooling and Chilling for Perfection: The Art of Patience
- Once your Apple Crumble Cheesecake has finished baking, turn off the oven. Here’s another key step for perfection: leave the cheesecake in the water bath inside the turned-off oven with the door slightly ajar for at least 1 hour. This extended, slow cooling process is absolutely vital. It prevents a drastic temperature change, which is the primary reason cheesecakes often develop cracks on their beautiful surface. It allows the cheesecake to gradually settle and cool gently.
- After an hour of slow cooling in the oven, carefully remove the springform pan from the water bath and the larger roasting pan. Take off all the aluminum foil wrapping. Be gentle, as the cheesecake is still delicate.
- Place the springform pan with the Apple Crumble Cheesecake on a wire rack to cool completely at room temperature. This will take another 2-3 hours, depending on your kitchen’s temperature. Resist the urge to rush this step! It needs to reach room temperature naturally.
- Once your Apple Crumble Cheesecake is completely cooled to room temperature, cover the springform pan loosely with plastic wrap. Now comes the final, essential step: refrigerate it for at least 6-8 hours, but preferably overnight. This chilling period is crucial for the cheesecake to fully firm up, allowing all the flavors to meld beautifully and ensuring it achieves its optimal, dense, creamy texture. It also makes it infinitely easier to slice cleanly.
Serving Your Delicious Apple Crumble Cheesecake: The Sweet Reward
- When you’re finally ready to unveil your masterpiece, run a thin, sharp knife around the edge of the springform pan before releasing the sides. This small action helps ensure a clean release and prevents any sticking, preserving the perfect edge of your Apple Crumble Cheesecake.
- To achieve the cleanest, most professional-looking slices, use a warm, sharp knife. I like to dip my knife in hot water and wipe it dry between each slice. This warms the blade just enough to glide through the dense cheesecake without dragging or sticking, giving you beautifully neat portions of your Apple Crumble Cheesecake.
- For an extra special touch, consider garnishing each slice just before serving. A luxurious drizzle of warm caramel sauce, a dollop of freshly whipped cream, or a light dusting of powdered sugar will not only elevate the presentation but also complement the rich, complex flavors of your homemade Apple Crumble Cheesecake beautifully. Each bite is a symphony of creamy, tart, sweet, and crunchy textures – truly a dessert to remember.
- Any leftover Apple Crumble Cheesecake can be stored in an airtight container in the refrigerator for up to 5 days. Though, I highly doubt it will last that long!
As we reach the sweet culmination of our culinary journey, I truly hope you’re feeling as excited and inspired as I am about this incredible dessert. This isn’t just another recipe; it’s an invitation to create something truly magical in your own kitchen. I’ve loved sharing every step of this process with you, and now it’s time for you to experience the sheer delight of bringing it to life.
Why is this particular creation an absolute must-try? Because it masterfully combines the best of several worlds into one harmonious, show-stopping dessert. You get the luscious, creamy tang of a classic cheesecake, perfectly balanced by the sweet, tender bite of spiced apples. And then, there’s that glorious crumble topping – a textural masterpiece providing a delightful crunch that contrasts beautifully with the smooth filling below. It’s a symphony of textures and flavors that dance on your palate, leaving a lasting impression of sophisticated comfort. Many desserts offer either richness or fruitiness, but this one provides both in perfect equilibrium, making it truly unforgettable. It’s comforting enough for a quiet evening at home, yet elegant enough to grace the most special dinner party, promising oohs and aahs from everyone at the table.
Now, let’s talk about how to make this extraordinary dessert even more spectacular or to simply enjoy it in new ways. While it’s absolutely divine on its own, a simple dollop of freshly whipped cream can elevate its luxuriousness, adding another layer of delicate richness. For those who love a bit more indulgence, a scoop of premium vanilla bean ice cream melting gently alongside a warm slice creates a truly heavenly experience, the cold creaminess against the slightly warmed cheesecake and apples is simply divine. If you’re feeling a touch adventurous, a drizzle of homemade caramel sauce or a sprinkle of toasted pecans over the top can introduce new dimensions of flavor and texture. For a contrasting note, a scattering of fresh raspberries or blueberries around the plate can add a burst of vibrant color and a welcome tartness. And don’t forget the beverages! This dessert pairs wonderfully with a robust cup of coffee, a warm chai latte, or even a glass of crisp, sweet dessert wine, making it the perfect end to any meal, no matter the occasion.
Thinking about variations for your next bake? Consider adding a pinch of ground ginger or cardamom to your apple filling for an extra layer of warmth and spice, especially during the cooler months. You could also experiment with the crumble topping by adding chopped walnuts or almonds for a nuttier crunch, or even a touch of shredded coconut for a tropical twist. For a slightly different crust, a ginger snap crust could introduce a lovely spicy kick that complements the apples beautifully. The beauty of this recipe lies in its adaptability; once you understand the core balance, you can playfully introduce your own personal touches and make it truly your own signature dessert.
So, my dear fellow bakers and dessert enthusiasts, I wholeheartedly encourage you to roll up your sleeves and give this phenomenal recipe a try. Don’t be intimidated by its elegant appearance; the steps are straightforward, and the reward is immeasurable. The joy of pulling such a magnificent creation from your oven, filling your home with its intoxicating aroma, is a feeling unlike any other. I promise you, the moment you take that first bite, you’ll understand exactly why I’m so enthusiastic about it. This isn’t just about following instructions; it’s about embarking on a delightful baking adventure that culminates in something truly extraordinary. Imagine the delight on your friends’ and family’s faces when they taste this incredible Apple Crum extractble Cheesecake – a testament to your baking prowess and a new favorite for everyone. Once you’ve made it, I would absolutely love to hear about your experience! Did you add any unique twists? What did your guests think? Share your successes, your photos, and your feedback. Let’s celebrate the magic of baking together. Happy baking!
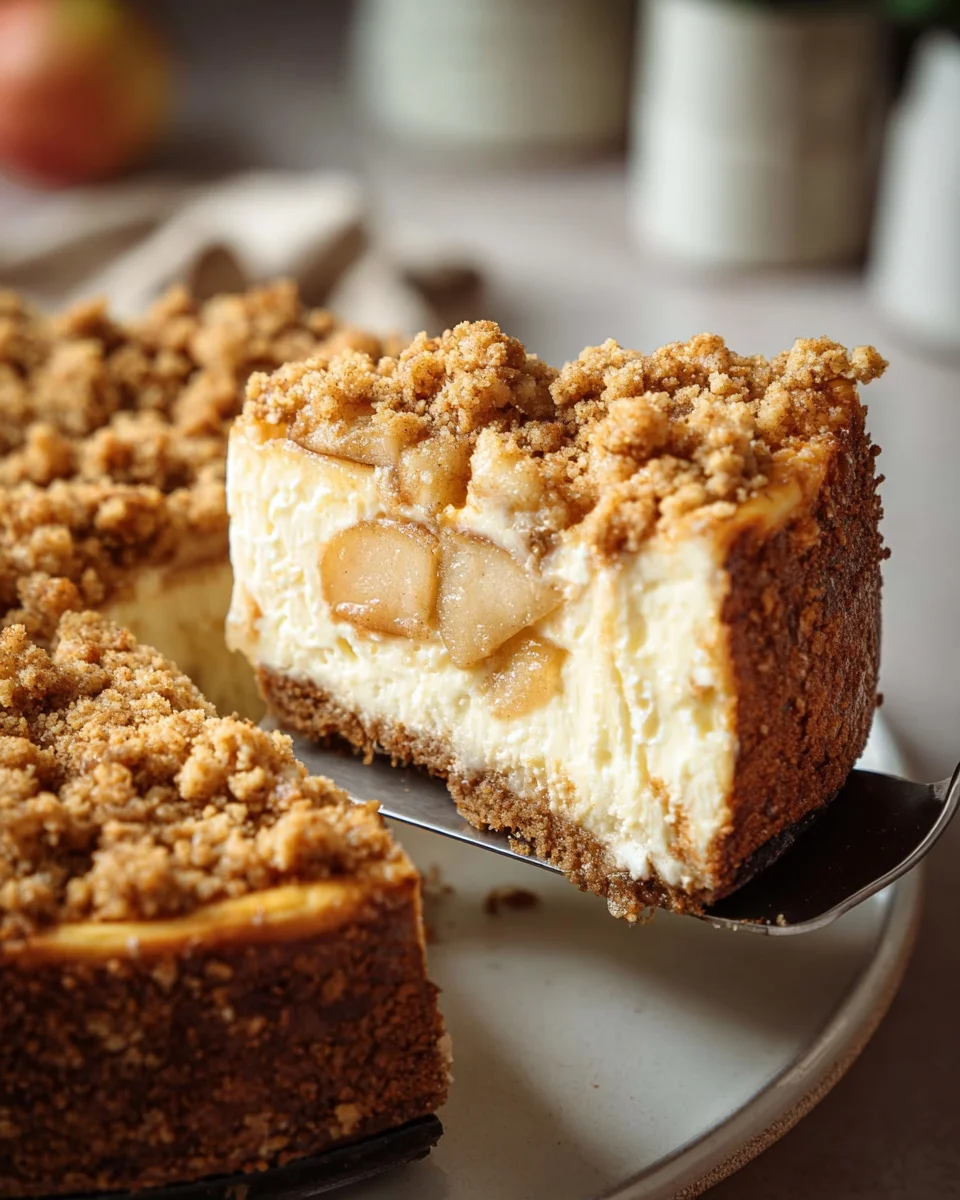
Apple Crumble Cheesecake
Experience pure dessert bliss with this Apple Crumble Cheesecake, a delightful fusion of a warm, comforting apple crumble and a smooth, tangy cheesecake. This unique dessert combines spiced apples, a creamy filling, and a buttery oat crumble topping on a crisp cookie crust for an extraordinary treat.
Ingredients
Instructions
Important Information
Nutrition Facts (Per Serving)
It is important to consider this information as approximate and not to use it as definitive health advice.
Allergy Information
Please check ingredients for potential allergens and consult a health professional if in doubt.