• Skip to primary navigation
  • Skip to main content
  • Skip to primary sidebar
Homesmad

Homesmad

  • Home
  • Breakfast & Brunch
  • Appetizers & Snacks
  • Dinner
  • Dessert
  • About
  • Privacy Policy
  • Contact
Homesmad
  • Home
  • Breakfast & Brunch
  • Appetizers & Snacks
  • Dinner
  • Dessert
  • About
  • Privacy Policy
  • Contact

Apple Pie Oatmeal Cookies: A Delicious Fall Treat!

October 1, 2025 by Lily author

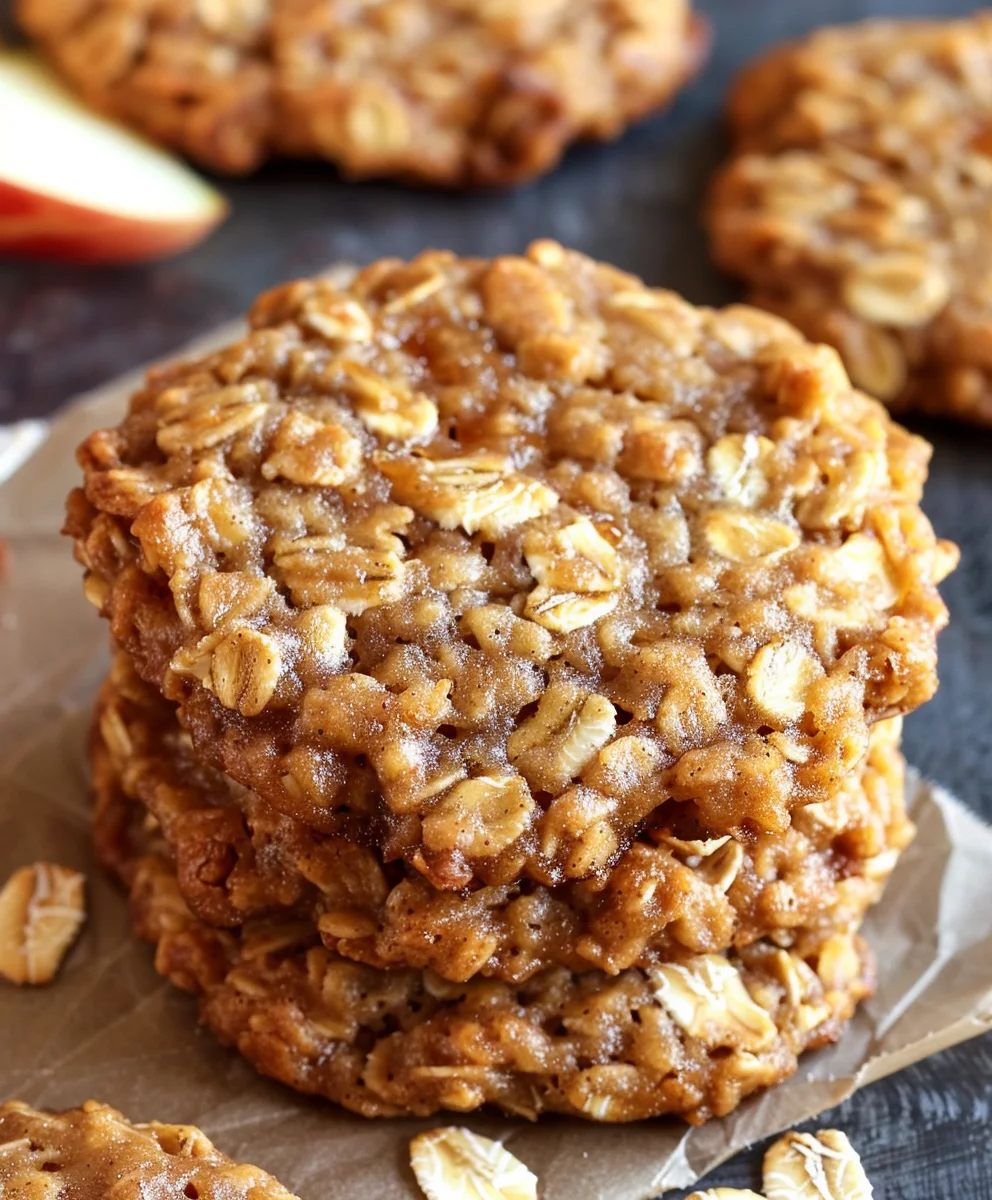
Apple Pie Oatmeal Cookies – just reading those words probably conjures up a delicious image, doesn’t it? I remember the comforting aroma of freshly baked apple pie filling our home on crisp autumn days. That warm, spiced goodness is truly a taste of home, a culinary embrace that brings back cherished memories. But what if you could capture that iconic flavor, complete with tender apple pieces and warming spices, in a convenient, chewy cookie? Well, dear reader, I’m thrilled to tell you that you absolutely can.

This recipe brings together the best of two beloved worlds: the wholesome chewiness of classic oatmeal cookies and the irresistible, spiced fruitiness of a homemade apple pie. Oatmeal cookies, with their humble yet satisfying origins often traced back to British and American home baking, have long been a pantry staple, offering comfort and energy. Apple pie, on the other hand, stands as a quintessential symbol of American culinary tradition, embodying warmth and hospitality. Our journey today elegantly combines these comforting legacies.

Why These Cookies Are Irresistible

Imagine sinking your teeth into a perfectly soft and chewy cookie, studded with tender bits of spiced apple and hearty oats, all without the fuss of rolling out a pie crust. These Apple Pie Oatmeal Cookies offer a delightful symphony of textures and flavors – the comforting warmth of cinnamon and nutmeg, the sweet tang of apple, and the satisfying chew of oats. They are wonderfully portable, making them perfect for lunchboxes, coffee breaks, or simply a cozy treat at home. I promise, they embody pure, unadulterated comfort in every single bite, offering all the joy of apple pie in a wonderfully accessible form.

Apple Pie Oatmeal Cookies: A Delicious Fall Treat! this RECIPE

Ingredients:

  • For the Apple Pie Filling:
    • 3 medium-sized baking apples (like Granny Smith, Honeycrisp, or Fuji), peeled, cored, and finely diced (about 3 cups) – Granny Smith apples are my personal favorite here for that perfect tart balance!
    • 2 tablespoons unsalted butter
    • ¼ cup granulated sugar
    • 2 tablespoons light brown sugar, packed
    • ½ teaspoon ground cinnamon
    • ¼ teaspoon ground nutmeg
    • ⅛ teaspoon ground cloves (optional, but I think it adds a lovely depth)
    • 1 tablespoon cornstarch
    • 2 tablespoons water
    • 1 teaspoon fresh lemon juice (prevents browning and brightens the flavor)
  • For the Oatmeal Cookies:
    • 1 cup (2 sticks) unsalted butter, softened to room temperature – This is crucial for a smooth, creamy dough!
    • ¾ cup granulated sugar
    • ¾ cup light brown sugar, packed
    • 2 large eggs, also at room temperature
    • 1 teaspoon pure vanilla extract – Always use good quality vanilla; it makes a difference!
    • 1 ½ cups all-purpose flour, spooned and leveled
    • 1 teaspoon baking soda
    • ½ teaspoon salt
    • 3 cups old-fashioned rolled oats (not instant or quick-cooking oats, as they will alter the texture of our delightful Apple Pie Oatmeal Cookies)
  • For the Optional Crumble Topping:
    • ½ cup all-purpose flour
    • ¼ cup light brown sugar, packed
    • ¼ teaspoon ground cinnamon
    • 4 tablespoons unsalted butter, cold and cut into small cubes
  • For the Optional Vanilla Glaze:
    • 1 cup powdered sugar, sifted
    • 2-3 tablespoons milk (any kind works, whole milk gives a richer glaze)
    • ½ teaspoon pure vanilla extract

Equipment You’ll Need:

Before we dive into the fun part of baking these incredible Apple Pie Oatmeal Cookies, let’s gather our tools to ensure a smooth and enjoyable process. Having everything ready truly makes a difference!

  • Large mixing bowls (at least two)
  • Medium saucepan for the apple filling
  • Rubber spatula
  • Electric mixer (stand mixer with paddle attachment or a hand mixer)
  • Whisk
  • Measuring cups and spoons
  • Sharp knife and cutting board for apples
  • Vegetable peeler and apple corer
  • Cookie scoops (I find a 1.5-inch scoop ideal for consistent cookie size)
  • Baking sheets
  • Parchment paper or silicone baking mats
  • Wire cooling rack
  • Small bowl for glaze (if using)

Preparation Phase: Getting Ready for Baking Excellence

This initial stage sets us up for success. Taking the time to properly prepare our ingredients and workspace is key to achieving truly spectacular Apple Pie Oatmeal Cookies.

  1. Preheat and Prepare: Start by preheating your oven to 375°F (190°C). While the oven heats up, line your baking sheets with parchment paper or silicone baking mats. This step is a lifesaver for easy cleanup and prevents sticking. It’s always good to have a couple of sheets ready to go.
  2. Crafting the Aromatic Apple Pie Filling:

    This filling is the heart of our Apple Pie Oatmeal Cookies, so let’s give it some love. In a medium saucepan, melt 2 tablespoons of unsalted butter over medium heat. Once melted, add your finely diced apples. Cook them down for about 5-7 minutes, stirring occasionally, until they start to soften slightly but still hold their shape. We want them tender, not mushy.

    Next, sprinkle in the granulated sugar, light brown sugar, cinnamon, nutmeg, and optional cloves. Stir everything together until the sugars have dissolved and the spices are fragrant, about another 2-3 minutes. At this point, your kitchen should be smelling absolutely divine – that’s the magic of apple pie spices!

    In a small separate bowl, whisk together the cornstarch and water until no lumps remain. This is our thickening slurry. Pour this mixture into the apple saucepan, stirring constantly. Continue to cook for another 1-2 minutes, allowing the filling to thicken. It should become glossy and coat the back of a spoon. Finally, remove the saucepan from the heat and stir in the fresh lemon juice. This brightens the flavor and prevents the apples from browning too much. Transfer the apple filling to a separate bowl or plate and allow it to cool completely while you prepare the cookie dough. It’s essential that the filling is cool, otherwise, it can melt your cookie dough and affect the cookie’s structure during baking.

  3. Optional: Prepare the Crumble Topping (if using):

    If you’re going for that extra layer of texture and flavor, let’s make the crumble. In a small bowl, combine the ½ cup all-purpose flour, ¼ cup light brown sugar, and ¼ teaspoon ground cinnamon. Mix these dry ingredients together with a fork until well combined. Now, add the cold, cubed butter. Using your fingertips or a pastry blender, work the butter into the flour mixture until it resembles coarse crumbs. Some larger pea-sized pieces are perfectly fine and even desired for a rustic texture. Place this in the refrigerator to keep it chilled while you make the cookie dough. Keeping it cold helps ensure a crumbly texture rather than melting into the cookie.

Creating the Irresistible Oatmeal Cookie Dough

Now for the main event – crafting the perfect base for our Apple Pie Oatmeal Cookies. This dough is soft, chewy, and holds the delicious apple filling beautifully.

  1. Creaming Butter and Sugars: In a large mixing bowl, using an electric mixer (stand mixer fitted with the paddle attachment or a hand mixer), cream together the softened unsalted butter, granulated sugar, and packed light brown sugar. Beat on medium speed for about 3-5 minutes, or until the mixture is light, fluffy, and pale in color. This creaming process incorporates air into the butter, which is vital for the cookies’ texture and spread. Don’t rush this step!
  2. Incorporating Eggs and Vanilla: Scrape down the sides of the bowl with your rubber spatula to ensure everything is well combined. Add one large egg at a time, beating well after each addition until fully incorporated. Then, stir in the pure vanilla extract. Continue to beat until the mixture is smooth and cohesive. The mixture might look a little curdled at first when adding the eggs, but keep beating until it comes together.
  3. Whisking Dry Ingredients: In a separate medium bowl, whisk together the all-purpose flour, baking soda, and salt. Make sure these dry ingredients are thoroughly combined so that the leavening agent and salt are evenly distributed throughout the dough.
  4. Combining Wet and Dry: Gradually add the dry ingredient mixture to the wet ingredients in the large bowl, mixing on low speed until just combined. Be careful not to overmix! Overmixing develops the gluten in the flour too much, which can lead to tough cookies. We want tender, chewy Apple Pie Oatmeal Cookies. As soon as you no longer see streaks of flour, stop mixing.
  5. Folding in the Oats: Finally, fold in the 3 cups of old-fashioned rolled oats using your rubber spatula. Mix until the oats are evenly distributed throughout the dough. The dough will be thick and wonderfully textured. Resist the urge to add quick oats here; old-fashioned oats provide that classic chewy texture we’re aiming for.

Assembling and Baking Your Apple Pie Oatmeal Cookies

This is where the magic truly comes together! We’re transforming our delicious components into stunning Apple Pie Oatmeal Cookies.

  1. Scooping the Dough: Using a 1.5-inch cookie scoop or about 2 tablespoons of dough per cookie, drop mounds of cookie dough onto your prepared baking sheets, leaving about 2 inches between each cookie. These cookies will spread a bit, so give them room to grow.
  2. Creating the Apple “Well”: Now for the signature touch! With your thumb or the back of a small spoon, gently make an indentation or “well” in the center of each cookie dough mound. Be careful not to press all the way through to the parchment paper. This little well is where our delightful apple pie filling will reside.
  3. Filling with Apple Goodness: Spoon about 1-1 ½ teaspoons of the cooled apple pie filling into the center of each indentation. Don’t overfill, or it might ooze out too much during baking. The goal is a perfect little pocket of apple flavor in every bite of your Apple Pie Oatmeal Cookies.
  4. Optional: Add Crumble Topping: If you prepared the crumble topping, now is the time to add it! Gently sprinkle a small amount of the chilled crumble mixture over the apple filling and around the edges of each cookie. This will give them a wonderful texture and an extra layer of “pie” resemblance.
  5. Baking to Golden Perfection: Place your baking sheets into the preheated oven. Bake for 12-15 minutes, or until the edges are golden brown and the centers are set. The exact baking time can vary depending on your oven, so keep an eye on them. The cookies should look slightly puffed and chewy. Don’t worry if the centers seem a little soft; they will firm up as they cool.
  6. Cooling Time: Once baked, remove the baking sheets from the oven and let the Apple Pie Oatmeal Cookies cool on the sheets for 5 minutes before carefully transferring them to a wire cooling rack to cool completely. This initial cooling on the hot sheet helps them set and prevents them from breaking when you move them. Allowing them to cool completely on the rack is essential before any glazing!

The Delectable Vanilla Glaze (Optional, but Highly Recommended!)

A simple drizzle of vanilla glaze adds a beautiful finish and another layer of sweetness to these already incredible Apple Pie Oatmeal Cookies.

  1. Whisking the Glaze: In a small bowl, combine the sifted powdered sugar, 2 tablespoons of milk, and ½ teaspoon of pure vanilla extract. Whisk thoroughly until the mixture is smooth and free of lumps. The consistency should be pourable but not too thin. If it’s too thick, add more milk ½ teaspoon at a time until you reach your desired consistency. If it’s too thin, add a tiny bit more sifted powdered sugar.
  2. Drizzling with Finesse: Once your Apple Pie Oatmeal Cookies are completely cool, use a spoon or a whisk to drizzle the vanilla glaze artfully over the tops of each cookie. You can go for a full coverage or just a delicate zig-zag pattern. Let the glaze set for about 15-20 minutes before serving or storing. This glaze will harden slightly, creating a lovely sweet crust.

Tips for Perfect Apple Pie Oatmeal Cookies Every Time:

Achieving bakery-quality Apple Pie Oatmeal Cookies is absolutely within your reach! Here are some tried-and-true tips that I’ve found helpful for consistent success:

  • Room Temperature Ingredients are Key:

    I cannot stress this enough! Make sure your butter and eggs are truly at room temperature. Softened butter creams beautifully with sugar, creating an airy base, while cold butter won’t incorporate properly. Room temperature eggs emulsify better into the mixture, resulting in a smoother, more uniform dough. If you forget to take them out, a quick trick for eggs is to place them in a bowl of warm (not hot!) water for 5-10 minutes. For butter, you can microwave it for a few seconds at a very low power, but be careful not to melt it completely!

  • Measure Flour Correctly:

    For consistent results with your Apple Pie Oatmeal Cookies, always spoon and level your flour. Dipping your measuring cup directly into the flour bag compacts it, leading to too much flour in your recipe. This can result in dry, dense cookies. Instead, spoon flour into your measuring cup until it’s overflowing, then use the back of a straight edge (like a knife or ruler) to level it off.

  • Don’t Overmix the Dough:

    Once you add the dry ingredients to the wet, mix only until just combined. Overmixing develops the gluten in the flour, which can lead to tough, chewy cookies instead of the soft, tender texture we desire. As soon as you no longer see streaks of flour, stop mixing! A gentle hand with your spatula for folding in the oats is also beneficial.

  • Cool the Apple Filling Completely:

    This is a critical step for our Apple Pie Oatmeal Cookies. If the apple filling is warm when you add it to the cookie dough, it can start to melt the butter in the dough, causing your cookies to spread excessively and lose their shape during baking. Plan ahead and make the filling in advance if you can, allowing it ample time to cool to room temperature or even chill in the refrigerator.

  • Chilling the Dough (Optional but Recommended):

    While not strictly necessary for this recipe, chilling the cookie dough for 30 minutes to an hour can further enhance the flavor and texture of your Apple Pie Oatmeal Cookies. It allows the flavors to meld and prevents excessive spreading, resulting in a thicker, chewier cookie. If you’re having trouble with your cookies spreading too much, chilling is definitely the answer.

  • Even Cookie Size for Even Baking:

    Using a cookie scoop ensures that all your Apple Pie Oatmeal Cookies are roughly the same size. This means they will bake evenly, and you won’t end up with some burnt and some underbaked. Consistency is key for presentation and texture.

  • Know Your Oven:

    Oven temperatures can vary significantly. An oven thermometer is an inexpensive tool that can save your baking. If you notice your cookies are baking too fast or too slow, adjust your oven temperature accordingly. For these Apple Pie Oatmeal Cookies, a golden brown edge with a slightly soft center usually indicates perfection.

  • Storage for Freshness:

    Store your Apple Pie Oatmeal Cookies in an airtight container at room temperature for up to 3-4 days. If they have the glaze, make sure the glaze is completely set before stacking them to prevent sticking. For longer storage, you can freeze baked, unglazed cookies in an airtight container for up to 2-3 months. Thaw at room temperature before serving or glazing.

  • Experiment with Spices:

    While cinnamon, nutmeg, and cloves are classic for Apple Pie Oatmeal Cookies, don’t hesitate to personalize! A pinch of allspice or even a tiny grating of fresh ginger can add another layer of warmth and complexity to the apple filling. Just remember to start small and add to taste.

Enjoy the process of baking these delightful Apple Pie Oatmeal Cookies, and prepare for your kitchen to be filled with the most comforting aromas!

Apple Pie Oatmeal Cookies: A Delicious Fall Treat!

<h2>Conclusion:</h2>
<p>And there you have it, my friends! We’ve journeyed through the simple steps to create a truly remarkable treat, a cookie that isn’t just a cookie, but a warm hug on a plate. If you’ve been looking for a recipe that combines the comforting, spiced essence of a classic apple pie with the delightful chewiness of an oatmeal cookie, then your search ends here. This isn’t just another dessert; it’s an experience, a memory in the making, and a testament to how simple ingredients can come together to create something truly magical. I can confidently say that these cookies are an absolute must-try for anyone who appreciates wholesome flavors and a touch of nostalgic sweetness.</p>

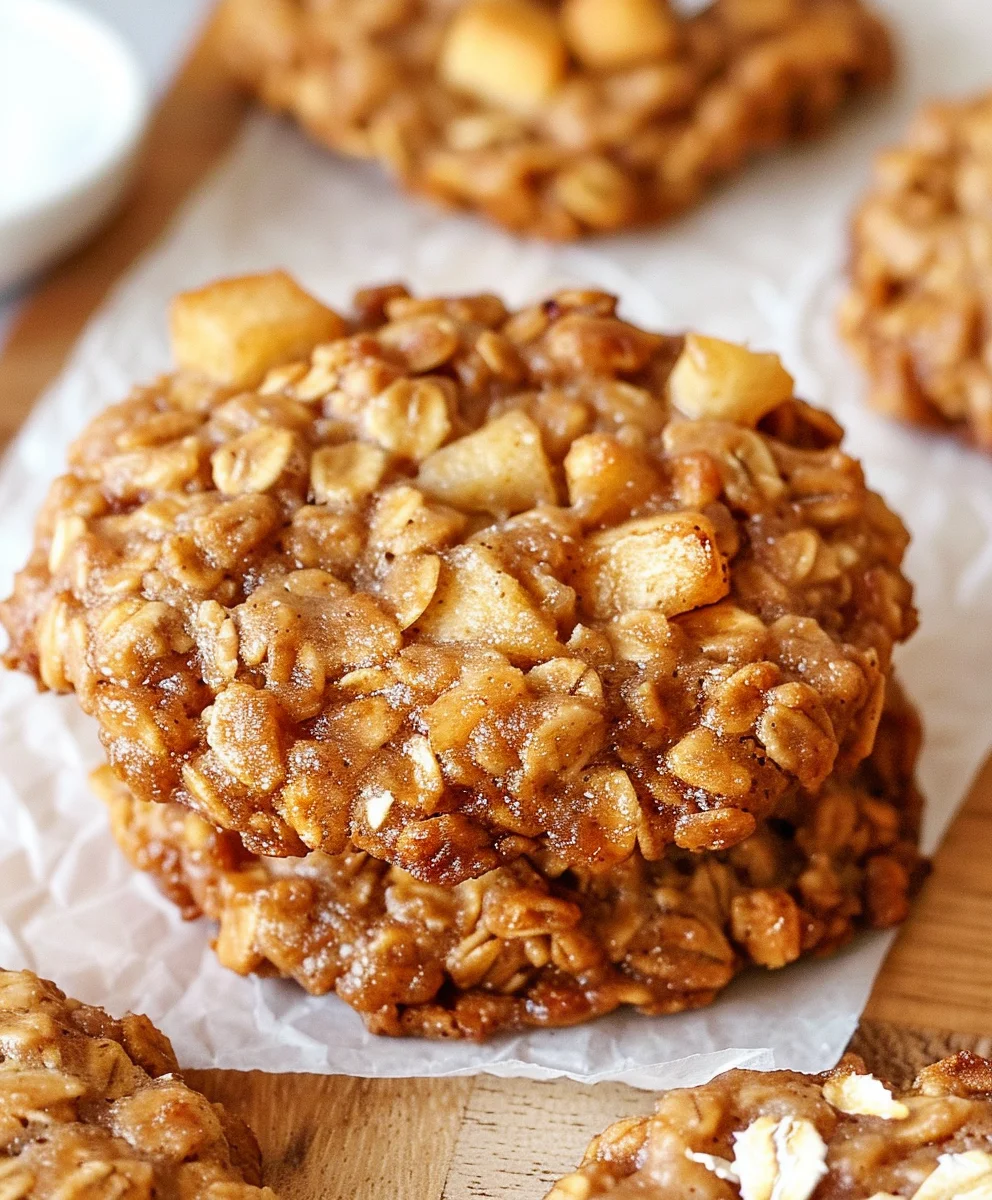
<h4>Why These Cookies Are a Must-Try</h4>
<p>What makes this recipe stand out, you ask? Well, it’s the perfect marriage of textures and flavors. Imagine: a soft, chewy oatmeal cookie base, studded with tender, spiced apple pieces that burst with autumnal goodness in every bite. The aroma alone, as these bake in your oven, is enough to transform your kitchen into the coziest corner of the world. It’s that unmistakable scent of cinnamon, nutmeg, and caramelized apples, mingling with the hearty earthiness of oats. They’re substantial enough to satisfy, yet light enough to leave you craving just one more. Trust me, once you experience the comforting embrace of these homemade <strong>Apple Pie Oatmeal Cookies</strong>, you’ll understand why they’re destined to become a new favorite in your baking repertoire. They offer all the beloved flavors of a homemade apple pie, conveniently packaged into a handheld, delightful cookie, making them incredibly versatile for any occasion.</p>

<h4>Serving Suggestions and Delightful Variations</h4>
<p>Now, while these cookies are absolutely divine straight off the cooling rack, there are so many wonderful ways to enjoy them. Imagine serving them slightly warm with a generous scoop of vanilla bean ice cream melting over the top – pure bliss! The warm, spiced cookie and the cool, creamy ice cream create a symphony of textures and temperatures that is simply irresistible. A dollop of freshly whipped cream or a drizzle of caramel sauce can also elevate these cookies into an elegant dessert. For a more casual treat, pair them with a tall glass of cold milk, a hot cup of coffee, or a steaming mug of spiced apple cider on a crisp evening. They also make fantastic companions for an afternoon tea.</p<

<p>Feeling adventurous? This recipe is wonderfully adaptable! You could try adding a handful of chopped pecans or walnuts to the dough for an extra layer of crunch and nutty flavor. A sprinkle of dried cranberries or golden raisins would introduce another fruity dimension. For an extra indulgent twist, consider making them into cookie sandwiches with a rich cream cheese frosting or a smooth butterscotch cream in the middle. If you’re catering to different dietary needs, you can often substitute gluten-free rolled oats and a gluten-free flour blend for a gluten-friendly version, or explore plant-based butter and flax eggs for a delightful vegan option without sacrificing much of the incredible taste. The beauty of these <strong>Apple Pie Oatmeal Cookies</strong> lies in their inherent flexibility, allowing you to tailor them perfectly to your taste and preferences.</p>

<h4>Your Turn to Bake and Share!</h4>
<p>Now, it’s your turn to experience the magic! I truly hope you feel inspired to roll up your sleeves, gather your ingredients, and fill your home with the intoxicating aroma of these delectable treats. Baking is more than just following a recipe; it’s an act of love, a creative outlet, and a wonderful way to bring joy to yourself and those around you. I guarantee that the smiles and appreciative murmurs you’ll receive when sharing these cookies will be well worth every moment spent in the kitchen.</p>

<p>Once you’ve baked your batch of these incredible cookies, I would absolutely love to hear from you! Please don’t hesitate to share your experience. Did you add any exciting variations? What did your family and friends think? Snap a photo of your beautiful creations and share them! Your feedback and stories inspire me and other bakers in our wonderful community. So, go ahead, embrace the warmth, the spices, and the sheer delight that these <strong>Apple Pie Oatmeal Cookies</strong> bring. Happy baking, and happy eating! I can’t wait to hear all about your cookie adventures!</p>


Apple Pie Oatmeal Cookies

Apple Pie Oatmeal Cookies

Capture the iconic flavor of apple pie, with tender apple pieces and warming spices, in a convenient, chewy oatmeal cookie. This recipe combines the wholesome chewiness of classic oatmeal cookies and the irresistible, spiced fruitiness of homemade apple pie.

Prep Time
20 Minutes

Cook Time
15 Minutes

Total Time
35 Minutes

Servings
24 cookies

Ingredients

  • 1 cup (100g) instant oats (gluten-free if needed)
  • ¾ cup (90g) whole wheat flour or gluten-free flour
  • 1 ½ tsp baking powder
  • 1 ½ tsp ground cinnamon
  • ⅛ tsp salt
  • 2 tbsp (28g) coconut oil or unsalted butter, melted
  • 1 large egg, room temperature
  • 1 tsp vanilla extract
  • ½ cup (120mL) agave
  • 1 cup (125g) finely diced red apple (about 1 medium)
  • For Optional Vanilla Glaze:
  • 1 cup powdered sugar, sifted
  • 2-3 tablespoons milk (any kind)
  • ½ teaspoon pure vanilla extract

Instructions

  1. Step 1
    Preheat oven to 375°F (190°C). Line baking sheets with parchment paper. In a large bowl, whisk together instant oats, whole wheat flour, baking powder, ground cinnamon, and salt.
  2. Step 2
    In a separate bowl, whisk together melted coconut oil or butter, large egg, vanilla extract, and agave until well combined.
  3. Step 3
    Pour the wet ingredients into the dry ingredients and mix until just combined. Gently fold in the finely diced red apple until evenly distributed throughout the dough.
  4. Step 4
    Drop rounded tablespoons (or use a 1.5-inch scoop) of dough onto prepared baking sheets, leaving about 2 inches between each cookie. Bake for 12-15 minutes, or until the edges are golden brown and the centers are set.
  5. Step 5
    Remove baking sheets from the oven and let the cookies cool on the sheets for 5 minutes before carefully transferring them to a wire cooling rack to cool completely.
  6. Step 6
    Once cookies are completely cool, prepare the glaze: In a small bowl, whisk together sifted powdered sugar, 2-3 tablespoons milk, and ½ teaspoon vanilla extract until smooth. Drizzle artfully over the tops of each cooled cookie. Let the glaze set for 15-20 minutes before serving or storing.

Important Information

Nutrition Facts (Per Serving)

It is important to consider this information as approximate and not to use it as definitive health advice.

Allergy Information

Please check ingredients for potential allergens and consult a health professional if in doubt.

« Previous Post
Apple Crumble Cheesecake: Irresistible & Easy Recipe
Next Post »
Make The Best Apple Pie Bars - Sweet, Simple & Scrumptious!

If you enjoyed this…

Best Ina Garten Sweet Potato Casserole with Pecans Recipe

Pumpkin Snickerdoodle: The Ultimate Fall Cookie Recipe

Little Bites Muffins: The Ultimate Guide to Flavors, Nutrition, and More

Primary Sidebar

Browse by Diet

BreakfastDinnerLunchDessertAppetizer

Sweet Peach Yogurt Parfait Delight

One of my fondest memories is from a lazy summer afternoon spent at my grandmother’s house. The sun filtered through the kitchen window, casting a warm glow over the table where she would create her culinary magic. It was during one of those blissful moments that I first tasted her Peach Yogurt Parfait with Honey and Granola. The sweet aroma of ripe peaches mingling with creamy yogurt and the crunch of granola was nothing short of heavenly. It felt like summer captured in a bowl, and I still remember the joy of diving in with a spoon, each layer revealing a new burst of flavor.

When I think about that parfait, I can almost hear the gentle hum of the bees outside, reminding me of the floral notes that honey brings to every bite. The vibrant yellows and soft oranges of the peaches contrast beautifully with the creamy white yogurt and the golden crunch of granola. It’s a dish that not only looks delightful but also tastes like a celebration of fresh, wholesome ingredients.

What makes my version of this Peach Yogurt Parfait special is the careful balance of flavors and textures. I use ripe, juicy peaches, drizzled with locally sourced honey, and a homemade granola that’s bursting with nuts and seeds for an extra crunch. It’s a simple dish, but every layer is crafted with love and attention.

Let me show you exactly how to make this delightful parfait, so you can bring a bit of that summer magic into your kitchen!

Sweet Peach Yogurt Parfait Delight

Why You’ll Love This Recipe

  • Delightfully creamy texture from the Greek yogurt, paired with the juicy sweetness of fresh peaches.
  • Ready in under 20 minutes, making it a quick and satisfying breakfast or snack option.
  • Budget-friendly, using common ingredients that you may already have in your pantry.
  • Customizable with your favorite granola and nuts, allowing you to tailor each parfait to your taste.
  • Perfectly balanced flavors with the bright acidity of lemon juice and the sweetness of honey enhancing the peaches.

Ingredients

  • For the Parfait:
  • 2 cups plain Greek yogurt (or vanilla yogurt for a sweeter option)
  • 2 large ripe peaches, diced (about 2 cups)
  • 1 tablespoon fresh lemon juice (to prevent browning of peaches)
  • 2 tablespoons honey (plus more for drizzling)
  • 1 teaspoon vanilla extract (optional for extra flavor)
  • For the Granola:
  • 1 cup granola (store-bought or homemade; see notes for a simple granola recipe)
  • 1/4 cup sliced almonds (optional for added crunch)
  • 1/4 cup shredded coconut (optional for added flavor)

Let’s dive into some key ingredients that make this Peach Yogurt Parfait so delightful! First, the Greek yogurt is not only creamy but also packed with protein, making it a satisfying option for breakfast or a snack. If you’re looking for a sweeter option, you can easily substitute it with vanilla yogurt, though it may alter the overall flavor balance. Next, the ripe peaches are the star of the show; their natural sweetness shines through, so I recommend choosing peaches that yield slightly to pressure, indicating they’re perfectly ripe. If peaches aren’t in season, feel free to use nectarines or even frozen peaches—just thaw them before use. Finally, honey adds a lovely floral sweetness that ties everything together. If you prefer, maple syrup can serve as a delicious substitute.

Step-by-Step Instructions

  1. Start by preparing the peaches. Wash them thoroughly, then slice and dice them into bite-sized pieces. In a medium bowl, toss the diced peaches with 1 tablespoon of fresh lemon juice to prevent browning. Set aside for about 5 minutes while the lemon juice works its magic.
  2. In a separate bowl, combine the Greek yogurt, 2 tablespoons of honey, and 1 teaspoon of vanilla extract if using. Stir the mixture until smooth and thoroughly blended. This should take about a minute. Avoid overmixing to maintain the creaminess of the yogurt.
  3. Now it’s time to layer your parfait. Grab a clear glass or bowl to showcase your beautiful creation. Start with a generous spoonful of the yogurt mixture at the bottom—about 1/4 cup will do. Use a spoon to spread it evenly.
  4. Add a layer of the diced peaches over the yogurt, ensuring they cover the yogurt completely. You might want to use about half of what you have prepared—roughly 1 cup. This layer should be visually appealing, so arrange the peaches neatly.
  5. Sprinkle 1/4 cup of granola over the peaches. This adds a delightful crunch. Make sure to distribute it evenly to ensure every bite has that satisfying texture. Avoid packing it down too tightly, as you want it to maintain its crunch.
  6. Repeat the layers: spoon in another 1/4 cup of yogurt, followed by another cup of peaches, and another sprinkle of granola. You should have at least two layers, but feel free to add more depending on your glass size.
  7. Finish off your parfait with a drizzle of honey on top for added sweetness and a touch of elegance. If you’re using sliced almonds or shredded coconut, sprinkle them on top now. It adds a lovely visual contrast and extra flavor.
  8. Serve immediately or refrigerate for up to 30 minutes before serving to allow the flavors to meld together. However, I recommend enjoying it fresh to maintain the granola’s crunch.

Pro Tips for the Best Peach Yogurt Parfait With Honey And Granola

  • Make sure to choose ripe peaches for the best flavor and texture. A common mistake is using unripe fruit, which can lead to a less enjoyable parfait. Look for peaches that are fragrant and slightly soft to the touch.
  • Use a clear glass to assemble your parfait; this not only makes for a beautiful presentation but also allows you to see the colorful layers, which adds to the enjoyment of eating it.
  • For an even creamier texture, consider whipping the Greek yogurt with a hand mixer for a couple of minutes before layering. This small adjustment makes a huge difference in mouthfeel.
  • Be mindful of the granola-to-yogurt ratio. Too much granola can overwhelm the parfait, while too little can make it feel too creamy. Aim for about 1/4 cup of granola per layer for the perfect balance.
  • If you’re making this for a gathering, consider preparing the yogurt and peaches ahead of time and layering them just before serving. This ensures the granola stays crunchy!

Variations & Serving Ideas

There are so many ways to get creative with your Peach Yogurt Parfait! For a tropical twist, swap out the peaches for mangoes or pineapples and top with coconut flakes. If you prefer a berry flavor, mix in some blueberries or strawberries with the peaches for added color and taste. For a nutty version, incorporate chopped walnuts or pecans instead of almonds.

As for serving ideas, this parfait pairs beautifully with a side of scrambled eggs for a hearty breakfast or fresh fruit salad for a light lunch. You might also enjoy it alongside whole grain toast with almond butter for an energizing snack. The contrast of flavors and textures will elevate your meal experience!

Storage, Make-Ahead & Reheating

The Peach Yogurt Parfait is best enjoyed fresh, but you can prepare some components ahead of time. Store the layered parfait in an airtight container in the refrigerator for up to 24 hours. However, be cautious; the granola may lose its crunch if stored too long. You can freeze the yogurt and peach mixture for up to 2 months; just remember to thaw it in the refrigerator overnight before serving.

If you plan to enjoy this dish the next day, it can taste even better as the flavors meld together. Just remember to add the granola right before serving to keep its delightful crunch!

Frequently Asked Questions

Can I make Peach Yogurt Parfait With Honey And Granola ahead of time?

Yes — in fact, it tastes even better the next day as the flavors meld. However, I recommend waiting to add the granola until just before serving to maintain its crunch.

What can I substitute for Greek yogurt?

If you prefer a lighter option, you can substitute Greek yogurt with regular yogurt or a dairy-free alternative like coconut yogurt. Just remember that this may alter the creaminess and flavor profile slightly.

Can I use frozen peaches for this parfait?

Absolutely! Just make sure to thaw the frozen peaches before using them. They will still add great flavor, though the texture may be slightly softer than fresh peaches.

How do I make the parfait vegan?

To make a vegan version, substitute the Greek yogurt with a plant-based yogurt alternative, and replace honey with maple syrup or agave nectar. This keeps the parfait sweet while adhering to a vegan diet.

What other fruits can I use in this recipe?

You can mix and match fruits based on your preference. Try using strawberries, blueberries, raspberries, or even bananas. Just make sure to adjust the lemon juice as needed to prevent browning.

Sweet Peach Yogurt Parfait Delight

Final Thoughts

The Peach Yogurt Parfait with Honey and Granola is a delightful blend of creamy yogurt, sweet peaches, and crunchy granola that creates a satisfying and nourishing treat. Each layer bursts with flavor, making it a perfect choice for breakfast or a light dessert.

This is the kind of recipe I come back to again and again, especially when I want something refreshing and wholesome to start my day. The harmony of sweet and tart flavors, combined with the delightful crunch, never fails to lift my spirits!

I encourage you to give this parfait a try and indulge in its comforting goodness. Feel free to share your results or even add your own twist—perhaps a sprinkle of cinnamon or a handful of nuts. Enjoy creating your perfect parfait!

Print
clock clock iconcutlery cutlery iconflag flag iconfolder folder iconinstagram instagram iconpinterest pinterest iconfacebook facebook iconprint print iconsquares squares iconheart heart iconheart solid heart solid icon

Peach Yogurt Parfait


  • Author: Lily author
  • Total Time: 15 minutes
  • Yield: 4 servings 1x
Pin Recipe
Print Recipe

Description

This Peach Yogurt Parfait combines creamy Greek yogurt, juicy peaches, and crunchy granola for a delightful treat. It’s a perfect breakfast or snack that captures the essence of summer in every bite.


Ingredients

Scale
  • For the Parfait:
  • 2 cups plain Greek yogurt (or vanilla yogurt for a sweeter option)
  • 2 large ripe peaches, diced (about 2 cups)
  • 1 tablespoon fresh lemon juice (to prevent browning of peaches)
  • 2 tablespoons honey (plus more for drizzling)
  • 1 teaspoon vanilla extract (optional for extra flavor)
  • For the Granola:
  • 1 cup granola (store-bought or homemade; see notes for a simple granola recipe)
  • 1/4 cup sliced almonds (optional for added crunch)
  • 1/4 cup shredded coconut (optional for added flavor)

Instructions

  1. Start by preparing the peaches. Wash them thoroughly, then slice and dice them into bite-sized pieces. In a medium bowl, toss the diced peaches with 1 tablespoon of fresh lemon juice to prevent browning. Set aside for about 5 minutes while the lemon juice works its magic.
  2. In a separate bowl, combine the Greek yogurt, 2 tablespoons of honey, and 1 teaspoon of vanilla extract if using. Stir the mixture until smooth and thoroughly blended. This should take about a minute. Avoid overmixing to maintain the creaminess of the yogurt.
  3. Now it’s time to layer your parfait. Grab a clear glass or bowl to showcase your beautiful creation. Start with a generous spoonful of the yogurt mixture at the bottom—about 1/4 cup will do. Use a spoon to spread it evenly.
  4. Add a layer of the diced peaches over the yogurt, ensuring they cover the yogurt completely. You might want to use about half of what you have prepared—roughly 1 cup. This layer should be visually appealing, so arrange the peaches neatly.
  5. Sprinkle 1/4 cup of granola over the peaches. This adds a delightful crunch. Make sure to distribute it evenly to ensure every bite has that satisfying texture. Avoid packing it down too tightly, as you want it to maintain its crunch.
  6. Repeat the layers: spoon in another 1/4 cup of yogurt, followed by another cup of peaches, and another sprinkle of granola. You should have at least two layers, but feel free to add more depending on your glass size.
  7. Finish off your parfait with a drizzle of honey on top for added sweetness and a touch of elegance. If you’re using sliced almonds or shredded coconut, sprinkle them on top now. It adds a lovely visual contrast and extra flavor.
  8. Serve immediately or refrigerate for up to 30 minutes before serving to allow the flavors to meld together. However, I recommend enjoying it fresh to maintain the granola’s crunch.
  • Prep Time: 15 mins
  • Cook Time: 0 mins
  • Category: Breakfast
  • Method: No-cook
  • Cuisine: American

Nutrition

  • Serving Size: 1 parfait
  • Calories: 250
  • Sugar: 20 g
  • Sodium: 50 mg
  • Fat: 5 g
  • Saturated Fat: 2 g
  • Unsaturated Fat: 3 g
  • Trans Fat: 0 g
  • Carbohydrates: 40 g
  • Fiber: 3 g
  • Protein: 10 g
  • Cholesterol: 10 mg

Keywords: Choose ripe peaches for the best flavor and texture. Use a clear glass for a beautiful presentation. For creaminess, consider whipping the yogurt before layering. Be mindful of the granola-to-yogurt ratio. Prepare yogurt and peaches ahead of time for gatherings, layering just before serving.

Did you make this recipe?

Share a photo and tag us — we can't wait to see what you've made!

Sun-Kissed Frozen Orange Cream Slush

As a child, summer days felt like they lasted forever. I remember the sticky heat wrapping around me as I played outside, my laughter mingling with the sounds of the neighborhood. But nothing could cool me down quite like the moment I’d spot my grandmother, laboring over her blender, whipping up her famous Frozen Orange Creamsicle Slush. That vibrant orange treat, with its frosty texture and sweet citrus aroma, was like a burst of sunshine in a cup. Just one sip, and I could feel the coolness wash over me, sparking pure joy.

This Frozen Orange Creamsicle Slush has a way of making you feel like a kid again. Its creamy, dreamy consistency is a delightful balance of bright orange and soft vanilla, inviting you to dive right in. The refreshing tang of orange dances on your tongue, while the smooth creaminess envelops you in a comforting embrace. It’s a nostalgic treat that’s perfect for hot summer afternoons or anytime you need a little pick-me-up.

What makes my version of this slush stand out is the addition of a hint of vanilla bean, which elevates the flavor and adds an extra layer of richness. Plus, it’s super easy to whip up with just a few simple ingredients that you probably already have on hand! So, if you’re ready to relive those sun-soaked memories, let me show you exactly how to make it.

Sun-Kissed Frozen Orange Cream Slush

Why You’ll Love This Recipe

  • Each slush is a perfect blend of creamy vanilla and zesty orange, creating a nostalgic flavor reminiscent of summer days.
  • This refreshing treat is ready in under 15 minutes, making it an ideal quick dessert for unexpected guests or hot afternoons.
  • With just 8 simple ingredients, it’s budget-friendly, ensuring you don’t have to break the bank to enjoy a delicious slush.
  • The slush has a perfectly smooth texture, thanks to the combination of ice and ice cream, providing a delightful contrast to the bright citrus flavors.
  • It’s highly customizable; you can easily adjust the sweetness and add fresh herbs for a unique twist that suits your taste.

Ingredients

  • 2 cups orange juice (freshly squeezed or store-bought)
  • 1 cup vanilla ice cream
  • 1 cup crushed ice
  • 1/2 cup milk (whole or 2%)
  • 1/4 cup granulated sugar (adjust based on sweetness preference)
  • 1 teaspoon vanilla extract
  • Zest of 1 orange (for added flavor)
  • Fresh orange slices and mint leaves (for garnish)

The star of this Frozen Orange Creamsicle Slush is the orange juice, which provides the vibrant, citrusy base. Freshly squeezed juice will yield the brightest flavor, but store-bought options can be just as convenient. If you’re opting for store-bought, choose 100% pure juice with no added sugars for the best results. Another essential ingredient is the vanilla ice cream; it adds creaminess and sweetness. You can substitute it with dairy-free ice cream if you’re looking for a vegan option. Whole or 2% milk complements the ice cream, creating a smooth blend. If you want a lower-calorie version, almond or oat milk can be good alternatives.

Lastly, the granulated sugar can be adjusted based on your sweetness preference. If you prefer a more natural sweetener, consider using honey or agave syrup. The orange zest enhances the flavor profile, providing an aromatic pop that brings the whole slush together. Don’t skip it! It adds an extra layer of brightness that makes this slush truly special.

Step-by-Step Instructions

  1. Start by preparing your ingredients. Gather 2 cups of orange juice, 1 cup of vanilla ice cream, and 1 cup of crushed ice. Make sure the ice is finely crushed, as larger chunks can make blending difficult.
  2. In a blender, combine the orange juice, vanilla ice cream, crushed ice, and 1/2 cup of milk. Add 1/4 cup of granulated sugar and 1 teaspoon of vanilla extract. If you like a sweeter slush, consider adding a bit more sugar at this stage.
  3. Add the zest of 1 orange to the blender. This step is crucial for enhancing the citrus flavor of your slush. Make sure not to include the bitter white pith—only the flavorful zest.
  4. Blend the mixture on medium-high speed for about 30-45 seconds. Stop once the ingredients are fully combined and the slush has a smooth, even consistency. If you notice large chunks of ice, blend for an additional 10-15 seconds. Avoid over-blending, as this can make the slush too liquidy.
  5. Once blended, taste the slush. If it needs more sweetness, add a little more sugar and blend for a few more seconds. If it’s too thick, you can add a splash of milk to reach your desired consistency.
  6. Pour the slush into glasses. This recipe typically serves 4, but you can easily double it for larger gatherings. Use a spoon to help guide the slush into the glasses if needed.
  7. Garnish each serving with fresh orange slices and mint leaves. The mint not only adds a pop of color but also a refreshing aroma that complements the citrus flavors beautifully.
  8. Serve immediately and enjoy! If you’ve made extra, you can refrigerate it for a short time, but it’s best enjoyed fresh.

Pro Tips for the Best Frozen Orange Creamsicle Slush

  • Don’t skip the orange zest! It’s a game-changer for flavor. Always zest before juicing to make it easier.
  • Use a high-powered blender for the best texture. A standard blender may struggle with ice, leading to uneven consistency. If you have a food processor, that can work too, but ensure the ice is finely crushed.
  • Adjust the ice-to-liquid ratio carefully. If your slush is too thick, it won’t blend well. Start with less ice and add more until you reach your preferred texture.
  • Be cautious with the sugar! Always start with the lower amount, as you can easily add more, but it’s hard to fix an overly sweet slush.
  • For a fun twist, consider adding a splash of coconut milk or a handful of fresh fruit like strawberries or pineapple. This not only enhances the flavor but also adds a beautiful color contrast.

Variations & Serving Ideas

There are countless ways to put a spin on your Frozen Orange Creamsicle Slush. Consider making a tropical version by adding in some pineapple juice or coconut milk for a delightful tropical twist. If you’re feeling adventurous, try incorporating a handful of frozen mango or peach slices for added sweetness. For a lighter version, swap out the vanilla ice cream for Greek yogurt for a creamy yet tangy alternative.

As for serving ideas, this refreshing slush pairs wonderfully with light summer dishes like grilled chicken skewers, fish tacos, or a simple salad topped with citrus vinaigrette. The bright, zesty flavors of the slush complement these dishes perfectly, making them an ideal pairing for a sunny day.

Storage, Make-Ahead & Reheating

This Frozen Orange Creamsicle Slush is best enjoyed fresh, but if you have leftovers, you can store them in an airtight container in the fridge for up to 2 days. Just keep in mind that the slush may lose some of its texture over time as the ice melts. It doesn’t freeze well, as the ice will turn into a solid block. If you must freeze it, blend again after thawing to restore the slushy consistency. This treat is best the day you make it, as the flavors meld together beautifully overnight, enhancing its deliciousness.

Frequently Asked Questions

Can I make Frozen Orange Creamsicle Slush ahead of time?

Yes — in fact, it tastes even better the next day as the flavors meld. However, it’s best to enjoy it fresh, as the texture can change if stored for too long. If you need to prepare it ahead, keep it in the fridge and re-blend before serving.

What kind of orange juice should I use?

For the best flavor, use freshly squeezed orange juice. However, if you’re short on time, opt for 100% pure store-bought juice without added sugars. This will ensure that your slush remains flavorful and refreshing.

Can I substitute the vanilla ice cream?

Absolutely! If you’re looking for a dairy-free option, coconut milk ice cream or a non-dairy vanilla ice cream can work wonderfully. They will still provide the creamy texture and sweetness you desire.

How can I adjust the sweetness of my slush?

You can easily adjust the sweetness by modifying the amount of sugar added. Start with 1/4 cup and taste the mixture before blending. If you prefer it sweeter, add more sugar gradually until it reaches your desired level.

What should I do if my slush is too thick?

If your slush is too thick, simply add a splash of milk or orange juice and blend again. This will help achieve a more drinkable consistency while maintaining the slushy texture. Adjust gradually to reach your preferred thickness.

Sun-Kissed Frozen Orange Cream Slush

Final Thoughts

The Frozen Orange Creamsicle Slush is a delightful blend of refreshing citrus and creamy goodness, making it a perfect treat for warm days or any time you crave a taste of nostalgia. The way the bright orange flavor dances with the creamy texture truly elevates this slush, transforming it into a satisfying escape from the everyday.

This is the kind of recipe I come back to again and again, especially when I’m looking to cool down or impress guests at a summer gathering. It’s simple to make and always brings smiles all around! I encourage you to try this recipe for yourself—don’t hesitate to share your results or even put your own spin on it. Happy slushing!

Print
clock clock iconcutlery cutlery iconflag flag iconfolder folder iconinstagram instagram iconpinterest pinterest iconfacebook facebook iconprint print iconsquares squares iconheart heart iconheart solid heart solid icon

Frozen Orange Creamsicle Slush


  • Author: Lily author
  • Total Time: 15 minutes
  • Yield: 4 servings 1x
Pin Recipe
Print Recipe

Description

This Frozen Orange Creamsicle Slush is a refreshing treat that combines creamy vanilla and zesty orange flavors. Perfect for hot summer days, it brings back nostalgic memories with every sip.


Ingredients

Scale
  • 2 cups orange juice (freshly squeezed or store-bought)
  • 1 cup vanilla ice cream
  • 1 cup crushed ice
  • 1/2 cup milk (whole or 2%)
  • 1/4 cup granulated sugar (adjust based on sweetness preference)
  • 1 teaspoon vanilla extract
  • Zest of 1 orange (for added flavor)
  • Fresh orange slices and mint leaves (for garnish)

Instructions

  1. Start by preparing your ingredients. Gather 2 cups of orange juice, 1 cup of vanilla ice cream, and 1 cup of crushed ice. Make sure the ice is finely crushed, as larger chunks can make blending difficult.
  2. In a blender, combine the orange juice, vanilla ice cream, crushed ice, and 1/2 cup of milk. Add 1/4 cup of granulated sugar and 1 teaspoon of vanilla extract. If you like a sweeter slush, consider adding a bit more sugar at this stage.
  3. Add the zest of 1 orange to the blender. This step is crucial for enhancing the citrus flavor of your slush. Make sure not to include the bitter white pith—only the flavorful zest.
  4. Blend the mixture on medium-high speed for about 30-45 seconds. Stop once the ingredients are fully combined and the slush has a smooth, even consistency. If you notice large chunks of ice, blend for an additional 10-15 seconds. Avoid over-blending, as this can make the slush too liquidy.
  5. Once blended, taste the slush. If it needs more sweetness, add a little more sugar and blend for a few more seconds. If it’s too thick, you can add a splash of milk to reach your desired consistency.
  6. Pour the slush into glasses. This recipe typically serves 4, but you can easily double it for larger gatherings. Use a spoon to help guide the slush into the glasses if needed.
  7. Garnish each serving with fresh orange slices and mint leaves. The mint not only adds a pop of color but also a refreshing aroma that complements the citrus flavors beautifully.
  8. Serve immediately and enjoy! If you’ve made extra, you can refrigerate it for a short time, but it's best enjoyed fresh.
  • Prep Time: 15 min
  • Cook Time: 0 min
  • Category: Dessert
  • Method: Blending
  • Cuisine: American

Nutrition

  • Serving Size: 1 serving
  • Calories: 200
  • Sugar: 30 g
  • Sodium: 50 mg
  • Fat: 5 g
  • Saturated Fat: 3 g
  • Unsaturated Fat: 2 g
  • Trans Fat: 0 g
  • Carbohydrates: 40 g
  • Fiber: 1 g
  • Protein: 2 g
  • Cholesterol: 20 mg

Keywords: Don't skip the orange zest! It's a game-changer for flavor. Always zest before juicing to make it easier.

Did you make this recipe?

Share a photo and tag us — we can't wait to see what you've made!

Zesty Lemon Poppy Seed Delight

One rainy afternoon, I found myself in my grandmother’s cozy kitchen, the kind that always smelled like warmth and love. She was whipping up her famous Lemon Poppy Seed Loaf, a recipe that had been passed down through generations. As the batter came together, the zesty aroma of fresh lemons filled the air, mingling perfectly with the nutty fragrance of poppy seeds. I can still picture her, apron-clad, as she expertly drizzled a vibrant citrus icing over the loaf, creating a glossy, sun-kissed finish that beckoned us to dive in. It was a moment that sparked my own passion for baking, and this recipe has become a cherished staple in my home ever since.

When you take a bite of this Lemon Poppy Seed Loaf, it’s like a burst of sunshine on your palate. The loaf is beautifully golden, with a tender crumb that melts in your mouth. Each slice is speckled with tiny poppy seeds, adding a delightful crunch that contrasts beautifully with the tangy sweetness of the lemon. And that citrus icing? It’s the finishing touch that elevates this loaf from ordinary to extraordinary, with its bright, zesty flavor dancing on your taste buds.

This recipe stands out because it embraces simplicity while delivering on flavor. I’ve added a hint of vanilla to the batter, enhancing the overall taste and making it even more indulgent. Trust me, once you make this Lemon Poppy Seed Loaf With Citrus Icing, it’ll become a go-to in your baking repertoire.

So, let me show you exactly how to make it!

Zesty Lemon Poppy Seed Delight

Why You’ll Love This Recipe

  • Moist and tender crumb that melts in your mouth, thanks to the perfect balance of butter and buttermilk.
  • Bright, zesty lemon flavor paired with crunchy poppy seeds, creating a delightful texture and taste experience.
  • Easy to whip up in just about an hour, perfect for last-minute gatherings or a cozy afternoon treat.
  • Budget-friendly with everyday ingredients, making it an accessible option for all home bakers.
  • The citrus icing adds a sweet tang that elevates the loaf, turning a simple recipe into a showstopper!

Ingredients

  • 1 ½ cups (190g) all-purpose flour
  • 1 teaspoon baking powder
  • ½ teaspoon baking soda
  • ½ teaspoon salt
  • 3 tablespoons poppy seeds
  • ½ cup (115g) unsalted butter, softened to room temperature
  • 1 cup (200g) granulated sugar
  • 2 large eggs
  • 1 teaspoon vanilla extract
  • 1 teaspoon lemon zest (from about 1 medium lemon)
  • ½ cup (120ml) buttermilk
  • 2 tablespoons fresh lemon juice

For the Citrus Icing:

  • 1 cup (120g) powdered sugar
  • 2 tablespoons fresh lemon juice
  • 1 tablespoon orange juice
  • 1 teaspoon lemon zest (for garnish, optional)

Let’s dive into the key ingredients that make this Lemon Poppy Seed Loaf so special. The all-purpose flour provides the structure and base for the loaf, while the baking powder and baking soda ensure it rises perfectly, giving the loaf a light texture. For a gluten-free variation, you could substitute the flour with a gluten-free all-purpose blend. Poppy seeds not only add a delightful crunch but also contribute to the unique flavor profile that pairs well with the citrus notes.

Unsalted butter is crucial for achieving the buttery richness that makes this loaf so moist. If you’re looking for a dairy-free option, coconut oil or a vegan butter can be used instead. The buttermilk is another essential component, providing acidity that activates the baking soda for a fluffy texture. If you don’t have buttermilk on hand, you can easily make a substitute by mixing ½ cup of milk with 1 tablespoon of vinegar or lemon juice and letting it sit for about 5 minutes.

Step-by-Step Instructions

  1. Preheat your oven to 350°F (175°C). Grease a 9×5-inch loaf pan or line it with parchment paper for easy removal later.
  2. In a medium mixing bowl, whisk together 1 ½ cups of all-purpose flour, 1 teaspoon of baking powder, ½ teaspoon of baking soda, ½ teaspoon of salt, and 3 tablespoons of poppy seeds. This helps to evenly distribute the baking agents and ensures a uniform rise.
  3. In a large mixing bowl, cream together ½ cup of softened unsalted butter and 1 cup of granulated sugar using an electric mixer on medium speed for about 3-4 minutes, until the mixture is light and fluffy. Make sure to scrape down the sides of the bowl occasionally.
  4. Add 2 large eggs, 1 teaspoon of vanilla extract, and 1 teaspoon of lemon zest to the creamed butter and sugar, mixing until fully combined. You want a smooth consistency, so ensure there are no lumps of butter.
  5. In a small bowl, combine ½ cup of buttermilk and 2 tablespoons of fresh lemon juice. Alternately add the dry ingredients and buttermilk mixture to the butter mixture, starting and ending with the dry ingredients. Mix just until combined; do not overmix, as this can lead to a dense loaf.
  6. Pour the batter into the prepared loaf pan. Smooth the top with a spatula, ensuring it’s even. Bake in the preheated oven for 50-60 minutes, or until a toothpick inserted in the center comes out clean. The edges should be lightly golden brown, and the center should feel just set.
  7. Once baked, remove the loaf from the oven and allow it to cool in the pan for about 10 minutes. Then, transfer it to a wire rack to cool completely. Resist the urge to slice too soon, as it will be crumbly if it’s still warm.
  8. While the loaf is cooling, prepare the citrus icing. In a medium bowl, whisk together 1 cup of powdered sugar, 2 tablespoons of fresh lemon juice, and 1 tablespoon of orange juice until smooth. If the icing is too thick, you can add a little more juice to reach your desired consistency.
  9. Once the loaf is completely cool, drizzle the citrus icing over the top. If you like, sprinkle with an additional teaspoon of lemon zest for an extra pop of flavor and color.

Pro Tips for the Best Lemon Poppy Seed Loaf With Citrus Icing

  • Be careful not to overmix your batter; this is a common mistake that can lead to a dense loaf. Mix just until the dry ingredients are incorporated for a light and fluffy texture.
  • Use room temperature ingredients, especially the butter and eggs. This helps to create a smoother batter and ensures even baking. Take your eggs out of the fridge about 30 minutes before you start.
  • For a more pronounced lemon flavor, consider adding a little lemon extract in addition to the zest and juice. Just a half teaspoon can elevate the citrus notes significantly.
  • When measuring your flour, spoon it into the measuring cup and level it off with a knife instead of scooping directly from the bag. This prevents packing and ensures you don’t end up with a dry loaf.
  • Invest in a good quality loaf pan; it makes a difference in heat distribution, which ensures even baking. If your pan is dark-coated, reduce the oven temperature by 25°F to prevent over-browning.

Variations & Serving Ideas

For a delightful twist, consider adding blueberries or raspberries to the batter for a fruity burst of flavor. You can also experiment with different citrus fruits—try lime or grapefruit zest and juice for a refreshing change. For a healthier option, substitute half of the all-purpose flour with whole wheat flour for added fiber without compromising too much on texture.

This Lemon Poppy Seed Loaf pairs beautifully with a light salad, such as a mixed greens salad with a vinaigrette, or a cup of tea for a cozy afternoon treat. It also complements a creamy cheese platter, as the acidity of the loaf balances rich cheeses perfectly. Lastly, a scoop of vanilla ice cream on the side creates a delightful contrast of temperatures and flavors!

Storage, Make-Ahead & Reheating

This Lemon Poppy Seed Loaf can be stored at room temperature for up to 3 days if wrapped tightly in plastic wrap. If you want to keep it longer, it freezes well for up to 3 months. To freeze, wrap the loaf tightly in plastic wrap and then in aluminum foil to prevent freezer burn.

When you’re ready to enjoy it again, simply thaw it in the fridge overnight. Reheat individual slices in the microwave for 15-20 seconds or in a toaster oven until warmed through. Interestingly, many people find that this loaf tastes even better the next day, as the flavors have time to meld!

Frequently Asked Questions

Can I make Lemon Poppy Seed Loaf With Citrus Icing ahead of time?

Yes — in fact, it tastes even better the next day! You can make the loaf a day in advance, allowing the flavors to develop. Just be sure to store it in an airtight container to maintain its moisture.

Can I substitute the poppy seeds?

Absolutely! If you don’t have poppy seeds on hand or prefer an alternative, you can use sesame seeds for a similar crunch or omit them entirely for a smooth loaf.

What can I use instead of buttermilk?

If you don’t have buttermilk, you can easily create a substitute by mixing ½ cup of milk (dairy or plant-based) with 1 tablespoon of vinegar or lemon juice. Let it sit for 5 minutes before using in the recipe.

How can I make this recipe gluten-free?

To make a gluten-free version of this Lemon Poppy Seed Loaf, substitute the all-purpose flour with a gluten-free all-purpose flour blend. Just ensure that the blend contains a binding agent like xanthan gum for the best results.

What is the best way to store leftover loaf?

Leftover Lemon Poppy Seed Loaf should be stored in an airtight container at room temperature for up to 3 days. For longer storage, wrap it tightly and freeze for up to 3 months. Thaw it before serving for the best texture.

Zesty Lemon Poppy Seed Delight

Final Thoughts

The Lemon Poppy Seed Loaf with Citrus Icing is truly a delightful treat that brings a burst of brightness to any occasion. The zesty lemon flavor combined with the subtle crunch of poppy seeds creates a satisfying balance, while the citrus icing adds a touch of sweetness that perfectly complements the loaf’s tanginess.

This is the kind of recipe I come back to again and again, especially when I want to brighten up a gloomy day or celebrate a small victory. The aroma that fills the kitchen as it bakes is absolutely heavenly! I encourage you to give this recipe a try; you might just find it becoming a beloved staple in your home. Don’t forget to share your results or even add your own unique twist—I can’t wait to see what you create!

Print
clock clock iconcutlery cutlery iconflag flag iconfolder folder iconinstagram instagram iconpinterest pinterest iconfacebook facebook iconprint print iconsquares squares iconheart heart iconheart solid heart solid icon

Lemon Poppy Seed Loaf


  • Author: Lily author
  • Total Time: 16 minute
  • Yield: 1 loaf 1x
Pin Recipe
Print Recipe

Description

This Lemon Poppy Seed Loaf is a delightful treat that combines zesty lemon flavor with crunchy poppy seeds. Topped with a citrus icing, it’s perfect for any occasion.


Ingredients

Scale
  • 1 ½ cups (190g) all-purpose flour
  • 1 teaspoon baking powder
  • ½ teaspoon baking soda
  • ½ teaspoon salt
  • 3 tablespoons poppy seeds
  • ½ cup (115g) unsalted butter, softened to room temperature
  • 1 cup (200g) granulated sugar
  • 2 large eggs
  • 1 teaspoon vanilla extract
  • 1 teaspoon lemon zest (from about 1 medium lemon)
  • ½ cup (120ml) buttermilk
  • 2 tablespoons fresh lemon juice
  • 1 cup (120g) powdered sugar
  • 2 tablespoons fresh lemon juice
  • 1 tablespoon orange juice
  • 1 teaspoon lemon zest (for garnish, optional)

Instructions

  1. Preheat your oven to 350°F (175°C). Grease a 9×5-inch loaf pan or line it with parchment paper for easy removal later.
  2. In a medium mixing bowl, whisk together 1 ½ cups of all-purpose flour, 1 teaspoon of baking powder, ½ teaspoon of baking soda, ½ teaspoon of salt, and 3 tablespoons of poppy seeds. This helps to evenly distribute the baking agents and ensures a uniform rise.
  3. In a large mixing bowl, cream together ½ cup of softened unsalted butter and 1 cup of granulated sugar using an electric mixer on medium speed for about 3-4 minutes, until the mixture is light and fluffy. Make sure to scrape down the sides of the bowl occasionally.
  4. Add 2 large eggs, 1 teaspoon of vanilla extract, and 1 teaspoon of lemon zest to the creamed butter and sugar, mixing until fully combined. You want a smooth consistency, so ensure there are no lumps of butter.
  5. In a small bowl, combine ½ cup of buttermilk and 2 tablespoons of fresh lemon juice. Alternately add the dry ingredients and buttermilk mixture to the butter mixture, starting and ending with the dry ingredients. Mix just until combined; do not overmix, as this can lead to a dense loaf.
  6. Pour the batter into the prepared loaf pan. Smooth the top with a spatula, ensuring it’s even. Bake in the preheated oven for 50-60 minutes, or until a toothpick inserted in the center comes out clean. The edges should be lightly golden brown, and the center should feel just set.
  7. Once baked, remove the loaf from the oven and allow it to cool in the pan for about 10 minutes. Then, transfer it to a wire rack to cool completely. Resist the urge to slice too soon, as it will be crumbly if it’s still warm.
  8. While the loaf is cooling, prepare the citrus icing. In a medium bowl, whisk together 1 cup of powdered sugar, 2 tablespoons of fresh lemon juice, and 1 tablespoon of orange juice until smooth. If the icing is too thick, you can add a little more juice to reach your desired consistency.
  9. Once the loaf is completely cool, drizzle the citrus icing over the top. If you like, sprinkle with an additional teaspoon of lemon zest for an extra pop of flavor and color.
  • Prep Time: 15 mins
  • Cook Time: 50-60 mins
  • Category: Dessert
  • Method: Baking
  • Cuisine: American

Nutrition

  • Serving Size: 1 slice
  • Calories: 200
  • Sugar: 15 g
  • Sodium: 150 mg
  • Fat: 8 g
  • Saturated Fat: 5 g
  • Unsaturated Fat: 3 g
  • Trans Fat: 0 g
  • Carbohydrates: 30 g
  • Fiber: 1 g
  • Protein: 3 g
  • Cholesterol: 40 mg

Keywords: Be careful not to overmix your batter; this is a common mistake that can lead to a dense loaf. Use room temperature ingredients for a smoother batter and even baking.

Did you make this recipe?

Share a photo and tag us — we can't wait to see what you've made!

  • Privacy Policy
  • Terms Of Service
  • Contact
  • About
  • GDPR

Copyright © 2025 Homesmad