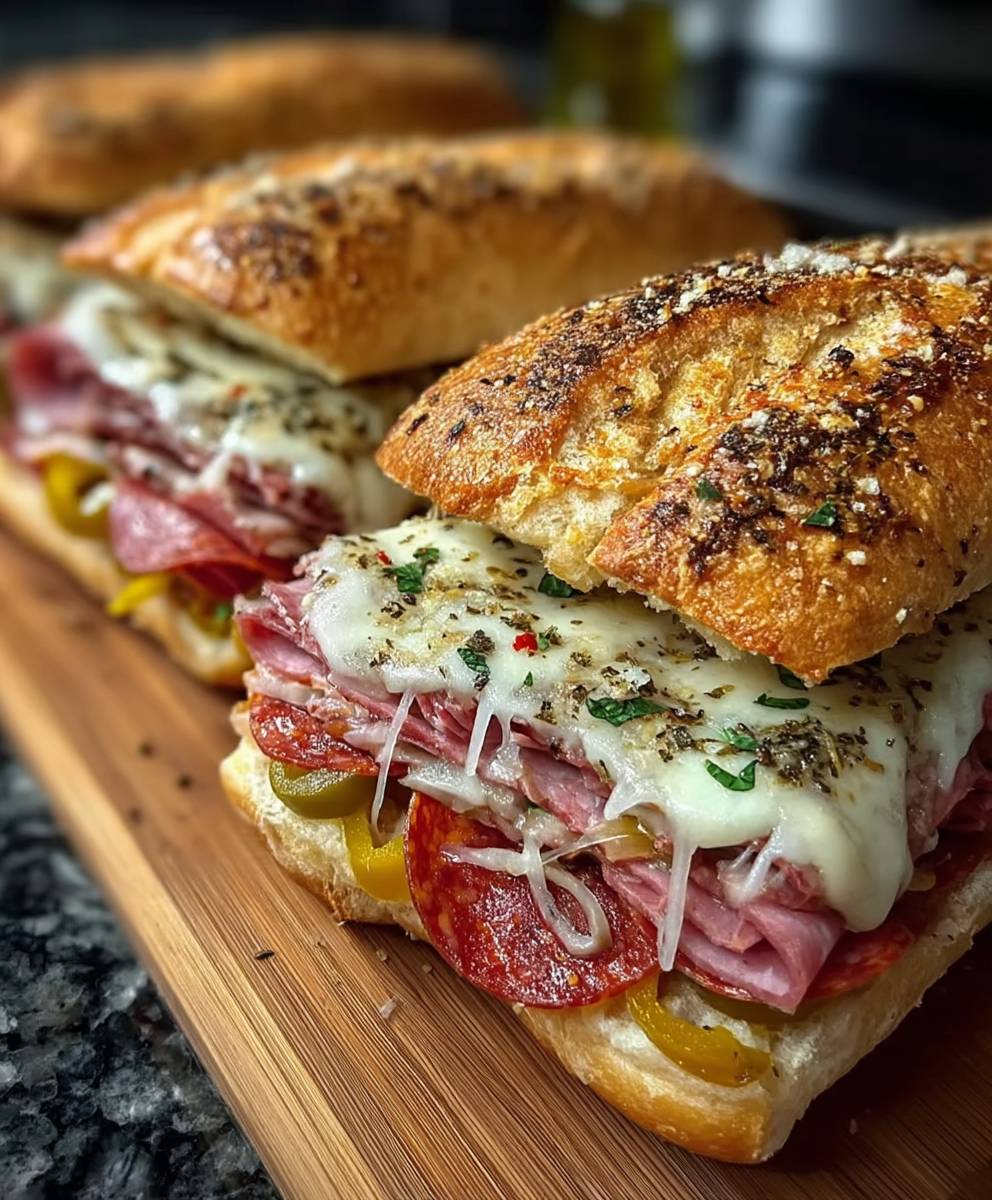
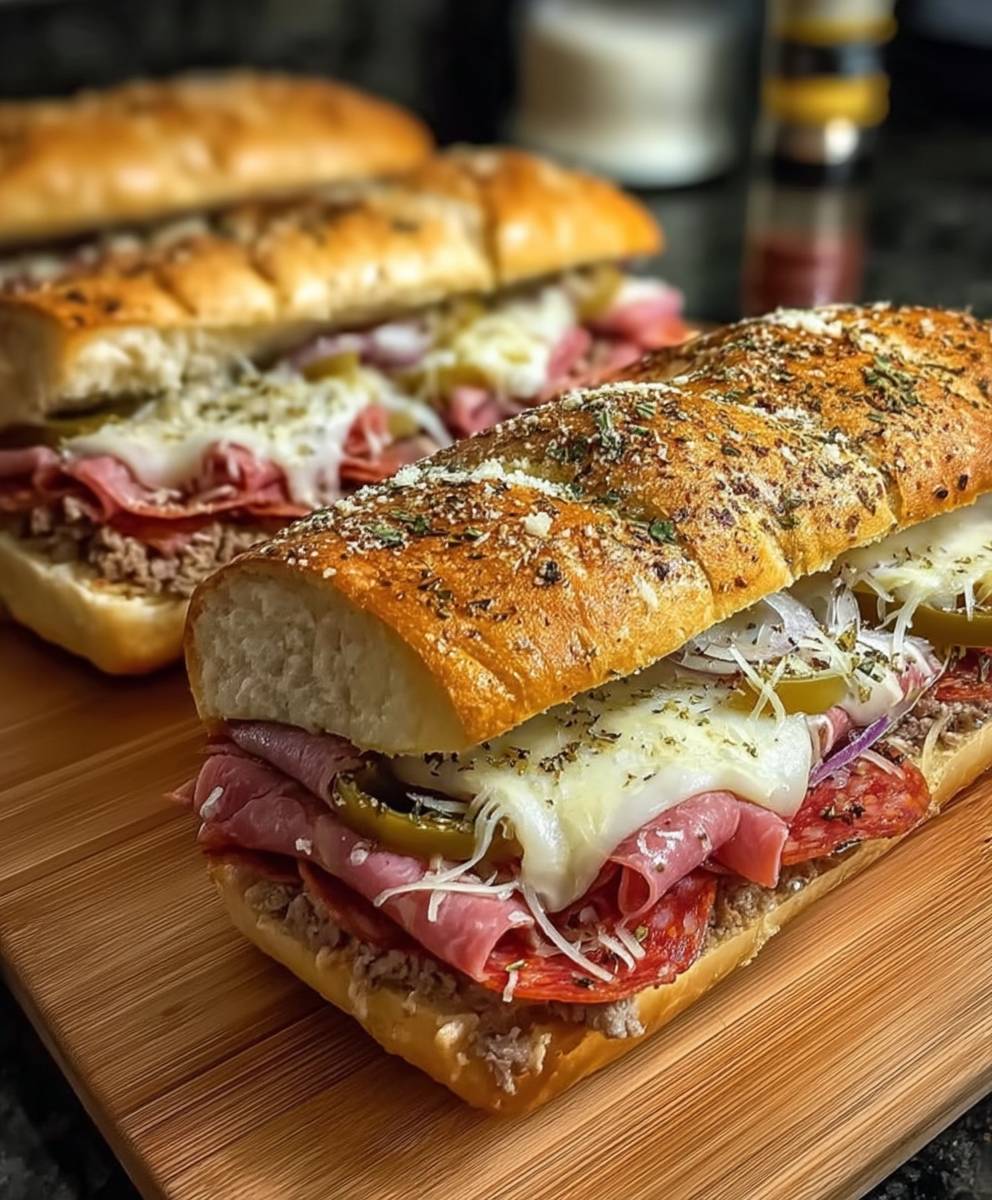
Baked Italian Sub Sandwiches: Is there anything more satisfying than biting into a warm, crusty sandwich bursting with layers of savory Italian meats, melted cheese, and tangy toppings? I think not! These aren’t your average cold-cut subs; we’re taking things to a whole new level by baking them to golden-brown perfection. This simple step elevates the flavors and textures, creating an unforgettable sandwich experience.
The Italian sub sandwich, a beloved staple in delis across America, has roots that trace back to the late 19th and early 20th centuries, when Italian immigrants began opening sandwich shops in cities like New York, Philadelphia, and Boston. These shops offered a taste of home, featuring cured meats, cheeses, and vegetables piled high on crusty bread. While the exact origin is debated, the enduring popularity of the Italian sub is undeniable.
People adore baked Italian sub sandwiches for a multitude of reasons. The combination of warm, melty cheese with the crispness of the toasted bread is simply irresistible. The baking process also melds all the flavors together, creating a harmonious blend of savory, salty, and tangy notes. Plus, they are incredibly convenient! Perfect for a quick lunch, a casual dinner, or even a crowd-pleasing party snack, these sandwiches are easy to assemble and require minimal effort. So, gather your ingredients, preheat your oven, and let’s create some truly amazing baked Italian sub sandwiches that will have everyone coming back for more!
Ingredients:
- 1 pound Italian sausage, casings removed
- 1/2 cup chopped onion
- 1/2 cup chopped green bell pepper
- 1 (15 ounce) can tomato sauce
- 1 (6 ounce) can tomato paste
- 1 teaspoon dried oregano
- 1/2 teaspoon dried basil
- 1/4 teaspoon garlic powder
- 1/4 teaspoon salt
- 1/4 teaspoon black pepper
- 1 tablespoon olive oil
- 6 Italian sub rolls, split lengthwise
- 12 slices provolone cheese
- 1/2 cup sliced banana peppers (optional)
- 1/4 cup grated Parmesan cheese
Preparing the Sausage Mixture:
Okay, let’s get started! The heart of these baked Italian subs is the savory sausage mixture. This is where all the delicious flavors come together, so pay close attention to the details.
- Brown the Sausage: In a large skillet, heat the olive oil over medium heat. Add the Italian sausage, breaking it up with a spoon as it cooks. You want to cook the sausage until it’s completely browned and no longer pink. This usually takes about 7-10 minutes. Make sure to stir it frequently to prevent sticking and ensure even cooking.
- Sauté the Vegetables: Once the sausage is browned, add the chopped onion and green bell pepper to the skillet. Cook until the vegetables are softened, about 5-7 minutes. Stir occasionally to prevent burning. The onions should become translucent and the peppers should be slightly tender.
- Add Tomato Sauce and Paste: Now, pour in the tomato sauce and tomato paste. Stir well to combine everything. The tomato paste will help thicken the sauce and add a richer flavor.
- Season the Sauce: Add the dried oregano, dried basil, garlic powder, salt, and black pepper to the skillet. Stir everything together thoroughly. These spices are essential for that classic Italian flavor.
- Simmer the Sauce: Reduce the heat to low, cover the skillet, and let the sauce simmer for at least 30 minutes, or even longer if you have the time. The longer it simmers, the more the flavors will meld together. Stir occasionally to prevent sticking and burning. If the sauce becomes too thick, you can add a little water, one tablespoon at a time, until it reaches your desired consistency. I usually let mine simmer for about an hour for the best flavor.
Assembling the Sub Sandwiches:
Now comes the fun part – putting together our delicious subs! This is where we layer all those amazing flavors onto the rolls.
- Preheat the Oven: Preheat your oven to 350°F (175°C). This will ensure that the sandwiches are heated evenly and the cheese melts perfectly.
- Prepare the Sub Rolls: Split the Italian sub rolls lengthwise. You want to create a top and bottom half for each sandwich.
- Layer the Provolone Cheese: Place two slices of provolone cheese on the bottom half of each sub roll. The cheese will act as a barrier to prevent the bread from getting soggy from the sauce.
- Add the Sausage Mixture: Spoon a generous amount of the sausage mixture over the provolone cheese on each sub roll. Don’t be shy – you want each bite to be packed with flavor!
- Add Banana Peppers (Optional): If you like a little kick, sprinkle some sliced banana peppers over the sausage mixture. This adds a nice tangy and slightly spicy flavor.
- Top with More Provolone Cheese: Place two more slices of provolone cheese on top of the sausage mixture and banana peppers (if using). This will create a cheesy top layer that melts beautifully in the oven.
- Sprinkle with Parmesan Cheese: Sprinkle the grated Parmesan cheese over the top of each sub sandwich. This adds a salty and nutty flavor that complements the provolone perfectly.
- Place the Top Bun: Carefully place the top half of each sub roll over the cheese and filling.
Baking the Sub Sandwiches:
Almost there! Now we just need to bake these beauties until they’re hot, cheesy, and irresistible.
- Prepare Baking Sheet: Line a baking sheet with parchment paper. This will prevent the sandwiches from sticking to the pan and make cleanup a breeze.
- Place Sandwiches on Baking Sheet: Place the assembled sub sandwiches on the prepared baking sheet. Make sure they are not too close together so the heat can circulate evenly.
- Bake the Sandwiches: Bake in the preheated oven for 15-20 minutes, or until the cheese is melted and bubbly and the bread is lightly toasted. Keep an eye on them to prevent burning. The baking time may vary depending on your oven.
- Check for Doneness: To check if the sandwiches are done, gently press down on the top of one. It should feel firm and the cheese should be melted and gooey.
- Let Cool Slightly: Remove the baking sheet from the oven and let the sandwiches cool for a few minutes before serving. This will prevent you from burning your mouth on the hot cheese.
Serving Suggestions:
These baked Italian sub sandwiches are delicious on their own, but here are a few serving suggestions to make them even better:
- Serve with a side salad: A simple green salad with a vinaigrette dressing is a refreshing complement to the rich and savory sandwiches.
- Serve with potato chips: Classic potato chips are always a crowd-pleaser.
- Serve with coleslaw: Creamy coleslaw adds a cool and tangy contrast to the hot sandwiches.
- Cut into smaller portions: If you’re serving these as appetizers, you can cut each sandwich into smaller portions.
- Add extra toppings: Feel free to add extra toppings like lettuce, tomato, or pickles after baking.
Tips and Variations:
Want to customize these baked Italian subs to your liking? Here are a few tips and variations to try:
- Use different types of sausage: You can use sweet Italian sausage, hot Italian sausage, or even a combination of both.
- Add different vegetables: Try adding mushrooms, onions, or roasted red peppers to the sausage mixture.
- Use different types of cheese: Mozzarella, Monterey Jack, or pepper jack cheese would also be delicious.
- Add a sprinkle of red pepper flakes: For an extra kick, add a sprinkle of red pepper flakes to the sausage mixture.
- Toast the sub rolls: For a crispier sandwich, toast the sub rolls before adding the filling.
- Make it a grinder: Add shredded lettuce, sliced tomatoes, and a drizzle of Italian dressing after baking to make it a grinder.
- Make it ahead of time: You can assemble the sandwiches ahead of time and store them in the refrigerator until you’re ready to bake them. Just add a few extra minutes to the baking time.
Storage Instructions:
If you have any leftover baked Italian sub sandwiches, you can store them in the refrigerator for up to 3 days. To reheat, wrap them in foil and bake in a preheated oven at 350°F (175°C) for about 10-15 minutes, or until heated through. You can also microwave them, but the bread may become a little soggy.
Enjoy!
I hope you enjoy these delicious baked Italian sub sandwiches as much as I do! They’re perfect for a quick and easy weeknight meal, a party, or a game day gathering. Let me know in the comments below if you try this recipe and what you think!

Conclusion:
This isn’t just another sandwich recipe; it’s a flavor explosion waiting to happen! I truly believe these Baked Italian Sub Sandwiches are a must-try for anyone who loves a hearty, satisfying meal. The combination of warm, crusty bread, melted cheese, and savory Italian meats is simply irresistible. It’s the perfect dish for a casual weeknight dinner, a weekend get-together with friends, or even a fun and easy party appetizer.
What makes this recipe so special is the way the baking process melds all the flavors together. The cheese becomes gooey and delicious, the meats release their savory juices, and the bread gets perfectly toasted. It’s a symphony of textures and tastes that will leave you wanting more. Plus, the fact that you can assemble these sandwiches ahead of time makes them incredibly convenient for busy schedules.
But the best part? This recipe is incredibly versatile! Feel free to experiment with different types of Italian meats. Prosciutto, salami, capicola – the possibilities are endless! You can also customize the cheese to your liking. Provolone is a classic choice, but mozzarella, fontina, or even a blend of Italian cheeses would work beautifully.
And don’t forget the toppings! While I’ve suggested a simple combination of lettuce, tomato, and onion, you can add your own personal touch. Roasted red peppers, pepperoncini, olives, or a drizzle of balsamic glaze would all be fantastic additions. For a spicier kick, try adding a pinch of red pepper flakes or a drizzle of hot sauce.
Serving suggestions? These Baked Italian Sub Sandwiches are delicious on their own, but they also pair perfectly with a simple side salad, some crispy potato chips, or a bowl of creamy tomato soup. For a more substantial meal, you could serve them with a side of pasta salad or a platter of fresh vegetables and dip.
Variations to Explore:
* Vegetarian Option: Swap out the Italian meats for grilled vegetables like zucchini, eggplant, and bell peppers. Add a layer of pesto for extra flavor.
* Mini Subs: Use slider buns instead of full-sized sub rolls to create bite-sized appetizers.
* Pizza Sub: Add a layer of pizza sauce and your favorite pizza toppings before baking for a fun twist.
* Garlic Bread Subs: Brush the sub rolls with garlic butter before assembling the sandwiches for an extra layer of flavor.
I’m so excited for you to try this recipe! I know you’re going to love it as much as I do. It’s a guaranteed crowd-pleaser that’s sure to become a staple in your recipe repertoire.
So, what are you waiting for? Gather your ingredients, preheat your oven, and get ready to experience the deliciousness of these Baked Italian Sub Sandwiches. I promise you won’t be disappointed!
Once you’ve made them, I’d love to hear about your experience. Share your photos and comments on social media using [Your Hashtag Here] and let me know what variations you tried. Did you add any special toppings? Did you use a different type of cheese? I’m always looking for new and creative ways to make this recipe even better. Happy baking (and sandwich-making)! I can’t wait to see what you create!
Baked Italian Sub Sandwiches: The Ultimate Recipe & Guide
Savory sausage, peppers, onions, and melted provolone cheese piled high on baked Italian sub rolls. A quick and easy meal for weeknights, parties, or game day!
Ingredients
Instructions
Recipe Notes
- Sausage: Use sweet, hot, or a combination of Italian sausage.
- Vegetables: Add mushrooms, onions, or roasted red peppers to the sausage mixture.
- Cheese: Mozzarella, Monterey Jack, or pepper jack cheese can be substituted.
- Spice: Add a sprinkle of red pepper flakes for extra heat.
- Crispiness: Toast the sub rolls before adding the filling for a crispier sandwich.
- Grinder: Add shredded lettuce, sliced tomatoes, and Italian dressing after baking to make it a grinder.
- Make Ahead: Assemble the sandwiches ahead of time and store them in the refrigerator until ready to bake. Add a few extra minutes to the baking time.
- Storage: Store leftovers in the refrigerator for up to 3 days. Reheat in a foil-wrapped oven at 350°F (175°C) for 10-15 minutes, or microwave (bread may become soggy).


