Baked Ranch Chicken: Just the name conjures up images of crispy, flavorful chicken, doesn’t it? I’m thrilled to share this incredibly easy and delicious recipe with you. Forget complicated marinades and lengthy prep times; this dish is all about maximum flavor with minimum effort.
While ranch dressing might seem like a modern American invention (and it largely is!), the concept of buttermilk-based dressings has roots stretching back to European dairy traditions. Ranch, as we know it, was born in the 1950s, and its creamy, tangy flavor quickly captured hearts across the nation. It’s no surprise that pairing it with chicken became a beloved combination!
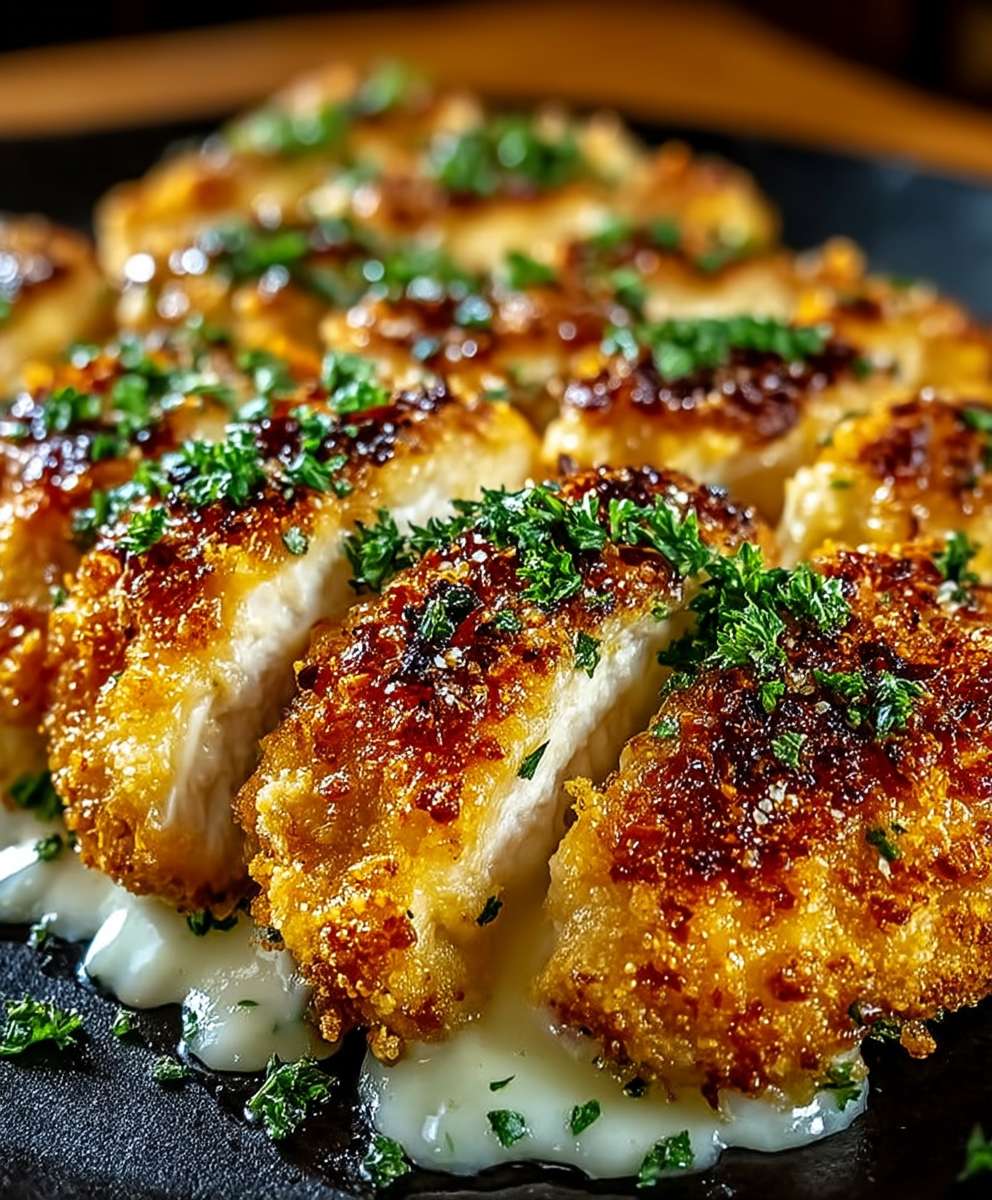
What makes baked ranch chicken so irresistible? It’s the perfect balance of textures and tastes. The chicken emerges from the oven juicy and tender on the inside, with a wonderfully crispy, flavorful coating on the outside. The ranch seasoning infuses every bite with that signature creamy, tangy, and slightly herby flavor that everyone loves. Plus, it’s incredibly versatile! Serve it with your favorite sides for a complete meal, or slice it up for salads and sandwiches. Whether you’re a seasoned cook or just starting out, this recipe is guaranteed to be a crowd-pleaser. Get ready to experience chicken perfection!

Ingredients:
- 1.5 lbs boneless, skinless chicken breasts
- 1 packet (1 oz) dry ranch dressing mix
- 1/2 cup grated Parmesan cheese
- 1/4 cup bread crumbs (plain or Italian seasoned)
- 1/4 cup mayonnaise
- 2 tablespoons milk
- 1 tablespoon olive oil (optional, for drizzling)
- Salt and pepper to taste
- Optional: Fresh parsley, chopped, for garnish
Preparing the Chicken and Ranch Mixture
- Preheat your oven to 375°F (190°C). This is crucial for even cooking. Make sure your oven is properly preheated before you even think about putting the chicken in!
- Prepare the chicken breasts. If your chicken breasts are particularly thick, I recommend pounding them to an even thickness (about 1/2 inch). This ensures they cook evenly and prevents some parts from being overcooked while others are still raw. You can do this by placing the chicken breasts between two sheets of plastic wrap and gently pounding with a meat mallet or rolling pin.
- Season the chicken. Lightly season both sides of the chicken breasts with salt and pepper. Remember that the ranch dressing mix already contains salt, so be careful not to over-salt. A little goes a long way!
- Prepare the ranch mixture. In a medium-sized bowl, combine the dry ranch dressing mix, Parmesan cheese, bread crumbs, mayonnaise, and milk. Mix well until everything is thoroughly combined and you have a smooth, creamy mixture. If the mixture seems too thick, add a teaspoon of milk at a time until it reaches a spreadable consistency.
- Coat the chicken. Generously spread the ranch mixture evenly over the top of each chicken breast. Make sure to cover the entire surface, as this is what will create that delicious, crispy coating. Don’t be shy with the mixture!
Baking the Ranch Chicken
- Prepare the baking dish. Lightly grease a baking dish with cooking spray or olive oil. This will prevent the chicken from sticking to the dish and make cleanup much easier. You can also line the dish with parchment paper for even easier cleanup.
- Arrange the chicken. Place the coated chicken breasts in the prepared baking dish, making sure they are not touching each other. This allows for even cooking and browning.
- Optional: Drizzle with olive oil. If you want an extra crispy and golden-brown crust, drizzle a small amount of olive oil over the top of each chicken breast. This is entirely optional, but I find it adds a nice touch.
- Bake the chicken. Bake in the preheated oven for 25-30 minutes, or until the chicken is cooked through and the internal temperature reaches 165°F (74°C). Use a meat thermometer to ensure accuracy. The ranch coating should be golden brown and slightly crispy.
- Check for doneness. To ensure the chicken is fully cooked, insert a meat thermometer into the thickest part of the breast. If it reads 165°F (74°C), it’s ready! If not, continue baking for a few more minutes and check again.
- Broil for extra crispiness (optional). If you want an even crispier crust, you can broil the chicken for the last 1-2 minutes of cooking time. Keep a close eye on it, as it can burn quickly under the broiler.
Serving and Enjoying Your Baked Ranch Chicken
- Rest the chicken. Once the chicken is cooked, remove it from the oven and let it rest for a few minutes before serving. This allows the juices to redistribute, resulting in a more tender and flavorful chicken.
- Garnish (optional). Garnish with fresh chopped parsley for a pop of color and freshness.
- Serve. Serve the baked ranch chicken immediately. It’s delicious on its own or with your favorite side dishes.
Serving Suggestions
This baked ranch chicken is incredibly versatile and pairs well with a variety of side dishes. Here are a few of my favorite serving suggestions:
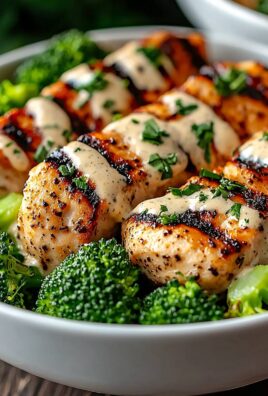
- Roasted vegetables: Broccoli, asparagus, carrots, and Brussels sprouts are all excellent choices.
- Mashed potatoes: Creamy mashed potatoes are a classic pairing with chicken.
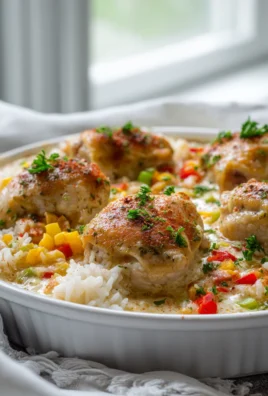
- Rice: White rice, brown rice, or quinoa are all great options.
- Salad: A simple green salad or a more elaborate salad with your favorite toppings.
- Pasta: Serve with a side of pasta tossed in butter, olive oil, or your favorite sauce.
- Corn on the cob: A summertime favorite that complements the ranch flavor perfectly.
Tips and Variations
Here are a few tips and variations to help you customize this recipe to your liking:
- Use different types of cheese: Instead of Parmesan cheese, try using cheddar cheese, mozzarella cheese, or a blend of cheeses.
- Add spices: Add a pinch of garlic powder, onion powder, paprika, or cayenne pepper to the ranch mixture for extra flavor.
- Use different types of bread crumbs: Try using panko bread crumbs for an extra crispy crust.
- Add vegetables to the baking dish: Toss some chopped vegetables, such as broccoli florets or sliced carrots, in the baking dish with the chicken for a complete one-pan meal.
- Make it spicy: Add a dash of hot sauce or a pinch of red pepper flakes to the ranch mixture for a spicy kick.
- Use chicken thighs: If you prefer chicken thighs, you can substitute them for the chicken breasts. Just be sure to adjust the cooking time accordingly. Chicken thighs typically take a bit longer to cook than chicken breasts.
- Make it ahead of time: You can prepare the chicken ahead of time by coating it with the ranch mixture and storing it in the refrigerator for up to 24 hours. When you’re ready to bake it, simply remove it from the refrigerator and bake as directed.
- Add bacon: Everything is better with bacon! Crumble some cooked bacon over the chicken before baking for an extra layer of flavor.
- Lemon juice: Squeeze some fresh lemon juice over the chicken after baking for a bright and zesty flavor.
Storage Instructions
Leftover baked ranch chicken can be stored in an airtight container in the refrigerator for up to 3-4 days. To reheat, you can microwave it, bake it in the oven, or pan-fry it. I recommend reheating it in the oven for the best results, as this will help to maintain the crispy crust.
Nutritional Information (Approximate)
Please note that the nutritional information is an estimate and may vary depending on the specific ingredients used.
- Calories: Approximately 350-400 per serving
- Protein: Approximately 40-45 grams per serving
- Fat: Approximately 15-20 grams per serving
- Carbohydrates: Approximately 10-15 grams per serving
Enjoy!
I hope you enjoy this recipe for baked ranch chicken as much as I do! It’s a simple, delicious, and versatile dish that’s perfect for a weeknight dinner or a weekend gathering. Feel free to experiment with different variations and make it your own. Happy cooking!
Conclusion:
This Baked Ranch Chicken recipe isn’t just another weeknight dinner; it’s a flavor explosion waiting to happen! I truly believe this will become a staple in your household, and here’s why: it’s incredibly easy to prepare, uses readily available ingredients, and delivers a juicy, flavorful chicken that even the pickiest eaters will devour. The creamy ranch dressing, combined with the crispy breadcrumb coating, creates a texture and taste sensation that’s simply irresistible. Forget dry, bland chicken – this recipe guarantees moist, tender perfection every single time.
But the best part? It’s incredibly versatile! Serve it alongside classic mashed potatoes and steamed green beans for a comforting, traditional meal. Or, for a lighter option, pair it with a vibrant salad and a side of quinoa. Thinking about something a little more adventurous? Slice the chicken and add it to tacos with your favorite toppings, or dice it up and toss it into a creamy pasta dish. The possibilities are truly endless!
For serving suggestions, consider a dollop of extra ranch dressing on the side for dipping – because, let’s be honest, you can never have too much ranch! A squeeze of fresh lemon juice over the chicken just before serving adds a bright, zesty note that complements the richness of the ranch. And if you’re feeling fancy, garnish with some chopped fresh parsley or chives for a pop of color.
Now, let’s talk variations. Want to kick up the heat? Add a pinch of cayenne pepper or a dash of hot sauce to the breadcrumb mixture. Prefer a different flavor profile? Experiment with different types of breadcrumbs, such as panko for extra crispiness, or Italian-seasoned breadcrumbs for a more savory taste. You could even try using a different type of creamy dressing, like a creamy Caesar or a honey mustard, to create a completely new flavor experience. For a healthier twist, consider using Greek yogurt instead of mayonnaise in the ranch dressing.
I’m so confident that you’ll love this Baked Ranch Chicken recipe that I urge you to try it out as soon as possible. It’s the perfect solution for busy weeknights, family gatherings, or even a simple, satisfying weekend meal. It’s a guaranteed crowd-pleaser, and I promise you won’t be disappointed.
Once you’ve given it a try, I’d absolutely love to hear about your experience! Did you make any modifications? What sides did you serve it with? What did your family think? Share your photos and stories in the comments below! Your feedback is invaluable, and it helps me continue to create and share recipes that you’ll love. So, go ahead, get in the kitchen, and whip up a batch of this amazing chicken. I can’t wait to hear all about it! Happy cooking! And remember, the secret ingredient is always love (and maybe a little extra ranch!).
Baked Ranch Chicken: The Ultimate Crispy & Flavorful Recipe
Easy and flavorful baked ranch chicken with a crispy coating, perfect for a quick weeknight dinner.
Ingredients
Instructions
Recipe Notes
- Pounding the chicken ensures even cooking.
- Be careful not to over-salt, as the ranch mix contains salt.
- For extra crispiness, drizzle with olive oil before baking and broil for the last minute or two.
- Letting the chicken rest before serving helps retain moisture.