Classic Bread Stuffing With Fresh Herbs is more than just a side dish; it’s often the unsung hero, the aromatic heart of any festive meal. As the enticing scent of sage, thyme, and rosemary fills your kitchen, you’ll immediately understand why this dish holds such a special place at our holiday tables. For generations, stuffing, or dressing as it’s known in some regions, has been a cherished tradition, originating from a practical need to make use of stale bread while infusing rich flavors into poultry. It has gracefully evolved into a centerpiece, eagerly anticipated by young and old alike.
What truly makes this dish so utterly irresistible? It’s that perfect harmony of textures – a delightfully crisp, golden-brown crust giving way to a wonderfully moist and savory interior. Each bite is packed with the vibrant essence of fresh herbs, mingling beautifully with the softened bread and savory broth. I find that this particular recipe for Classic Bread Stuffing With Fresh Herbs strikes the ideal balance, offering a taste of comforting nostalgia combined with an elevated flavor profile that is sure to impress your guests. It’s incredibly versatile and surprisingly simple to prepare, making it a perfect addition to any special occasion or even a comforting weeknight dinner.

Ingredients:
- 1 loaf (about 1.5 lbs) day-old or stale rustic bread. I highly recommend a high-quality loaf like sourdough, French baguette, challah, or a good country loaf. This bread should be cut into 1/2 to 3/4-inch cubes, aiming for uniformity to ensure even drying and absorption.
- 1 cup (2 sticks) unsalted butter, plus a little extra for greasing your baking dish. Using unsalted butter allows us to control the seasoning precisely, which is key for the best flavor.
- 2 large yellow onions, peeled and finely diced. This usually yields about 3 cups of diced onion, providing a foundational sweetness and aroma to our stuffing.
- 4 celery stalks, trimmed and finely diced. You’ll get roughly 2 cups from this, adding a lovely, subtle crunch and classic flavor that pairs beautifully with the onions.
- 4 cloves garlic, minced. Fresh garlic makes all the difference here, bringing a pungent warmth that enhances the other aromatics.
- 1 tablespoon fresh sage, finely chopped. This herb is truly the star of a Classic Bread Stuffing With Fresh Herbs, imparting a wonderfully savory, slightly peppery, and earthy aroma.
- 1 tablespoon fresh thyme, finely chopped. Thyme adds another layer of woodsy, slightly floral notes that complement the sage perfectly.
- 1/2 cup fresh parsley, finely chopped. Parsley brightens the entire dish with its fresh, herbaceous flavor, cutting through the richness.
- 1 teaspoon salt, or to taste. I always recommend starting with a conservative amount and adjusting as you go, especially since broths can vary in sodium content.
- 1/2 teaspoon black pepper, freshly ground, or to taste. Freshly ground pepper has a much more vibrant flavor than pre-ground.
- 4 cups (32 fl oz) low-sodium chicken or vegetable broth, plus more if needed. Using low-sodium broth gives us maximum control over the final saltiness.
- 2 large eggs, lightly beaten (optional, but highly recommended for binding and richness). If you prefer a firmer stuffing that holds its shape a bit more, these eggs are your secret weapon.
- Pinch of freshly grated nutmeg (optional, but I find it adds a wonderful, subtle warmth and complexity that elevates the dish).
Preparing Your Foundation: The Bread and Aromatics
Drying the Bread: A Crucial First Step for the Best Classic Bread Stuffing With Fresh Herbs
- Prepare Your Bread: The journey to the perfect Classic Bread Stuffing With Fresh Herbs begins with properly dried bread. If your bread isn’t already day-old and relatively stale, you’ll need to dry it out. Cube your chosen rustic bread into uniform 1/2 to 3/4-inch pieces. This size is ideal because it allows for plenty of surface area to absorb the delicious liquids without turning mushy, and it provides a pleasing texture contrast. Scatter the bread cubes in a single layer across one or two large baking sheets. Don’t overcrowd them; air circulation is key.
- Oven Drying Method (Recommended): Preheat your oven to a low temperature, around 250°F (120°C). Bake the bread cubes for 20-30 minutes, tossing them gently halfway through. You’re looking for them to be dry and slightly crisp, but not toasted or browned. They should feel light and airy. This slow drying process is incredibly important because it prevents the bread from becoming a soggy mess later. A properly dried bread cube acts like a sponge, ready to soak up all the flavorful broth and butter. Once dried, remove them from the oven and let them cool completely on the baking sheets. This cooling step allows any residual moisture to escape.
- Air Drying Method (If you have time): Alternatively, you can simply leave the bread cubes out on baking sheets at room temperature for at least 12-24 hours, or even up to 2 days, turning them occasionally. This method works beautifully if you’re planning ahead, and it requires no oven time. Just make sure they are fully exposed to air and not covered, allowing them to truly become stale and firm.
Sautéing the Aromatic Vegetables: Building Flavor Layers
- Melt the Butter: In a large, heavy-bottomed pot or Dutch oven, melt the full cup of unsalted butter over medium heat. Don’t rush this step. Allow the butter to fully melt and start to shimmer. The generous amount of butter here is not just for flavor; it also helps to evenly cook the vegetables and later coat the bread, contributing to that irresistible rich texture.
- Sauté Onions and Celery: Add your finely diced yellow onions and celery to the melted butter. Stir them to coat evenly. Reduce the heat slightly to medium-low. This is where patience pays off! We want to gently “sweat” these vegetables, not brown them. Cook them slowly for about 10-15 minutes, stirring occasionally, until they are very soft and translucent. You’ll notice a beautiful fragrance filling your kitchen. The goal is to coax out all their natural sweetness and soften their texture completely, which provides a tender base for our stuffing.
- Add Garlic and Fresh Herbs: Once the onions and celery are perfectly tender, add the minced garlic, chopped fresh sage, and chopped fresh thyme. Stir well and cook for another 2-3 minutes. You’ll immediately notice the intoxicating aroma of the herbs awakening in the warm butter. Be careful not to burn the garlic; it should just become fragrant. This combination of sage and thyme is truly what defines a classic bread stuffing with fresh herbs. The fresh herbs release their essential oils, infusing the butter and vegetables with incredible depth of flavor.
- Season the Aromatics: Stir in the salt, freshly ground black pepper, and the optional pinch of nutmeg. Give everything a good stir to ensure the seasonings are evenly distributed. Taste a small bit of the cooked vegetables (carefully, it will be hot!). This gives you an opportunity to adjust the salt and pepper to your preference before adding the bread and broth. Remember, these seasoned aromatics are the very heart of your stuffing’s flavor profile.
Combining and Moistening: Bringing Your Classic Bread Stuffing With Fresh Herbs Together
Mixing the Components: Texture and Flavor Harmony
- Combine with Bread: Carefully transfer your dried bread cubes into the pot with the sautéed aromatic vegetables and herbs. If your pot isn’t large enough, you can transfer the aromatics to a very large mixing bowl and add the bread there. Gently toss the bread cubes with the buttery vegetable mixture. Use a large spoon or your clean hands to ensure every single bread cube is lightly coated with the fragrant butter and herb mixture. This initial coating is crucial for flavor distribution and helps to prevent sogginess. You’ll see the bread cubes starting to absorb some of that lovely golden butter.
- Add Parsley and Eggs (if using): Now, stir in the fresh chopped parsley. This vibrant herb is best added towards the end to maintain its fresh flavor and bright green color. If you’re using the optional beaten eggs, pour them over the bread mixture at this stage. Toss everything gently again. The eggs will act as a binder, helping the stuffing hold its shape a bit better, and they also add a touch of richness. Don’t worry if the eggs don’t seem fully incorporated at this stage; they will cook and bind everything together in the oven.
Adding the Liquid: Achieving the Perfect Consistency
- Pour in Broth: Gradually pour in 3 cups of the low-sodium chicken or vegetable broth over the bread mixture. Begin by adding about half of the broth, then gently fold the mixture to distribute it. Add the remaining broth slowly, continuing to fold. The key here is not to dump all the broth in at once. We want to achieve a moist, but not soaking wet, consistency. The dried bread will eagerly absorb the liquid.
-
Assess and Adjust Moisture: After adding 3 cups of broth, let the mixture sit for 5-10 minutes. This gives the bread time to fully absorb the liquid. Then, assess the consistency. This is a critical step for perfect Classic Bread Stuffing With Fresh Herbs.
- If you prefer a softer, moister stuffing, add the remaining 1 cup of broth, a little at a time, until it reaches your desired consistency.
- If you prefer a stuffing with more distinct bread pieces and a slightly firmer texture, you might only need 3 to 3.5 cups of broth.
The consistency you’re looking for is moist but still loose. When you press a handful, it should just about hold together, but not be mushy. It should look like the bread cubes are thoroughly moistened, but not swimming in liquid. Remember, different types of bread absorb liquid differently, so trust your judgment and the feel of the mixture. This careful control of moisture is what separates great stuffing from merely good stuffing.
- Final Seasoning Check: Take a small spoonful of the wet stuffing mixture and taste it. This is your last chance to adjust the seasoning before baking. Add more salt, pepper, or even a little more fresh sage or thyme if you feel it needs it. Remember that flavors can mellow slightly during baking, so it’s okay for it to taste just a tiny bit on the salty side before it goes into the oven. I always encourage a thorough taste test here because a well-seasoned stuffing is truly a delight.
Baking Your Classic Bread Stuffing With Fresh Herbs
Prepping for the Oven: Crispy Edges, Tender Interior
- Preheat Oven and Prepare Dish: Preheat your oven to 375°F (190°C). While the oven preheats, lightly butter a 9×13-inch baking dish (or an equivalent oven-safe dish). Buttering the dish not only prevents sticking but also contributes to those delicious, slightly crispy, golden-brown edges that everyone loves. If you’re making a very large batch, you might need two dishes.
- Transfer to Baking Dish: Gently spoon the stuffing mixture into the prepared baking dish. Spread it evenly, but don’t pack it down too tightly. We want some air circulation between the bread pieces to allow for a combination of tender interior and slightly crispy top. If you pack it too densely, it will become very heavy and potentially soggy. For an extra golden and crispy top, you can dot a few small pieces of butter over the surface of the stuffing before baking, or even drizzle a tablespoon of melted butter over it. This little touch makes a big difference!
- Cover for First Phase: Cover the baking dish tightly with aluminum foil. This initial covering is essential because it traps steam, ensuring that the interior of your Classic Bread Stuffing With Fresh Herbs cooks through and remains beautifully moist and tender. Without it, the top could dry out and become overly crisp before the center is heated through.
The Baking Process: Golden Perfection
- Initial Bake (Covered): Place the covered baking dish into your preheated oven. Bake for 30 minutes. During this time, the bread cubes will continue to absorb moisture, the eggs (if used) will set, and all the wonderful flavors will meld together in the steamy environment. You’ll begin to smell the amazing aroma of herbs and butter wafting from your oven.
- Uncover and Continue Baking: After 30 minutes, carefully remove the foil. The stuffing should look plump and moist. Now, return the uncovered dish to the oven. Continue baking for another 20-30 minutes, or until the top is beautifully golden brown and crispy, and the edges are slightly caramelized. The internal temperature should reach at least 165°F (74°C) for food safety, especially if eggs were included. Use an instant-read thermometer if you want to be precise. This second phase of baking is where the magic happens, transforming the moist mixture into a texture-rich dish with lovely contrasts. Keep an eye on it during this stage to prevent over-browning. If it’s browning too quickly, you can loosely tent it with foil again for the last 10 minutes.
- Resting and Serving: The Grand Finale: Once your stuffing has reached its golden, crispy perfection, carefully remove it from the oven. Let it rest for 10-15 minutes before serving. This resting period is important, as it allows the stuffing to set further and the flavors to fully settle. It also makes it easier to scoop and serve. Your kitchen will smell absolutely incredible! When ready to serve, scoop generous portions onto plates. I often garnish with a sprinkle of fresh parsley or a few tiny sage leaves for a pop of color and extra freshness.
Tips for the Ultimate Classic Bread Stuffing With Fresh Herbs
Make-Ahead Magic: Saving Time on Busy Days
One of the best things about a Classic Bread Stuffing With Fresh Herbs is how well it lends itself to make-ahead preparation, which is a lifesaver, especially during holiday cooking. You can assemble the entire stuffing mixture, right up to the point of putting it into the baking dish, up to one day in advance. Simply cover the baking dish tightly with plastic wrap and refrigerate. On the day of serving, take it out of the refrigerator about 30 minutes before baking to allow it to come closer to room temperature. You might need to add an extra 10-15 minutes to the baking time since it’s starting from a colder temperature. I often prepare mine the night before Thanksgiving; it makes the big day so much less stressful!
Customizing Your Stuffing: Endless Possibilities
While this recipe is for a traditional Classic Bread Stuffing With Fresh Herbs, it’s also incredibly versatile. Feel free to get creative and make it your own!
- Add Protein: For a heartier stuffing, brown 1 pound of breakfast sausage (mild or spicy), ground pork, or finely diced pancetta and drain any excess fat before adding it to your sautéed aromatics. This introduces a wonderful savory depth.
- Mushrooms: Sauté sliced mushrooms (cremini or shiitake are excellent) with the onions and celery for an earthy umami boost.
- Apples or Dried Fruit: For a touch of sweetness and tartness, consider adding diced Granny Smith apples or dried cranberries/cherries to the mixture. These additions pair beautifully with the savory herbs.
- Nuts: Toasted pecans or walnuts can provide a lovely textural contrast and nutty flavor.
- Different Broths: Experiment with turkey broth if you have it on hand, especially for a Thanksgiving meal; it deepens the overall poultry flavor profile.
- Spice It Up: A pinch of red pepper flakes can add a subtle kick if you enjoy a bit of heat.
Remember, the core of this recipe – the dried bread, butter, onions, celery, and fresh herbs – is what makes it a classic. Any additions should complement, not overpower, these foundational flavors.
Storage and Reheating: Enjoying Leftovers
Leftover Classic Bread Stuffing With Fresh Herbs is often just as good, if not better, the next day!
- Storage: Store any leftover stuffing in an airtight container in the refrigerator for up to 3-4 days.
- Reheating in Oven: The best way to reheat stuffing is in the oven. Preheat your oven to 300-325°F (150-160°C). Transfer the stuffing to an oven-safe dish, add a splash of broth or water (about 1-2 tablespoons) to prevent it from drying out, and cover it loosely with foil. Bake for 20-30 minutes, or until heated through. For a crispy top, remove the foil for the last 5-10 minutes.
- Reheating in Microwave: While quicker, the microwave can sometimes make stuffing a bit soft. If using, heat in short intervals, stirring occasionally, until warm. It’s best for smaller portions.
- Freezing: Stuffing freezes surprisingly well! Once completely cooled, you can freeze it in an airtight, freezer-safe container or bag for up to 2-3 months. Thaw overnight in the refrigerator before reheating in the oven as described above.
I often make extra just so I have plenty of leftovers to enjoy for days after! It’s truly a versatile and satisfying dish that makes any meal feel special.
Conclusion:
As we wrap up our culinary journey with this incredible recipe, I truly hope you’re feeling inspired to roll up your sleeves and get cooking! This isn’t just another side dish; it’s a centerpiece of comfort, a symphony of flavors and textures that promises to transform any meal into a cherished memory. I’ve poured my heart into perfecting this particular rendition because I believe everyone deserves to experience the profound satisfaction that comes from serving something truly extraordinary. It’s the kind of dish that garners compliments, sparks conversations, and quite frankly, disappears from the table faster than you can say “seconds!” The crisp, golden-brown edges giving way to a wonderfully moist and aromatic interior are an absolute revelation. You’ll find yourself reaching for just one more spoonful, then another, savoring every single bite. This isn’t just food; it’s an experience designed to bring joy and warmth to your dining table, making every occasion feel a little more special and every bite utterly memorable.
What makes this recipe an absolute must-try, in my humble opinion, is its unparalleled ability to evoke warmth and nostalgia, while simultaneously delivering a fresh, vibrant taste. It’s the ultimate comfort food, elevated. We’re talking about a dish that perfectly balances savory notes with the earthy fragrance of fresh herbs, creating a harmonious profile that complements virtually any main course. If you’ve ever yearned for that quintessential holiday flavor, or simply a deeply satisfying side to elevate a regular weeknight roast, then this is your answer. It’s designed to be approachable for home cooks of all skill levels, ensuring a rewarding experience from prep to plate. The simple act of combining quality ingredients, allowing them to meld and bake to perfection, results in a flavor profile that is robust yet incredibly nuanced. Trust me, once you taste this, it will become an indispensable part of your culinary repertoire. It’s truly a dish that speaks to the soul, promising a delicious adventure with every forkful.
Now, let’s talk about how to truly make this recipe sing in your home. While it’s absolutely phenomenal straight out of the baking dish, don’t hesitate to get creative with your serving. Of course, it’s the undisputed king of holiday tables, pairing magnificently with roasted turkey, glazed ham, or a succulent prime rib. But its versatility extends far beyond the festive season! Consider serving it alongside a simple roasted chicken and seasonal vegetables for an elevated weeknight dinner. It’s also fantastic with pan-seared pork chops, or even as a hearty accompaniment to a flavorful lentil loaf for a vegetarian option. Don’t forget the power of leftovers! Cooled stuffing can be sliced and gently pan-fried for a crispy breakfast treat alongside eggs, or crumbled over a garden salad for an unexpected burst of flavor and texture. You can even make delightful little “stuffing cakes” by forming patties and crisping them in a skillet, serving them with a dollop of cranberry sauce for an extra touch of gourmet flair. It really is the gift that keeps on giving!
And speaking of creativity, this recipe is a wonderful canvas for your own culinary variations. While the foundational flavor of our Classic Bread Stuffing With Fresh Herbs is perfect as is, feel free to personalize it! For an added layer of richness, try incorporating sautéed mushrooms, caramelized onions, or even some finely diced bell peppers into the mix. If you’re a meat lover, browned sausage (sage or apple sausage would be incredible!), crispy bacon bits, or even some cooked giblets can be folded in for extra depth and a truly hearty dish. For a touch of sweetness and tartness, dried cranberries, chopped apples, or even toasted pecans or walnuts can add a delightful contrast and textural intrigue. A sprinkle of grated Gruyère or sharp cheddar cheese over the top during the last 15 minutes of baking will create an irresistible cheesy crust that everyone will adore. You could even experiment with different types of bread – a rustic sourdough, hearty challah, or even a cornbread base would yield fascinating new dimensions of flavor and texture. Just remember to adjust the liquid content slightly if you alter the bread type, as different breads absorb differently. The possibilities are truly endless, allowing you to tailor this amazing dish precisely to your family’s preferences and make it uniquely your own masterpiece.
So, what are you waiting for? This is more than just a recipe; it’s an invitation to create, to savor, and to share. I wholeheartedly encourage you to try this recipe for yourself. Experience the intoxicating aromas filling your kitchen, the simple joy of bringing such a delightful dish to your table, and the appreciative smiles of those you feed. Cooking is an act of love, and this dish is brimming with it. Once you’ve had a chance to make it, please don’t keep your experiences to yourself! I would absolutely love to hear how it turned out for you. Did you add any unique twists? What did your family think? Sharing your cooking triumphs and even your minor experiments helps inspire our entire community of food lovers. Your feedback and photos mean the world to me and to fellow aspiring chefs. So, go forth, bake with confidence, and prepare to fall in love with your new favorite side dish! Happy cooking, my friends!
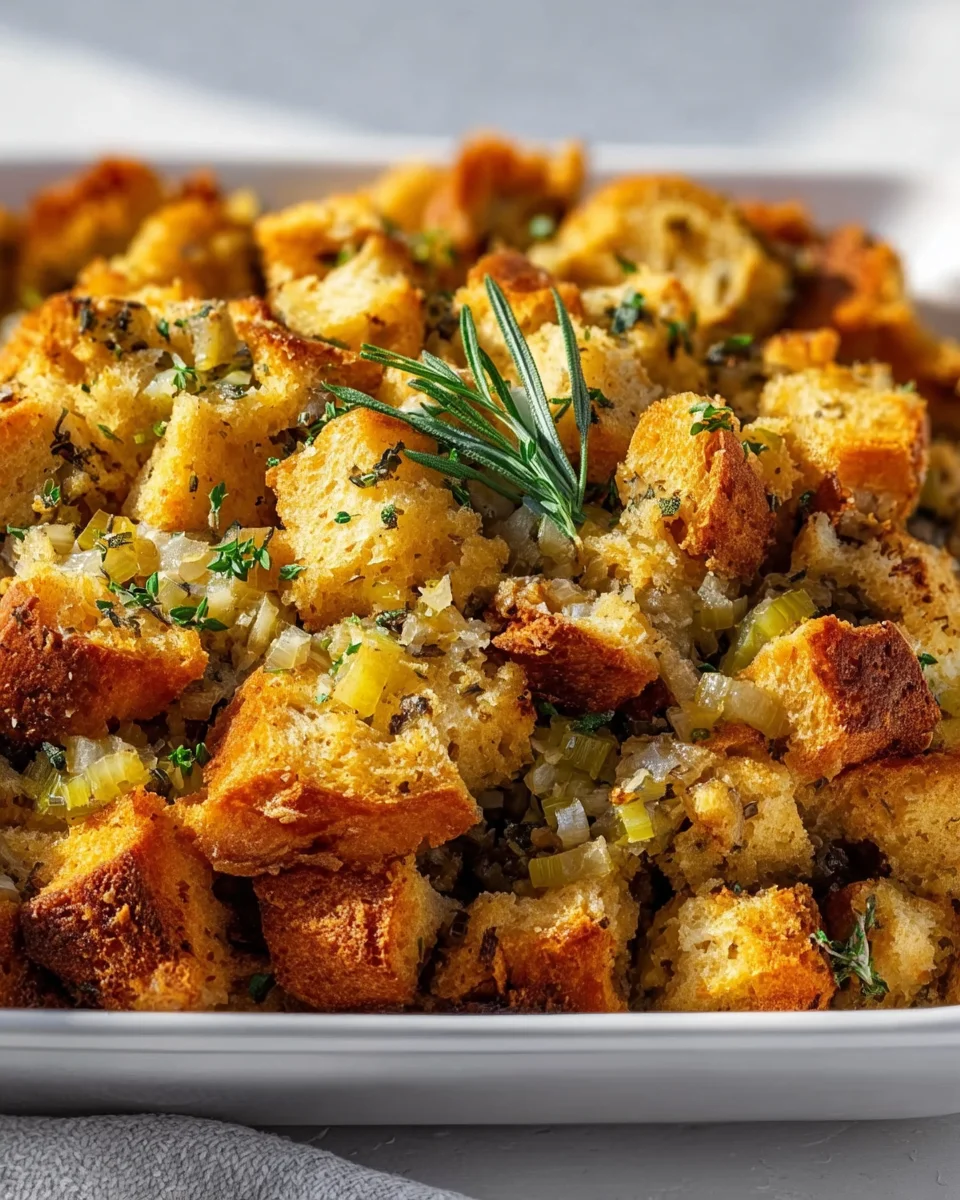
Classic Bread Stuffing With Fresh Herbs
Classic Bread Stuffing With Fresh Herbs is the aromatic heart of any festive meal, filling your kitchen with the enticing scent of sage, thyme, and rosemary. This cherished tradition combines a delightfully crisp, golden-brown crust with a wonderfully moist and savory interior, striking the ideal balance for a comforting and impressive side dish.
Ingredients
Instructions
Important Information
Nutrition Facts (Per Serving)
It is important to consider this information as approximate and not to use it as definitive health advice.
Allergy Information
Please check ingredients for potential allergens and consult a health professional if in doubt.