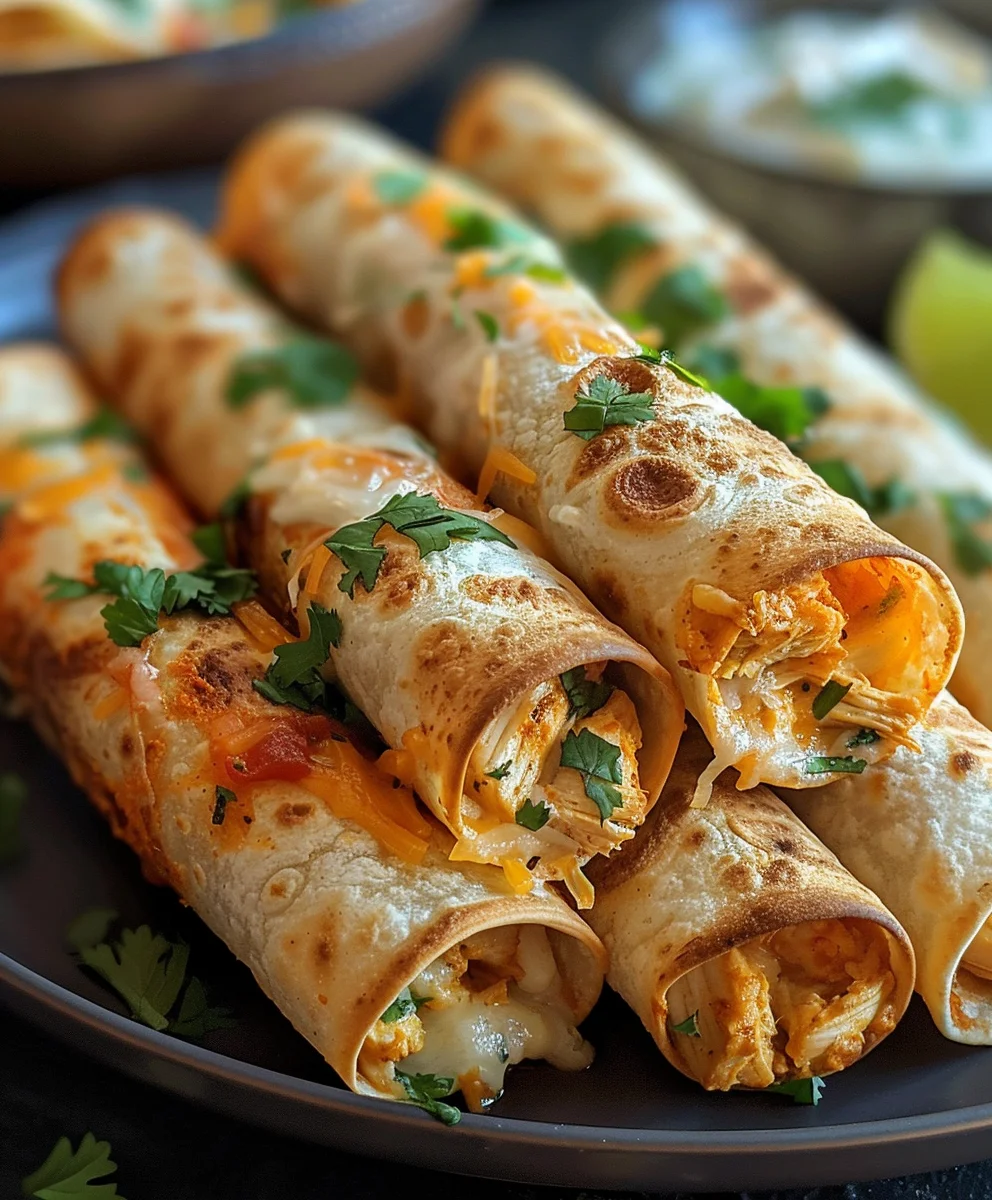
Crispy Chicken Taquitos are more than just a delightful snack; they are a culinary celebration that brings joy with every crunchy bite. There’s an undeniable magic in the sound of that perfectly golden, fried tortilla shattering, revealing a warm, savory chicken filling within. This beloved dish, often tracing its roots to Mexican cuisine, where it’s known as ‘tacos dorados’ or ‘flautas,’ has gracefully evolved into a staple across countless homes, becoming a go-to for casual weeknight dinners, festive gatherings, and everything in between.
I find that people simply adore taquitos for their incredible versatility and their utterly satisfying texture. The contrast between the unbelievably crisp exterior and the tender, well-seasoned chicken filling is pure culinary genius. They are incredibly convenient to prepare, making them an excellent choice when you desire something flavorful and satisfying without spending hours in the kitchen. Learning to master these homemade Crispy Chicken Taquitos will undoubtedly elevate your appetizer game and quickly become a cherished recipe in your repertoire.
Ingredients:
- For the Chicken Filling:
- 2 large boneless, skinless chicken breasts (about 1.5 lbs total), cooked and finely shredded
- 8 ounces cream cheese, softened to room temperature
- 1 cup shredded Monterey Jack cheese (or a Mexican blend), packed
- 1 tablespoon chili powder
- 1 teaspoon ground cumin
- 1 teaspoon garlic powder
- 1/2 teaspoon onion powder
- 1/2 teaspoon salt, or to taste
- 1/4 teaspoon black pepper, or to taste
- 2 tablespoons finely chopped fresh cilantro (optional, but highly recommended for flavor)
- 1-2 tablespoons chicken broth or milk, if needed to adjust consistency
- For the Crispy Chicken Taquitos:
- 24 small corn tortillas (typically 5-6 inches in diameter)
- 4-6 cups vegetable oil, canola oil, or another neutral high-smoke-point oil, for frying
- Optional Toppings and Dipping Sauces:
- Salsa (your favorite red or green variety)
- Guacamole or sliced avocado
- Sour cream or Mexican crema
- Fresh lime wedges
- More fresh cilantro, chopped
- Pico de gallo
Preparing the Chicken Filling for Your Crispy Chicken Taquitos
- Prepare the Chicken: First things first, we need our chicken. If you don’t already have cooked chicken on hand, you can boil, bake, or grill your boneless, skinless chicken breasts until they are thoroughly cooked through. My preferred method for easily shreddable chicken is to simmer them in a pot of lightly salted water or chicken broth for about 15-20 minutes, or until cooked. Once cooked, remove the chicken from the liquid and let it cool slightly. The key to truly delightful Crispy Chicken Taquitos is a well-shredded filling. You can shred the chicken using two forks, a stand mixer with a paddle attachment on low speed, or even by hand if it’s cool enough. Aim for finely shredded pieces; this ensures the filling is evenly distributed and easy to roll.
- Soften the Cream Cheese: While your chicken is cooling or shredding, make sure your 8 ounces of cream cheese are softened to room temperature. This is a crucial step for achieving a smooth, creamy, and easily mixable filling. If your cream cheese is still cold, it will be lumpy and difficult to incorporate into the other ingredients. You can speed up the softening process by unwrapping it and letting it sit on the counter for 30 minutes, or by carefully microwaving it in 10-15 second intervals until just soft.
- Combine the Filling Ingredients: In a large mixing bowl, combine the finely shredded chicken, softened cream cheese, and 1 cup of shredded Monterey Jack cheese. Now it’s time to infuse that wonderful flavor! Add the chili powder, ground cumin, garlic powder, onion powder, salt, and black pepper. If you’re using fresh cilantro, toss that in now too; it adds a bright, fresh note that really elevates the flavor of these Crispy Chicken Taquitos.
- Mix Thoroughly: Using a sturdy spoon, a spatula, or even your hands (wearing gloves, of course!), mix all the ingredients together until they are very well combined. You want a homogenous mixture where the cream cheese has completely coated the chicken and the spices are evenly distributed. The consistency should be thick, creamy, and hold together when pressed. If the mixture seems a little too stiff or dry, you can add 1-2 tablespoons of chicken broth or milk, one tablespoon at a time, until you reach a spreadable yet firm consistency. Do not make it too wet, as this can make your taquitos soggy. Taste the filling and adjust seasonings as needed; you might want a little more salt, pepper, or a pinch more chili powder depending on your preference. This filling is the heart of our Crispy Chicken Taquitos, so make sure it’s perfect!
Assembling the Crispy Chicken Taquitos
-
Prepare the Tortillas: This step is absolutely critical for successful taquito rolling and preventing your tortillas from cracking. Corn tortillas can be quite brittle when cold, so we need to warm them up to make them pliable. You have a few options:
- Microwave Method: Stack about 5-6 tortillas between two damp paper towels and microwave on high for 30-45 seconds, or until they are warm and flexible. Repeat with the remaining tortillas.
- Steamer Method: Place tortillas in a steamer basket over simmering water for 1-2 minutes until soft.
- Griddle Method: Heat a dry skillet or griddle over medium heat. Warm each tortilla for about 15-20 seconds per side until it’s soft and pliable. Keep the warmed tortillas covered with a clean kitchen towel to retain their heat and flexibility as you work.
Working with warm tortillas is non-negotiable for perfectly rolled, crack-free Crispy Chicken Taquitos.
- Fill Each Tortilla: Lay one warm tortilla flat on a clean work surface. Take approximately 1 to 1.5 tablespoons of the chicken filling and spread it in a thin line across the lower third of the tortilla. Do not overfill! Overfilling is a common mistake that leads to taquitos bursting open during frying. You want a modest amount that allows for a tight roll. Leave about a half-inch margin on both ends of the filling so it doesn’t squeeze out as you roll.
- Roll the Taquitos Tightly: Starting from the end with the filling, tightly roll the tortilla upwards. The goal here is to create a snug, compact cylinder. The tighter you roll it, the less likely it is to unravel and the more uniform your Crispy Chicken Taquitos will be. Once rolled, place the taquito seam-side down on a plate or baking sheet. This helps to secure the roll while you prepare the others. Continue this process until you have used all the chicken filling and tortillas. You should end up with approximately 24 taquitos. If you’re not frying them immediately, cover them loosely with plastic wrap to prevent the tortillas from drying out.
Frying the Crispy Chicken Taquitos
- Prepare Your Frying Set Up: Now, for the magic that makes them truly “crispy.” Choose a large, heavy-bottomed pot, Dutch oven, or deep-sided skillet that is suitable for deep frying. Pour in enough vegetable, canola, or other neutral high-smoke-point oil to reach a depth of about 2-3 inches. You want enough oil so the taquitos can be mostly submerged as they fry. Place the pot on your stovetop over medium-high heat.
- Heat the Oil to the Correct Temperature: This is arguably the most important step for achieving perfectly Crispy Chicken Taquitos without them being greasy or soggy. The ideal oil temperature is between 350°F and 375°F (175°C and 190°C). If you have a deep-fry thermometer, this is the time to use it! It gives you the most accurate reading. If you don’t have a thermometer, you can test the oil by dropping a tiny piece of tortilla into it. If it immediately bubbles vigorously and floats to the surface, your oil is ready. If it just sinks and barely bubbles, it’s not hot enough. If it smokes furiously, it’s too hot – remove it from heat for a moment to cool slightly. Maintaining a consistent oil temperature is key; too low, and your taquitos will absorb too much oil and be greasy; too high, and they will burn on the outside before crisping properly throughout.
- Fry the Taquitos in Batches: Carefully, using tongs, place 4-5 taquitos, seam-side down, into the hot oil. Do not overcrowd the pot! Frying too many at once will drop the oil temperature significantly, leading to less crispy and more greasy results. Give them space to fry evenly.
- Fry Until Golden and Crispy: Fry the taquitos for about 3-5 minutes, turning them occasionally with tongs, until they are beautifully golden brown and incredibly crispy on all sides. You’ll see them transform into those gorgeous, firm, and crunchy cylinders we’re aiming for. Keep an eye on them as they fry, as cooking times can vary depending on your stove and oil temperature.
- Drain and Season: Once your Crispy Chicken Taquitos are perfectly golden and crunchy, carefully remove them from the oil using tongs and transfer them to a wire rack set over a baking sheet lined with paper towels. The wire rack allows air to circulate, preventing the taquitos from steaming and losing their crispness on the bottom. While they are still hot, lightly sprinkle them with a pinch of salt if desired. Repeat the frying process with the remaining taquitos, ensuring the oil returns to the proper temperature between batches.
Serving Suggestions and Tips for Crispy Chicken Taquitos
- Serve Immediately for Best Crispness: These Crispy Chicken Taquitos are truly at their best when served hot and fresh, straight out of the fryer. The crispness is unparalleled at this point.
-
Offer a Variety of Toppings: Arrange your favorite toppings and dipping sauces alongside the warm taquitos. Popular choices include:
- Fresh salsa, whether a vibrant pico de gallo or a smooth puréed variety.
- Creamy guacamole or simple slices of fresh avocado for a cool contrast.
- Cool sour cream or a dollop of Mexican crema.
- A squeeze of fresh lime juice over the top brightens all the flavors.
- A sprinkle of fresh chopped cilantro adds a final flourish and herbaceous note.
- Consider a mild queso fresco or cotija cheese crumbled over for extra saltiness and texture.
Experiment with your favorite combinations to truly make these Crispy Chicken Taquitos your own!
- Make-Ahead Tips: You can prepare the chicken filling a day or two in advance and store it in an airtight container in the refrigerator. This makes assembly much quicker on the day you plan to fry. You can also assemble the taquitos a few hours before frying; just place them seam-side down on a baking sheet, cover loosely with plastic wrap, and refrigerate. Let them come to room temperature for about 15-20 minutes before frying for best results.
- Storage and Reheating Leftovers: If you happen to have any leftover Crispy Chicken Taquitos (a rare occurrence in my house!), store them in an airtight container in the refrigerator for up to 3 days. To reheat and bring back some of that amazing crispness, I recommend using an air fryer at 350°F (175°C) for 5-7 minutes, or baking them in a preheated oven at 375°F (190°C) for 10-15 minutes, flipping halfway through. Microwaving them will make them soft, so avoid that if you want to retain any crunch.
-
Variations to Explore: Feel free to customize your Crispy Chicken Taquitos!
- Spicier Kick: Add a pinch of cayenne pepper or a dash of hot sauce to the chicken filling.
- Different Cheeses: Experiment with different cheeses like sharp cheddar, Colby Jack, or a blend of Mexican cheeses for varied flavor profiles.
- Veggie Boost: Finely diced bell peppers or corn kernels can be added to the filling for extra texture and nutrition.
- Baked Not Fried: If you prefer a lighter version, you can bake these taquitos. Lightly brush or spray the assembled taquitos with oil and bake in a preheated oven at 400°F (200°C) for 15-20 minutes, or until golden and crispy, flipping halfway. While they won’t have quite the same deep-fried crisp, they’ll still be delicious!
No matter how you prepare them, these Crispy Chicken Taquitos are sure to be a crowd-pleaser! Enjoy the process and the fantastic flavors!
Conclusion:
And there you have it, my friends! We’ve reached the delicious culmination of our culinary journey, and I genuinely believe this recipe for our truly exceptional Crispy Chicken Taquitos is not just another dish but an experience waiting to happen in your kitchen. Why is it a must-try, you ask? Well, it’s the perfect storm of textures and flavors. Imagine the satisfying crunch of a perfectly golden tortilla, giving way to a warm, savory, and perfectly seasoned shredded chicken filling. It’s comforting, it’s exciting, and it’s surprisingly straightforward to achieve that restaurant-quality crispiness right in your own home. This isn’t just a meal; it’s an opportunity to create joy, whether you’re feeding a hungry family on a Tuesday night or dazzling guests at your next gathering. I’ve poured my heart into perfecting these, ensuring every bite delivers that irresistible combination of tender chicken and utterly addictive crunch.
What truly elevates these taquitos from great to absolutely unforgettable are the endless possibilities for serving and personalization. While they are undeniably stellar on their own, a few well-chosen accompaniments can transform them into a gourmet experience. For classic appeal, I always recommend a dollop of cool, creamy sour cream or Greek yogurt, a generous scoop of vibrant, chunky guacamole, and your favorite salsa – whether it’s a fiery habanero or a mild, sweet mango salsa. But don’t stop there! Think outside the box and consider a scattering of fresh pico de gallo, a sprinkle of crumbled cotija cheese, or even a drizzle of a homemade cilantro-lime crema to add a bright, zesty counterpoint to the rich chicken filling. For those who love a bit of heat, thinly sliced pickled jalapeños offer a fantastic kick and tang.
Elevate Your Taquito Experience!
Beyond the dips and garnishes, consider building a full meal around these delightful handhelds. Serve them alongside fluffy Mexican rice and savory black beans for a hearty family dinner. A simple side salad, dressed with a light vinaigrette, can also offer a refreshing balance, cutting through the richness and adding a lovely freshness to your plate. And for a truly festive occasion, consider pairing them with a homemade agua fresca or even a classic margarita – it really sets the mood! Don’t forget about the kids (and adults who are kids at heart); a simple side of cheesy nacho dip or even just ketchup can make these an instant hit for even the pickiest eaters.
Unleash Your Inner Chef with Creative Variations!
The beauty of this recipe extends to its versatility for variations too. If you’re feeling adventurous, don’t hesitate to experiment with the filling. While chicken is king here, a shredded beef or pork carnitas filling would be equally spectacular. For a vegetarian twist, a mixture of seasoned black beans, corn, and cheese makes a fantastic alternative. You can also play with the spice level of the chicken itself, adding a pinch more cayenne pepper for heat or a dash of smoked paprika for a deeper, more complex flavor profile. If you have an air fryer, that’s another fantastic method for achieving incredible crispiness with less oil, offering a slightly different texture but still delivering that satisfying crunch we all crave. Simply spray the rolled taquitos lightly with cooking oil and air fry at 375°F (190°C) for 10-15 minutes, flipping halfway, until golden and crispy. It’s a wonderful way to enjoy these guilt-free!
So now, it’s your turn! I have shared all my secrets and tips, and the rest is up to you. I genuinely hope you’re feeling inspired and eager to roll up your sleeves and bring these magnificent taquitos to life in your own kitchen. Trust me, the aroma alone as they cook will have everyone in your household gathering around, eagerly awaiting their first bite. Don’t be shy – dive in, make them your own, and savor every single crunchy moment. Once you’ve whipped up your batch of these utterly delightful Crispy Chicken Taquitos, please, please, please come back and share your experience with me! I absolutely adore hearing about your culinary adventures, your successes, and any fun twists or serving ideas you come up with. Did you try a new dip? Did your kids love them? Did they disappear in minutes at your party? Let me know in the comments below, or snap a photo and tell us all about it. Your feedback and creativity inspire not just me, but our entire community of food lovers. Happy cooking, and get ready for some serious crunch!
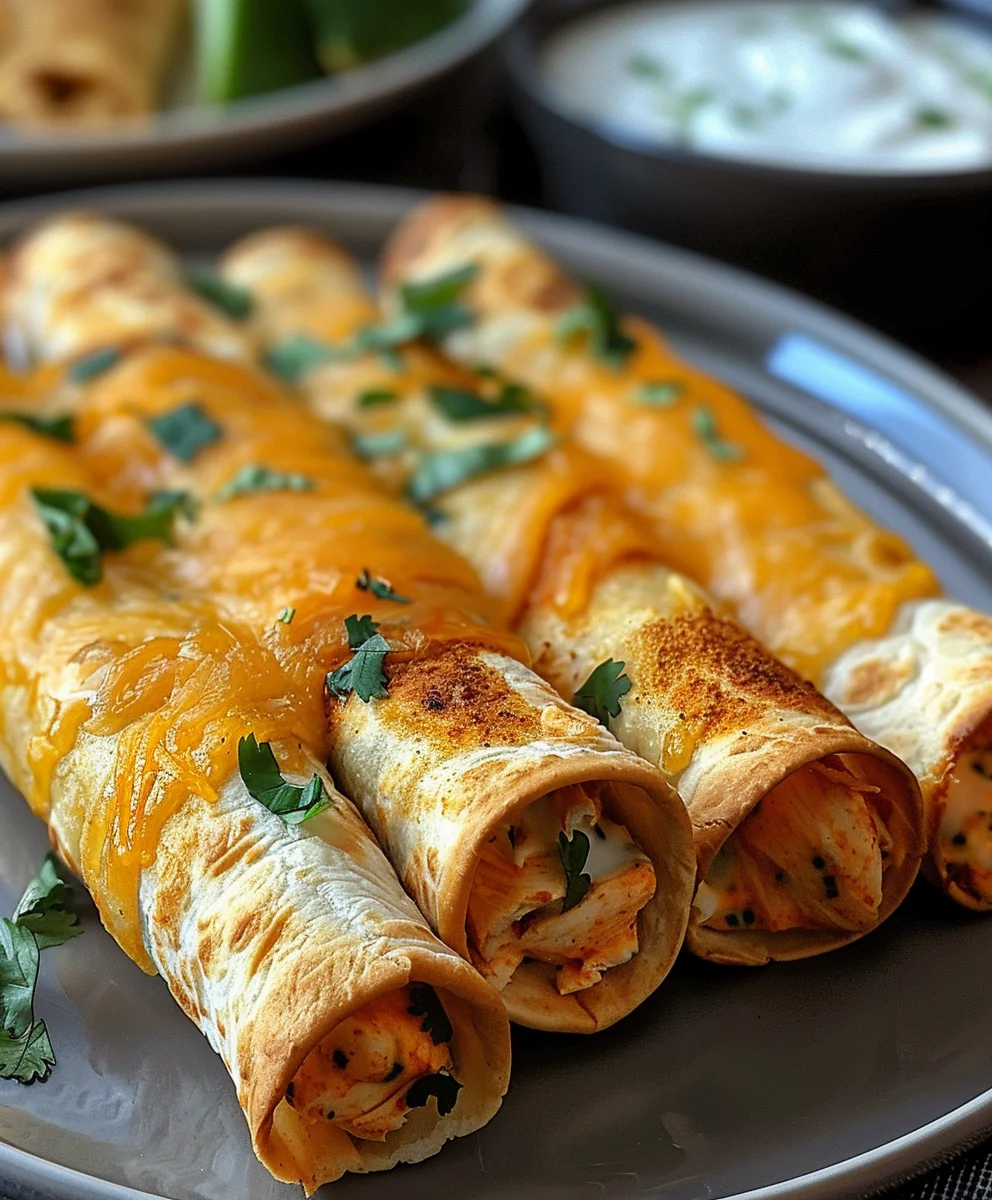
Crispy Chicken Taquitos
Crispy Chicken Taquitos are a culinary celebration offering a delightful crunch and a warm, savory chicken filling. This beloved dish, inspired by Mexican ‘tacos dorados’ or ‘flautas,’ is perfect as a party appetizer or a satisfying snack, known for its versatile and utterly satisfying texture.
Ingredients
-
1.5 lbs boneless, skinless chicken breasts, cooked & finely shredded
-
8 oz cream cheese, softened
-
1 cup Monterey Jack cheese, shredded
-
1 tbsp chili powder
-
1 tsp ground cumin
-
1 tsp garlic powder
-
1/2 tsp onion powder
-
1/2 tsp salt
-
1/4 tsp black pepper
-
2 tbsp fresh cilantro, chopped (optional)
-
1-2 tbsp chicken broth or milk (optional, for consistency)
-
24 small corn tortillas (5-6 inches)
-
4-6 cups neutral high-smoke-point oil, for frying
Instructions
-
Step 1
Cook 1.5 lbs boneless, skinless chicken breasts (boil, bake, or grill) until done. Let cool, then finely shred using forks, a stand mixer, or by hand. -
Step 2
Ensure 8 oz cream cheese is softened to room temperature for a smooth, creamy filling. -
Step 3
In a large bowl, combine shredded chicken, softened cream cheese, 1 cup shredded Monterey Jack cheese, 1 tbsp chili powder, 1 tsp ground cumin, 1 tsp garlic powder, 1/2 tsp onion powder, 1/2 tsp salt, 1/4 tsp black pepper, and 2 tbsp optional fresh cilantro. Mix thoroughly until homogenous. If too stiff, add 1-2 tbsp chicken broth or milk, one tablespoon at a time. Taste and adjust seasonings as needed. -
Step 4
Warm 24 corn tortillas until pliable to prevent cracking. Use microwave (30-45 seconds for 5-6 tortillas between damp paper towels), steamer (1-2 minutes), or griddle (15-20 seconds per side). Keep warmed tortillas covered to retain heat. -
Step 5
Lay one warm tortilla flat. Spread 1 to 1.5 tablespoons of chicken filling in a thin line across the lower third, leaving 0.5-inch margins on both ends. Tightly roll the tortilla upwards into a snug cylinder. Place taquito seam-side down on a plate. Repeat for all remaining tortillas and filling. -
Step 6
Choose a large, heavy-bottomed pot or skillet suitable for deep frying. Pour in enough neutral high-smoke-point oil (vegetable or canola) to reach a depth of 2-3 inches. Heat oil over medium-high heat to 350-375°F (175-190°C). -
Step 7
Carefully place 4-5 taquitos, seam-side down, into the hot oil using tongs. Do not overcrowd the pot. Fry for about 3-5 minutes, turning occasionally, until beautifully golden brown and incredibly crispy on all sides. -
Step 8
Once golden and crunchy, remove taquitos from oil and transfer to a wire rack set over paper towels to drain. Lightly sprinkle with salt while still hot. Repeat the frying process with the remaining taquitos, ensuring oil returns to proper temperature between batches. -
Step 9
Serve Crispy Chicken Taquitos hot and fresh for optimal crispness. Offer a variety of toppings and dipping sauces like fresh salsa, guacamole/sliced avocado, sour cream/Mexican crema, fresh lime wedges, chopped cilantro, or pico de gallo. -
Step 10
Prepare chicken filling a day or two in advance and refrigerate. Assemble taquitos a few hours before frying, store seam-side down in the refrigerator, and bring to room temperature before frying. Reheat leftover taquitos in an air fryer at 350°F (175°C) for 5-7 minutes, or in a preheated oven at 375°F (190°C) for 10-15 minutes (flipping halfway) to restore crispness. Avoid microwaving. -
Step 11
Customize your taquitos by adding cayenne pepper or hot sauce for a spicier kick, using different cheeses (e.g., sharp cheddar, Colby Jack), or incorporating finely diced bell peppers or corn kernels into the filling. For a lighter alternative, bake taquitos brushed/sprayed with oil in a preheated oven at 400°F (200°C) for 15-20 minutes, flipping halfway, until golden and crispy.
Important Information
Nutrition Facts (Per Serving)
It is important to consider this information as approximate and not to use it as definitive health advice.
Allergy Information
Please check ingredients for potential allergens and consult a health professional if in doubt.