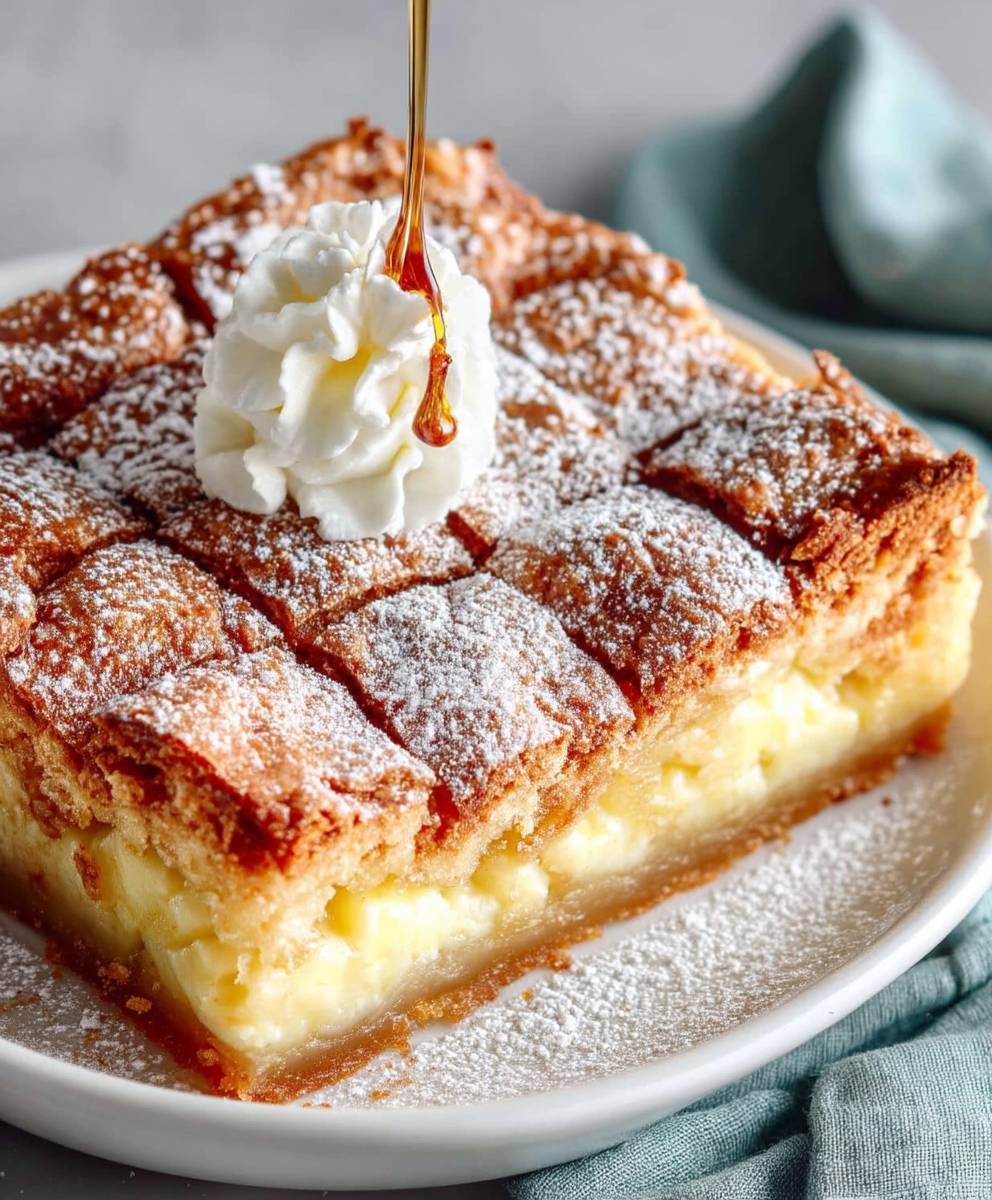
Brown Butter Gooey Butter Cake: Prepare to be utterly captivated by a dessert that’s as decadent as it is delightful! Imagine sinking your teeth into a slice of rich, buttery goodness, where the edges boast a delightful chew and the center melts in your mouth with an irresistible, gooey sweetness. This isn’t just any cake; it’s an experience, a symphony of textures and flavors that will leave you craving more.
Gooey Butter Cake, in its original form, has deep roots in St. Louis, Missouri, where legend has it that a happy accident involving inverted ingredient ratios led to its creation. While the exact origins remain shrouded in a bit of mystery, its popularity is undeniable. Bakeries across the city proudly display their versions, each with its own unique twist. But we’re taking it a step further, elevating this classic with the nutty, caramelized notes of brown butter.
What makes Brown Butter Gooey Butter Cake so universally loved? It’s the perfect combination of textures – the slightly crisp edges contrasting with the unbelievably gooey center. The sweetness is balanced by the richness of the butter, and the addition of brown butter adds a depth of flavor that’s simply irresistible. Plus, it’s surprisingly easy to make, making it a perfect treat for both experienced bakers and those just starting out. Get ready to impress your friends and family with this unforgettable dessert!

Ingredients:
- For the Cake Base:
- 1 ½ cups all-purpose flour
- ½ teaspoon baking powder
- ¼ teaspoon salt
- ½ cup (1 stick) unsalted butter, softened
- ¾ cup granulated sugar
- 1 large egg
- 1 teaspoon vanilla extract
- For the Gooey Butter Filling:
- 8 tablespoons (1 stick) unsalted butter
- 8 ounces cream cheese, softened
- 2 large eggs
- 1 teaspoon vanilla extract
- 3 ½ cups powdered sugar
- Pinch of salt
- 2 tablespoons brown butter, cooled slightly (see instructions below)
- For the Brown Butter:
- 6 tablespoons unsalted butter
Making the Brown Butter
- Melt the Butter: Place the 6 tablespoons of butter in a light-colored saucepan over medium heat. A light-colored pan will allow you to see the color change more easily.
- Simmer and Watch: Allow the butter to melt completely. Once melted, it will begin to simmer. Continue to cook, swirling the pan occasionally, until the butter foams and then subsides.
- Look for Color Change: As the butter cooks, you’ll notice the milk solids at the bottom of the pan turning brown. This is what gives brown butter its nutty flavor. Watch carefully, as it can burn quickly.
- Smell the Aroma: You’ll also notice a nutty aroma as the butter browns. This is another indicator that it’s ready.
- Remove from Heat: Once the butter is a deep golden brown and smells nutty, immediately remove the pan from the heat.
- Cool Slightly: Let the brown butter cool slightly before using it in the filling. You only need 2 tablespoons for the filling, so you can reserve the rest for another use (it’s delicious drizzled over vegetables or pasta!).
Preparing the Cake Base
- Preheat and Prep: Preheat your oven to 350°F (175°C). Grease and lightly flour a 9×13 inch baking pan. This will prevent the cake from sticking.
- Combine Dry Ingredients: In a medium bowl, whisk together the flour, baking powder, and salt. Whisking ensures the baking powder is evenly distributed.
- Cream Butter and Sugar: In a large bowl, cream together the softened butter and granulated sugar until light and fluffy. This usually takes about 3-5 minutes with an electric mixer.
- Add Egg and Vanilla: Beat in the egg and vanilla extract until well combined. Make sure to scrape down the sides of the bowl to ensure everything is mixed evenly.
- Gradually Add Dry Ingredients: Gradually add the dry ingredients to the wet ingredients, mixing on low speed until just combined. Be careful not to overmix, as this can result in a tough cake.
- Press into Pan: Press the cake batter evenly into the prepared baking pan. It will be a bit crumbly, but that’s okay. Just make sure it’s evenly distributed.
Making the Gooey Butter Filling
- Cream Cheese and Butter: In a large bowl, beat together the softened cream cheese and butter until smooth and creamy. This is crucial for a smooth, gooey filling.
- Add Eggs and Vanilla: Beat in the eggs one at a time, then stir in the vanilla extract. Again, make sure everything is well combined.
- Gradually Add Powdered Sugar: Gradually add the powdered sugar, beating on low speed until smooth. Be careful not to create a powdered sugar cloud!
- Add Salt and Brown Butter: Stir in the pinch of salt and the 2 tablespoons of cooled brown butter. The brown butter adds a wonderful nutty depth to the filling.
Assembling and Baking the Cake
- Pour Filling Over Base: Pour the gooey butter filling evenly over the cake base in the pan.
- Bake: Bake in the preheated oven for 35-40 minutes, or until the edges are golden brown and the center is set but still slightly gooey. The center should jiggle slightly when you gently shake the pan.
- Cool Completely: Let the cake cool completely in the pan before cutting and serving. This is important, as the filling will continue to set as it cools.
- Dust with Powdered Sugar (Optional): If desired, dust the cooled cake with powdered sugar before serving. This adds a nice touch of sweetness and visual appeal.
Tips for Success
- Softened Butter and Cream Cheese: Make sure your butter and cream cheese are properly softened before starting. This will ensure a smooth and creamy filling.
- Don’t Overmix: Be careful not to overmix the cake batter or the filling. Overmixing can result in a tough cake or a dense filling.
- Browning the Butter: Watch the butter carefully when browning it, as it can burn quickly. The color should be a deep golden brown, and the aroma should be nutty.
- Cooling Time: Allow the cake to cool completely before cutting and serving. This will allow the filling to set properly.
- Storage: Store leftover cake in an airtight container at room temperature for up to 3 days, or in the refrigerator for up to 5 days.
Variations
- Chocolate Chip Gooey Butter Cake: Add 1 cup of chocolate chips to the gooey butter filling.
- Lemon Gooey Butter Cake: Add 2 tablespoons of lemon zest and 2 tablespoons of lemon juice to the gooey butter filling.
- Pecan Gooey Butter Cake: Sprinkle ½ cup of chopped pecans over the cake before baking.
- Salted Caramel Gooey Butter Cake: Drizzle salted caramel sauce over the cooled cake.
Troubleshooting
- Cake is too dry: Make sure you’re not overbaking the cake. Also, ensure your oven temperature is accurate.
- Filling is too runny: Make sure you’re using the correct amount of powdered sugar. Also, ensure your cream cheese and butter are properly softened.
- Cake is sticking to the pan: Make sure you’re greasing and flouring the pan properly. You can also use parchment paper to line the bottom of the pan.
- Brown butter burned: Start again with a fresh batch of butter. Burnt butter will make the cake taste bitter.
Enjoy your delicious Brown Butter Gooey Butter Cake! I hope you find this recipe easy to follow and that it brings you as much joy as it brings me. Happy baking!
Conclusion:
This Brown Butter Gooey Butter Cake is truly something special, and I sincerely believe it deserves a spot in your regular baking rotation. It’s more than just a dessert; it’s an experience. The rich, nutty depth of the browned butter elevates the classic gooey butter cake to a whole new level of indulgence. The combination of the slightly crisp edges, the unbelievably gooey center, and that unmistakable brown butter aroma is simply irresistible. If you’re looking for a show-stopping dessert that’s surprisingly easy to make, look no further.
Why You Absolutely Need to Bake This Cake
Honestly, the reasons are endless! But to highlight a few: the recipe is straightforward, using ingredients you likely already have in your pantry. The brown butter adds a sophisticated twist that will impress your friends and family. And, most importantly, the taste is out of this world! It’s the perfect balance of sweet, buttery, and slightly salty, making it a crowd-pleaser every single time. This cake is also incredibly versatile. It’s fantastic served warm with a scoop of vanilla ice cream, a dollop of whipped cream, or even a sprinkle of fresh berries.
Serving Suggestions and Variations
Speaking of serving, the possibilities are endless! For a simple yet elegant presentation, dust the cooled cake with powdered sugar just before serving. For a more decadent treat, try drizzling it with a homemade caramel sauce or a chocolate ganache. And if you’re feeling adventurous, why not experiment with different flavor variations?
* Lemon Zest: Add the zest of one lemon to the batter for a bright and citrusy twist.
* Chocolate Chips: Fold in a cup of chocolate chips (milk, dark, or semi-sweet) for an extra layer of chocolatey goodness.
* Espresso Powder: Add a teaspoon of espresso powder to the batter to enhance the brown butter flavor and create a mocha-inspired cake.
* Nuts: Sprinkle chopped pecans or walnuts on top of the cake before baking for added texture and flavor.
* Seasonal Fruit: Top the cake with sliced peaches, berries, or apples before baking for a seasonal twist.
Don’t be afraid to get creative and customize this recipe to your liking! The beauty of baking is that you can always experiment and create something new and delicious.
Your Turn to Bake!
I truly hope you’ll give this Brown Butter Gooey Butter Cake recipe a try. I’m confident that you’ll love it as much as I do. It’s the perfect dessert for any occasion, from a casual weeknight treat to a special celebration. Once you experience the magic of brown butter in this classic cake, you’ll never go back!
So, preheat your oven, gather your ingredients, and get ready to bake! And most importantly, don’t forget to share your creations with me! I’d love to see your photos and hear about your experiences. Tag me on social media and let me know what you think. Happy baking! I can’t wait to see what delicious variations you come up with. Let me know in the comments below if you have any questions or if you tried any variations!
Brown Butter Gooey Butter Cake: The Ultimate Recipe
Rich, decadent Brown Butter Gooey Butter Cake with a soft base and sweet, irresistible filling.
Ingredients
Instructions
Recipe Notes
- Softened Butter and Cream Cheese: Make sure your butter and cream cheese are properly softened before starting. This will ensure a smooth and creamy filling.
- Don’t Overmix: Be careful not to overmix the cake batter or the filling. Overmixing can result in a tough cake or a dense filling.
- Browning the Butter: Watch the butter carefully when browning it, as it can burn quickly. The color should be a deep golden brown, and the aroma should be nutty.
- Cooling Time: Allow the cake to cool completely before cutting and serving. This will allow the filling to set properly.
- Storage: Store leftover cake in an airtight container at room temperature for up to 3 days, or in the refrigerator for up to 5 days.