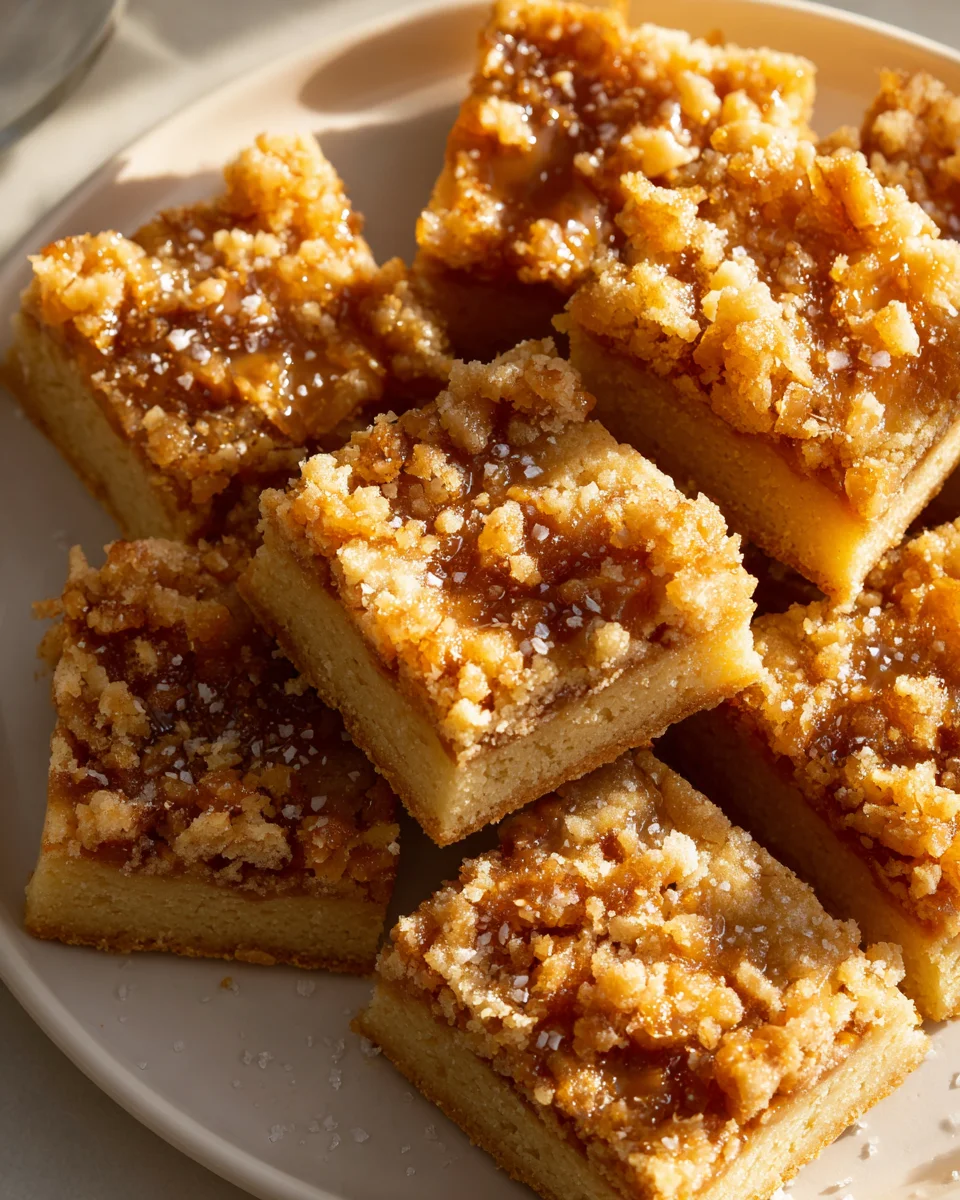
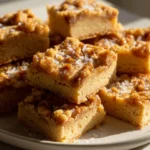
Brown Butter Toffee Shortbread Bars
Oh, let me tell you about these Brown Butter Toffee Shortbread Bars! If you’re looking for a dessert that’s utterly irresistible and packed with incredible flavor, you’ve found your new favorite. What makes these bars so special, you ask? Well, it all starts with the magical transformation of butter into a nutty, fragrant brown butter, which infuses the entire shortbread base with an unparalleled depth. This isn’t just any shortbread; it’s a melt-in-your-mouth experience that’s rich, tender, and perfectly buttery. Then, we take it up a notch with a generous scattering of crunchy, chewy toffee bits layered on top. The combination of that deeply flavorful brown butter shortbread and the sweet, buttery crunch of toffee is pure heaven in every single bite.
You’re going to absolutely adore these bars because they hit all the right notes: sophisticated enough for a dinner party, yet comforting enough for a cozy night in. They’re surprisingly simple to make, but they taste like you’ve spent hours in the kitchen creating a gourmet treat. Plus, who can resist a bar cookie that’s easy to share (or hoard for yourself, I won’t judge!). Imagine that perfect balance of crumbly shortbread, nutty brown butter aroma, and sweet, slightly sticky toffee – it’s a symphony of textures and flavors that will have everyone asking for the recipe. Get ready to bake something truly spectacular!

Ingredient Notes
Crafting the perfect Brown Butter Toffee Shortbread Bars begins with understanding the star ingredients that give them their irresistible character. I’ve found that using high-quality components truly makes all the difference in these buttery, crumbly delights.
- Unsalted Butter: This is the foundation of our shortbread, and because we’re browning it, its quality shines through. I always opt for unsalted so I can control the salt content precisely. The browning process transforms ordinary butter into a nutty, aromatic marvel that is absolutely essential for the unique flavor profile of these bars. If you only have salted butter, you can use it, but be sure to reduce the added salt in the recipe by about half a teaspoon.
- All-Purpose Flour: Standard all-purpose flour works beautifully here. Its moderate protein content gives us that classic tender, crumbly shortbread texture without being too dense or too fragile. I don’t typically recommend substitutions for flour in shortbread as it can drastically alter the texture.
- Granulated Sugar: For sweetness and to contribute to that wonderful crispness. It’s a simple ingredient, but vital for balance against the rich butter and toffee. I wouldn’t suggest cutting back significantly on the sugar, as it affects the texture as well as the sweetness.
- Fine Sea Salt: A touch of salt is crucial for enhancing all the other flavors, especially the sweetness and the nuttiness of the brown butter. It really brings everything into harmonious balance. Don’t skip it!
- Vanilla Extract: While often overlooked, a good quality vanilla extract complements the brown butter beautifully, adding a warm, aromatic background note. I find pure vanilla extract gives the best flavor.
- English Toffee Bits: These are the “toffee” in our “Brown Butter Toffee Shortbread Bars” and they provide that delightful chewy crunch and buttery caramel flavor. I typically use commercially available English toffee bits (like Heath bits), which are already broken down and ready to go. You can find them in the baking aisle. If you wanted to get adventurous, you could make your own toffee and chop it, but for convenience, the pre-made bits are perfect. I wouldn’t recommend substituting these with something like chocolate chips if you want to maintain the specific “toffee” character of the bars, but for a different variation, chocolate would certainly be delicious.
Step-by-Step Instructions
Making these Brown Butter Toffee Shortbread Bars is a straightforward process, but paying attention to a few key details will ensure your success. I promise, the extra effort for browning the butter is absolutely worth it!
- Prepare Your Pan: First things first, preheat your oven to 350°F (175°C). Then, grab an 8×8-inch or 9×9-inch baking pan. Line it with parchment paper, leaving an overhang on two sides. This creates “slings” that will make it incredibly easy to lift the entire slab of shortbread out of the pan once it’s cooled, allowing for neat and effortless cutting.
- Brown the Butter: This is the most crucial step for that signature flavor! In a light-colored saucepan (a light bottom helps you see the color change), melt the unsalted butter over medium heat. Continue cooking, stirring occasionally, until the butter starts to foam, then crackle. Keep a close eye on it! The milk solids at the bottom of the pan will begin to turn golden brown, then amber, and eventually develop a rich, nutty aroma. Immediately remove the pan from the heat once you see those beautiful amber flecks and smell that nutty fragrance. It can go from perfect to burnt very quickly. Pour the browned butter (including all the browned bits!) into a heatproof bowl to cool slightly. Let it cool for about 10-15 minutes until it’s no longer piping hot but still liquid.
- Whisk Dry Ingredients: In a medium mixing bowl, whisk together the all-purpose flour, granulated sugar, and fine sea salt. This ensures all the dry ingredients are evenly distributed, which is important for a consistent shortbread texture.
- Combine Wet and Dry: Pour the slightly cooled brown butter and the vanilla extract into the bowl with the dry ingredients. Mix with a sturdy spoon or a rubber spatula until the mixture is just combined and forms a crumbly, sandy dough. Be careful not to overmix; overdeveloping the gluten can lead to a tougher shortbread.
- Form the Base Layer: Take about two-thirds of the shortbread dough mixture and press it firmly and evenly into the bottom of your prepared baking pan. Use the bottom of a flat glass or your clean hands to compact the dough into a solid, uniform layer. This creates the sturdy, buttery base of your bars.
- Add the Toffee: Sprinkle the English toffee bits evenly over the pressed shortbread base. I love how these bits soften slightly in the oven, creating a gooey layer.
- Crumble the Topping: Take the remaining one-third of the shortbread dough and crumble it over the layer of toffee bits. You don’t need to press this layer down firmly; a light pat is enough to help it adhere while still maintaining a slightly crumbly, rustic top texture.
- Bake to Golden Perfection: Place the pan in your preheated oven and bake for 25-30 minutes, or until the edges are lightly golden brown and the top has a firm, slightly set appearance. The exact baking time can vary depending on your oven, so keep an eye on it.
- Cool Completely (Crucial!): This step is non-negotiable for perfectly structured shortbread bars. Remove the pan from the oven and place it on a wire rack to cool completely in the pan. This usually takes at least 1-2 hours, or even longer. Resisting the urge to cut into them warm is hard, but essential for neat, firm bars. Warm shortbread will crumble and fall apart.
- Slice and Serve: Once completely cool, use the parchment paper overhangs to lift the entire shortbread slab out of the pan. Transfer it to a cutting board and use a sharp knife to cut it into squares or bars of your desired size.
Tips & Suggestions
I’ve made these Brown Butter Toffee Shortbread Bars countless times, and I’ve picked up a few tricks along the way that I think will help you achieve absolute perfection. These insights are specific to ensuring your shortbread is tender, flavorful, and beautifully structured.
- Don’t Rush the Brown Butter: This is truly the secret ingredient. The process of browning the butter adds an incredible depth of nutty, caramelized flavor that regular melted butter just can’t achieve. Use a light-bottomed pan so you can clearly see the milk solids changing color, and stir frequently. As soon as you see those amber flecks and smell the toasted, nutty aroma, take it off the heat immediately. It can go from perfect to burnt in seconds!
- Quality Butter Matters: Since butter is such a prominent flavor here, opting for a good quality unsalted butter will elevate your shortbread from great to extraordinary. Higher butterfat content can also contribute to a richer taste and more tender texture.
- Avoid Overmixing the Dough: Shortbread is meant to be tender and crumbly, and overmixing develops gluten in the flour, which can lead to a tough, chewy texture. Once the brown butter is added to the dry ingredients, mix just until a crumbly dough forms and no streaks of dry flour remain.
- Press Firmly for the Base: For the bottom layer, really take the time to press the dough firmly and evenly into the pan. This creates a dense, sturdy base that holds up well when sliced and provides a lovely contrast to the slightly looser top crumble. A flat-bottomed glass or a small offset spatula can be very helpful for this.
- Cool Completely – Be Patient!: I cannot stress this enough! Shortbread needs to cool down entirely for it to firm up and for the butter to re-solidify. If you try to cut it warm, it will be soft and crumble excessively, making neat slices nearly impossible. Let it cool on a wire rack in the pan for at least an hour, preferably two, or even longer if your kitchen is warm.
- A Sprinkle of Sea Salt: For an extra touch of gourmet sophistication and to truly make the flavors pop, consider sprinkling a tiny bit of flaky sea salt (like Maldon) over the top of the bars just after they come out of the oven, or even right before serving. The salt provides a wonderful counterpoint to the sweet toffee and rich brown butter.
- Even Thickness for Even Baking: When pressing the dough into the pan, aim for an even thickness throughout. This ensures that all parts of your shortbread bake at the same rate, preventing some areas from being over-baked while others are under-baked.
- At Room Temperature: Once the shortbread bars have cooled completely and been cut, I typically store them in an airtight container at room temperature. A cookie tin or a sealed plastic container works perfectly. Placed on your counter, they will stay fresh and delicious for up to 5-7 days. The shortbread’s low moisture content helps it keep well.
- Refrigeration (Not Usually Necessary): I don’t typically recommend refrigerating shortbread bars unless your kitchen is exceptionally warm and humid, or if you’ve added a very perishable topping. Refrigeration can sometimes alter the texture of shortbread, making it a bit firmer and less melt-in-your-mouth. If you do refrigerate them, be sure to let them come back to room temperature before serving for the best texture and flavor.
- Freezing for Longer Storage: These bars freeze beautifully, which is fantastic if you want to make them ahead or save some for later. Once completely cooled and cut, arrange the shortbread bars in a single layer on a baking sheet and flash freeze them for about 30 minutes to an hour, or until solid. This prevents them from sticking together. Then, transfer the frozen bars to a freezer-safe airtight container or a heavy-duty freezer bag, layering parchment paper between layers if necessary. They will keep well in the freezer for up to 2-3 months.
- Thawing Frozen Bars: To enjoy frozen shortbread bars, simply remove them from the freezer and let them thaw at room temperature for an hour or two. They will taste just as fresh and buttery as when they were first baked!
- Total Time: 45 minutes
- Yield: 16 bars 1x
- 1 cup Unsalted Butter
- 1 1/2 cups All-Purpose Flour
- 3/4 cup Granulated Sugar
- 1/2 teaspoon Fine Sea Salt
- 1 teaspoon Vanilla Extract
- 1 cup English Toffee Bits
- Preheat your oven to 350°F (175°C) and line an 8×8-inch or 9×9-inch baking pan with parchment paper, leaving an overhang on two sides.
- In a light-colored saucepan, melt the unsalted butter over medium heat, stirring occasionally until it starts to foam and crackle. Watch for the milk solids to turn golden brown and remove from heat once you smell a nutty aroma.
- Pour the browned butter into a heatproof bowl and let it cool for about 10-15 minutes.
- In a medium mixing bowl, whisk together the all-purpose flour, granulated sugar, and fine sea salt.
- Pour the slightly cooled brown butter and vanilla extract into the dry ingredients and mix until just combined to form a crumbly dough.
- Press about two-thirds of the dough firmly into the bottom of the prepared baking pan to create a solid base layer.
- Sprinkle the English toffee bits evenly over the pressed shortbread base.
- Crumble the remaining one-third of the dough over the layer of toffee bits without pressing it down firmly.
- Bake in the preheated oven for 25-30 minutes until the edges are lightly golden brown and the top is slightly set.
- Remove from the oven and let cool completely in the pan on a wire rack for at least 1-2 hours before cutting into squares or bars.
- Prep Time: 15 mins
- Cook Time: 30 mins
- Category: Dessert
- Method: Baking
- Cuisine: American
- Serving Size: 1 bar
- Calories: 200
- Sugar: 10 g
- Sodium: 50 mg
- Fat: 12 g
- Saturated Fat: 7 g
- Unsaturated Fat: 4 g
- Trans Fat: 0 g
- Carbohydrates: 20 g
- Fiber: 1 g
- Protein: 2 g
- Cholesterol: 30 mg
Storage
Proper storage will help your Brown Butter Toffee Shortbread Bars maintain their exquisite texture and flavor for days. They’re so delicious, I doubt they’ll last long, but it’s good to know how to keep them fresh!
Final Thoughts
And there you have it! I truly believe these Brown Butter Toffee Shortbread Bars are more than just a dessert; they’re an experience waiting to happen. The magic really lies in that perfectly browned butter, infusing every crumb of the shortbread with an incredible, nutty depth that regular shortbread just can’t touch. Then, you get hit with those delightful pockets of buttery, chewy toffee, adding a fantastic textural contrast and an extra layer of sweetness that makes each bite absolutely irresistible.
These aren’t your average shortbreads; the combination of the tender, melt-in-your-mouth base with the rich toffee bits and that signature brown butter flavor makes these Brown Butter Toffee Shortbread Bars an absolute must-try. Whether you’re treating yourself, sharing with loved ones, or looking for a showstopper for your next gathering, I promise you, these bars will disappear in a flash. Go ahead, bake a batch, and discover the joy of this elevated classic!
Brown Butter Toffee Shortbread Bars: Simply Irresistible!
Description
These Brown Butter Toffee Shortbread Bars are a melt-in-your-mouth experience that combines rich, nutty brown butter with crunchy toffee bits. Perfect for any occasion, they’re surprisingly simple to make yet taste gourmet!
Ingredients
Instructions
Nutrition
Keywords: Ensure to brown the butter carefully for the best flavor. Use high-quality unsalted butter for optimal results, and avoid overmixing the dough to maintain a tender texture.