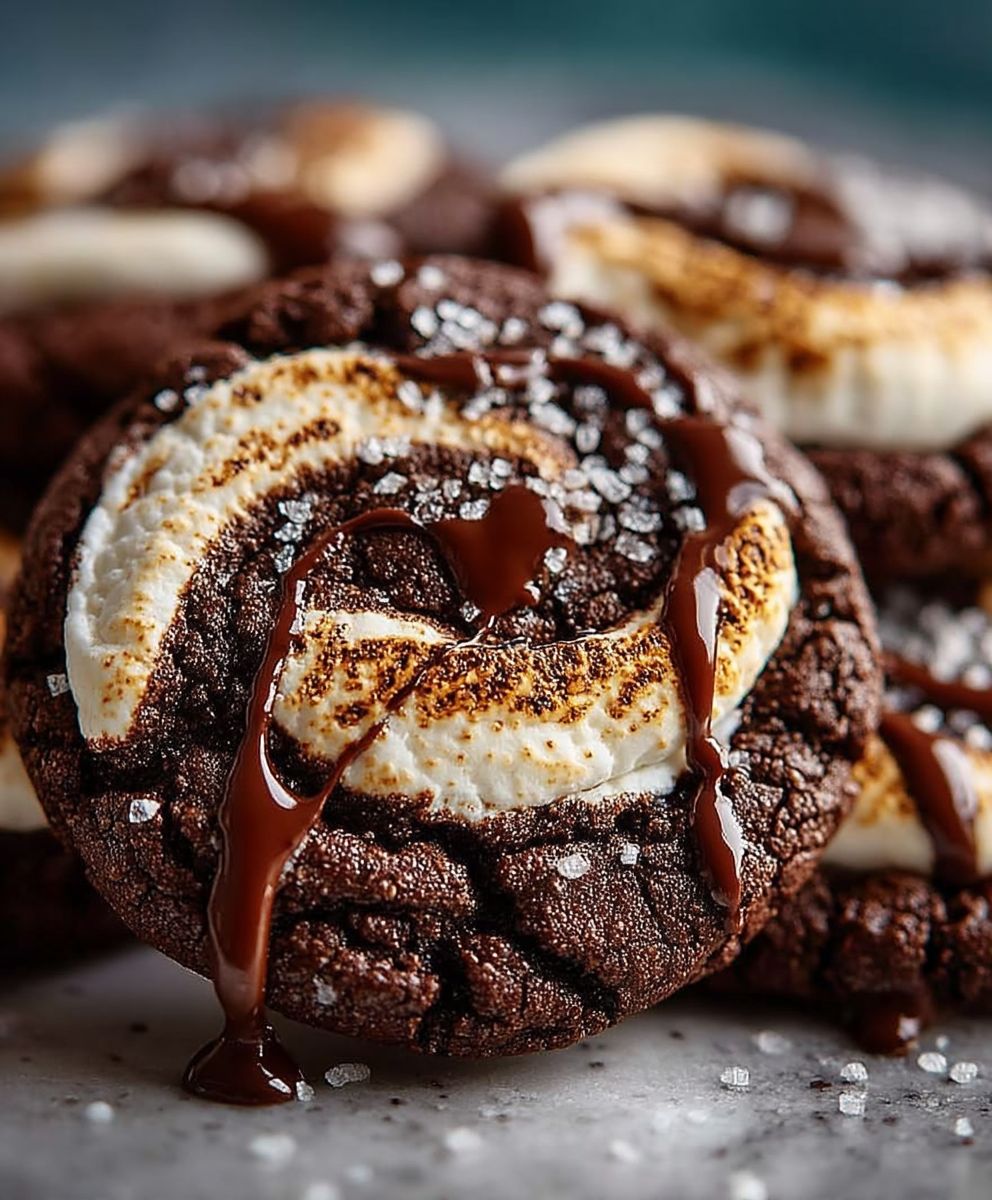
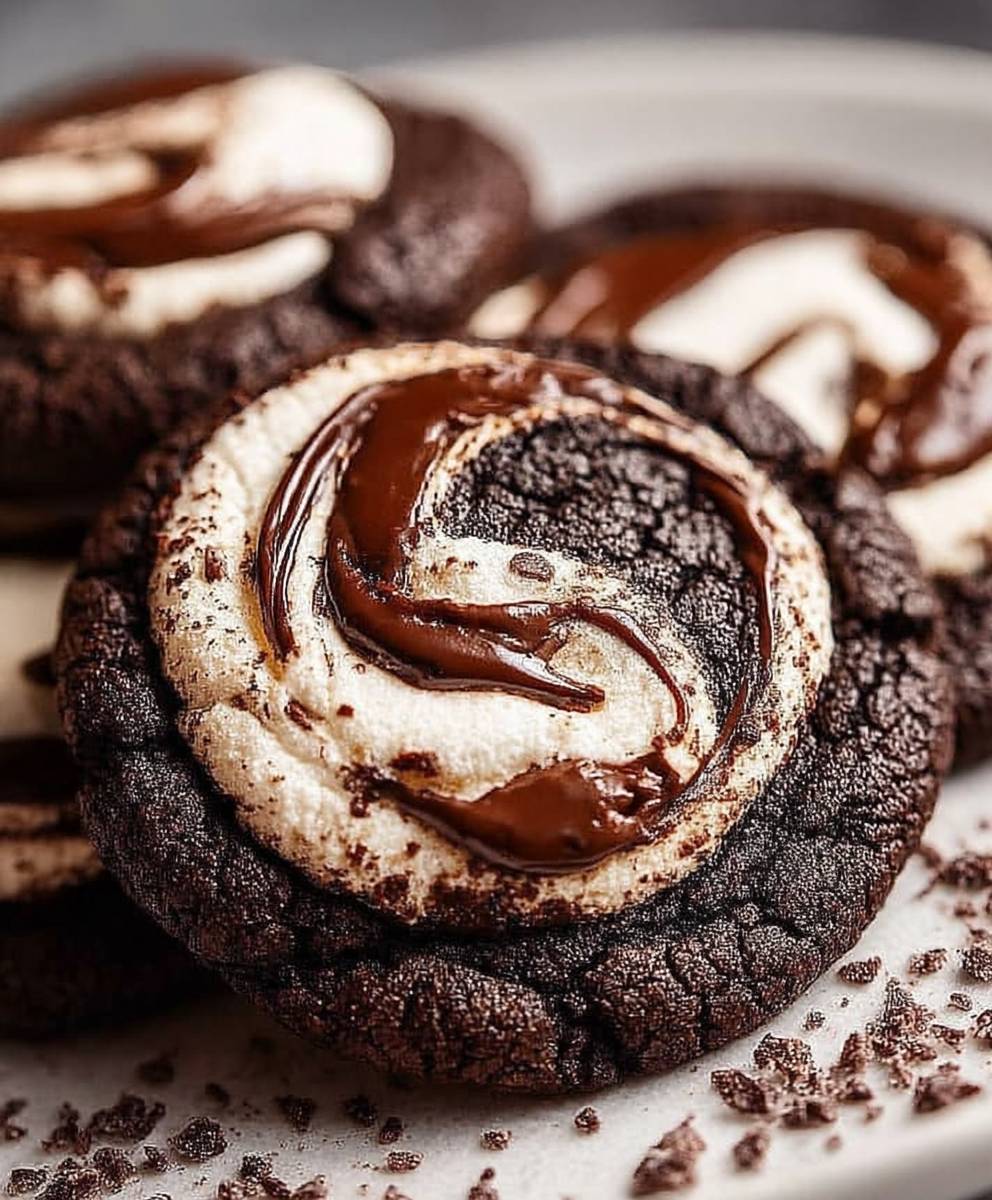
Chocolate Marshmallow Swirl Cookies: Prepare to enter a realm of pure, unadulterated cookie bliss! Imagine sinking your teeth into a soft, chewy cookie, the rich chocolate notes dancing on your tongue, followed by the sweet, gooey embrace of melted marshmallow. It’s a symphony of flavors and textures that will leave you craving more.
While the exact origins of swirling marshmallow into cookies are somewhat shrouded in mystery, the combination itself feels inherently nostalgic. Marshmallows, a confection dating back to ancient Egypt (though quite different from what we know today!), have always held a special place in our hearts. Paired with the universally loved chocolate, it’s a match made in dessert heaven. Think s’mores around a campfire, but in cookie form!
What makes these Chocolate Marshmallow Swirl Cookies so irresistible? It’s the perfect balance of indulgence and comfort. The slightly crisp edges give way to a soft, almost brownie-like center, punctuated by pockets of melted marshmallow that create a delightful textural contrast. They’re also incredibly easy to make, perfect for a weekend baking project or a quick treat when you need a little pick-me-up. The visual appeal is undeniable too – the swirling patterns of chocolate and marshmallow create a beautiful, almost artistic effect. Get ready to impress your friends and family with these decadent delights!
Ingredients:
- 1 cup (2 sticks) unsalted butter, softened
- 1 cup granulated sugar
- 1 cup packed light brown sugar
- 2 large eggs
- 1 teaspoon vanilla extract
- 2 1/4 cups all-purpose flour
- 1 teaspoon baking soda
- 1 teaspoon salt
- 1 cup semi-sweet chocolate chips
- 1 cup mini marshmallows
- 1/2 cup marshmallow fluff
- 1/4 cup unsweetened cocoa powder
- 2 tablespoons milk
Preparing the Dough:
- First, let’s cream together the butter and sugars. In a large bowl, or the bowl of your stand mixer, beat the softened butter, granulated sugar, and brown sugar together until light and fluffy. This usually takes about 3-5 minutes. Don’t rush this step; it’s important for the texture of the cookies!
- Next, beat in the eggs one at a time, making sure each egg is fully incorporated before adding the next. Then, stir in the vanilla extract. The vanilla really enhances the chocolate flavor, so don’t skip it!
- In a separate medium bowl, whisk together the flour, baking soda, and salt. This ensures that the baking soda and salt are evenly distributed throughout the flour, which is crucial for even baking and flavor.
- Gradually add the dry ingredients to the wet ingredients, mixing on low speed until just combined. Be careful not to overmix! Overmixing can lead to tough cookies.
- Now, for the chocolate swirl! In a small, microwave-safe bowl, combine the marshmallow fluff, cocoa powder, and milk. Microwave for 15-20 seconds, or until the marshmallow fluff is melted and the mixture is smooth. Stir well to combine. This creates a rich, chocolatey marshmallow swirl that will make these cookies extra special.
- Gently fold in the chocolate chips and mini marshmallows into the cookie dough. Don’t overmix at this stage; you want to keep the marshmallows relatively intact.
Creating the Swirl:
- This is where the magic happens! Divide the cookie dough in half. Leave one half plain.
- Add the chocolate marshmallow mixture to the other half of the cookie dough and gently fold it in until it’s marbled throughout. Don’t overmix; you want to see distinct swirls of chocolate marshmallow.
- Now, take a tablespoon of the plain dough and a tablespoon of the chocolate marshmallow dough. Gently press them together and roll them into a ball. This creates a beautiful swirl effect in each cookie.
- Place the cookie dough balls onto a baking sheet lined with parchment paper, leaving about 2 inches between each cookie. The parchment paper prevents the cookies from sticking and makes cleanup a breeze.
Baking the Cookies:
- Preheat your oven to 375°F (190°C). Make sure your oven is properly preheated for even baking.
- Bake for 9-11 minutes, or until the edges are golden brown and the centers are still slightly soft. The cookies will continue to bake slightly as they cool on the baking sheet.
- Remove the baking sheet from the oven and let the cookies cool on the baking sheet for a few minutes before transferring them to a wire rack to cool completely. This prevents the cookies from breaking apart while they’re still warm and soft.
Tips and Variations:
- For extra gooey cookies: Add a few extra mini marshmallows on top of each cookie before baking.
- For a richer chocolate flavor: Use dark chocolate chips instead of semi-sweet chocolate chips.
- For a peanut butter twist: Add 1/2 cup of peanut butter chips to the dough along with the chocolate chips.
- For a festive touch: Use red and green mini marshmallows for Christmas, or pastel-colored marshmallows for Easter.
- Freezing the dough: You can freeze the cookie dough balls for up to 2 months. Just thaw them in the refrigerator overnight before baking.
- Storing the cookies: Store the baked cookies in an airtight container at room temperature for up to 3 days.
- High Altitude Adjustments: If you live at a high altitude, you may need to adjust the recipe slightly. Try reducing the amount of baking soda by 1/4 teaspoon and adding 1-2 tablespoons of extra flour.
- Don’t overbake! Overbaked cookies will be dry and crumbly. The cookies should be slightly soft in the center when you remove them from the oven.
- Use room temperature ingredients: Using room temperature butter and eggs will help the ingredients blend together more easily and create a smoother dough.
- Measure your flour correctly: The best way to measure flour is to use a kitchen scale. If you don’t have a scale, spoon the flour into your measuring cup and level it off with a knife. Don’t scoop the flour directly from the bag, as this can pack the flour and result in too much flour in the recipe.
- Chill the dough (optional): For thicker cookies, chill the dough in the refrigerator for at least 30 minutes before baking. This will help prevent the cookies from spreading too much in the oven.
- Experiment with extracts: Try adding a different extract, such as almond extract or peppermint extract, to the dough for a unique flavor.
- Add nuts: Chopped walnuts, pecans, or almonds would be a delicious addition to these cookies.
- Make them gluten-free: Substitute the all-purpose flour with a gluten-free all-purpose flour blend. Be sure to use a blend that contains xanthan gum for best results.
Troubleshooting:
- Cookies are too flat: This could be due to using too much butter, not enough flour, or not chilling the dough. Make sure you’re using the correct amount of butter and flour, and try chilling the dough for at least 30 minutes before baking.
- Cookies are too dry: This could be due to overbaking or using too much flour. Make sure you’re not overbaking the cookies, and try using a little less flour in the recipe.
- Cookies are too hard: This could be due to overmixing the dough or using too much sugar. Be careful not to overmix the dough, and try using a little less sugar in the recipe.
- Cookies are not spreading: This could be due to using too much flour or not enough butter. Make sure you’re using the correct amount of flour and butter.
Enjoy your delicious Chocolate Marshmallow Swirl Cookies!

Conclusion:
And there you have it! These Chocolate Marshmallow Swirl Cookies are more than just a treat; they’re an experience. From the rich, decadent chocolate dough to the gooey, toasted marshmallow swirls, every bite is a symphony of textures and flavors that will leave you craving more. I truly believe this recipe is a must-try for any baking enthusiast, whether you’re a seasoned pro or just starting out. The process is surprisingly simple, yet the results are incredibly impressive.
Why is this recipe a must-try? Because it’s the perfect balance of comfort and indulgence. It’s the kind of cookie that evokes childhood memories of campfires and s’mores, but with a sophisticated twist that makes it perfect for any occasion. Imagine serving these warm, fresh-baked cookies at your next gathering – they’re guaranteed to be a crowd-pleaser! Or picture yourself curled up on the couch with a glass of milk and a plate of these delightful treats on a chilly evening. Pure bliss!
But the best part? The versatility! While I’ve shared my go-to recipe, feel free to get creative and experiment with different variations.
Serving Suggestions and Variations:
* Ice Cream Sandwich Extravaganza: Use these cookies to make ice cream sandwiches! Vanilla bean, chocolate, or even coffee ice cream would pair perfectly with the rich chocolate and marshmallow flavors.
* Drizzle Delight: Drizzle melted white chocolate or dark chocolate over the cooled cookies for an extra touch of elegance. A sprinkle of sea salt would also add a delightful contrast.
* Nutty Goodness: Add chopped pecans, walnuts, or almonds to the dough for a nutty crunch.
* Espresso Boost: For a mocha-inspired twist, add a teaspoon of instant espresso powder to the chocolate dough.
* Marshmallow Mania: Use different flavored marshmallows! Strawberry, vanilla, or even toasted coconut marshmallows would add a unique twist.
* S’mores Upgrade: Crush some graham crackers and sprinkle them on top of the cookies before baking for an authentic s’mores experience.
* Cookie Crumbles: Crumble these cookies over ice cream or yogurt for a decadent topping.
* Gift Giving: Package these cookies in a cute box or tin for a thoughtful homemade gift.
I’m so excited for you to try this recipe and experience the magic of these Chocolate Marshmallow Swirl Cookies for yourself. Don’t be intimidated by the swirl – it’s easier than it looks, and the visual appeal is definitely worth the effort. Remember to have fun with it and don’t be afraid to experiment with different variations to create your own signature cookie.
I truly believe that baking is a form of therapy, and these cookies are the perfect recipe to unwind and create something delicious. So, preheat your oven, gather your ingredients, and get ready to embark on a baking adventure!
Once you’ve made these cookies, I would absolutely love to hear about your experience! Share your photos and stories with me in the comments below. Did you try any of the variations? What did you think of the marshmallow swirl technique? I can’t wait to see your creations and hear your feedback. Happy baking! Let me know if you have any questions, and I’ll do my best to help. Enjoy!
Chocolate Marshmallow Swirl Cookies: Recipe & Baking Tips
Decadent chocolate marshmallow swirl cookies with a soft, chewy texture and a beautiful marbled effect.
Ingredients
Instructions
Recipe Notes
- Extra Gooey: Add extra mini marshmallows on top before baking.
- Richer Chocolate: Use dark chocolate chips.
- Peanut Butter Twist: Add 1/2 cup peanut butter chips.
- Festive Touch: Use red/green or pastel marshmallows.
- Freezing: Freeze dough balls for up to 2 months; thaw overnight before baking.
- Storing: Store baked cookies in an airtight container at room temperature for up to 3 days.
- High Altitude: Reduce baking soda by 1/4 tsp and add 1-2 tbsp extra flour.
- Don’t Overbake: Cookies should be slightly soft in the center.
- Room Temp Ingredients: Use room temperature butter and eggs.
- Measure Flour Correctly: Spoon and level flour.
- Chill Dough (Optional): Chill for 30 minutes for thicker cookies.
- Experiment with Extracts: Try almond or peppermint extract.
- Add Nuts: Chopped walnuts, pecans, or almonds.
- Gluten-Free: Use gluten-free all-purpose flour blend with xanthan gum.


