• Skip to primary navigation
  • Skip to main content
  • Skip to primary sidebar
Homesmad

Homesmad

  • Home
  • Breakfast & Brunch
  • Appetizers & Snacks
  • Dinner
  • Dessert
  • About
  • Privacy Policy
  • Contact
Homesmad
  • Home
  • Breakfast & Brunch
  • Appetizers & Snacks
  • Dinner
  • Dessert
  • About
  • Privacy Policy
  • Contact

Cranberry Turkey Stuffing Balls: Festive & Flavorful Bites

October 8, 2025 by Lily author

Cranberry Turkey Stuffing Balls are not just a side dish; they are a revolution in holiday feasting. Gone are the days of wrestling with a large, unwieldy stuffing dish, hoping for that perfect ratio of crispy edges to moist interior. Stuffing, or ‘dressing’ as it’s known in some regions, has graced our holiday tables for centuries, evolving from a simple way to fill poultry to a star in its own right. It embodies the warmth and bounty of festive gatherings, a comforting classic that signifies home and celebration.

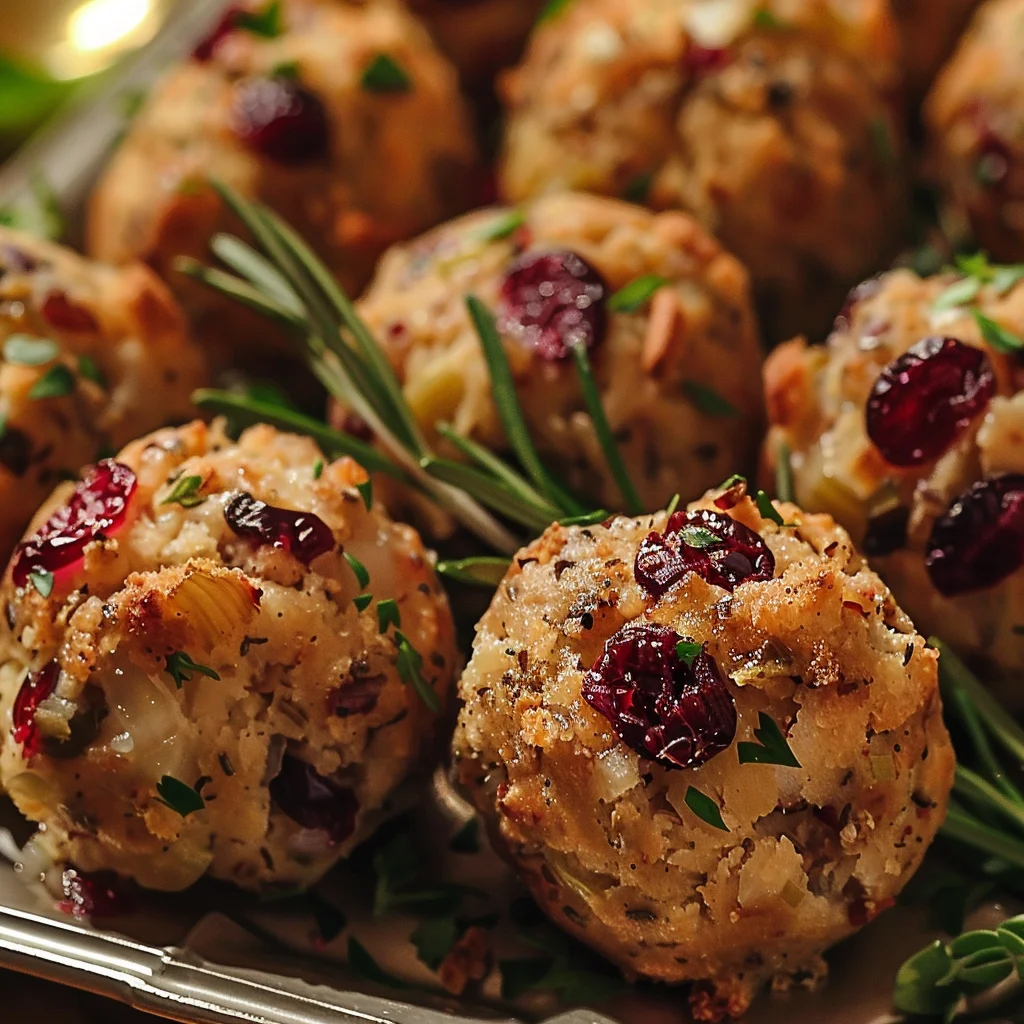
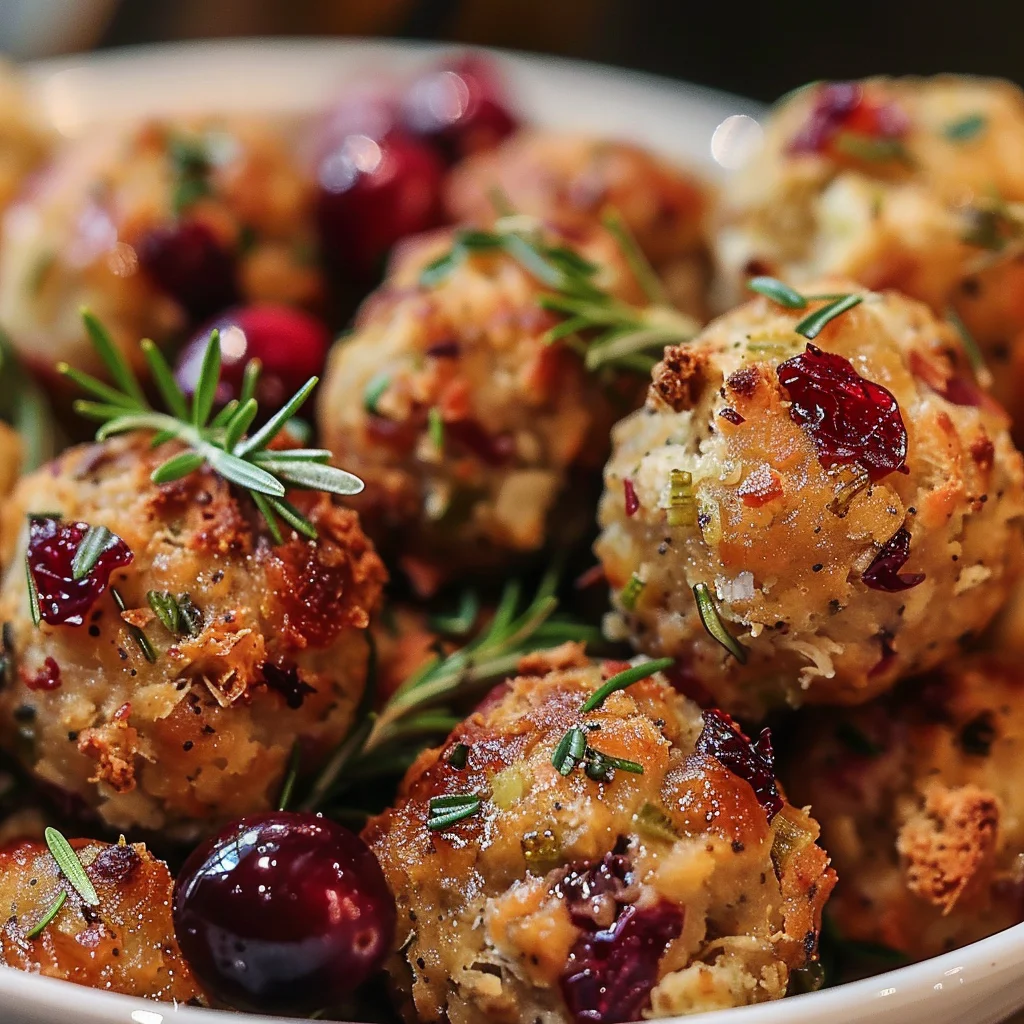
And while the classic holds a special place, I’ve found that presenting this beloved staple in individual portions elevates the entire experience. Imagine perfectly golden-brown spheres, each bursting with the savory notes of succulent turkey, the bright, tart tang of cranberries, and a harmonious blend of aromatic herbs. These delightful little Cranberry Turkey Stuffing Balls offer a superb textural contrast—a slightly crisp exterior giving way to a wonderfully moist and flavorful center. They are incredibly convenient for serving, ensure everyone gets a delightful ‘edge piece’ without the fuss, and add an elegant, portion-controlled touch to your festive spread. I am truly excited to share this recipe with you, as it brings together cherished tradition with a touch of modern ease and undeniable deliciousness.

Cranberry Turkey Stuffing Balls: Festive & Flavorful Bites this RECIPE

Ingredients:

  • For the Stuffing Base:
    • 12 cups (approximately 1.5 lbs) day-old bread, cut into 1/2 to 3/4-inch cubes. I love using a mix of sourdough and a more traditional white sandwich bread for complex flavor and texture, but brioche or challah also work beautifully for a richer stuffing.
    • 1 cup (2 sticks) unsalted butter.
    • 2 large yellow onions, finely diced.
    • 4 celery stalks, finely diced.
    • 4 cloves garlic, minced.
    • 1/2 cup fresh sage, finely chopped (about 1 large bunch). Fresh herbs make all the difference, trust me!
    • 1/4 cup fresh thyme, leaves stripped and finely chopped.
    • 2 tablespoons fresh rosemary, finely chopped.
    • 1 teaspoon sea salt, plus more to taste.
    • 1/2 teaspoon freshly ground black pepper, plus more to taste.
    • 1 tablespoon poultry seasoning (a wonderful blend of savory spices that truly elevates the flavor).
    • 1 cup dried cranberries, plump and juicy. These add a delightful pop of sweetness and tartness, perfectly complementing the savory turkey.
    • 2 large eggs, lightly beaten.
    • 2 cups low-sodium chicken or turkey broth, plus extra if needed.
  • For the Turkey:
    • 1.5 lbs lean ground turkey (93/7 or 90/10 works best to keep the balls moist without being overly greasy).
  • Optional Additions (highly recommended for extra texture and flavor!):
    • 1/2 cup toasted pecans or walnuts, roughly chopped.
    • 1 Granny Smith apple, peeled, cored, and finely diced or grated.

Preparing the Stuffing Base: The Foundation of Flavor

Before we dive into assembling our delicious Cranberry Turkey Stuffing Balls, let’s get our stuffing base perfectly prepared. This initial stage is crucial for building deep, complex flavors that will shine through in every bite. Think of it as the canvas for our culinary masterpiece, where every ingredient plays a vital role in creating that comforting, aromatic experience we all love.

  1. Preheat and Prepare: Start by preheating your oven to 375°F (190°C). While the oven heats, take a moment to line two large baking sheets with parchment paper or silicone baking mats. This simple step is a game-changer; it will prevent any sticking whatsoever and make for an effortless cleanup later, allowing you to focus on enjoying your delicious creation rather than scrubbing pans.
  2. Toast the Bread (if needed): If your bread cubes aren’t already day-old and slightly firm, or if you prefer an even crispier foundation, you’ll want to toast them. Spread the bread cubes in an even layer on your prepared baking sheets. Bake for 10-15 minutes, or until they are lightly golden brown around the edges and noticeably dried out. It is absolutely essential to keep a close eye on them during this process, as bread can go from perfectly toasted to burnt very quickly. This step is vital for preventing soggy stuffing; we want our bread to be porous enough to absorb all those wonderful flavors without turning into a mushy consistency. Once toasted to perfection, remove them from the oven and set them aside to cool slightly while you move on to the next steps.
  3. Sauté the Aromatics: In a large, heavy-bottomed pot or a spacious Dutch oven, melt the 1 cup of unsalted butter over medium heat. Once the butter is shimmering beautifully and emits a rich, nutty fragrance, add the finely diced yellow onions and celery. Sauté these delightful vegetables gently, stirring them occasionally with a wooden spoon or spatula, for about 8-10 minutes. Your goal here is to achieve a significant softening of the vegetables, where they become wonderfully translucent without taking on any browning. You’ll notice their sweet, earthy aroma beginning to fill your kitchen – this is the undeniable sign that the foundation of something truly special is being laid! We’re coaxing out their natural sweetness and tenderness, which will contribute immensely to the overall depth of flavor.
  4. Infuse with Herbs and Garlic: Once the onions and celery are perfectly soft and glistening, add the minced garlic along with your vibrant, finely chopped fresh sage, thyme, and rosemary. Continue to cook for just another 2-3 minutes, stirring constantly to ensure even distribution and to prevent burning. Be particularly careful not to overcook the garlic, as burnt garlic can introduce a bitter note that we definitely want to avoid. A gentle sauté is all that’s required to unlock its pungent aroma and mellow its intensity just enough. The fragrance at this stage is truly intoxicating – it’s the quintessential holiday aroma, promising warmth, comfort, and an abundance of deliciousness. This blend of fresh herbs is what gives our stuffing its signature, complex taste.
  5. Combine Dry Ingredients: Now, grab your most enormous mixing bowl – seriously, the bigger, the better, as we’ll be adding many components! Into this generous bowl, combine your perfectly toasted bread cubes, the wonderfully fragrant sautéed aromatic mixture (make sure to scrape every last bit of that flavorful butter from the pot – no deliciousness left behind!), the plump and juicy dried cranberries, a teaspoon of sea salt, half a teaspoon of freshly ground black pepper, and the tablespoon of poultry seasoning. If you’re opting for the optional additions of toasted pecans or walnuts and the finely diced or grated apple, now is the ideal time to incorporate them as well. Using your clean hands or a large, sturdy spoon, gently toss everything together. The aim is for the bread cubes to be evenly coated with the herb-butter mixture, ensuring all ingredients are well distributed throughout.

    A Gentle Touch is Key Here

    When mixing, you want to be thorough but remember to be gentle. The primary goal is to get all those lovely, savory, sweet, and herbaceous flavors thoroughly infused into every bread cube without crushing them too much. Maintaining the integrity of the bread cubes ensures a delightful, varied texture in your finished Cranberry Turkey Stuffing Balls, avoiding a uniform, mushy consistency.

  6. Prepare the Liquid Binder: In a separate, medium-sized bowl, whisk together the 2 lightly beaten large eggs and the 2 cups of low-sodium chicken or turkey broth until they are thoroughly combined. The eggs serve as a crucial binder in this recipe, helping our stuffing balls to hold their shape beautifully during baking. Meanwhile, the broth adds essential moisture and introduces an extra layer of savory depth, enriching the overall flavor profile of the stuffing. This liquid mixture is the glue that will bring all our ingredients together harmoniously.
  7. Moisten the Stuffing: Carefully pour the egg and broth mixture evenly over the bread and herb mixture that’s waiting in your large mixing bowl. Again, employing your hands or a large spoon, gently mix everything together until all the bread cubes are thoroughly and evenly moistened. The mixture should feel damp and cohesive, but under no circumstances should it appear soggy. If, after thorough mixing, the mixture seems too dry or crumbly, you can gradually add another 1/4 to 1/2 cup of broth, a little at a time, until it reaches the desired moist consistency. Once moistened, allow the mixture to sit undisturbed for about 5-10 minutes; this crucial resting period allows the bread to fully absorb all the liquids and flavors, contributing to a more uniform and tender texture throughout your stuffing balls.

Incorporating the Turkey and Forming the Cranberry Turkey Stuffing Balls

Now that our aromatic stuffing base is perfectly prepared and bursting with flavor, it’s time to introduce the star of the show – the lean ground turkey – and skillfully transform our cohesive mixture into perfectly portioned, delightful stuffing balls. This stage requires a careful hand to ensure even distribution and proper shaping.

  1. Add the Ground Turkey: Take your 1.5 lbs of lean ground turkey and add it directly into the large bowl with the wonderfully moistened stuffing mixture. This is where your clean hands truly become your most effective tools! Gently, but thoroughly, work the ground turkey into the stuffing mixture. You want to ensure that the turkey is completely and evenly distributed throughout the entire stuffing base. The key is to combine everything until you can no longer see any large pockets of unmixed ground turkey, but it’s equally important to avoid overworking the mixture. Overworking can lead to tough, dense stuffing balls, and we’re aiming for a tender, flavorful outcome.

    Achieving the Perfect Mixture Consistency

    At this point, the mixture should feel perfectly cohesive enough to hold its shape when you gently squeeze a handful, yet it should still possess some pleasant give. If, by chance, the mixture feels too loose or crumbly to form into balls, you might add a tiny bit more plain breadcrumbs (if you have them on hand) or another lightly beaten egg to help bind it. Conversely, if it feels overly dry and crumbly, a small splash more broth, added gradually, can work wonders to bring it to the ideal consistency. Trust your instincts and the feel of the mixture in your hands here; practice makes perfect!

  2. Form the Stuffing Balls: Now comes the satisfying part! Take about 1/4 cup of the mixture for each ball. A standard ice cream scoop (the kind with the release lever) works absolutely perfectly for achieving consistent sizing and making this task quick and efficient. Gently press the mixture together in your hands, then roll it carefully between your palms to form a firm, compact ball, roughly 1.5 to 2 inches in diameter. The trick here is to make them firm enough so that they maintain their shape beautifully during the baking process and don’t crumble apart, but avoid making them excessively dense, which could result in a heavy texture. Aim for a delicate balance.

    The Importance of Uniform Size

    Creating uniformly sized balls is an incredibly important detail for ensuring even cooking. This thoughtful step guarantees that every single Cranberry Turkey Stuffing Ball cooks through at the exact same rate, preventing the frustration of some balls being undercooked in the center while others unfortunately dry out on the exterior. Consistency is key for culinary success!

  3. Arrange on Baking Sheets: Carefully place the newly formed stuffing balls onto your prepared baking sheets. Make sure to leave about 1 inch of space between each ball. Depending on the exact size you make them, you should comfortably yield approximately 30-40 delicious stuffing balls from this recipe. It’s crucial not to overcrowd the baking sheets; if necessary, utilize a third sheet or plan to bake them in separate batches. Providing ample space around each ball allows for proper air circulation during baking, which is vital for helping them to bake evenly and, crucially, to achieve that beautifully crisp, golden-brown exterior we’re aiming for.

Baking the Cranberry Turkey Stuffing Balls: Golden Perfection Awaits

With our Cranberry Turkey Stuffing Balls meticulously formed and thoughtfully arranged on the baking sheets, it’s now time to usher them into the oven. Our goal is to bake them to that coveted golden, savory perfection, ensuring that the ground turkey is thoroughly cooked and the stuffing inside remains wonderfully moist, incredibly flavorful, and beautifully aromatic. This final stage brings all our careful preparation to fruition.

  1. Initial Bake: Carefully place the baking sheets, laden with our delightful stuffing balls, into your preheated 375°F (190°C) oven. Allow them to bake for an initial period of 25-30 minutes, or until you observe that the balls are gorgeously golden brown on their outside surface and feel pleasantly firm to the touch when gently pressed. During this initial baking phase, the external surface will begin to develop a delightful crispness, creating a wonderful textural contrast to the tender, flavorful interior that awaits. The aromas emanating from your oven at this point will be absolutely captivating!
  2. Check for Doneness and Finish Baking: To ensure that the ground turkey within our stuffing balls is completely cooked through and safe for consumption, it is highly recommended to use an instant-read meat thermometer. Carefully insert the thermometer into the very center of a few of the stuffing balls. The internal temperature should consistently register 165°F (74°C). If, upon checking, they haven’t quite reached this safe internal temperature, simply continue baking them for an additional 5-10 minutes, then recheck. If you notice that the tops of your stuffing balls are browning a little too rapidly for your liking, you can loosely tent the baking sheets with aluminum foil. This clever trick helps to prevent any further over-browning while allowing the interior of the balls to finish cooking thoroughly.

    Don’t Overbake!

    It is absolutely crucial not to overbake your Cranberry Turkey Stuffing Balls, as this common mistake can unfortunately lead to dry, crumbly, and less enjoyable results. We are passionately aiming for a moist, tender interior that is absolutely packed with flavor, all beautifully encased in a delightfully crisp and golden exterior. Precision in baking time is key to achieving this perfect balance.

  3. Rest and Serve: Once the stuffing balls are cooked through, showcasing that beautiful golden hue and satisfying crispness, carefully remove them from the oven. Allow them to rest undisturbed on the baking sheets for a brief period of about 5-10 minutes before you move them to a serving platter. This short but crucial resting period is invaluable; it allows the internal juices to redistribute evenly throughout the stuffing, resulting in even more tender, succulent, and incredibly flavorful balls.

    The Grand Reveal

    As they rest, you’ll be greeted with an irresistible aroma – a rich, savory symphony of turkey and aromatic herbs beautifully mingling with the sweet-tart bursts of cranberries. These finished Cranberry Turkey Stuffing Balls are incredibly versatile and make a fantastic, show-stopping side dish for any holiday feast, a delightful and unique appetizer for gatherings, or even a wonderfully satisfying and portable addition to a packed lunch. They offer all the beloved, comforting flavors of traditional stuffing but presented in a fun, convenient, and perfectly portioned package that is sure to impress everyone at your table.

Enjoy these incredibly flavorful, perfectly textured, and wonderfully aromatic Cranberry Turkey Stuffing Balls! They truly are a delightful and innovative twist on a cherished classic, offering both unparalleled convenience and absolutely incredible taste that will have everyone asking for the recipe.

Cranberry Turkey Stuffing Balls: Festive & Flavorful Bites

Conclusion:

And there you have it, my friends! We’ve journeyed through the creation of what I firmly believe will become one of your most requested and celebrated dishes. This isn’t just another recipe; it’s an invitation to elevate your culinary game with something truly special, something that whispers “homemade comfort” while shouting “gourmet delight.” These Cranberry Turkey Stuffing Balls are, without a doubt, a must-try. They represent the perfect marriage of classic flavors with a modern, convenient presentation. Imagine the savory depth of perfectly seasoned turkey and bread, infused with the bright, tangy burst of cranberries, all lovingly rolled into perfectly portioned spheres. It’s the kind of dish that disappears quickly from the buffet table and leaves everyone asking for the recipe.

What truly sets this recipe apart is its incredible versatility and the sheer joy it brings to any meal. Forget the fuss of a traditional stuffing baked in a large dish; these individual balls offer a delightful texture, with a slightly crispy exterior yielding to a tender, moist interior. They’re visually appealing, perfectly portioned, and incredibly easy to serve. I’ve found that they make holiday entertaining so much smoother, allowing me to focus on my guests rather than wrestling with serving spoons and a crumbling side dish. The convenience factor here is simply unmatched, making them a game-changer for busy cooks who still want to deliver big on flavor. Plus, the aroma that fills your kitchen as these bake is utterly intoxicating, a true harbinger of deliciousness to come.

Serving Suggestions & Creative Variations

Now, let’s talk about how you can best enjoy these culinary gems. While they are undeniably a showstopper as part of your Thanksgiving or Christmas spread, nestled alongside roasted turkey, creamy mashed potatoes, and vibrant green beans, their appeal extends far beyond the holiday table. Consider serving them as an elegant appetizer at your next gathering. A simple cranberry aioli or a savory mushroom gravy makes for an exquisite dipping sauce that will have your guests raving. For a comforting weeknight meal, pair them with a simple side salad and a light pan sauce for a surprisingly sophisticated yet comforting dinner. They also make fantastic additions to a packed lunch, reheating beautifully to provide a delicious and satisfying midday meal.

But don’t stop there – this recipe is also incredibly forgiving and open to your creative whims! Feeling adventurous? Try swapping out a portion of the cranberries for dried apricots or cherries for a different fruity tang. A pinch of fresh sage or rosemary can further enhance the herbaceous notes, or you could introduce a smoky element with a touch of crumbled cooked bacon or pancetta stirred into the mixture. For those looking for a vegetarian alternative, you could easily adapt the recipe by using a hearty mushroom blend and vegetable broth in place of the turkey and chicken broth, maintaining that rich, umami depth. You could even experiment with different types of bread, like a rustic sourdough or a savory cornbread, to alter the texture and flavor profile. The possibilities are truly endless, allowing you to tailor this fantastic base recipe to your exact preferences and dietary needs.

So, what are you waiting for? I’ve shared my heart and soul in bringing you this recipe, and I truly believe it’s one that deserves a permanent spot in your culinary repertoire. It’s an opportunity to create something incredibly delicious with minimal fuss, impressing everyone at your table with your skill and thoughtfulness. Trust me on this one; you’ll be so glad you gave these a try. They are the perfect embodiment of comfort food elevated, offering an experience that’s both nostalgic and exciting.

I absolutely adore hearing about your kitchen adventures, so once you’ve whipped up a batch of these glorious Cranberry Turkey Stuffing Balls, please don’t hesitate to share your experience with me! What did you pair them with? Did you experiment with any exciting variations? Your feedback and culinary tales are what make this community so vibrant and inspiring. Take a photo, share your thoughts, and let’s celebrate the joy of good food together. Happy cooking!


Cranberry Turkey Stuffing Balls: Festive & Flavorful Bites

Cranberry Turkey Stuffing Balls: Festive & Flavorful Bites

Cranberry Turkey Stuffing Balls are a festive and flavorful twist on traditional holiday stuffing. These individual portions feature golden-brown spheres with succulent turkey, bright cranberries, and aromatic herbs, offering a crisp exterior and moist, flavorful center. Convenient for serving and perfect for holiday feasts or gatherings.

Prep Time
45 Minutes

Cook Time
30 Minutes

Total Time
15 Minutes

Servings
30-40 balls

Ingredients

  • 12 cups (1.5 lbs) day-old bread, 1/2-3/4 inch cubes
  • 1 cup (2 sticks) unsalted butter
  • 2 large yellow onions, finely diced
  • 4 celery stalks, finely diced
  • 4 cloves garlic, minced
  • 1/2 cup fresh sage, finely chopped
  • 1/4 cup fresh thyme, finely chopped
  • 2 tbsp fresh rosemary, finely chopped
  • 1 tsp sea salt
  • 1/2 tsp black pepper
  • 1 tbsp poultry seasoning
  • 1 cup dried cranberries
  • 2 large eggs, lightly beaten
  • 2 cups low-sodium chicken or turkey broth, plus extra
  • 1.5 lbs lean ground turkey (93/7 or 90/10)
  • 1/2 cup toasted pecans or walnuts, chopped (optional)
  • 1 Granny Smith apple, diced or grated (optional)

Instructions

  1. Step 1
    Preheat oven to 375°F (190°C). Line two large baking sheets with parchment paper.
  2. Step 2
    If bread is not day-old, spread cubes on prepared baking sheets and toast for 10-15 minutes until lightly golden and dried. Remove and cool.
  3. Step 3
    In a large pot, melt 1 cup butter over medium heat. Sauté diced onions and celery for 8-10 minutes until soft and translucent.
  4. Step 4
    Add minced garlic, chopped sage, thyme, and rosemary. Cook for 2-3 minutes, stirring constantly.
  5. Step 5
    In a large bowl, combine toasted bread, sautéed aromatics, dried cranberries, 1 tsp sea salt, 1/2 tsp black pepper, and 1 tbsp poultry seasoning. Add optional pecans/walnuts and apple if using. Toss gently.
  6. Step 6
    In a separate bowl, whisk 2 beaten eggs with 2 cups chicken or turkey broth.
  7. Step 7
    Pour liquid mixture over bread mixture. Mix gently until moistened. If too dry, add 1/4-1/2 cup more broth. Let rest 5-10 minutes.
  8. Step 8
    Add 1.5 lbs ground turkey to the mixture. Gently combine until evenly distributed, avoiding overworking.
  9. Step 9
    Using a 1/4 cup scoop, form mixture into 1.5-2 inch firm, compact balls.
  10. Step 10
    Arrange balls 1 inch apart on prepared baking sheets. Do not overcrowd.
  11. Step 11
    Bake for 25-30 minutes, until golden brown and firm.
  12. Step 12
    Check internal temperature of a few balls; it should reach 165°F (74°C). Bake for another 5-10 minutes if needed. Tent with foil if browning too quickly.
  13. Step 13
    Rest on baking sheets for 5-10 minutes before serving.

Important Information

Nutrition Facts (Per Serving)

It is important to consider this information as approximate and not to use it as definitive health advice.

Allergy Information

Please check ingredients for potential allergens and consult a health professional if in doubt.

« Previous Post
Slow Cooker Beef Manhattan: Easy, Tender & Flavorful Meal
Next Post »
Easy Fig Jam Pizza with Goat Cheese & Beef Prosciutto

If you enjoyed this…

Crispy Air Fryer Langos Recipe – Easy & Delicious Snack!

Reuben Beef Balls with Spicy Thousand Island Dip Recipe

Halloween Jello Shots: Spooky Recipes & Easy DIY Ideas

Primary Sidebar

Browse by Diet

BreakfastDinnerLunchDessertAppetizer

Sweet Peach Yogurt Parfait Delight

One of my fondest memories is from a lazy summer afternoon spent at my grandmother’s house. The sun filtered through the kitchen window, casting a warm glow over the table where she would create her culinary magic. It was during one of those blissful moments that I first tasted her Peach Yogurt Parfait with Honey and Granola. The sweet aroma of ripe peaches mingling with creamy yogurt and the crunch of granola was nothing short of heavenly. It felt like summer captured in a bowl, and I still remember the joy of diving in with a spoon, each layer revealing a new burst of flavor.

When I think about that parfait, I can almost hear the gentle hum of the bees outside, reminding me of the floral notes that honey brings to every bite. The vibrant yellows and soft oranges of the peaches contrast beautifully with the creamy white yogurt and the golden crunch of granola. It’s a dish that not only looks delightful but also tastes like a celebration of fresh, wholesome ingredients.

What makes my version of this Peach Yogurt Parfait special is the careful balance of flavors and textures. I use ripe, juicy peaches, drizzled with locally sourced honey, and a homemade granola that’s bursting with nuts and seeds for an extra crunch. It’s a simple dish, but every layer is crafted with love and attention.

Let me show you exactly how to make this delightful parfait, so you can bring a bit of that summer magic into your kitchen!

Sweet Peach Yogurt Parfait Delight

Why You’ll Love This Recipe

  • Delightfully creamy texture from the Greek yogurt, paired with the juicy sweetness of fresh peaches.
  • Ready in under 20 minutes, making it a quick and satisfying breakfast or snack option.
  • Budget-friendly, using common ingredients that you may already have in your pantry.
  • Customizable with your favorite granola and nuts, allowing you to tailor each parfait to your taste.
  • Perfectly balanced flavors with the bright acidity of lemon juice and the sweetness of honey enhancing the peaches.

Ingredients

  • For the Parfait:
  • 2 cups plain Greek yogurt (or vanilla yogurt for a sweeter option)
  • 2 large ripe peaches, diced (about 2 cups)
  • 1 tablespoon fresh lemon juice (to prevent browning of peaches)
  • 2 tablespoons honey (plus more for drizzling)
  • 1 teaspoon vanilla extract (optional for extra flavor)
  • For the Granola:
  • 1 cup granola (store-bought or homemade; see notes for a simple granola recipe)
  • 1/4 cup sliced almonds (optional for added crunch)
  • 1/4 cup shredded coconut (optional for added flavor)

Let’s dive into some key ingredients that make this Peach Yogurt Parfait so delightful! First, the Greek yogurt is not only creamy but also packed with protein, making it a satisfying option for breakfast or a snack. If you’re looking for a sweeter option, you can easily substitute it with vanilla yogurt, though it may alter the overall flavor balance. Next, the ripe peaches are the star of the show; their natural sweetness shines through, so I recommend choosing peaches that yield slightly to pressure, indicating they’re perfectly ripe. If peaches aren’t in season, feel free to use nectarines or even frozen peaches—just thaw them before use. Finally, honey adds a lovely floral sweetness that ties everything together. If you prefer, maple syrup can serve as a delicious substitute.

Step-by-Step Instructions

  1. Start by preparing the peaches. Wash them thoroughly, then slice and dice them into bite-sized pieces. In a medium bowl, toss the diced peaches with 1 tablespoon of fresh lemon juice to prevent browning. Set aside for about 5 minutes while the lemon juice works its magic.
  2. In a separate bowl, combine the Greek yogurt, 2 tablespoons of honey, and 1 teaspoon of vanilla extract if using. Stir the mixture until smooth and thoroughly blended. This should take about a minute. Avoid overmixing to maintain the creaminess of the yogurt.
  3. Now it’s time to layer your parfait. Grab a clear glass or bowl to showcase your beautiful creation. Start with a generous spoonful of the yogurt mixture at the bottom—about 1/4 cup will do. Use a spoon to spread it evenly.
  4. Add a layer of the diced peaches over the yogurt, ensuring they cover the yogurt completely. You might want to use about half of what you have prepared—roughly 1 cup. This layer should be visually appealing, so arrange the peaches neatly.
  5. Sprinkle 1/4 cup of granola over the peaches. This adds a delightful crunch. Make sure to distribute it evenly to ensure every bite has that satisfying texture. Avoid packing it down too tightly, as you want it to maintain its crunch.
  6. Repeat the layers: spoon in another 1/4 cup of yogurt, followed by another cup of peaches, and another sprinkle of granola. You should have at least two layers, but feel free to add more depending on your glass size.
  7. Finish off your parfait with a drizzle of honey on top for added sweetness and a touch of elegance. If you’re using sliced almonds or shredded coconut, sprinkle them on top now. It adds a lovely visual contrast and extra flavor.
  8. Serve immediately or refrigerate for up to 30 minutes before serving to allow the flavors to meld together. However, I recommend enjoying it fresh to maintain the granola’s crunch.

Pro Tips for the Best Peach Yogurt Parfait With Honey And Granola

  • Make sure to choose ripe peaches for the best flavor and texture. A common mistake is using unripe fruit, which can lead to a less enjoyable parfait. Look for peaches that are fragrant and slightly soft to the touch.
  • Use a clear glass to assemble your parfait; this not only makes for a beautiful presentation but also allows you to see the colorful layers, which adds to the enjoyment of eating it.
  • For an even creamier texture, consider whipping the Greek yogurt with a hand mixer for a couple of minutes before layering. This small adjustment makes a huge difference in mouthfeel.
  • Be mindful of the granola-to-yogurt ratio. Too much granola can overwhelm the parfait, while too little can make it feel too creamy. Aim for about 1/4 cup of granola per layer for the perfect balance.
  • If you’re making this for a gathering, consider preparing the yogurt and peaches ahead of time and layering them just before serving. This ensures the granola stays crunchy!

Variations & Serving Ideas

There are so many ways to get creative with your Peach Yogurt Parfait! For a tropical twist, swap out the peaches for mangoes or pineapples and top with coconut flakes. If you prefer a berry flavor, mix in some blueberries or strawberries with the peaches for added color and taste. For a nutty version, incorporate chopped walnuts or pecans instead of almonds.

As for serving ideas, this parfait pairs beautifully with a side of scrambled eggs for a hearty breakfast or fresh fruit salad for a light lunch. You might also enjoy it alongside whole grain toast with almond butter for an energizing snack. The contrast of flavors and textures will elevate your meal experience!

Storage, Make-Ahead & Reheating

The Peach Yogurt Parfait is best enjoyed fresh, but you can prepare some components ahead of time. Store the layered parfait in an airtight container in the refrigerator for up to 24 hours. However, be cautious; the granola may lose its crunch if stored too long. You can freeze the yogurt and peach mixture for up to 2 months; just remember to thaw it in the refrigerator overnight before serving.

If you plan to enjoy this dish the next day, it can taste even better as the flavors meld together. Just remember to add the granola right before serving to keep its delightful crunch!

Frequently Asked Questions

Can I make Peach Yogurt Parfait With Honey And Granola ahead of time?

Yes — in fact, it tastes even better the next day as the flavors meld. However, I recommend waiting to add the granola until just before serving to maintain its crunch.

What can I substitute for Greek yogurt?

If you prefer a lighter option, you can substitute Greek yogurt with regular yogurt or a dairy-free alternative like coconut yogurt. Just remember that this may alter the creaminess and flavor profile slightly.

Can I use frozen peaches for this parfait?

Absolutely! Just make sure to thaw the frozen peaches before using them. They will still add great flavor, though the texture may be slightly softer than fresh peaches.

How do I make the parfait vegan?

To make a vegan version, substitute the Greek yogurt with a plant-based yogurt alternative, and replace honey with maple syrup or agave nectar. This keeps the parfait sweet while adhering to a vegan diet.

What other fruits can I use in this recipe?

You can mix and match fruits based on your preference. Try using strawberries, blueberries, raspberries, or even bananas. Just make sure to adjust the lemon juice as needed to prevent browning.

Sweet Peach Yogurt Parfait Delight

Final Thoughts

The Peach Yogurt Parfait with Honey and Granola is a delightful blend of creamy yogurt, sweet peaches, and crunchy granola that creates a satisfying and nourishing treat. Each layer bursts with flavor, making it a perfect choice for breakfast or a light dessert.

This is the kind of recipe I come back to again and again, especially when I want something refreshing and wholesome to start my day. The harmony of sweet and tart flavors, combined with the delightful crunch, never fails to lift my spirits!

I encourage you to give this parfait a try and indulge in its comforting goodness. Feel free to share your results or even add your own twist—perhaps a sprinkle of cinnamon or a handful of nuts. Enjoy creating your perfect parfait!

Print
clock clock iconcutlery cutlery iconflag flag iconfolder folder iconinstagram instagram iconpinterest pinterest iconfacebook facebook iconprint print iconsquares squares iconheart heart iconheart solid heart solid icon

Peach Yogurt Parfait


  • Author: Lily author
  • Total Time: 15 minutes
  • Yield: 4 servings 1x
Pin Recipe
Print Recipe

Description

This Peach Yogurt Parfait combines creamy Greek yogurt, juicy peaches, and crunchy granola for a delightful treat. It’s a perfect breakfast or snack that captures the essence of summer in every bite.


Ingredients

Scale
  • For the Parfait:
  • 2 cups plain Greek yogurt (or vanilla yogurt for a sweeter option)
  • 2 large ripe peaches, diced (about 2 cups)
  • 1 tablespoon fresh lemon juice (to prevent browning of peaches)
  • 2 tablespoons honey (plus more for drizzling)
  • 1 teaspoon vanilla extract (optional for extra flavor)
  • For the Granola:
  • 1 cup granola (store-bought or homemade; see notes for a simple granola recipe)
  • 1/4 cup sliced almonds (optional for added crunch)
  • 1/4 cup shredded coconut (optional for added flavor)

Instructions

  1. Start by preparing the peaches. Wash them thoroughly, then slice and dice them into bite-sized pieces. In a medium bowl, toss the diced peaches with 1 tablespoon of fresh lemon juice to prevent browning. Set aside for about 5 minutes while the lemon juice works its magic.
  2. In a separate bowl, combine the Greek yogurt, 2 tablespoons of honey, and 1 teaspoon of vanilla extract if using. Stir the mixture until smooth and thoroughly blended. This should take about a minute. Avoid overmixing to maintain the creaminess of the yogurt.
  3. Now it’s time to layer your parfait. Grab a clear glass or bowl to showcase your beautiful creation. Start with a generous spoonful of the yogurt mixture at the bottom—about 1/4 cup will do. Use a spoon to spread it evenly.
  4. Add a layer of the diced peaches over the yogurt, ensuring they cover the yogurt completely. You might want to use about half of what you have prepared—roughly 1 cup. This layer should be visually appealing, so arrange the peaches neatly.
  5. Sprinkle 1/4 cup of granola over the peaches. This adds a delightful crunch. Make sure to distribute it evenly to ensure every bite has that satisfying texture. Avoid packing it down too tightly, as you want it to maintain its crunch.
  6. Repeat the layers: spoon in another 1/4 cup of yogurt, followed by another cup of peaches, and another sprinkle of granola. You should have at least two layers, but feel free to add more depending on your glass size.
  7. Finish off your parfait with a drizzle of honey on top for added sweetness and a touch of elegance. If you’re using sliced almonds or shredded coconut, sprinkle them on top now. It adds a lovely visual contrast and extra flavor.
  8. Serve immediately or refrigerate for up to 30 minutes before serving to allow the flavors to meld together. However, I recommend enjoying it fresh to maintain the granola’s crunch.
  • Prep Time: 15 mins
  • Cook Time: 0 mins
  • Category: Breakfast
  • Method: No-cook
  • Cuisine: American

Nutrition

  • Serving Size: 1 parfait
  • Calories: 250
  • Sugar: 20 g
  • Sodium: 50 mg
  • Fat: 5 g
  • Saturated Fat: 2 g
  • Unsaturated Fat: 3 g
  • Trans Fat: 0 g
  • Carbohydrates: 40 g
  • Fiber: 3 g
  • Protein: 10 g
  • Cholesterol: 10 mg

Keywords: Choose ripe peaches for the best flavor and texture. Use a clear glass for a beautiful presentation. For creaminess, consider whipping the yogurt before layering. Be mindful of the granola-to-yogurt ratio. Prepare yogurt and peaches ahead of time for gatherings, layering just before serving.

Did you make this recipe?

Share a photo and tag us — we can't wait to see what you've made!

Sun-Kissed Frozen Orange Cream Slush

As a child, summer days felt like they lasted forever. I remember the sticky heat wrapping around me as I played outside, my laughter mingling with the sounds of the neighborhood. But nothing could cool me down quite like the moment I’d spot my grandmother, laboring over her blender, whipping up her famous Frozen Orange Creamsicle Slush. That vibrant orange treat, with its frosty texture and sweet citrus aroma, was like a burst of sunshine in a cup. Just one sip, and I could feel the coolness wash over me, sparking pure joy.

This Frozen Orange Creamsicle Slush has a way of making you feel like a kid again. Its creamy, dreamy consistency is a delightful balance of bright orange and soft vanilla, inviting you to dive right in. The refreshing tang of orange dances on your tongue, while the smooth creaminess envelops you in a comforting embrace. It’s a nostalgic treat that’s perfect for hot summer afternoons or anytime you need a little pick-me-up.

What makes my version of this slush stand out is the addition of a hint of vanilla bean, which elevates the flavor and adds an extra layer of richness. Plus, it’s super easy to whip up with just a few simple ingredients that you probably already have on hand! So, if you’re ready to relive those sun-soaked memories, let me show you exactly how to make it.

Sun-Kissed Frozen Orange Cream Slush

Why You’ll Love This Recipe

  • Each slush is a perfect blend of creamy vanilla and zesty orange, creating a nostalgic flavor reminiscent of summer days.
  • This refreshing treat is ready in under 15 minutes, making it an ideal quick dessert for unexpected guests or hot afternoons.
  • With just 8 simple ingredients, it’s budget-friendly, ensuring you don’t have to break the bank to enjoy a delicious slush.
  • The slush has a perfectly smooth texture, thanks to the combination of ice and ice cream, providing a delightful contrast to the bright citrus flavors.
  • It’s highly customizable; you can easily adjust the sweetness and add fresh herbs for a unique twist that suits your taste.

Ingredients

  • 2 cups orange juice (freshly squeezed or store-bought)
  • 1 cup vanilla ice cream
  • 1 cup crushed ice
  • 1/2 cup milk (whole or 2%)
  • 1/4 cup granulated sugar (adjust based on sweetness preference)
  • 1 teaspoon vanilla extract
  • Zest of 1 orange (for added flavor)
  • Fresh orange slices and mint leaves (for garnish)

The star of this Frozen Orange Creamsicle Slush is the orange juice, which provides the vibrant, citrusy base. Freshly squeezed juice will yield the brightest flavor, but store-bought options can be just as convenient. If you’re opting for store-bought, choose 100% pure juice with no added sugars for the best results. Another essential ingredient is the vanilla ice cream; it adds creaminess and sweetness. You can substitute it with dairy-free ice cream if you’re looking for a vegan option. Whole or 2% milk complements the ice cream, creating a smooth blend. If you want a lower-calorie version, almond or oat milk can be good alternatives.

Lastly, the granulated sugar can be adjusted based on your sweetness preference. If you prefer a more natural sweetener, consider using honey or agave syrup. The orange zest enhances the flavor profile, providing an aromatic pop that brings the whole slush together. Don’t skip it! It adds an extra layer of brightness that makes this slush truly special.

Step-by-Step Instructions

  1. Start by preparing your ingredients. Gather 2 cups of orange juice, 1 cup of vanilla ice cream, and 1 cup of crushed ice. Make sure the ice is finely crushed, as larger chunks can make blending difficult.
  2. In a blender, combine the orange juice, vanilla ice cream, crushed ice, and 1/2 cup of milk. Add 1/4 cup of granulated sugar and 1 teaspoon of vanilla extract. If you like a sweeter slush, consider adding a bit more sugar at this stage.
  3. Add the zest of 1 orange to the blender. This step is crucial for enhancing the citrus flavor of your slush. Make sure not to include the bitter white pith—only the flavorful zest.
  4. Blend the mixture on medium-high speed for about 30-45 seconds. Stop once the ingredients are fully combined and the slush has a smooth, even consistency. If you notice large chunks of ice, blend for an additional 10-15 seconds. Avoid over-blending, as this can make the slush too liquidy.
  5. Once blended, taste the slush. If it needs more sweetness, add a little more sugar and blend for a few more seconds. If it’s too thick, you can add a splash of milk to reach your desired consistency.
  6. Pour the slush into glasses. This recipe typically serves 4, but you can easily double it for larger gatherings. Use a spoon to help guide the slush into the glasses if needed.
  7. Garnish each serving with fresh orange slices and mint leaves. The mint not only adds a pop of color but also a refreshing aroma that complements the citrus flavors beautifully.
  8. Serve immediately and enjoy! If you’ve made extra, you can refrigerate it for a short time, but it’s best enjoyed fresh.

Pro Tips for the Best Frozen Orange Creamsicle Slush

  • Don’t skip the orange zest! It’s a game-changer for flavor. Always zest before juicing to make it easier.
  • Use a high-powered blender for the best texture. A standard blender may struggle with ice, leading to uneven consistency. If you have a food processor, that can work too, but ensure the ice is finely crushed.
  • Adjust the ice-to-liquid ratio carefully. If your slush is too thick, it won’t blend well. Start with less ice and add more until you reach your preferred texture.
  • Be cautious with the sugar! Always start with the lower amount, as you can easily add more, but it’s hard to fix an overly sweet slush.
  • For a fun twist, consider adding a splash of coconut milk or a handful of fresh fruit like strawberries or pineapple. This not only enhances the flavor but also adds a beautiful color contrast.

Variations & Serving Ideas

There are countless ways to put a spin on your Frozen Orange Creamsicle Slush. Consider making a tropical version by adding in some pineapple juice or coconut milk for a delightful tropical twist. If you’re feeling adventurous, try incorporating a handful of frozen mango or peach slices for added sweetness. For a lighter version, swap out the vanilla ice cream for Greek yogurt for a creamy yet tangy alternative.

As for serving ideas, this refreshing slush pairs wonderfully with light summer dishes like grilled chicken skewers, fish tacos, or a simple salad topped with citrus vinaigrette. The bright, zesty flavors of the slush complement these dishes perfectly, making them an ideal pairing for a sunny day.

Storage, Make-Ahead & Reheating

This Frozen Orange Creamsicle Slush is best enjoyed fresh, but if you have leftovers, you can store them in an airtight container in the fridge for up to 2 days. Just keep in mind that the slush may lose some of its texture over time as the ice melts. It doesn’t freeze well, as the ice will turn into a solid block. If you must freeze it, blend again after thawing to restore the slushy consistency. This treat is best the day you make it, as the flavors meld together beautifully overnight, enhancing its deliciousness.

Frequently Asked Questions

Can I make Frozen Orange Creamsicle Slush ahead of time?

Yes — in fact, it tastes even better the next day as the flavors meld. However, it’s best to enjoy it fresh, as the texture can change if stored for too long. If you need to prepare it ahead, keep it in the fridge and re-blend before serving.

What kind of orange juice should I use?

For the best flavor, use freshly squeezed orange juice. However, if you’re short on time, opt for 100% pure store-bought juice without added sugars. This will ensure that your slush remains flavorful and refreshing.

Can I substitute the vanilla ice cream?

Absolutely! If you’re looking for a dairy-free option, coconut milk ice cream or a non-dairy vanilla ice cream can work wonderfully. They will still provide the creamy texture and sweetness you desire.

How can I adjust the sweetness of my slush?

You can easily adjust the sweetness by modifying the amount of sugar added. Start with 1/4 cup and taste the mixture before blending. If you prefer it sweeter, add more sugar gradually until it reaches your desired level.

What should I do if my slush is too thick?

If your slush is too thick, simply add a splash of milk or orange juice and blend again. This will help achieve a more drinkable consistency while maintaining the slushy texture. Adjust gradually to reach your preferred thickness.

Sun-Kissed Frozen Orange Cream Slush

Final Thoughts

The Frozen Orange Creamsicle Slush is a delightful blend of refreshing citrus and creamy goodness, making it a perfect treat for warm days or any time you crave a taste of nostalgia. The way the bright orange flavor dances with the creamy texture truly elevates this slush, transforming it into a satisfying escape from the everyday.

This is the kind of recipe I come back to again and again, especially when I’m looking to cool down or impress guests at a summer gathering. It’s simple to make and always brings smiles all around! I encourage you to try this recipe for yourself—don’t hesitate to share your results or even put your own spin on it. Happy slushing!

Print
clock clock iconcutlery cutlery iconflag flag iconfolder folder iconinstagram instagram iconpinterest pinterest iconfacebook facebook iconprint print iconsquares squares iconheart heart iconheart solid heart solid icon

Frozen Orange Creamsicle Slush


  • Author: Lily author
  • Total Time: 15 minutes
  • Yield: 4 servings 1x
Pin Recipe
Print Recipe

Description

This Frozen Orange Creamsicle Slush is a refreshing treat that combines creamy vanilla and zesty orange flavors. Perfect for hot summer days, it brings back nostalgic memories with every sip.


Ingredients

Scale
  • 2 cups orange juice (freshly squeezed or store-bought)
  • 1 cup vanilla ice cream
  • 1 cup crushed ice
  • 1/2 cup milk (whole or 2%)
  • 1/4 cup granulated sugar (adjust based on sweetness preference)
  • 1 teaspoon vanilla extract
  • Zest of 1 orange (for added flavor)
  • Fresh orange slices and mint leaves (for garnish)

Instructions

  1. Start by preparing your ingredients. Gather 2 cups of orange juice, 1 cup of vanilla ice cream, and 1 cup of crushed ice. Make sure the ice is finely crushed, as larger chunks can make blending difficult.
  2. In a blender, combine the orange juice, vanilla ice cream, crushed ice, and 1/2 cup of milk. Add 1/4 cup of granulated sugar and 1 teaspoon of vanilla extract. If you like a sweeter slush, consider adding a bit more sugar at this stage.
  3. Add the zest of 1 orange to the blender. This step is crucial for enhancing the citrus flavor of your slush. Make sure not to include the bitter white pith—only the flavorful zest.
  4. Blend the mixture on medium-high speed for about 30-45 seconds. Stop once the ingredients are fully combined and the slush has a smooth, even consistency. If you notice large chunks of ice, blend for an additional 10-15 seconds. Avoid over-blending, as this can make the slush too liquidy.
  5. Once blended, taste the slush. If it needs more sweetness, add a little more sugar and blend for a few more seconds. If it’s too thick, you can add a splash of milk to reach your desired consistency.
  6. Pour the slush into glasses. This recipe typically serves 4, but you can easily double it for larger gatherings. Use a spoon to help guide the slush into the glasses if needed.
  7. Garnish each serving with fresh orange slices and mint leaves. The mint not only adds a pop of color but also a refreshing aroma that complements the citrus flavors beautifully.
  8. Serve immediately and enjoy! If you’ve made extra, you can refrigerate it for a short time, but it's best enjoyed fresh.
  • Prep Time: 15 min
  • Cook Time: 0 min
  • Category: Dessert
  • Method: Blending
  • Cuisine: American

Nutrition

  • Serving Size: 1 serving
  • Calories: 200
  • Sugar: 30 g
  • Sodium: 50 mg
  • Fat: 5 g
  • Saturated Fat: 3 g
  • Unsaturated Fat: 2 g
  • Trans Fat: 0 g
  • Carbohydrates: 40 g
  • Fiber: 1 g
  • Protein: 2 g
  • Cholesterol: 20 mg

Keywords: Don't skip the orange zest! It's a game-changer for flavor. Always zest before juicing to make it easier.

Did you make this recipe?

Share a photo and tag us — we can't wait to see what you've made!

Zesty Lemon Poppy Seed Delight

One rainy afternoon, I found myself in my grandmother’s cozy kitchen, the kind that always smelled like warmth and love. She was whipping up her famous Lemon Poppy Seed Loaf, a recipe that had been passed down through generations. As the batter came together, the zesty aroma of fresh lemons filled the air, mingling perfectly with the nutty fragrance of poppy seeds. I can still picture her, apron-clad, as she expertly drizzled a vibrant citrus icing over the loaf, creating a glossy, sun-kissed finish that beckoned us to dive in. It was a moment that sparked my own passion for baking, and this recipe has become a cherished staple in my home ever since.

When you take a bite of this Lemon Poppy Seed Loaf, it’s like a burst of sunshine on your palate. The loaf is beautifully golden, with a tender crumb that melts in your mouth. Each slice is speckled with tiny poppy seeds, adding a delightful crunch that contrasts beautifully with the tangy sweetness of the lemon. And that citrus icing? It’s the finishing touch that elevates this loaf from ordinary to extraordinary, with its bright, zesty flavor dancing on your taste buds.

This recipe stands out because it embraces simplicity while delivering on flavor. I’ve added a hint of vanilla to the batter, enhancing the overall taste and making it even more indulgent. Trust me, once you make this Lemon Poppy Seed Loaf With Citrus Icing, it’ll become a go-to in your baking repertoire.

So, let me show you exactly how to make it!

Zesty Lemon Poppy Seed Delight

Why You’ll Love This Recipe

  • Moist and tender crumb that melts in your mouth, thanks to the perfect balance of butter and buttermilk.
  • Bright, zesty lemon flavor paired with crunchy poppy seeds, creating a delightful texture and taste experience.
  • Easy to whip up in just about an hour, perfect for last-minute gatherings or a cozy afternoon treat.
  • Budget-friendly with everyday ingredients, making it an accessible option for all home bakers.
  • The citrus icing adds a sweet tang that elevates the loaf, turning a simple recipe into a showstopper!

Ingredients

  • 1 ½ cups (190g) all-purpose flour
  • 1 teaspoon baking powder
  • ½ teaspoon baking soda
  • ½ teaspoon salt
  • 3 tablespoons poppy seeds
  • ½ cup (115g) unsalted butter, softened to room temperature
  • 1 cup (200g) granulated sugar
  • 2 large eggs
  • 1 teaspoon vanilla extract
  • 1 teaspoon lemon zest (from about 1 medium lemon)
  • ½ cup (120ml) buttermilk
  • 2 tablespoons fresh lemon juice

For the Citrus Icing:

  • 1 cup (120g) powdered sugar
  • 2 tablespoons fresh lemon juice
  • 1 tablespoon orange juice
  • 1 teaspoon lemon zest (for garnish, optional)

Let’s dive into the key ingredients that make this Lemon Poppy Seed Loaf so special. The all-purpose flour provides the structure and base for the loaf, while the baking powder and baking soda ensure it rises perfectly, giving the loaf a light texture. For a gluten-free variation, you could substitute the flour with a gluten-free all-purpose blend. Poppy seeds not only add a delightful crunch but also contribute to the unique flavor profile that pairs well with the citrus notes.

Unsalted butter is crucial for achieving the buttery richness that makes this loaf so moist. If you’re looking for a dairy-free option, coconut oil or a vegan butter can be used instead. The buttermilk is another essential component, providing acidity that activates the baking soda for a fluffy texture. If you don’t have buttermilk on hand, you can easily make a substitute by mixing ½ cup of milk with 1 tablespoon of vinegar or lemon juice and letting it sit for about 5 minutes.

Step-by-Step Instructions

  1. Preheat your oven to 350°F (175°C). Grease a 9×5-inch loaf pan or line it with parchment paper for easy removal later.
  2. In a medium mixing bowl, whisk together 1 ½ cups of all-purpose flour, 1 teaspoon of baking powder, ½ teaspoon of baking soda, ½ teaspoon of salt, and 3 tablespoons of poppy seeds. This helps to evenly distribute the baking agents and ensures a uniform rise.
  3. In a large mixing bowl, cream together ½ cup of softened unsalted butter and 1 cup of granulated sugar using an electric mixer on medium speed for about 3-4 minutes, until the mixture is light and fluffy. Make sure to scrape down the sides of the bowl occasionally.
  4. Add 2 large eggs, 1 teaspoon of vanilla extract, and 1 teaspoon of lemon zest to the creamed butter and sugar, mixing until fully combined. You want a smooth consistency, so ensure there are no lumps of butter.
  5. In a small bowl, combine ½ cup of buttermilk and 2 tablespoons of fresh lemon juice. Alternately add the dry ingredients and buttermilk mixture to the butter mixture, starting and ending with the dry ingredients. Mix just until combined; do not overmix, as this can lead to a dense loaf.
  6. Pour the batter into the prepared loaf pan. Smooth the top with a spatula, ensuring it’s even. Bake in the preheated oven for 50-60 minutes, or until a toothpick inserted in the center comes out clean. The edges should be lightly golden brown, and the center should feel just set.
  7. Once baked, remove the loaf from the oven and allow it to cool in the pan for about 10 minutes. Then, transfer it to a wire rack to cool completely. Resist the urge to slice too soon, as it will be crumbly if it’s still warm.
  8. While the loaf is cooling, prepare the citrus icing. In a medium bowl, whisk together 1 cup of powdered sugar, 2 tablespoons of fresh lemon juice, and 1 tablespoon of orange juice until smooth. If the icing is too thick, you can add a little more juice to reach your desired consistency.
  9. Once the loaf is completely cool, drizzle the citrus icing over the top. If you like, sprinkle with an additional teaspoon of lemon zest for an extra pop of flavor and color.

Pro Tips for the Best Lemon Poppy Seed Loaf With Citrus Icing

  • Be careful not to overmix your batter; this is a common mistake that can lead to a dense loaf. Mix just until the dry ingredients are incorporated for a light and fluffy texture.
  • Use room temperature ingredients, especially the butter and eggs. This helps to create a smoother batter and ensures even baking. Take your eggs out of the fridge about 30 minutes before you start.
  • For a more pronounced lemon flavor, consider adding a little lemon extract in addition to the zest and juice. Just a half teaspoon can elevate the citrus notes significantly.
  • When measuring your flour, spoon it into the measuring cup and level it off with a knife instead of scooping directly from the bag. This prevents packing and ensures you don’t end up with a dry loaf.
  • Invest in a good quality loaf pan; it makes a difference in heat distribution, which ensures even baking. If your pan is dark-coated, reduce the oven temperature by 25°F to prevent over-browning.

Variations & Serving Ideas

For a delightful twist, consider adding blueberries or raspberries to the batter for a fruity burst of flavor. You can also experiment with different citrus fruits—try lime or grapefruit zest and juice for a refreshing change. For a healthier option, substitute half of the all-purpose flour with whole wheat flour for added fiber without compromising too much on texture.

This Lemon Poppy Seed Loaf pairs beautifully with a light salad, such as a mixed greens salad with a vinaigrette, or a cup of tea for a cozy afternoon treat. It also complements a creamy cheese platter, as the acidity of the loaf balances rich cheeses perfectly. Lastly, a scoop of vanilla ice cream on the side creates a delightful contrast of temperatures and flavors!

Storage, Make-Ahead & Reheating

This Lemon Poppy Seed Loaf can be stored at room temperature for up to 3 days if wrapped tightly in plastic wrap. If you want to keep it longer, it freezes well for up to 3 months. To freeze, wrap the loaf tightly in plastic wrap and then in aluminum foil to prevent freezer burn.

When you’re ready to enjoy it again, simply thaw it in the fridge overnight. Reheat individual slices in the microwave for 15-20 seconds or in a toaster oven until warmed through. Interestingly, many people find that this loaf tastes even better the next day, as the flavors have time to meld!

Frequently Asked Questions

Can I make Lemon Poppy Seed Loaf With Citrus Icing ahead of time?

Yes — in fact, it tastes even better the next day! You can make the loaf a day in advance, allowing the flavors to develop. Just be sure to store it in an airtight container to maintain its moisture.

Can I substitute the poppy seeds?

Absolutely! If you don’t have poppy seeds on hand or prefer an alternative, you can use sesame seeds for a similar crunch or omit them entirely for a smooth loaf.

What can I use instead of buttermilk?

If you don’t have buttermilk, you can easily create a substitute by mixing ½ cup of milk (dairy or plant-based) with 1 tablespoon of vinegar or lemon juice. Let it sit for 5 minutes before using in the recipe.

How can I make this recipe gluten-free?

To make a gluten-free version of this Lemon Poppy Seed Loaf, substitute the all-purpose flour with a gluten-free all-purpose flour blend. Just ensure that the blend contains a binding agent like xanthan gum for the best results.

What is the best way to store leftover loaf?

Leftover Lemon Poppy Seed Loaf should be stored in an airtight container at room temperature for up to 3 days. For longer storage, wrap it tightly and freeze for up to 3 months. Thaw it before serving for the best texture.

Zesty Lemon Poppy Seed Delight

Final Thoughts

The Lemon Poppy Seed Loaf with Citrus Icing is truly a delightful treat that brings a burst of brightness to any occasion. The zesty lemon flavor combined with the subtle crunch of poppy seeds creates a satisfying balance, while the citrus icing adds a touch of sweetness that perfectly complements the loaf’s tanginess.

This is the kind of recipe I come back to again and again, especially when I want to brighten up a gloomy day or celebrate a small victory. The aroma that fills the kitchen as it bakes is absolutely heavenly! I encourage you to give this recipe a try; you might just find it becoming a beloved staple in your home. Don’t forget to share your results or even add your own unique twist—I can’t wait to see what you create!

Print
clock clock iconcutlery cutlery iconflag flag iconfolder folder iconinstagram instagram iconpinterest pinterest iconfacebook facebook iconprint print iconsquares squares iconheart heart iconheart solid heart solid icon

Lemon Poppy Seed Loaf


  • Author: Lily author
  • Total Time: 16 minute
  • Yield: 1 loaf 1x
Pin Recipe
Print Recipe

Description

This Lemon Poppy Seed Loaf is a delightful treat that combines zesty lemon flavor with crunchy poppy seeds. Topped with a citrus icing, it’s perfect for any occasion.


Ingredients

Scale
  • 1 ½ cups (190g) all-purpose flour
  • 1 teaspoon baking powder
  • ½ teaspoon baking soda
  • ½ teaspoon salt
  • 3 tablespoons poppy seeds
  • ½ cup (115g) unsalted butter, softened to room temperature
  • 1 cup (200g) granulated sugar
  • 2 large eggs
  • 1 teaspoon vanilla extract
  • 1 teaspoon lemon zest (from about 1 medium lemon)
  • ½ cup (120ml) buttermilk
  • 2 tablespoons fresh lemon juice
  • 1 cup (120g) powdered sugar
  • 2 tablespoons fresh lemon juice
  • 1 tablespoon orange juice
  • 1 teaspoon lemon zest (for garnish, optional)

Instructions

  1. Preheat your oven to 350°F (175°C). Grease a 9×5-inch loaf pan or line it with parchment paper for easy removal later.
  2. In a medium mixing bowl, whisk together 1 ½ cups of all-purpose flour, 1 teaspoon of baking powder, ½ teaspoon of baking soda, ½ teaspoon of salt, and 3 tablespoons of poppy seeds. This helps to evenly distribute the baking agents and ensures a uniform rise.
  3. In a large mixing bowl, cream together ½ cup of softened unsalted butter and 1 cup of granulated sugar using an electric mixer on medium speed for about 3-4 minutes, until the mixture is light and fluffy. Make sure to scrape down the sides of the bowl occasionally.
  4. Add 2 large eggs, 1 teaspoon of vanilla extract, and 1 teaspoon of lemon zest to the creamed butter and sugar, mixing until fully combined. You want a smooth consistency, so ensure there are no lumps of butter.
  5. In a small bowl, combine ½ cup of buttermilk and 2 tablespoons of fresh lemon juice. Alternately add the dry ingredients and buttermilk mixture to the butter mixture, starting and ending with the dry ingredients. Mix just until combined; do not overmix, as this can lead to a dense loaf.
  6. Pour the batter into the prepared loaf pan. Smooth the top with a spatula, ensuring it’s even. Bake in the preheated oven for 50-60 minutes, or until a toothpick inserted in the center comes out clean. The edges should be lightly golden brown, and the center should feel just set.
  7. Once baked, remove the loaf from the oven and allow it to cool in the pan for about 10 minutes. Then, transfer it to a wire rack to cool completely. Resist the urge to slice too soon, as it will be crumbly if it’s still warm.
  8. While the loaf is cooling, prepare the citrus icing. In a medium bowl, whisk together 1 cup of powdered sugar, 2 tablespoons of fresh lemon juice, and 1 tablespoon of orange juice until smooth. If the icing is too thick, you can add a little more juice to reach your desired consistency.
  9. Once the loaf is completely cool, drizzle the citrus icing over the top. If you like, sprinkle with an additional teaspoon of lemon zest for an extra pop of flavor and color.
  • Prep Time: 15 mins
  • Cook Time: 50-60 mins
  • Category: Dessert
  • Method: Baking
  • Cuisine: American

Nutrition

  • Serving Size: 1 slice
  • Calories: 200
  • Sugar: 15 g
  • Sodium: 150 mg
  • Fat: 8 g
  • Saturated Fat: 5 g
  • Unsaturated Fat: 3 g
  • Trans Fat: 0 g
  • Carbohydrates: 30 g
  • Fiber: 1 g
  • Protein: 3 g
  • Cholesterol: 40 mg

Keywords: Be careful not to overmix your batter; this is a common mistake that can lead to a dense loaf. Use room temperature ingredients for a smoother batter and even baking.

Did you make this recipe?

Share a photo and tag us — we can't wait to see what you've made!

  • Privacy Policy
  • Terms Of Service
  • Contact
  • About
  • GDPR

Copyright © 2025 Homesmad