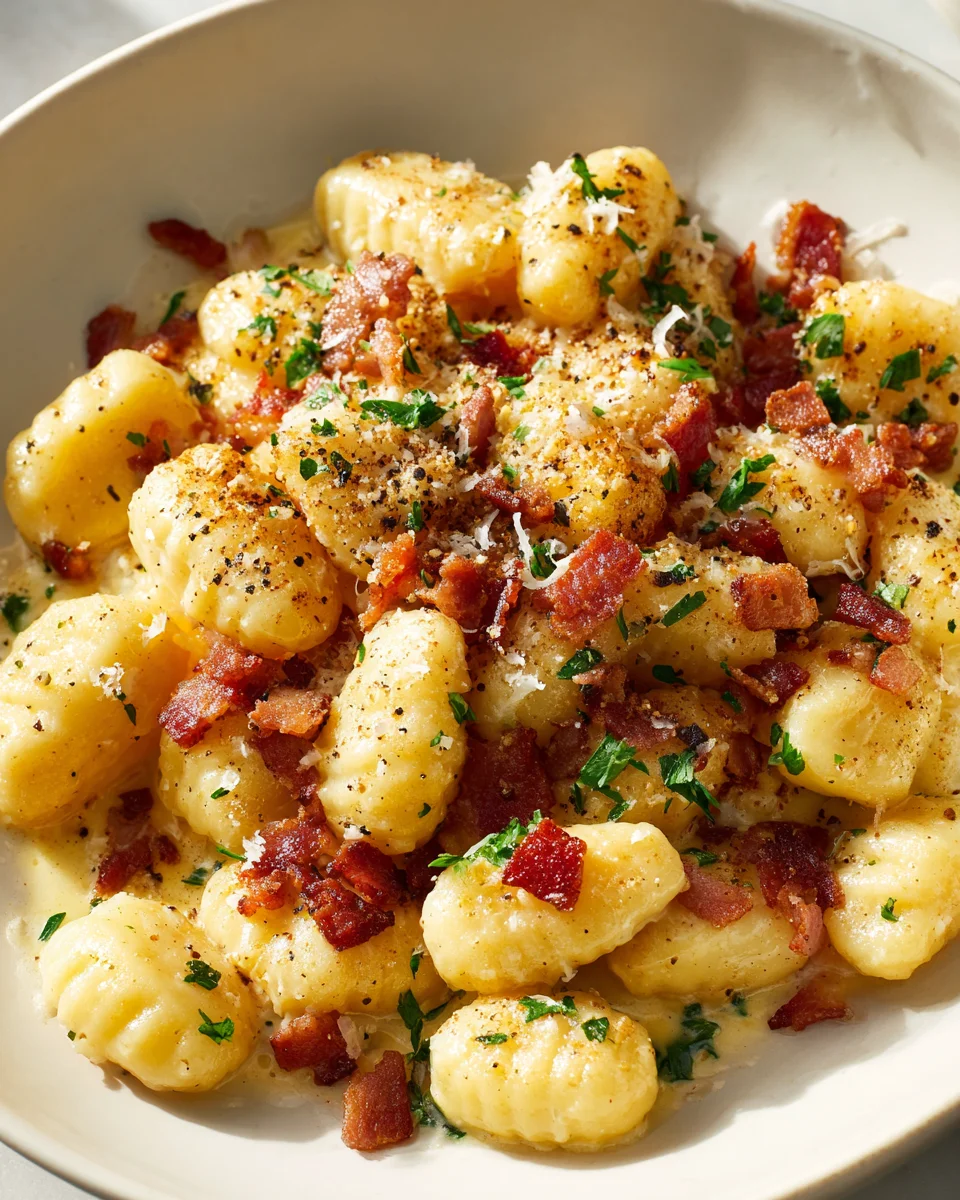
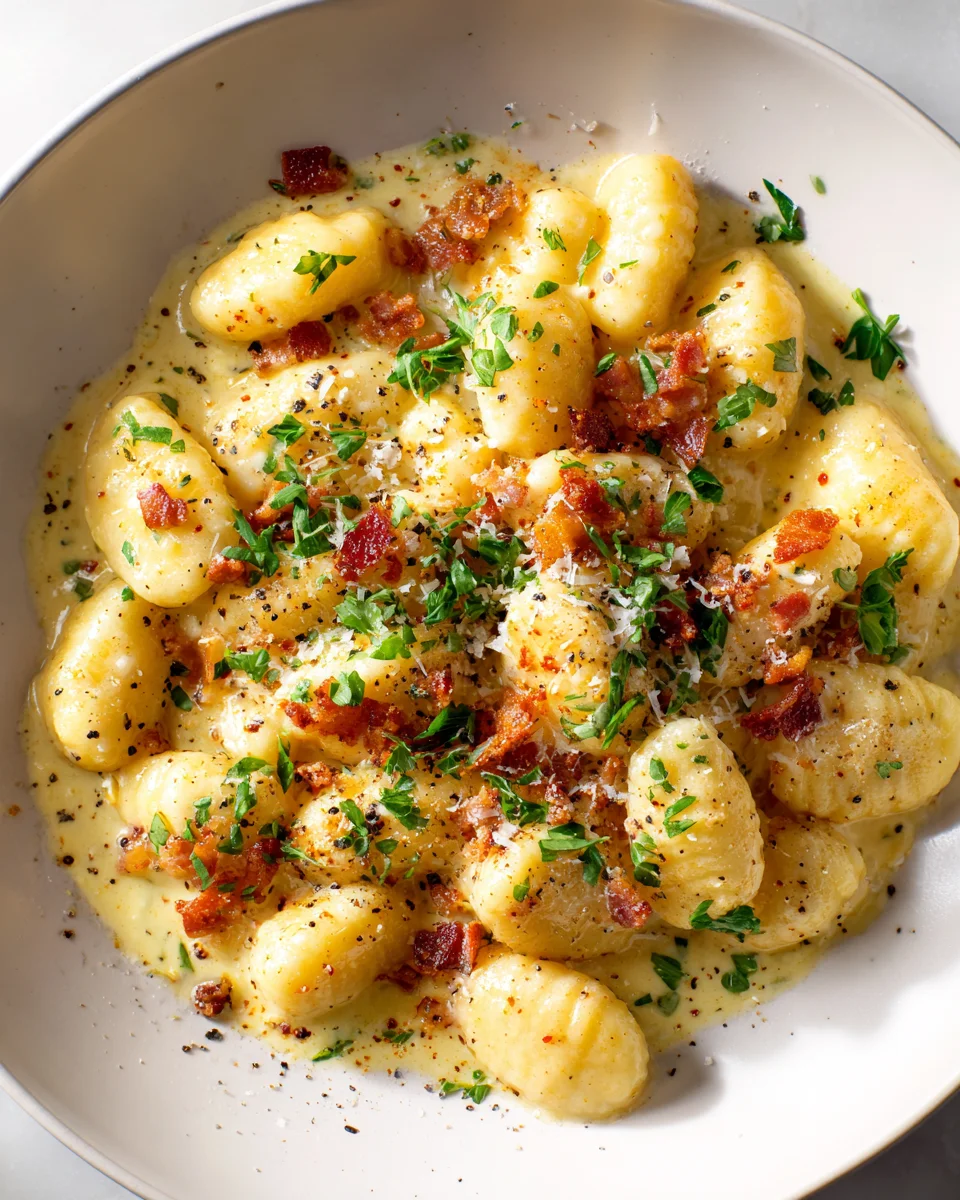
Carbonara With Gnocchi
Hello, my fellow food lovers! I am absolutely thrilled to share a recipe with you today that takes a beloved classic and elevates it to new heights of comfort and flavor. While we all adore traditional Carbonara, I’ve discovered a magical twist that I know you’re going to adore: Carbonara With Gnocchi. This isn’t just a simple substitution; it’s a brilliant marriage of two incredibly satisfying components that creates something truly special.
What makes this recipe so exceptional is the delightful interplay of textures and tastes. Imagine the rich, velvety Carbonara sauce – made with savory cured beef, vibrant egg yolks, generous amounts of Pecorino Romano cheese, and a punch of freshly ground black pepper – clinging perfectly to every soft, pillowy potato gnocchi. It’s a comforting hug in a bowl that truly sets it apart from any Carbonara you’ve had before. You’ll fall in love with how the tender, melt-in-your-mouth gnocchi absorbs all that incredible flavor, offering a chewiness that pasta just can’t replicate.
This dish is an elegant yet approachable way to bring gourmet comfort to your table, whether it’s for a cozy weeknight dinner or to impress guests. Get ready to experience a deeply satisfying and wonderfully unique culinary journey with every single bite!
Ingredient Notes
Diving into Carbonara with Gnocchi is an exciting twist on a classic, and getting the ingredients right is key to unlocking that incredible creamy, peppery, and rich flavor. Here’s what you’ll need to make this dish sing:
Gnocchi
- The Star: Naturally, gnocchi takes center stage here! I recommend using a good quality store-bought potato gnocchi for convenience, or if you’re feeling ambitious, homemade gnocchi truly takes this dish to another level. The beauty of gnocchi in carbonara is how its soft, pillowy texture absorbs the rich sauce, offering a delightful contrast to traditional pasta. Look for gnocchi that cooks quickly, usually in just a few minutes, which is perfect for timing with the sauce.
- Substitutions: While potato gnocchi is classic, you could experiment with sweet potato gnocchi for a slightly sweeter, earthier note, or even ricotta gnocchi for a lighter, more delicate bite. Just ensure whatever gnocchi you choose is fresh and of good quality.
The Beef Element
- Crispy & Savory: Traditional carbonara relies on cured pork, but for our Carbonara with Gnocchi, we’re using a delicious beef alternative. I highly recommend using thinly sliced, fatty cured beef, similar to beef bacon or a very lean, dry-aged beef that can be rendered until crispy. If you can find beef ‘guanciale’ or ‘pancetta’ specifically prepared from beef, that would be ideal. Otherwise, a thinly sliced, good quality smoked beef brisket or even some beef pastrami, rendered until delightfully crisp, will provide that essential savory depth and crispy texture that’s so crucial.
- Preparation: The goal is to render out the fat and achieve crispy “beef lardons.” This rendered beef fat is absolutely essential for building the sauce’s flavor and richness.
Eggs & Cheese
- The Creamy Base: For that signature rich, emulsified sauce, you’ll need a combination of whole eggs and extra egg yolks. I usually go for about two whole eggs and two extra egg yolks for a serving for two to three people. The extra yolks provide incredible richness and help achieve that luscious, velvety texture without scrambling.
- Pecorino Romano: This hard, salty sheep’s milk cheese is non-negotiable for authentic carbonara flavor. Its sharp, tangy profile cuts through the richness of the eggs and beef beautifully. Freshly grated is a must!
- Optional Parmesan: While Pecorino Romano is key, I sometimes like to add a touch of freshly grated Parmigiano-Reggiano for an extra layer of nutty, complex flavor. It’s optional, but highly recommended if you have it on hand.
Freshly Ground Black Pepper
- The Spice: Plenty of freshly ground black pepper is crucial. The quantity might surprise you, but it’s meant to be a prominent flavor that balances the richness of the dish. Use a good quality coarse grind for the best aroma and bite.
Pasta Water (Gnocchi Water!)
- Liquid Gold: This starchy water from cooking the gnocchi is your secret weapon for emulsifying the sauce. It helps create that perfect creamy consistency, bringing everything together without adding any cream. Do not discard it!
Step-by-Step Instructions
Making Carbonara with Gnocchi is all about timing and technique, ensuring you get that perfectly creamy sauce without scrambling the eggs. Follow these steps for a dish that’s truly restaurant-quality:
Step 1: Prepare Your Ingredients
- First things first, get all your components ready. Grate your Pecorino Romano (and Parmigiano, if using) finely.
- In a medium bowl, whisk together your eggs and extra egg yolks until just combined and slightly frothy. Stir in a generous amount of freshly ground black pepper and about half of your grated Pecorino Romano. Set this mixture aside.
- Chop your fatty cured beef into small, bite-sized pieces or thin strips, aiming for consistency.
Step 2: Render the Crispy Beef
- Place a large skillet, preferably non-stick or cast iron, over medium heat. Add your chopped beef. Cook slowly, allowing the fat to render out and the beef to become beautifully golden brown and crispy. This can take anywhere from 8-12 minutes, depending on the beef.
- Once crispy, use a slotted spoon to transfer the cooked beef to a plate lined with paper towels, leaving all that glorious rendered beef fat in the skillet. Keep the skillet off the heat for a moment, but don’t clean it!
Step 3: Cook the Gnocchi
- While the beef is rendering, bring a large pot of salted water to a rolling boil.
- Add your gnocchi to the boiling water. Fresh or store-bought gnocchi typically cooks very quickly, often floating to the surface in 2-3 minutes when done.
- As soon as the gnocchi floats, use a slotted spoon or spider to transfer it directly into the skillet with the beef fat. Do not drain the pot completely; you absolutely need that starchy gnocchi cooking water! Reserve at least 1 cup.
Step 4: Emulsify the Carbonara Sauce
- This is the critical step for that silky, creamy sauce. Ensure your skillet is off the direct heat, or on very low heat if you must, to prevent the eggs from scrambling.
- Add a splash (about 1/4 cup) of the reserved hot gnocchi cooking water to the gnocchi in the skillet.
- Pour the egg and cheese mixture over the gnocchi. Immediately begin to toss and stir vigorously using tongs or a spoon. The heat from the gnocchi and the residual heat from the skillet, combined with the hot starchy water, will cook the eggs just enough to create a creamy, velvety sauce without scrambling.
- Continue to toss, adding more gnocchi water a tablespoon at a time if the sauce is too thick, until it reaches your desired creamy consistency. You want a luscious, coating sauce, not a runny one.
- Stir in most of the crispy beef bits (save a few for garnish!).
Step 5: Serve Immediately
- Transfer the Carbonara with Gnocchi directly into warm bowls.
- Garnish with a sprinkle of the remaining grated Pecorino Romano, a generous grind of fresh black pepper, and the reserved crispy beef bits. Serve immediately, as carbonara is best enjoyed fresh off the stove.
Tips & Suggestions
Achieving the perfect Carbonara with Gnocchi is a delicate dance, but these tips will help you master it and ensure a stunning, creamy result every time:
- Temperature Control is Key: This is the most crucial tip for carbonara. The biggest pitfall is scrambling the eggs. The goal is to gently cook the eggs using the residual heat from the hot gnocchi and the warm skillet, not direct high heat. Always remove the skillet from direct heat before adding the egg mixture. If your skillet is too hot, let it cool for a minute or two before adding the eggs.
- Don’t Be Shy with Pepper: Carbonara is meant to be peppery. Don’t just use a few cracks; grind a generous amount of fresh black pepper into your egg mixture and add more at the end for garnish. The heat releases the pepper’s aromatics, contributing significantly to the dish’s depth.
- The Power of Starchy Water: Always reserve more gnocchi water than you think you’ll need. It’s your emulsifying agent and your safety net for adjusting the sauce consistency. If your sauce is too thick, a splash of hot starchy water will bring it back to life.
- Quality of Gnocchi Matters: While store-bought is perfectly fine, a high-quality potato gnocchi will provide the best texture. If you’re using homemade gnocchi, ensure it’s light and pillowy – over-kneading can lead to dense gnocchi.
- Render Beef Fat Thoroughly: The fat from your beef substitute is not just for flavor; it’s a vital part of the sauce’s richness and mouthfeel. Cook the beef slowly and thoroughly to render out as much fat as possible and get those crispy bits.
- Warming the Bowls: For an extra touch, warm your serving bowls before plating. This helps keep the carbonara warm for longer, enhancing the dining experience.
- Taste and Adjust: Before serving, always taste your carbonara. Does it need more salt? More pepper? A final sprinkle of Pecorino? Adjust to your preference. Remember that Pecorino Romano is quite salty, so be mindful when salting your gnocchi water.
- No Cream, Please! True carbonara never uses cream. The creaminess comes solely from the emulsified eggs, cheese, beef fat, and starchy gnocchi water. Stick to these traditional ingredients for the most authentic and delicious result.
Storage
Carbonara, especially Carbonara with Gnocchi, is a dish that truly shines when served immediately. Its delicate, creamy sauce is at its absolute best right off the stove, when the gnocchi is tender and the sauce is perfectly emulsified and warm.
- Serving Fresh: My strongest recommendation is to prepare only as much as you plan to eat in one sitting. The texture and flavor will never be as good as when it’s freshly made.
- If You Must Store: If you do find yourself with leftovers, store them in an airtight container in the refrigerator for no more than 1-2 days. Be aware that the texture will change. The sauce will likely thicken considerably, and the gnocchi might become denser.
- Reheating Challenges: Reheating carbonara is tricky because the egg-based sauce can easily scramble or become grainy.
- Method 1 (Gentle Stovetop): Place the leftovers in a non-stick skillet over very low heat. Add a tablespoon or two of water or beef broth. Stir constantly and very gently until just warmed through. Do not let it boil or get too hot, as this will scramble the eggs.
- Method 2 (Microwave – Use with Caution): If using a microwave, heat in short bursts (30-60 seconds) on a lower power setting, stirring well after each burst. This method carries a higher risk of scrambling the eggs, so proceed carefully.
- Expect Texture Changes: Even with careful reheating, the creamy, luscious texture of fresh carbonara will be difficult to replicate. The sauce may be less silky, and the gnocchi can lose some of its tenderness. For the best experience, savor every bite when it’s hot and fresh!
Final Thoughts
And there you have it – our journey through a truly special dish comes to a delightful close. I honestly believe this Carbonara With Gnocchi recipe is an absolute game-changer for anyone seeking a fresh, comforting, and utterly delicious meal.
What makes this particular dish a must-try is the incredible synergy between its components. Imagine the tender, pillowy gnocchi, perfectly coated in that silky, rich, and intensely savory sauce, each bite punctuated by the delightful crunch of crispy beef. It’s a textural and flavor masterpiece that elevates the traditional Carbonara into something new and exciting, all while maintaining that beloved comforting warmth.
We’ve created a dish that’s both familiar in its soul and innovative in its form. The depth of flavor, achieved with thoughtful non-alcohol alternatives, truly shines through, making every forkful a moment to savor. So, do yourself a favor and experience the magic of Carbonara With Gnocchi. It’s not just a meal; it’s a culinary hug that promises to become a cherished favorite in your kitchen. Enjoy!

Creamy Beef Carbonara With Gnocchi: Easy, Flavorful Meal
- Total Time: 45 minutes
- Yield: 4 servings
Description
This Creamy Beef Carbonara with Gnocchi is a delightful twist on a classic dish, combining rich flavors and comforting textures. Perfect for a cozy dinner or to impress guests, this recipe is sure to become a favorite.
Ingredients
- Potato gnocchi
- Thinly sliced fatty cured beef (beef bacon, dry-aged beef, or smoked beef brisket)
- Whole eggs
- Extra egg yolks
- Pecorino Romano cheese (freshly grated)
- Optional Parmigiano-Reggiano cheese (freshly grated)
- Freshly ground black pepper
- Pasta water (gnocchi cooking water)
Instructions
- First things first, get all your components ready. Grate your Pecorino Romano (and Parmigiano, if using) finely.
- In a medium bowl, whisk together your eggs and extra egg yolks until just combined and slightly frothy. Stir in a generous amount of freshly ground black pepper and about half of your grated Pecorino Romano. Set this mixture aside.
- Chop your fatty cured beef into small, bite-sized pieces or thin strips, aiming for consistency.
- Place a large skillet, preferably non-stick or cast iron, over medium heat. Add your chopped beef. Cook slowly, allowing the fat to render out and the beef to become beautifully golden brown and crispy. This can take anywhere from 8-12 minutes, depending on the beef.
- Once crispy, use a slotted spoon to transfer the cooked beef to a plate lined with paper towels, leaving all that glorious rendered beef fat in the skillet. Keep the skillet off the heat for a moment, but don't clean it!
- While the beef is rendering, bring a large pot of salted water to a rolling boil.
- Add your gnocchi to the boiling water. Fresh or store-bought gnocchi typically cooks very quickly, often floating to the surface in 2-3 minutes when done.
- As soon as the gnocchi floats, use a slotted spoon or spider to transfer it directly into the skillet with the beef fat. Do not drain the pot completely; you absolutely need that starchy gnocchi cooking water! Reserve at least 1 cup.
- This is the critical step for that silky, creamy sauce. Ensure your skillet is off the direct heat, or on very low heat if you must, to prevent the eggs from scrambling.
- Add a splash (about 1/4 cup) of the reserved hot gnocchi cooking water to the gnocchi in the skillet.
- Pour the egg and cheese mixture over the gnocchi. Immediately begin to toss and stir vigorously using tongs or a spoon. The heat from the gnocchi and the residual heat from the skillet, combined with the hot starchy water, will cook the eggs just enough to create a creamy, velvety sauce without scrambling.
- Continue to toss, adding more gnocchi water a tablespoon at a time if the sauce is too thick, until it reaches your desired creamy consistency. You want a luscious, coating sauce, not a runny one.
- Stir in most of the crispy beef bits (save a few for garnish!).
- Transfer the Carbonara with Gnocchi directly into warm bowls.
- Garnish with a sprinkle of the remaining grated Pecorino Romano, a generous grind of fresh black pepper, and the reserved crispy beef bits. Serve immediately, as carbonara is best enjoyed fresh off the stove.
- Prep Time: 15 mins
- Cook Time: 30 mins
- Category: Dinner
- Method: Stovetop
- Cuisine: Italian
Nutrition
- Serving Size: 1 bowl
- Calories: 600
- Sugar: 2 g
- Sodium: 800 mg
- Fat: 30 g
- Saturated Fat: 10 g
- Unsaturated Fat: 15 g
- Trans Fat: 0 g
- Carbohydrates: 60 g
- Fiber: 3 g
- Protein: 25 g
- Cholesterol: 200 mg
Keywords: Temperature control is key to avoid scrambling the eggs. Don't be shy with the pepper, and always reserve more gnocchi water than you think you'll need. Quality of gnocchi matters, and render beef fat thoroughly for the best flavor.