• Skip to primary navigation
  • Skip to main content
  • Skip to primary sidebar
Homesmad

Homesmad

  • Home
  • Breakfast & Brunch
  • Appetizers & Snacks
  • Dinner
  • Dessert
  • About
  • Privacy Policy
  • Contact
Homesmad
  • Home
  • Breakfast & Brunch
  • Appetizers & Snacks
  • Dinner
  • Dessert
  • About
  • Privacy Policy
  • Contact

Creamy Chicken Alfredo Lasagna Rolls Recipe You’ll Love

September 28, 2025 by Lily author

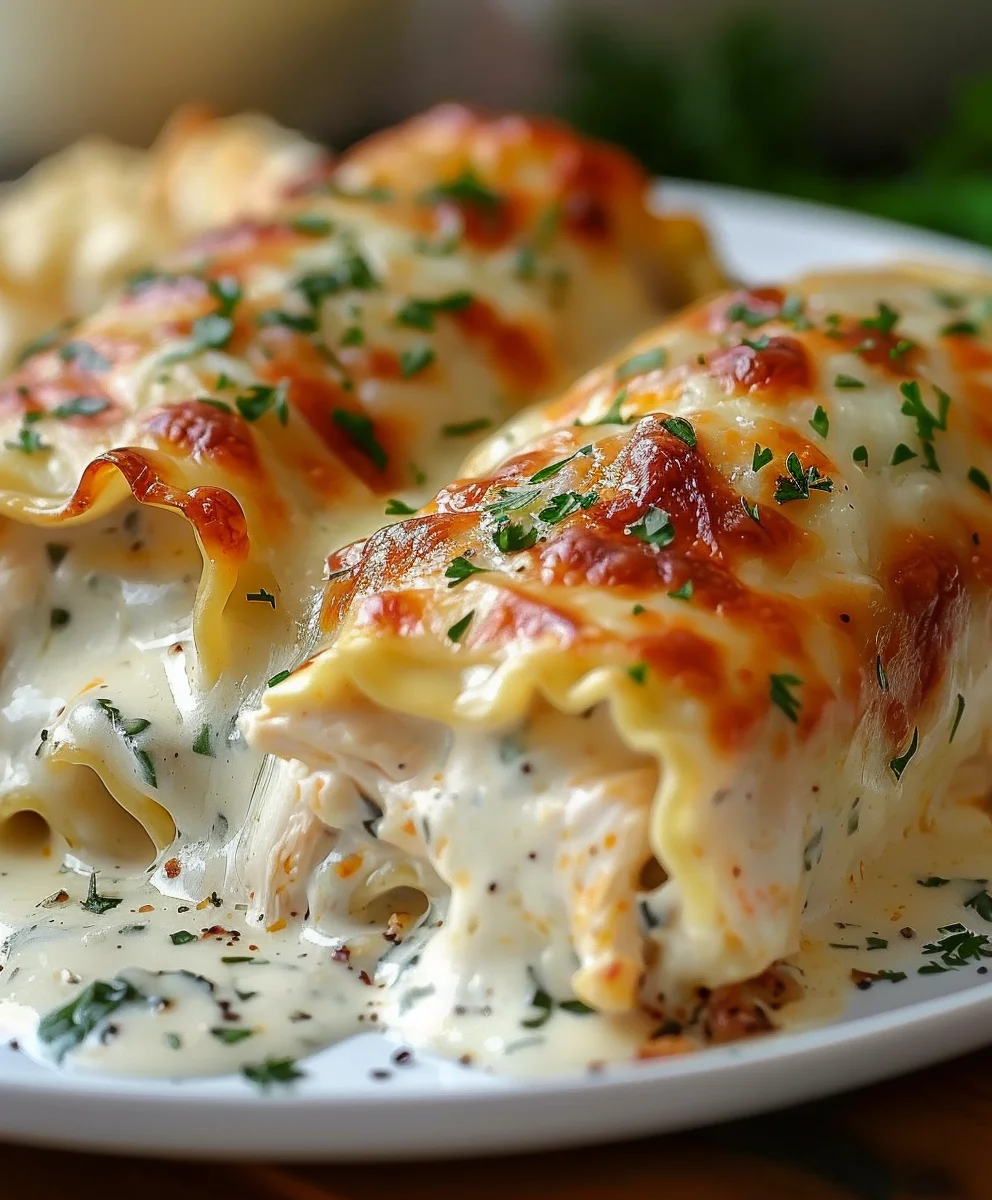
Chicken Alfredo Lasagna Rolls offer a truly delightful twist on two beloved Italian-American classics, transforming them into an irresistible, portion-controlled marvel that’s perfect for any occasion. I’ve always been fascinated by how traditional dishes evolve, and this recipe is a brilliant example of culinary innovation. While Alfredo sauce itself traces its rich, buttery, and cheesy origins back to Rome in the early 20th century, credited to chef Alfredo di Lelio, and lasagna has graced Italian tables for centuries, combining these elements into individual rolls brings a modern convenience to timeless flavors. It’s a dish that artfully bridges the gap between old-world charm and contemporary dining needs.

Why We Love This Innovative Dish So Much

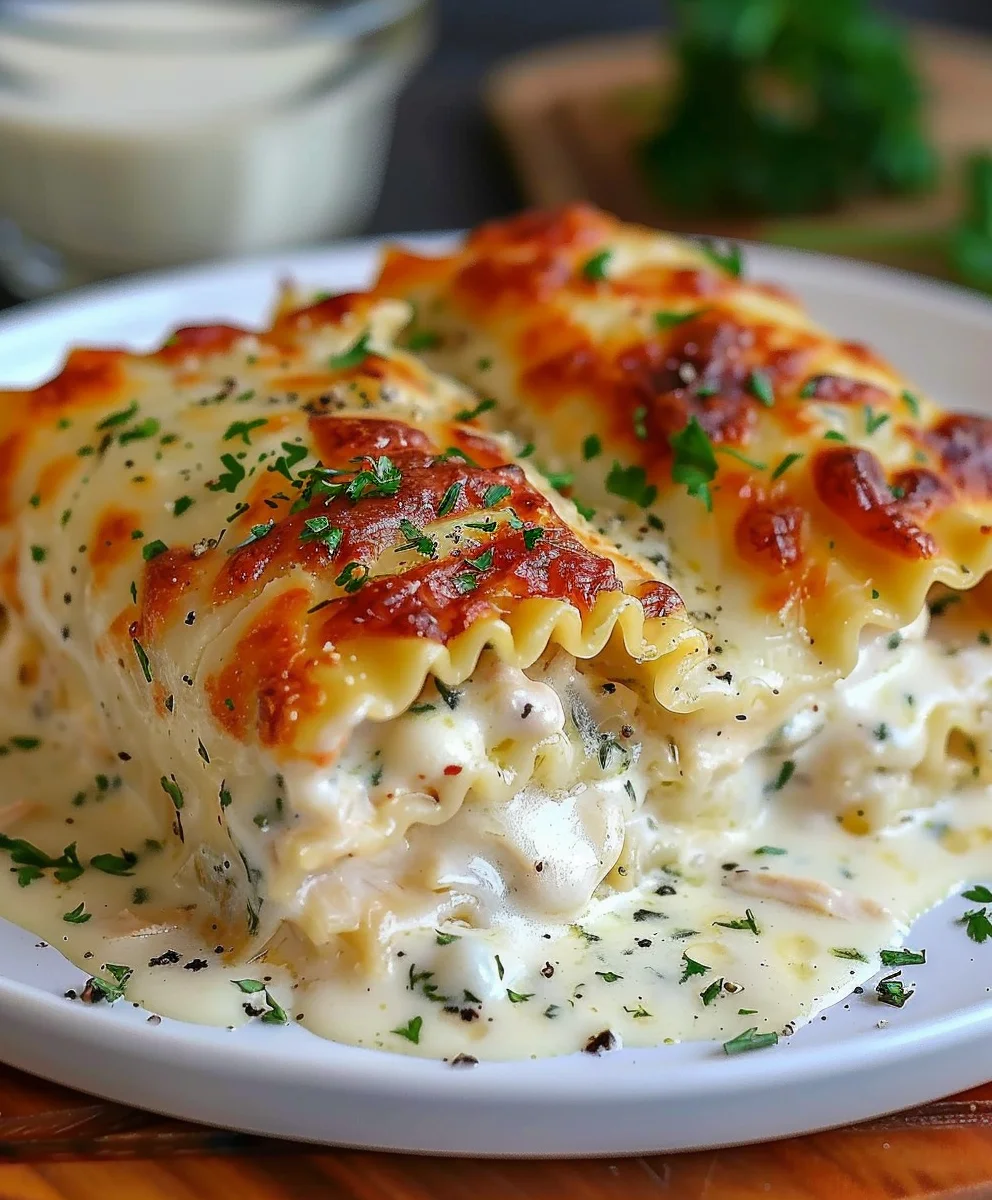
There’s something incredibly satisfying about a dish that delivers both comfort and elegance, and that’s precisely what these rolls achieve. People adore this dish not just for its incredible taste – the creamy, garlic-infused Alfredo sauce coating tender, seasoned chicken, layered with soft pasta sheets and rich cheeses – but also for its clever, individual presentation. Each roll is a perfectly portioned parcel of cheesy, savory goodness, making serving a breeze and ensuring everyone at the table gets a generous, comforting bite. It’s the ultimate comfort food, providing that warm, hug-in-a-bowl feeling, but in a neat, individual package. This ingenious approach to a classic pasta dish truly highlights why the Chicken Alfredo Lasagna Rolls have become a cherished household favorite, simplifying mealtime without sacrificing an ounce of flavor or that comforting, homemade appeal we all deeply appreciate.

Creamy Chicken Alfredo Lasagna Rolls Recipe You'll Love this RECIPE

Ingredients:

  • 12 lasagna noodles, oven-ready or classic (if classic, pre-cooked according to package directions)
  • 3 cups cooked chicken, shredded or finely diced (I often use a rotisserie chicken for ease!)
  • 15 ounces ricotta cheese, whole milk for best creaminess
  • 1 large egg, lightly beaten
  • ½ cup grated Parmesan cheese, plus more for topping
  • 2 cups shredded mozzarella cheese, plus more for topping
  • ¼ cup fresh parsley, chopped, plus extra for garnish
  • ½ teaspoon garlic powder
  • Salt and freshly ground black pepper to taste
  • 2 tablespoons olive oil
  • 4 cloves garlic, minced
  • 4 tablespoons unsalted butter
  • 4 tablespoons all-purpose flour
  • 3 cups whole milk, warmed
  • 1 ½ cups heavy cream, warmed
  • Pinch of freshly grated nutmeg
  • Extra salt and black pepper for the Alfredo sauce
  • Optional: 1 cup fresh spinach, finely chopped (I love adding this for a touch of green!)

Preparing the Chicken and Alfredo Sauce

  1. Cook Your Lasagna Noodles (If Using Classic): If you’re using classic lasagna noodles, start by cooking them according to package directions until al dente. This is crucial because you don’t want them mushy, but pliable enough to roll without breaking. Once cooked, drain them and lay them flat on a sheet of parchment paper or a clean kitchen towel to prevent them from sticking together. A little olive oil brushed between layers can also help. If you’re using oven-ready noodles, you can skip this step entirely, making your life a little easier!
  2. Prepare Your Chicken: If your chicken isn’t already cooked, this is the time to prepare it. I usually bake or boil chicken breasts until cooked through, then shred them using two forks or even my stand mixer with the paddle attachment – it works wonders for shredding chicken quickly! You’ll want about 3 cups. Set the shredded chicken aside in a medium bowl.
  3. Begin Your Homemade Alfredo Sauce: While you can absolutely use a high-quality jarred Alfredo sauce to save time, I find that making it from scratch really elevates this dish. In a medium saucepan or a deep skillet, melt 2 tablespoons of unsalted butter over medium heat. Add your minced garlic and sauté for about 1 minute until fragrant. Be careful not to let it brown, as burnt garlic can taste bitter.
  4. Create a Roux for Thickening: Now, add the remaining 2 tablespoons of butter to the saucepan and let it melt. Once melted, sprinkle in the 4 tablespoons of all-purpose flour. Whisk continuously for about 1-2 minutes to create a smooth roux. This mixture will be slightly pale and smell a bit nutty. Cooking the flour sufficiently is key here; it removes the raw flour taste and helps achieve that silky-smooth sauce.
  5. Whisk in Liquids Gradually: Slowly, and I mean slowly, pour in the warmed whole milk while continuously whisking to prevent lumps. Once all the milk is incorporated and the sauce begins to thicken slightly, gradually whisk in the warmed heavy cream. Keep whisking over medium-low heat until the sauce thickens to your desired consistency – it should be thick enough to coat the back of a spoon. This process usually takes about 5-7 minutes.
  6. Season and Finish the Alfredo Sauce: Remove the saucepan from the heat. Stir in ½ cup of grated Parmesan cheese, a pinch of freshly grated nutmeg (this secret ingredient adds so much depth!), and season generously with salt and freshly ground black pepper to taste. Taste your sauce! Adjust seasonings as needed. Remember, this sauce will be a major flavor component of your “Chicken Alfredo Lasagna Rolls,” so make sure it’s perfect. Set aside about 1 ½ cups of this luscious Alfredo sauce for the base of your baking dish and for drizzling later. The remaining sauce will be used in the filling.

Preparing the Filling for Your Lasagna Rolls

  1. Combine Ricotta Mixture: In a large mixing bowl, combine the 15 ounces of ricotta cheese, 1 large beaten egg, the remaining ½ cup of grated Parmesan cheese, and 2 cups of shredded mozzarella cheese. Add the ¼ cup of chopped fresh parsley and ½ teaspoon of garlic powder. Season with salt and freshly ground black pepper. Mix everything together until well combined. This is the creamy heart of your Chicken Alfredo Lasagna Rolls!
  2. Add Chicken and Alfredo to the Filling: To the ricotta mixture, add your shredded cooked chicken. Now, take about ½ cup of your freshly made Alfredo sauce (or jarred, if you went that route) and add it to the chicken and cheese mixture. This helps bind the filling and adds another layer of that delicious Alfredo flavor directly into the rolls. If you’re adding the optional chopped spinach, stir it in now until evenly distributed.
  3. Mix Thoroughly: Use a sturdy spoon or even your clean hands to thoroughly combine all the ingredients in the filling bowl. You want everything to be evenly distributed so every bite of your lasagna roll is packed with flavor.

Assembling the Lasagna Rolls

  1. Prepare Your Baking Dish: Preheat your oven to 375°F (190°C). Pour the reserved 1 ½ cups of Alfredo sauce into the bottom of a 9×13-inch baking dish, spreading it evenly. This creates a wonderful, creamy base for your “Chicken Alfredo Lasagna Rolls” and helps keep them moist during baking.
  2. Lay Out Noodles for Filling: Lay one cooked lasagna noodle flat on a clean work surface. If your noodles are sticking, a quick rinse under warm water can sometimes help, but dry them well afterwards.
  3. Spread the Filling: Take about ¼ to ⅓ cup of the chicken and ricotta filling and spread it evenly over the entire surface of the lasagna noodle, leaving a small border (about half an inch) on the short ends. Don’t overfill, or it will be messy to roll and might squeeze out during baking. A thin, even layer is your goal here.
  4. Roll Up the Noodles: Starting from one short end, carefully and snugly roll up the lasagna noodle into a spiral. You want it to be firm but not so tight that the filling bursts out. This rolling motion is what creates the elegant “lasagna roll” presentation.
  5. Place Rolls in Dish: Place the rolled lasagna noodle, seam-side down, into your prepared baking dish. Repeat this process with the remaining lasagna noodles and filling, arranging the rolls snugly next to each other in the baking dish. Depending on the size of your dish and how tightly you pack them, you should fit all 12 rolls.

Baking the Chicken Alfredo Lasagna Rolls

  1. Top with More Goodness: Once all your “Chicken Alfredo Lasagna Rolls” are nestled in the baking dish, drizzle any remaining Alfredo sauce over the tops of the rolls. Then, generously sprinkle the remaining shredded mozzarella cheese and an extra dusting of grated Parmesan cheese over everything. Don’t be shy with the cheese! It will melt into a glorious, golden-brown crust.
  2. Cover and Bake: Cover the baking dish tightly with aluminum foil. This helps to steam the rolls and ensure they heat through evenly and remain moist. Bake in your preheated oven for 20 minutes.
  3. Uncover and Brown: After 20 minutes, remove the foil. This is where the magic happens for that irresistible golden crust! Continue to bake for another 10-15 minutes, or until the cheese on top is beautifully melted, bubbly, and lightly golden brown. If you like a really crispy, browned top, you can even put it under the broiler for a minute or two at the very end, but watch it extremely carefully to prevent burning!
  4. Rest Before Serving: Once out of the oven, let the “Chicken Alfredo Lasagna Rolls” rest for about 5-10 minutes before serving. This allows the cheeses and sauce to set slightly, making them easier to scoop out and preventing them from falling apart. This short resting period is often overlooked but truly makes a difference in presentation and enjoyment.

Serving Your Delicious Creation

  1. Garnish and Serve: Garnish your magnificent “Chicken Alfredo Lasagna Rolls” with a fresh sprinkle of chopped parsley just before serving. The vibrant green not only adds a pop of color but also a fresh herbaceous note that complements the richness of the dish beautifully.
  2. Enjoy! Serve these delicious rolls hot, perhaps alongside a crisp green salad with a light vinaigrette or some garlic bread for dipping into any extra sauce. They are absolutely perfect for a weeknight family dinner or even elegant enough for a special gathering. Each bite offers a harmonious blend of tender pasta, creamy Alfredo, savory chicken, and a medley of cheeses. This dish is truly comfort food at its finest!

Creamy Chicken Alfredo Lasagna Rolls Recipe You'll Love

Conclusion:

And there you have it, friends! We’ve journeyed through the creation of what I truly believe is a dinner masterpiece, a dish that effortlessly marries convenience with an unparalleled depth of flavor. This isn’t just another weeknight meal; it’s an experience, a moment of culinary triumph waiting to happen in your kitchen. From the very first bite, I guarantee you’ll understand why these Chicken Alfredo Lasagna Rolls are poised to become a staple in your family’s rotation. They represent the perfect confluence of creamy Alfredo sauce, tender chicken, and perfectly cooked lasagna noodles, all lovingly rolled up and baked under a blanket of golden, bubbly cheese. It’s comforting, it’s elegant, and it’s surprisingly manageable, especially for those busy evenings when you still crave something truly special.

What makes this recipe a must-try, in my humble opinion, is its ingenious design. No more wrestling with slippery lasagna sheets trying to layer a massive pan; these individual rolls offer portion control and a delightful presentation that will impress even the most discerning dinner guests. The rich, velvety Alfredo sauce coats every morsel of seasoned chicken, creating a symphony of textures and tastes that dance on your palate. Plus, the preparation, while seemingly intricate, is broken down into straightforward steps, making it accessible for cooks of all skill levels. It’s a guaranteed crowd-pleaser, delivering all the cheesy, creamy goodness you adore in a format that’s both novel and incredibly satisfying. Think about the joy of serving a dish that looks like it took hours of painstaking effort, when in reality, it’s a brilliant shortcut to gourmet-level comfort food. It’s the kind of meal that sparks conversation, creates smiles, and fills your home with an aroma that signals pure deliciousness.

Perfect Pairings and Creative Twists to Elevate Your Meal

Now, let’s talk about how to serve these beauties! While truly a star on their own, a light accompaniment can truly complete the meal. I always recommend pairing your Chicken Alfredo Lasagna Rolls with a fresh, crisp green salad tossed in a simple vinaigrette to cut through the richness. A side of warm, crusty garlic bread is practically mandatory for soaking up any extra sauce – trust me, you won’t want to leave a drop behind! For a more substantial vegetable pairing, consider some roasted asparagus or broccoli florets; their slight bitterness and vibrant color complement the creamy pasta perfectly. A glass of crisp white wine, perhaps a Sauvignon Blanc or a light Chardonnay, would also be a lovely addition for the adults at the table, enhancing the dining experience.

But the fun doesn’t stop there! These Chicken Alfredo Lasagna Rolls are incredibly versatile, inviting you to put your own spin on the recipe. Don’t be afraid to experiment with variations to suit your taste or what you have on hand. For a touch of green, you could easily wilt some fresh spinach or chopped kale into the chicken and Alfredo mixture. Sautéed mushrooms, sun-dried tomatoes, or even roasted red peppers would also make fantastic additions, adding layers of flavor and texture. If you’re a fan of different cheeses, feel free to swap out or add to the mozzarella and Parmesan; a sprinkle of provolone or a dollop of creamy ricotta in each roll would be divine. For those who like a bit of heat, a pinch of red pepper flakes stirred into the Alfredo sauce before tossing with the chicken will add a wonderful kick. You can even vary the protein: cooked shrimp makes for a luxurious seafood Alfredo roll, or for a vegetarian option, simply omit the chicken and load up on your favorite vegetables and perhaps some crumbled goat cheese or fresh herbs like basil and parsley. For make-ahead convenience, you can assemble the rolls a day in advance, cover them tightly, and refrigerate until you’re ready to bake. They also freeze beautifully before baking – just thaw overnight in the refrigerator before baking as directed, or bake from frozen with extended cooking time. The possibilities are truly endless, allowing this recipe to evolve with your culinary creativity.

Your Turn to Experience the Magic!

I truly hope this recipe inspires you to get into the kitchen and create something wonderful. There’s an immense satisfaction that comes from preparing a delicious meal with your own hands, especially one that brings so much joy to those you share it with. These Chicken Alfredo Lasagna Rolls aren’t just food; they’re an invitation to gather, to celebrate, and to savor simple moments. So, arm yourself with your ingredients, put on some good music, and let the magic unfold. I am genuinely excited for you to experience the rich, comforting flavors of this dish firsthand. Once you’ve tried it, please, please come back and share your experience! I absolutely adore hearing your feedback, seeing your beautiful culinary creations, and learning about any modifications or personal touches you added. Did you try a new cheese? Add a secret ingredient? Let me know in the comments below, or better yet, share a photo on social media and tag me! Your culinary adventures inspire me, and I can’t wait to see your take on these delightful lasagna rolls. Happy cooking, everyone!


Creamy Chicken Alfredo Lasagna Rolls

Creamy Chicken Alfredo Lasagna Rolls

Chicken Alfredo Lasagna Rolls offer a delightful twist on two beloved Italian-American classics, transforming them into an irresistible, portion-controlled marvel perfect for any occasion. Each roll is a perfectly portioned parcel of cheesy, savory goodness, making serving a breeze and ensuring everyone gets a generous, comforting bite.

Prep Time
30 Minutes

Cook Time
35 Minutes

Total Time
75 Minutes

Servings
12 rolls

Ingredients

  • 12 lasagna noodles
  • 2 cups cooked chicken, shredded
  • 2 cups ricotta cheese
  • 1 cup grated Parmesan cheese
  • 2 cups shredded mozzarella cheese
  • 3 cups Alfredo sauce
  • 1 teaspoon garlic powder
  • 1 teaspoon Italian seasoning
  • Salt and pepper to taste
  • Fresh parsley (for garnish)

Instructions

  1. Step 1
    Prepare Noodles: Cook classic lasagna noodles according to package directions until al dente. Drain and lay flat on a clean surface. If using oven-ready noodles, no pre-cooking is needed.
  2. Step 2
    Prepare Filling: In a large bowl, combine shredded cooked chicken, ricotta cheese, 1/2 cup Parmesan cheese, 1 cup shredded mozzarella cheese, 1 teaspoon garlic powder, 1 teaspoon Italian seasoning, salt, and pepper. Mix thoroughly until well combined.
  3. Step 3
    Prepare Alfredo Sauce: Have 3 cups of Alfredo sauce ready (homemade or high-quality jarred). Set aside 1.5 cups for the baking dish base. Add 1/2 cup of the Alfredo sauce to the chicken-ricotta mixture and mix well. The remaining 1 cup is for drizzling.
  4. Step 4
    Preheat Oven & Dish Prep: Preheat your oven to 375°F (190°C). Pour the reserved 1.5 cups of Alfredo sauce into the bottom of a 9×13-inch baking dish, spreading it evenly.
  5. Step 5
    Assemble Rolls: Lay one cooked lasagna noodle flat. Spread approximately 1/4 to 1/3 cup of the chicken and ricotta filling evenly over the entire surface of the noodle, leaving a small border on the short ends. Carefully roll up the noodle from one short end into a snug spiral.
  6. Step 6
    Arrange & Top: Place the rolled lasagna noodle, seam-side down, into the prepared baking dish. Repeat this process with the remaining noodles and filling, arranging all 12 rolls snugly in the dish. Drizzle any remaining 1 cup of Alfredo sauce over the tops of the rolls. Generously sprinkle the remaining 1 cup shredded mozzarella cheese and 1/2 cup grated Parmesan cheese over everything.
  7. Step 7
    Bake Covered: Cover the baking dish tightly with aluminum foil. Bake in the preheated oven for 20 minutes.
  8. Step 8
    Bake Uncovered: Remove the foil and continue to bake for another 10-15 minutes, or until the cheese on top is melted, bubbly, and lightly golden brown. If desired, broil for 1-2 minutes for extra browning, watching carefully to prevent burning.
  9. Step 9
    Rest & Serve: Once out of the oven, let the lasagna rolls rest for about 5-10 minutes before serving. Garnish with a fresh sprinkle of chopped parsley. Serve hot and enjoy!

Important Information

Nutrition Facts (Per Serving)

It is important to consider this information as approximate and not to use it as definitive health advice.

Allergy Information

Please check ingredients for potential allergens and consult a health professional if in doubt.

« Previous Post
Best Cheesy Chicken & Rice Casserole - Quick Family Meal
Next Post »
Air Fryer Pumpkin Gnocchi Cake: Sweet & Savory Delight

If you enjoyed this…

Comforting Beef Potsticker Soup: Your Delicious Hug in a Bowl

Creamy Garlic Parmesan Chicken & Cheesy Twisted Pasta

Cajun Corn & Beef Sausage Skillet: Quick & Zesty Meal

Primary Sidebar

Browse by Diet

BreakfastDinnerLunchDessertAppetizer

Sweet Peach Yogurt Parfait Delight

One of my fondest memories is from a lazy summer afternoon spent at my grandmother’s house. The sun filtered through the kitchen window, casting a warm glow over the table where she would create her culinary magic. It was during one of those blissful moments that I first tasted her Peach Yogurt Parfait with Honey and Granola. The sweet aroma of ripe peaches mingling with creamy yogurt and the crunch of granola was nothing short of heavenly. It felt like summer captured in a bowl, and I still remember the joy of diving in with a spoon, each layer revealing a new burst of flavor.

When I think about that parfait, I can almost hear the gentle hum of the bees outside, reminding me of the floral notes that honey brings to every bite. The vibrant yellows and soft oranges of the peaches contrast beautifully with the creamy white yogurt and the golden crunch of granola. It’s a dish that not only looks delightful but also tastes like a celebration of fresh, wholesome ingredients.

What makes my version of this Peach Yogurt Parfait special is the careful balance of flavors and textures. I use ripe, juicy peaches, drizzled with locally sourced honey, and a homemade granola that’s bursting with nuts and seeds for an extra crunch. It’s a simple dish, but every layer is crafted with love and attention.

Let me show you exactly how to make this delightful parfait, so you can bring a bit of that summer magic into your kitchen!

Sweet Peach Yogurt Parfait Delight

Why You’ll Love This Recipe

  • Delightfully creamy texture from the Greek yogurt, paired with the juicy sweetness of fresh peaches.
  • Ready in under 20 minutes, making it a quick and satisfying breakfast or snack option.
  • Budget-friendly, using common ingredients that you may already have in your pantry.
  • Customizable with your favorite granola and nuts, allowing you to tailor each parfait to your taste.
  • Perfectly balanced flavors with the bright acidity of lemon juice and the sweetness of honey enhancing the peaches.

Ingredients

  • For the Parfait:
  • 2 cups plain Greek yogurt (or vanilla yogurt for a sweeter option)
  • 2 large ripe peaches, diced (about 2 cups)
  • 1 tablespoon fresh lemon juice (to prevent browning of peaches)
  • 2 tablespoons honey (plus more for drizzling)
  • 1 teaspoon vanilla extract (optional for extra flavor)
  • For the Granola:
  • 1 cup granola (store-bought or homemade; see notes for a simple granola recipe)
  • 1/4 cup sliced almonds (optional for added crunch)
  • 1/4 cup shredded coconut (optional for added flavor)

Let’s dive into some key ingredients that make this Peach Yogurt Parfait so delightful! First, the Greek yogurt is not only creamy but also packed with protein, making it a satisfying option for breakfast or a snack. If you’re looking for a sweeter option, you can easily substitute it with vanilla yogurt, though it may alter the overall flavor balance. Next, the ripe peaches are the star of the show; their natural sweetness shines through, so I recommend choosing peaches that yield slightly to pressure, indicating they’re perfectly ripe. If peaches aren’t in season, feel free to use nectarines or even frozen peaches—just thaw them before use. Finally, honey adds a lovely floral sweetness that ties everything together. If you prefer, maple syrup can serve as a delicious substitute.

Step-by-Step Instructions

  1. Start by preparing the peaches. Wash them thoroughly, then slice and dice them into bite-sized pieces. In a medium bowl, toss the diced peaches with 1 tablespoon of fresh lemon juice to prevent browning. Set aside for about 5 minutes while the lemon juice works its magic.
  2. In a separate bowl, combine the Greek yogurt, 2 tablespoons of honey, and 1 teaspoon of vanilla extract if using. Stir the mixture until smooth and thoroughly blended. This should take about a minute. Avoid overmixing to maintain the creaminess of the yogurt.
  3. Now it’s time to layer your parfait. Grab a clear glass or bowl to showcase your beautiful creation. Start with a generous spoonful of the yogurt mixture at the bottom—about 1/4 cup will do. Use a spoon to spread it evenly.
  4. Add a layer of the diced peaches over the yogurt, ensuring they cover the yogurt completely. You might want to use about half of what you have prepared—roughly 1 cup. This layer should be visually appealing, so arrange the peaches neatly.
  5. Sprinkle 1/4 cup of granola over the peaches. This adds a delightful crunch. Make sure to distribute it evenly to ensure every bite has that satisfying texture. Avoid packing it down too tightly, as you want it to maintain its crunch.
  6. Repeat the layers: spoon in another 1/4 cup of yogurt, followed by another cup of peaches, and another sprinkle of granola. You should have at least two layers, but feel free to add more depending on your glass size.
  7. Finish off your parfait with a drizzle of honey on top for added sweetness and a touch of elegance. If you’re using sliced almonds or shredded coconut, sprinkle them on top now. It adds a lovely visual contrast and extra flavor.
  8. Serve immediately or refrigerate for up to 30 minutes before serving to allow the flavors to meld together. However, I recommend enjoying it fresh to maintain the granola’s crunch.

Pro Tips for the Best Peach Yogurt Parfait With Honey And Granola

  • Make sure to choose ripe peaches for the best flavor and texture. A common mistake is using unripe fruit, which can lead to a less enjoyable parfait. Look for peaches that are fragrant and slightly soft to the touch.
  • Use a clear glass to assemble your parfait; this not only makes for a beautiful presentation but also allows you to see the colorful layers, which adds to the enjoyment of eating it.
  • For an even creamier texture, consider whipping the Greek yogurt with a hand mixer for a couple of minutes before layering. This small adjustment makes a huge difference in mouthfeel.
  • Be mindful of the granola-to-yogurt ratio. Too much granola can overwhelm the parfait, while too little can make it feel too creamy. Aim for about 1/4 cup of granola per layer for the perfect balance.
  • If you’re making this for a gathering, consider preparing the yogurt and peaches ahead of time and layering them just before serving. This ensures the granola stays crunchy!

Variations & Serving Ideas

There are so many ways to get creative with your Peach Yogurt Parfait! For a tropical twist, swap out the peaches for mangoes or pineapples and top with coconut flakes. If you prefer a berry flavor, mix in some blueberries or strawberries with the peaches for added color and taste. For a nutty version, incorporate chopped walnuts or pecans instead of almonds.

As for serving ideas, this parfait pairs beautifully with a side of scrambled eggs for a hearty breakfast or fresh fruit salad for a light lunch. You might also enjoy it alongside whole grain toast with almond butter for an energizing snack. The contrast of flavors and textures will elevate your meal experience!

Storage, Make-Ahead & Reheating

The Peach Yogurt Parfait is best enjoyed fresh, but you can prepare some components ahead of time. Store the layered parfait in an airtight container in the refrigerator for up to 24 hours. However, be cautious; the granola may lose its crunch if stored too long. You can freeze the yogurt and peach mixture for up to 2 months; just remember to thaw it in the refrigerator overnight before serving.

If you plan to enjoy this dish the next day, it can taste even better as the flavors meld together. Just remember to add the granola right before serving to keep its delightful crunch!

Frequently Asked Questions

Can I make Peach Yogurt Parfait With Honey And Granola ahead of time?

Yes — in fact, it tastes even better the next day as the flavors meld. However, I recommend waiting to add the granola until just before serving to maintain its crunch.

What can I substitute for Greek yogurt?

If you prefer a lighter option, you can substitute Greek yogurt with regular yogurt or a dairy-free alternative like coconut yogurt. Just remember that this may alter the creaminess and flavor profile slightly.

Can I use frozen peaches for this parfait?

Absolutely! Just make sure to thaw the frozen peaches before using them. They will still add great flavor, though the texture may be slightly softer than fresh peaches.

How do I make the parfait vegan?

To make a vegan version, substitute the Greek yogurt with a plant-based yogurt alternative, and replace honey with maple syrup or agave nectar. This keeps the parfait sweet while adhering to a vegan diet.

What other fruits can I use in this recipe?

You can mix and match fruits based on your preference. Try using strawberries, blueberries, raspberries, or even bananas. Just make sure to adjust the lemon juice as needed to prevent browning.

Sweet Peach Yogurt Parfait Delight

Final Thoughts

The Peach Yogurt Parfait with Honey and Granola is a delightful blend of creamy yogurt, sweet peaches, and crunchy granola that creates a satisfying and nourishing treat. Each layer bursts with flavor, making it a perfect choice for breakfast or a light dessert.

This is the kind of recipe I come back to again and again, especially when I want something refreshing and wholesome to start my day. The harmony of sweet and tart flavors, combined with the delightful crunch, never fails to lift my spirits!

I encourage you to give this parfait a try and indulge in its comforting goodness. Feel free to share your results or even add your own twist—perhaps a sprinkle of cinnamon or a handful of nuts. Enjoy creating your perfect parfait!

Print
clock clock iconcutlery cutlery iconflag flag iconfolder folder iconinstagram instagram iconpinterest pinterest iconfacebook facebook iconprint print iconsquares squares iconheart heart iconheart solid heart solid icon

Peach Yogurt Parfait


  • Author: Lily author
  • Total Time: 15 minutes
  • Yield: 4 servings 1x
Pin Recipe
Print Recipe

Description

This Peach Yogurt Parfait combines creamy Greek yogurt, juicy peaches, and crunchy granola for a delightful treat. It’s a perfect breakfast or snack that captures the essence of summer in every bite.


Ingredients

Scale
  • For the Parfait:
  • 2 cups plain Greek yogurt (or vanilla yogurt for a sweeter option)
  • 2 large ripe peaches, diced (about 2 cups)
  • 1 tablespoon fresh lemon juice (to prevent browning of peaches)
  • 2 tablespoons honey (plus more for drizzling)
  • 1 teaspoon vanilla extract (optional for extra flavor)
  • For the Granola:
  • 1 cup granola (store-bought or homemade; see notes for a simple granola recipe)
  • 1/4 cup sliced almonds (optional for added crunch)
  • 1/4 cup shredded coconut (optional for added flavor)

Instructions

  1. Start by preparing the peaches. Wash them thoroughly, then slice and dice them into bite-sized pieces. In a medium bowl, toss the diced peaches with 1 tablespoon of fresh lemon juice to prevent browning. Set aside for about 5 minutes while the lemon juice works its magic.
  2. In a separate bowl, combine the Greek yogurt, 2 tablespoons of honey, and 1 teaspoon of vanilla extract if using. Stir the mixture until smooth and thoroughly blended. This should take about a minute. Avoid overmixing to maintain the creaminess of the yogurt.
  3. Now it’s time to layer your parfait. Grab a clear glass or bowl to showcase your beautiful creation. Start with a generous spoonful of the yogurt mixture at the bottom—about 1/4 cup will do. Use a spoon to spread it evenly.
  4. Add a layer of the diced peaches over the yogurt, ensuring they cover the yogurt completely. You might want to use about half of what you have prepared—roughly 1 cup. This layer should be visually appealing, so arrange the peaches neatly.
  5. Sprinkle 1/4 cup of granola over the peaches. This adds a delightful crunch. Make sure to distribute it evenly to ensure every bite has that satisfying texture. Avoid packing it down too tightly, as you want it to maintain its crunch.
  6. Repeat the layers: spoon in another 1/4 cup of yogurt, followed by another cup of peaches, and another sprinkle of granola. You should have at least two layers, but feel free to add more depending on your glass size.
  7. Finish off your parfait with a drizzle of honey on top for added sweetness and a touch of elegance. If you’re using sliced almonds or shredded coconut, sprinkle them on top now. It adds a lovely visual contrast and extra flavor.
  8. Serve immediately or refrigerate for up to 30 minutes before serving to allow the flavors to meld together. However, I recommend enjoying it fresh to maintain the granola’s crunch.
  • Prep Time: 15 mins
  • Cook Time: 0 mins
  • Category: Breakfast
  • Method: No-cook
  • Cuisine: American

Nutrition

  • Serving Size: 1 parfait
  • Calories: 250
  • Sugar: 20 g
  • Sodium: 50 mg
  • Fat: 5 g
  • Saturated Fat: 2 g
  • Unsaturated Fat: 3 g
  • Trans Fat: 0 g
  • Carbohydrates: 40 g
  • Fiber: 3 g
  • Protein: 10 g
  • Cholesterol: 10 mg

Keywords: Choose ripe peaches for the best flavor and texture. Use a clear glass for a beautiful presentation. For creaminess, consider whipping the yogurt before layering. Be mindful of the granola-to-yogurt ratio. Prepare yogurt and peaches ahead of time for gatherings, layering just before serving.

Did you make this recipe?

Share a photo and tag us — we can't wait to see what you've made!

Sun-Kissed Frozen Orange Cream Slush

As a child, summer days felt like they lasted forever. I remember the sticky heat wrapping around me as I played outside, my laughter mingling with the sounds of the neighborhood. But nothing could cool me down quite like the moment I’d spot my grandmother, laboring over her blender, whipping up her famous Frozen Orange Creamsicle Slush. That vibrant orange treat, with its frosty texture and sweet citrus aroma, was like a burst of sunshine in a cup. Just one sip, and I could feel the coolness wash over me, sparking pure joy.

This Frozen Orange Creamsicle Slush has a way of making you feel like a kid again. Its creamy, dreamy consistency is a delightful balance of bright orange and soft vanilla, inviting you to dive right in. The refreshing tang of orange dances on your tongue, while the smooth creaminess envelops you in a comforting embrace. It’s a nostalgic treat that’s perfect for hot summer afternoons or anytime you need a little pick-me-up.

What makes my version of this slush stand out is the addition of a hint of vanilla bean, which elevates the flavor and adds an extra layer of richness. Plus, it’s super easy to whip up with just a few simple ingredients that you probably already have on hand! So, if you’re ready to relive those sun-soaked memories, let me show you exactly how to make it.

Sun-Kissed Frozen Orange Cream Slush

Why You’ll Love This Recipe

  • Each slush is a perfect blend of creamy vanilla and zesty orange, creating a nostalgic flavor reminiscent of summer days.
  • This refreshing treat is ready in under 15 minutes, making it an ideal quick dessert for unexpected guests or hot afternoons.
  • With just 8 simple ingredients, it’s budget-friendly, ensuring you don’t have to break the bank to enjoy a delicious slush.
  • The slush has a perfectly smooth texture, thanks to the combination of ice and ice cream, providing a delightful contrast to the bright citrus flavors.
  • It’s highly customizable; you can easily adjust the sweetness and add fresh herbs for a unique twist that suits your taste.

Ingredients

  • 2 cups orange juice (freshly squeezed or store-bought)
  • 1 cup vanilla ice cream
  • 1 cup crushed ice
  • 1/2 cup milk (whole or 2%)
  • 1/4 cup granulated sugar (adjust based on sweetness preference)
  • 1 teaspoon vanilla extract
  • Zest of 1 orange (for added flavor)
  • Fresh orange slices and mint leaves (for garnish)

The star of this Frozen Orange Creamsicle Slush is the orange juice, which provides the vibrant, citrusy base. Freshly squeezed juice will yield the brightest flavor, but store-bought options can be just as convenient. If you’re opting for store-bought, choose 100% pure juice with no added sugars for the best results. Another essential ingredient is the vanilla ice cream; it adds creaminess and sweetness. You can substitute it with dairy-free ice cream if you’re looking for a vegan option. Whole or 2% milk complements the ice cream, creating a smooth blend. If you want a lower-calorie version, almond or oat milk can be good alternatives.

Lastly, the granulated sugar can be adjusted based on your sweetness preference. If you prefer a more natural sweetener, consider using honey or agave syrup. The orange zest enhances the flavor profile, providing an aromatic pop that brings the whole slush together. Don’t skip it! It adds an extra layer of brightness that makes this slush truly special.

Step-by-Step Instructions

  1. Start by preparing your ingredients. Gather 2 cups of orange juice, 1 cup of vanilla ice cream, and 1 cup of crushed ice. Make sure the ice is finely crushed, as larger chunks can make blending difficult.
  2. In a blender, combine the orange juice, vanilla ice cream, crushed ice, and 1/2 cup of milk. Add 1/4 cup of granulated sugar and 1 teaspoon of vanilla extract. If you like a sweeter slush, consider adding a bit more sugar at this stage.
  3. Add the zest of 1 orange to the blender. This step is crucial for enhancing the citrus flavor of your slush. Make sure not to include the bitter white pith—only the flavorful zest.
  4. Blend the mixture on medium-high speed for about 30-45 seconds. Stop once the ingredients are fully combined and the slush has a smooth, even consistency. If you notice large chunks of ice, blend for an additional 10-15 seconds. Avoid over-blending, as this can make the slush too liquidy.
  5. Once blended, taste the slush. If it needs more sweetness, add a little more sugar and blend for a few more seconds. If it’s too thick, you can add a splash of milk to reach your desired consistency.
  6. Pour the slush into glasses. This recipe typically serves 4, but you can easily double it for larger gatherings. Use a spoon to help guide the slush into the glasses if needed.
  7. Garnish each serving with fresh orange slices and mint leaves. The mint not only adds a pop of color but also a refreshing aroma that complements the citrus flavors beautifully.
  8. Serve immediately and enjoy! If you’ve made extra, you can refrigerate it for a short time, but it’s best enjoyed fresh.

Pro Tips for the Best Frozen Orange Creamsicle Slush

  • Don’t skip the orange zest! It’s a game-changer for flavor. Always zest before juicing to make it easier.
  • Use a high-powered blender for the best texture. A standard blender may struggle with ice, leading to uneven consistency. If you have a food processor, that can work too, but ensure the ice is finely crushed.
  • Adjust the ice-to-liquid ratio carefully. If your slush is too thick, it won’t blend well. Start with less ice and add more until you reach your preferred texture.
  • Be cautious with the sugar! Always start with the lower amount, as you can easily add more, but it’s hard to fix an overly sweet slush.
  • For a fun twist, consider adding a splash of coconut milk or a handful of fresh fruit like strawberries or pineapple. This not only enhances the flavor but also adds a beautiful color contrast.

Variations & Serving Ideas

There are countless ways to put a spin on your Frozen Orange Creamsicle Slush. Consider making a tropical version by adding in some pineapple juice or coconut milk for a delightful tropical twist. If you’re feeling adventurous, try incorporating a handful of frozen mango or peach slices for added sweetness. For a lighter version, swap out the vanilla ice cream for Greek yogurt for a creamy yet tangy alternative.

As for serving ideas, this refreshing slush pairs wonderfully with light summer dishes like grilled chicken skewers, fish tacos, or a simple salad topped with citrus vinaigrette. The bright, zesty flavors of the slush complement these dishes perfectly, making them an ideal pairing for a sunny day.

Storage, Make-Ahead & Reheating

This Frozen Orange Creamsicle Slush is best enjoyed fresh, but if you have leftovers, you can store them in an airtight container in the fridge for up to 2 days. Just keep in mind that the slush may lose some of its texture over time as the ice melts. It doesn’t freeze well, as the ice will turn into a solid block. If you must freeze it, blend again after thawing to restore the slushy consistency. This treat is best the day you make it, as the flavors meld together beautifully overnight, enhancing its deliciousness.

Frequently Asked Questions

Can I make Frozen Orange Creamsicle Slush ahead of time?

Yes — in fact, it tastes even better the next day as the flavors meld. However, it’s best to enjoy it fresh, as the texture can change if stored for too long. If you need to prepare it ahead, keep it in the fridge and re-blend before serving.

What kind of orange juice should I use?

For the best flavor, use freshly squeezed orange juice. However, if you’re short on time, opt for 100% pure store-bought juice without added sugars. This will ensure that your slush remains flavorful and refreshing.

Can I substitute the vanilla ice cream?

Absolutely! If you’re looking for a dairy-free option, coconut milk ice cream or a non-dairy vanilla ice cream can work wonderfully. They will still provide the creamy texture and sweetness you desire.

How can I adjust the sweetness of my slush?

You can easily adjust the sweetness by modifying the amount of sugar added. Start with 1/4 cup and taste the mixture before blending. If you prefer it sweeter, add more sugar gradually until it reaches your desired level.

What should I do if my slush is too thick?

If your slush is too thick, simply add a splash of milk or orange juice and blend again. This will help achieve a more drinkable consistency while maintaining the slushy texture. Adjust gradually to reach your preferred thickness.

Sun-Kissed Frozen Orange Cream Slush

Final Thoughts

The Frozen Orange Creamsicle Slush is a delightful blend of refreshing citrus and creamy goodness, making it a perfect treat for warm days or any time you crave a taste of nostalgia. The way the bright orange flavor dances with the creamy texture truly elevates this slush, transforming it into a satisfying escape from the everyday.

This is the kind of recipe I come back to again and again, especially when I’m looking to cool down or impress guests at a summer gathering. It’s simple to make and always brings smiles all around! I encourage you to try this recipe for yourself—don’t hesitate to share your results or even put your own spin on it. Happy slushing!

Print
clock clock iconcutlery cutlery iconflag flag iconfolder folder iconinstagram instagram iconpinterest pinterest iconfacebook facebook iconprint print iconsquares squares iconheart heart iconheart solid heart solid icon

Frozen Orange Creamsicle Slush


  • Author: Lily author
  • Total Time: 15 minutes
  • Yield: 4 servings 1x
Pin Recipe
Print Recipe

Description

This Frozen Orange Creamsicle Slush is a refreshing treat that combines creamy vanilla and zesty orange flavors. Perfect for hot summer days, it brings back nostalgic memories with every sip.


Ingredients

Scale
  • 2 cups orange juice (freshly squeezed or store-bought)
  • 1 cup vanilla ice cream
  • 1 cup crushed ice
  • 1/2 cup milk (whole or 2%)
  • 1/4 cup granulated sugar (adjust based on sweetness preference)
  • 1 teaspoon vanilla extract
  • Zest of 1 orange (for added flavor)
  • Fresh orange slices and mint leaves (for garnish)

Instructions

  1. Start by preparing your ingredients. Gather 2 cups of orange juice, 1 cup of vanilla ice cream, and 1 cup of crushed ice. Make sure the ice is finely crushed, as larger chunks can make blending difficult.
  2. In a blender, combine the orange juice, vanilla ice cream, crushed ice, and 1/2 cup of milk. Add 1/4 cup of granulated sugar and 1 teaspoon of vanilla extract. If you like a sweeter slush, consider adding a bit more sugar at this stage.
  3. Add the zest of 1 orange to the blender. This step is crucial for enhancing the citrus flavor of your slush. Make sure not to include the bitter white pith—only the flavorful zest.
  4. Blend the mixture on medium-high speed for about 30-45 seconds. Stop once the ingredients are fully combined and the slush has a smooth, even consistency. If you notice large chunks of ice, blend for an additional 10-15 seconds. Avoid over-blending, as this can make the slush too liquidy.
  5. Once blended, taste the slush. If it needs more sweetness, add a little more sugar and blend for a few more seconds. If it’s too thick, you can add a splash of milk to reach your desired consistency.
  6. Pour the slush into glasses. This recipe typically serves 4, but you can easily double it for larger gatherings. Use a spoon to help guide the slush into the glasses if needed.
  7. Garnish each serving with fresh orange slices and mint leaves. The mint not only adds a pop of color but also a refreshing aroma that complements the citrus flavors beautifully.
  8. Serve immediately and enjoy! If you’ve made extra, you can refrigerate it for a short time, but it's best enjoyed fresh.
  • Prep Time: 15 min
  • Cook Time: 0 min
  • Category: Dessert
  • Method: Blending
  • Cuisine: American

Nutrition

  • Serving Size: 1 serving
  • Calories: 200
  • Sugar: 30 g
  • Sodium: 50 mg
  • Fat: 5 g
  • Saturated Fat: 3 g
  • Unsaturated Fat: 2 g
  • Trans Fat: 0 g
  • Carbohydrates: 40 g
  • Fiber: 1 g
  • Protein: 2 g
  • Cholesterol: 20 mg

Keywords: Don't skip the orange zest! It's a game-changer for flavor. Always zest before juicing to make it easier.

Did you make this recipe?

Share a photo and tag us — we can't wait to see what you've made!

Zesty Lemon Poppy Seed Delight

One rainy afternoon, I found myself in my grandmother’s cozy kitchen, the kind that always smelled like warmth and love. She was whipping up her famous Lemon Poppy Seed Loaf, a recipe that had been passed down through generations. As the batter came together, the zesty aroma of fresh lemons filled the air, mingling perfectly with the nutty fragrance of poppy seeds. I can still picture her, apron-clad, as she expertly drizzled a vibrant citrus icing over the loaf, creating a glossy, sun-kissed finish that beckoned us to dive in. It was a moment that sparked my own passion for baking, and this recipe has become a cherished staple in my home ever since.

When you take a bite of this Lemon Poppy Seed Loaf, it’s like a burst of sunshine on your palate. The loaf is beautifully golden, with a tender crumb that melts in your mouth. Each slice is speckled with tiny poppy seeds, adding a delightful crunch that contrasts beautifully with the tangy sweetness of the lemon. And that citrus icing? It’s the finishing touch that elevates this loaf from ordinary to extraordinary, with its bright, zesty flavor dancing on your taste buds.

This recipe stands out because it embraces simplicity while delivering on flavor. I’ve added a hint of vanilla to the batter, enhancing the overall taste and making it even more indulgent. Trust me, once you make this Lemon Poppy Seed Loaf With Citrus Icing, it’ll become a go-to in your baking repertoire.

So, let me show you exactly how to make it!

Zesty Lemon Poppy Seed Delight

Why You’ll Love This Recipe

  • Moist and tender crumb that melts in your mouth, thanks to the perfect balance of butter and buttermilk.
  • Bright, zesty lemon flavor paired with crunchy poppy seeds, creating a delightful texture and taste experience.
  • Easy to whip up in just about an hour, perfect for last-minute gatherings or a cozy afternoon treat.
  • Budget-friendly with everyday ingredients, making it an accessible option for all home bakers.
  • The citrus icing adds a sweet tang that elevates the loaf, turning a simple recipe into a showstopper!

Ingredients

  • 1 ½ cups (190g) all-purpose flour
  • 1 teaspoon baking powder
  • ½ teaspoon baking soda
  • ½ teaspoon salt
  • 3 tablespoons poppy seeds
  • ½ cup (115g) unsalted butter, softened to room temperature
  • 1 cup (200g) granulated sugar
  • 2 large eggs
  • 1 teaspoon vanilla extract
  • 1 teaspoon lemon zest (from about 1 medium lemon)
  • ½ cup (120ml) buttermilk
  • 2 tablespoons fresh lemon juice

For the Citrus Icing:

  • 1 cup (120g) powdered sugar
  • 2 tablespoons fresh lemon juice
  • 1 tablespoon orange juice
  • 1 teaspoon lemon zest (for garnish, optional)

Let’s dive into the key ingredients that make this Lemon Poppy Seed Loaf so special. The all-purpose flour provides the structure and base for the loaf, while the baking powder and baking soda ensure it rises perfectly, giving the loaf a light texture. For a gluten-free variation, you could substitute the flour with a gluten-free all-purpose blend. Poppy seeds not only add a delightful crunch but also contribute to the unique flavor profile that pairs well with the citrus notes.

Unsalted butter is crucial for achieving the buttery richness that makes this loaf so moist. If you’re looking for a dairy-free option, coconut oil or a vegan butter can be used instead. The buttermilk is another essential component, providing acidity that activates the baking soda for a fluffy texture. If you don’t have buttermilk on hand, you can easily make a substitute by mixing ½ cup of milk with 1 tablespoon of vinegar or lemon juice and letting it sit for about 5 minutes.

Step-by-Step Instructions

  1. Preheat your oven to 350°F (175°C). Grease a 9×5-inch loaf pan or line it with parchment paper for easy removal later.
  2. In a medium mixing bowl, whisk together 1 ½ cups of all-purpose flour, 1 teaspoon of baking powder, ½ teaspoon of baking soda, ½ teaspoon of salt, and 3 tablespoons of poppy seeds. This helps to evenly distribute the baking agents and ensures a uniform rise.
  3. In a large mixing bowl, cream together ½ cup of softened unsalted butter and 1 cup of granulated sugar using an electric mixer on medium speed for about 3-4 minutes, until the mixture is light and fluffy. Make sure to scrape down the sides of the bowl occasionally.
  4. Add 2 large eggs, 1 teaspoon of vanilla extract, and 1 teaspoon of lemon zest to the creamed butter and sugar, mixing until fully combined. You want a smooth consistency, so ensure there are no lumps of butter.
  5. In a small bowl, combine ½ cup of buttermilk and 2 tablespoons of fresh lemon juice. Alternately add the dry ingredients and buttermilk mixture to the butter mixture, starting and ending with the dry ingredients. Mix just until combined; do not overmix, as this can lead to a dense loaf.
  6. Pour the batter into the prepared loaf pan. Smooth the top with a spatula, ensuring it’s even. Bake in the preheated oven for 50-60 minutes, or until a toothpick inserted in the center comes out clean. The edges should be lightly golden brown, and the center should feel just set.
  7. Once baked, remove the loaf from the oven and allow it to cool in the pan for about 10 minutes. Then, transfer it to a wire rack to cool completely. Resist the urge to slice too soon, as it will be crumbly if it’s still warm.
  8. While the loaf is cooling, prepare the citrus icing. In a medium bowl, whisk together 1 cup of powdered sugar, 2 tablespoons of fresh lemon juice, and 1 tablespoon of orange juice until smooth. If the icing is too thick, you can add a little more juice to reach your desired consistency.
  9. Once the loaf is completely cool, drizzle the citrus icing over the top. If you like, sprinkle with an additional teaspoon of lemon zest for an extra pop of flavor and color.

Pro Tips for the Best Lemon Poppy Seed Loaf With Citrus Icing

  • Be careful not to overmix your batter; this is a common mistake that can lead to a dense loaf. Mix just until the dry ingredients are incorporated for a light and fluffy texture.
  • Use room temperature ingredients, especially the butter and eggs. This helps to create a smoother batter and ensures even baking. Take your eggs out of the fridge about 30 minutes before you start.
  • For a more pronounced lemon flavor, consider adding a little lemon extract in addition to the zest and juice. Just a half teaspoon can elevate the citrus notes significantly.
  • When measuring your flour, spoon it into the measuring cup and level it off with a knife instead of scooping directly from the bag. This prevents packing and ensures you don’t end up with a dry loaf.
  • Invest in a good quality loaf pan; it makes a difference in heat distribution, which ensures even baking. If your pan is dark-coated, reduce the oven temperature by 25°F to prevent over-browning.

Variations & Serving Ideas

For a delightful twist, consider adding blueberries or raspberries to the batter for a fruity burst of flavor. You can also experiment with different citrus fruits—try lime or grapefruit zest and juice for a refreshing change. For a healthier option, substitute half of the all-purpose flour with whole wheat flour for added fiber without compromising too much on texture.

This Lemon Poppy Seed Loaf pairs beautifully with a light salad, such as a mixed greens salad with a vinaigrette, or a cup of tea for a cozy afternoon treat. It also complements a creamy cheese platter, as the acidity of the loaf balances rich cheeses perfectly. Lastly, a scoop of vanilla ice cream on the side creates a delightful contrast of temperatures and flavors!

Storage, Make-Ahead & Reheating

This Lemon Poppy Seed Loaf can be stored at room temperature for up to 3 days if wrapped tightly in plastic wrap. If you want to keep it longer, it freezes well for up to 3 months. To freeze, wrap the loaf tightly in plastic wrap and then in aluminum foil to prevent freezer burn.

When you’re ready to enjoy it again, simply thaw it in the fridge overnight. Reheat individual slices in the microwave for 15-20 seconds or in a toaster oven until warmed through. Interestingly, many people find that this loaf tastes even better the next day, as the flavors have time to meld!

Frequently Asked Questions

Can I make Lemon Poppy Seed Loaf With Citrus Icing ahead of time?

Yes — in fact, it tastes even better the next day! You can make the loaf a day in advance, allowing the flavors to develop. Just be sure to store it in an airtight container to maintain its moisture.

Can I substitute the poppy seeds?

Absolutely! If you don’t have poppy seeds on hand or prefer an alternative, you can use sesame seeds for a similar crunch or omit them entirely for a smooth loaf.

What can I use instead of buttermilk?

If you don’t have buttermilk, you can easily create a substitute by mixing ½ cup of milk (dairy or plant-based) with 1 tablespoon of vinegar or lemon juice. Let it sit for 5 minutes before using in the recipe.

How can I make this recipe gluten-free?

To make a gluten-free version of this Lemon Poppy Seed Loaf, substitute the all-purpose flour with a gluten-free all-purpose flour blend. Just ensure that the blend contains a binding agent like xanthan gum for the best results.

What is the best way to store leftover loaf?

Leftover Lemon Poppy Seed Loaf should be stored in an airtight container at room temperature for up to 3 days. For longer storage, wrap it tightly and freeze for up to 3 months. Thaw it before serving for the best texture.

Zesty Lemon Poppy Seed Delight

Final Thoughts

The Lemon Poppy Seed Loaf with Citrus Icing is truly a delightful treat that brings a burst of brightness to any occasion. The zesty lemon flavor combined with the subtle crunch of poppy seeds creates a satisfying balance, while the citrus icing adds a touch of sweetness that perfectly complements the loaf’s tanginess.

This is the kind of recipe I come back to again and again, especially when I want to brighten up a gloomy day or celebrate a small victory. The aroma that fills the kitchen as it bakes is absolutely heavenly! I encourage you to give this recipe a try; you might just find it becoming a beloved staple in your home. Don’t forget to share your results or even add your own unique twist—I can’t wait to see what you create!

Print
clock clock iconcutlery cutlery iconflag flag iconfolder folder iconinstagram instagram iconpinterest pinterest iconfacebook facebook iconprint print iconsquares squares iconheart heart iconheart solid heart solid icon

Lemon Poppy Seed Loaf


  • Author: Lily author
  • Total Time: 15 minute
  • Yield: 1 loaf 1x
Pin Recipe
Print Recipe

Description

This Lemon Poppy Seed Loaf is a delightful treat that combines zesty lemon flavor with crunchy poppy seeds. Topped with a citrus icing, it’s perfect for any occasion.


Ingredients

Scale
  • 1 ½ cups (190g) all-purpose flour
  • 1 teaspoon baking powder
  • ½ teaspoon baking soda
  • ½ teaspoon salt
  • 3 tablespoons poppy seeds
  • ½ cup (115g) unsalted butter, softened to room temperature
  • 1 cup (200g) granulated sugar
  • 2 large eggs
  • 1 teaspoon vanilla extract
  • 1 teaspoon lemon zest (from about 1 medium lemon)
  • ½ cup (120ml) buttermilk
  • 2 tablespoons fresh lemon juice
  • 1 cup (120g) powdered sugar
  • 2 tablespoons fresh lemon juice
  • 1 tablespoon orange juice
  • 1 teaspoon lemon zest (for garnish, optional)

Instructions

  1. Preheat your oven to 350°F (175°C). Grease a 9×5-inch loaf pan or line it with parchment paper for easy removal later.
  2. In a medium mixing bowl, whisk together 1 ½ cups of all-purpose flour, 1 teaspoon of baking powder, ½ teaspoon of baking soda, ½ teaspoon of salt, and 3 tablespoons of poppy seeds. This helps to evenly distribute the baking agents and ensures a uniform rise.
  3. In a large mixing bowl, cream together ½ cup of softened unsalted butter and 1 cup of granulated sugar using an electric mixer on medium speed for about 3-4 minutes, until the mixture is light and fluffy. Make sure to scrape down the sides of the bowl occasionally.
  4. Add 2 large eggs, 1 teaspoon of vanilla extract, and 1 teaspoon of lemon zest to the creamed butter and sugar, mixing until fully combined. You want a smooth consistency, so ensure there are no lumps of butter.
  5. In a small bowl, combine ½ cup of buttermilk and 2 tablespoons of fresh lemon juice. Alternately add the dry ingredients and buttermilk mixture to the butter mixture, starting and ending with the dry ingredients. Mix just until combined; do not overmix, as this can lead to a dense loaf.
  6. Pour the batter into the prepared loaf pan. Smooth the top with a spatula, ensuring it’s even. Bake in the preheated oven for 50-60 minutes, or until a toothpick inserted in the center comes out clean. The edges should be lightly golden brown, and the center should feel just set.
  7. Once baked, remove the loaf from the oven and allow it to cool in the pan for about 10 minutes. Then, transfer it to a wire rack to cool completely. Resist the urge to slice too soon, as it will be crumbly if it’s still warm.
  8. While the loaf is cooling, prepare the citrus icing. In a medium bowl, whisk together 1 cup of powdered sugar, 2 tablespoons of fresh lemon juice, and 1 tablespoon of orange juice until smooth. If the icing is too thick, you can add a little more juice to reach your desired consistency.
  9. Once the loaf is completely cool, drizzle the citrus icing over the top. If you like, sprinkle with an additional teaspoon of lemon zest for an extra pop of flavor and color.
  • Prep Time: 15 mins
  • Cook Time: 50-60 mins
  • Category: Dessert
  • Method: Baking
  • Cuisine: American

Nutrition

  • Serving Size: 1 slice
  • Calories: 200
  • Sugar: 15 g
  • Sodium: 150 mg
  • Fat: 8 g
  • Saturated Fat: 5 g
  • Unsaturated Fat: 3 g
  • Trans Fat: 0 g
  • Carbohydrates: 30 g
  • Fiber: 1 g
  • Protein: 3 g
  • Cholesterol: 40 mg

Keywords: Be careful not to overmix your batter; this is a common mistake that can lead to a dense loaf. Use room temperature ingredients for a smoother batter and even baking.

Did you make this recipe?

Share a photo and tag us — we can't wait to see what you've made!

  • Privacy Policy
  • Terms Of Service
  • Contact
  • About
  • GDPR

Copyright © 2025 Homesmad