• Skip to primary navigation
  • Skip to main content
  • Skip to primary sidebar
Homesmad

Homesmad

  • Home
  • Breakfast & Brunch
  • Appetizers & Snacks
  • Dinner
  • Dessert
  • About
  • Privacy Policy
  • Contact
Homesmad
  • Home
  • Breakfast & Brunch
  • Appetizers & Snacks
  • Dinner
  • Dessert
  • About
  • Privacy Policy
  • Contact

Creamy Pumpkin Soup Recipe: Easy, Healthy & Delicious!

November 15, 2025 by Lily author

Pumpkin Soup – ah, the very name conjures images of cozy evenings, crackling fires, and the comforting embrace of autumn. But what if I told you that the perfect bowl of pumpkin soup isn’t just a seasonal delight, but a culinary masterpiece capable of warming you from the inside out, no matter the weather? Prepare to discover a recipe that transforms simple ingredients into an extraordinary experience, a silky smooth elixir that promises both comfort and culinary delight.

The humble pumpkin, central to this beloved dish, boasts a history as rich and vibrant as its color. Native to North America, pumpkins have been a staple food for indigenous cultures for thousands of years, revered for their versatility and nutritional value. From ancient harvest celebrations to modern-day family tables, soups made from these magnificent gourds have long symbolized abundance, warmth, and sustenance. It’s this deep-rooted tradition that imbues every spoonful with a sense of connection to the past.

Why Everyone Falls in Love with Our Pumpkin Soup

There are countless reasons why this creamy, aromatic delight has captured hearts globally. Firstly, its unparalleled taste profile—a harmonious blend of earthy sweetness, subtle spices, and a savory depth that lingers pleasantly on the palate. Then there’s the texture: incredibly velvety and smooth, it glides across your tongue, offering a luxurious mouthfeel that is simply irresistible. Whether you’re seeking a hearty appetizer or a light, satisfying meal, a bowl of this wholesome pumpkin soup offers pure, unadulterated comfort and a nutritious boost. It’s not just food; it’s an embrace in a bowl.

Creamy Pumpkin Soup Recipe: Easy, Healthy & Delicious! this RECIPE

Ingredients:

Creating a truly heartwarming and unforgettable Pumpkin Soup starts with selecting the freshest, most flavorful ingredients. Here’s what you’ll need for a batch that will serve 6-8 people generously, bringing a touch of comforting warmth to any meal.

  • Pumpkin: 3-4 pounds (about 1.5-2 kg) of a sweet, dense variety such as sugar pumpkin, kabocha, butternut squash, or even Cinderella pumpkin. Peeled, seeded, and cut into 1-inch cubes.
  • Aromatics:
    • 1 large yellow onion, finely chopped.
    • 2 medium carrots, peeled and finely chopped.
    • 2 stalks celery, trimmed and finely chopped.
    • 4-6 cloves garlic, minced.
  • Cooking Fat: 2 tablespoons unsalted butter or olive oil (or a combination for richer flavor).
  • Broth: 6-8 cups (about 1.5-2 liters) high-quality vegetable broth or chicken broth, depending on your dietary preferences and desired flavor depth. Use low-sodium to control seasoning.
  • Dairy/Cream: 1/2 cup (about 120ml) heavy cream, half-and-half, or full-fat coconut milk (for a dairy-free option).
  • Sweetener (Optional): 1-2 tablespoons maple syrup or brown sugar, to enhance the pumpkin’s natural sweetness, especially if your pumpkin isn’t very sweet.
  • Acidity (Optional): 1 tablespoon apple cider vinegar or a squeeze of fresh lemon juice, to brighten the flavors at the end.
  • Spices:
    • 1 teaspoon ground ginger.
    • 1/2 teaspoon ground cinnamon.
    • 1/4 teaspoon ground nutmeg.
    • 1/4 teaspoon cayenne pepper (optional, for a subtle kick).
    • 1 teaspoon curry powder or ground cumin (optional, for an earthy, savory depth).
    • Salt and freshly ground black pepper to taste.
  • Fresh Herbs (for garnish): Fresh sage leaves, thyme sprigs, or chives, finely chopped.
  • Garnishes (Optional, but highly recommended): Toasted pumpkin seeds (pepitas), a swirl of extra cream or crème fraîche, homemade croutons, or a drizzle of chili oil.

Preparing the Vegetables: The Foundation of Flavor

The journey to an incredible Pumpkin Soup truly begins with meticulous preparation of your core ingredients. This phase is not just about cutting; it’s about building layers of flavor that will sing in harmony in your finished soup.

  1. Choosing and Preparing Your Pumpkin:Selecting the right pumpkin is paramount for a flavorful Pumpkin Soup. While carving pumpkins are fun for Halloween, they lack the dense, sweet flesh needed for a robust soup. I always recommend sugar pumpkins (also known as pie pumpkins), butternut squash, kabocha squash, or even a Cinderella pumpkin. Butternut squash is a fantastic, readily available option that offers a consistently sweet and creamy texture. To prepare your chosen pumpkin, first, give it a good wash. Then, carefully cut it in half from top to bottom using a sturdy chef’s knife. Be mindful of your grip and always cut on a stable surface. Once halved, use a spoon or an ice cream scoop to thoroughly remove all the seeds and fibrous strands from the cavity. Don’t discard the seeds if you have time; they can be roasted for a delicious garnish later! Next, it’s time to peel. For tougher-skinned pumpkins like butternut, you might find it easier to cut the halves into more manageable wedges or thick slices before peeling with a sharp vegetable peeler or carefully slicing off the skin with a paring knife. The goal here is to remove all the tough outer skin. Finally, chop the peeled pumpkin flesh into roughly 1-inch (2.5 cm) cubes. Uniformity in size is key here, as it ensures that all pieces cook at the same rate, leading to a consistently tender texture that will blend into a silky-smooth Pumpkin Soup.
  2. Chopping the Aromatics:These vegetables — onions, carrots, celery, and garlic — form the classic “mirepoix” (or soffritto, if you add garlic), the aromatic foundation for countless dishes, including our Pumpkin Soup. They provide a depth of flavor that complements the sweetness of the pumpkin beautifully. Take your time to finely chop the onion, carrots, and celery. I aim for pieces that are roughly the same size, about ¼-inch dice, so they cook down evenly and become tender. For the garlic, mince it finely. You want its flavor to infuse the oil, not to have large chunks in the soup. These aromatics will be gently sautéed to release their natural sugars and complex flavors, creating a rich base upon which the rest of our Pumpkin Soup will be built.

Building the Flavor Base: Sautéing and Spicing

This stage is where the magic truly begins, as we transform simple vegetables into a fragrant, golden base that will define the character of our Pumpkin Soup. The careful cooking of the aromatics and the toasting of spices are crucial steps that cannot be rushed.

  1. Sautéing the Mirepoix:In a large, heavy-bottomed pot or Dutch oven, melt the unsalted butter with the olive oil over medium heat. The combination of butter and olive oil offers a lovely richness from the butter and a higher smoke point from the olive oil, preventing the butter from burning too quickly. Once the fats are shimmering, add your finely chopped onion, carrots, and celery. Stir frequently, allowing them to soften and sweeten without browning too much. This process typically takes about 8-10 minutes. You’re looking for them to become translucent and tender, releasing their moisture and concentrating their flavors. This gentle cooking ensures a sweet, mellow base for your Pumpkin Soup, avoiding any harsh, raw vegetable notes.
  2. Adding the Garlic and Spices:Once the mirepoix is soft, add the minced garlic to the pot. Stir it in and cook for about 1 minute until it becomes fragrant. Be careful not to burn the garlic, as it can turn bitter very quickly. Immediately after the garlic becomes fragrant, it’s time to introduce our spices: the ground ginger, cinnamon, nutmeg, and optionally, a pinch of cayenne pepper, curry powder, or cumin. Sprinkle them over the vegetables and stir well to coat everything. Cook for another 1-2 minutes, stirring constantly. This brief toasting of the spices in the hot oil helps to bloom their essential oils, intensifying their aromas and flavors significantly. This is a critical step for a deeply aromatic and flavorful Pumpkin Soup, allowing the warm, earthy notes to truly shine through.

Simmering to Perfection: Developing Depth

With the flavor base established, it’s time to bring all the main components together and allow them to meld into a cohesive and delicious liquid foundation for our Pumpkin Soup.

  1. Adding the Pumpkin and Broth:Now, add your cubed pumpkin to the pot. Stir it in with the sautéed aromatics and toasted spices, making sure every piece is coated with that flavorful mixture. Cook for about 2-3 minutes, stirring occasionally, allowing the pumpkin to absorb some of those initial flavors. Next, pour in the vegetable or chicken broth. I always opt for a good quality, low-sodium broth, as it allows me to control the saltiness of the final Pumpkin Soup precisely. Add enough broth to completely cover the pumpkin and vegetables, usually around 6-8 cups. If you’re using homemade broth, even better, as it adds an unparalleled depth of flavor.
  2. Bringing to a Boil and Simmering:Increase the heat to bring the liquid to a rolling boil. Once boiling, immediately reduce the heat to low, cover the pot, and let your Pumpkin Soup gently simmer. This slow, gentle cooking process is crucial. It allows the pumpkin to become incredibly tender and the flavors to deepen and meld beautifully. You’ll want to simmer it for about 20-25 minutes, or until the pumpkin cubes are fork-tender and practically falling apart. Check a piece with a fork – if it goes through easily with little resistance, your pumpkin is perfectly cooked and ready for the next stage. This patience during simmering ensures a wonderfully smooth and consistent texture once blended.

Blending and Finishing: Achieving Creamy Perfection

The transformation from chunky vegetables to a silky-smooth, luxurious Pumpkin Soup happens in this stage. It’s also where we adjust the final flavors and texture.

  1. Blending the Soup:Once the pumpkin is tender, remove the pot from the heat. Now comes the exciting part: blending! You have two main options here, each with its own benefits.
    1. Using an Immersion Blender: This is my preferred method for ease and safety. Carefully insert the immersion blender into the pot, making sure the blade is fully submerged. Blend directly in the pot until the soup is completely smooth and creamy. Move the blender around to ensure no chunks remain. Be cautious when blending hot liquids, as splashes can be dangerous.
    2. Using a Regular Blender: If you don’t have an immersion blender, a standard blender works perfectly. However, you’ll need to work in batches. Carefully ladle portions of the soup into your blender, making sure not to overfill it (usually no more than half full for hot liquids). Crucially, remove the center cap from the blender lid and cover the opening with a kitchen towel. This allows steam to escape and prevents pressure buildup, which can cause the lid to blow off. Blend on low speed, gradually increasing to high until smooth. Pour the blended soup into a clean bowl or back into the pot, and repeat with the remaining batches. This method results in an exceptionally smooth Pumpkin Soup, but requires more steps and caution.
  2. Adding the Cream and Final Seasoning:Once your Pumpkin Soup is silky smooth, return the pot to low heat. Stir in the heavy cream, half-and-half, or full-fat coconut milk. The cream adds a beautiful richness and velvety texture, mellowing out the flavors and making the soup truly indulgent. If you’re opting for a dairy-free version, full-fat coconut milk provides a wonderful creaminess and a subtle tropical hint that pairs surprisingly well with pumpkin. At this point, I often add 1-2 tablespoons of maple syrup or brown sugar if the pumpkin wasn’t sweet enough, or if I desire a richer, dessert-like quality to the soup. I also like to add a splash of apple cider vinegar or a squeeze of fresh lemon juice – this isn’t for sourness, but rather to brighten all the flavors and lift the soup, cutting through the richness beautifully. Stir everything together and let it warm through for a few minutes, but avoid bringing it back to a full boil after adding the cream, as it can sometimes curdle. Taste your Pumpkin Soup and adjust the seasoning as needed with salt and freshly ground black pepper. This is your chance to make it perfect, balancing the sweet, savory, and spicy notes to your liking. Perhaps a little more salt to bring out the sweetness, or a dash more cayenne if you like a bit of warmth.

Serving and Garnishing: The Grand Finale

The final presentation can elevate your homemade Pumpkin Soup from merely delicious to truly spectacular. These little touches make all the difference.

  1. Reheating and Serving:Serve the Pumpkin Soup hot, ladled into warm bowls. If you’ve prepared it ahead of time, gently reheat it over low heat, stirring frequently, until it’s warmed through. Avoid aggressive boiling, especially if it contains cream. A perfectly warm bowl of Pumpkin Soup on a chilly day is one of life’s simple pleasures.
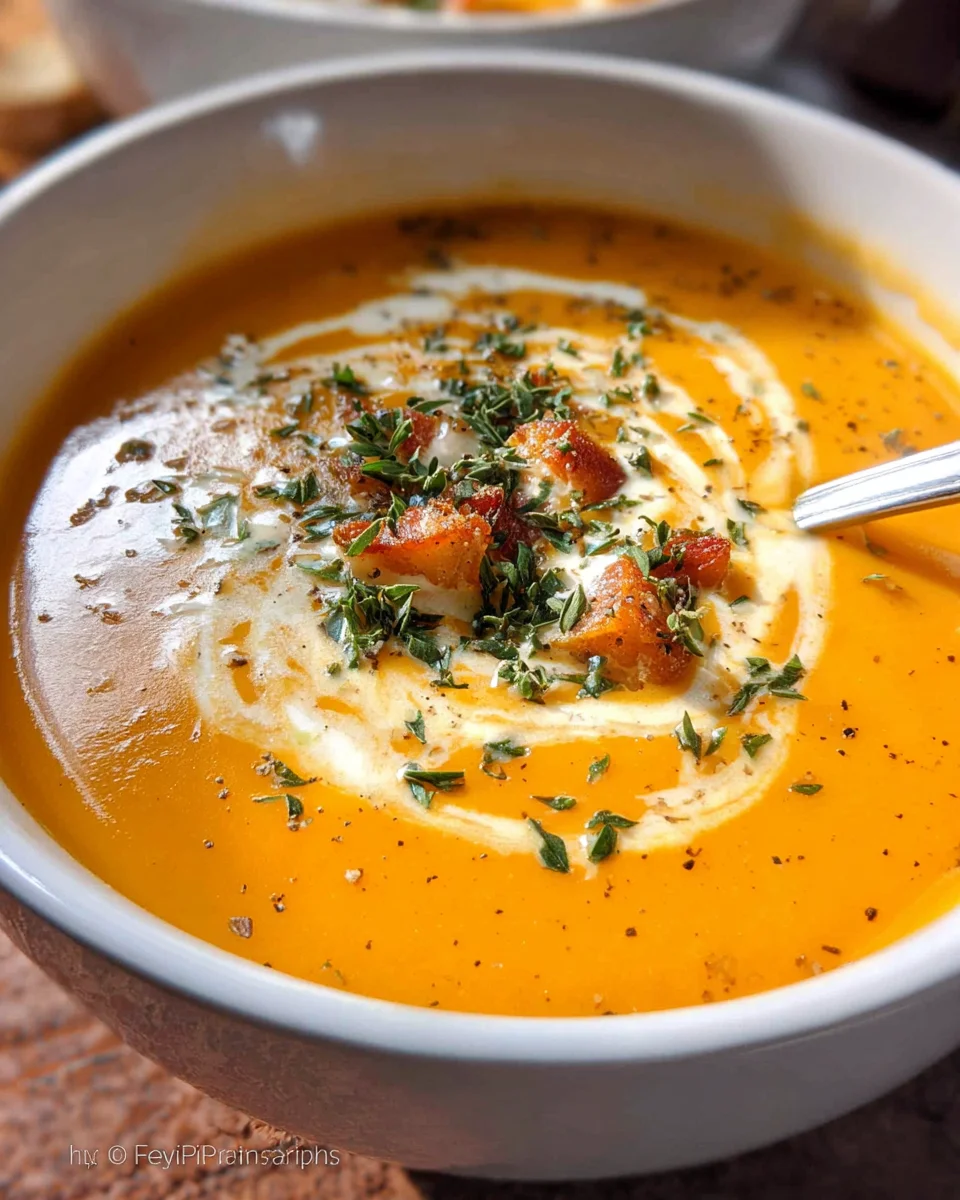
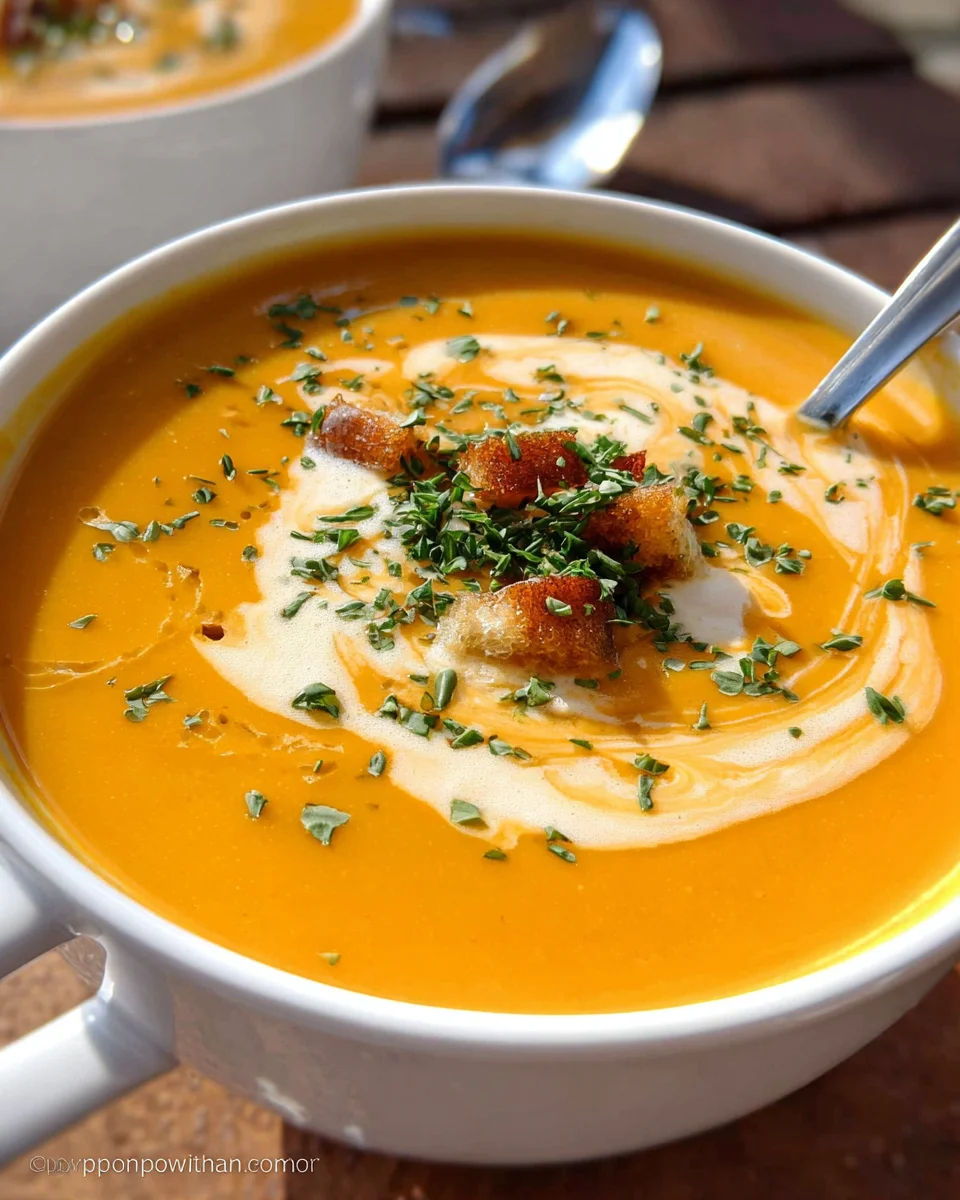
  2. Garnishing for Impact:Garnishes add not only visual appeal but also additional texture and flavor dimensions. I love to finish my Pumpkin Soup with a swirl of extra heavy cream, crème fraîche, or plain Greek yogurt for a touch of tangy richness. Toasted pumpkin seeds (pepitas) offer a delightful crunch and nutty flavor. A sprinkle of freshly chopped herbs, such as sage, thyme, or chives, adds freshness and a pop of color. For those who enjoy a little heat, a tiny drizzle of chili oil or a sprinkle of red pepper flakes can provide a wonderful counterpoint to the soup’s sweetness. Homemade croutons are also a fantastic addition, absorbing some of the soup while providing a lovely crispy texture. Don’t be afraid to experiment with your favorite garnishes to personalize your bowl of comforting Pumpkin Soup.

There you have it – a comprehensive guide to making a truly exceptional Pumpkin Soup. This recipe, with its layered flavors and creamy texture, is sure to become a cherished favorite in your kitchen.

Creamy Pumpkin Soup Recipe: Easy, Healthy & Delicious!

Conclusion:

Well, my friends, we’ve reached the end of our culinary journey for today, but the true adventure is just beginning for you in your kitchen! I genuinely believe that this recipe isn’t just another dish; it’s an experience, a warm embrace in a bowl that you absolutely have to try. From the moment the aromatic spices begin to dance with the sweet, earthy scent of simmering pumpkin, you’ll understand why this particular creation holds such a special place in my heart.

Why This Recipe Will Become Your New Favorite:

What makes this recipe a true standout, you ask? It’s the perfect symphony of simplicity and profound flavor. We’ve meticulously crafted a balance that highlights the natural sweetness of the pumpkin without being cloying, enhanced by a carefully selected blend of spices that adds depth and warmth, rather than overwhelming it. The texture is velvety smooth, luxurious, and utterly comforting, making it suitable for any occasion – from a casual weeknight dinner to an elegant starter for a holiday feast. It’s also incredibly forgiving, meaning you don’t need to be a seasoned chef to achieve spectacular results. Imagine serving this glorious bowl of goodness on a chilly evening; the pure joy and satisfaction it brings are simply unmatched. This isn’t just about food; it’s about creating moments, memories, and filling your home with an irresistible aroma that signals coziness and care. This truly is a transformative way to enjoy a classic, elevating it to something extraordinary. We’ve managed to create a dish that is both incredibly nourishing and deeply satisfying, hitting all the right notes for a truly memorable meal. Trust me, once you taste the rich, nuanced flavors we’ve developed here, you’ll find yourself craving it again and again. It truly embodies everything wonderful about autumn cooking, making it the quintessential comforting dish for the season.

Serving Suggestions to Elevate Your Experience:

Now that you’re ready to dive in, let’s talk about how to make your tasting experience even more spectacular. While this soup is absolutely divine on its own, a few thoughtful additions can take it to the next level. I love to swirl a dollop of crème fraîche or a spoonful of plain Greek yogurt on top for a creamy tang that cuts through the richness beautifully. A sprinkle of toasted pumpkin seeds or crunchy croutons adds a delightful textural contrast and a satisfying crunch. For a touch of fresh elegance, a finely chopped chive or a delicate sprig of fresh thyme makes for a beautiful garnish that also brightens the flavor. Don’t forget a side of crusty, artisanal bread for dipping – it’s practically mandatory for soaking up every last drop! It’s also wonderful alongside a simple, crisp green salad with a light vinaigrette, offering a refreshing counterpoint to the warm, hearty soup. For a more substantial meal, consider pairing it with a grilled cheese sandwich featuring sharp cheddar or a goat cheese and fig panini. The possibilities for pairing are endless, allowing you to tailor the meal to your mood and palate, making each serving a unique delight.

Exciting Variations to Explore:

One of the beauties of this recipe is its versatility. Feel free to make it your own! If you prefer a bit more heat, a pinch of cayenne pepper or a dash of hot sauce can really wake things up and add an exciting kick. For those with a sweet tooth, a tiny drizzle of maple syrup or a spoonful of brown sugar can enhance the pumpkin’s natural sweetness even further, creating a dessert-like quality. To make this an entirely vegan affair, simply swap out any dairy products for plant-based alternatives like full-fat coconut milk for an even creamier, subtly tropical twist, or a cashew cream for a rich, neutral base. You could also experiment with roasting your pumpkin beforehand to bring out an even deeper, caramelized flavor profile that adds another layer of complexity. And why stop at pumpkin? Consider adding a roasted apple or a sweet potato to the mix for additional layers of complexity and sweetness. For a heartier meal, stir in some cooked lentils, cannellini beans, or a handful of baby spinach towards the end for added protein and greens. This is your canvas, so don’t be afraid to paint with your favorite flavors and make this soup truly your own!

Your Turn: Make This Delicious Pumpkin Soup!

So, what are you waiting for? I urge you, absolutely implore you, to set aside some time soon to create this incredible Pumpkin Soup in your own kitchen. You won’t regret it – the warmth, the flavor, the sheer satisfaction of making something so delicious from scratch is an unparalleled feeling. And when you do, please, please share your experience with me! I absolutely adore hearing about your culinary adventures. Did you add a secret ingredient? Did you serve it with something unique? Did it become an instant family favorite? Your feedback and creativity inspire me every single day. Let’s make this season one filled with delicious food, shared moments, and the joy of home cooking. Happy cooking, and I can’t wait to see what amazing bowls of soup you create!


Creamy Pumpkin Soup

Discover a simple yet extraordinary Creamy Pumpkin Soup recipe. This silky smooth elixir combines the earthy sweetness of pumpkin with subtle spices and savory depth, offering unparalleled comfort and culinary delight. Easy to prepare and deeply satisfying, it’s an embrace in a bowl for any season.

Prep Time
15 Minutes
Cook Time
45 Minutes
Total Time
1 Hours
Servings
6-8 servings

Ingredients


Instructions


Important Information

Nutrition Facts (Per Serving)

It is important to consider this information as approximate and not to use it as definitive health advice.

Allergy Information

Please check ingredients for potential allergens and consult a health professional if in doubt.

« Previous Post
Classic Apple Crumble: Warm, Sweet, & Easy Dessert Recipe
Next Post »
Quick & Easy Egg Drop Soup in Minutes – Perfect Comfort Food

If you enjoyed this…

Maple Bacon Brie

Maple Bacon Brie Cheese

Irresistible Keto Philly Cheesesteak Rolls: Easy & Delicious!

Philly Cheese Steak Pasta Recipe

Philly Cheese Steak Pasta Recipe – Creamy, Cheesy, One-Pot Comfort!

Primary Sidebar

Browse by Diet

BreakfastDinnerLunchDessertAppetizer

Sweet Peach Yogurt Parfait Delight

One of my fondest memories is from a lazy summer afternoon spent at my grandmother’s house. The sun filtered through the kitchen window, casting a warm glow over the table where she would create her culinary magic. It was during one of those blissful moments that I first tasted her Peach Yogurt Parfait with Honey and Granola. The sweet aroma of ripe peaches mingling with creamy yogurt and the crunch of granola was nothing short of heavenly. It felt like summer captured in a bowl, and I still remember the joy of diving in with a spoon, each layer revealing a new burst of flavor.

When I think about that parfait, I can almost hear the gentle hum of the bees outside, reminding me of the floral notes that honey brings to every bite. The vibrant yellows and soft oranges of the peaches contrast beautifully with the creamy white yogurt and the golden crunch of granola. It’s a dish that not only looks delightful but also tastes like a celebration of fresh, wholesome ingredients.

What makes my version of this Peach Yogurt Parfait special is the careful balance of flavors and textures. I use ripe, juicy peaches, drizzled with locally sourced honey, and a homemade granola that’s bursting with nuts and seeds for an extra crunch. It’s a simple dish, but every layer is crafted with love and attention.

Let me show you exactly how to make this delightful parfait, so you can bring a bit of that summer magic into your kitchen!

Sweet Peach Yogurt Parfait Delight

Why You’ll Love This Recipe

  • Delightfully creamy texture from the Greek yogurt, paired with the juicy sweetness of fresh peaches.
  • Ready in under 20 minutes, making it a quick and satisfying breakfast or snack option.
  • Budget-friendly, using common ingredients that you may already have in your pantry.
  • Customizable with your favorite granola and nuts, allowing you to tailor each parfait to your taste.
  • Perfectly balanced flavors with the bright acidity of lemon juice and the sweetness of honey enhancing the peaches.

Ingredients

  • For the Parfait:
  • 2 cups plain Greek yogurt (or vanilla yogurt for a sweeter option)
  • 2 large ripe peaches, diced (about 2 cups)
  • 1 tablespoon fresh lemon juice (to prevent browning of peaches)
  • 2 tablespoons honey (plus more for drizzling)
  • 1 teaspoon vanilla extract (optional for extra flavor)
  • For the Granola:
  • 1 cup granola (store-bought or homemade; see notes for a simple granola recipe)
  • 1/4 cup sliced almonds (optional for added crunch)
  • 1/4 cup shredded coconut (optional for added flavor)

Let’s dive into some key ingredients that make this Peach Yogurt Parfait so delightful! First, the Greek yogurt is not only creamy but also packed with protein, making it a satisfying option for breakfast or a snack. If you’re looking for a sweeter option, you can easily substitute it with vanilla yogurt, though it may alter the overall flavor balance. Next, the ripe peaches are the star of the show; their natural sweetness shines through, so I recommend choosing peaches that yield slightly to pressure, indicating they’re perfectly ripe. If peaches aren’t in season, feel free to use nectarines or even frozen peaches—just thaw them before use. Finally, honey adds a lovely floral sweetness that ties everything together. If you prefer, maple syrup can serve as a delicious substitute.

Step-by-Step Instructions

  1. Start by preparing the peaches. Wash them thoroughly, then slice and dice them into bite-sized pieces. In a medium bowl, toss the diced peaches with 1 tablespoon of fresh lemon juice to prevent browning. Set aside for about 5 minutes while the lemon juice works its magic.
  2. In a separate bowl, combine the Greek yogurt, 2 tablespoons of honey, and 1 teaspoon of vanilla extract if using. Stir the mixture until smooth and thoroughly blended. This should take about a minute. Avoid overmixing to maintain the creaminess of the yogurt.
  3. Now it’s time to layer your parfait. Grab a clear glass or bowl to showcase your beautiful creation. Start with a generous spoonful of the yogurt mixture at the bottom—about 1/4 cup will do. Use a spoon to spread it evenly.
  4. Add a layer of the diced peaches over the yogurt, ensuring they cover the yogurt completely. You might want to use about half of what you have prepared—roughly 1 cup. This layer should be visually appealing, so arrange the peaches neatly.
  5. Sprinkle 1/4 cup of granola over the peaches. This adds a delightful crunch. Make sure to distribute it evenly to ensure every bite has that satisfying texture. Avoid packing it down too tightly, as you want it to maintain its crunch.
  6. Repeat the layers: spoon in another 1/4 cup of yogurt, followed by another cup of peaches, and another sprinkle of granola. You should have at least two layers, but feel free to add more depending on your glass size.
  7. Finish off your parfait with a drizzle of honey on top for added sweetness and a touch of elegance. If you’re using sliced almonds or shredded coconut, sprinkle them on top now. It adds a lovely visual contrast and extra flavor.
  8. Serve immediately or refrigerate for up to 30 minutes before serving to allow the flavors to meld together. However, I recommend enjoying it fresh to maintain the granola’s crunch.

Pro Tips for the Best Peach Yogurt Parfait With Honey And Granola

  • Make sure to choose ripe peaches for the best flavor and texture. A common mistake is using unripe fruit, which can lead to a less enjoyable parfait. Look for peaches that are fragrant and slightly soft to the touch.
  • Use a clear glass to assemble your parfait; this not only makes for a beautiful presentation but also allows you to see the colorful layers, which adds to the enjoyment of eating it.
  • For an even creamier texture, consider whipping the Greek yogurt with a hand mixer for a couple of minutes before layering. This small adjustment makes a huge difference in mouthfeel.
  • Be mindful of the granola-to-yogurt ratio. Too much granola can overwhelm the parfait, while too little can make it feel too creamy. Aim for about 1/4 cup of granola per layer for the perfect balance.
  • If you’re making this for a gathering, consider preparing the yogurt and peaches ahead of time and layering them just before serving. This ensures the granola stays crunchy!

Variations & Serving Ideas

There are so many ways to get creative with your Peach Yogurt Parfait! For a tropical twist, swap out the peaches for mangoes or pineapples and top with coconut flakes. If you prefer a berry flavor, mix in some blueberries or strawberries with the peaches for added color and taste. For a nutty version, incorporate chopped walnuts or pecans instead of almonds.

As for serving ideas, this parfait pairs beautifully with a side of scrambled eggs for a hearty breakfast or fresh fruit salad for a light lunch. You might also enjoy it alongside whole grain toast with almond butter for an energizing snack. The contrast of flavors and textures will elevate your meal experience!

Storage, Make-Ahead & Reheating

The Peach Yogurt Parfait is best enjoyed fresh, but you can prepare some components ahead of time. Store the layered parfait in an airtight container in the refrigerator for up to 24 hours. However, be cautious; the granola may lose its crunch if stored too long. You can freeze the yogurt and peach mixture for up to 2 months; just remember to thaw it in the refrigerator overnight before serving.

If you plan to enjoy this dish the next day, it can taste even better as the flavors meld together. Just remember to add the granola right before serving to keep its delightful crunch!

Frequently Asked Questions

Can I make Peach Yogurt Parfait With Honey And Granola ahead of time?

Yes — in fact, it tastes even better the next day as the flavors meld. However, I recommend waiting to add the granola until just before serving to maintain its crunch.

What can I substitute for Greek yogurt?

If you prefer a lighter option, you can substitute Greek yogurt with regular yogurt or a dairy-free alternative like coconut yogurt. Just remember that this may alter the creaminess and flavor profile slightly.

Can I use frozen peaches for this parfait?

Absolutely! Just make sure to thaw the frozen peaches before using them. They will still add great flavor, though the texture may be slightly softer than fresh peaches.

How do I make the parfait vegan?

To make a vegan version, substitute the Greek yogurt with a plant-based yogurt alternative, and replace honey with maple syrup or agave nectar. This keeps the parfait sweet while adhering to a vegan diet.

What other fruits can I use in this recipe?

You can mix and match fruits based on your preference. Try using strawberries, blueberries, raspberries, or even bananas. Just make sure to adjust the lemon juice as needed to prevent browning.

Sweet Peach Yogurt Parfait Delight

Final Thoughts

The Peach Yogurt Parfait with Honey and Granola is a delightful blend of creamy yogurt, sweet peaches, and crunchy granola that creates a satisfying and nourishing treat. Each layer bursts with flavor, making it a perfect choice for breakfast or a light dessert.

This is the kind of recipe I come back to again and again, especially when I want something refreshing and wholesome to start my day. The harmony of sweet and tart flavors, combined with the delightful crunch, never fails to lift my spirits!

I encourage you to give this parfait a try and indulge in its comforting goodness. Feel free to share your results or even add your own twist—perhaps a sprinkle of cinnamon or a handful of nuts. Enjoy creating your perfect parfait!

Print
clock clock iconcutlery cutlery iconflag flag iconfolder folder iconinstagram instagram iconpinterest pinterest iconfacebook facebook iconprint print iconsquares squares iconheart heart iconheart solid heart solid icon

Peach Yogurt Parfait


  • Author: Lily author
  • Total Time: 15 minutes
  • Yield: 4 servings 1x
Pin Recipe
Print Recipe

Description

This Peach Yogurt Parfait combines creamy Greek yogurt, juicy peaches, and crunchy granola for a delightful treat. It’s a perfect breakfast or snack that captures the essence of summer in every bite.


Ingredients

Scale
  • For the Parfait:
  • 2 cups plain Greek yogurt (or vanilla yogurt for a sweeter option)
  • 2 large ripe peaches, diced (about 2 cups)
  • 1 tablespoon fresh lemon juice (to prevent browning of peaches)
  • 2 tablespoons honey (plus more for drizzling)
  • 1 teaspoon vanilla extract (optional for extra flavor)
  • For the Granola:
  • 1 cup granola (store-bought or homemade; see notes for a simple granola recipe)
  • 1/4 cup sliced almonds (optional for added crunch)
  • 1/4 cup shredded coconut (optional for added flavor)

Instructions

  1. Start by preparing the peaches. Wash them thoroughly, then slice and dice them into bite-sized pieces. In a medium bowl, toss the diced peaches with 1 tablespoon of fresh lemon juice to prevent browning. Set aside for about 5 minutes while the lemon juice works its magic.
  2. In a separate bowl, combine the Greek yogurt, 2 tablespoons of honey, and 1 teaspoon of vanilla extract if using. Stir the mixture until smooth and thoroughly blended. This should take about a minute. Avoid overmixing to maintain the creaminess of the yogurt.
  3. Now it’s time to layer your parfait. Grab a clear glass or bowl to showcase your beautiful creation. Start with a generous spoonful of the yogurt mixture at the bottom—about 1/4 cup will do. Use a spoon to spread it evenly.
  4. Add a layer of the diced peaches over the yogurt, ensuring they cover the yogurt completely. You might want to use about half of what you have prepared—roughly 1 cup. This layer should be visually appealing, so arrange the peaches neatly.
  5. Sprinkle 1/4 cup of granola over the peaches. This adds a delightful crunch. Make sure to distribute it evenly to ensure every bite has that satisfying texture. Avoid packing it down too tightly, as you want it to maintain its crunch.
  6. Repeat the layers: spoon in another 1/4 cup of yogurt, followed by another cup of peaches, and another sprinkle of granola. You should have at least two layers, but feel free to add more depending on your glass size.
  7. Finish off your parfait with a drizzle of honey on top for added sweetness and a touch of elegance. If you’re using sliced almonds or shredded coconut, sprinkle them on top now. It adds a lovely visual contrast and extra flavor.
  8. Serve immediately or refrigerate for up to 30 minutes before serving to allow the flavors to meld together. However, I recommend enjoying it fresh to maintain the granola’s crunch.
  • Prep Time: 15 mins
  • Cook Time: 0 mins
  • Category: Breakfast
  • Method: No-cook
  • Cuisine: American

Nutrition

  • Serving Size: 1 parfait
  • Calories: 250
  • Sugar: 20 g
  • Sodium: 50 mg
  • Fat: 5 g
  • Saturated Fat: 2 g
  • Unsaturated Fat: 3 g
  • Trans Fat: 0 g
  • Carbohydrates: 40 g
  • Fiber: 3 g
  • Protein: 10 g
  • Cholesterol: 10 mg

Keywords: Choose ripe peaches for the best flavor and texture. Use a clear glass for a beautiful presentation. For creaminess, consider whipping the yogurt before layering. Be mindful of the granola-to-yogurt ratio. Prepare yogurt and peaches ahead of time for gatherings, layering just before serving.

Did you make this recipe?

Share a photo and tag us — we can't wait to see what you've made!

Sun-Kissed Frozen Orange Cream Slush

As a child, summer days felt like they lasted forever. I remember the sticky heat wrapping around me as I played outside, my laughter mingling with the sounds of the neighborhood. But nothing could cool me down quite like the moment I’d spot my grandmother, laboring over her blender, whipping up her famous Frozen Orange Creamsicle Slush. That vibrant orange treat, with its frosty texture and sweet citrus aroma, was like a burst of sunshine in a cup. Just one sip, and I could feel the coolness wash over me, sparking pure joy.

This Frozen Orange Creamsicle Slush has a way of making you feel like a kid again. Its creamy, dreamy consistency is a delightful balance of bright orange and soft vanilla, inviting you to dive right in. The refreshing tang of orange dances on your tongue, while the smooth creaminess envelops you in a comforting embrace. It’s a nostalgic treat that’s perfect for hot summer afternoons or anytime you need a little pick-me-up.

What makes my version of this slush stand out is the addition of a hint of vanilla bean, which elevates the flavor and adds an extra layer of richness. Plus, it’s super easy to whip up with just a few simple ingredients that you probably already have on hand! So, if you’re ready to relive those sun-soaked memories, let me show you exactly how to make it.

Sun-Kissed Frozen Orange Cream Slush

Why You’ll Love This Recipe

  • Each slush is a perfect blend of creamy vanilla and zesty orange, creating a nostalgic flavor reminiscent of summer days.
  • This refreshing treat is ready in under 15 minutes, making it an ideal quick dessert for unexpected guests or hot afternoons.
  • With just 8 simple ingredients, it’s budget-friendly, ensuring you don’t have to break the bank to enjoy a delicious slush.
  • The slush has a perfectly smooth texture, thanks to the combination of ice and ice cream, providing a delightful contrast to the bright citrus flavors.
  • It’s highly customizable; you can easily adjust the sweetness and add fresh herbs for a unique twist that suits your taste.

Ingredients

  • 2 cups orange juice (freshly squeezed or store-bought)
  • 1 cup vanilla ice cream
  • 1 cup crushed ice
  • 1/2 cup milk (whole or 2%)
  • 1/4 cup granulated sugar (adjust based on sweetness preference)
  • 1 teaspoon vanilla extract
  • Zest of 1 orange (for added flavor)
  • Fresh orange slices and mint leaves (for garnish)

The star of this Frozen Orange Creamsicle Slush is the orange juice, which provides the vibrant, citrusy base. Freshly squeezed juice will yield the brightest flavor, but store-bought options can be just as convenient. If you’re opting for store-bought, choose 100% pure juice with no added sugars for the best results. Another essential ingredient is the vanilla ice cream; it adds creaminess and sweetness. You can substitute it with dairy-free ice cream if you’re looking for a vegan option. Whole or 2% milk complements the ice cream, creating a smooth blend. If you want a lower-calorie version, almond or oat milk can be good alternatives.

Lastly, the granulated sugar can be adjusted based on your sweetness preference. If you prefer a more natural sweetener, consider using honey or agave syrup. The orange zest enhances the flavor profile, providing an aromatic pop that brings the whole slush together. Don’t skip it! It adds an extra layer of brightness that makes this slush truly special.

Step-by-Step Instructions

  1. Start by preparing your ingredients. Gather 2 cups of orange juice, 1 cup of vanilla ice cream, and 1 cup of crushed ice. Make sure the ice is finely crushed, as larger chunks can make blending difficult.
  2. In a blender, combine the orange juice, vanilla ice cream, crushed ice, and 1/2 cup of milk. Add 1/4 cup of granulated sugar and 1 teaspoon of vanilla extract. If you like a sweeter slush, consider adding a bit more sugar at this stage.
  3. Add the zest of 1 orange to the blender. This step is crucial for enhancing the citrus flavor of your slush. Make sure not to include the bitter white pith—only the flavorful zest.
  4. Blend the mixture on medium-high speed for about 30-45 seconds. Stop once the ingredients are fully combined and the slush has a smooth, even consistency. If you notice large chunks of ice, blend for an additional 10-15 seconds. Avoid over-blending, as this can make the slush too liquidy.
  5. Once blended, taste the slush. If it needs more sweetness, add a little more sugar and blend for a few more seconds. If it’s too thick, you can add a splash of milk to reach your desired consistency.
  6. Pour the slush into glasses. This recipe typically serves 4, but you can easily double it for larger gatherings. Use a spoon to help guide the slush into the glasses if needed.
  7. Garnish each serving with fresh orange slices and mint leaves. The mint not only adds a pop of color but also a refreshing aroma that complements the citrus flavors beautifully.
  8. Serve immediately and enjoy! If you’ve made extra, you can refrigerate it for a short time, but it’s best enjoyed fresh.

Pro Tips for the Best Frozen Orange Creamsicle Slush

  • Don’t skip the orange zest! It’s a game-changer for flavor. Always zest before juicing to make it easier.
  • Use a high-powered blender for the best texture. A standard blender may struggle with ice, leading to uneven consistency. If you have a food processor, that can work too, but ensure the ice is finely crushed.
  • Adjust the ice-to-liquid ratio carefully. If your slush is too thick, it won’t blend well. Start with less ice and add more until you reach your preferred texture.
  • Be cautious with the sugar! Always start with the lower amount, as you can easily add more, but it’s hard to fix an overly sweet slush.
  • For a fun twist, consider adding a splash of coconut milk or a handful of fresh fruit like strawberries or pineapple. This not only enhances the flavor but also adds a beautiful color contrast.

Variations & Serving Ideas

There are countless ways to put a spin on your Frozen Orange Creamsicle Slush. Consider making a tropical version by adding in some pineapple juice or coconut milk for a delightful tropical twist. If you’re feeling adventurous, try incorporating a handful of frozen mango or peach slices for added sweetness. For a lighter version, swap out the vanilla ice cream for Greek yogurt for a creamy yet tangy alternative.

As for serving ideas, this refreshing slush pairs wonderfully with light summer dishes like grilled chicken skewers, fish tacos, or a simple salad topped with citrus vinaigrette. The bright, zesty flavors of the slush complement these dishes perfectly, making them an ideal pairing for a sunny day.

Storage, Make-Ahead & Reheating

This Frozen Orange Creamsicle Slush is best enjoyed fresh, but if you have leftovers, you can store them in an airtight container in the fridge for up to 2 days. Just keep in mind that the slush may lose some of its texture over time as the ice melts. It doesn’t freeze well, as the ice will turn into a solid block. If you must freeze it, blend again after thawing to restore the slushy consistency. This treat is best the day you make it, as the flavors meld together beautifully overnight, enhancing its deliciousness.

Frequently Asked Questions

Can I make Frozen Orange Creamsicle Slush ahead of time?

Yes — in fact, it tastes even better the next day as the flavors meld. However, it’s best to enjoy it fresh, as the texture can change if stored for too long. If you need to prepare it ahead, keep it in the fridge and re-blend before serving.

What kind of orange juice should I use?

For the best flavor, use freshly squeezed orange juice. However, if you’re short on time, opt for 100% pure store-bought juice without added sugars. This will ensure that your slush remains flavorful and refreshing.

Can I substitute the vanilla ice cream?

Absolutely! If you’re looking for a dairy-free option, coconut milk ice cream or a non-dairy vanilla ice cream can work wonderfully. They will still provide the creamy texture and sweetness you desire.

How can I adjust the sweetness of my slush?

You can easily adjust the sweetness by modifying the amount of sugar added. Start with 1/4 cup and taste the mixture before blending. If you prefer it sweeter, add more sugar gradually until it reaches your desired level.

What should I do if my slush is too thick?

If your slush is too thick, simply add a splash of milk or orange juice and blend again. This will help achieve a more drinkable consistency while maintaining the slushy texture. Adjust gradually to reach your preferred thickness.

Sun-Kissed Frozen Orange Cream Slush

Final Thoughts

The Frozen Orange Creamsicle Slush is a delightful blend of refreshing citrus and creamy goodness, making it a perfect treat for warm days or any time you crave a taste of nostalgia. The way the bright orange flavor dances with the creamy texture truly elevates this slush, transforming it into a satisfying escape from the everyday.

This is the kind of recipe I come back to again and again, especially when I’m looking to cool down or impress guests at a summer gathering. It’s simple to make and always brings smiles all around! I encourage you to try this recipe for yourself—don’t hesitate to share your results or even put your own spin on it. Happy slushing!

Print
clock clock iconcutlery cutlery iconflag flag iconfolder folder iconinstagram instagram iconpinterest pinterest iconfacebook facebook iconprint print iconsquares squares iconheart heart iconheart solid heart solid icon

Frozen Orange Creamsicle Slush


  • Author: Lily author
  • Total Time: 15 minutes
  • Yield: 4 servings 1x
Pin Recipe
Print Recipe

Description

This Frozen Orange Creamsicle Slush is a refreshing treat that combines creamy vanilla and zesty orange flavors. Perfect for hot summer days, it brings back nostalgic memories with every sip.


Ingredients

Scale
  • 2 cups orange juice (freshly squeezed or store-bought)
  • 1 cup vanilla ice cream
  • 1 cup crushed ice
  • 1/2 cup milk (whole or 2%)
  • 1/4 cup granulated sugar (adjust based on sweetness preference)
  • 1 teaspoon vanilla extract
  • Zest of 1 orange (for added flavor)
  • Fresh orange slices and mint leaves (for garnish)

Instructions

  1. Start by preparing your ingredients. Gather 2 cups of orange juice, 1 cup of vanilla ice cream, and 1 cup of crushed ice. Make sure the ice is finely crushed, as larger chunks can make blending difficult.
  2. In a blender, combine the orange juice, vanilla ice cream, crushed ice, and 1/2 cup of milk. Add 1/4 cup of granulated sugar and 1 teaspoon of vanilla extract. If you like a sweeter slush, consider adding a bit more sugar at this stage.
  3. Add the zest of 1 orange to the blender. This step is crucial for enhancing the citrus flavor of your slush. Make sure not to include the bitter white pith—only the flavorful zest.
  4. Blend the mixture on medium-high speed for about 30-45 seconds. Stop once the ingredients are fully combined and the slush has a smooth, even consistency. If you notice large chunks of ice, blend for an additional 10-15 seconds. Avoid over-blending, as this can make the slush too liquidy.
  5. Once blended, taste the slush. If it needs more sweetness, add a little more sugar and blend for a few more seconds. If it’s too thick, you can add a splash of milk to reach your desired consistency.
  6. Pour the slush into glasses. This recipe typically serves 4, but you can easily double it for larger gatherings. Use a spoon to help guide the slush into the glasses if needed.
  7. Garnish each serving with fresh orange slices and mint leaves. The mint not only adds a pop of color but also a refreshing aroma that complements the citrus flavors beautifully.
  8. Serve immediately and enjoy! If you’ve made extra, you can refrigerate it for a short time, but it's best enjoyed fresh.
  • Prep Time: 15 min
  • Cook Time: 0 min
  • Category: Dessert
  • Method: Blending
  • Cuisine: American

Nutrition

  • Serving Size: 1 serving
  • Calories: 200
  • Sugar: 30 g
  • Sodium: 50 mg
  • Fat: 5 g
  • Saturated Fat: 3 g
  • Unsaturated Fat: 2 g
  • Trans Fat: 0 g
  • Carbohydrates: 40 g
  • Fiber: 1 g
  • Protein: 2 g
  • Cholesterol: 20 mg

Keywords: Don't skip the orange zest! It's a game-changer for flavor. Always zest before juicing to make it easier.

Did you make this recipe?

Share a photo and tag us — we can't wait to see what you've made!

Zesty Lemon Poppy Seed Delight

One rainy afternoon, I found myself in my grandmother’s cozy kitchen, the kind that always smelled like warmth and love. She was whipping up her famous Lemon Poppy Seed Loaf, a recipe that had been passed down through generations. As the batter came together, the zesty aroma of fresh lemons filled the air, mingling perfectly with the nutty fragrance of poppy seeds. I can still picture her, apron-clad, as she expertly drizzled a vibrant citrus icing over the loaf, creating a glossy, sun-kissed finish that beckoned us to dive in. It was a moment that sparked my own passion for baking, and this recipe has become a cherished staple in my home ever since.

When you take a bite of this Lemon Poppy Seed Loaf, it’s like a burst of sunshine on your palate. The loaf is beautifully golden, with a tender crumb that melts in your mouth. Each slice is speckled with tiny poppy seeds, adding a delightful crunch that contrasts beautifully with the tangy sweetness of the lemon. And that citrus icing? It’s the finishing touch that elevates this loaf from ordinary to extraordinary, with its bright, zesty flavor dancing on your taste buds.

This recipe stands out because it embraces simplicity while delivering on flavor. I’ve added a hint of vanilla to the batter, enhancing the overall taste and making it even more indulgent. Trust me, once you make this Lemon Poppy Seed Loaf With Citrus Icing, it’ll become a go-to in your baking repertoire.

So, let me show you exactly how to make it!

Zesty Lemon Poppy Seed Delight

Why You’ll Love This Recipe

  • Moist and tender crumb that melts in your mouth, thanks to the perfect balance of butter and buttermilk.
  • Bright, zesty lemon flavor paired with crunchy poppy seeds, creating a delightful texture and taste experience.
  • Easy to whip up in just about an hour, perfect for last-minute gatherings or a cozy afternoon treat.
  • Budget-friendly with everyday ingredients, making it an accessible option for all home bakers.
  • The citrus icing adds a sweet tang that elevates the loaf, turning a simple recipe into a showstopper!

Ingredients

  • 1 ½ cups (190g) all-purpose flour
  • 1 teaspoon baking powder
  • ½ teaspoon baking soda
  • ½ teaspoon salt
  • 3 tablespoons poppy seeds
  • ½ cup (115g) unsalted butter, softened to room temperature
  • 1 cup (200g) granulated sugar
  • 2 large eggs
  • 1 teaspoon vanilla extract
  • 1 teaspoon lemon zest (from about 1 medium lemon)
  • ½ cup (120ml) buttermilk
  • 2 tablespoons fresh lemon juice

For the Citrus Icing:

  • 1 cup (120g) powdered sugar
  • 2 tablespoons fresh lemon juice
  • 1 tablespoon orange juice
  • 1 teaspoon lemon zest (for garnish, optional)

Let’s dive into the key ingredients that make this Lemon Poppy Seed Loaf so special. The all-purpose flour provides the structure and base for the loaf, while the baking powder and baking soda ensure it rises perfectly, giving the loaf a light texture. For a gluten-free variation, you could substitute the flour with a gluten-free all-purpose blend. Poppy seeds not only add a delightful crunch but also contribute to the unique flavor profile that pairs well with the citrus notes.

Unsalted butter is crucial for achieving the buttery richness that makes this loaf so moist. If you’re looking for a dairy-free option, coconut oil or a vegan butter can be used instead. The buttermilk is another essential component, providing acidity that activates the baking soda for a fluffy texture. If you don’t have buttermilk on hand, you can easily make a substitute by mixing ½ cup of milk with 1 tablespoon of vinegar or lemon juice and letting it sit for about 5 minutes.

Step-by-Step Instructions

  1. Preheat your oven to 350°F (175°C). Grease a 9×5-inch loaf pan or line it with parchment paper for easy removal later.
  2. In a medium mixing bowl, whisk together 1 ½ cups of all-purpose flour, 1 teaspoon of baking powder, ½ teaspoon of baking soda, ½ teaspoon of salt, and 3 tablespoons of poppy seeds. This helps to evenly distribute the baking agents and ensures a uniform rise.
  3. In a large mixing bowl, cream together ½ cup of softened unsalted butter and 1 cup of granulated sugar using an electric mixer on medium speed for about 3-4 minutes, until the mixture is light and fluffy. Make sure to scrape down the sides of the bowl occasionally.
  4. Add 2 large eggs, 1 teaspoon of vanilla extract, and 1 teaspoon of lemon zest to the creamed butter and sugar, mixing until fully combined. You want a smooth consistency, so ensure there are no lumps of butter.
  5. In a small bowl, combine ½ cup of buttermilk and 2 tablespoons of fresh lemon juice. Alternately add the dry ingredients and buttermilk mixture to the butter mixture, starting and ending with the dry ingredients. Mix just until combined; do not overmix, as this can lead to a dense loaf.
  6. Pour the batter into the prepared loaf pan. Smooth the top with a spatula, ensuring it’s even. Bake in the preheated oven for 50-60 minutes, or until a toothpick inserted in the center comes out clean. The edges should be lightly golden brown, and the center should feel just set.
  7. Once baked, remove the loaf from the oven and allow it to cool in the pan for about 10 minutes. Then, transfer it to a wire rack to cool completely. Resist the urge to slice too soon, as it will be crumbly if it’s still warm.
  8. While the loaf is cooling, prepare the citrus icing. In a medium bowl, whisk together 1 cup of powdered sugar, 2 tablespoons of fresh lemon juice, and 1 tablespoon of orange juice until smooth. If the icing is too thick, you can add a little more juice to reach your desired consistency.
  9. Once the loaf is completely cool, drizzle the citrus icing over the top. If you like, sprinkle with an additional teaspoon of lemon zest for an extra pop of flavor and color.

Pro Tips for the Best Lemon Poppy Seed Loaf With Citrus Icing

  • Be careful not to overmix your batter; this is a common mistake that can lead to a dense loaf. Mix just until the dry ingredients are incorporated for a light and fluffy texture.
  • Use room temperature ingredients, especially the butter and eggs. This helps to create a smoother batter and ensures even baking. Take your eggs out of the fridge about 30 minutes before you start.
  • For a more pronounced lemon flavor, consider adding a little lemon extract in addition to the zest and juice. Just a half teaspoon can elevate the citrus notes significantly.
  • When measuring your flour, spoon it into the measuring cup and level it off with a knife instead of scooping directly from the bag. This prevents packing and ensures you don’t end up with a dry loaf.
  • Invest in a good quality loaf pan; it makes a difference in heat distribution, which ensures even baking. If your pan is dark-coated, reduce the oven temperature by 25°F to prevent over-browning.

Variations & Serving Ideas

For a delightful twist, consider adding blueberries or raspberries to the batter for a fruity burst of flavor. You can also experiment with different citrus fruits—try lime or grapefruit zest and juice for a refreshing change. For a healthier option, substitute half of the all-purpose flour with whole wheat flour for added fiber without compromising too much on texture.

This Lemon Poppy Seed Loaf pairs beautifully with a light salad, such as a mixed greens salad with a vinaigrette, or a cup of tea for a cozy afternoon treat. It also complements a creamy cheese platter, as the acidity of the loaf balances rich cheeses perfectly. Lastly, a scoop of vanilla ice cream on the side creates a delightful contrast of temperatures and flavors!

Storage, Make-Ahead & Reheating

This Lemon Poppy Seed Loaf can be stored at room temperature for up to 3 days if wrapped tightly in plastic wrap. If you want to keep it longer, it freezes well for up to 3 months. To freeze, wrap the loaf tightly in plastic wrap and then in aluminum foil to prevent freezer burn.

When you’re ready to enjoy it again, simply thaw it in the fridge overnight. Reheat individual slices in the microwave for 15-20 seconds or in a toaster oven until warmed through. Interestingly, many people find that this loaf tastes even better the next day, as the flavors have time to meld!

Frequently Asked Questions

Can I make Lemon Poppy Seed Loaf With Citrus Icing ahead of time?

Yes — in fact, it tastes even better the next day! You can make the loaf a day in advance, allowing the flavors to develop. Just be sure to store it in an airtight container to maintain its moisture.

Can I substitute the poppy seeds?

Absolutely! If you don’t have poppy seeds on hand or prefer an alternative, you can use sesame seeds for a similar crunch or omit them entirely for a smooth loaf.

What can I use instead of buttermilk?

If you don’t have buttermilk, you can easily create a substitute by mixing ½ cup of milk (dairy or plant-based) with 1 tablespoon of vinegar or lemon juice. Let it sit for 5 minutes before using in the recipe.

How can I make this recipe gluten-free?

To make a gluten-free version of this Lemon Poppy Seed Loaf, substitute the all-purpose flour with a gluten-free all-purpose flour blend. Just ensure that the blend contains a binding agent like xanthan gum for the best results.

What is the best way to store leftover loaf?

Leftover Lemon Poppy Seed Loaf should be stored in an airtight container at room temperature for up to 3 days. For longer storage, wrap it tightly and freeze for up to 3 months. Thaw it before serving for the best texture.

Zesty Lemon Poppy Seed Delight

Final Thoughts

The Lemon Poppy Seed Loaf with Citrus Icing is truly a delightful treat that brings a burst of brightness to any occasion. The zesty lemon flavor combined with the subtle crunch of poppy seeds creates a satisfying balance, while the citrus icing adds a touch of sweetness that perfectly complements the loaf’s tanginess.

This is the kind of recipe I come back to again and again, especially when I want to brighten up a gloomy day or celebrate a small victory. The aroma that fills the kitchen as it bakes is absolutely heavenly! I encourage you to give this recipe a try; you might just find it becoming a beloved staple in your home. Don’t forget to share your results or even add your own unique twist—I can’t wait to see what you create!

Print
clock clock iconcutlery cutlery iconflag flag iconfolder folder iconinstagram instagram iconpinterest pinterest iconfacebook facebook iconprint print iconsquares squares iconheart heart iconheart solid heart solid icon

Lemon Poppy Seed Loaf


  • Author: Lily author
  • Total Time: 20 minute
  • Yield: 1 loaf 1x
Pin Recipe
Print Recipe

Description

This Lemon Poppy Seed Loaf is a delightful treat that combines zesty lemon flavor with crunchy poppy seeds. Topped with a citrus icing, it’s perfect for any occasion.


Ingredients

Scale
  • 1 ½ cups (190g) all-purpose flour
  • 1 teaspoon baking powder
  • ½ teaspoon baking soda
  • ½ teaspoon salt
  • 3 tablespoons poppy seeds
  • ½ cup (115g) unsalted butter, softened to room temperature
  • 1 cup (200g) granulated sugar
  • 2 large eggs
  • 1 teaspoon vanilla extract
  • 1 teaspoon lemon zest (from about 1 medium lemon)
  • ½ cup (120ml) buttermilk
  • 2 tablespoons fresh lemon juice
  • 1 cup (120g) powdered sugar
  • 2 tablespoons fresh lemon juice
  • 1 tablespoon orange juice
  • 1 teaspoon lemon zest (for garnish, optional)

Instructions

  1. Preheat your oven to 350°F (175°C). Grease a 9×5-inch loaf pan or line it with parchment paper for easy removal later.
  2. In a medium mixing bowl, whisk together 1 ½ cups of all-purpose flour, 1 teaspoon of baking powder, ½ teaspoon of baking soda, ½ teaspoon of salt, and 3 tablespoons of poppy seeds. This helps to evenly distribute the baking agents and ensures a uniform rise.
  3. In a large mixing bowl, cream together ½ cup of softened unsalted butter and 1 cup of granulated sugar using an electric mixer on medium speed for about 3-4 minutes, until the mixture is light and fluffy. Make sure to scrape down the sides of the bowl occasionally.
  4. Add 2 large eggs, 1 teaspoon of vanilla extract, and 1 teaspoon of lemon zest to the creamed butter and sugar, mixing until fully combined. You want a smooth consistency, so ensure there are no lumps of butter.
  5. In a small bowl, combine ½ cup of buttermilk and 2 tablespoons of fresh lemon juice. Alternately add the dry ingredients and buttermilk mixture to the butter mixture, starting and ending with the dry ingredients. Mix just until combined; do not overmix, as this can lead to a dense loaf.
  6. Pour the batter into the prepared loaf pan. Smooth the top with a spatula, ensuring it’s even. Bake in the preheated oven for 50-60 minutes, or until a toothpick inserted in the center comes out clean. The edges should be lightly golden brown, and the center should feel just set.
  7. Once baked, remove the loaf from the oven and allow it to cool in the pan for about 10 minutes. Then, transfer it to a wire rack to cool completely. Resist the urge to slice too soon, as it will be crumbly if it’s still warm.
  8. While the loaf is cooling, prepare the citrus icing. In a medium bowl, whisk together 1 cup of powdered sugar, 2 tablespoons of fresh lemon juice, and 1 tablespoon of orange juice until smooth. If the icing is too thick, you can add a little more juice to reach your desired consistency.
  9. Once the loaf is completely cool, drizzle the citrus icing over the top. If you like, sprinkle with an additional teaspoon of lemon zest for an extra pop of flavor and color.
  • Prep Time: 15 mins
  • Cook Time: 50-60 mins
  • Category: Dessert
  • Method: Baking
  • Cuisine: American

Nutrition

  • Serving Size: 1 slice
  • Calories: 200
  • Sugar: 15 g
  • Sodium: 150 mg
  • Fat: 8 g
  • Saturated Fat: 5 g
  • Unsaturated Fat: 3 g
  • Trans Fat: 0 g
  • Carbohydrates: 30 g
  • Fiber: 1 g
  • Protein: 3 g
  • Cholesterol: 40 mg

Keywords: Be careful not to overmix your batter; this is a common mistake that can lead to a dense loaf. Use room temperature ingredients for a smoother batter and even baking.

Did you make this recipe?

Share a photo and tag us — we can't wait to see what you've made!

  • Privacy Policy
  • Terms Of Service
  • Contact
  • About
  • GDPR

Copyright © 2025 Homesmad