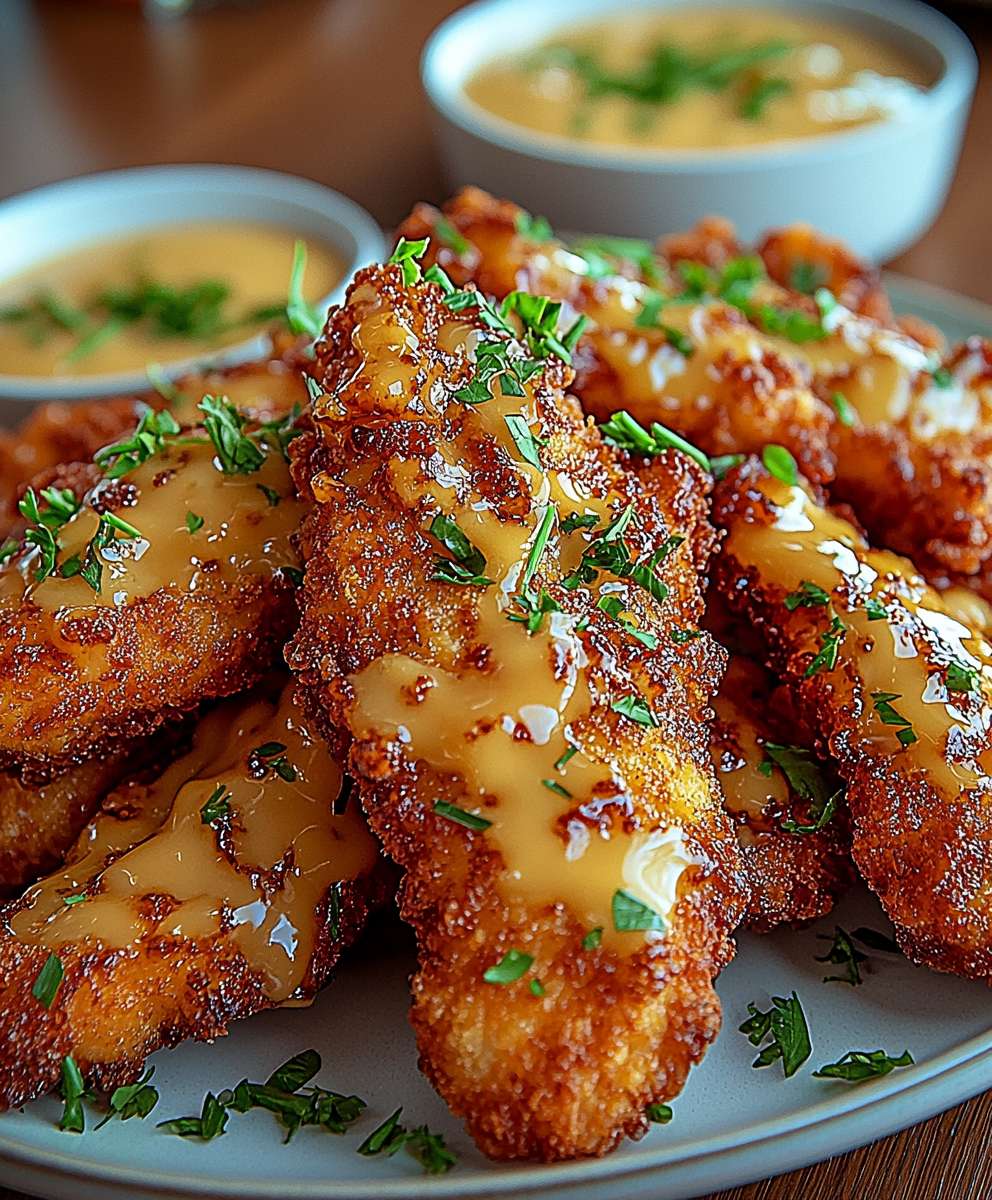
Crispy Crack Chicken Tenders are not just a meal; they are an experience that brings joy to every table. As I prepared this dish for the first time, I was instantly captivated by the tantalizing aroma that filled my kitchen. The history of chicken tenders dates back to the mid-20th century, but the unique twist of “crack” seasoning elevates this classic to a whole new level. People adore these tenders for their irresistible crunch and savory flavor, making them a perfect choice for family dinners or casual gatherings. The combination of spices and the crispy coating creates a delightful texture that keeps everyone coming back for more. Trust me, once you try these Crispy Crack Chicken Tenders, they will become a staple in your home!
Ingredients:
- 1 pound chicken tenders
- 1 cup buttermilk
- 1 teaspoon garlic powder
- 1 teaspoon onion powder
- 1 teaspoon smoked paprika
- 1 teaspoon salt
- 1/2 teaspoon black pepper
- 1 cup all-purpose flour
- 1 cup crushed cornflakes
- 1/2 cup grated Parmesan cheese
- 1 teaspoon dried parsley
- 1/2 teaspoon cayenne pepper (optional, for heat)
- Vegetable oil (for frying)
- Ranch dressing (for serving)
Preparing the Marinade
1. In a large mixing bowl, combine the buttermilk, garlic powder, onion powder, smoked paprika, salt, and black pepper. Whisk everything together until well blended. This marinade is going to infuse the chicken with flavor and keep it juicy. 2. Add the chicken tenders to the buttermilk mixture, ensuring they are fully submerged. Cover the bowl with plastic wrap or transfer everything to a resealable plastic bag. Let the chicken marinate in the refrigerator for at least 1 hour, but if you have time, overnight is even better. This allows the flavors to penetrate the chicken deeply.Preparing the Breading
3. While the chicken is marinating, it’s time to prepare the breading. In a shallow dish, combine the all-purpose flour, crushed cornflakes, grated Parmesan cheese, dried parsley, and cayenne pepper (if using). Mix everything together until evenly distributed. The cornflakes will give the tenders that delightful crunch we’re after. 4. Set up a breading station: Place the flour mixture on one side, and on the other side, have a clean plate ready for the breaded chicken. This will make the process smoother and less messy.Breading the Chicken Tenders
5. Once the chicken has marinated, remove it from the refrigerator. Take each chicken tender out of the buttermilk, allowing any excess to drip off. 6. Dredge the chicken tender in the flour mixture, pressing down gently to ensure it adheres well. Make sure to coat both sides thoroughly. 7. Place the breaded chicken tender on the clean plate. Repeat this process for all the chicken tenders, ensuring they are all well coated.Cooking the Chicken Tenders
8. In a large skillet, pour enough vegetable oil to cover the bottom of the pan by about 1/4 inch. Heat the oil over medium-high heat. To test if the oil is hot enough, drop a small piece of bread into the oil; if it sizzles and bubbles, you’re ready to go. 9. Carefully add the breaded chicken tenders to the hot oil, making sure not to overcrowd the pan. You may need to do this in batches depending on the size of your skillet. Fry the tenders for about 4-5 minutes on each side, or until they are golden brown and cooked through. The internal temperature should reach 165°F (75°C). 10. Once cooked, use tongs to transfer the chicken tenders to a plate lined with paper towels to drain any excess oil. This will help keep them crispy.Assembling and Serving
11. After all the chicken tenders are cooked, it’s time to serve! You can plate them up as is, or if you want to get a little fancy, you can serve them with a side of ranch dressing for dipping. 12. For a complete meal, consider pairing the crispy crack chicken tenders with a fresh salad, some crispy fries, or even a side of coleslaw. The contrast of textures and flavors will elevate your dining experience.Storage and Reheating Tips
13. If you have any leftovers (which is rare because they’re so delicious!), allow the chicken tenders to cool completely before storing them in an airtight container in the refrigerator. They will keep well for up to 3 days. 14. To reheat, preheat your oven to 375°F (190°C). Place the chicken tenders on a baking sheet and heat for about 10-15 minutes, or until they are warmed through and crispy again. Avoid using the microwave, as it can make them soggy. 15. If you want to freeze the chicken tenders, you can do so before frying. After breading, place them in a single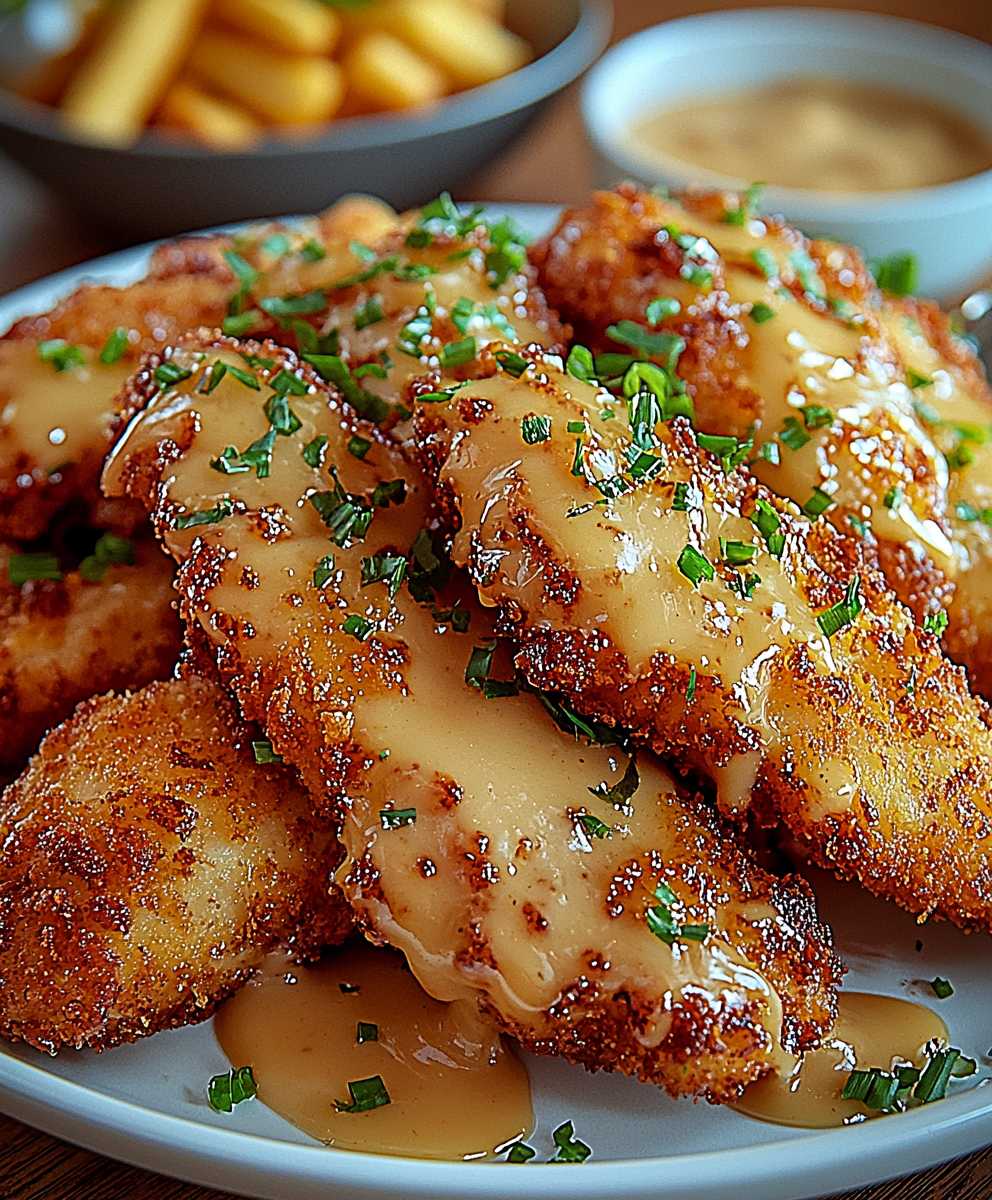
Conclusion:
In summary, these Crispy Crack Chicken Tenders are an absolute must-try for anyone looking to elevate their dinner game or impress guests at their next gathering. The combination of juicy chicken, a perfectly seasoned crispy coating, and the delightful crunch will have everyone coming back for seconds. Plus, they’re incredibly versatile! You can serve them with a variety of dipping sauces like honey mustard, ranch, or even a spicy sriracha mayo for those who like a kick. If you want to mix things up, consider adding some grated Parmesan cheese to the coating for an extra layer of flavor, or try using different spices to customize the taste to your liking. You could even turn these tenders into a delicious sandwich by placing them in a toasted bun with your favorite toppings. I encourage you to give this recipe a try and experience the joy of making your own Crispy Crack Chicken Tenders at home. Don’t forget to share your experience and any variations you come up with! I’d love to hear how they turned out for you, and I’m sure your friends and family will be just as excited about them as I am. Happy cooking! Print
Crispy Crack Chicken Tenders: The Ultimate Recipe for a Delicious Snack
- Total Time: 80 minutes
- Yield: 4 servings 1x
Description
Crispy chicken tenders marinated in buttermilk and coated with a crunchy cornflake and Parmesan breading, perfect for dipping in ranch dressing. Ideal for family meals or game day snacks!
Ingredients
- 1 pound chicken tenders
- 1 cup buttermilk
- 1 teaspoon garlic powder
- 1 teaspoon onion powder
- 1 teaspoon smoked paprika
- 1 teaspoon salt
- 1/2 teaspoon black pepper
- 1 cup all-purpose flour
- 1 cup crushed cornflakes
- 1/2 cup grated Parmesan cheese
- 1 teaspoon dried parsley
- 1/2 teaspoon cayenne pepper (optional, for heat)
- Vegetable oil (for frying)
- Ranch dressing (for serving)
Instructions
- In a large mixing bowl, combine buttermilk, garlic powder, onion powder, smoked paprika, salt, and black pepper. Whisk until well blended.
- Add chicken tenders, ensuring they are fully submerged. Cover and refrigerate for at least 1 hour, preferably overnight.
- In a shallow dish, mix all-purpose flour, crushed cornflakes, grated Parmesan cheese, dried parsley, and cayenne pepper (if using).
- Set up a breading station with the flour mixture on one side and a clean plate on the other.
- Remove chicken from the marinade, allowing excess to drip off.
- Dredge each tender in the flour mixture, pressing gently to adhere. Place on the clean plate.
- In a large skillet, heat enough vegetable oil to cover the bottom by about 1/4 inch over medium-high heat.
- Test oil temperature by dropping in a small piece of bread; if it sizzles, it’s ready.
- Carefully add chicken tenders, frying in batches if necessary. Cook for 4-5 minutes on each side until golden brown and cooked through (internal temperature should reach 165°F/75°C).
- Transfer cooked tenders to a plate lined with paper towels to drain excess oil.
- Serve chicken tenders with ranch dressing for dipping. Pair with a fresh salad, fries, or coleslaw for a complete meal.
Notes
- For extra crunch, consider double-dipping the chicken in the buttermilk and flour mixture.
- Adjust the cayenne pepper to your heat preference.
- Leftovers can be stored in an airtight container in the refrigerator for up to 3 days.
- Prep Time: 60 minutes
- Cook Time: 20 minutes