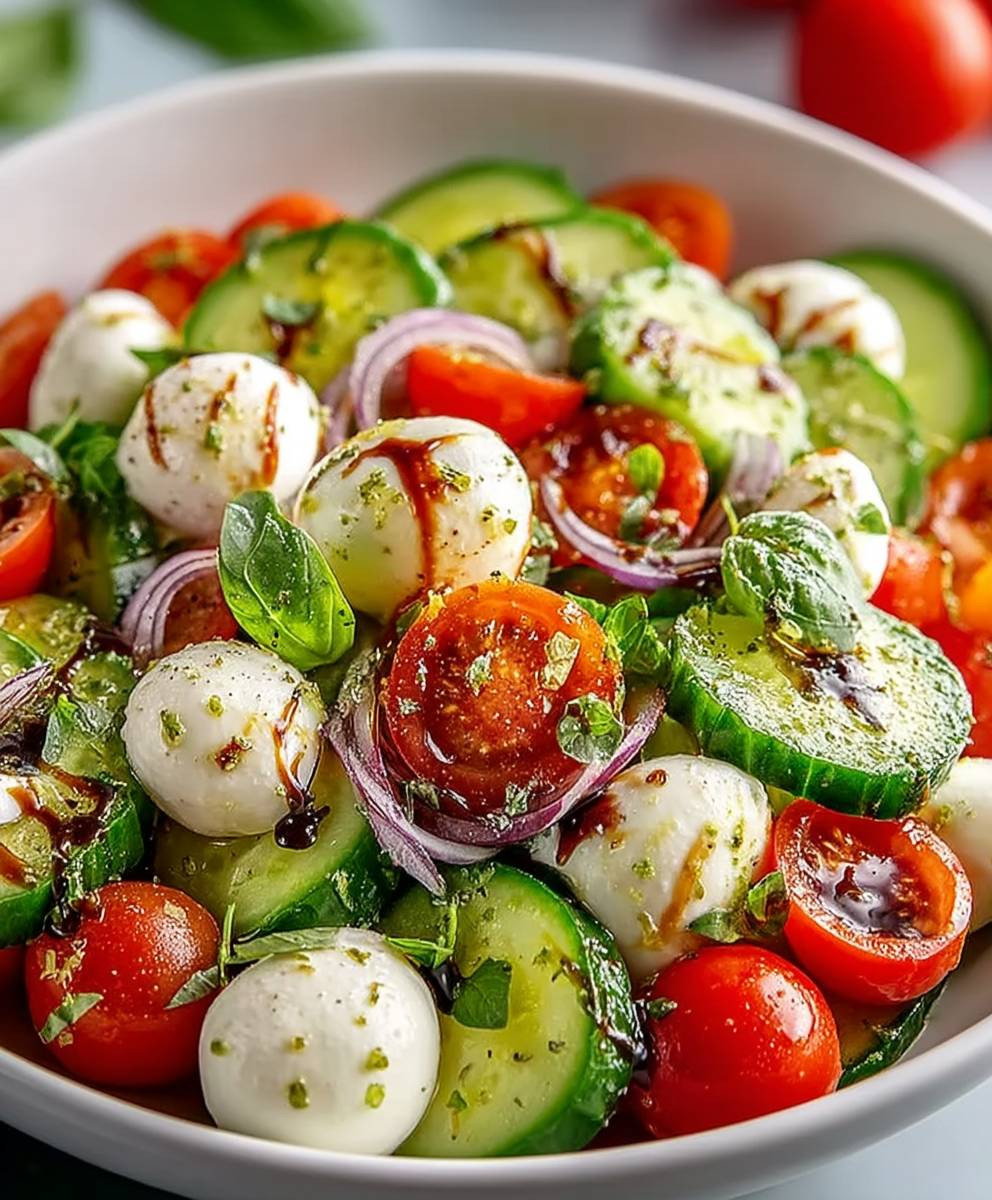
Cucumber Caprese Salad: Prepare to be amazed by this refreshing twist on a classic Italian favorite! Imagine the creamy mozzarella, juicy tomatoes, and fragrant basil you adore, now elevated with the crisp, cool crunch of cucumber. This isn’t just a salad; it’s a vibrant celebration of summer flavors that will tantalize your taste buds and leave you wanting more.
The traditional Caprese Salad, with its simple yet elegant combination of ingredients representing the colors of the Italian flag, has long been a symbol of Italian culinary pride. But sometimes, even the most beloved dishes can benefit from a fresh perspective. That’s where the cucumber comes in! Adding cucumber not only enhances the texture but also provides a hydrating element, making it the perfect light and healthy meal or side dish.
People love Caprese Salad for its simplicity, its vibrant flavors, and its ability to transport them to the sun-drenched shores of Italy with every bite. This Cucumber Caprese Salad takes all those wonderful qualities and amplifies them. The cucumber adds a delightful coolness that perfectly complements the richness of the mozzarella and the sweetness of the tomatoes. It’s quick to prepare, visually stunning, and incredibly delicious – a guaranteed crowd-pleaser for any occasion. So, ditch the ordinary and embrace the extraordinary with this delightful twist on a timeless classic!
Ingredients:
- 2 large English cucumbers, thinly sliced
- 1 pound fresh mozzarella balls (bocconcini), halved or quartered if large
- 1 pint cherry tomatoes, halved
- 1/2 cup fresh basil leaves, roughly chopped
- 1/4 cup extra virgin olive oil
- 2 tablespoons balsamic glaze (or balsamic reduction)
- 1 tablespoon red wine vinegar
- 1 teaspoon Dijon mustard
- 1 clove garlic, minced
- Salt and freshly ground black pepper to taste
- Optional: Pinch of red pepper flakes for a little heat
Preparing the Vinaigrette:
This vinaigrette is what really brings the Cucumber Caprese Salad together. It’s tangy, slightly sweet, and perfectly complements the fresh flavors of the cucumbers, mozzarella, and tomatoes. Don’t skip this step!
- Combine the ingredients: In a small bowl, whisk together the extra virgin olive oil, balsamic glaze, red wine vinegar, Dijon mustard, and minced garlic. Make sure the garlic is finely minced so it distributes evenly throughout the vinaigrette.
- Season to perfection: Add salt and freshly ground black pepper to taste. I like to start with about 1/4 teaspoon of salt and 1/8 teaspoon of pepper, then adjust as needed. If you’re feeling adventurous, add a pinch of red pepper flakes for a little kick.
- Emulsify the vinaigrette: Whisk vigorously until the vinaigrette is well combined and slightly emulsified. This means the oil and vinegar should be blended together, creating a slightly thicker, more cohesive dressing. If you have a small jar with a lid, you can also shake the ingredients together until emulsified.
- Taste and adjust: Give the vinaigrette a taste and adjust the seasonings as needed. If it’s too tart, add a little more balsamic glaze. If it’s not flavorful enough, add a pinch more salt or pepper. The goal is to create a balanced and delicious vinaigrette that complements the other ingredients in the salad.
- Let it rest (optional): While not strictly necessary, letting the vinaigrette rest for about 15-20 minutes allows the flavors to meld together even more. This will result in a more complex and flavorful dressing.
Assembling the Cucumber Caprese Salad:
Now comes the fun part – putting everything together! This is where you get to be creative and arrange the ingredients in a way that’s both visually appealing and easy to eat.
- Prepare the cucumbers: If you’re using English cucumbers, you don’t need to peel them. Simply wash them thoroughly and slice them thinly. A mandoline slicer can be helpful for achieving uniform slices, but a sharp knife will work just fine.
- Prepare the mozzarella: If you’re using small bocconcini mozzarella balls, you can leave them whole or halve them. If you’re using larger mozzarella balls, quarter them into bite-sized pieces.
- Prepare the tomatoes: Wash the cherry tomatoes and halve them. If you’re using larger tomatoes, cut them into bite-sized wedges.
- Arrange the salad: There are several ways you can arrange the Cucumber Caprese Salad. Here are a few options:
- Layered Platter: Arrange the cucumber slices in a single layer on a large platter. Top with the mozzarella balls and cherry tomatoes. Drizzle with the vinaigrette and sprinkle with fresh basil.
- Individual Bowls: Divide the cucumber slices, mozzarella balls, and cherry tomatoes among individual bowls. Drizzle with the vinaigrette and sprinkle with fresh basil.
- Skewers: Thread the cucumber slices, mozzarella balls, and cherry tomatoes onto skewers. Drizzle with the vinaigrette and sprinkle with fresh basil. This is a fun and elegant way to serve the salad as an appetizer.
- Drizzle with vinaigrette: Generously drizzle the prepared vinaigrette over the salad. Make sure to coat all of the ingredients evenly.
- Garnish with fresh basil: Sprinkle the chopped fresh basil leaves over the salad. The basil adds a pop of color and a burst of fresh flavor.
- Season with salt and pepper: Give the salad a final sprinkle of salt and freshly ground black pepper to taste.
- Serve immediately: For the best flavor and texture, serve the Cucumber Caprese Salad immediately. If you’re not serving it right away, you can store it in the refrigerator for a short period of time, but the cucumbers may become slightly soggy.
Tips and Variations:
This Cucumber Caprese Salad is a versatile dish that can be easily customized to your liking. Here are a few tips and variations to try:
- Add avocado: For a creamier and more decadent salad, add sliced avocado. The avocado pairs perfectly with the cucumbers, mozzarella, and tomatoes.
- Use different types of cheese: Instead of mozzarella, try using burrata, feta, or goat cheese. Each type of cheese will add a unique flavor and texture to the salad.
- Add grilled vegetables: For a heartier salad, add grilled vegetables such as zucchini, eggplant, or bell peppers. The grilled vegetables will add a smoky flavor and a satisfying bite.
- Use different herbs: Instead of basil, try using mint, parsley, or oregano. Each herb will add a different flavor profile to the salad.
- Add a touch of sweetness: For a sweeter salad, add a drizzle of honey or maple syrup to the vinaigrette.
- Make it spicy: For a spicy salad, add a pinch of red pepper flakes to the vinaigrette or sprinkle some chili oil over the salad.
- Marinate the mozzarella: For an extra flavorful salad, marinate the mozzarella balls in the vinaigrette for at least 30 minutes before assembling the salad. This will allow the mozzarella to absorb the flavors of the vinaigrette.
- Use heirloom tomatoes: For a more colorful and flavorful salad, use heirloom tomatoes. Heirloom tomatoes come in a variety of colors and flavors, and they will add a beautiful touch to the salad.
- Add a protein: To make it a complete meal, add grilled chicken, shrimp, or tofu.
Serving Suggestions:
Cucumber Caprese Salad is a versatile dish that can be served as an appetizer, side dish, or light meal. Here are a few serving suggestions:
- Serve it as an appetizer at a summer barbecue or picnic.
- Serve it as a side dish with grilled chicken, fish, or steak.
- Serve it as a light lunch with a slice of crusty bread.
- Serve it as a refreshing snack on a hot day.
- Serve it as part of a Caprese-themed meal, along with other Caprese dishes such as Caprese skewers or Caprese pasta salad.
Storage Instructions:
For best results, Cucumber Caprese Salad should be served immediately. However, if you have leftovers, you can store them in the refrigerator for up to 24 hours. Keep in mind that the cucumbers may become slightly soggy over time. To prevent this, you can store the cucumbers separately from the mozzarella and tomatoes, and then assemble the salad just before serving.
Nutritional Information:
The nutritional information for Cucumber Caprese Salad will vary depending on the specific ingredients used and the portion size. However, in general, this salad is a healthy and nutritious option. It is low in calories and fat, and it is a good source of vitamins, minerals, and antioxidants. Cucumbers are hydrating and provide fiber, while tomatoes are rich in Vitamin C and lycopene. Mozzarella provides calcium and protein. Olive oil contributes healthy fats.
Enjoy your delicious and refreshing Cucumber Caprese Salad!
Conclusion:
This Cucumber Caprese Salad isn’t just another salad; it’s a vibrant celebration of fresh flavors and simple elegance that deserves a spot on your table. I truly believe you’ll find it’s a must-try recipe, especially when you’re craving something light, refreshing, and utterly delicious. The combination of crisp cucumber, juicy tomatoes, creamy mozzarella, and fragrant basil, all drizzled with a tangy balsamic glaze, is simply irresistible. It’s a symphony of textures and tastes that will awaken your senses and leave you feeling satisfied without being weighed down.
But what makes this salad truly special is its versatility. While it’s fantastic as a standalone appetizer or light lunch, it also shines as a side dish alongside grilled chicken, fish, or even a hearty pasta dish. Imagine serving it at your next barbecue – it’s the perfect counterpoint to richer, heavier fare. Or, for a more substantial meal, try adding grilled shrimp or chicken directly to the salad.
And don’t be afraid to experiment with variations! If you’re feeling adventurous, try using different types of tomatoes, such as heirloom varieties for a burst of color and unique flavors. You could also swap out the traditional mozzarella for burrata, which offers an even creamier and more decadent experience. For a spicy kick, add a pinch of red pepper flakes to the balsamic glaze. Or, if you’re looking for a vegan option, simply substitute the mozzarella with a plant-based alternative. The possibilities are endless!
I’ve personally made this Cucumber Caprese Salad countless times, and it’s always a hit. It’s quick to prepare, requires minimal ingredients, and is guaranteed to impress your family and friends. It’s the kind of recipe that you’ll find yourself reaching for again and again, especially during the warmer months when fresh produce is at its peak.
Serving Suggestions and Variations:
* As an Appetizer: Serve small portions on individual plates or skewers for an elegant and easy-to-eat appetizer.
* As a Side Dish: Pair it with grilled meats, fish, or pasta for a complete and balanced meal.
* With Grilled Protein: Add grilled chicken, shrimp, or tofu for a more substantial and protein-rich salad.
* Heirloom Tomato Variation: Use a mix of colorful heirloom tomatoes for a visually stunning and flavorful salad.
* Burrata Upgrade: Substitute the mozzarella with burrata for an extra creamy and decadent experience.
* Spicy Kick: Add a pinch of red pepper flakes to the balsamic glaze for a touch of heat.
* Vegan Option: Use plant-based mozzarella for a delicious and cruelty-free version.
I’m so confident that you’ll love this recipe as much as I do. It’s a simple yet sophisticated dish that’s perfect for any occasion. So, go ahead and give it a try! I promise you won’t be disappointed.
And most importantly, I’d love to hear about your experience! Did you make any variations? What did you serve it with? What did your family and friends think? Share your photos and stories in the comments below. I can’t wait to see your creations and hear your feedback. Happy cooking, and enjoy your delicious and refreshing Cucumber Caprese Salad! I hope it becomes a staple in your kitchen, just like it is in mine.
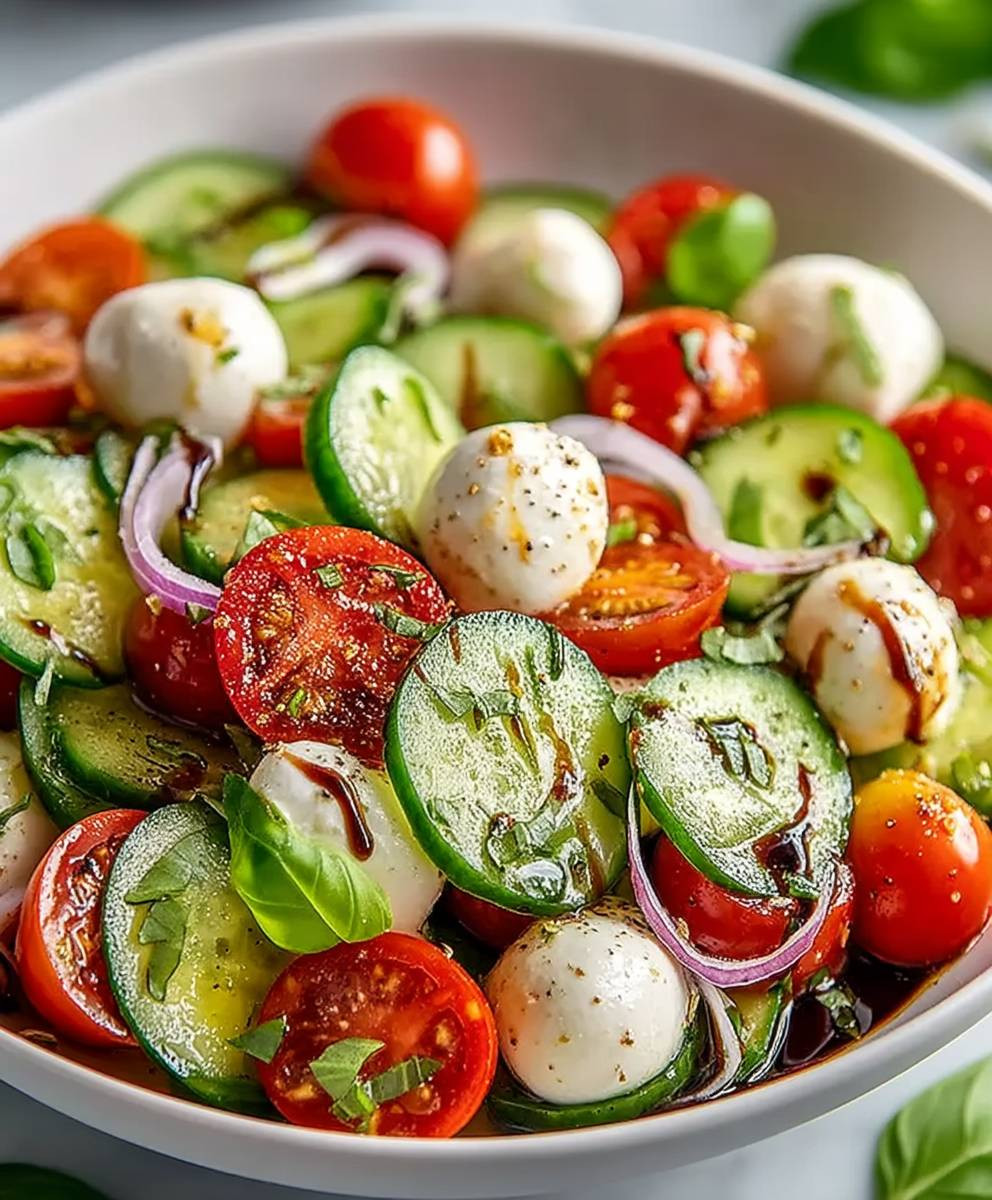
Cucumber Caprese Salad: A Refreshing Summer Twist
Refreshing Cucumber Caprese Salad with mozzarella, tomatoes, and basil, drizzled with tangy balsamic vinaigrette. Perfect as an appetizer, side dish, or light meal.
Ingredients
Instructions
Recipe Notes
- Variations: Add sliced avocado, different cheeses (burrata, feta, goat cheese), grilled vegetables, different herbs (mint, parsley, oregano), a touch of honey or maple syrup, or chili oil.
- Marinating: Marinate the mozzarella balls in the vinaigrette for at least 30 minutes for extra flavor.
- Heirloom Tomatoes: Use heirloom tomatoes for a more colorful and flavorful salad.
- Add Protein: Add grilled chicken, shrimp, or tofu to make it a complete meal.
- Serving Suggestions: Serve as an appetizer, side dish, or light meal.
- Storage: Serve immediately for best results. Leftovers can be stored in the refrigerator for up to 24 hours, but cucumbers may become soggy. Store cucumbers separately if possible.