• Skip to primary navigation
  • Skip to main content
  • Skip to primary sidebar
Homesmad

Homesmad

  • Home
  • Breakfast & Brunch
  • Appetizers & Snacks
  • Dinner
  • Dessert
  • About
  • Privacy Policy
  • Contact
Homesmad
  • Home
  • Breakfast & Brunch
  • Appetizers & Snacks
  • Dinner
  • Dessert
  • About
  • Privacy Policy
  • Contact

Decadent Chocolate Beef Salami Recipe: A Must-Try!

December 9, 2025 by Lily author

Chocolate Beef Salami – now there’s a phrase that might make you do a double-take, isn’t it? I understand if your culinary curiosity is piqued, or perhaps even a little bewildered! I am thrilled to introduce you to a truly remarkable creation that masterfully bridges the gap between sweet indulgence and savory sophistication. This unique delicacy isn’t just a novelty; it’s a testament to adventurous flavors, offering an unparalleled gastronomic experience.

While traditional salame al cioccolato often foregoes meat, this inventive recipe takes inspiration from historical savory applications of chocolate – think rich moles or medieval spice blends – and reinterprets them with a modern, gourmet sensibility. It’s a bold departure that truly stands out. People adore this dish not only for its intriguing name but for its surprisingly harmonious blend of deep, dark chocolate notes with the subtle richness of cured beef. The texture is a delightful interplay of smooth chocolate and tender, finely textured beef, creating an almost melt-in-your-mouth experience that is both decadent and satisfying. It’s perfect as an impressive appetizer, a sophisticated snack, or even a unique dessert course that guarantees to be a conversation starter. Preparing your own Chocolate Beef Salami is an exciting journey into innovative cooking, and I promise, once you taste it, you’ll understand why this intriguing combination has garnered such a passionate following.

Decadent Chocolate Beef Salami Recipe: A Must-Try! this RECIPE

Ingredients:

Creating this magnificent Chocolate Beef Salami is an absolute joy, and the best part is, it requires no baking! Here’s what you’ll need to gather:

  • 200g (approximately 7 oz) High-Quality Dark Chocolate: I always recommend using a dark chocolate with at least 60-70% cocoa solids. This provides a deep, rich flavor that truly makes our Chocolate Beef Salami sing. Using good quality chocolate makes all the difference in the world for both flavor and texture.
  • 100g (approximately 3.5 oz) Unsalted Butter: Make sure it’s at room temperature or slightly softened. Butter adds a crucial creaminess and helps bind all our ingredients together beautifully, giving the salami its luscious, smooth texture.
  • 50g (approximately 1/4 cup) Granulated Sugar or Powdered Sugar: While the chocolate provides sweetness, a little extra sugar helps balance the bitterness of the dark chocolate. Powdered sugar dissolves more easily, contributing to a smoother consistency, but granulated sugar works fine too.
  • 2 Tablespoons Unsweetened Cocoa Powder: This deepens the chocolate flavor and enhances the rich, dark color, which is essential for mimicking the look of traditional salami. It also adds a slight dryness that balances the butter and chocolate.
  • 1 Teaspoon Pure Vanilla Extract: Vanilla is a magical ingredient that enhances and complements chocolate’s flavor profile. Don’t skip it; it adds a wonderful aromatic warmth.
  • Pinch of Fine Sea Salt: A tiny pinch of salt doesn’t make things salty, but rather acts as a flavor enhancer, intensifying the chocolate notes and balancing the sweetness. It’s my secret weapon for truly outstanding chocolate desserts!
  • 200g (approximately 7 oz) Digestive Biscuits or Rich Tea Biscuits: These are the “meat” of our Chocolate Beef Salami! They provide the crumbly, chunky texture that resembles the fat and spices in a real salami. Avoid overly sweet or flavored biscuits, as we want the chocolate to be the star.
  • 50g (approximately 1/2 cup) Chopped Nuts (Optional): I love adding pistachios, almonds, or hazelnuts for extra crunch and a subtle nutty flavor. They also contribute to the visual appeal, looking like flecks in a cured sausage. If you’re not a fan of nuts, you can certainly omit them or substitute with dried cranberries for a festive touch.
  • 2-3 Tablespoons Rum, Brandy, or Strong Coffee (Optional): A splash of alcohol (or coffee for an alcohol-free version) adds incredible depth and complexity to the chocolate flavor. Dark rum or a good brandy works wonderfully, imparting a warm, sophisticated note to our Chocolate Beef Salami.
  • For Dusting: Powdered Sugar and/or Cocoa Powder: This final touch is purely for presentation, giving our Chocolate Beef Salami that authentic, mold-dusted, artisanal look. A mix of both creates a lovely marbled effect.

Preparation of the Chocolate Base

Now that we have all our ingredients assembled, let’s dive into the exciting part of bringing this stunning Chocolate Beef Salami to life. The first step involves creating the rich, velvety chocolate base that will envelop all our wonderful textures.

  1. Melt the Chocolate: My preferred method for melting chocolate is a double boiler, as it provides gentle, even heat, preventing the chocolate from scorching. To do this, chop your 200g of dark chocolate into small, uniform pieces. Place them in a heatproof bowl. Fill a small saucepan with about an inch or two of water and bring it to a simmer. Place the bowl of chocolate over the simmering water, ensuring the bottom of the bowl does not touch the water. Stir occasionally with a spatula until the chocolate is completely smooth and melted. Alternatively, you can use a microwave: heat the chopped chocolate in a microwave-safe bowl in 30-second intervals, stirring well after each interval, until fully melted and smooth. Be very careful not to overheat it, as chocolate can seize up quickly. Once melted, set the chocolate aside to cool slightly. We want it warm, but not piping hot, as it will be mixed with butter.
  2. Cream the Butter and Sugar: In a separate medium-sized mixing bowl, place the 100g of softened unsalted butter and 50g of granulated or powdered sugar. Using an electric mixer (or a sturdy whisk and some elbow grease), beat them together until the mixture is light, fluffy, and pale in color. This process incorporates air, making our chocolate base wonderfully smooth and rich. Scrape down the sides of the bowl occasionally to ensure everything is well combined. This step is crucial for achieving the right texture in your Chocolate Beef Salami.
  3. Combine Wet Ingredients: Once the butter and sugar are beautifully creamed, gradually add the slightly cooled melted dark chocolate to the butter mixture. Pour it in slowly while continuing to beat on low speed, or fold it in gently with a spatula. You want to ensure they emulsify properly, creating a homogeneous, glossy mixture. Next, sift in the 2 tablespoons of unsweetened cocoa powder and the pinch of fine sea salt. Add the 1 teaspoon of pure vanilla extract. If you’re opting for a touch of spirits, now is the time to add your 2-3 tablespoons of rum, brandy, or strong coffee. Mix everything until it’s perfectly combined and smooth, a gorgeous deep brown hue. Make sure there are no streaks of butter or unmixed cocoa powder. This forms the luxurious foundation for our unique Chocolate Beef Salami.

Mixing and Forming the Salami

Now we move on to assembling the core components of our Chocolate Beef Salami, giving it its distinctive texture and shape. This is where the magic truly happens, transforming simple ingredients into an impressive culinary delight.

  1. Prepare the Biscuits and Nuts: This step is all about creating the “marbling” effect in our salami. Take your 200g of digestive or rich tea biscuits and place them in a large freezer bag. Using a rolling pin or the bottom of a heavy pan, gently crush the biscuits. We’re not aiming for fine crumbs here; rather, you want a mix of small pieces and larger chunks, ranging from pea-sized to half-an-inch. This varied texture is what will give your Chocolate Beef Salami that authentic, rustic appearance when sliced. If you’re adding nuts, chop your 50g of preferred nuts (pistachios, almonds, or hazelnuts work wonderfully) to a similar rough consistency. You want distinct pieces, not a fine powder.
  2. Fold in the Dry Ingredients: Transfer the crushed biscuits and chopped nuts (if using) into the bowl with your prepared chocolate base. Using a sturdy spatula or a wooden spoon, fold them into the chocolate mixture until everything is thoroughly combined. It might look a bit messy at first, but keep folding gently until every biscuit piece and nut is coated in the rich chocolate. This is the stage where your Chocolate Beef Salami starts to take its true form. Ensure no dry spots remain at the bottom of the bowl. The mixture should be thick, sticky, and quite stiff.
  3. Chill the Mixture Briefly: Before shaping, I find it incredibly helpful to chill the mixture for about 15-20 minutes in the refrigerator. This allows the chocolate to firm up just slightly, making it much easier to handle and shape into a cohesive log. If the mixture is too soft, it will be difficult to form a tight, well-defined salami shape. Don’t let it chill for too long, though, or it will become too hard to work with. You want it pliable but not sticky.
  4. Prepare for Shaping: Lay out a large piece of cling film (plastic wrap) or parchment paper on a clean work surface. You’ll need a piece that’s at least 18-20 inches long. If using cling film, you might want to use two overlapping pieces for extra strength, especially if your mixture is on the softer side. This will be your wrapping material for the Chocolate Beef Salami.
  5. Shape the Salami: Spoon the slightly chilled chocolate-biscuit mixture onto the center of your prepared cling film or parchment paper. Using your hands, gently form the mixture into a rough log shape, aiming for a cylinder that’s approximately 8-10 inches long and about 2-2.5 inches in diameter. Don’t worry about perfection at this stage, we’ll refine it next.
  6. Roll and Tighten: Now comes the satisfying part of shaping our Chocolate Beef Salami! Tightly roll the cling film or parchment paper around the chocolate log. Once rolled, use your hands to gently press and compress the mixture, rolling it back and forth on your work surface to create a firm, smooth, and even cylindrical shape. The tighter you roll it, the less air will be trapped, and the denser and more authentic your salami will look. Twist the ends of the cling film or parchment paper in opposite directions, just like you would twist a candy wrapper, to further compact the log and seal the ends. This creates a really appealing, neat package for chilling and truly helps achieve that beautiful “salami” aesthetic. You can even tie the ends with kitchen twine if you want to be extra fancy and replicate a hanging salami.
  7. Pro Tip for a Perfect Salami Shape:

    For an even more authentic look, once rolled and twisted, place your wrapped Chocolate Beef Salami in an empty paper towel tube or a clean, empty Pringles can. This will help maintain a perfectly round shape as it chills and prevents any flattening, ensuring a beautifully consistent cross-section when you slice it later.

Chilling and Finishing the Chocolate Beef Salami

The final steps are crucial for setting our magnificent Chocolate Beef Salami and giving it its signature, rustic appearance. Patience is a virtue here, as the chilling process is what transforms the soft mixture into a firm, sliceable delicacy.

  1. Chill Thoroughly: Transfer your tightly wrapped Chocolate Beef Salami to the refrigerator. It needs to chill for a minimum of 4-6 hours, but ideally, I recommend leaving it overnight. This extended chilling time is absolutely essential for the butter and chocolate to firm up completely, allowing you to slice the salami cleanly without it crumbling or losing its shape. Don’t rush this step! A well-chilled salami will yield perfect, neat slices that showcase all those wonderful biscuit and nut flecks.
  2. Prepare for Dusting: Once your Chocolate Beef Salami is firm and thoroughly chilled, carefully unwrap it from the cling film or parchment paper. It should now hold its shape perfectly. You’ll notice how dense and solid it feels – a true testament to its transformation!
  3. Dust for Presentation: This is where we give our creation its final, traditional salami-like finish. On a clean plate or cutting board, spread a generous layer of powdered sugar. If you prefer a slightly less sweet, more rustic look, you can mix equal parts powdered sugar and unsweetened cocoa powder. For an even more authentic “aged” look, I sometimes dust it first with a very light layer of cocoa powder, then roll it in powdered sugar. This creates a beautiful contrast and depth of color. Gently roll the entire Chocolate Beef Salami in the powdered sugar (or mixture), ensuring it’s completely coated. You can even pat the sugar onto the surface with your hands to help it adhere. The white dusting mimics the traditional mold found on cured sausages, adding to the illusion that this is a savory treat. This step truly elevates the visual appeal of your Chocolate Beef Salami.
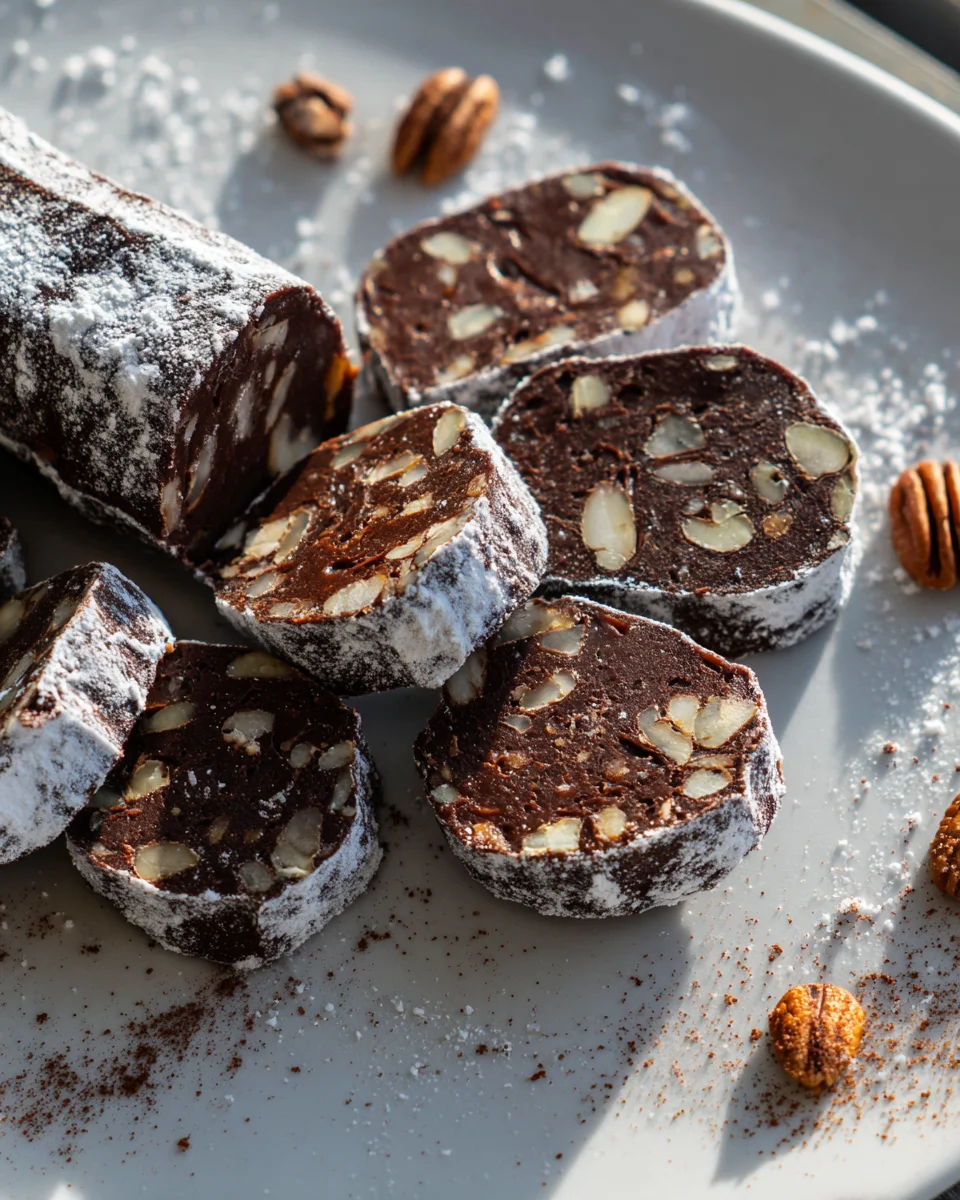
  4. Slice and Serve: Now for the grand reveal! Place your beautifully dusted Chocolate Beef Salami on a cutting board. Using a sharp knife, slice it into rounds approximately 1/4 to 1/2 inch thick. Each slice will reveal the stunning cross-section of dark chocolate interspersed with the lighter biscuit and nut pieces, creating an incredibly convincing imitation of a real salami. The texture will be firm yet yielding, with a satisfying crunch from the biscuits.
  5. Serving Suggestions and Storage:

    This Chocolate Beef Salami is an absolute showstopper and a fantastic addition to any dessert platter, coffee break, or special occasion. It pairs wonderfully with a cup of strong coffee, a glass of dessert wine, or even a shot of espresso. You can arrange the slices artfully on a plate, perhaps garnished with a few fresh berries or a sprig of mint for a pop of color.

    Store any leftover Chocolate Beef Salami tightly wrapped in cling film or in an airtight container in the refrigerator for up to 1-2 weeks. It actually tastes even better the next day, as the flavors have more time to meld and deepen. You can even freeze it for longer storage (up to 1-2 months); just make sure to wrap it extra well before freezing, and thaw in the refrigerator before serving.

    Why I Love This Chocolate Beef Salami:

    Beyond its clever disguise, this dessert is a pure indulgence. The rich, dark chocolate, the satisfying crunch of biscuits and nuts, and the subtle hint of vanilla or rum create a symphony of flavors and textures. It’s surprisingly easy to make, yet always impresses. The “beef” in its name comes purely from its striking resemblance to a cured meat product, with its deep, marbled appearance. It’s a playful, delicious twist on a classic no-bake treat that’s guaranteed to spark conversation and delight taste buds. Enjoy crafting and sharing this truly unique and utterly delicious Chocolate Beef Salami!

Decadent Chocolate Beef Salami Recipe: A Must-Try!

Conclusion:

Well, my friends, we’ve reached the delicious culmination of our journey, and I genuinely hope you’re feeling inspired to roll up your sleeves and dive into this truly exceptional recipe. If there’s one thing I want you to take away from our time together, it’s that this isn’t just another dessert; it’s an experience, a conversation starter, and a testament to the magic that happens when you dare to combine the unexpected. This incredible creation transcends the ordinary, offering a sophisticated sweetness perfectly balanced by an intriguing savory depth that will surprise and delight even the most discerning palates. You might think a dessert should stick to sweetness, but trust me, the subtle, rich notes woven throughout this treat are what elevate it from good to truly unforgettable. It’s remarkably simple to prepare, requiring no baking, making it an ideal candidate for those busy days when you still want to impress, or for a fun project with the kids.

So, how best to enjoy your culinary masterpiece? While delightful on its own, sliced thinly and served with a robust espresso or a steaming mug of herbal tea, the possibilities truly expand from there. Imagine it as the star of a sophisticated dessert platter, elegantly arranged alongside fresh berries, perhaps a dollop of crème fraîche, or even a light dusting of cocoa powder to enhance its visual appeal and chocolatey aroma. For an adventurous twist, consider adding it to your next charcuterie board. Its unique profile creates a fascinating interplay when paired with contrasting flavors. Think creamy brie, sharp aged cheddar, or even a pungent blue cheese, complemented by tart dried cranberries, crunchy walnuts, and crisp apple slices. The interplay of sweet, savory, and tangy elements will create a truly memorable spread that will have your guests talking long after the party ends.

Elevate Your Serving Experience:

Don’t be afraid to experiment! This truly versatile treat also shines during festive occasions. For the holidays, it makes a wonderfully unique edible gift, neatly wrapped and tied with a bow, or a fantastic addition to your Christmas dessert table, offering a refreshing departure from traditional puddings and pies. For a more adult-centric pairing, try serving thin slices with a glass of port wine, a robust Zinfandel, or even a smoky single malt whisky – the flavors will dance together in a delightful symphony. And if you’re feeling particularly indulgent, a small slice alongside a scoop of vanilla bean ice cream creates a truly luxurious dessert that balances temperatures and textures beautifully.

But the fun doesn’t stop there. One of the greatest joys of cooking is making a recipe truly your own, and this one offers a fantastic canvas for personalization. Feel free to experiment with different types of nuts – toasted pistachios or hazelnuts instead of almonds would add a distinct flavor and vibrant color. You could also incorporate dried fruits like finely chopped sour cherries or cranberries for an extra burst of tartness and chewiness. For those who enjoy a hint of warmth, a pinch of cinnamon or a tiny dash of chili powder (to complement the chocolate) could introduce an exciting new dimension. Furthermore, don’t hesitate to play with liqueurs; a tablespoon of rum, brandy, or an orange liqueur like Grand Marnier can infuse your creation with an irresistible aroma and a sophisticated kick. You might also vary the type of chocolate itself, opting for a higher percentage dark chocolate for a more intense bitterness, or a milk chocolate for a sweeter, creamier profile. And for its final flourish, instead of a simple powdered sugar coating, consider rolling it in finely chopped toasted nuts, shredded coconut, or even more cocoa powder for different textures and appearances.

Ultimately, my hope is that you’ll take this recipe and make it your own. The satisfaction of creating something so surprisingly delicious and utterly unique is incredibly rewarding. I wholeheartedly encourage you to step into your kitchen, embrace the joy of discovery, and craft your very own batch of this delightful Chocolate Beef Salami. Prepare to impress yourself, your family, and your friends with this extraordinary confection. Once you’ve had a chance to try it, I would absolutely love to hear about your experience! Please share your thoughts, your clever variations, and how you chose to serve this show-stopping treat. Your feedback and creativity inspire us all, and I can’t wait to see the wonderful ways you bring this recipe to life. Happy cooking, and even happier eating!


Decadent Chocolate Beef Salami

A remarkable creation bridging sweet indulgence and savory sophistication, this no-bake Chocolate Beef Salami is a unique delicacy. It’s a bold dessert that mimics a cured meat product, offering an unparalleled gastronomic experience with deep dark chocolate notes, biscuit crunch, and nutty richness.

Prep Time
45 Minutes
Cook Time
PT0S
Total Time
12 Hours
Servings
1 Salami Log (approx. 20-24 slices)

Ingredients


Instructions


Important Information

Nutrition Facts (Per Serving)

It is important to consider this information as approximate and not to use it as definitive health advice.

Allergy Information

Please check ingredients for potential allergens and consult a health professional if in doubt.

« Previous Post
Best Classic Beef Bourguignon – Ultimate Comfort Food!
Next Post »
Best Non-Alcoholic Christmas Punch for Holiday Fun

If you enjoyed this…

Delicious Christmas Tree Mini Pizzas Recipe for Festive Fun!

Buttery Garlic Herb Pretzel Bites: The Ultimate Snack Recipe for Any Occasion

Air Fryer Pretzel Bites: Easy Recipe & Perfect Snack

Primary Sidebar

Browse by Diet

BreakfastDinnerLunchDessertAppetizer

Sweet Peach Yogurt Parfait Delight

One of my fondest memories is from a lazy summer afternoon spent at my grandmother’s house. The sun filtered through the kitchen window, casting a warm glow over the table where she would create her culinary magic. It was during one of those blissful moments that I first tasted her Peach Yogurt Parfait with Honey and Granola. The sweet aroma of ripe peaches mingling with creamy yogurt and the crunch of granola was nothing short of heavenly. It felt like summer captured in a bowl, and I still remember the joy of diving in with a spoon, each layer revealing a new burst of flavor.

When I think about that parfait, I can almost hear the gentle hum of the bees outside, reminding me of the floral notes that honey brings to every bite. The vibrant yellows and soft oranges of the peaches contrast beautifully with the creamy white yogurt and the golden crunch of granola. It’s a dish that not only looks delightful but also tastes like a celebration of fresh, wholesome ingredients.

What makes my version of this Peach Yogurt Parfait special is the careful balance of flavors and textures. I use ripe, juicy peaches, drizzled with locally sourced honey, and a homemade granola that’s bursting with nuts and seeds for an extra crunch. It’s a simple dish, but every layer is crafted with love and attention.

Let me show you exactly how to make this delightful parfait, so you can bring a bit of that summer magic into your kitchen!

Sweet Peach Yogurt Parfait Delight

Why You’ll Love This Recipe

  • Delightfully creamy texture from the Greek yogurt, paired with the juicy sweetness of fresh peaches.
  • Ready in under 20 minutes, making it a quick and satisfying breakfast or snack option.
  • Budget-friendly, using common ingredients that you may already have in your pantry.
  • Customizable with your favorite granola and nuts, allowing you to tailor each parfait to your taste.
  • Perfectly balanced flavors with the bright acidity of lemon juice and the sweetness of honey enhancing the peaches.

Ingredients

  • For the Parfait:
  • 2 cups plain Greek yogurt (or vanilla yogurt for a sweeter option)
  • 2 large ripe peaches, diced (about 2 cups)
  • 1 tablespoon fresh lemon juice (to prevent browning of peaches)
  • 2 tablespoons honey (plus more for drizzling)
  • 1 teaspoon vanilla extract (optional for extra flavor)
  • For the Granola:
  • 1 cup granola (store-bought or homemade; see notes for a simple granola recipe)
  • 1/4 cup sliced almonds (optional for added crunch)
  • 1/4 cup shredded coconut (optional for added flavor)

Let’s dive into some key ingredients that make this Peach Yogurt Parfait so delightful! First, the Greek yogurt is not only creamy but also packed with protein, making it a satisfying option for breakfast or a snack. If you’re looking for a sweeter option, you can easily substitute it with vanilla yogurt, though it may alter the overall flavor balance. Next, the ripe peaches are the star of the show; their natural sweetness shines through, so I recommend choosing peaches that yield slightly to pressure, indicating they’re perfectly ripe. If peaches aren’t in season, feel free to use nectarines or even frozen peaches—just thaw them before use. Finally, honey adds a lovely floral sweetness that ties everything together. If you prefer, maple syrup can serve as a delicious substitute.

Step-by-Step Instructions

  1. Start by preparing the peaches. Wash them thoroughly, then slice and dice them into bite-sized pieces. In a medium bowl, toss the diced peaches with 1 tablespoon of fresh lemon juice to prevent browning. Set aside for about 5 minutes while the lemon juice works its magic.
  2. In a separate bowl, combine the Greek yogurt, 2 tablespoons of honey, and 1 teaspoon of vanilla extract if using. Stir the mixture until smooth and thoroughly blended. This should take about a minute. Avoid overmixing to maintain the creaminess of the yogurt.
  3. Now it’s time to layer your parfait. Grab a clear glass or bowl to showcase your beautiful creation. Start with a generous spoonful of the yogurt mixture at the bottom—about 1/4 cup will do. Use a spoon to spread it evenly.
  4. Add a layer of the diced peaches over the yogurt, ensuring they cover the yogurt completely. You might want to use about half of what you have prepared—roughly 1 cup. This layer should be visually appealing, so arrange the peaches neatly.
  5. Sprinkle 1/4 cup of granola over the peaches. This adds a delightful crunch. Make sure to distribute it evenly to ensure every bite has that satisfying texture. Avoid packing it down too tightly, as you want it to maintain its crunch.
  6. Repeat the layers: spoon in another 1/4 cup of yogurt, followed by another cup of peaches, and another sprinkle of granola. You should have at least two layers, but feel free to add more depending on your glass size.
  7. Finish off your parfait with a drizzle of honey on top for added sweetness and a touch of elegance. If you’re using sliced almonds or shredded coconut, sprinkle them on top now. It adds a lovely visual contrast and extra flavor.
  8. Serve immediately or refrigerate for up to 30 minutes before serving to allow the flavors to meld together. However, I recommend enjoying it fresh to maintain the granola’s crunch.

Pro Tips for the Best Peach Yogurt Parfait With Honey And Granola

  • Make sure to choose ripe peaches for the best flavor and texture. A common mistake is using unripe fruit, which can lead to a less enjoyable parfait. Look for peaches that are fragrant and slightly soft to the touch.
  • Use a clear glass to assemble your parfait; this not only makes for a beautiful presentation but also allows you to see the colorful layers, which adds to the enjoyment of eating it.
  • For an even creamier texture, consider whipping the Greek yogurt with a hand mixer for a couple of minutes before layering. This small adjustment makes a huge difference in mouthfeel.
  • Be mindful of the granola-to-yogurt ratio. Too much granola can overwhelm the parfait, while too little can make it feel too creamy. Aim for about 1/4 cup of granola per layer for the perfect balance.
  • If you’re making this for a gathering, consider preparing the yogurt and peaches ahead of time and layering them just before serving. This ensures the granola stays crunchy!

Variations & Serving Ideas

There are so many ways to get creative with your Peach Yogurt Parfait! For a tropical twist, swap out the peaches for mangoes or pineapples and top with coconut flakes. If you prefer a berry flavor, mix in some blueberries or strawberries with the peaches for added color and taste. For a nutty version, incorporate chopped walnuts or pecans instead of almonds.

As for serving ideas, this parfait pairs beautifully with a side of scrambled eggs for a hearty breakfast or fresh fruit salad for a light lunch. You might also enjoy it alongside whole grain toast with almond butter for an energizing snack. The contrast of flavors and textures will elevate your meal experience!

Storage, Make-Ahead & Reheating

The Peach Yogurt Parfait is best enjoyed fresh, but you can prepare some components ahead of time. Store the layered parfait in an airtight container in the refrigerator for up to 24 hours. However, be cautious; the granola may lose its crunch if stored too long. You can freeze the yogurt and peach mixture for up to 2 months; just remember to thaw it in the refrigerator overnight before serving.

If you plan to enjoy this dish the next day, it can taste even better as the flavors meld together. Just remember to add the granola right before serving to keep its delightful crunch!

Frequently Asked Questions

Can I make Peach Yogurt Parfait With Honey And Granola ahead of time?

Yes — in fact, it tastes even better the next day as the flavors meld. However, I recommend waiting to add the granola until just before serving to maintain its crunch.

What can I substitute for Greek yogurt?

If you prefer a lighter option, you can substitute Greek yogurt with regular yogurt or a dairy-free alternative like coconut yogurt. Just remember that this may alter the creaminess and flavor profile slightly.

Can I use frozen peaches for this parfait?

Absolutely! Just make sure to thaw the frozen peaches before using them. They will still add great flavor, though the texture may be slightly softer than fresh peaches.

How do I make the parfait vegan?

To make a vegan version, substitute the Greek yogurt with a plant-based yogurt alternative, and replace honey with maple syrup or agave nectar. This keeps the parfait sweet while adhering to a vegan diet.

What other fruits can I use in this recipe?

You can mix and match fruits based on your preference. Try using strawberries, blueberries, raspberries, or even bananas. Just make sure to adjust the lemon juice as needed to prevent browning.

Sweet Peach Yogurt Parfait Delight

Final Thoughts

The Peach Yogurt Parfait with Honey and Granola is a delightful blend of creamy yogurt, sweet peaches, and crunchy granola that creates a satisfying and nourishing treat. Each layer bursts with flavor, making it a perfect choice for breakfast or a light dessert.

This is the kind of recipe I come back to again and again, especially when I want something refreshing and wholesome to start my day. The harmony of sweet and tart flavors, combined with the delightful crunch, never fails to lift my spirits!

I encourage you to give this parfait a try and indulge in its comforting goodness. Feel free to share your results or even add your own twist—perhaps a sprinkle of cinnamon or a handful of nuts. Enjoy creating your perfect parfait!

Print
clock clock iconcutlery cutlery iconflag flag iconfolder folder iconinstagram instagram iconpinterest pinterest iconfacebook facebook iconprint print iconsquares squares iconheart heart iconheart solid heart solid icon

Peach Yogurt Parfait


  • Author: Lily author
  • Total Time: 15 minutes
  • Yield: 4 servings 1x
Pin Recipe
Print Recipe

Description

This Peach Yogurt Parfait combines creamy Greek yogurt, juicy peaches, and crunchy granola for a delightful treat. It’s a perfect breakfast or snack that captures the essence of summer in every bite.


Ingredients

Scale
  • For the Parfait:
  • 2 cups plain Greek yogurt (or vanilla yogurt for a sweeter option)
  • 2 large ripe peaches, diced (about 2 cups)
  • 1 tablespoon fresh lemon juice (to prevent browning of peaches)
  • 2 tablespoons honey (plus more for drizzling)
  • 1 teaspoon vanilla extract (optional for extra flavor)
  • For the Granola:
  • 1 cup granola (store-bought or homemade; see notes for a simple granola recipe)
  • 1/4 cup sliced almonds (optional for added crunch)
  • 1/4 cup shredded coconut (optional for added flavor)

Instructions

  1. Start by preparing the peaches. Wash them thoroughly, then slice and dice them into bite-sized pieces. In a medium bowl, toss the diced peaches with 1 tablespoon of fresh lemon juice to prevent browning. Set aside for about 5 minutes while the lemon juice works its magic.
  2. In a separate bowl, combine the Greek yogurt, 2 tablespoons of honey, and 1 teaspoon of vanilla extract if using. Stir the mixture until smooth and thoroughly blended. This should take about a minute. Avoid overmixing to maintain the creaminess of the yogurt.
  3. Now it’s time to layer your parfait. Grab a clear glass or bowl to showcase your beautiful creation. Start with a generous spoonful of the yogurt mixture at the bottom—about 1/4 cup will do. Use a spoon to spread it evenly.
  4. Add a layer of the diced peaches over the yogurt, ensuring they cover the yogurt completely. You might want to use about half of what you have prepared—roughly 1 cup. This layer should be visually appealing, so arrange the peaches neatly.
  5. Sprinkle 1/4 cup of granola over the peaches. This adds a delightful crunch. Make sure to distribute it evenly to ensure every bite has that satisfying texture. Avoid packing it down too tightly, as you want it to maintain its crunch.
  6. Repeat the layers: spoon in another 1/4 cup of yogurt, followed by another cup of peaches, and another sprinkle of granola. You should have at least two layers, but feel free to add more depending on your glass size.
  7. Finish off your parfait with a drizzle of honey on top for added sweetness and a touch of elegance. If you’re using sliced almonds or shredded coconut, sprinkle them on top now. It adds a lovely visual contrast and extra flavor.
  8. Serve immediately or refrigerate for up to 30 minutes before serving to allow the flavors to meld together. However, I recommend enjoying it fresh to maintain the granola’s crunch.
  • Prep Time: 15 mins
  • Cook Time: 0 mins
  • Category: Breakfast
  • Method: No-cook
  • Cuisine: American

Nutrition

  • Serving Size: 1 parfait
  • Calories: 250
  • Sugar: 20 g
  • Sodium: 50 mg
  • Fat: 5 g
  • Saturated Fat: 2 g
  • Unsaturated Fat: 3 g
  • Trans Fat: 0 g
  • Carbohydrates: 40 g
  • Fiber: 3 g
  • Protein: 10 g
  • Cholesterol: 10 mg

Keywords: Choose ripe peaches for the best flavor and texture. Use a clear glass for a beautiful presentation. For creaminess, consider whipping the yogurt before layering. Be mindful of the granola-to-yogurt ratio. Prepare yogurt and peaches ahead of time for gatherings, layering just before serving.

Did you make this recipe?

Share a photo and tag us — we can't wait to see what you've made!

Sun-Kissed Frozen Orange Cream Slush

As a child, summer days felt like they lasted forever. I remember the sticky heat wrapping around me as I played outside, my laughter mingling with the sounds of the neighborhood. But nothing could cool me down quite like the moment I’d spot my grandmother, laboring over her blender, whipping up her famous Frozen Orange Creamsicle Slush. That vibrant orange treat, with its frosty texture and sweet citrus aroma, was like a burst of sunshine in a cup. Just one sip, and I could feel the coolness wash over me, sparking pure joy.

This Frozen Orange Creamsicle Slush has a way of making you feel like a kid again. Its creamy, dreamy consistency is a delightful balance of bright orange and soft vanilla, inviting you to dive right in. The refreshing tang of orange dances on your tongue, while the smooth creaminess envelops you in a comforting embrace. It’s a nostalgic treat that’s perfect for hot summer afternoons or anytime you need a little pick-me-up.

What makes my version of this slush stand out is the addition of a hint of vanilla bean, which elevates the flavor and adds an extra layer of richness. Plus, it’s super easy to whip up with just a few simple ingredients that you probably already have on hand! So, if you’re ready to relive those sun-soaked memories, let me show you exactly how to make it.

Sun-Kissed Frozen Orange Cream Slush

Why You’ll Love This Recipe

  • Each slush is a perfect blend of creamy vanilla and zesty orange, creating a nostalgic flavor reminiscent of summer days.
  • This refreshing treat is ready in under 15 minutes, making it an ideal quick dessert for unexpected guests or hot afternoons.
  • With just 8 simple ingredients, it’s budget-friendly, ensuring you don’t have to break the bank to enjoy a delicious slush.
  • The slush has a perfectly smooth texture, thanks to the combination of ice and ice cream, providing a delightful contrast to the bright citrus flavors.
  • It’s highly customizable; you can easily adjust the sweetness and add fresh herbs for a unique twist that suits your taste.

Ingredients

  • 2 cups orange juice (freshly squeezed or store-bought)
  • 1 cup vanilla ice cream
  • 1 cup crushed ice
  • 1/2 cup milk (whole or 2%)
  • 1/4 cup granulated sugar (adjust based on sweetness preference)
  • 1 teaspoon vanilla extract
  • Zest of 1 orange (for added flavor)
  • Fresh orange slices and mint leaves (for garnish)

The star of this Frozen Orange Creamsicle Slush is the orange juice, which provides the vibrant, citrusy base. Freshly squeezed juice will yield the brightest flavor, but store-bought options can be just as convenient. If you’re opting for store-bought, choose 100% pure juice with no added sugars for the best results. Another essential ingredient is the vanilla ice cream; it adds creaminess and sweetness. You can substitute it with dairy-free ice cream if you’re looking for a vegan option. Whole or 2% milk complements the ice cream, creating a smooth blend. If you want a lower-calorie version, almond or oat milk can be good alternatives.

Lastly, the granulated sugar can be adjusted based on your sweetness preference. If you prefer a more natural sweetener, consider using honey or agave syrup. The orange zest enhances the flavor profile, providing an aromatic pop that brings the whole slush together. Don’t skip it! It adds an extra layer of brightness that makes this slush truly special.

Step-by-Step Instructions

  1. Start by preparing your ingredients. Gather 2 cups of orange juice, 1 cup of vanilla ice cream, and 1 cup of crushed ice. Make sure the ice is finely crushed, as larger chunks can make blending difficult.
  2. In a blender, combine the orange juice, vanilla ice cream, crushed ice, and 1/2 cup of milk. Add 1/4 cup of granulated sugar and 1 teaspoon of vanilla extract. If you like a sweeter slush, consider adding a bit more sugar at this stage.
  3. Add the zest of 1 orange to the blender. This step is crucial for enhancing the citrus flavor of your slush. Make sure not to include the bitter white pith—only the flavorful zest.
  4. Blend the mixture on medium-high speed for about 30-45 seconds. Stop once the ingredients are fully combined and the slush has a smooth, even consistency. If you notice large chunks of ice, blend for an additional 10-15 seconds. Avoid over-blending, as this can make the slush too liquidy.
  5. Once blended, taste the slush. If it needs more sweetness, add a little more sugar and blend for a few more seconds. If it’s too thick, you can add a splash of milk to reach your desired consistency.
  6. Pour the slush into glasses. This recipe typically serves 4, but you can easily double it for larger gatherings. Use a spoon to help guide the slush into the glasses if needed.
  7. Garnish each serving with fresh orange slices and mint leaves. The mint not only adds a pop of color but also a refreshing aroma that complements the citrus flavors beautifully.
  8. Serve immediately and enjoy! If you’ve made extra, you can refrigerate it for a short time, but it’s best enjoyed fresh.

Pro Tips for the Best Frozen Orange Creamsicle Slush

  • Don’t skip the orange zest! It’s a game-changer for flavor. Always zest before juicing to make it easier.
  • Use a high-powered blender for the best texture. A standard blender may struggle with ice, leading to uneven consistency. If you have a food processor, that can work too, but ensure the ice is finely crushed.
  • Adjust the ice-to-liquid ratio carefully. If your slush is too thick, it won’t blend well. Start with less ice and add more until you reach your preferred texture.
  • Be cautious with the sugar! Always start with the lower amount, as you can easily add more, but it’s hard to fix an overly sweet slush.
  • For a fun twist, consider adding a splash of coconut milk or a handful of fresh fruit like strawberries or pineapple. This not only enhances the flavor but also adds a beautiful color contrast.

Variations & Serving Ideas

There are countless ways to put a spin on your Frozen Orange Creamsicle Slush. Consider making a tropical version by adding in some pineapple juice or coconut milk for a delightful tropical twist. If you’re feeling adventurous, try incorporating a handful of frozen mango or peach slices for added sweetness. For a lighter version, swap out the vanilla ice cream for Greek yogurt for a creamy yet tangy alternative.

As for serving ideas, this refreshing slush pairs wonderfully with light summer dishes like grilled chicken skewers, fish tacos, or a simple salad topped with citrus vinaigrette. The bright, zesty flavors of the slush complement these dishes perfectly, making them an ideal pairing for a sunny day.

Storage, Make-Ahead & Reheating

This Frozen Orange Creamsicle Slush is best enjoyed fresh, but if you have leftovers, you can store them in an airtight container in the fridge for up to 2 days. Just keep in mind that the slush may lose some of its texture over time as the ice melts. It doesn’t freeze well, as the ice will turn into a solid block. If you must freeze it, blend again after thawing to restore the slushy consistency. This treat is best the day you make it, as the flavors meld together beautifully overnight, enhancing its deliciousness.

Frequently Asked Questions

Can I make Frozen Orange Creamsicle Slush ahead of time?

Yes — in fact, it tastes even better the next day as the flavors meld. However, it’s best to enjoy it fresh, as the texture can change if stored for too long. If you need to prepare it ahead, keep it in the fridge and re-blend before serving.

What kind of orange juice should I use?

For the best flavor, use freshly squeezed orange juice. However, if you’re short on time, opt for 100% pure store-bought juice without added sugars. This will ensure that your slush remains flavorful and refreshing.

Can I substitute the vanilla ice cream?

Absolutely! If you’re looking for a dairy-free option, coconut milk ice cream or a non-dairy vanilla ice cream can work wonderfully. They will still provide the creamy texture and sweetness you desire.

How can I adjust the sweetness of my slush?

You can easily adjust the sweetness by modifying the amount of sugar added. Start with 1/4 cup and taste the mixture before blending. If you prefer it sweeter, add more sugar gradually until it reaches your desired level.

What should I do if my slush is too thick?

If your slush is too thick, simply add a splash of milk or orange juice and blend again. This will help achieve a more drinkable consistency while maintaining the slushy texture. Adjust gradually to reach your preferred thickness.

Sun-Kissed Frozen Orange Cream Slush

Final Thoughts

The Frozen Orange Creamsicle Slush is a delightful blend of refreshing citrus and creamy goodness, making it a perfect treat for warm days or any time you crave a taste of nostalgia. The way the bright orange flavor dances with the creamy texture truly elevates this slush, transforming it into a satisfying escape from the everyday.

This is the kind of recipe I come back to again and again, especially when I’m looking to cool down or impress guests at a summer gathering. It’s simple to make and always brings smiles all around! I encourage you to try this recipe for yourself—don’t hesitate to share your results or even put your own spin on it. Happy slushing!

Print
clock clock iconcutlery cutlery iconflag flag iconfolder folder iconinstagram instagram iconpinterest pinterest iconfacebook facebook iconprint print iconsquares squares iconheart heart iconheart solid heart solid icon

Frozen Orange Creamsicle Slush


  • Author: Lily author
  • Total Time: 15 minutes
  • Yield: 4 servings 1x
Pin Recipe
Print Recipe

Description

This Frozen Orange Creamsicle Slush is a refreshing treat that combines creamy vanilla and zesty orange flavors. Perfect for hot summer days, it brings back nostalgic memories with every sip.


Ingredients

Scale
  • 2 cups orange juice (freshly squeezed or store-bought)
  • 1 cup vanilla ice cream
  • 1 cup crushed ice
  • 1/2 cup milk (whole or 2%)
  • 1/4 cup granulated sugar (adjust based on sweetness preference)
  • 1 teaspoon vanilla extract
  • Zest of 1 orange (for added flavor)
  • Fresh orange slices and mint leaves (for garnish)

Instructions

  1. Start by preparing your ingredients. Gather 2 cups of orange juice, 1 cup of vanilla ice cream, and 1 cup of crushed ice. Make sure the ice is finely crushed, as larger chunks can make blending difficult.
  2. In a blender, combine the orange juice, vanilla ice cream, crushed ice, and 1/2 cup of milk. Add 1/4 cup of granulated sugar and 1 teaspoon of vanilla extract. If you like a sweeter slush, consider adding a bit more sugar at this stage.
  3. Add the zest of 1 orange to the blender. This step is crucial for enhancing the citrus flavor of your slush. Make sure not to include the bitter white pith—only the flavorful zest.
  4. Blend the mixture on medium-high speed for about 30-45 seconds. Stop once the ingredients are fully combined and the slush has a smooth, even consistency. If you notice large chunks of ice, blend for an additional 10-15 seconds. Avoid over-blending, as this can make the slush too liquidy.
  5. Once blended, taste the slush. If it needs more sweetness, add a little more sugar and blend for a few more seconds. If it’s too thick, you can add a splash of milk to reach your desired consistency.
  6. Pour the slush into glasses. This recipe typically serves 4, but you can easily double it for larger gatherings. Use a spoon to help guide the slush into the glasses if needed.
  7. Garnish each serving with fresh orange slices and mint leaves. The mint not only adds a pop of color but also a refreshing aroma that complements the citrus flavors beautifully.
  8. Serve immediately and enjoy! If you’ve made extra, you can refrigerate it for a short time, but it's best enjoyed fresh.
  • Prep Time: 15 min
  • Cook Time: 0 min
  • Category: Dessert
  • Method: Blending
  • Cuisine: American

Nutrition

  • Serving Size: 1 serving
  • Calories: 200
  • Sugar: 30 g
  • Sodium: 50 mg
  • Fat: 5 g
  • Saturated Fat: 3 g
  • Unsaturated Fat: 2 g
  • Trans Fat: 0 g
  • Carbohydrates: 40 g
  • Fiber: 1 g
  • Protein: 2 g
  • Cholesterol: 20 mg

Keywords: Don't skip the orange zest! It's a game-changer for flavor. Always zest before juicing to make it easier.

Did you make this recipe?

Share a photo and tag us — we can't wait to see what you've made!

Zesty Lemon Poppy Seed Delight

One rainy afternoon, I found myself in my grandmother’s cozy kitchen, the kind that always smelled like warmth and love. She was whipping up her famous Lemon Poppy Seed Loaf, a recipe that had been passed down through generations. As the batter came together, the zesty aroma of fresh lemons filled the air, mingling perfectly with the nutty fragrance of poppy seeds. I can still picture her, apron-clad, as she expertly drizzled a vibrant citrus icing over the loaf, creating a glossy, sun-kissed finish that beckoned us to dive in. It was a moment that sparked my own passion for baking, and this recipe has become a cherished staple in my home ever since.

When you take a bite of this Lemon Poppy Seed Loaf, it’s like a burst of sunshine on your palate. The loaf is beautifully golden, with a tender crumb that melts in your mouth. Each slice is speckled with tiny poppy seeds, adding a delightful crunch that contrasts beautifully with the tangy sweetness of the lemon. And that citrus icing? It’s the finishing touch that elevates this loaf from ordinary to extraordinary, with its bright, zesty flavor dancing on your taste buds.

This recipe stands out because it embraces simplicity while delivering on flavor. I’ve added a hint of vanilla to the batter, enhancing the overall taste and making it even more indulgent. Trust me, once you make this Lemon Poppy Seed Loaf With Citrus Icing, it’ll become a go-to in your baking repertoire.

So, let me show you exactly how to make it!

Zesty Lemon Poppy Seed Delight

Why You’ll Love This Recipe

  • Moist and tender crumb that melts in your mouth, thanks to the perfect balance of butter and buttermilk.
  • Bright, zesty lemon flavor paired with crunchy poppy seeds, creating a delightful texture and taste experience.
  • Easy to whip up in just about an hour, perfect for last-minute gatherings or a cozy afternoon treat.
  • Budget-friendly with everyday ingredients, making it an accessible option for all home bakers.
  • The citrus icing adds a sweet tang that elevates the loaf, turning a simple recipe into a showstopper!

Ingredients

  • 1 ½ cups (190g) all-purpose flour
  • 1 teaspoon baking powder
  • ½ teaspoon baking soda
  • ½ teaspoon salt
  • 3 tablespoons poppy seeds
  • ½ cup (115g) unsalted butter, softened to room temperature
  • 1 cup (200g) granulated sugar
  • 2 large eggs
  • 1 teaspoon vanilla extract
  • 1 teaspoon lemon zest (from about 1 medium lemon)
  • ½ cup (120ml) buttermilk
  • 2 tablespoons fresh lemon juice

For the Citrus Icing:

  • 1 cup (120g) powdered sugar
  • 2 tablespoons fresh lemon juice
  • 1 tablespoon orange juice
  • 1 teaspoon lemon zest (for garnish, optional)

Let’s dive into the key ingredients that make this Lemon Poppy Seed Loaf so special. The all-purpose flour provides the structure and base for the loaf, while the baking powder and baking soda ensure it rises perfectly, giving the loaf a light texture. For a gluten-free variation, you could substitute the flour with a gluten-free all-purpose blend. Poppy seeds not only add a delightful crunch but also contribute to the unique flavor profile that pairs well with the citrus notes.

Unsalted butter is crucial for achieving the buttery richness that makes this loaf so moist. If you’re looking for a dairy-free option, coconut oil or a vegan butter can be used instead. The buttermilk is another essential component, providing acidity that activates the baking soda for a fluffy texture. If you don’t have buttermilk on hand, you can easily make a substitute by mixing ½ cup of milk with 1 tablespoon of vinegar or lemon juice and letting it sit for about 5 minutes.

Step-by-Step Instructions

  1. Preheat your oven to 350°F (175°C). Grease a 9×5-inch loaf pan or line it with parchment paper for easy removal later.
  2. In a medium mixing bowl, whisk together 1 ½ cups of all-purpose flour, 1 teaspoon of baking powder, ½ teaspoon of baking soda, ½ teaspoon of salt, and 3 tablespoons of poppy seeds. This helps to evenly distribute the baking agents and ensures a uniform rise.
  3. In a large mixing bowl, cream together ½ cup of softened unsalted butter and 1 cup of granulated sugar using an electric mixer on medium speed for about 3-4 minutes, until the mixture is light and fluffy. Make sure to scrape down the sides of the bowl occasionally.
  4. Add 2 large eggs, 1 teaspoon of vanilla extract, and 1 teaspoon of lemon zest to the creamed butter and sugar, mixing until fully combined. You want a smooth consistency, so ensure there are no lumps of butter.
  5. In a small bowl, combine ½ cup of buttermilk and 2 tablespoons of fresh lemon juice. Alternately add the dry ingredients and buttermilk mixture to the butter mixture, starting and ending with the dry ingredients. Mix just until combined; do not overmix, as this can lead to a dense loaf.
  6. Pour the batter into the prepared loaf pan. Smooth the top with a spatula, ensuring it’s even. Bake in the preheated oven for 50-60 minutes, or until a toothpick inserted in the center comes out clean. The edges should be lightly golden brown, and the center should feel just set.
  7. Once baked, remove the loaf from the oven and allow it to cool in the pan for about 10 minutes. Then, transfer it to a wire rack to cool completely. Resist the urge to slice too soon, as it will be crumbly if it’s still warm.
  8. While the loaf is cooling, prepare the citrus icing. In a medium bowl, whisk together 1 cup of powdered sugar, 2 tablespoons of fresh lemon juice, and 1 tablespoon of orange juice until smooth. If the icing is too thick, you can add a little more juice to reach your desired consistency.
  9. Once the loaf is completely cool, drizzle the citrus icing over the top. If you like, sprinkle with an additional teaspoon of lemon zest for an extra pop of flavor and color.

Pro Tips for the Best Lemon Poppy Seed Loaf With Citrus Icing

  • Be careful not to overmix your batter; this is a common mistake that can lead to a dense loaf. Mix just until the dry ingredients are incorporated for a light and fluffy texture.
  • Use room temperature ingredients, especially the butter and eggs. This helps to create a smoother batter and ensures even baking. Take your eggs out of the fridge about 30 minutes before you start.
  • For a more pronounced lemon flavor, consider adding a little lemon extract in addition to the zest and juice. Just a half teaspoon can elevate the citrus notes significantly.
  • When measuring your flour, spoon it into the measuring cup and level it off with a knife instead of scooping directly from the bag. This prevents packing and ensures you don’t end up with a dry loaf.
  • Invest in a good quality loaf pan; it makes a difference in heat distribution, which ensures even baking. If your pan is dark-coated, reduce the oven temperature by 25°F to prevent over-browning.

Variations & Serving Ideas

For a delightful twist, consider adding blueberries or raspberries to the batter for a fruity burst of flavor. You can also experiment with different citrus fruits—try lime or grapefruit zest and juice for a refreshing change. For a healthier option, substitute half of the all-purpose flour with whole wheat flour for added fiber without compromising too much on texture.

This Lemon Poppy Seed Loaf pairs beautifully with a light salad, such as a mixed greens salad with a vinaigrette, or a cup of tea for a cozy afternoon treat. It also complements a creamy cheese platter, as the acidity of the loaf balances rich cheeses perfectly. Lastly, a scoop of vanilla ice cream on the side creates a delightful contrast of temperatures and flavors!

Storage, Make-Ahead & Reheating

This Lemon Poppy Seed Loaf can be stored at room temperature for up to 3 days if wrapped tightly in plastic wrap. If you want to keep it longer, it freezes well for up to 3 months. To freeze, wrap the loaf tightly in plastic wrap and then in aluminum foil to prevent freezer burn.

When you’re ready to enjoy it again, simply thaw it in the fridge overnight. Reheat individual slices in the microwave for 15-20 seconds or in a toaster oven until warmed through. Interestingly, many people find that this loaf tastes even better the next day, as the flavors have time to meld!

Frequently Asked Questions

Can I make Lemon Poppy Seed Loaf With Citrus Icing ahead of time?

Yes — in fact, it tastes even better the next day! You can make the loaf a day in advance, allowing the flavors to develop. Just be sure to store it in an airtight container to maintain its moisture.

Can I substitute the poppy seeds?

Absolutely! If you don’t have poppy seeds on hand or prefer an alternative, you can use sesame seeds for a similar crunch or omit them entirely for a smooth loaf.

What can I use instead of buttermilk?

If you don’t have buttermilk, you can easily create a substitute by mixing ½ cup of milk (dairy or plant-based) with 1 tablespoon of vinegar or lemon juice. Let it sit for 5 minutes before using in the recipe.

How can I make this recipe gluten-free?

To make a gluten-free version of this Lemon Poppy Seed Loaf, substitute the all-purpose flour with a gluten-free all-purpose flour blend. Just ensure that the blend contains a binding agent like xanthan gum for the best results.

What is the best way to store leftover loaf?

Leftover Lemon Poppy Seed Loaf should be stored in an airtight container at room temperature for up to 3 days. For longer storage, wrap it tightly and freeze for up to 3 months. Thaw it before serving for the best texture.

Zesty Lemon Poppy Seed Delight

Final Thoughts

The Lemon Poppy Seed Loaf with Citrus Icing is truly a delightful treat that brings a burst of brightness to any occasion. The zesty lemon flavor combined with the subtle crunch of poppy seeds creates a satisfying balance, while the citrus icing adds a touch of sweetness that perfectly complements the loaf’s tanginess.

This is the kind of recipe I come back to again and again, especially when I want to brighten up a gloomy day or celebrate a small victory. The aroma that fills the kitchen as it bakes is absolutely heavenly! I encourage you to give this recipe a try; you might just find it becoming a beloved staple in your home. Don’t forget to share your results or even add your own unique twist—I can’t wait to see what you create!

Print
clock clock iconcutlery cutlery iconflag flag iconfolder folder iconinstagram instagram iconpinterest pinterest iconfacebook facebook iconprint print iconsquares squares iconheart heart iconheart solid heart solid icon

Lemon Poppy Seed Loaf


  • Author: Lily author
  • Total Time: 35 minute
  • Yield: 1 loaf 1x
Pin Recipe
Print Recipe

Description

This Lemon Poppy Seed Loaf is a delightful treat that combines zesty lemon flavor with crunchy poppy seeds. Topped with a citrus icing, it’s perfect for any occasion.


Ingredients

Scale
  • 1 ½ cups (190g) all-purpose flour
  • 1 teaspoon baking powder
  • ½ teaspoon baking soda
  • ½ teaspoon salt
  • 3 tablespoons poppy seeds
  • ½ cup (115g) unsalted butter, softened to room temperature
  • 1 cup (200g) granulated sugar
  • 2 large eggs
  • 1 teaspoon vanilla extract
  • 1 teaspoon lemon zest (from about 1 medium lemon)
  • ½ cup (120ml) buttermilk
  • 2 tablespoons fresh lemon juice
  • 1 cup (120g) powdered sugar
  • 2 tablespoons fresh lemon juice
  • 1 tablespoon orange juice
  • 1 teaspoon lemon zest (for garnish, optional)

Instructions

  1. Preheat your oven to 350°F (175°C). Grease a 9×5-inch loaf pan or line it with parchment paper for easy removal later.
  2. In a medium mixing bowl, whisk together 1 ½ cups of all-purpose flour, 1 teaspoon of baking powder, ½ teaspoon of baking soda, ½ teaspoon of salt, and 3 tablespoons of poppy seeds. This helps to evenly distribute the baking agents and ensures a uniform rise.
  3. In a large mixing bowl, cream together ½ cup of softened unsalted butter and 1 cup of granulated sugar using an electric mixer on medium speed for about 3-4 minutes, until the mixture is light and fluffy. Make sure to scrape down the sides of the bowl occasionally.
  4. Add 2 large eggs, 1 teaspoon of vanilla extract, and 1 teaspoon of lemon zest to the creamed butter and sugar, mixing until fully combined. You want a smooth consistency, so ensure there are no lumps of butter.
  5. In a small bowl, combine ½ cup of buttermilk and 2 tablespoons of fresh lemon juice. Alternately add the dry ingredients and buttermilk mixture to the butter mixture, starting and ending with the dry ingredients. Mix just until combined; do not overmix, as this can lead to a dense loaf.
  6. Pour the batter into the prepared loaf pan. Smooth the top with a spatula, ensuring it’s even. Bake in the preheated oven for 50-60 minutes, or until a toothpick inserted in the center comes out clean. The edges should be lightly golden brown, and the center should feel just set.
  7. Once baked, remove the loaf from the oven and allow it to cool in the pan for about 10 minutes. Then, transfer it to a wire rack to cool completely. Resist the urge to slice too soon, as it will be crumbly if it’s still warm.
  8. While the loaf is cooling, prepare the citrus icing. In a medium bowl, whisk together 1 cup of powdered sugar, 2 tablespoons of fresh lemon juice, and 1 tablespoon of orange juice until smooth. If the icing is too thick, you can add a little more juice to reach your desired consistency.
  9. Once the loaf is completely cool, drizzle the citrus icing over the top. If you like, sprinkle with an additional teaspoon of lemon zest for an extra pop of flavor and color.
  • Prep Time: 15 mins
  • Cook Time: 50-60 mins
  • Category: Dessert
  • Method: Baking
  • Cuisine: American

Nutrition

  • Serving Size: 1 slice
  • Calories: 200
  • Sugar: 15 g
  • Sodium: 150 mg
  • Fat: 8 g
  • Saturated Fat: 5 g
  • Unsaturated Fat: 3 g
  • Trans Fat: 0 g
  • Carbohydrates: 30 g
  • Fiber: 1 g
  • Protein: 3 g
  • Cholesterol: 40 mg

Keywords: Be careful not to overmix your batter; this is a common mistake that can lead to a dense loaf. Use room temperature ingredients for a smoother batter and even baking.

Did you make this recipe?

Share a photo and tag us — we can't wait to see what you've made!

  • Privacy Policy
  • Terms Of Service
  • Contact
  • About
  • GDPR

Copyright © 2025 Homesmad