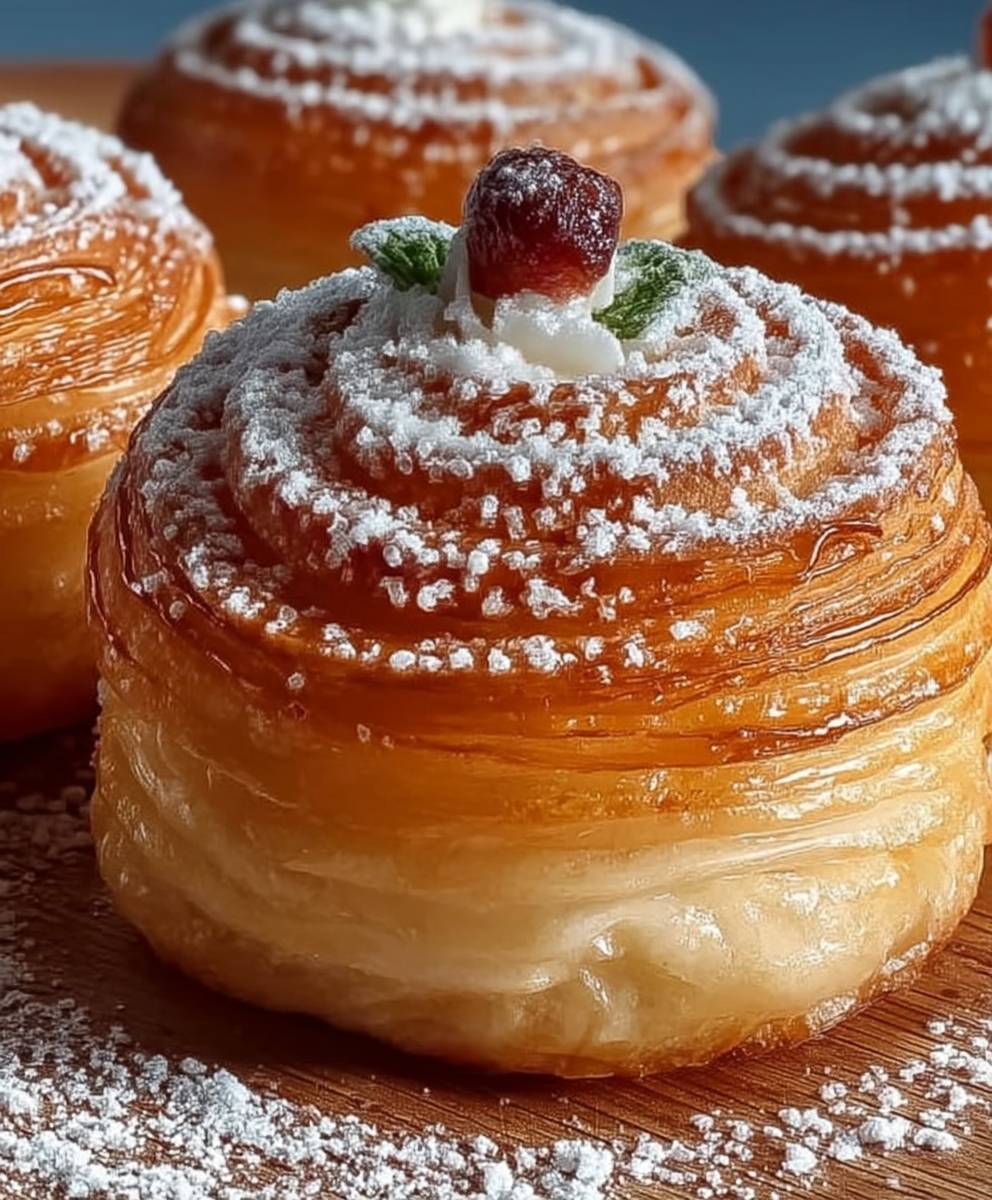
Delicious Cruffins: Prepare to be amazed! Imagine the flaky, buttery layers of a croissant, perfectly fused with the delightful, muffin-like shape. That’s precisely what you get with these irresistible treats, and I’m thrilled to share my foolproof recipe with you. This isn’t just another pastry; it’s a culinary adventure that will elevate your baking game and impress everyone who takes a bite.
While the cruffin is a relatively modern invention, born in the kitchens of San Francisco around 2013, it cleverly marries the time-honored techniques of croissant making with the convenient form factor of a muffin. This innovative pastry quickly gained popularity, becoming a social media sensation and a must-try item for foodies worldwide. The beauty of the cruffin lies in its versatility. You can fill it with everything from classic pastry cream and chocolate ganache to savory fillings like cheese and ham, making it perfect for breakfast, brunch, or a decadent dessert.
People adore delicious cruffins for their unique texture – the crisp, shattering layers give way to a soft, yielding interior. The buttery richness is simply divine, and the customizable fillings allow for endless flavor combinations. Plus, let’s be honest, they look absolutely stunning! Whether you’re a seasoned baker or just starting out, this recipe will guide you through each step, ensuring that you create bakery-worthy cruffins in your own kitchen. Get ready to experience pastry perfection!

Ingredients:
- For the Dough:
- 500g strong bread flour, plus extra for dusting
- 10g instant dried yeast
- 50g granulated sugar
- 10g salt
- 300ml lukewarm milk
- 1 large egg, lightly beaten
- 50g unsalted butter, softened
- For the Lamination:
- 250g unsalted butter, very cold
- For the Filling (Vanilla Cream):
- 500ml whole milk
- 1 vanilla bean, split and seeds scraped (or 1 tbsp vanilla extract)
- 100g granulated sugar
- 50g cornstarch
- 4 large egg yolks
- 50g unsalted butter, cold and cubed
- Pinch of salt
- For the Coating:
- 100g granulated sugar
- 5g ground cinnamon
- 50g unsalted butter, melted
Preparing the Dough:
- In a large bowl, whisk together the flour, yeast, sugar, and salt. Make sure the yeast and salt are on opposite sides of the bowl before mixing to avoid inhibiting the yeast.
- Add the lukewarm milk and beaten egg to the dry ingredients. Mix with a wooden spoon or your hands until a shaggy dough forms.
- Add the softened butter to the dough and knead for 8-10 minutes, either by hand on a lightly floured surface or in a stand mixer with a dough hook attachment, until the dough is smooth, elastic, and pulls away from the sides of the bowl. The dough should be slightly tacky but not sticky.
- Place the dough in a lightly oiled bowl, turning to coat. Cover with plastic wrap or a damp towel and let rise in a warm place for 1-1.5 hours, or until doubled in size. This first rise is crucial for developing flavor and structure.
Laminating the Dough:
- Once the dough has doubled, gently punch it down to release the air. Turn it out onto a lightly floured surface and roll it into a large rectangle, about 12×18 inches.
- Prepare the butter block: Place the very cold butter between two sheets of parchment paper. Using a rolling pin, pound and roll the butter into a rectangle about 6×8 inches and ¼ inch thick. The butter needs to be cold and firm but pliable enough to roll. If it gets too soft, return it to the refrigerator for a few minutes.
- Place the butter block in the center of the dough rectangle. Fold one side of the dough over the butter, then fold the other side over, creating a “book fold.” Pinch the edges to seal the butter inside.
- Rotate the dough 90 degrees. Roll it out again into a rectangle about 12×18 inches. Be gentle and even with your rolling to avoid tearing the dough or squeezing the butter out.
- Fold the dough into thirds again, like a letter. This is the first single fold. Wrap the dough tightly in plastic wrap and refrigerate for 30 minutes.
- Repeat the rolling and folding process two more times, for a total of three single folds, refrigerating the dough for 30 minutes between each fold. This chilling time is essential to keep the butter cold and prevent it from melting into the dough. This creates the flaky layers we want in our cruffins.
Preparing the Vanilla Cream Filling:
- In a medium saucepan, combine the milk and vanilla bean (or vanilla extract). Heat over medium heat until just simmering. Remove from heat and let steep for 15-20 minutes to infuse the milk with vanilla flavor. If using a vanilla bean, remove it and scrape the seeds back into the milk.
- In a separate bowl, whisk together the sugar, cornstarch, and egg yolks until pale and smooth.
- Slowly pour about one-third of the hot milk into the egg yolk mixture, whisking constantly to temper the eggs and prevent them from scrambling.
- Pour the tempered egg yolk mixture back into the saucepan with the remaining milk. Cook over medium heat, whisking constantly, until the mixture thickens and comes to a boil. Continue to cook for 1-2 minutes, whisking vigorously, to ensure the cornstarch is fully cooked.
- Remove from heat and stir in the cold butter and salt until smooth and glossy.
- Pour the vanilla cream into a clean bowl, cover with plastic wrap, pressing the plastic directly onto the surface of the cream to prevent a skin from forming. Refrigerate for at least 2 hours, or preferably overnight, until completely chilled.
Shaping and Baking the Cruffins:
- After the final fold and chilling, remove the dough from the refrigerator. On a lightly floured surface, roll the dough out into a large rectangle, about 12×24 inches, and about ¼ inch thick.
- Using a pizza cutter or sharp knife, cut the dough into strips about 1 inch wide.
- Gently stretch each strip of dough slightly. Starting at one end, roll the strip up tightly, like a jelly roll.
- Place the rolled dough, seam-side down, into a well-greased muffin tin. You can use standard or jumbo muffin tins, depending on the size of cruffins you prefer.
- Cover the muffin tin with plastic wrap and let the cruffins proof in a warm place for 30-45 minutes, or until they have puffed up slightly.
- Preheat your oven to 375°F (190°C).
- Bake the cruffins for 20-25 minutes, or until they are golden brown and cooked through.
- Let the cruffins cool in the muffin tin for a few minutes before transferring them to a wire rack to cool completely.
Filling and Coating the Cruffins:
- While the cruffins are cooling, prepare the cinnamon-sugar coating: In a small bowl, combine the granulated sugar and ground cinnamon. In another bowl, melt the butter.
- Once the cruffins are completely cool, use a piping bag fitted with a small round tip to fill them with the chilled vanilla cream. Insert the tip into the top of each cruffin and pipe in the cream until it is generously filled. You can also use a small knife to create a pocket for the cream.
- Dip the top of each cruffin in the melted butter, then immediately dip it in the cinnamon-sugar mixture, coating it evenly.
- Serve the cruffins immediately and enjoy! They are best enjoyed fresh, but can be stored in an airtight container at room temperature for up to 2 days.
Conclusion:
And there you have it! I truly believe this recipe for Delicious Cruffins is a must-try for any baking enthusiast, whether you’re a seasoned pro or just starting your culinary journey. The combination of flaky croissant layers and the delightful muffin shape creates a truly unique and unforgettable treat. It’s the perfect balance of textures and flavors, guaranteed to impress your friends and family.
But why is it *really* a must-try? Because it’s more than just a recipe; it’s an experience. The process of laminating the dough, creating those beautiful layers, is incredibly satisfying. And the aroma that fills your kitchen as these beauties bake is simply divine. Plus, the end result is so visually stunning, you’ll feel like a professional pastry chef!
Beyond the sheer deliciousness, these Cruffins are incredibly versatile. For a simple yet elegant presentation, dust them with powdered sugar and serve alongside a cup of freshly brewed coffee or tea. Imagine enjoying one of these warm, flaky treats on a crisp autumn morning – pure bliss!
But don’t stop there! The possibilities are endless. For a more decadent experience, try filling them with pastry cream, chocolate ganache, or even a dollop of your favorite fruit jam. A lemon curd filling would add a bright and tangy twist, while a Nutella filling would satisfy any chocolate craving. You could even experiment with savory fillings like ham and cheese or spinach and feta for a delightful brunch option.
Consider these variations:
* Berry Bliss Cruffins: Add fresh raspberries or blueberries to the dough before baking for a burst of fruity flavor.
* Chocolate Chip Cruffins: Fold in chocolate chips for a classic and comforting treat.
* Cinnamon Sugar Cruffins: Roll the baked Cruffins in melted butter and then in a mixture of cinnamon and sugar for a sweet and spicy delight.
* Savory Herb Cruffins: Incorporate chopped fresh herbs like rosemary, thyme, or chives into the dough for a savory twist.
These are just a few ideas to get you started. Feel free to get creative and experiment with your own favorite flavors and fillings. The beauty of this recipe is that it’s a blank canvas for your culinary imagination.
I’m so excited for you to try this recipe and experience the joy of baking your own Delicious Cruffins. I know you’ll love them as much as I do.
So, what are you waiting for? Gather your ingredients, preheat your oven, and get ready to embark on a baking adventure! And most importantly, don’t forget to share your creations with me! I’d love to see your photos and hear about your experiences. Tag me on social media or leave a comment below. I can’t wait to see what delicious variations you come up with! Happy baking!
Delicious Cruffins: The Ultimate Guide to Baking and Enjoying Them
Flaky, croissant-muffin hybrids filled with luscious vanilla cream and coated in cinnamon sugar. A delightful treat worth the effort!
Ingredients
- 500g strong bread flour, plus extra for dusting
- 10g instant dried yeast
- 50g granulated sugar
- 10g salt
- 300ml lukewarm milk
- 1 large egg, lightly beaten
- 50g unsalted butter, softened
- 250g unsalted butter, very cold
- 500ml whole milk
- 1 vanilla bean, split and seeds scraped (or 1 tbsp vanilla extract)
- 100g granulated sugar
- 50g cornstarch
- 4 large egg yolks
- 50g unsalted butter, cold and cubed
- Pinch of salt
- 100g granulated sugar
- 5g ground cinnamon
- 50g unsalted butter, melted
Instructions
- In a large bowl, whisk together the flour, yeast, sugar, and salt. Make sure the yeast and salt are on opposite sides of the bowl before mixing to avoid inhibiting the yeast.
- Add the lukewarm milk and beaten egg to the dry ingredients. Mix with a wooden spoon or your hands until a shaggy dough forms.
- Add the softened butter to the dough and knead for 8-10 minutes, either by hand on a lightly floured surface or in a stand mixer with a dough hook attachment, until the dough is smooth, elastic, and pulls away from the sides of the bowl. The dough should be slightly tacky but not sticky.
- Place the dough in a lightly oiled bowl, turning to coat. Cover with plastic wrap or a damp towel and let rise in a warm place for 1-1.5 hours, or until doubled in size. This first rise is crucial for developing flavor and structure.
- Once the dough has doubled, gently punch it down to release the air. Turn it out onto a lightly floured surface and roll it into a large rectangle, about 12×18 inches.
- Prepare the butter block: Place the very cold butter between two sheets of parchment paper. Using a rolling pin, pound and roll the butter into a rectangle about 6×8 inches and ¼ inch thick. The butter needs to be cold and firm but pliable enough to roll. If it gets too soft, return it to the refrigerator for a few minutes.
- Place the butter block in the center of the dough rectangle. Fold one side of the dough over the butter, then fold the other side over, creating a “book fold.” Pinch the edges to seal the butter inside.
- Rotate the dough 90 degrees. Roll it out again into a rectangle about 12×18 inches. Be gentle and even with your rolling to avoid tearing the dough or squeezing the butter out.
- Fold the dough into thirds again, like a letter. This is the first single fold. Wrap the dough tightly in plastic wrap and refrigerate for 30 minutes.
- Repeat the rolling and folding process two more times, for a total of three single folds, refrigerating the dough for 30 minutes between each fold. This chilling time is essential to keep the butter cold and prevent it from melting into the dough. This creates the flaky layers we want in our cruffins.
- In a medium saucepan, combine the milk and vanilla bean (or vanilla extract). Heat over medium heat until just simmering. Remove from heat and let steep for 15-20 minutes to infuse the milk with vanilla flavor. If using a vanilla bean, remove it and scrape the seeds back into the milk.
- In a separate bowl, whisk together the sugar, cornstarch, and egg yolks until pale and smooth.
- Slowly pour about one-third of the hot milk into the egg yolk mixture, whisking constantly to temper the eggs and prevent them from scrambling.
- Pour the tempered egg yolk mixture back into the saucepan with the remaining milk. Cook over medium heat, whisking constantly, until the mixture thickens and comes to a boil. Continue to cook for 1-2 minutes, whisking vigorously, to ensure the cornstarch is fully cooked.
- Remove from heat and stir in the cold butter and salt until smooth and glossy.
- Pour the vanilla cream into a clean bowl, cover with plastic wrap, pressing the plastic directly onto the surface of the cream to prevent a skin from forming. Refrigerate for at least 2 hours, or preferably overnight, until completely chilled.
- After the final fold and chilling, remove the dough from the refrigerator. On a lightly floured surface, roll the dough out into a large rectangle, about 12×24 inches, and about ¼ inch thick.
- Using a pizza cutter or sharp knife, cut the dough into strips about 1 inch wide.
- Gently stretch each strip of dough slightly. Starting at one end, roll the strip up tightly, like a jelly roll.
- Place the rolled dough, seam-side down, into a well-greased muffin tin. You can use standard or jumbo muffin tins, depending on the size of cruffins you prefer.
- Cover the muffin tin with plastic wrap and let the cruffins proof in a warm place for 30-45 minutes, or until they have puffed up slightly.
- Preheat your oven to 375°F (190°C).
- Bake the cruffins for 20-25 minutes, or until they are golden brown and cooked through.
- Let the cruffins cool in the muffin tin for a few minutes before transferring them to a wire rack to cool completely.
- While the cruffins are cooling, prepare the cinnamon-sugar coating: In a small bowl, combine the granulated sugar and ground cinnamon. In another bowl, melt the butter.
- Once the cruffins are completely cool, use a piping bag fitted with a small round tip to fill them with the chilled vanilla cream. Insert the tip into the top of each cruffin and pipe in the cream until it is generously filled. You can also use a small knife to create a pocket for the cream.
- Dip the top of each cruffin in the melted butter, then immediately dip it in the cinnamon-sugar mixture, coating it evenly.
- Serve the cruffins immediately and enjoy! They are best enjoyed fresh, but can be stored in an airtight container at room temperature for up to 2 days.
Notes
- Butter Temperature is Key: The success of cruffins relies heavily on keeping the butter cold during the lamination process. If the butter gets too soft, it will melt into the dough instead of creating distinct layers.
- Chilling Time: Don’t skip the chilling times between folds. This allows the gluten to relax and the butter to firm up.
- Vanilla Bean vs. Extract: Using a vanilla bean will give the cream a more intense vanilla flavor, but vanilla extract works just fine.
- Proofing: Proofing the cruffins before baking allows them to rise properly and become light and airy.
- Storage: Cruffins are best enjoyed fresh, but can be stored in an airtight container at room temperature for up to 2 days. The cinnamon-sugar coating may become slightly sticky over time.