• Skip to primary navigation
  • Skip to main content
  • Skip to primary sidebar
Homesmad

Homesmad

  • Home
  • Breakfast & Brunch
  • Appetizers & Snacks
  • Dinner
  • Dessert
  • About
  • Privacy Policy
  • Contact
Homesmad
  • Home
  • Breakfast & Brunch
  • Appetizers & Snacks
  • Dinner
  • Dessert
  • About
  • Privacy Policy
  • Contact

Delicious Easy Lasagna Soup Recipe – Family Favorite Dinner

October 1, 2025 by Lily author

Easy Lasagna Soup offers all the rich, hearty flavors of your beloved baked Italian classic, but in a fraction of the time and with far less fuss. We all adore the comforting layers of pasta, savory meat, creamy cheese, and vibrant tomato sauce that make traditional lasagna a true culinary masterpiece. However, the lengthy preparation and baking time often reserve this delightful dish for special occasions or dedicated weekend projects.

What if I told you there’s a way to capture that same irresistible essence in a single pot, ready to warm your soul on any busy weeknight?

While classic lasagna boasts centuries of Italian heritage, this ingenious soup reinterprets that beloved tradition for the modern kitchen. It’s a testament to how classic comfort food can evolve, marrying the warmth of a rustic soup with the iconic flavors of Italy’s most famous layered pasta dish. People absolutely adore this dish because it delivers the ultimate comfort without the lengthy assembly. Imagine tender pasta fragments, savory ground meat, rich tomato sauce, and creamy ricotta, all mingling harmoniously in a deeply satisfying broth. This

Easy Lasagna Soup truly simplifies weeknight dining without compromising on taste or texture, making it an instant family favorite.

Delicious Easy Lasagna Soup Recipe - Family Favorite Dinner this RECIPE

Ingredients:

  • 1 pound Ground Italian Sausage: I love using a mild or medium Italian sausage for its built-in seasoning, but feel free to go spicy if you prefer! If you can’t find Italian sausage, lean ground beef (80/20 or 85/15) also works wonderfully; you’ll just want to add a bit more seasoning like fennel seeds, oregano, and basil to mimic that Italian flavor profile.
  • 1 tablespoon Olive Oil: Just a touch to get us started, especially if your sausage isn’t very fatty, or if you’re using lean ground beef.
  • 1 large Yellow Onion: Diced finely. This is the aromatic backbone of our soup, providing a sweet, savory depth as it caramelizes slightly.
  • 4 cloves Garlic: Minced. Garlic is non-negotiable in Italian-inspired dishes, adding a pungent, irresistible aroma and flavor that truly brightens the whole soup.
  • 1 (28-ounce) can Crushed Tomatoes: The heart of our tomato base. Crushed tomatoes provide a robust, slightly chunky texture that holds up beautifully in the soup. I always opt for good quality, pure crushed tomatoes.
  • 1 (15-ounce) can Diced Tomatoes: Undrained. These add more textural variety and a fresh tomato burst to the soup. If you prefer a smoother soup, you can use two cans of crushed tomatoes instead, but I enjoy the little chunks.
  • 6 cups Chicken Broth: Or vegetable broth, if you prefer. This is our main liquid component. I recommend a low-sodium broth so we can control the seasoning ourselves.
  • 1 tablespoon Dried Basil: Or 3 tablespoons fresh, chopped. Dried basil infuses its sweet, peppery flavor throughout the simmering process.
  • 1 teaspoon Dried Oregano: A classic Italian herb that adds a slightly bitter, earthy counterpoint to the basil and tomatoes.
  • 1/2 teaspoon Red Pepper Flakes: Optional, but I highly recommend them for a subtle warmth and a touch of excitement. Adjust to your spice preference!
  • 1 teaspoon Sugar: Or to taste. A small amount of sugar helps to balance the acidity of the tomatoes and really makes their flavor pop.
  • 12-15 Lasagna Noodles: Broken into 2-inch pieces. This is where the “lasagna” magic happens! We’re using the traditional pasta, just in a soup-friendly size. About 8-10 ounces dry pasta.
  • 1/2 cup Heavy Cream: A luxurious touch that adds richness and helps to soften the acidity of the tomatoes, making the soup incredibly smooth and comforting.
  • Salt and Freshly Ground Black Pepper: To taste. Essential for bringing all the flavors into harmony. We’ll season at various stages.

For the Creamy Ricotta Topping (Essential for the “Lasagna” Experience!):

  • 15 ounces Ricotta Cheese: Whole milk ricotta is best for its creamy texture and rich flavor.
  • 1/2 cup Grated Parmesan Cheese: Plus more for garnish. The salty, nutty Parmesan is a perfect complement to the mild ricotta.
  • 1/4 cup Fresh Parsley: Chopped. Adds a vibrant, fresh, herbaceous note to the topping.
  • 1/4 cup Fresh Basil: Chopped. Reinforces the basil flavor in the soup and adds a beautiful green fleck.
  • 1/4 teaspoon Garlic Powder: Or one small minced clove of fresh garlic for an extra kick.
  • Pinch of Salt and Pepper: To taste. Just enough to season the topping itself.

Optional Garnishes:

  • Extra grated Parmesan cheese
  • Fresh basil leaves, torn
  • Fresh parsley, chopped
  • A drizzle of good quality extra virgin olive oil

Gathering and Prepping Our Ingredients for Easy Lasagna Soup

  1. The Initial Chop: Before we even think about turning on the stove, let’s get all our ingredients prepped. This makes the cooking process so much smoother and more enjoyable. First, grab your large yellow onion and carefully dice it into small, uniform pieces. Aim for about a quarter-inch dice; this ensures it melts beautifully into the soup without being overly chunky. Next, peel and mince your garlic cloves. I personally love to use a garlic press for speed, but a finely minced chop works just as well. Having these aromatics ready to go is key.
  2. Breaking Down the Lasagna: Now, for the star of the show – the lasagna noodles! This is perhaps the most unique step for our “Easy Lasagna Soup.” Take your dry lasagna noodles and break them into manageable, bite-sized pieces, roughly 1.5 to 2 inches in length. I usually just snap them with my hands right over the pot, but you can also use a sharp knife if you prefer neater edges. Be careful when breaking them, as sometimes they can snap unpredictably. Place these broken noodles aside; we’ll add them later. Having them pre-broken means they’ll cook evenly in the soup and be much easier to eat with a spoon!
  3. Measure and Assemble: Go ahead and measure out all your dried herbs – the basil, oregano, and red pepper flakes (if using). Open your cans of crushed and diced tomatoes and have them ready. Measure your chicken broth. By having everything laid out and measured, we create what professional chefs call “mise en place,” which simply means “everything in its place.” This organized approach significantly reduces stress during cooking and ensures you don’t forget an ingredient. Trust me, it makes a huge difference, especially with a dish as flavorful as our lasagna soup!
  4. Whipping Up the Ricotta Topping: While it’s not going directly into the soup during the main cooking phase, preparing the ricotta topping beforehand is a smart move. In a medium bowl, combine your whole milk ricotta cheese, grated Parmesan cheese, freshly chopped parsley, freshly chopped basil, and a pinch of garlic powder, salt, and pepper. Gently stir everything together until it’s just combined. You don’t want to overmix it; just enough so the herbs and cheese are evenly distributed. This mixture will be thick and creamy, ready to be dolloped onto each serving, providing that signature cheesy, herbaceous layer that makes lasagna so irresistible. Cover and refrigerate until serving.

Building the Hearty Flavor Base

  1. Browning Our Italian Sausage: Grab a large pot or a Dutch oven – something with a heavy bottom that can hold a good amount of liquid. Place it over medium-high heat and add the tablespoon of olive oil, if using. Once the oil shimmers, add your pound of ground Italian sausage. Using a wooden spoon or a spatula, break the sausage apart as it cooks. We’re looking for it to brown evenly, getting some lovely caramelized bits, which are crucial for flavor. This step usually takes about 5-7 minutes. Once it’s fully cooked through and beautifully browned, drain off any excess fat from the pot. A little bit of fat is fine and adds to the richness, but we don’t want an overly greasy soup. You’ll notice the incredible aroma already starting to fill your kitchen – that’s the Italian sausage doing its job!
  2. Sautéing the Aromatics: Reduce the heat to medium. Add your diced yellow onion to the pot with the browned sausage (and any residual fat). Sauté the onion, stirring occasionally, for about 5-7 minutes, until it softens and becomes translucent. You’ll start to notice its sweetness as it cooks down. At this point, add your minced garlic. Stir it in and cook for just about 1 minute more, until it becomes fragrant. Be careful not to burn the garlic, as burnt garlic can taste bitter and will spoil the lovely flavor we’re building. The scent of onion and garlic mingling with the sausage is absolutely divine and truly forms the aromatic foundation of our soup.
  3. Toasting the Tomato Paste: This is a small but mighty step that adds incredible depth! Push the sausage and onion mixture to one side of the pot, creating a small clearing. Add your tablespoon of tomato paste to this cleared space. Let it cook for 1-2 minutes, stirring it occasionally, allowing it to deepen in color and caramelize slightly. This process, often called “toasting” or “cooking out” the tomato paste, concentrates its flavor and removes any raw, tinny taste. Then, stir the tomato paste into the sausage and onion mixture, coating everything.
  4. Introducing Our Tomatoes and Seasonings: Now, it’s time to bring in the stars of our tomato base. Pour in the 28-ounce can of crushed tomatoes and the 15-ounce can of diced tomatoes (undrained). Stir everything together. Next, add your dried basil, dried oregano, and red pepper flakes (if using). Don’t forget that little bit of sugar – it’s a secret weapon to balance the acidity of the tomatoes and really makes their flavor sing. Stir all these wonderful ingredients together until they are well combined.

Simmering Our Delicious Lasagna Soup

  1. The Liquid Foundation: Pour in your 6 cups of chicken broth. Give everything a good stir, making sure no bits are stuck to the bottom of the pot. Bring the soup mixture to a strong simmer over medium-high heat. Once it’s actively simmering, reduce the heat to medium-low, cover the pot, and let it gently simmer for at least 15-20 minutes. This simmering time is crucial! It allows all the flavors to meld and deepen, creating a truly harmonious and rich base for our “Easy Lasagna Soup.” You’ll notice the kitchen filling with the most inviting, comforting aromas.
  2. Adding the Lasagna Noodles: After our soup has had a good, long simmer, remove the lid. Now, it’s time for our broken lasagna noodles! Carefully add them to the simmering soup. Stir them in well, making sure they are fully submerged in the liquid. This prevents them from sticking together or to the bottom of the pot.
  3. Cooking the Pasta to Perfection: Continue to simmer the soup, uncovered, for about 8-12 minutes, or until the lasagna noodles are al dente – meaning they’re tender but still have a slight bite to them. It’s important to stir frequently during this stage, especially every minute or so, to prevent the pasta from sticking. Lasagna noodles can be quite starchy and prone to clumping, so consistent stirring is your friend here! The pasta will absorb some of the liquid, thickening the soup slightly. Keep an eye on it, as cooking times can vary depending on the thickness of your noodles and your stove.
  4. Adding the Creamy Finish and Final Seasoning: Once the pasta is cooked, reduce the heat to low. Stir in the 1/2 cup of heavy cream. This adds an incredible richness and a velvety texture to the soup, rounding out all the flavors beautifully. Taste the soup at this point. Now is the time to adjust the seasoning. Add salt and freshly ground black pepper to your preference. Remember, the amount of salt needed will depend on the sodium content of your broth and Italian sausage. You might find you need a good amount of salt to truly make all those flavors pop.
  5. A Moment to Rest (Optional but Recommended): Once the cream is stirred in and the seasoning is perfect, remove the pot from the heat. I like to let the soup sit, uncovered, for about 5-10 minutes before serving. This brief resting period allows the flavors to settle and intensify even further, and the soup thickens ever so slightly to that perfect, comforting consistency. It’s a small step that makes a big difference in the overall depth of flavor.

Serving and Enjoying Your Easy Lasagna Soup

  1. Ladle It Up! Your “Easy Lasagna Soup” is now ready to be enjoyed! Carefully ladle generous portions of the hot, fragrant soup into individual serving bowls. Make sure each bowl gets a good mix of sausage, tomatoes, and plenty of those tender lasagna noodle pieces. The steam rising from the bowl will be absolutely intoxicating – a testament to the deliciousness you’ve created.
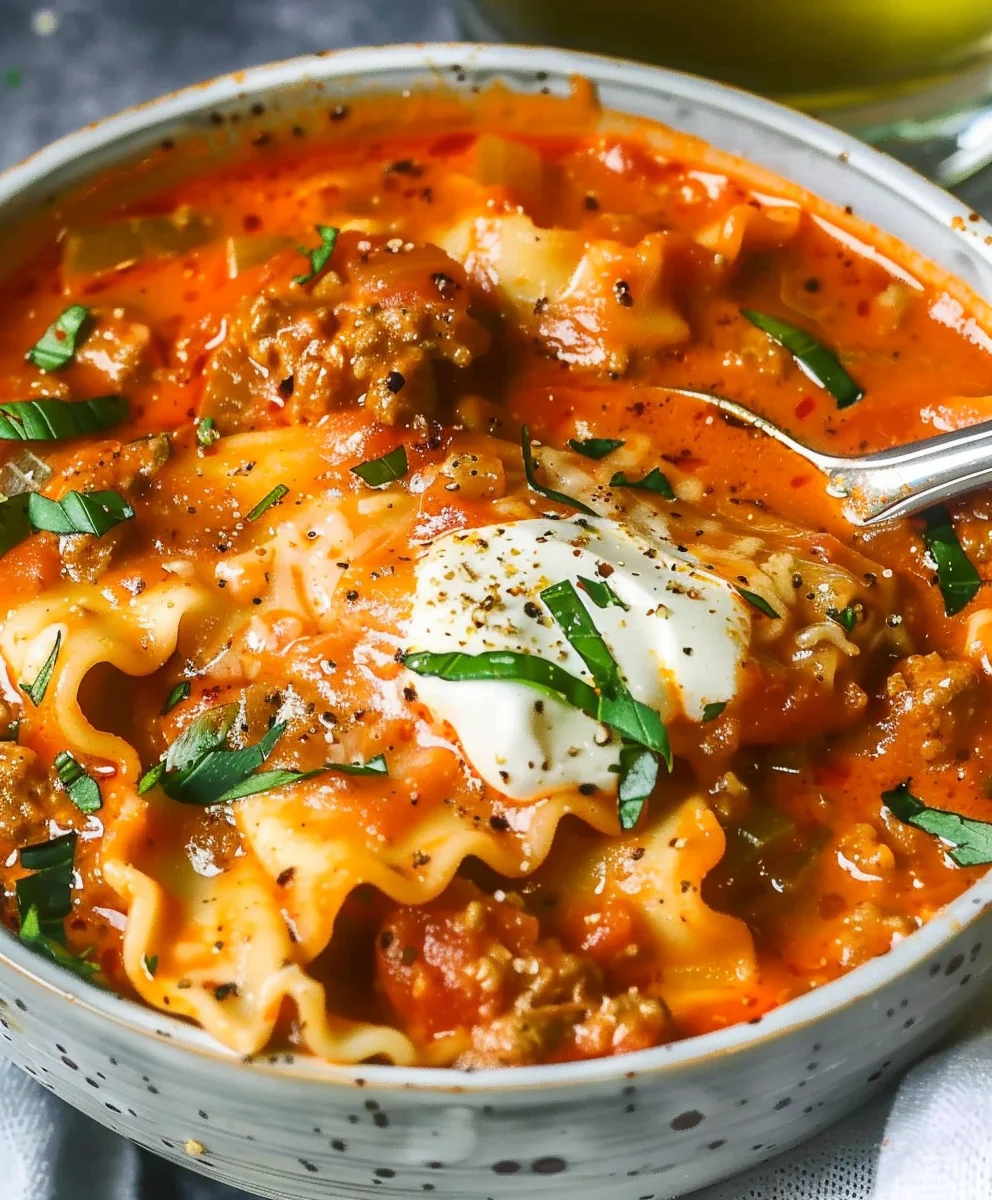
  2. The Signature Ricotta Dollop: Now for the truly “lasagna” experience! Take your prepared ricotta topping from the fridge. Place a generous dollop (or two!) of this creamy, herbed ricotta mixture right in the center of each bowl of hot soup. As the hot soup warms the ricotta, it will gently melt and infuse its creamy, cheesy goodness into every spoonful. This isn’t just a garnish; it’s a crucial component that provides a delightful textural and flavor contrast to the rich tomato base.
  3. Final Flourishes and Garnish: To complete the presentation and add extra bursts of flavor, I always recommend a few final garnishes. Sprinkle a little extra grated Parmesan cheese over the ricotta. For a fresh, vibrant touch, scatter some freshly torn basil leaves or chopped parsley over the top. A tiny drizzle of good quality extra virgin olive oil can also add a lovely aromatic finish.
  4. Serve Immediately: This “Easy Lasagna Soup” is best served hot, allowing the ricotta to gently melt into the soup as you eat. Encourage everyone to stir the ricotta into their soup as they enjoy it, blending those incredible creamy, herbaceous notes with the hearty tomato broth.
  5. Storage and Reheating Tips: If you happen to have any leftovers (which is a rare occurrence in my house!), store the soup in an airtight container in the refrigerator for up to 3-4 days. A quick note: the lasagna noodles will continue to absorb liquid as the soup sits. This means the soup will be much thicker upon reheating. To thin it out, simply add a splash of chicken broth or even a little water when reheating on the stovetop or in the microwave, stirring until it reaches your desired consistency. The ricotta topping is best stored separately and added fresh to each serving, but if you have soup with the topping already mixed in, it will still be delicious.

Enjoy every comforting spoonful of your homemade Easy Lasagna Soup! It truly captures all the beloved flavors of traditional lasagna in a much simpler, quicker, and wonderfully slurpable form. It’s a fantastic weeknight meal that still feels incredibly special.

Delicious Easy Lasagna Soup Recipe - Family Favorite Dinner

Conclusion:

And there you have it, my friends! We’ve reached the end of our journey, but truly, it’s just the beginning of your delicious adventure with what I confidently call one of the most comforting and satisfying dishes you’ll ever make. This isn’t just any soup; it’s a revelation, transforming the beloved classic lasagna into a convenient, delightful, and incredibly flavorful bowl of warmth. If you’ve been searching for that perfect weeknight meal that tastes like you’ve spent hours in the kitchen but actually comes together with surprising ease, then this recipe for Easy Lasagna Soup is your answer. It captures all the rich, savory notes, the tender pasta, and the creamy, cheesy goodness of traditional lasagna without any of the fuss of layering. Imagine a chilly evening, a steaming bowl cradled in your hands, each spoonful delivering a symphony of robust tomato, fragrant herbs, and perfectly cooked noodles, all bathed in a luxurious, cheesy broth. That, my friends, is the magic we’ve bottled up in this recipe.

I truly believe this recipe is a must-try because it elegantly solves so many common dinner dilemmas. Are you short on time but craving something substantial and homemade? This soup is your champion. Do you love the flavors of Italian cuisine but dread the multi-step process often involved? This streamlined version is pure genius. Furthermore, it’s incredibly adaptable, making it a fantastic staple for any household. The aroma alone as it simmers on the stove is enough to gather everyone around, promising a meal that nourishes both body and soul. It’s hearty without being heavy, flavorful without being complicated, and utterly irresistible no matter the season. Seriously, prepare to be amazed at how quickly this becomes a regular request in your home!

Now, let’s talk about making this already incredible soup even more uniquely yours! The beauty of this recipe lies in its versatility, and I highly encourage you to experiment with various serving suggestions and exciting variations to suit your taste buds and what you have on hand.

Fantastic Serving Suggestions:
  • The Classic Topping Medley: No bowl of lasagna-inspired anything is complete without a generous dollop of creamy ricotta cheese, a sprinkle of freshly grated Parmesan, and a handful of shredded mozzarella. As they melt into the hot soup, they create pockets of irresistible richness. A dash of red pepper flakes adds a delightful, subtle kick, and a garnish of fresh basil or parsley elevates both the flavor and presentation.

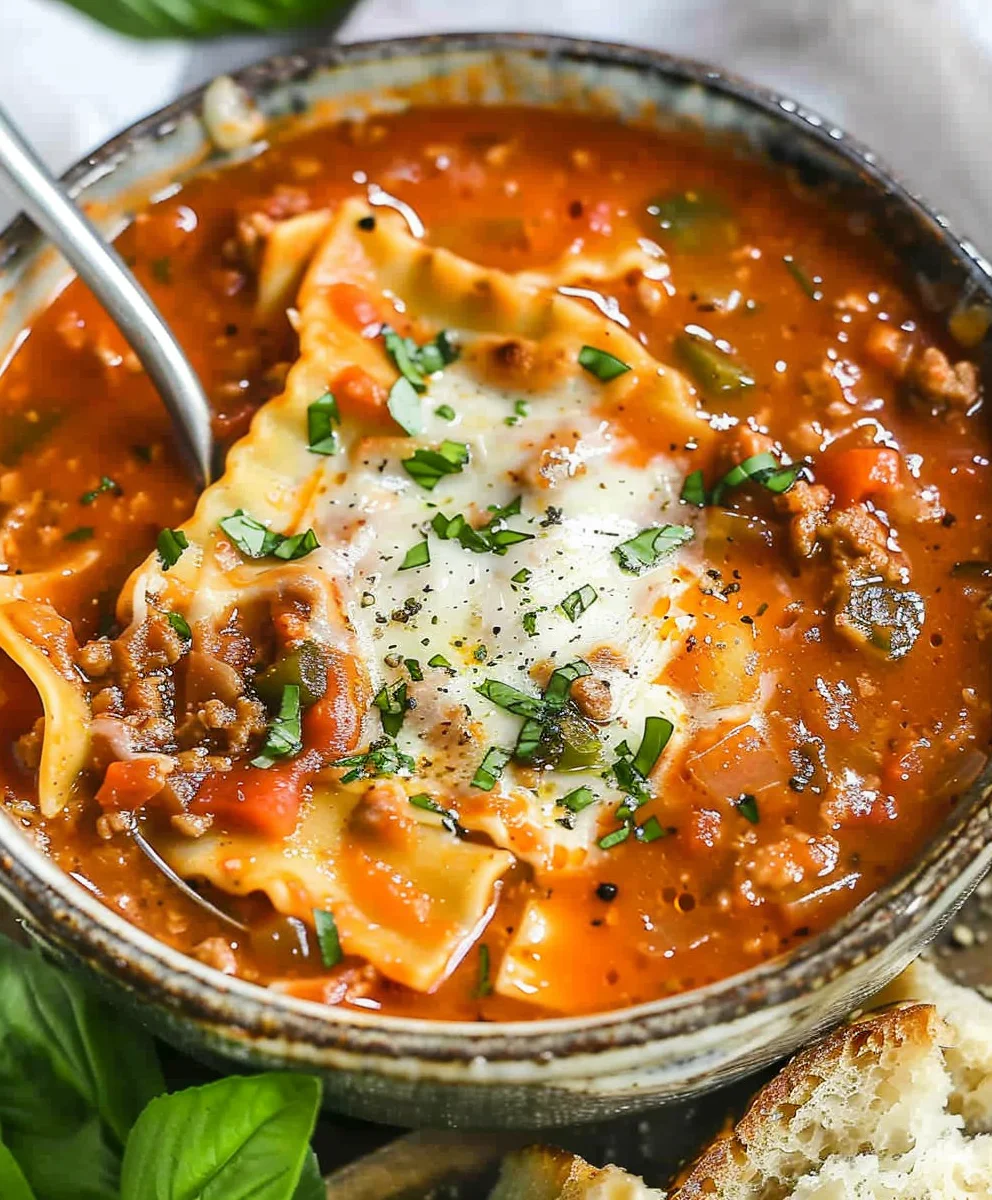
  • Crusty Bread Companion: Always, always serve this soup with some warm, crusty bread or garlic bread. It’s perfect for soaking up every last drop of that incredible broth and adds a wonderful textural contrast.

  • Side Salad Freshness: A simple, crisp green salad with a light vinaigrette makes for a perfect counterpoint, adding freshness and balance to the rich flavors of the soup.

Exciting Recipe Variations:
  • Meat Lover’s Dream: While my recipe often features ground beef or Italian sausage, feel free to swap in ground turkey, ground chicken, or even a mix of meats. If using Italian sausage, mild or hot varieties can add distinct flavor profiles. Brown it well before adding your aromatics for maximum depth.

  • Vegetarian Feast: This soup lends itself beautifully to a meatless rendition. Sauté diced mushrooms, zucchini, and bell peppers with your onions and garlic. You could also add a can of drained and rinsed lentils for extra protein and heartiness, or a generous amount of fresh spinach or kale wilts down perfectly into the hot soup just before serving.

  • Spice It Up: If you’re a fan of heat, don’t hesitate to increase the red pepper flakes or add a pinch of cayenne pepper with the seasonings. A swirl of your favorite hot sauce at the table can also transform each individual bowl.

  • Cheesy Indulgence: Beyond the initial cheese additions, you can experiment with other Italian cheeses. A touch of provolone adds a lovely tang, or a smoked mozzarella can introduce a deeper, more complex note. You could even stir in a spoonful of cream cheese or mascarpone at the end for an extra creamy, luxurious broth.

  • Noodle Know-How: While broken lasagna noodles are key to the experience, if you’re in a pinch, other short pasta shapes like rotini, penne, or farfalle would also work wonderfully, though you might lose a bit of that true “lasagna” feel.

So, what are you waiting for? I’ve shared all my secrets and now it’s your turn to bring this incredible Easy Lasagna Soup to life in your own kitchen. Trust me, the joy you’ll feel from creating something so delicious and comforting with such minimal effort is truly rewarding. I absolutely cannot wait for you to experience the rich flavors and the sheer delight of this dish. Once you’ve made it, please, please come back and share your experience with me! Did you add a unique twist? What did your family think? Your feedback and stories inspire not just me, but other home cooks who are looking for their next favorite meal. Leave a comment, tell us your serving suggestions, or how you made it uniquely yours. Let’s build a community around delicious food and shared kitchen triumphs. Happy cooking, everyone – I’m so excited for you to dive into this bowl of pure comfort!


Delicious Easy Lasagna Soup

Delicious Easy Lasagna Soup

Enjoy all the comforting, hearty flavors of classic lasagna in a single pot with this easy-to-make soup. Featuring savory ground beef, tender pasta, rich tomato sauce, and creamy cheese, it’s a family-favorite weeknight dinner that delivers ultimate comfort without the fuss.

Prep Time
20 Minutes

Cook Time
60 Minutes

Total Time
80 Minutes

Servings
6 servings

Ingredients

  • 1 tablespoon olive oil
  • 1 medium onion, finely diced
  • 1 pound ground beef, 80/20
  • 5 cloves garlic, minced
  • ½ teaspoon red pepper flakes
  • 1 teaspoon dried oregano
  • 2 tablespoons tomato paste
  • 25 ounces tomato basil pasta sauce
  • 28 ounces diced canned tomatoes, undrained
  • 4 cups chicken broth
  • 2 teaspoons kosher salt, divided
  • 12 lasagna noodles, uncooked and broken into 2-inch pieces
  • ½ cup heavy cream (optional)
  • 1 cup shredded mozzarella cheese
  • ½ cup freshly grated Parmesan cheese

Instructions

  1. Step 1
    Dice the onion, mince the garlic, and break lasagna noodles into approximately 2-inch pieces. Have all other ingredients measured and ready.
  2. Step 2
    In a large pot or Dutch oven, heat olive oil over medium-high heat. Add ground beef and cook, breaking it apart, until fully browned (about 5-7 minutes). Drain any excess fat from the pot.
  3. Step 3
    Reduce heat to medium. Add the diced onion to the pot and sauté, stirring occasionally, until it softens and becomes translucent (about 5-7 minutes). Stir in the minced garlic and red pepper flakes; cook for 1 minute more until fragrant, being careful not to burn the garlic.
  4. Step 4
    Push the beef and aromatic mixture to one side of the pot. Add the tomato paste to the cleared space and cook for 1-2 minutes, stirring occasionally, allowing it to deepen in color. Then, stir the tomato paste into the beef and onion mixture until well combined. Stir in the diced tomatoes, tomato basil pasta sauce, dried oregano, and 1 teaspoon of kosher salt.
  5. Step 5
    Pour in the chicken broth. Bring the mixture to a strong simmer over medium-high heat. Once simmering, reduce the heat to medium-low, cover the pot, and let it gently simmer for 15-20 minutes to allow the flavors to meld and deepen.
  6. Step 6
    Uncover the pot. Carefully add the broken lasagna noodles to the simmering soup. Stir them in well, ensuring they are fully submerged. Continue to simmer, uncovered, for about 8-12 minutes, or until the noodles are al dente (tender with a slight bite). Stir frequently during this stage to prevent sticking.
  7. Step 7
    Reduce the heat to low. Stir in the heavy cream (if using) and the remaining 1 teaspoon of kosher salt. Taste the soup and adjust seasoning with additional salt and freshly ground black pepper to your preference.
  8. Step 8
    Stir in the shredded mozzarella cheese and freshly grated Parmesan cheese until they are melted and well combined, making the soup creamy and cheesy.
  9. Step 9
    Ladle generous portions of the hot Lasagna Soup into individual serving bowls. Garnish with extra grated Parmesan cheese or fresh herbs if desired. Serve immediately and enjoy every comforting spoonful!

Important Information

Nutrition Facts (Per Serving)

It is important to consider this information as approximate and not to use it as definitive health advice.

Allergy Information

Please check ingredients for potential allergens and consult a health professional if in doubt.

« Previous Post
Creepy-Cute Skewered Beef Salami Eyeballs for Halloween Fun!
Next Post »
Delicious Apple Pie Recipe – Simple Steps for a Perfect Dessert

If you enjoyed this…

Pesto Chicken Flatbread: A Simple & Delicious Recipe

Hawaiian Chicken Slow Cooker: Easy and Delicious Recipe for a Tropical Feast

Honey Pepper Chicken Mac and Cheese: A Delicious Twist on a Classic Comfort Food

Primary Sidebar

Browse by Diet

BreakfastDinnerLunchDessertAppetizer

Sweet Peach Yogurt Parfait Delight

One of my fondest memories is from a lazy summer afternoon spent at my grandmother’s house. The sun filtered through the kitchen window, casting a warm glow over the table where she would create her culinary magic. It was during one of those blissful moments that I first tasted her Peach Yogurt Parfait with Honey and Granola. The sweet aroma of ripe peaches mingling with creamy yogurt and the crunch of granola was nothing short of heavenly. It felt like summer captured in a bowl, and I still remember the joy of diving in with a spoon, each layer revealing a new burst of flavor.

When I think about that parfait, I can almost hear the gentle hum of the bees outside, reminding me of the floral notes that honey brings to every bite. The vibrant yellows and soft oranges of the peaches contrast beautifully with the creamy white yogurt and the golden crunch of granola. It’s a dish that not only looks delightful but also tastes like a celebration of fresh, wholesome ingredients.

What makes my version of this Peach Yogurt Parfait special is the careful balance of flavors and textures. I use ripe, juicy peaches, drizzled with locally sourced honey, and a homemade granola that’s bursting with nuts and seeds for an extra crunch. It’s a simple dish, but every layer is crafted with love and attention.

Let me show you exactly how to make this delightful parfait, so you can bring a bit of that summer magic into your kitchen!

Sweet Peach Yogurt Parfait Delight

Why You’ll Love This Recipe

  • Delightfully creamy texture from the Greek yogurt, paired with the juicy sweetness of fresh peaches.
  • Ready in under 20 minutes, making it a quick and satisfying breakfast or snack option.
  • Budget-friendly, using common ingredients that you may already have in your pantry.
  • Customizable with your favorite granola and nuts, allowing you to tailor each parfait to your taste.
  • Perfectly balanced flavors with the bright acidity of lemon juice and the sweetness of honey enhancing the peaches.

Ingredients

  • For the Parfait:
  • 2 cups plain Greek yogurt (or vanilla yogurt for a sweeter option)
  • 2 large ripe peaches, diced (about 2 cups)
  • 1 tablespoon fresh lemon juice (to prevent browning of peaches)
  • 2 tablespoons honey (plus more for drizzling)
  • 1 teaspoon vanilla extract (optional for extra flavor)
  • For the Granola:
  • 1 cup granola (store-bought or homemade; see notes for a simple granola recipe)
  • 1/4 cup sliced almonds (optional for added crunch)
  • 1/4 cup shredded coconut (optional for added flavor)

Let’s dive into some key ingredients that make this Peach Yogurt Parfait so delightful! First, the Greek yogurt is not only creamy but also packed with protein, making it a satisfying option for breakfast or a snack. If you’re looking for a sweeter option, you can easily substitute it with vanilla yogurt, though it may alter the overall flavor balance. Next, the ripe peaches are the star of the show; their natural sweetness shines through, so I recommend choosing peaches that yield slightly to pressure, indicating they’re perfectly ripe. If peaches aren’t in season, feel free to use nectarines or even frozen peaches—just thaw them before use. Finally, honey adds a lovely floral sweetness that ties everything together. If you prefer, maple syrup can serve as a delicious substitute.

Step-by-Step Instructions

  1. Start by preparing the peaches. Wash them thoroughly, then slice and dice them into bite-sized pieces. In a medium bowl, toss the diced peaches with 1 tablespoon of fresh lemon juice to prevent browning. Set aside for about 5 minutes while the lemon juice works its magic.
  2. In a separate bowl, combine the Greek yogurt, 2 tablespoons of honey, and 1 teaspoon of vanilla extract if using. Stir the mixture until smooth and thoroughly blended. This should take about a minute. Avoid overmixing to maintain the creaminess of the yogurt.
  3. Now it’s time to layer your parfait. Grab a clear glass or bowl to showcase your beautiful creation. Start with a generous spoonful of the yogurt mixture at the bottom—about 1/4 cup will do. Use a spoon to spread it evenly.
  4. Add a layer of the diced peaches over the yogurt, ensuring they cover the yogurt completely. You might want to use about half of what you have prepared—roughly 1 cup. This layer should be visually appealing, so arrange the peaches neatly.
  5. Sprinkle 1/4 cup of granola over the peaches. This adds a delightful crunch. Make sure to distribute it evenly to ensure every bite has that satisfying texture. Avoid packing it down too tightly, as you want it to maintain its crunch.
  6. Repeat the layers: spoon in another 1/4 cup of yogurt, followed by another cup of peaches, and another sprinkle of granola. You should have at least two layers, but feel free to add more depending on your glass size.
  7. Finish off your parfait with a drizzle of honey on top for added sweetness and a touch of elegance. If you’re using sliced almonds or shredded coconut, sprinkle them on top now. It adds a lovely visual contrast and extra flavor.
  8. Serve immediately or refrigerate for up to 30 minutes before serving to allow the flavors to meld together. However, I recommend enjoying it fresh to maintain the granola’s crunch.

Pro Tips for the Best Peach Yogurt Parfait With Honey And Granola

  • Make sure to choose ripe peaches for the best flavor and texture. A common mistake is using unripe fruit, which can lead to a less enjoyable parfait. Look for peaches that are fragrant and slightly soft to the touch.
  • Use a clear glass to assemble your parfait; this not only makes for a beautiful presentation but also allows you to see the colorful layers, which adds to the enjoyment of eating it.
  • For an even creamier texture, consider whipping the Greek yogurt with a hand mixer for a couple of minutes before layering. This small adjustment makes a huge difference in mouthfeel.
  • Be mindful of the granola-to-yogurt ratio. Too much granola can overwhelm the parfait, while too little can make it feel too creamy. Aim for about 1/4 cup of granola per layer for the perfect balance.
  • If you’re making this for a gathering, consider preparing the yogurt and peaches ahead of time and layering them just before serving. This ensures the granola stays crunchy!

Variations & Serving Ideas

There are so many ways to get creative with your Peach Yogurt Parfait! For a tropical twist, swap out the peaches for mangoes or pineapples and top with coconut flakes. If you prefer a berry flavor, mix in some blueberries or strawberries with the peaches for added color and taste. For a nutty version, incorporate chopped walnuts or pecans instead of almonds.

As for serving ideas, this parfait pairs beautifully with a side of scrambled eggs for a hearty breakfast or fresh fruit salad for a light lunch. You might also enjoy it alongside whole grain toast with almond butter for an energizing snack. The contrast of flavors and textures will elevate your meal experience!

Storage, Make-Ahead & Reheating

The Peach Yogurt Parfait is best enjoyed fresh, but you can prepare some components ahead of time. Store the layered parfait in an airtight container in the refrigerator for up to 24 hours. However, be cautious; the granola may lose its crunch if stored too long. You can freeze the yogurt and peach mixture for up to 2 months; just remember to thaw it in the refrigerator overnight before serving.

If you plan to enjoy this dish the next day, it can taste even better as the flavors meld together. Just remember to add the granola right before serving to keep its delightful crunch!

Frequently Asked Questions

Can I make Peach Yogurt Parfait With Honey And Granola ahead of time?

Yes — in fact, it tastes even better the next day as the flavors meld. However, I recommend waiting to add the granola until just before serving to maintain its crunch.

What can I substitute for Greek yogurt?

If you prefer a lighter option, you can substitute Greek yogurt with regular yogurt or a dairy-free alternative like coconut yogurt. Just remember that this may alter the creaminess and flavor profile slightly.

Can I use frozen peaches for this parfait?

Absolutely! Just make sure to thaw the frozen peaches before using them. They will still add great flavor, though the texture may be slightly softer than fresh peaches.

How do I make the parfait vegan?

To make a vegan version, substitute the Greek yogurt with a plant-based yogurt alternative, and replace honey with maple syrup or agave nectar. This keeps the parfait sweet while adhering to a vegan diet.

What other fruits can I use in this recipe?

You can mix and match fruits based on your preference. Try using strawberries, blueberries, raspberries, or even bananas. Just make sure to adjust the lemon juice as needed to prevent browning.

Sweet Peach Yogurt Parfait Delight

Final Thoughts

The Peach Yogurt Parfait with Honey and Granola is a delightful blend of creamy yogurt, sweet peaches, and crunchy granola that creates a satisfying and nourishing treat. Each layer bursts with flavor, making it a perfect choice for breakfast or a light dessert.

This is the kind of recipe I come back to again and again, especially when I want something refreshing and wholesome to start my day. The harmony of sweet and tart flavors, combined with the delightful crunch, never fails to lift my spirits!

I encourage you to give this parfait a try and indulge in its comforting goodness. Feel free to share your results or even add your own twist—perhaps a sprinkle of cinnamon or a handful of nuts. Enjoy creating your perfect parfait!

Print
clock clock iconcutlery cutlery iconflag flag iconfolder folder iconinstagram instagram iconpinterest pinterest iconfacebook facebook iconprint print iconsquares squares iconheart heart iconheart solid heart solid icon

Peach Yogurt Parfait


  • Author: Lily author
  • Total Time: 15 minutes
  • Yield: 4 servings 1x
Pin Recipe
Print Recipe

Description

This Peach Yogurt Parfait combines creamy Greek yogurt, juicy peaches, and crunchy granola for a delightful treat. It’s a perfect breakfast or snack that captures the essence of summer in every bite.


Ingredients

Scale
  • For the Parfait:
  • 2 cups plain Greek yogurt (or vanilla yogurt for a sweeter option)
  • 2 large ripe peaches, diced (about 2 cups)
  • 1 tablespoon fresh lemon juice (to prevent browning of peaches)
  • 2 tablespoons honey (plus more for drizzling)
  • 1 teaspoon vanilla extract (optional for extra flavor)
  • For the Granola:
  • 1 cup granola (store-bought or homemade; see notes for a simple granola recipe)
  • 1/4 cup sliced almonds (optional for added crunch)
  • 1/4 cup shredded coconut (optional for added flavor)

Instructions

  1. Start by preparing the peaches. Wash them thoroughly, then slice and dice them into bite-sized pieces. In a medium bowl, toss the diced peaches with 1 tablespoon of fresh lemon juice to prevent browning. Set aside for about 5 minutes while the lemon juice works its magic.
  2. In a separate bowl, combine the Greek yogurt, 2 tablespoons of honey, and 1 teaspoon of vanilla extract if using. Stir the mixture until smooth and thoroughly blended. This should take about a minute. Avoid overmixing to maintain the creaminess of the yogurt.
  3. Now it’s time to layer your parfait. Grab a clear glass or bowl to showcase your beautiful creation. Start with a generous spoonful of the yogurt mixture at the bottom—about 1/4 cup will do. Use a spoon to spread it evenly.
  4. Add a layer of the diced peaches over the yogurt, ensuring they cover the yogurt completely. You might want to use about half of what you have prepared—roughly 1 cup. This layer should be visually appealing, so arrange the peaches neatly.
  5. Sprinkle 1/4 cup of granola over the peaches. This adds a delightful crunch. Make sure to distribute it evenly to ensure every bite has that satisfying texture. Avoid packing it down too tightly, as you want it to maintain its crunch.
  6. Repeat the layers: spoon in another 1/4 cup of yogurt, followed by another cup of peaches, and another sprinkle of granola. You should have at least two layers, but feel free to add more depending on your glass size.
  7. Finish off your parfait with a drizzle of honey on top for added sweetness and a touch of elegance. If you’re using sliced almonds or shredded coconut, sprinkle them on top now. It adds a lovely visual contrast and extra flavor.
  8. Serve immediately or refrigerate for up to 30 minutes before serving to allow the flavors to meld together. However, I recommend enjoying it fresh to maintain the granola’s crunch.
  • Prep Time: 15 mins
  • Cook Time: 0 mins
  • Category: Breakfast
  • Method: No-cook
  • Cuisine: American

Nutrition

  • Serving Size: 1 parfait
  • Calories: 250
  • Sugar: 20 g
  • Sodium: 50 mg
  • Fat: 5 g
  • Saturated Fat: 2 g
  • Unsaturated Fat: 3 g
  • Trans Fat: 0 g
  • Carbohydrates: 40 g
  • Fiber: 3 g
  • Protein: 10 g
  • Cholesterol: 10 mg

Keywords: Choose ripe peaches for the best flavor and texture. Use a clear glass for a beautiful presentation. For creaminess, consider whipping the yogurt before layering. Be mindful of the granola-to-yogurt ratio. Prepare yogurt and peaches ahead of time for gatherings, layering just before serving.

Did you make this recipe?

Share a photo and tag us — we can't wait to see what you've made!

Sun-Kissed Frozen Orange Cream Slush

As a child, summer days felt like they lasted forever. I remember the sticky heat wrapping around me as I played outside, my laughter mingling with the sounds of the neighborhood. But nothing could cool me down quite like the moment I’d spot my grandmother, laboring over her blender, whipping up her famous Frozen Orange Creamsicle Slush. That vibrant orange treat, with its frosty texture and sweet citrus aroma, was like a burst of sunshine in a cup. Just one sip, and I could feel the coolness wash over me, sparking pure joy.

This Frozen Orange Creamsicle Slush has a way of making you feel like a kid again. Its creamy, dreamy consistency is a delightful balance of bright orange and soft vanilla, inviting you to dive right in. The refreshing tang of orange dances on your tongue, while the smooth creaminess envelops you in a comforting embrace. It’s a nostalgic treat that’s perfect for hot summer afternoons or anytime you need a little pick-me-up.

What makes my version of this slush stand out is the addition of a hint of vanilla bean, which elevates the flavor and adds an extra layer of richness. Plus, it’s super easy to whip up with just a few simple ingredients that you probably already have on hand! So, if you’re ready to relive those sun-soaked memories, let me show you exactly how to make it.

Sun-Kissed Frozen Orange Cream Slush

Why You’ll Love This Recipe

  • Each slush is a perfect blend of creamy vanilla and zesty orange, creating a nostalgic flavor reminiscent of summer days.
  • This refreshing treat is ready in under 15 minutes, making it an ideal quick dessert for unexpected guests or hot afternoons.
  • With just 8 simple ingredients, it’s budget-friendly, ensuring you don’t have to break the bank to enjoy a delicious slush.
  • The slush has a perfectly smooth texture, thanks to the combination of ice and ice cream, providing a delightful contrast to the bright citrus flavors.
  • It’s highly customizable; you can easily adjust the sweetness and add fresh herbs for a unique twist that suits your taste.

Ingredients

  • 2 cups orange juice (freshly squeezed or store-bought)
  • 1 cup vanilla ice cream
  • 1 cup crushed ice
  • 1/2 cup milk (whole or 2%)
  • 1/4 cup granulated sugar (adjust based on sweetness preference)
  • 1 teaspoon vanilla extract
  • Zest of 1 orange (for added flavor)
  • Fresh orange slices and mint leaves (for garnish)

The star of this Frozen Orange Creamsicle Slush is the orange juice, which provides the vibrant, citrusy base. Freshly squeezed juice will yield the brightest flavor, but store-bought options can be just as convenient. If you’re opting for store-bought, choose 100% pure juice with no added sugars for the best results. Another essential ingredient is the vanilla ice cream; it adds creaminess and sweetness. You can substitute it with dairy-free ice cream if you’re looking for a vegan option. Whole or 2% milk complements the ice cream, creating a smooth blend. If you want a lower-calorie version, almond or oat milk can be good alternatives.

Lastly, the granulated sugar can be adjusted based on your sweetness preference. If you prefer a more natural sweetener, consider using honey or agave syrup. The orange zest enhances the flavor profile, providing an aromatic pop that brings the whole slush together. Don’t skip it! It adds an extra layer of brightness that makes this slush truly special.

Step-by-Step Instructions

  1. Start by preparing your ingredients. Gather 2 cups of orange juice, 1 cup of vanilla ice cream, and 1 cup of crushed ice. Make sure the ice is finely crushed, as larger chunks can make blending difficult.
  2. In a blender, combine the orange juice, vanilla ice cream, crushed ice, and 1/2 cup of milk. Add 1/4 cup of granulated sugar and 1 teaspoon of vanilla extract. If you like a sweeter slush, consider adding a bit more sugar at this stage.
  3. Add the zest of 1 orange to the blender. This step is crucial for enhancing the citrus flavor of your slush. Make sure not to include the bitter white pith—only the flavorful zest.
  4. Blend the mixture on medium-high speed for about 30-45 seconds. Stop once the ingredients are fully combined and the slush has a smooth, even consistency. If you notice large chunks of ice, blend for an additional 10-15 seconds. Avoid over-blending, as this can make the slush too liquidy.
  5. Once blended, taste the slush. If it needs more sweetness, add a little more sugar and blend for a few more seconds. If it’s too thick, you can add a splash of milk to reach your desired consistency.
  6. Pour the slush into glasses. This recipe typically serves 4, but you can easily double it for larger gatherings. Use a spoon to help guide the slush into the glasses if needed.
  7. Garnish each serving with fresh orange slices and mint leaves. The mint not only adds a pop of color but also a refreshing aroma that complements the citrus flavors beautifully.
  8. Serve immediately and enjoy! If you’ve made extra, you can refrigerate it for a short time, but it’s best enjoyed fresh.

Pro Tips for the Best Frozen Orange Creamsicle Slush

  • Don’t skip the orange zest! It’s a game-changer for flavor. Always zest before juicing to make it easier.
  • Use a high-powered blender for the best texture. A standard blender may struggle with ice, leading to uneven consistency. If you have a food processor, that can work too, but ensure the ice is finely crushed.
  • Adjust the ice-to-liquid ratio carefully. If your slush is too thick, it won’t blend well. Start with less ice and add more until you reach your preferred texture.
  • Be cautious with the sugar! Always start with the lower amount, as you can easily add more, but it’s hard to fix an overly sweet slush.
  • For a fun twist, consider adding a splash of coconut milk or a handful of fresh fruit like strawberries or pineapple. This not only enhances the flavor but also adds a beautiful color contrast.

Variations & Serving Ideas

There are countless ways to put a spin on your Frozen Orange Creamsicle Slush. Consider making a tropical version by adding in some pineapple juice or coconut milk for a delightful tropical twist. If you’re feeling adventurous, try incorporating a handful of frozen mango or peach slices for added sweetness. For a lighter version, swap out the vanilla ice cream for Greek yogurt for a creamy yet tangy alternative.

As for serving ideas, this refreshing slush pairs wonderfully with light summer dishes like grilled chicken skewers, fish tacos, or a simple salad topped with citrus vinaigrette. The bright, zesty flavors of the slush complement these dishes perfectly, making them an ideal pairing for a sunny day.

Storage, Make-Ahead & Reheating

This Frozen Orange Creamsicle Slush is best enjoyed fresh, but if you have leftovers, you can store them in an airtight container in the fridge for up to 2 days. Just keep in mind that the slush may lose some of its texture over time as the ice melts. It doesn’t freeze well, as the ice will turn into a solid block. If you must freeze it, blend again after thawing to restore the slushy consistency. This treat is best the day you make it, as the flavors meld together beautifully overnight, enhancing its deliciousness.

Frequently Asked Questions

Can I make Frozen Orange Creamsicle Slush ahead of time?

Yes — in fact, it tastes even better the next day as the flavors meld. However, it’s best to enjoy it fresh, as the texture can change if stored for too long. If you need to prepare it ahead, keep it in the fridge and re-blend before serving.

What kind of orange juice should I use?

For the best flavor, use freshly squeezed orange juice. However, if you’re short on time, opt for 100% pure store-bought juice without added sugars. This will ensure that your slush remains flavorful and refreshing.

Can I substitute the vanilla ice cream?

Absolutely! If you’re looking for a dairy-free option, coconut milk ice cream or a non-dairy vanilla ice cream can work wonderfully. They will still provide the creamy texture and sweetness you desire.

How can I adjust the sweetness of my slush?

You can easily adjust the sweetness by modifying the amount of sugar added. Start with 1/4 cup and taste the mixture before blending. If you prefer it sweeter, add more sugar gradually until it reaches your desired level.

What should I do if my slush is too thick?

If your slush is too thick, simply add a splash of milk or orange juice and blend again. This will help achieve a more drinkable consistency while maintaining the slushy texture. Adjust gradually to reach your preferred thickness.

Sun-Kissed Frozen Orange Cream Slush

Final Thoughts

The Frozen Orange Creamsicle Slush is a delightful blend of refreshing citrus and creamy goodness, making it a perfect treat for warm days or any time you crave a taste of nostalgia. The way the bright orange flavor dances with the creamy texture truly elevates this slush, transforming it into a satisfying escape from the everyday.

This is the kind of recipe I come back to again and again, especially when I’m looking to cool down or impress guests at a summer gathering. It’s simple to make and always brings smiles all around! I encourage you to try this recipe for yourself—don’t hesitate to share your results or even put your own spin on it. Happy slushing!

Print
clock clock iconcutlery cutlery iconflag flag iconfolder folder iconinstagram instagram iconpinterest pinterest iconfacebook facebook iconprint print iconsquares squares iconheart heart iconheart solid heart solid icon

Frozen Orange Creamsicle Slush


  • Author: Lily author
  • Total Time: 15 minutes
  • Yield: 4 servings 1x
Pin Recipe
Print Recipe

Description

This Frozen Orange Creamsicle Slush is a refreshing treat that combines creamy vanilla and zesty orange flavors. Perfect for hot summer days, it brings back nostalgic memories with every sip.


Ingredients

Scale
  • 2 cups orange juice (freshly squeezed or store-bought)
  • 1 cup vanilla ice cream
  • 1 cup crushed ice
  • 1/2 cup milk (whole or 2%)
  • 1/4 cup granulated sugar (adjust based on sweetness preference)
  • 1 teaspoon vanilla extract
  • Zest of 1 orange (for added flavor)
  • Fresh orange slices and mint leaves (for garnish)

Instructions

  1. Start by preparing your ingredients. Gather 2 cups of orange juice, 1 cup of vanilla ice cream, and 1 cup of crushed ice. Make sure the ice is finely crushed, as larger chunks can make blending difficult.
  2. In a blender, combine the orange juice, vanilla ice cream, crushed ice, and 1/2 cup of milk. Add 1/4 cup of granulated sugar and 1 teaspoon of vanilla extract. If you like a sweeter slush, consider adding a bit more sugar at this stage.
  3. Add the zest of 1 orange to the blender. This step is crucial for enhancing the citrus flavor of your slush. Make sure not to include the bitter white pith—only the flavorful zest.
  4. Blend the mixture on medium-high speed for about 30-45 seconds. Stop once the ingredients are fully combined and the slush has a smooth, even consistency. If you notice large chunks of ice, blend for an additional 10-15 seconds. Avoid over-blending, as this can make the slush too liquidy.
  5. Once blended, taste the slush. If it needs more sweetness, add a little more sugar and blend for a few more seconds. If it’s too thick, you can add a splash of milk to reach your desired consistency.
  6. Pour the slush into glasses. This recipe typically serves 4, but you can easily double it for larger gatherings. Use a spoon to help guide the slush into the glasses if needed.
  7. Garnish each serving with fresh orange slices and mint leaves. The mint not only adds a pop of color but also a refreshing aroma that complements the citrus flavors beautifully.
  8. Serve immediately and enjoy! If you’ve made extra, you can refrigerate it for a short time, but it's best enjoyed fresh.
  • Prep Time: 15 min
  • Cook Time: 0 min
  • Category: Dessert
  • Method: Blending
  • Cuisine: American

Nutrition

  • Serving Size: 1 serving
  • Calories: 200
  • Sugar: 30 g
  • Sodium: 50 mg
  • Fat: 5 g
  • Saturated Fat: 3 g
  • Unsaturated Fat: 2 g
  • Trans Fat: 0 g
  • Carbohydrates: 40 g
  • Fiber: 1 g
  • Protein: 2 g
  • Cholesterol: 20 mg

Keywords: Don't skip the orange zest! It's a game-changer for flavor. Always zest before juicing to make it easier.

Did you make this recipe?

Share a photo and tag us — we can't wait to see what you've made!

Zesty Lemon Poppy Seed Delight

One rainy afternoon, I found myself in my grandmother’s cozy kitchen, the kind that always smelled like warmth and love. She was whipping up her famous Lemon Poppy Seed Loaf, a recipe that had been passed down through generations. As the batter came together, the zesty aroma of fresh lemons filled the air, mingling perfectly with the nutty fragrance of poppy seeds. I can still picture her, apron-clad, as she expertly drizzled a vibrant citrus icing over the loaf, creating a glossy, sun-kissed finish that beckoned us to dive in. It was a moment that sparked my own passion for baking, and this recipe has become a cherished staple in my home ever since.

When you take a bite of this Lemon Poppy Seed Loaf, it’s like a burst of sunshine on your palate. The loaf is beautifully golden, with a tender crumb that melts in your mouth. Each slice is speckled with tiny poppy seeds, adding a delightful crunch that contrasts beautifully with the tangy sweetness of the lemon. And that citrus icing? It’s the finishing touch that elevates this loaf from ordinary to extraordinary, with its bright, zesty flavor dancing on your taste buds.

This recipe stands out because it embraces simplicity while delivering on flavor. I’ve added a hint of vanilla to the batter, enhancing the overall taste and making it even more indulgent. Trust me, once you make this Lemon Poppy Seed Loaf With Citrus Icing, it’ll become a go-to in your baking repertoire.

So, let me show you exactly how to make it!

Zesty Lemon Poppy Seed Delight

Why You’ll Love This Recipe

  • Moist and tender crumb that melts in your mouth, thanks to the perfect balance of butter and buttermilk.
  • Bright, zesty lemon flavor paired with crunchy poppy seeds, creating a delightful texture and taste experience.
  • Easy to whip up in just about an hour, perfect for last-minute gatherings or a cozy afternoon treat.
  • Budget-friendly with everyday ingredients, making it an accessible option for all home bakers.
  • The citrus icing adds a sweet tang that elevates the loaf, turning a simple recipe into a showstopper!

Ingredients

  • 1 ½ cups (190g) all-purpose flour
  • 1 teaspoon baking powder
  • ½ teaspoon baking soda
  • ½ teaspoon salt
  • 3 tablespoons poppy seeds
  • ½ cup (115g) unsalted butter, softened to room temperature
  • 1 cup (200g) granulated sugar
  • 2 large eggs
  • 1 teaspoon vanilla extract
  • 1 teaspoon lemon zest (from about 1 medium lemon)
  • ½ cup (120ml) buttermilk
  • 2 tablespoons fresh lemon juice

For the Citrus Icing:

  • 1 cup (120g) powdered sugar
  • 2 tablespoons fresh lemon juice
  • 1 tablespoon orange juice
  • 1 teaspoon lemon zest (for garnish, optional)

Let’s dive into the key ingredients that make this Lemon Poppy Seed Loaf so special. The all-purpose flour provides the structure and base for the loaf, while the baking powder and baking soda ensure it rises perfectly, giving the loaf a light texture. For a gluten-free variation, you could substitute the flour with a gluten-free all-purpose blend. Poppy seeds not only add a delightful crunch but also contribute to the unique flavor profile that pairs well with the citrus notes.

Unsalted butter is crucial for achieving the buttery richness that makes this loaf so moist. If you’re looking for a dairy-free option, coconut oil or a vegan butter can be used instead. The buttermilk is another essential component, providing acidity that activates the baking soda for a fluffy texture. If you don’t have buttermilk on hand, you can easily make a substitute by mixing ½ cup of milk with 1 tablespoon of vinegar or lemon juice and letting it sit for about 5 minutes.

Step-by-Step Instructions

  1. Preheat your oven to 350°F (175°C). Grease a 9×5-inch loaf pan or line it with parchment paper for easy removal later.
  2. In a medium mixing bowl, whisk together 1 ½ cups of all-purpose flour, 1 teaspoon of baking powder, ½ teaspoon of baking soda, ½ teaspoon of salt, and 3 tablespoons of poppy seeds. This helps to evenly distribute the baking agents and ensures a uniform rise.
  3. In a large mixing bowl, cream together ½ cup of softened unsalted butter and 1 cup of granulated sugar using an electric mixer on medium speed for about 3-4 minutes, until the mixture is light and fluffy. Make sure to scrape down the sides of the bowl occasionally.
  4. Add 2 large eggs, 1 teaspoon of vanilla extract, and 1 teaspoon of lemon zest to the creamed butter and sugar, mixing until fully combined. You want a smooth consistency, so ensure there are no lumps of butter.
  5. In a small bowl, combine ½ cup of buttermilk and 2 tablespoons of fresh lemon juice. Alternately add the dry ingredients and buttermilk mixture to the butter mixture, starting and ending with the dry ingredients. Mix just until combined; do not overmix, as this can lead to a dense loaf.
  6. Pour the batter into the prepared loaf pan. Smooth the top with a spatula, ensuring it’s even. Bake in the preheated oven for 50-60 minutes, or until a toothpick inserted in the center comes out clean. The edges should be lightly golden brown, and the center should feel just set.
  7. Once baked, remove the loaf from the oven and allow it to cool in the pan for about 10 minutes. Then, transfer it to a wire rack to cool completely. Resist the urge to slice too soon, as it will be crumbly if it’s still warm.
  8. While the loaf is cooling, prepare the citrus icing. In a medium bowl, whisk together 1 cup of powdered sugar, 2 tablespoons of fresh lemon juice, and 1 tablespoon of orange juice until smooth. If the icing is too thick, you can add a little more juice to reach your desired consistency.
  9. Once the loaf is completely cool, drizzle the citrus icing over the top. If you like, sprinkle with an additional teaspoon of lemon zest for an extra pop of flavor and color.

Pro Tips for the Best Lemon Poppy Seed Loaf With Citrus Icing

  • Be careful not to overmix your batter; this is a common mistake that can lead to a dense loaf. Mix just until the dry ingredients are incorporated for a light and fluffy texture.
  • Use room temperature ingredients, especially the butter and eggs. This helps to create a smoother batter and ensures even baking. Take your eggs out of the fridge about 30 minutes before you start.
  • For a more pronounced lemon flavor, consider adding a little lemon extract in addition to the zest and juice. Just a half teaspoon can elevate the citrus notes significantly.
  • When measuring your flour, spoon it into the measuring cup and level it off with a knife instead of scooping directly from the bag. This prevents packing and ensures you don’t end up with a dry loaf.
  • Invest in a good quality loaf pan; it makes a difference in heat distribution, which ensures even baking. If your pan is dark-coated, reduce the oven temperature by 25°F to prevent over-browning.

Variations & Serving Ideas

For a delightful twist, consider adding blueberries or raspberries to the batter for a fruity burst of flavor. You can also experiment with different citrus fruits—try lime or grapefruit zest and juice for a refreshing change. For a healthier option, substitute half of the all-purpose flour with whole wheat flour for added fiber without compromising too much on texture.

This Lemon Poppy Seed Loaf pairs beautifully with a light salad, such as a mixed greens salad with a vinaigrette, or a cup of tea for a cozy afternoon treat. It also complements a creamy cheese platter, as the acidity of the loaf balances rich cheeses perfectly. Lastly, a scoop of vanilla ice cream on the side creates a delightful contrast of temperatures and flavors!

Storage, Make-Ahead & Reheating

This Lemon Poppy Seed Loaf can be stored at room temperature for up to 3 days if wrapped tightly in plastic wrap. If you want to keep it longer, it freezes well for up to 3 months. To freeze, wrap the loaf tightly in plastic wrap and then in aluminum foil to prevent freezer burn.

When you’re ready to enjoy it again, simply thaw it in the fridge overnight. Reheat individual slices in the microwave for 15-20 seconds or in a toaster oven until warmed through. Interestingly, many people find that this loaf tastes even better the next day, as the flavors have time to meld!

Frequently Asked Questions

Can I make Lemon Poppy Seed Loaf With Citrus Icing ahead of time?

Yes — in fact, it tastes even better the next day! You can make the loaf a day in advance, allowing the flavors to develop. Just be sure to store it in an airtight container to maintain its moisture.

Can I substitute the poppy seeds?

Absolutely! If you don’t have poppy seeds on hand or prefer an alternative, you can use sesame seeds for a similar crunch or omit them entirely for a smooth loaf.

What can I use instead of buttermilk?

If you don’t have buttermilk, you can easily create a substitute by mixing ½ cup of milk (dairy or plant-based) with 1 tablespoon of vinegar or lemon juice. Let it sit for 5 minutes before using in the recipe.

How can I make this recipe gluten-free?

To make a gluten-free version of this Lemon Poppy Seed Loaf, substitute the all-purpose flour with a gluten-free all-purpose flour blend. Just ensure that the blend contains a binding agent like xanthan gum for the best results.

What is the best way to store leftover loaf?

Leftover Lemon Poppy Seed Loaf should be stored in an airtight container at room temperature for up to 3 days. For longer storage, wrap it tightly and freeze for up to 3 months. Thaw it before serving for the best texture.

Zesty Lemon Poppy Seed Delight

Final Thoughts

The Lemon Poppy Seed Loaf with Citrus Icing is truly a delightful treat that brings a burst of brightness to any occasion. The zesty lemon flavor combined with the subtle crunch of poppy seeds creates a satisfying balance, while the citrus icing adds a touch of sweetness that perfectly complements the loaf’s tanginess.

This is the kind of recipe I come back to again and again, especially when I want to brighten up a gloomy day or celebrate a small victory. The aroma that fills the kitchen as it bakes is absolutely heavenly! I encourage you to give this recipe a try; you might just find it becoming a beloved staple in your home. Don’t forget to share your results or even add your own unique twist—I can’t wait to see what you create!

Print
clock clock iconcutlery cutlery iconflag flag iconfolder folder iconinstagram instagram iconpinterest pinterest iconfacebook facebook iconprint print iconsquares squares iconheart heart iconheart solid heart solid icon

Lemon Poppy Seed Loaf


  • Author: Lily author
  • Total Time: 13 minute
  • Yield: 1 loaf 1x
Pin Recipe
Print Recipe

Description

This Lemon Poppy Seed Loaf is a delightful treat that combines zesty lemon flavor with crunchy poppy seeds. Topped with a citrus icing, it’s perfect for any occasion.


Ingredients

Scale
  • 1 ½ cups (190g) all-purpose flour
  • 1 teaspoon baking powder
  • ½ teaspoon baking soda
  • ½ teaspoon salt
  • 3 tablespoons poppy seeds
  • ½ cup (115g) unsalted butter, softened to room temperature
  • 1 cup (200g) granulated sugar
  • 2 large eggs
  • 1 teaspoon vanilla extract
  • 1 teaspoon lemon zest (from about 1 medium lemon)
  • ½ cup (120ml) buttermilk
  • 2 tablespoons fresh lemon juice
  • 1 cup (120g) powdered sugar
  • 2 tablespoons fresh lemon juice
  • 1 tablespoon orange juice
  • 1 teaspoon lemon zest (for garnish, optional)

Instructions

  1. Preheat your oven to 350°F (175°C). Grease a 9×5-inch loaf pan or line it with parchment paper for easy removal later.
  2. In a medium mixing bowl, whisk together 1 ½ cups of all-purpose flour, 1 teaspoon of baking powder, ½ teaspoon of baking soda, ½ teaspoon of salt, and 3 tablespoons of poppy seeds. This helps to evenly distribute the baking agents and ensures a uniform rise.
  3. In a large mixing bowl, cream together ½ cup of softened unsalted butter and 1 cup of granulated sugar using an electric mixer on medium speed for about 3-4 minutes, until the mixture is light and fluffy. Make sure to scrape down the sides of the bowl occasionally.
  4. Add 2 large eggs, 1 teaspoon of vanilla extract, and 1 teaspoon of lemon zest to the creamed butter and sugar, mixing until fully combined. You want a smooth consistency, so ensure there are no lumps of butter.
  5. In a small bowl, combine ½ cup of buttermilk and 2 tablespoons of fresh lemon juice. Alternately add the dry ingredients and buttermilk mixture to the butter mixture, starting and ending with the dry ingredients. Mix just until combined; do not overmix, as this can lead to a dense loaf.
  6. Pour the batter into the prepared loaf pan. Smooth the top with a spatula, ensuring it’s even. Bake in the preheated oven for 50-60 minutes, or until a toothpick inserted in the center comes out clean. The edges should be lightly golden brown, and the center should feel just set.
  7. Once baked, remove the loaf from the oven and allow it to cool in the pan for about 10 minutes. Then, transfer it to a wire rack to cool completely. Resist the urge to slice too soon, as it will be crumbly if it’s still warm.
  8. While the loaf is cooling, prepare the citrus icing. In a medium bowl, whisk together 1 cup of powdered sugar, 2 tablespoons of fresh lemon juice, and 1 tablespoon of orange juice until smooth. If the icing is too thick, you can add a little more juice to reach your desired consistency.
  9. Once the loaf is completely cool, drizzle the citrus icing over the top. If you like, sprinkle with an additional teaspoon of lemon zest for an extra pop of flavor and color.
  • Prep Time: 15 mins
  • Cook Time: 50-60 mins
  • Category: Dessert
  • Method: Baking
  • Cuisine: American

Nutrition

  • Serving Size: 1 slice
  • Calories: 200
  • Sugar: 15 g
  • Sodium: 150 mg
  • Fat: 8 g
  • Saturated Fat: 5 g
  • Unsaturated Fat: 3 g
  • Trans Fat: 0 g
  • Carbohydrates: 30 g
  • Fiber: 1 g
  • Protein: 3 g
  • Cholesterol: 40 mg

Keywords: Be careful not to overmix your batter; this is a common mistake that can lead to a dense loaf. Use room temperature ingredients for a smoother batter and even baking.

Did you make this recipe?

Share a photo and tag us — we can't wait to see what you've made!

  • Privacy Policy
  • Terms Of Service
  • Contact
  • About
  • GDPR

Copyright © 2025 Homesmad