• Skip to primary navigation
  • Skip to main content
  • Skip to primary sidebar
Homesmad

Homesmad

  • Home
  • Breakfast & Brunch
  • Appetizers & Snacks
  • Dinner
  • Dessert
  • About
  • Privacy Policy
  • Contact
Homesmad
  • Home
  • Breakfast & Brunch
  • Appetizers & Snacks
  • Dinner
  • Dessert
  • About
  • Privacy Policy
  • Contact

Delicious Spring Couscous Salad with Zesty Basil Vinaigrette

November 18, 2025 by Lily author

Spring Couscous Salad With Basil Vinaigrette is more than just a recipe; it’s a vibrant celebration of the season’s freshest bounty, a culinary promise of warmer days and lighter meals. I find myself returning to this dish year after year, eager to infuse my kitchen with the uplifting aromas of fresh basil and sun-kissed vegetables. Originating from North Africa, couscous has long been cherished for its incredible versatility, transforming simple grains into a canvas for a myriad of flavors, and its global appeal continues to grow, making it a beloved staple in kitchens worldwide.

Why We Adore This Springtime Staple

What truly elevates this particular creation, making it an absolute favorite, is the dazzling combination of fluffy, pearl-like couscous with an irresistibly bright, herbaceous dressing. The delicate chewiness of the couscous perfectly complements a medley of crisp, seasonal vegetables – think juicy cherry tomatoes, crunchy cucumbers, and tender asparagus – all brought to life by the zesty kick of a homemade basil vinaigrette. It’s incredibly refreshing, surprisingly filling, and an ideal companion for any spring gathering, picnic, or a delightful weekday lunch. This Spring Couscous Salad With Basil Vinaigrette is a testament to how simple, quality ingredients can create something truly extraordinary. It’s a dish that embodies both elegance and approachability, ensuring a smile with every forkful.

Delicious Spring Couscous Salad with Zesty Basil Vinaigrette this RECIPE

Ingredients:

  • For the Couscous:
    • 1 ½ cups (about 250g) couscous, preferably medium-grain or pearl (Israeli) couscous for a chewier texture. If using fine-grain Moroccan couscous, adjust cooking time accordingly.
    • 2 ¼ cups (approximately 530ml) vegetable broth or water. Using vegetable broth adds a foundational layer of savory flavor to our Spring Couscous Salad With Basil Vinaigrette.
    • 1 tablespoon olive oil (for cooking the couscous).
    • ½ teaspoon salt (for seasoning the couscous).
  • For the Spring Vegetables:
    • 1 bunch (about 1 pound or 450g) fresh asparagus, tough ends snapped off. Look for bright green, firm spears.
    • 1 cup (about 150g) frozen green peas, thawed. Fresh peas can also be used, blanched briefly.
    • 1 pint (about 2 cups or 300g) cherry or grape tomatoes, halved. I love using a mix of red and yellow for a vibrant color pop!
    • 1 English cucumber, peeled (if skin is tough) and finely diced. You can leave some skin on for added color and nutrients.
    • 1 medium red bell pepper, cored, seeded, and finely diced.
    • ½ small red onion, very finely minced. For a milder flavor, you can rinse the minced onion under cold water and pat it dry.
    • 4-6 radishes, thinly sliced or finely diced. They add a lovely peppery bite and crunch to our Spring Couscous Salad With Basil Vinaigrette.
    • (Optional) 1 can (15 ounces / 425g) chickpeas, rinsed and drained, for added protein and heartiness.
    • (Optional) ½ cup crumbled feta cheese or goat cheese, for a creamy, tangy element.
    • (Optional) ¼ cup toasted pine nuts or slivered almonds, for extra crunch.
  • For the Fresh Basil Vinaigrette:
    • ½ cup (about 120ml) extra virgin olive oil, a good quality one makes all the difference!
    • ¼ cup (about 60ml) red wine vinegar or white wine vinegar. Apple cider vinegar can also work if you prefer a slightly fruitier tang.
    • 1 large bunch (about 1 ½ cups packed) fresh basil leaves, washed and thoroughly dried. This is the star of our Basil Vinaigrette, so make sure it’s vibrant and fragrant.
    • 2 cloves garlic, minced or grated.
    • 1 teaspoon Dijon mustard. This acts as an emulsifier, helping the oil and vinegar stay together beautifully.
    • ½ teaspoon salt, or to taste.
    • ¼ teaspoon freshly ground black pepper, or to taste.
    • (Optional) 1 teaspoon honey or maple syrup, to balance the acidity if desired.

Preparing the Couscous Base for Your Spring Couscous Salad:

  1. Choose Your Couscous Wisely: Before we dive in, let’s talk about couscous. There are generally two types you’ll find: traditional fine-grain Moroccan couscous and larger, pearl-like Israeli couscous (also called fregola sarda or maftoul). For this particular Spring Couscous Salad With Basil Vinaigrette, I often lean towards pearl couscous because its larger size gives it a wonderful chewy texture that stands up beautifully to all the vibrant spring vegetables we’re adding. If you opt for the finer Moroccan couscous, just be aware it cooks much quicker and will result in a lighter, fluffier base.
  2. Bring the Liquid to a Boil: In a medium saucepan, combine the 2 ¼ cups of vegetable broth (or water, though broth adds more flavor!), 1 tablespoon of olive oil, and ½ teaspoon of salt. Place the saucepan over medium-high heat and bring the liquid to a rolling boil. Using broth instead of plain water will infuse your couscous with an incredible depth of flavor right from the start, making your finished salad even more satisfying.
  3. Add the Couscous: Once the liquid is vigorously boiling, immediately stir in the 1 ½ cups of couscous. Give it a good stir to ensure all the grains are submerged and evenly moistened.
  4. Cover and Steep: As soon as the couscous is added and stirred, remove the saucepan from the heat. Place a tight-fitting lid on the pot. This is a crucial step! We’re not actively cooking the couscous over heat for very long; rather, we’re allowing it to absorb the hot liquid and steam gently. For pearl couscous, let it sit undisturbed for about 10-12 minutes. If you’re using fine-grain Moroccan couscous, it will only need about 5 minutes. Resist the urge to peek during this time, as lifting the lid releases the steam essential for perfect texture.
  5. Fluff and Cool: After the recommended resting time, remove the lid. Using a fork, gently fluff the couscous. You’ll notice the grains have plumped up and are tender. Transfer the hot couscous to a large, shallow bowl or baking sheet. This helps it cool down quickly and prevents it from clumping together. Let it cool completely to room temperature before adding the other ingredients. This step is important for preventing the warm couscous from wilting our fresh spring vegetables and helps all the flavors meld together perfectly in our Spring Couscous Salad With Basil Vinaigrette.

Preparing the Vibrant Spring Vegetables:

  1. Prepare the Asparagus: Start by washing your asparagus spears. To trim them, simply hold a spear by both ends and bend it; it will naturally snap at the point where the tough, woody part meets the tender stem. Discard the woody ends. For uniform pieces and better integration into our salad, I like to cut the asparagus into 1-inch pieces.
  2. Blanch the Asparagus (or Roast for Deeper Flavor): You have a couple of options here!

    • Blanching: Bring a pot of salted water to a boil. Add the asparagus pieces and cook for just 2-3 minutes, until they are bright green and tender-crisp. Immediately transfer them to an ice bath (a bowl of ice water) to stop the cooking process and preserve their vibrant color. Once cooled, drain well and pat dry. This method keeps them fresh and snappy for our Spring Couscous Salad With Basil Vinaigrette.
    • Roasting: For a slightly sweeter, more concentrated flavor, you can toss the asparagus pieces with a drizzle of olive oil, salt, and pepper. Spread them on a baking sheet and roast at 400°F (200°C) for 8-12 minutes, or until tender-crisp and slightly caramelized. Let them cool completely.
  3. Thaw the Green Peas: If using frozen peas, simply place them in a colander and rinse them under cold water for a minute or two until thawed. Drain them thoroughly. If using fresh peas, a quick blanch in boiling water for 1-2 minutes followed by an ice bath will bring out their sweetness.
  4. Halve the Cherry Tomatoes: Wash and thoroughly dry your cherry or grape tomatoes. Cut each one in half. For a more rustic look, you could even quarter larger cherry tomatoes. These will burst with juicy flavor in every bite of our salad.
  5. Dice the Cucumber and Bell Pepper: Wash the English cucumber. I usually leave some of the skin on for texture and a beautiful green fleck, but if you prefer, you can peel it. Dice the cucumber into small, uniform pieces, roughly ½-inch cubes. Similarly, wash, core, and seed the red bell pepper, then dice it to a similar size. The uniform dicing helps ensure you get a bit of everything in each spoonful of your Spring Couscous Salad With Basil Vinaigrette.
  6. Mince the Red Onion and Slice Radishes: Peel and finely mince the red onion. Remember, a little goes a long way with red onion in a raw salad, so aim for a very fine dice. If you find raw red onion too strong, you can soak the minced onion in cold water for 5-10 minutes and then drain and pat dry – this mellows its pungent bite considerably. Wash and thinly slice or finely dice the radishes. Their peppery crunch is a delightful addition.
  7. Prepare Optional Add-ins: If you’re including chickpeas, ensure they are thoroughly rinsed under cold water until no suds remain, then drained very well. If using feta cheese, simply crumble it. If adding nuts like pine nuts or slivered almonds, toast them lightly in a dry skillet over medium-low heat for a few minutes until fragrant and lightly golden, then let them cool completely. This really enhances their flavor and crunch.

Crafting the Fresh Basil Vinaigrette: The Heart of the Spring Couscous Salad:

  1. Prepare the Basil: Wash your fresh basil leaves and gently pat them completely dry with paper towels. Any excess water can dilute our vinaigrette. If you have a mini food processor or blender, you can roughly chop the basil. If making by hand, stack the basil leaves, roll them tightly into a cigar shape, and then thinly slice across to create a chiffonade. For the vinaigrette, I prefer to blend it to fully incorporate the basil flavor and color.
  2. Combine Vinaigrette Ingredients: In a small food processor or blender, add the ½ cup of extra virgin olive oil, ¼ cup of red wine vinegar, the prepared fresh basil leaves, 2 minced cloves of garlic, 1 teaspoon of Dijon mustard, ½ teaspoon of salt, and ¼ teaspoon of freshly ground black pepper. If you want to balance the acidity or add a touch of sweetness, now is the time to add an optional teaspoon of honey or maple syrup.
  3. Blend Until Smooth: Process the ingredients on high speed until the basil is finely chopped and the vinaigrette is well emulsified and vibrant green. It should be relatively smooth, though small flecks of basil are perfectly fine and even desirable for texture. If you don’t have a food processor or blender, you can finely mince the basil and garlic, then whisk all the ingredients vigorously in a bowl until combined. It won’t be as creamy, but it will still taste fantastic!
  4. Taste and Adjust: This is arguably the most important step for any dressing! Dip a clean spoon into the vinaigrette and taste it. Does it need more salt? More pepper? A bit more tang from the vinegar? Perhaps a touch more olive oil to mellow it, or a hint of sweetness to round it out? Adjust to your personal preference. Remember, this vinaigrette is going to coat our entire Spring Couscous Salad With Basil Vinaigrette, so you want it to be perfectly balanced.
  5. Set Aside: Once perfected, set your beautiful basil vinaigrette aside. You can even make this a day or two in advance and store it in an airtight container in the refrigerator; just give it a good shake or whisk before using, as the oil and vinegar may separate slightly.

Assembling Your Perfect Spring Couscous Salad:

  1. Gather All Prepared Components: Ensure your cooked couscous is completely cooled to room temperature. Having warm couscous will not only wilt your fresh vegetables but also create a less refreshing salad experience. Gather all your prepared spring vegetables – the blanched asparagus, thawed peas, halved tomatoes, diced cucumber, diced bell pepper, minced red onion, and sliced radishes. Have your optional chickpeas, feta, and toasted nuts ready too.
  2. Combine Couscous and Vegetables: In a very large mixing bowl – you’ll want plenty of room to toss everything without spilling – add the cooled couscous. Then, carefully add all the prepared spring vegetables: the asparagus, green peas, cherry tomatoes, cucumber, red bell pepper, red onion, and radishes. If you’re adding chickpeas, toss those in now as well.
  3. Add the Basil Vinaigrette: Pour about two-thirds of your freshly made Basil Vinaigrette over the couscous and vegetable mixture. We’re starting with two-thirds to avoid over-dressing the salad from the get-go. You can always add more, but you can’t take it away!
  4. Gently Toss to Combine: Using a large spoon or a pair of tongs, gently toss all the ingredients together. The goal is to evenly distribute the vinaigrette and ensure every grain of couscous and every piece of vegetable is coated. Be gentle to avoid mashing the softer ingredients like the tomatoes. As you toss, you’ll see the vibrant colors come alive and the fragrant basil scent will fill your kitchen – a true testament to a delightful Spring Couscous Salad With Basil Vinaigrette.
  5. Taste and Adjust Seasoning: Take a small spoonful of the salad and taste it. Does it need more dressing? More salt or pepper? This is your chance to fine-tune the flavors. Add the remaining vinaigrette if desired, or additional salt and pepper, and toss again until you’re completely satisfied with the taste.
  6. Fold in Optional Ingredients: If you’re adding crumbled feta cheese or goat cheese, gently fold it into the salad now. Do this step last so the cheese doesn’t break down too much during vigorous tossing. Similarly, if you’re using toasted pine nuts or slivered almonds, stir them in right before serving or sprinkle them on top for maximum crunch.
  7. Chill Before Serving (Highly Recommended): For the best flavor, cover the bowl and refrigerate the Spring Couscous Salad With Basil Vinaigrette for at least 30 minutes, or even better, for a few hours. This chilling time allows the flavors to meld and deepen, making the salad even more delicious and refreshing. If you can let it sit for an hour or two, you’ll be rewarded with a truly spectacular dish where all the components harmonize beautifully.

Serving and Enjoying Your Spring Couscous Salad With Basil Vinaigrette:

  1. Serve Chilled: When ready to serve, give the salad one last gentle stir. The basil vinaigrette may settle slightly, so a quick toss will redistribute its goodness. Serve your beautiful Spring Couscous Salad With Basil Vinaigrette chilled or at cool room temperature. It’s a fantastic side dish for grilled chicken, fish, or even as a light vegetarian main course.
  2. Garnish (Optional): For an extra touch of freshness and visual appeal, you can garnish the salad with a few fresh basil leaves, a sprinkle of extra crumbled feta, or a dash of black pepper right before serving.

Tips and Variations for Your Spring Couscous Salad:

  1. Make it a Meal: To elevate this side dish into a hearty main course, consider adding grilled shrimp, shredded chicken, or a generous portion of roasted vegetables like zucchini and eggplant alongside the chickpeas. The couscous base and the flavorful Basil Vinaigrette provide a perfect foundation for almost any protein. For a completely plant-based meal, simply increase the amount of chickpeas or add some white beans.
  2. Experiment with Herbs: While fresh basil is the star of our vinaigrette, feel free to experiment with other spring herbs. A mix of basil and fresh mint can add an incredibly refreshing lift, especially on a warm day. You could also try incorporating a bit of fresh parsley or dill into the vinaigrette or as a garnish. Each herb brings its unique aromatic profile, allowing you to customize the flavor of your Spring Couscous Salad With Basil Vinaigrette.
  3. Seasonal Vegetable Swaps: The beauty of a spring couscous salad is its adaptability to seasonal produce. Don’t feel limited to just asparagus and peas. In early spring, blanched snap peas, sugar peas, or finely chopped spring onions would be delightful additions. As summer approaches, feel free to add roasted corn kernels, diced zucchini, or even finely chopped green beans. The core idea is to use fresh, vibrant vegetables that speak to the season, making your salad unique every time.
  4. Spice it Up: If you enjoy a little heat, a pinch of red pepper flakes added to the basil vinaigrette will give your salad a subtle kick. Alternatively, a finely minced jalapeño (seeds removed for less heat) could be incorporated with the other diced vegetables for a fresh, spicy crunch.
  5. Storage: This Spring Couscous Salad With Basil Vinaigrette stores beautifully! Leftovers can be kept in an airtight container in the refrigerator for up to 3-4 days. The flavors often deepen and meld even further overnight, making it a fantastic meal prep option for lunches throughout the week. If you plan to store it for several days, you might want to add any delicate greens (like spinach or arugula) right before serving, rather than mixing them in initially, to prevent wilting.
  6. Presentation Matters: While the taste is paramount, a visually appealing dish enhances the eating experience. When serving, consider piling the salad high in a beautiful serving bowl. If you’re hosting, you might even scoop individual portions into martini glasses or small clear bowls for an elegant presentation. A final sprinkle of fresh basil leaves or a drizzle of extra virgin olive oil can add that professional touch.

Delicious Spring Couscous Salad with Zesty Basil Vinaigrette

Conclusion:

And so, we arrive at the culmination of our culinary journey! I truly hope you’re as excited as I am about what we’ve created here. If there’s one dish I could implore you to try this season, it’s this one. It’s more than just a meal; it’s an experience, a celebration of fresh, vibrant produce and bright flavors that truly sing on the palate. I’m convinced that once you taste the delightful medley of textures and the incredible zing of the homemade vinaigrette, you’ll understand exactly why I’m so passionate about it. This isn’t just any salad; it’s a dish that promises to brighten your day and invigorate your taste buds with every forkful. The ease of preparation combined with its stunning visual appeal makes it an absolute winner in my book, perfect for both everyday enjoyment and special occasions. The carefully selected ingredients come together to form a harmonious blend, making the Spring Couscous Salad With Basil Vinaigrette an unforgettable dish that perfectly captures the essence of the season.

Now, let’s talk about how you can best enjoy this incredible creation. While it’s utterly satisfying as a light lunch or dinner on its own, it truly shines when paired with a few complementary dishes. Imagine serving it alongside some perfectly grilled chicken breasts or tender pan-seared salmon; the freshness of the salad beautifully balances the richness of the protein. For vegetarian options, I love it with a hearty lentil soup or a platter of roasted root vegetables. It’s also an absolute showstopper as a side dish at a potluck or backyard barbecue – trust me, it always disappears first! I often make a big batch at the beginning of the week, and it serves as a fantastic, healthy meal prep option that holds up wonderfully in the fridge for a few days. Don’t forget it for picnics either; it travels exceptionally well and remains refreshing even after a little time outdoors. It’s the kind of versatile dish that adapts to almost any dining scenario you can imagine, bringing a burst of color and flavor wherever it goes. Its vibrant nature makes it a perfect companion to nearly any main course you could dream up, elevating simple meals into something truly special.

One of the aspects I adore most about this recipe is its incredible adaptability. While the core flavors of the Spring Couscous Salad With Basil Vinaigrette are simply divine as they are, don’t hesitate to make it your own! Feel free to experiment with different seasonal vegetables based on what you have on hand or what’s freshest at your local market. Asparagus, sugar snap peas, or even finely diced bell peppers would be wonderful additions. If you’re looking to boost the protein content, grilled shrimp, crumbled feta cheese, or a handful of toasted chickpeas would be excellent choices, adding even more texture and satiety. For those who prefer a different grain, quinoa, farro, or even pearl barley could easily be substituted for the couscous, offering a slightly different mouthfeel and nutritional profile. And for the basil vinaigrette itself? A little zest from a lemon or lime can add an extra layer of brightness, or a tiny dollop of Dijon mustard could give it a subtle kick. The possibilities are truly endless, allowing you to tailor this recipe to your personal preferences and dietary needs, ensuring it becomes a regular fixture in your culinary repertoire. Don’t be afraid to let your creativity flow!

So, there you have it. My heartfelt plea for you to give this amazing recipe a try. I promise you won’t be disappointed. It’s simple, it’s vibrant, and it’s bursting with the kind of fresh flavors that make you feel good from the inside out. There’s something truly magical about bringing together such straightforward ingredients to create something so spectacularly delicious. I genuinely believe that every bite is a little ray of sunshine, a delightful reminder of the season’s bounty. I am incredibly eager for you to experience the joy of preparing and savoring this salad. Please, don’t just read about it – gather your ingredients, head into the kitchen, and immerse yourself in the process. I would absolutely love to hear about your experience! Did you make any exciting variations? What did you serve it with? Please share your thoughts, photos, and any creative twists you come up with in the comments or on social media. Your feedback and culinary adventures truly inspire me, and I can’t wait to see how you make this dish your own.

Ultimately, this isn’t just a recipe; it’s an invitation to embrace fresh, wholesome eating with open arms and a happy heart. It’s light yet satisfying, healthy yet incredibly flavorful, making it a perfect example of how delicious nutritious food can be. It’s the ideal dish to welcome warmer weather, to share with loved ones, or simply to treat yourself to a moment of culinary bliss. The balance of textures – the fluffy couscous, the crisp vegetables, the creamy avocado – combined with the herbaceous, tangy vinaigrette, creates a symphony for the senses. You’ll find yourself reaching for this recipe again and again, not just because it’s easy, but because it consistently delivers on taste and satisfaction. Trust me, once you master the art of this simple vinaigrette and taste how it elevates the fresh ingredients, you’ll wonder how you ever lived without it. It truly embodies everything wonderful about seasonal cooking and I am confident it will become a new favorite in your kitchen.


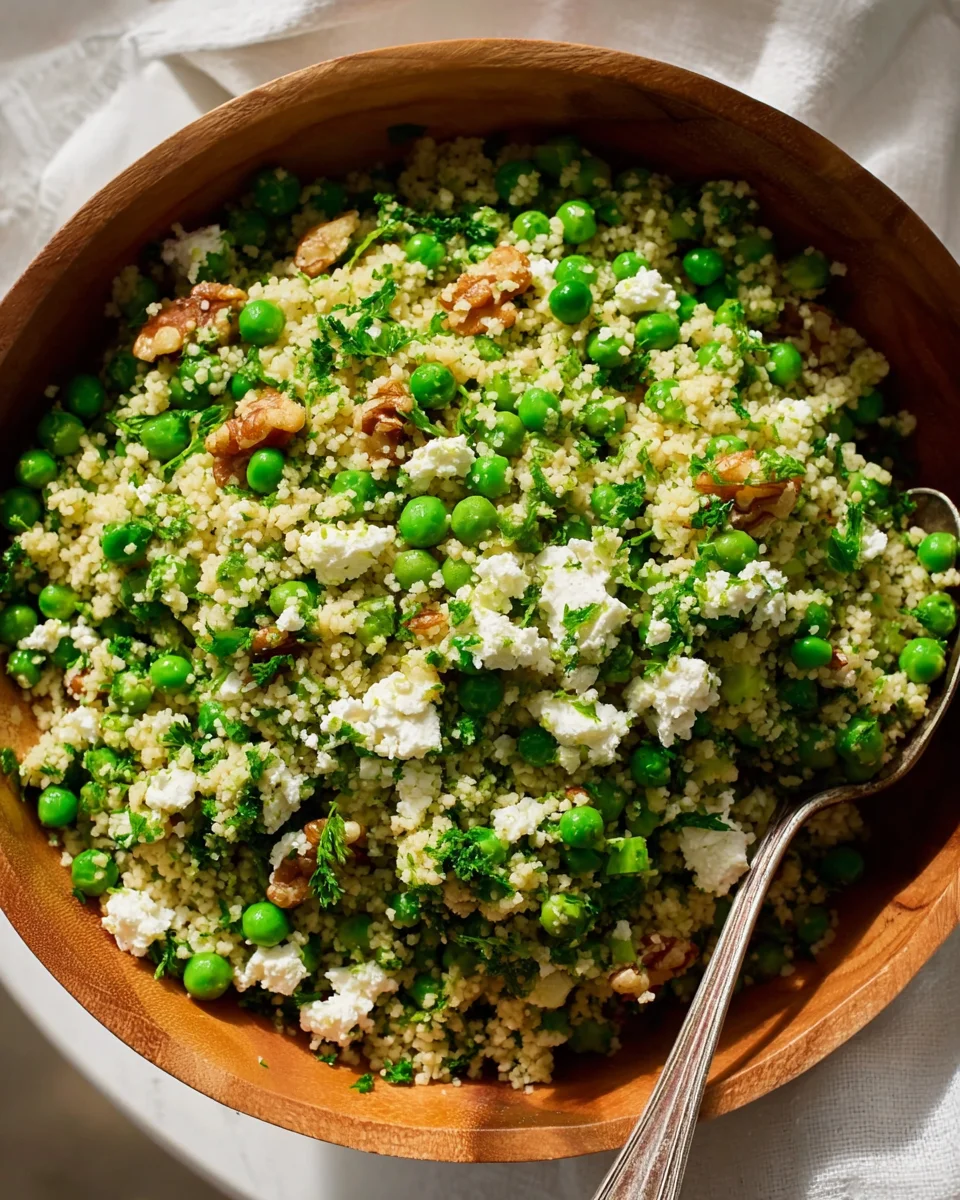
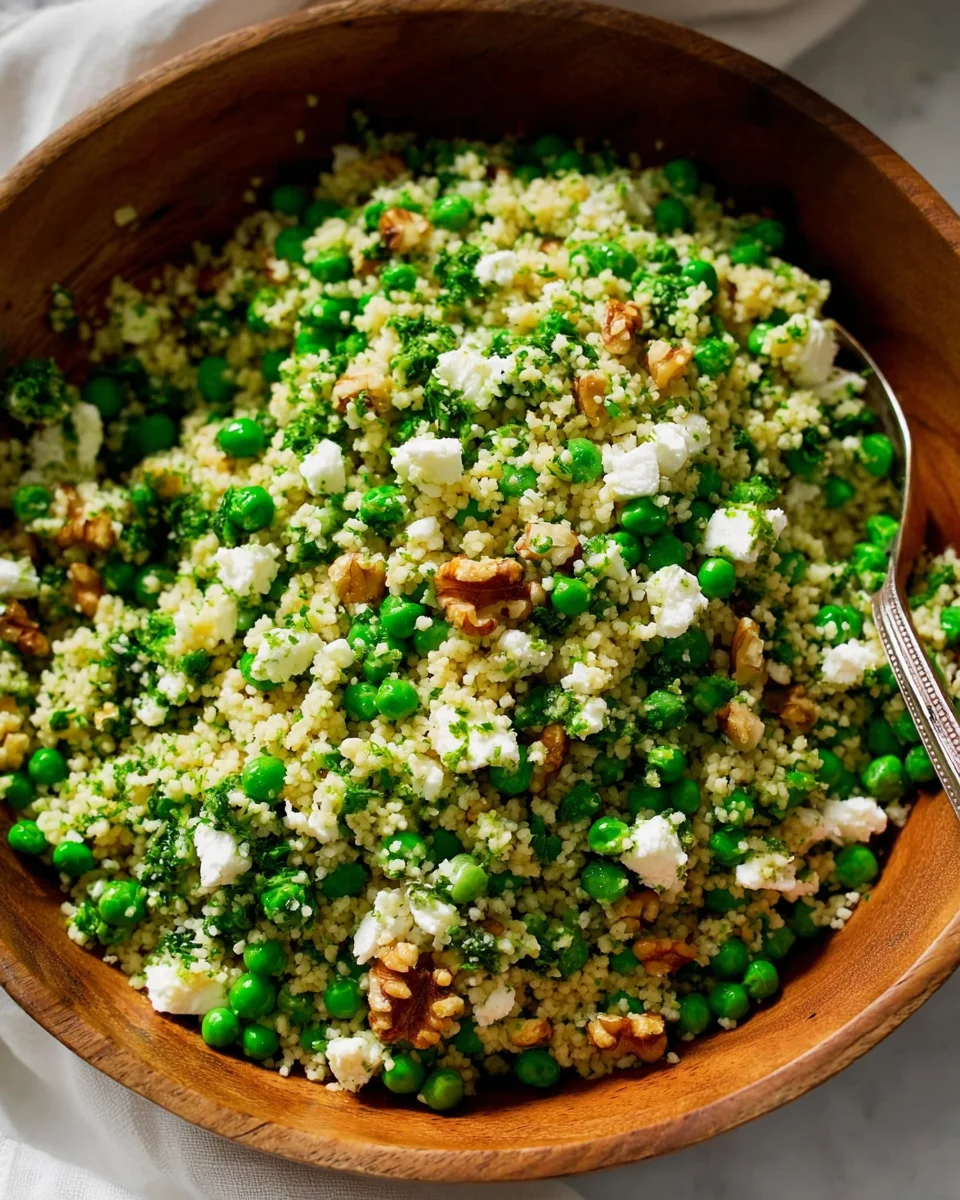
Spring Couscous Salad With Zesty Basil Vinaigrette

A vibrant and refreshing couscous salad featuring fluffy couscous, sweet peas, tangy feta, and crunchy walnuts, all brought together with a bright, herbaceous basil vinaigrette. A perfect dish for spring gatherings or a light meal.

Prep Time
30 Minutes
Cook Time
15 Minutes
Total Time
30 Minutes
Servings
4 servings

Ingredients


Instructions


Important Information

Nutrition Facts (Per Serving)

It is important to consider this information as approximate and not to use it as definitive health advice.

Allergy Information

Please check ingredients for potential allergens and consult a health professional if in doubt.

« Previous Post
Ultra Thick Bakery Chocolate Chip Cookies: Crispy & Gooey
Next Post »
Honey Mustard BLT Chicken Sliders: Delicious & Easy!

If you enjoyed this…

Delicious Chinese Garlic Sauce Recipe for Beef Dishes

Baja Sauce Recipe

Baja Sauce (Delicious Creamy Sauce for Fish Tacos)

Mediterranean Grilled Shrimp with Tzatziki Sauce

Primary Sidebar

Browse by Diet

BreakfastDinnerLunchDessertAppetizer

Sweet Peach Yogurt Parfait Delight

One of my fondest memories is from a lazy summer afternoon spent at my grandmother’s house. The sun filtered through the kitchen window, casting a warm glow over the table where she would create her culinary magic. It was during one of those blissful moments that I first tasted her Peach Yogurt Parfait with Honey and Granola. The sweet aroma of ripe peaches mingling with creamy yogurt and the crunch of granola was nothing short of heavenly. It felt like summer captured in a bowl, and I still remember the joy of diving in with a spoon, each layer revealing a new burst of flavor.

When I think about that parfait, I can almost hear the gentle hum of the bees outside, reminding me of the floral notes that honey brings to every bite. The vibrant yellows and soft oranges of the peaches contrast beautifully with the creamy white yogurt and the golden crunch of granola. It’s a dish that not only looks delightful but also tastes like a celebration of fresh, wholesome ingredients.

What makes my version of this Peach Yogurt Parfait special is the careful balance of flavors and textures. I use ripe, juicy peaches, drizzled with locally sourced honey, and a homemade granola that’s bursting with nuts and seeds for an extra crunch. It’s a simple dish, but every layer is crafted with love and attention.

Let me show you exactly how to make this delightful parfait, so you can bring a bit of that summer magic into your kitchen!

Sweet Peach Yogurt Parfait Delight

Why You’ll Love This Recipe

  • Delightfully creamy texture from the Greek yogurt, paired with the juicy sweetness of fresh peaches.
  • Ready in under 20 minutes, making it a quick and satisfying breakfast or snack option.
  • Budget-friendly, using common ingredients that you may already have in your pantry.
  • Customizable with your favorite granola and nuts, allowing you to tailor each parfait to your taste.
  • Perfectly balanced flavors with the bright acidity of lemon juice and the sweetness of honey enhancing the peaches.

Ingredients

  • For the Parfait:
  • 2 cups plain Greek yogurt (or vanilla yogurt for a sweeter option)
  • 2 large ripe peaches, diced (about 2 cups)
  • 1 tablespoon fresh lemon juice (to prevent browning of peaches)
  • 2 tablespoons honey (plus more for drizzling)
  • 1 teaspoon vanilla extract (optional for extra flavor)
  • For the Granola:
  • 1 cup granola (store-bought or homemade; see notes for a simple granola recipe)
  • 1/4 cup sliced almonds (optional for added crunch)
  • 1/4 cup shredded coconut (optional for added flavor)

Let’s dive into some key ingredients that make this Peach Yogurt Parfait so delightful! First, the Greek yogurt is not only creamy but also packed with protein, making it a satisfying option for breakfast or a snack. If you’re looking for a sweeter option, you can easily substitute it with vanilla yogurt, though it may alter the overall flavor balance. Next, the ripe peaches are the star of the show; their natural sweetness shines through, so I recommend choosing peaches that yield slightly to pressure, indicating they’re perfectly ripe. If peaches aren’t in season, feel free to use nectarines or even frozen peaches—just thaw them before use. Finally, honey adds a lovely floral sweetness that ties everything together. If you prefer, maple syrup can serve as a delicious substitute.

Step-by-Step Instructions

  1. Start by preparing the peaches. Wash them thoroughly, then slice and dice them into bite-sized pieces. In a medium bowl, toss the diced peaches with 1 tablespoon of fresh lemon juice to prevent browning. Set aside for about 5 minutes while the lemon juice works its magic.
  2. In a separate bowl, combine the Greek yogurt, 2 tablespoons of honey, and 1 teaspoon of vanilla extract if using. Stir the mixture until smooth and thoroughly blended. This should take about a minute. Avoid overmixing to maintain the creaminess of the yogurt.
  3. Now it’s time to layer your parfait. Grab a clear glass or bowl to showcase your beautiful creation. Start with a generous spoonful of the yogurt mixture at the bottom—about 1/4 cup will do. Use a spoon to spread it evenly.
  4. Add a layer of the diced peaches over the yogurt, ensuring they cover the yogurt completely. You might want to use about half of what you have prepared—roughly 1 cup. This layer should be visually appealing, so arrange the peaches neatly.
  5. Sprinkle 1/4 cup of granola over the peaches. This adds a delightful crunch. Make sure to distribute it evenly to ensure every bite has that satisfying texture. Avoid packing it down too tightly, as you want it to maintain its crunch.
  6. Repeat the layers: spoon in another 1/4 cup of yogurt, followed by another cup of peaches, and another sprinkle of granola. You should have at least two layers, but feel free to add more depending on your glass size.
  7. Finish off your parfait with a drizzle of honey on top for added sweetness and a touch of elegance. If you’re using sliced almonds or shredded coconut, sprinkle them on top now. It adds a lovely visual contrast and extra flavor.
  8. Serve immediately or refrigerate for up to 30 minutes before serving to allow the flavors to meld together. However, I recommend enjoying it fresh to maintain the granola’s crunch.

Pro Tips for the Best Peach Yogurt Parfait With Honey And Granola

  • Make sure to choose ripe peaches for the best flavor and texture. A common mistake is using unripe fruit, which can lead to a less enjoyable parfait. Look for peaches that are fragrant and slightly soft to the touch.
  • Use a clear glass to assemble your parfait; this not only makes for a beautiful presentation but also allows you to see the colorful layers, which adds to the enjoyment of eating it.
  • For an even creamier texture, consider whipping the Greek yogurt with a hand mixer for a couple of minutes before layering. This small adjustment makes a huge difference in mouthfeel.
  • Be mindful of the granola-to-yogurt ratio. Too much granola can overwhelm the parfait, while too little can make it feel too creamy. Aim for about 1/4 cup of granola per layer for the perfect balance.
  • If you’re making this for a gathering, consider preparing the yogurt and peaches ahead of time and layering them just before serving. This ensures the granola stays crunchy!

Variations & Serving Ideas

There are so many ways to get creative with your Peach Yogurt Parfait! For a tropical twist, swap out the peaches for mangoes or pineapples and top with coconut flakes. If you prefer a berry flavor, mix in some blueberries or strawberries with the peaches for added color and taste. For a nutty version, incorporate chopped walnuts or pecans instead of almonds.

As for serving ideas, this parfait pairs beautifully with a side of scrambled eggs for a hearty breakfast or fresh fruit salad for a light lunch. You might also enjoy it alongside whole grain toast with almond butter for an energizing snack. The contrast of flavors and textures will elevate your meal experience!

Storage, Make-Ahead & Reheating

The Peach Yogurt Parfait is best enjoyed fresh, but you can prepare some components ahead of time. Store the layered parfait in an airtight container in the refrigerator for up to 24 hours. However, be cautious; the granola may lose its crunch if stored too long. You can freeze the yogurt and peach mixture for up to 2 months; just remember to thaw it in the refrigerator overnight before serving.

If you plan to enjoy this dish the next day, it can taste even better as the flavors meld together. Just remember to add the granola right before serving to keep its delightful crunch!

Frequently Asked Questions

Can I make Peach Yogurt Parfait With Honey And Granola ahead of time?

Yes — in fact, it tastes even better the next day as the flavors meld. However, I recommend waiting to add the granola until just before serving to maintain its crunch.

What can I substitute for Greek yogurt?

If you prefer a lighter option, you can substitute Greek yogurt with regular yogurt or a dairy-free alternative like coconut yogurt. Just remember that this may alter the creaminess and flavor profile slightly.

Can I use frozen peaches for this parfait?

Absolutely! Just make sure to thaw the frozen peaches before using them. They will still add great flavor, though the texture may be slightly softer than fresh peaches.

How do I make the parfait vegan?

To make a vegan version, substitute the Greek yogurt with a plant-based yogurt alternative, and replace honey with maple syrup or agave nectar. This keeps the parfait sweet while adhering to a vegan diet.

What other fruits can I use in this recipe?

You can mix and match fruits based on your preference. Try using strawberries, blueberries, raspberries, or even bananas. Just make sure to adjust the lemon juice as needed to prevent browning.

Sweet Peach Yogurt Parfait Delight

Final Thoughts

The Peach Yogurt Parfait with Honey and Granola is a delightful blend of creamy yogurt, sweet peaches, and crunchy granola that creates a satisfying and nourishing treat. Each layer bursts with flavor, making it a perfect choice for breakfast or a light dessert.

This is the kind of recipe I come back to again and again, especially when I want something refreshing and wholesome to start my day. The harmony of sweet and tart flavors, combined with the delightful crunch, never fails to lift my spirits!

I encourage you to give this parfait a try and indulge in its comforting goodness. Feel free to share your results or even add your own twist—perhaps a sprinkle of cinnamon or a handful of nuts. Enjoy creating your perfect parfait!

Print
clock clock iconcutlery cutlery iconflag flag iconfolder folder iconinstagram instagram iconpinterest pinterest iconfacebook facebook iconprint print iconsquares squares iconheart heart iconheart solid heart solid icon

Peach Yogurt Parfait


  • Author: Lily author
  • Total Time: 15 minutes
  • Yield: 4 servings 1x
Pin Recipe
Print Recipe

Description

This Peach Yogurt Parfait combines creamy Greek yogurt, juicy peaches, and crunchy granola for a delightful treat. It’s a perfect breakfast or snack that captures the essence of summer in every bite.


Ingredients

Scale
  • For the Parfait:
  • 2 cups plain Greek yogurt (or vanilla yogurt for a sweeter option)
  • 2 large ripe peaches, diced (about 2 cups)
  • 1 tablespoon fresh lemon juice (to prevent browning of peaches)
  • 2 tablespoons honey (plus more for drizzling)
  • 1 teaspoon vanilla extract (optional for extra flavor)
  • For the Granola:
  • 1 cup granola (store-bought or homemade; see notes for a simple granola recipe)
  • 1/4 cup sliced almonds (optional for added crunch)
  • 1/4 cup shredded coconut (optional for added flavor)

Instructions

  1. Start by preparing the peaches. Wash them thoroughly, then slice and dice them into bite-sized pieces. In a medium bowl, toss the diced peaches with 1 tablespoon of fresh lemon juice to prevent browning. Set aside for about 5 minutes while the lemon juice works its magic.
  2. In a separate bowl, combine the Greek yogurt, 2 tablespoons of honey, and 1 teaspoon of vanilla extract if using. Stir the mixture until smooth and thoroughly blended. This should take about a minute. Avoid overmixing to maintain the creaminess of the yogurt.
  3. Now it’s time to layer your parfait. Grab a clear glass or bowl to showcase your beautiful creation. Start with a generous spoonful of the yogurt mixture at the bottom—about 1/4 cup will do. Use a spoon to spread it evenly.
  4. Add a layer of the diced peaches over the yogurt, ensuring they cover the yogurt completely. You might want to use about half of what you have prepared—roughly 1 cup. This layer should be visually appealing, so arrange the peaches neatly.
  5. Sprinkle 1/4 cup of granola over the peaches. This adds a delightful crunch. Make sure to distribute it evenly to ensure every bite has that satisfying texture. Avoid packing it down too tightly, as you want it to maintain its crunch.
  6. Repeat the layers: spoon in another 1/4 cup of yogurt, followed by another cup of peaches, and another sprinkle of granola. You should have at least two layers, but feel free to add more depending on your glass size.
  7. Finish off your parfait with a drizzle of honey on top for added sweetness and a touch of elegance. If you’re using sliced almonds or shredded coconut, sprinkle them on top now. It adds a lovely visual contrast and extra flavor.
  8. Serve immediately or refrigerate for up to 30 minutes before serving to allow the flavors to meld together. However, I recommend enjoying it fresh to maintain the granola’s crunch.
  • Prep Time: 15 mins
  • Cook Time: 0 mins
  • Category: Breakfast
  • Method: No-cook
  • Cuisine: American

Nutrition

  • Serving Size: 1 parfait
  • Calories: 250
  • Sugar: 20 g
  • Sodium: 50 mg
  • Fat: 5 g
  • Saturated Fat: 2 g
  • Unsaturated Fat: 3 g
  • Trans Fat: 0 g
  • Carbohydrates: 40 g
  • Fiber: 3 g
  • Protein: 10 g
  • Cholesterol: 10 mg

Keywords: Choose ripe peaches for the best flavor and texture. Use a clear glass for a beautiful presentation. For creaminess, consider whipping the yogurt before layering. Be mindful of the granola-to-yogurt ratio. Prepare yogurt and peaches ahead of time for gatherings, layering just before serving.

Did you make this recipe?

Share a photo and tag us — we can't wait to see what you've made!

Sun-Kissed Frozen Orange Cream Slush

As a child, summer days felt like they lasted forever. I remember the sticky heat wrapping around me as I played outside, my laughter mingling with the sounds of the neighborhood. But nothing could cool me down quite like the moment I’d spot my grandmother, laboring over her blender, whipping up her famous Frozen Orange Creamsicle Slush. That vibrant orange treat, with its frosty texture and sweet citrus aroma, was like a burst of sunshine in a cup. Just one sip, and I could feel the coolness wash over me, sparking pure joy.

This Frozen Orange Creamsicle Slush has a way of making you feel like a kid again. Its creamy, dreamy consistency is a delightful balance of bright orange and soft vanilla, inviting you to dive right in. The refreshing tang of orange dances on your tongue, while the smooth creaminess envelops you in a comforting embrace. It’s a nostalgic treat that’s perfect for hot summer afternoons or anytime you need a little pick-me-up.

What makes my version of this slush stand out is the addition of a hint of vanilla bean, which elevates the flavor and adds an extra layer of richness. Plus, it’s super easy to whip up with just a few simple ingredients that you probably already have on hand! So, if you’re ready to relive those sun-soaked memories, let me show you exactly how to make it.

Sun-Kissed Frozen Orange Cream Slush

Why You’ll Love This Recipe

  • Each slush is a perfect blend of creamy vanilla and zesty orange, creating a nostalgic flavor reminiscent of summer days.
  • This refreshing treat is ready in under 15 minutes, making it an ideal quick dessert for unexpected guests or hot afternoons.
  • With just 8 simple ingredients, it’s budget-friendly, ensuring you don’t have to break the bank to enjoy a delicious slush.
  • The slush has a perfectly smooth texture, thanks to the combination of ice and ice cream, providing a delightful contrast to the bright citrus flavors.
  • It’s highly customizable; you can easily adjust the sweetness and add fresh herbs for a unique twist that suits your taste.

Ingredients

  • 2 cups orange juice (freshly squeezed or store-bought)
  • 1 cup vanilla ice cream
  • 1 cup crushed ice
  • 1/2 cup milk (whole or 2%)
  • 1/4 cup granulated sugar (adjust based on sweetness preference)
  • 1 teaspoon vanilla extract
  • Zest of 1 orange (for added flavor)
  • Fresh orange slices and mint leaves (for garnish)

The star of this Frozen Orange Creamsicle Slush is the orange juice, which provides the vibrant, citrusy base. Freshly squeezed juice will yield the brightest flavor, but store-bought options can be just as convenient. If you’re opting for store-bought, choose 100% pure juice with no added sugars for the best results. Another essential ingredient is the vanilla ice cream; it adds creaminess and sweetness. You can substitute it with dairy-free ice cream if you’re looking for a vegan option. Whole or 2% milk complements the ice cream, creating a smooth blend. If you want a lower-calorie version, almond or oat milk can be good alternatives.

Lastly, the granulated sugar can be adjusted based on your sweetness preference. If you prefer a more natural sweetener, consider using honey or agave syrup. The orange zest enhances the flavor profile, providing an aromatic pop that brings the whole slush together. Don’t skip it! It adds an extra layer of brightness that makes this slush truly special.

Step-by-Step Instructions

  1. Start by preparing your ingredients. Gather 2 cups of orange juice, 1 cup of vanilla ice cream, and 1 cup of crushed ice. Make sure the ice is finely crushed, as larger chunks can make blending difficult.
  2. In a blender, combine the orange juice, vanilla ice cream, crushed ice, and 1/2 cup of milk. Add 1/4 cup of granulated sugar and 1 teaspoon of vanilla extract. If you like a sweeter slush, consider adding a bit more sugar at this stage.
  3. Add the zest of 1 orange to the blender. This step is crucial for enhancing the citrus flavor of your slush. Make sure not to include the bitter white pith—only the flavorful zest.
  4. Blend the mixture on medium-high speed for about 30-45 seconds. Stop once the ingredients are fully combined and the slush has a smooth, even consistency. If you notice large chunks of ice, blend for an additional 10-15 seconds. Avoid over-blending, as this can make the slush too liquidy.
  5. Once blended, taste the slush. If it needs more sweetness, add a little more sugar and blend for a few more seconds. If it’s too thick, you can add a splash of milk to reach your desired consistency.
  6. Pour the slush into glasses. This recipe typically serves 4, but you can easily double it for larger gatherings. Use a spoon to help guide the slush into the glasses if needed.
  7. Garnish each serving with fresh orange slices and mint leaves. The mint not only adds a pop of color but also a refreshing aroma that complements the citrus flavors beautifully.
  8. Serve immediately and enjoy! If you’ve made extra, you can refrigerate it for a short time, but it’s best enjoyed fresh.

Pro Tips for the Best Frozen Orange Creamsicle Slush

  • Don’t skip the orange zest! It’s a game-changer for flavor. Always zest before juicing to make it easier.
  • Use a high-powered blender for the best texture. A standard blender may struggle with ice, leading to uneven consistency. If you have a food processor, that can work too, but ensure the ice is finely crushed.
  • Adjust the ice-to-liquid ratio carefully. If your slush is too thick, it won’t blend well. Start with less ice and add more until you reach your preferred texture.
  • Be cautious with the sugar! Always start with the lower amount, as you can easily add more, but it’s hard to fix an overly sweet slush.
  • For a fun twist, consider adding a splash of coconut milk or a handful of fresh fruit like strawberries or pineapple. This not only enhances the flavor but also adds a beautiful color contrast.

Variations & Serving Ideas

There are countless ways to put a spin on your Frozen Orange Creamsicle Slush. Consider making a tropical version by adding in some pineapple juice or coconut milk for a delightful tropical twist. If you’re feeling adventurous, try incorporating a handful of frozen mango or peach slices for added sweetness. For a lighter version, swap out the vanilla ice cream for Greek yogurt for a creamy yet tangy alternative.

As for serving ideas, this refreshing slush pairs wonderfully with light summer dishes like grilled chicken skewers, fish tacos, or a simple salad topped with citrus vinaigrette. The bright, zesty flavors of the slush complement these dishes perfectly, making them an ideal pairing for a sunny day.

Storage, Make-Ahead & Reheating

This Frozen Orange Creamsicle Slush is best enjoyed fresh, but if you have leftovers, you can store them in an airtight container in the fridge for up to 2 days. Just keep in mind that the slush may lose some of its texture over time as the ice melts. It doesn’t freeze well, as the ice will turn into a solid block. If you must freeze it, blend again after thawing to restore the slushy consistency. This treat is best the day you make it, as the flavors meld together beautifully overnight, enhancing its deliciousness.

Frequently Asked Questions

Can I make Frozen Orange Creamsicle Slush ahead of time?

Yes — in fact, it tastes even better the next day as the flavors meld. However, it’s best to enjoy it fresh, as the texture can change if stored for too long. If you need to prepare it ahead, keep it in the fridge and re-blend before serving.

What kind of orange juice should I use?

For the best flavor, use freshly squeezed orange juice. However, if you’re short on time, opt for 100% pure store-bought juice without added sugars. This will ensure that your slush remains flavorful and refreshing.

Can I substitute the vanilla ice cream?

Absolutely! If you’re looking for a dairy-free option, coconut milk ice cream or a non-dairy vanilla ice cream can work wonderfully. They will still provide the creamy texture and sweetness you desire.

How can I adjust the sweetness of my slush?

You can easily adjust the sweetness by modifying the amount of sugar added. Start with 1/4 cup and taste the mixture before blending. If you prefer it sweeter, add more sugar gradually until it reaches your desired level.

What should I do if my slush is too thick?

If your slush is too thick, simply add a splash of milk or orange juice and blend again. This will help achieve a more drinkable consistency while maintaining the slushy texture. Adjust gradually to reach your preferred thickness.

Sun-Kissed Frozen Orange Cream Slush

Final Thoughts

The Frozen Orange Creamsicle Slush is a delightful blend of refreshing citrus and creamy goodness, making it a perfect treat for warm days or any time you crave a taste of nostalgia. The way the bright orange flavor dances with the creamy texture truly elevates this slush, transforming it into a satisfying escape from the everyday.

This is the kind of recipe I come back to again and again, especially when I’m looking to cool down or impress guests at a summer gathering. It’s simple to make and always brings smiles all around! I encourage you to try this recipe for yourself—don’t hesitate to share your results or even put your own spin on it. Happy slushing!

Print
clock clock iconcutlery cutlery iconflag flag iconfolder folder iconinstagram instagram iconpinterest pinterest iconfacebook facebook iconprint print iconsquares squares iconheart heart iconheart solid heart solid icon

Frozen Orange Creamsicle Slush


  • Author: Lily author
  • Total Time: 15 minutes
  • Yield: 4 servings 1x
Pin Recipe
Print Recipe

Description

This Frozen Orange Creamsicle Slush is a refreshing treat that combines creamy vanilla and zesty orange flavors. Perfect for hot summer days, it brings back nostalgic memories with every sip.


Ingredients

Scale
  • 2 cups orange juice (freshly squeezed or store-bought)
  • 1 cup vanilla ice cream
  • 1 cup crushed ice
  • 1/2 cup milk (whole or 2%)
  • 1/4 cup granulated sugar (adjust based on sweetness preference)
  • 1 teaspoon vanilla extract
  • Zest of 1 orange (for added flavor)
  • Fresh orange slices and mint leaves (for garnish)

Instructions

  1. Start by preparing your ingredients. Gather 2 cups of orange juice, 1 cup of vanilla ice cream, and 1 cup of crushed ice. Make sure the ice is finely crushed, as larger chunks can make blending difficult.
  2. In a blender, combine the orange juice, vanilla ice cream, crushed ice, and 1/2 cup of milk. Add 1/4 cup of granulated sugar and 1 teaspoon of vanilla extract. If you like a sweeter slush, consider adding a bit more sugar at this stage.
  3. Add the zest of 1 orange to the blender. This step is crucial for enhancing the citrus flavor of your slush. Make sure not to include the bitter white pith—only the flavorful zest.
  4. Blend the mixture on medium-high speed for about 30-45 seconds. Stop once the ingredients are fully combined and the slush has a smooth, even consistency. If you notice large chunks of ice, blend for an additional 10-15 seconds. Avoid over-blending, as this can make the slush too liquidy.
  5. Once blended, taste the slush. If it needs more sweetness, add a little more sugar and blend for a few more seconds. If it’s too thick, you can add a splash of milk to reach your desired consistency.
  6. Pour the slush into glasses. This recipe typically serves 4, but you can easily double it for larger gatherings. Use a spoon to help guide the slush into the glasses if needed.
  7. Garnish each serving with fresh orange slices and mint leaves. The mint not only adds a pop of color but also a refreshing aroma that complements the citrus flavors beautifully.
  8. Serve immediately and enjoy! If you’ve made extra, you can refrigerate it for a short time, but it's best enjoyed fresh.
  • Prep Time: 15 min
  • Cook Time: 0 min
  • Category: Dessert
  • Method: Blending
  • Cuisine: American

Nutrition

  • Serving Size: 1 serving
  • Calories: 200
  • Sugar: 30 g
  • Sodium: 50 mg
  • Fat: 5 g
  • Saturated Fat: 3 g
  • Unsaturated Fat: 2 g
  • Trans Fat: 0 g
  • Carbohydrates: 40 g
  • Fiber: 1 g
  • Protein: 2 g
  • Cholesterol: 20 mg

Keywords: Don't skip the orange zest! It's a game-changer for flavor. Always zest before juicing to make it easier.

Did you make this recipe?

Share a photo and tag us — we can't wait to see what you've made!

Zesty Lemon Poppy Seed Delight

One rainy afternoon, I found myself in my grandmother’s cozy kitchen, the kind that always smelled like warmth and love. She was whipping up her famous Lemon Poppy Seed Loaf, a recipe that had been passed down through generations. As the batter came together, the zesty aroma of fresh lemons filled the air, mingling perfectly with the nutty fragrance of poppy seeds. I can still picture her, apron-clad, as she expertly drizzled a vibrant citrus icing over the loaf, creating a glossy, sun-kissed finish that beckoned us to dive in. It was a moment that sparked my own passion for baking, and this recipe has become a cherished staple in my home ever since.

When you take a bite of this Lemon Poppy Seed Loaf, it’s like a burst of sunshine on your palate. The loaf is beautifully golden, with a tender crumb that melts in your mouth. Each slice is speckled with tiny poppy seeds, adding a delightful crunch that contrasts beautifully with the tangy sweetness of the lemon. And that citrus icing? It’s the finishing touch that elevates this loaf from ordinary to extraordinary, with its bright, zesty flavor dancing on your taste buds.

This recipe stands out because it embraces simplicity while delivering on flavor. I’ve added a hint of vanilla to the batter, enhancing the overall taste and making it even more indulgent. Trust me, once you make this Lemon Poppy Seed Loaf With Citrus Icing, it’ll become a go-to in your baking repertoire.

So, let me show you exactly how to make it!

Zesty Lemon Poppy Seed Delight

Why You’ll Love This Recipe

  • Moist and tender crumb that melts in your mouth, thanks to the perfect balance of butter and buttermilk.
  • Bright, zesty lemon flavor paired with crunchy poppy seeds, creating a delightful texture and taste experience.
  • Easy to whip up in just about an hour, perfect for last-minute gatherings or a cozy afternoon treat.
  • Budget-friendly with everyday ingredients, making it an accessible option for all home bakers.
  • The citrus icing adds a sweet tang that elevates the loaf, turning a simple recipe into a showstopper!

Ingredients

  • 1 ½ cups (190g) all-purpose flour
  • 1 teaspoon baking powder
  • ½ teaspoon baking soda
  • ½ teaspoon salt
  • 3 tablespoons poppy seeds
  • ½ cup (115g) unsalted butter, softened to room temperature
  • 1 cup (200g) granulated sugar
  • 2 large eggs
  • 1 teaspoon vanilla extract
  • 1 teaspoon lemon zest (from about 1 medium lemon)
  • ½ cup (120ml) buttermilk
  • 2 tablespoons fresh lemon juice

For the Citrus Icing:

  • 1 cup (120g) powdered sugar
  • 2 tablespoons fresh lemon juice
  • 1 tablespoon orange juice
  • 1 teaspoon lemon zest (for garnish, optional)

Let’s dive into the key ingredients that make this Lemon Poppy Seed Loaf so special. The all-purpose flour provides the structure and base for the loaf, while the baking powder and baking soda ensure it rises perfectly, giving the loaf a light texture. For a gluten-free variation, you could substitute the flour with a gluten-free all-purpose blend. Poppy seeds not only add a delightful crunch but also contribute to the unique flavor profile that pairs well with the citrus notes.

Unsalted butter is crucial for achieving the buttery richness that makes this loaf so moist. If you’re looking for a dairy-free option, coconut oil or a vegan butter can be used instead. The buttermilk is another essential component, providing acidity that activates the baking soda for a fluffy texture. If you don’t have buttermilk on hand, you can easily make a substitute by mixing ½ cup of milk with 1 tablespoon of vinegar or lemon juice and letting it sit for about 5 minutes.

Step-by-Step Instructions

  1. Preheat your oven to 350°F (175°C). Grease a 9×5-inch loaf pan or line it with parchment paper for easy removal later.
  2. In a medium mixing bowl, whisk together 1 ½ cups of all-purpose flour, 1 teaspoon of baking powder, ½ teaspoon of baking soda, ½ teaspoon of salt, and 3 tablespoons of poppy seeds. This helps to evenly distribute the baking agents and ensures a uniform rise.
  3. In a large mixing bowl, cream together ½ cup of softened unsalted butter and 1 cup of granulated sugar using an electric mixer on medium speed for about 3-4 minutes, until the mixture is light and fluffy. Make sure to scrape down the sides of the bowl occasionally.
  4. Add 2 large eggs, 1 teaspoon of vanilla extract, and 1 teaspoon of lemon zest to the creamed butter and sugar, mixing until fully combined. You want a smooth consistency, so ensure there are no lumps of butter.
  5. In a small bowl, combine ½ cup of buttermilk and 2 tablespoons of fresh lemon juice. Alternately add the dry ingredients and buttermilk mixture to the butter mixture, starting and ending with the dry ingredients. Mix just until combined; do not overmix, as this can lead to a dense loaf.
  6. Pour the batter into the prepared loaf pan. Smooth the top with a spatula, ensuring it’s even. Bake in the preheated oven for 50-60 minutes, or until a toothpick inserted in the center comes out clean. The edges should be lightly golden brown, and the center should feel just set.
  7. Once baked, remove the loaf from the oven and allow it to cool in the pan for about 10 minutes. Then, transfer it to a wire rack to cool completely. Resist the urge to slice too soon, as it will be crumbly if it’s still warm.
  8. While the loaf is cooling, prepare the citrus icing. In a medium bowl, whisk together 1 cup of powdered sugar, 2 tablespoons of fresh lemon juice, and 1 tablespoon of orange juice until smooth. If the icing is too thick, you can add a little more juice to reach your desired consistency.
  9. Once the loaf is completely cool, drizzle the citrus icing over the top. If you like, sprinkle with an additional teaspoon of lemon zest for an extra pop of flavor and color.

Pro Tips for the Best Lemon Poppy Seed Loaf With Citrus Icing

  • Be careful not to overmix your batter; this is a common mistake that can lead to a dense loaf. Mix just until the dry ingredients are incorporated for a light and fluffy texture.
  • Use room temperature ingredients, especially the butter and eggs. This helps to create a smoother batter and ensures even baking. Take your eggs out of the fridge about 30 minutes before you start.
  • For a more pronounced lemon flavor, consider adding a little lemon extract in addition to the zest and juice. Just a half teaspoon can elevate the citrus notes significantly.
  • When measuring your flour, spoon it into the measuring cup and level it off with a knife instead of scooping directly from the bag. This prevents packing and ensures you don’t end up with a dry loaf.
  • Invest in a good quality loaf pan; it makes a difference in heat distribution, which ensures even baking. If your pan is dark-coated, reduce the oven temperature by 25°F to prevent over-browning.

Variations & Serving Ideas

For a delightful twist, consider adding blueberries or raspberries to the batter for a fruity burst of flavor. You can also experiment with different citrus fruits—try lime or grapefruit zest and juice for a refreshing change. For a healthier option, substitute half of the all-purpose flour with whole wheat flour for added fiber without compromising too much on texture.

This Lemon Poppy Seed Loaf pairs beautifully with a light salad, such as a mixed greens salad with a vinaigrette, or a cup of tea for a cozy afternoon treat. It also complements a creamy cheese platter, as the acidity of the loaf balances rich cheeses perfectly. Lastly, a scoop of vanilla ice cream on the side creates a delightful contrast of temperatures and flavors!

Storage, Make-Ahead & Reheating

This Lemon Poppy Seed Loaf can be stored at room temperature for up to 3 days if wrapped tightly in plastic wrap. If you want to keep it longer, it freezes well for up to 3 months. To freeze, wrap the loaf tightly in plastic wrap and then in aluminum foil to prevent freezer burn.

When you’re ready to enjoy it again, simply thaw it in the fridge overnight. Reheat individual slices in the microwave for 15-20 seconds or in a toaster oven until warmed through. Interestingly, many people find that this loaf tastes even better the next day, as the flavors have time to meld!

Frequently Asked Questions

Can I make Lemon Poppy Seed Loaf With Citrus Icing ahead of time?

Yes — in fact, it tastes even better the next day! You can make the loaf a day in advance, allowing the flavors to develop. Just be sure to store it in an airtight container to maintain its moisture.

Can I substitute the poppy seeds?

Absolutely! If you don’t have poppy seeds on hand or prefer an alternative, you can use sesame seeds for a similar crunch or omit them entirely for a smooth loaf.

What can I use instead of buttermilk?

If you don’t have buttermilk, you can easily create a substitute by mixing ½ cup of milk (dairy or plant-based) with 1 tablespoon of vinegar or lemon juice. Let it sit for 5 minutes before using in the recipe.

How can I make this recipe gluten-free?

To make a gluten-free version of this Lemon Poppy Seed Loaf, substitute the all-purpose flour with a gluten-free all-purpose flour blend. Just ensure that the blend contains a binding agent like xanthan gum for the best results.

What is the best way to store leftover loaf?

Leftover Lemon Poppy Seed Loaf should be stored in an airtight container at room temperature for up to 3 days. For longer storage, wrap it tightly and freeze for up to 3 months. Thaw it before serving for the best texture.

Zesty Lemon Poppy Seed Delight

Final Thoughts

The Lemon Poppy Seed Loaf with Citrus Icing is truly a delightful treat that brings a burst of brightness to any occasion. The zesty lemon flavor combined with the subtle crunch of poppy seeds creates a satisfying balance, while the citrus icing adds a touch of sweetness that perfectly complements the loaf’s tanginess.

This is the kind of recipe I come back to again and again, especially when I want to brighten up a gloomy day or celebrate a small victory. The aroma that fills the kitchen as it bakes is absolutely heavenly! I encourage you to give this recipe a try; you might just find it becoming a beloved staple in your home. Don’t forget to share your results or even add your own unique twist—I can’t wait to see what you create!

Print
clock clock iconcutlery cutlery iconflag flag iconfolder folder iconinstagram instagram iconpinterest pinterest iconfacebook facebook iconprint print iconsquares squares iconheart heart iconheart solid heart solid icon

Lemon Poppy Seed Loaf


  • Author: Lily author
  • Total Time: 23 minute
  • Yield: 1 loaf 1x
Pin Recipe
Print Recipe

Description

This Lemon Poppy Seed Loaf is a delightful treat that combines zesty lemon flavor with crunchy poppy seeds. Topped with a citrus icing, it’s perfect for any occasion.


Ingredients

Scale
  • 1 ½ cups (190g) all-purpose flour
  • 1 teaspoon baking powder
  • ½ teaspoon baking soda
  • ½ teaspoon salt
  • 3 tablespoons poppy seeds
  • ½ cup (115g) unsalted butter, softened to room temperature
  • 1 cup (200g) granulated sugar
  • 2 large eggs
  • 1 teaspoon vanilla extract
  • 1 teaspoon lemon zest (from about 1 medium lemon)
  • ½ cup (120ml) buttermilk
  • 2 tablespoons fresh lemon juice
  • 1 cup (120g) powdered sugar
  • 2 tablespoons fresh lemon juice
  • 1 tablespoon orange juice
  • 1 teaspoon lemon zest (for garnish, optional)

Instructions

  1. Preheat your oven to 350°F (175°C). Grease a 9×5-inch loaf pan or line it with parchment paper for easy removal later.
  2. In a medium mixing bowl, whisk together 1 ½ cups of all-purpose flour, 1 teaspoon of baking powder, ½ teaspoon of baking soda, ½ teaspoon of salt, and 3 tablespoons of poppy seeds. This helps to evenly distribute the baking agents and ensures a uniform rise.
  3. In a large mixing bowl, cream together ½ cup of softened unsalted butter and 1 cup of granulated sugar using an electric mixer on medium speed for about 3-4 minutes, until the mixture is light and fluffy. Make sure to scrape down the sides of the bowl occasionally.
  4. Add 2 large eggs, 1 teaspoon of vanilla extract, and 1 teaspoon of lemon zest to the creamed butter and sugar, mixing until fully combined. You want a smooth consistency, so ensure there are no lumps of butter.
  5. In a small bowl, combine ½ cup of buttermilk and 2 tablespoons of fresh lemon juice. Alternately add the dry ingredients and buttermilk mixture to the butter mixture, starting and ending with the dry ingredients. Mix just until combined; do not overmix, as this can lead to a dense loaf.
  6. Pour the batter into the prepared loaf pan. Smooth the top with a spatula, ensuring it’s even. Bake in the preheated oven for 50-60 minutes, or until a toothpick inserted in the center comes out clean. The edges should be lightly golden brown, and the center should feel just set.
  7. Once baked, remove the loaf from the oven and allow it to cool in the pan for about 10 minutes. Then, transfer it to a wire rack to cool completely. Resist the urge to slice too soon, as it will be crumbly if it’s still warm.
  8. While the loaf is cooling, prepare the citrus icing. In a medium bowl, whisk together 1 cup of powdered sugar, 2 tablespoons of fresh lemon juice, and 1 tablespoon of orange juice until smooth. If the icing is too thick, you can add a little more juice to reach your desired consistency.
  9. Once the loaf is completely cool, drizzle the citrus icing over the top. If you like, sprinkle with an additional teaspoon of lemon zest for an extra pop of flavor and color.
  • Prep Time: 15 mins
  • Cook Time: 50-60 mins
  • Category: Dessert
  • Method: Baking
  • Cuisine: American

Nutrition

  • Serving Size: 1 slice
  • Calories: 200
  • Sugar: 15 g
  • Sodium: 150 mg
  • Fat: 8 g
  • Saturated Fat: 5 g
  • Unsaturated Fat: 3 g
  • Trans Fat: 0 g
  • Carbohydrates: 30 g
  • Fiber: 1 g
  • Protein: 3 g
  • Cholesterol: 40 mg

Keywords: Be careful not to overmix your batter; this is a common mistake that can lead to a dense loaf. Use room temperature ingredients for a smoother batter and even baking.

Did you make this recipe?

Share a photo and tag us — we can't wait to see what you've made!

  • Privacy Policy
  • Terms Of Service
  • Contact
  • About
  • GDPR

Copyright © 2025 Homesmad