Exciting Dill Pickle Parmesan Chicken Recipe Youll Love, are you ready to embark on a flavor journey that promises to tantalize your taste buds in the most unexpected and delightful way? Prepare to have your perceptions of chicken dinner completely transformed! This isn’t just another meal; it’s a culinary revelation that marries the sharp, briny tang of dill pickles with the rich, savory depth of Parmesan cheese, all coating succulent, crispy chicken.
While this particular fusion might not boast centuries of ancient tradition, it represents a vibrant evolution in modern comfort food, taking beloved individual flavors and creating something entirely new and irresistible. We’ve discovered that people absolutely adore this dish not only for its incredible, surprisingly harmonious flavor profile—think crispy chicken with a punchy, cheesy, and tangy crust—but also for its remarkable ability to elevate a simple weeknight meal into a memorable feast. The unique combination offers a delightful texture contrast and an unforgettable taste that will have you coming back for more. You’ll find that this Exciting Dill Pickle Parmesan Chicken Recipe Youll Love truly stands out from the crowd, offering a fresh, zesty twist that’s both comforting and thrillingly innovative.
Ingredients:
- For the Chicken:
- 4 boneless, skinless chicken breasts (about 1.5 to 2 pounds total), butterflied and pounded to ¼-inch thickness, or 8 chicken cutlets
- ½ teaspoon salt
- ¼ teaspoon black pepper
- For the Flour Dredge:
- ½ cup all-purpose flour
- ½ teaspoon garlic powder
- ½ teaspoon onion powder
- ¼ teaspoon paprika (smoked paprika for extra depth)
- ¼ teaspoon salt
- ⅛ teaspoon black pepper
- For the Egg Wash:
- 2 large eggs
- 2 tablespoons dill pickle juice (from the jar!)
- 1 tablespoon milk or cream (optional, for richness)
- For the Dill Pickle Parmesan Breading:
- 1 ½ cups Panko breadcrumbs (for ultimate crispiness)
- ½ cup grated Parmesan cheese (freshly grated is always best)
- ½ cup finely minced dill pickles (about 2-3 medium spears, squeezed dry)
- 2 tablespoons fresh dill, finely chopped (or 2 teaspoons dried dill weed)
- 1 teaspoon garlic powder
- ½ teaspoon black pepper
- ¼ teaspoon salt (optional, as Parmesan and pickles are salty)
- For Cooking:
- ½ cup vegetable oil, canola oil, or avocado oil (or more, as needed for pan-frying)
- Optional Creamy Dill Drizzle:
- ½ cup Greek yogurt or sour cream
- 2 tablespoons mayonnaise
- 1 tablespoon dill pickle juice
- 1 tablespoon fresh dill, chopped
- ½ teaspoon garlic powder
- Salt and black pepper to taste
- For Garnish:
- Fresh dill sprigs
- Lemon wedges
- Extra grated Parmesan cheese
Getting Started: Prepping Your Ingredients for Maximum Flavor
My culinary journey often begins with meticulous preparation, and for this Exciting Dill Pickle Parmesan Chicken Recipe You’ll Love, it’s no different. Trust me, a little organization goes a long way in ensuring your cooking process is smooth and enjoyable, leading to perfectly crispy, flavorful chicken every time.
- First things first, let’s get our chicken ready. If you have full boneless, skinless chicken breasts, I recommend butterflying them carefully with a sharp knife. Lay a chicken breast flat on your cutting board. With one hand firmly on top, slice horizontally through the thickest part, stopping about an inch from the opposite side. Open it up like a book. Now, place each butterflied breast between two pieces of plastic wrap or parchment paper. Using a meat mallet or the bottom of a heavy skillet, pound the chicken gently and evenly until it’s about ¼-inch thick. This ensures even cooking and a tender result. If you’re starting with pre-cut chicken cutlets, you might just need to give them a quick pound to ensure uniform thickness. Once pounded, pat the chicken pieces thoroughly dry with paper towels. This step is crucial for crispy breading – moisture is the enemy of crispiness! Season both sides lightly with ½ teaspoon of salt and ¼ teaspoon of black pepper.
- Next, let’s tackle the dill pickles for the breading. You’ll want to finely mince about ½ cup of dill pickles. I prefer using classic dill pickle spears for this. Once minced, place the pickles in a fine-mesh sieve or wrap them in a few layers of paper towels and squeeze out as much excess liquid as possible. This prevents your breading from becoming soggy. We want the flavor, not the extra moisture in our breading.
- Now, it’s time to set up our dredging stations. This is like an assembly line, and having everything ready prevents mess and makes the process efficient. Grab three shallow dishes or pie plates.
Crafting the Ultimate Dill Pickle Parmesan Breading
The magic of this Exciting Dill Pickle Parmesan Chicken Recipe You’ll Love truly comes alive in its unique breading. We’re building layers of flavor that promise a delightful crunch with every bite.
- For the Flour Dredge: In your first shallow dish, combine ½ cup all-purpose flour, ½ teaspoon garlic powder, ½ teaspoon onion powder, ¼ teaspoon paprika (smoked paprika adds a wonderful depth), ¼ teaspoon salt, and ⅛ teaspoon black pepper. Whisk these ingredients together until they are well combined. This seasoned flour provides the foundational layer, helping the egg wash adhere beautifully.
- For the Egg Wash: In your second shallow dish, crack 2 large eggs. To this, add 2 tablespoons of dill pickle juice – yes, straight from the jar! This little secret infusion of pickle juice in the egg wash is a game-changer, intensifying that tangy dill flavor throughout the chicken. If you like, you can also add 1 tablespoon of milk or cream here for a slightly richer egg wash, but it’s optional. Whisk everything together thoroughly until the eggs are completely broken down and the mixture is uniform.
- For the Dill Pickle Parmesan Breading: This is where the main flavor party happens! In your third shallow dish, combine 1 ½ cups Panko breadcrumbs, ½ cup grated Parmesan cheese (I always advocate for freshly grated, it melts and crisps better), the ½ cup of finely minced and squeezed-dry dill pickles, 2 tablespoons of fresh dill (finely chopped, or 2 teaspoons of dried dill weed if fresh isn’t available), 1 teaspoon garlic powder, ½ teaspoon black pepper, and if you feel it needs it, a ¼ teaspoon of salt (remember, Parmesan and pickles are already quite salty, so taste first!). Use your fingers to thoroughly mix all these ingredients, ensuring the minced pickles and Parmesan are evenly distributed throughout the Panko. You want to make sure those little pickle bits are well incorporated into the breadcrumbs to get that burst of flavor.
The Art of Breading: Coating Your Chicken Perfectly
Achieving that perfect, crispy crust is an art form, but with these clear steps, you’ll be a master. This careful coating process is what makes our Exciting Dill Pickle Parmesan Chicken Recipe You’ll Love so incredibly satisfying.
- Take one piece of your prepared chicken and first dredge it generously in the seasoned flour mixture. Make sure it’s completely coated on all sides, then gently shake off any excess flour. We want a thin, even layer, not a thick cakey one.
- Next, transfer the floured chicken into the egg wash. Ensure both sides are thoroughly coated with the egg mixture. Let any excess drip off briefly before moving to the final station. The egg acts as a binder, helping the breading adhere.
- Finally, place the egg-washed chicken into the dill pickle Parmesan breading mixture. This is where you want to be assertive! Press the breading firmly onto both sides of the chicken, ensuring every inch is covered. Don’t be shy about really pressing down to help the Panko, pickles, and Parmesan stick. The firmer you press, the better the breading will adhere, and the crispier your chicken will be. Repeat this process for all remaining chicken pieces. If you have extra breading, you can lightly press more onto any areas that look sparse.
- Place the breaded chicken on a clean plate or baking sheet. For best results, I highly recommend refrigerating the breaded chicken for at least 15-30 minutes before cooking. This helps the breading to set and adhere even better, reducing the chances of it falling off during cooking. It’s a small step that makes a big difference in the final texture of your Exciting Dill Pickle Parmesan Chicken Recipe You’ll Love.
Cooking Your Exciting Dill Pickle Parmesan Chicken
Now comes the moment of truth – cooking our beautifully breaded chicken to golden-brown perfection. While I’m focusing on pan-frying for that classic crispy exterior, I’ll also give you some alternative methods. Get ready for an irresistible aroma to fill your kitchen!
- Pan-Frying Method (My personal favorite for ultimate crispiness): Heat ½ cup of vegetable oil (or canola/avocado oil) in a large, heavy-bottomed skillet (cast iron works wonderfully here) over medium-high heat. You want the oil to be hot enough to sizzle immediately when a tiny sprinkle of breading is dropped in, but not smoking. A good temperature is around 350-375°F (175-190°C) if you have a thermometer. If you don’t have a thermometer, you’ll know it’s ready when a small piece of breading dropped into the oil immediately starts to bubble vigorously.
- Carefully place 2-3 pieces of breaded chicken into the hot oil, ensuring not to overcrowd the pan. Overcrowding can lower the oil temperature and lead to soggy chicken. Cook in batches if necessary.
- Cook for about 3-5 minutes per side, or until the chicken is beautifully golden brown, crispy, and cooked through. The exact timing will depend on the thickness of your chicken. You’ll want an internal temperature of 165°F (74°C) when checked with an instant-read thermometer at the thickest part. Don’t rush this step; a slow, steady fry yields the best crust. If you notice the breading browning too quickly, reduce the heat slightly. Conversely, if it’s taking too long to brown, increase the heat a touch.
- Once cooked, transfer the crispy chicken cutlets to a wire rack set over a baking sheet. This allows air to circulate around the chicken, keeping the bottom crisp while any excess oil drains away. Season lightly with a pinch of flaky sea salt if desired, right after it comes out of the pan. Repeat with the remaining chicken, adding more oil to the pan between batches if needed.
- Baking Method (A lighter alternative): Preheat your oven to 400°F (200°C). Lightly grease a baking sheet or line it with parchment paper. Place the breaded chicken cutlets in a single layer on the prepared baking sheet. Bake for 20-25 minutes, flipping halfway through, or until golden brown and the internal temperature reaches 165°F (74°C). For extra crispiness, you can lightly spray the chicken with cooking oil before baking.
- Air Fryer Method (Quick and convenient): Preheat your air fryer to 375°F (190°C). Lightly spray the air fryer basket with cooking oil. Place 1-2 chicken cutlets in a single layer in the basket, ensuring not to overcrowd. Lightly spray the top of the chicken with cooking oil. Air fry for 10-14 minutes, flipping halfway through, until golden brown and crispy, and the internal temperature reaches 165°F (74°C). Cooking time may vary depending on your air fryer model and chicken thickness.
- No matter how you cook it, once your Exciting Dill Pickle Parmesan Chicken Recipe You’ll Love is done, let it rest on the wire rack for 5 minutes before serving. This allows the juices to redistribute, ensuring moist and tender chicken.
Optional: Elevating Your Dish with a Creamy Dill Drizzle
While this chicken is absolutely phenomenal on its own, a quick, creamy dill drizzle takes this Exciting Dill Pickle Parmesan Chicken Recipe You’ll Love to an even higher level of deliciousness. It adds a refreshing, cool counterpoint to the crispy, savory chicken.
- In a small bowl, whisk together ½ cup Greek yogurt or sour cream, 2 tablespoons mayonnaise, 1 tablespoon dill pickle juice (yes, more pickle goodness!), 1 tablespoon fresh chopped dill, and ½ teaspoon garlic powder.
- Taste the sauce and adjust seasonings as needed. You might want a pinch of salt or a grind of black pepper, or even a tiny squeeze of lemon juice for brightness. The consistency should be pourable but still creamy. If it’s too thick, add another splash of pickle juice or milk. If it’s too thin, a tiny bit more Greek yogurt will help.
- Drizzle this delightful sauce generously over your cooked chicken before serving, or offer it on the side for dipping.
Serving Suggestions and Pro Tips for an Unforgettable Meal
You’ve put in the work, and now it’s time to enjoy the fruits of your labor! This Exciting Dill Pickle Parmesan Chicken Recipe You’ll Love is versatile and pairs beautifully with a variety of sides, making it a fantastic addition to your weeknight rotation or a casual dinner party.
To serve: Garnish the plates with fresh dill sprigs and lemon wedges. A squeeze of fresh lemon juice over the hot chicken just before eating adds a wonderful zesty brightness that cuts through the richness and complements the dill and pickle flavors perfectly. This simple touch truly elevates the dish.
What to pair it with:
- Simple Green Salad: A light, crisp salad with a vinaigrette dressing is always a winner.
- Roasted Asparagus or Broccoli: These vegetables offer a lovely textural contrast and healthy balance.
- Creamy Mashed Potatoes: A classic comfort food pairing that absorbs any delicious drippings.
- Rice Pilaf or Quinoa: For a heartier side that soaks up flavor.
- Coleslaw: The creamy tang of coleslaw can echo the pickle notes in the chicken.
- French Fries or Sweet Potato Fries: For a fun, diner-style experience, especially with that creamy dill drizzle!
Pro Tips for Success:
- Don’t Skimp on the Dryness: Seriously, patting that chicken dry is the secret weapon for ultimate crispiness. Any lingering moisture will steam the breading instead of frying it.
- Even Thickness is Key: Pounding the chicken to an even ¼-inch thickness ensures every part cooks at the same rate, preventing dry edges or undercooked centers. This makes for a consistently tender and juicy result.
- Press that Breading Firmly: It’s worth repeating – really press the breading onto the chicken. This isn’t a gentle pat; it’s a firm, decisive press to create a robust, flavorful crust that won’t flake off.
- Don’t Overcrowd the Pan: Give your chicken room to breathe! Overcrowding lowers the oil temperature, leading to greasy, soggy chicken. Cook in batches, being patient will pay off.
- Monitor Oil Temperature: If your oil is too cold, the breading will absorb too much oil and become greasy. If it’s too hot, the breading will burn before the chicken cooks through. Medium-high heat is usually the sweet spot, but adjust as needed based on how your chicken is browning.
- Make Ahead Option: You can bread the chicken a few hours in advance and keep it refrigerated on a wire rack uncovered. This not only helps the breading adhere better but also cuts down on last-minute prep. Just make sure to bring it closer to room temperature for about 15 minutes before frying for more even cooking.
- Leftovers: If you have any leftovers, store them in an airtight container in the refrigerator for up to 3 days. To reheat and maintain crispiness, I recommend reheating in an air fryer at 350°F (175°C) for 5-7 minutes, or in an oven at 375°F (190°C) for 10-15 minutes, until heated through and crisp again.
- Embrace the Dill: Fresh dill makes a noticeable difference in flavor. If you can get your hands on it, use it generously both in the breading and as a garnish. The vibrant green color and fresh herbaceous notes are simply divine.
I genuinely believe this Exciting Dill Pickle Parmesan Chicken Recipe You’ll Love will become a new favorite in your household. It’s got that perfect balance of tangy, savory, and crispy, making every bite an absolute delight. Enjoy creating and savoring this incredible dish!
Conclusion:
Well, my friends, we’ve reached the end of our culinary journey for today, and I truly hope you’re feeling as excited as I am about what we’ve just explored. This isn’t just another chicken dish; it’s an absolute game-changer, a vibrant symphony of flavors that promises to awaken your taste buds in the most delightful way. I’m genuinely confident that you’re going to fall head over heels for the incredible combination of tangy pickle brine, sharp Parmesan cheese, and perfectly cooked, tender chicken. It’s that perfect balance of crispy exterior and juicy interior, with an unexpected punch that makes every bite memorable. Seriously, forget everything you thought you knew about chicken dinners because this Exciting Dill Pickle Parmesan Chicken Recipe Youll Love is here to prove that weeknight meals can be extraordinary without demanding hours of your precious time. The ease of preparation combined with the gourmet-level taste is what truly sets this dish apart. It’s comforting, yet surprisingly sophisticated, and it delivers on flavor in spades. If you’re looking for a dish that will impress your family or guests, or simply want to treat yourself to something truly unique and delicious after a long day, then this is absolutely the one. It truly encapsulates everything wonderful about home cooking: simplicity, incredible taste, and the joy of sharing something special. I guarantee you won’t regret diving into this unique flavor adventure that redefines what chicken can be.
Serving Suggestions to Elevate Your Meal:
One of the many beauties of this amazing chicken recipe is its versatility when it comes to serving. For a classic, comforting meal, I highly recommend pairing it with a generous dollop of creamy mashed potatoes or a fluffy bed of jasmine rice to soak up all those incredible juices. If you’re leaning towards something a bit lighter, a simple, crisp green salad with a lemon vinaigrette offers a refreshing counterpoint to the rich flavors of the chicken. Roasted asparagus, green beans, or broccoli florets tossed with a little garlic and olive oil also make fantastic side dishes, adding both color and essential nutrients to your plate. Don’t underestimate the power of a side of roasted root vegetables either – carrots, parsnips, and sweet potatoes can bring a lovely earthy sweetness that complements the tangy chicken beautifully. And for those nights when you really want to lean into comfort, serving it alongside a simple pasta dish, perhaps a light buttered linguine or spaghetti, would be divine. The rich, savory notes of the chicken find a wonderful companion in the subtle flavors of pasta, creating a truly satisfying experience that is both hearty and delightfully flavorful.
Get Creative with Delicious Variations:
But wait, the fun doesn’t stop there! This recipe is also wonderfully adaptable, inviting you to put your own spin on it and make it uniquely yours. Feel free to experiment with different cheeses; while Parmesan is a classic and brings a wonderful nutty sharpness, imagine the melt-in-your-mouth goodness with a sprinkle of sharp provolone, a creamy mozzarella, or even a smoked gouda for an extra layer of flavor and complexity. If you like a little heat, a pinch of red pepper flakes mixed into the breading or sprinkled over the finished dish will add a delightful kick that perfectly complements the pickle tang. You could also play with fresh herbs – a scattering of finely chopped fresh dill, chives, or parsley before serving can brighten up the entire dish and add another dimension of freshness and aroma. For a lighter touch, consider air frying or baking the chicken instead of pan-frying; you’ll still achieve a wonderfully crispy coating with less oil, making it a healthier option without compromising on texture. And for a truly inventive take, slice the cooked chicken and use it as the star of a gourmet sandwich, layered with crisp lettuce, juicy tomato, and a smear of creamy ranch dressing on a toasted bun. Or, chop it up and toss it into a vibrant salad for a lunch that’s anything but boring. The possibilities are truly endless, limited only by your imagination and what you have on hand in your pantry. Don’t be afraid to experiment and personalize this already fantastic recipe!
Your Culinary Adventure Awaits!
So, what are you waiting for? This is your official invitation, a friendly nudge from me to you, to step into your kitchen and give this incredible recipe a try. I promise you, the moment you take that first bite, you’ll understand exactly why I’ve been raving about it. It’s not just about cooking a meal; it’s about creating an experience, discovering new favorite flavors, and adding a truly special dish to your personal culinary repertoire. Don’t be shy, embrace the adventure! You’ll be so glad you did. And once you’ve experienced the magic, I absolutely can’t wait to hear all about it. Please, share your journey with me! I’d love to see your photos, read about your triumphs, and even hear about any clever variations you came up with. Did you try a different cheese? Did you find the perfect side dish? Or maybe you discovered a new favorite way to incorporate dill pickles into your main courses? Tag me, comment below, or just shout it from the rooftops! Your feedback and experiences are what truly bring these recipes to life for me and for our wonderful community of food lovers. So go forth, cook with confidence, and prepare to be amazed. Happy cooking, everyone!
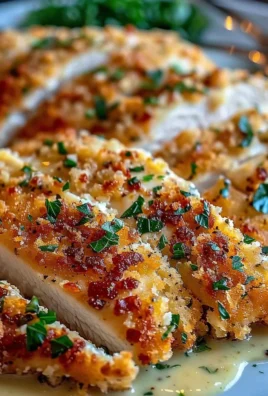
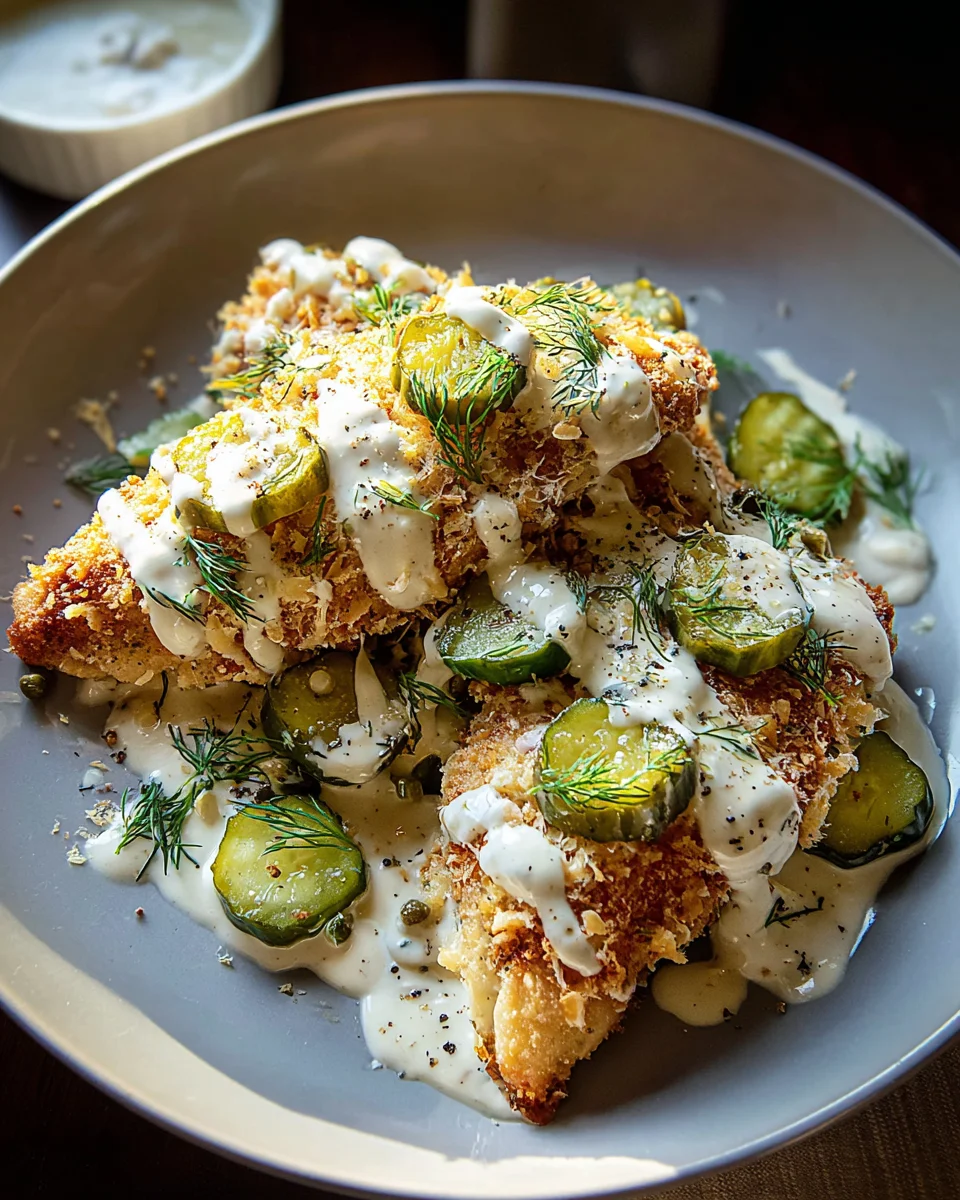
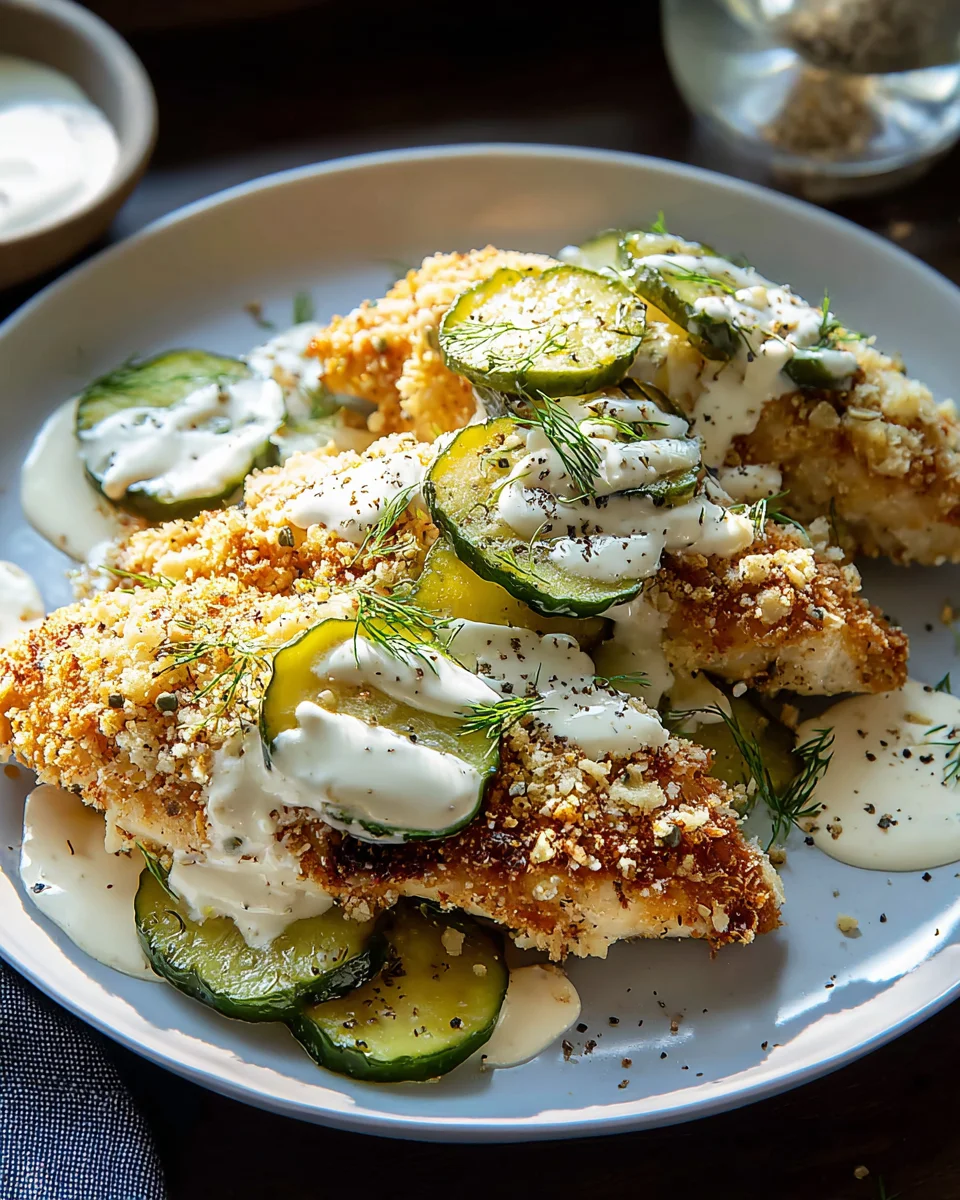
Exciting Dill Pickle Parmesan Chicken
Crispy chicken with a unique, tangy dill pickle and savory Parmesan crust, offering a delightful texture and unforgettable taste.
Ingredients
Instructions
Important Information
Nutrition Facts (Per Serving)
It is important to consider this information as approximate and not to use it as definitive health advice.
Allergy Information
Please check ingredients for potential allergens and consult a health professional if in doubt.