• Skip to primary navigation
  • Skip to main content
  • Skip to primary sidebar
Homesmad

Homesmad

  • Home
  • Breakfast & Brunch
  • Appetizers & Snacks
  • Dinner
  • Dessert
  • About
  • Privacy Policy
  • Contact
Homesmad
  • Home
  • Breakfast & Brunch
  • Appetizers & Snacks
  • Dinner
  • Dessert
  • About
  • Privacy Policy
  • Contact

Easy Butter Chicken Recipe: Ultimate Flavor, Quick Meal

September 28, 2025 by Lily author

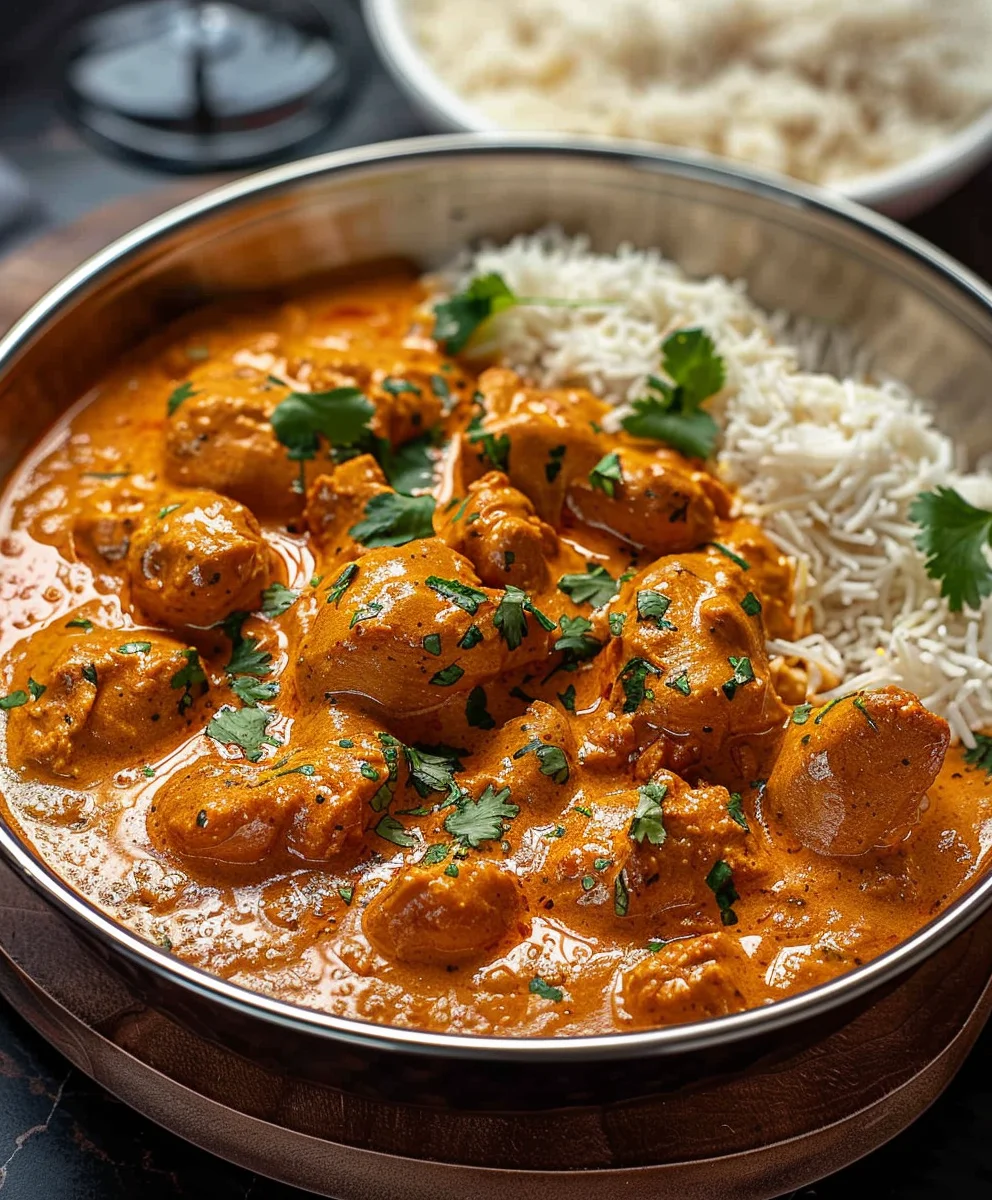
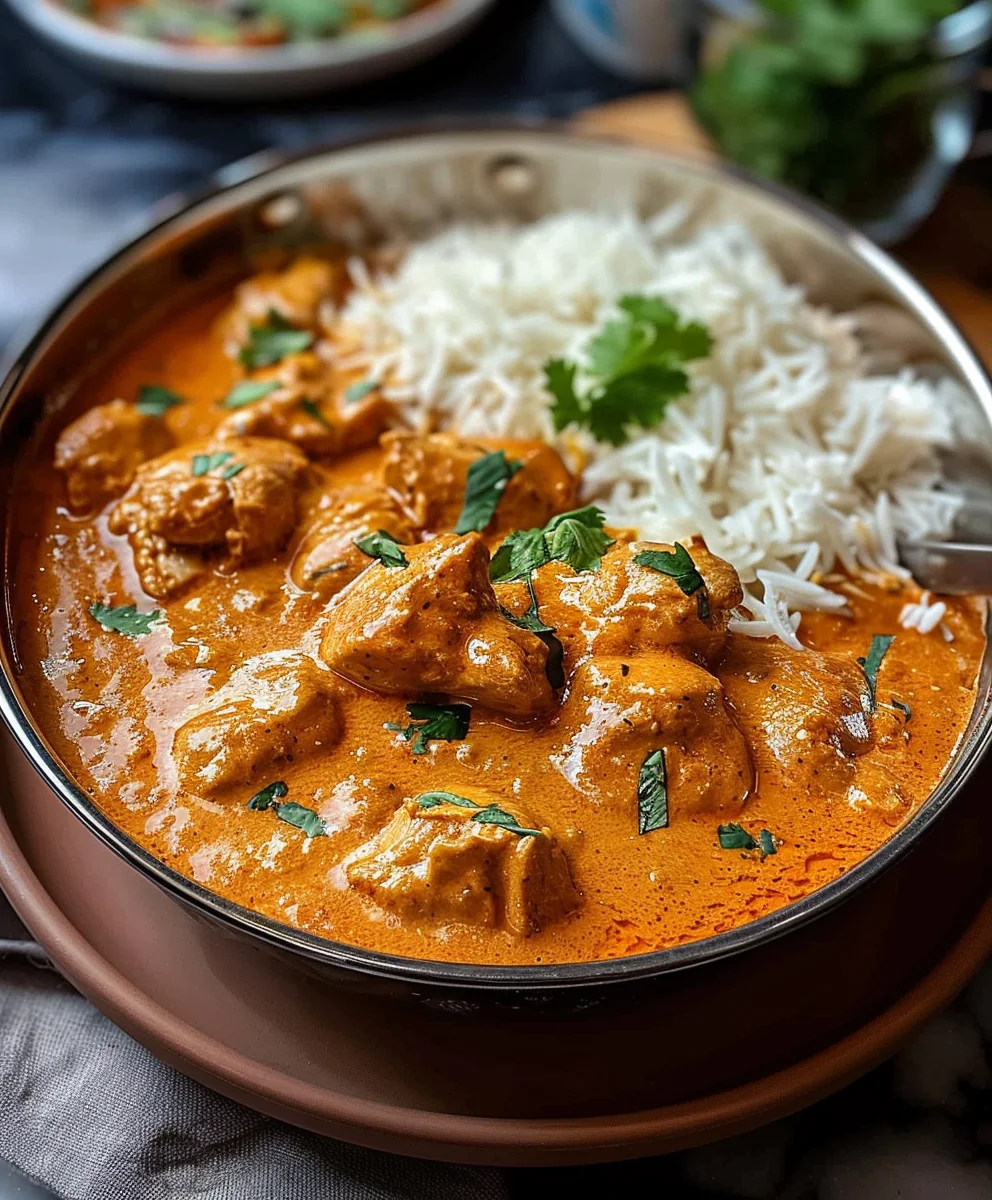
The Ultimate Easy Butter Chicken Recipe is a truly iconic dish, celebrated worldwide for its unparalleled depth of flavor and incredibly comforting appeal. There’s something undeniably captivating about the silky-smooth, rich tomato-based gravy, perfectly spiced and enveloping succulent, tender pieces of chicken. This beloved classic, known as Murgh Makhani, originated in the bustling kitchens of Delhi, India, in the 1950s, quickly rising to global fame and becoming a cornerstone of Indian cuisine that transcends borders.

What makes butter chicken so universally adored is its exquisite balance: the gentle tang of ripe tomatoes, the luxurious sweetness of cream, and the aromatic warmth of a blend of traditional Indian spices. It’s a dish that feels wonderfully indulgent, yet remarkably approachable. For many, myself included, it represents a perfect harmony of tastes and textures that simply melts in your mouth.

I’m thrilled to present a version that truly lives up to its name, promising all the authentic, restaurant-quality deliciousness you crave without the usual complexity.

This particular rendition of The Ultimate Easy Butter Chicken Recipe is designed to be straightforward and accessible, ensuring you can recreate this culinary masterpiece in your own kitchen with minimal effort, making it ideal for both weeknight meals and special occasions.

Easy Butter Chicken Recipe: Ultimate Flavor, Quick Meal this RECIPE

Ingredients:

  • For the Chicken Marinade:

    • 680g (about 1.5 lbs) boneless, skinless chicken thighs or breasts, cut into 1-inch cubes
    • 120g (about 1/2 cup) plain full-fat yogurt
    • 1 tablespoon fresh ginger-garlic paste (equal parts grated ginger and minced garlic)
    • 1 teaspoon ground turmeric
    • 1.5 teaspoons Kashmiri red chili powder (or regular red chili powder for more heat, adjust to your preference)
    • 1 teaspoon ground cumin
    • 1 teaspoon ground coriander
    • 1 teaspoon garam masala
    • 1/2 teaspoon salt, or to taste
    • 1 tablespoon fresh lemon juice
  • For the Ultimate Butter Chicken Sauce:

    • 50g (about 3.5 tablespoons) unsalted butter, divided
    • 1 large yellow onion, finely chopped
    • 1 tablespoon fresh ginger-garlic paste
    • 2-3 green chilies, slit lengthwise (optional, for heat)
    • 1/4 teaspoon ground turmeric
    • 1 teaspoon Kashmiri red chili powder (for color and mild heat)
    • 1 teaspoon ground cumin
    • 1 teaspoon ground coriander
    • 1/2 cup (about 70g) raw cashews, soaked in hot water for 15-20 minutes and drained
    • 800g (about 28 oz) crushed tomatoes (from a can is perfect, or 3-4 large ripe tomatoes, pureed)
    • 1/2 cup (120ml) water or chicken broth
    • 1 teaspoon salt, or to taste
    • 1 tablespoon sugar (balances the tanginess of tomatoes)
    • 1 tablespoon dried fenugreek leaves (Kasoori Methi), lightly crushed between your palms – this is crucial for authentic flavor!
    • 1/2 cup (120ml) heavy cream (or whipping cream)
    • 1 teaspoon garam masala, for finishing
  • For Garnish and Serving:

    • Fresh cilantro, chopped, for garnish
    • A swirl of extra heavy cream or a pat of butter, for serving (optional)
    • Basmati rice or naan bread, for serving

Preparing the Chicken: Marinating for Flavor

  1. Prepare the Chicken: First things first, let’s get our chicken ready for its flavor journey. Take your boneless, skinless chicken thighs or breasts and cut them into uniform 1-inch cubes. Uniformity is key here to ensure even cooking. If you’re using breasts, remember they can dry out a little faster than thighs, so keep an eye on them. Place the cubed chicken into a large mixing bowl.

  2. Create the Marinade Base: In a separate smaller bowl, or directly with the chicken if you prefer to save on dishes, combine all the ingredients for the chicken marinade. That’s the plain full-fat yogurt, fresh ginger-garlic paste, ground turmeric, Kashmiri red chili powder (I love this for the vibrant color it gives without too much heat), ground cumin, ground coriander, garam masala, salt, and fresh lemon juice. Give it a good stir until all the spices are fully incorporated into the yogurt, forming a thick, aromatic paste. The yogurt acts as a tenderizer, thanks to its lactic acid, and also helps the spices cling beautifully to the chicken.

  3. Marinate the Chicken: Now, pour this delightful marinade over your cubed chicken. Using your hands (and gloves, if you like!), really get in there and massage the marinade into every piece of chicken. You want each cube to be thoroughly coated. This isn’t just about covering; it’s about infusing deep flavor. Once coated, cover the bowl tightly with plastic wrap or a lid. For the best flavor, refrigerate the chicken for at least 30 minutes, but ideally for 2-4 hours. If you have the luxury of time, an overnight marinade will truly make your “The Ultimate Easy Butter Chicken Recipe” sing with flavor. The longer it marinates, the more tender and flavorful your chicken will become.

Crafting the Ultimate Butter Chicken Sauce Base

  1. Soften the Onions: Heat 2 tablespoons of the unsalted butter in a large, heavy-bottomed pot or Dutch oven over medium heat. Once the butter has melted and is gently bubbling, add the finely chopped yellow onion. Cook the onion, stirring occasionally, for about 8-10 minutes. The goal here is to get them wonderfully translucent and soft, almost melting, but not browned. This step is crucial for developing a sweet base for our sauce, so don’t rush it.

  2. Build Aromatic Layers: Once the onions are soft, add the remaining 1 tablespoon of fresh ginger-garlic paste. If you’re using green chilies for an extra kick, add them now too. Sauté for another 1-2 minutes, stirring constantly, until the raw smell of ginger and garlic dissipates, and your kitchen starts to smell absolutely incredible. Be careful not to burn the garlic.

  3. Bloom the Spices: Reduce the heat to low. This is important to prevent the spices from burning. Add the ground turmeric, Kashmiri red chili powder, ground cumin, and ground coriander to the pot. Stir well and cook for just about 30-60 seconds. You’ll notice the spices becoming fragrant as they “bloom” in the butter and oil. This brief cooking step helps to intensify their flavors and release their essential oils, contributing to the rich depth of our ultimate butter chicken sauce.

  4. Add Tomatoes and Cashews: Immediately after blooming the spices, pour in the crushed tomatoes. If you pureed fresh tomatoes, add them now. Stir everything together thoroughly. Next, add the pre-soaked and drained raw cashews. The cashews are a secret weapon in butter chicken, providing a beautiful creaminess and thickening the sauce naturally, without needing excessive cream later. Add the water or chicken broth now as well. Stir everything together, ensuring the cashews are submerged.

  5. Simmer and Develop Flavor: Bring the mixture to a gentle simmer. Once simmering, reduce the heat to low, cover the pot, and let it cook for about 15-20 minutes. Stir occasionally to prevent sticking, especially with the cashews at the bottom. During this time, the tomatoes will break down further, the flavors will meld, and the sauce will begin to thicken. You’ll notice the oil starting to separate and rise to the top – a sign that the sauce is cooking down beautifully and developing its richness. This simmering stage is vital for a deeply flavored sauce for “The Ultimate Easy Butter Chicken Recipe”.

  6. Blend to Perfection: Carefully remove the pot from the heat. Using an immersion blender, blend the sauce directly in the pot until it is completely smooth and creamy. Take your time with this step; you want absolutely no lumps. If you don’t have an immersion blender, carefully transfer the sauce in batches to a regular blender. Be very cautious when blending hot liquids, as the steam can build up pressure. Leave the vent open on your blender lid (if it has one) and cover it with a kitchen towel. Blend until silky smooth, then pour it back into the pot. A perfectly smooth sauce is a hallmark of a restaurant-quality butter chicken.

Cooking the Chicken to Perfection

  1. Sear the Chicken: While the sauce is simmering or immediately after blending, heat the remaining 2 tablespoons of unsalted butter in a large skillet or non-stick pan over medium-high heat. Once the butter is melted and shimmering, add the marinated chicken in a single layer, making sure not to overcrowd the pan. You might need to do this in two or three batches to ensure the chicken sears properly rather than steams. Overcrowding will lower the pan’s temperature and prevent that lovely browning. Sear the chicken for about 3-4 minutes per side, until it’s beautifully browned and slightly charred at the edges. It doesn’t need to be cooked through at this stage, as it will finish cooking in the sauce.

  2. Set Aside: Once each batch of chicken is nicely seared, transfer it to a plate and set it aside. Resist the urge to snack on it yet – it’s going to be even better once it’s swimming in that gorgeous sauce!

Bringing It All Together: Simmering for Richness

  1. Combine and Simmer: Return the smooth sauce to medium-low heat. Add the seared chicken pieces to the pot with the sauce. Stir gently to ensure all the chicken is submerged and coated. Now, add the salt and sugar. The sugar is important to balance the acidity of the tomatoes and give the sauce that characteristic subtle sweetness that defines a great butter chicken. Stir well.

  2. Add Kasoori Methi: This is a key moment for “The Ultimate Easy Butter Chicken Recipe”! Take your dried fenugreek leaves (Kasoori Methi) and crush them lightly between your palms before adding them to the sauce. This action releases their incredibly unique, slightly bitter, and aromatic flavor. It’s truly what gives butter chicken its distinctive taste profile. Stir it in thoroughly.

  3. Final Simmer: Bring the sauce back to a gentle simmer. Cover the pot and let everything cook together for another 10-15 minutes. This simmering time allows the chicken to finish cooking through, absorbing all the wonderful flavors from the sauce, and for all the ingredients to truly meld into a harmonious symphony. The sauce will continue to thicken slightly during this time. Stir occasionally to prevent any sticking.

  4. Stir in the Cream and Garam Masala: Once the chicken is cooked through and the sauce has reached your desired consistency, remove the pot from the heat. Stir in the heavy cream. The cream adds that luxurious richness and velvety texture that butter chicken is famous for. You can adjust the amount to your liking – more cream for an even richer, milder sauce, less for a slightly lighter version. Finally, stir in the finishing teaspoon of garam masala. Adding it at the end preserves its fresh, potent aroma and flavor. Taste and adjust for salt, sugar, or spice if needed. This is your moment to perfect your “The Ultimate Easy Butter Chicken Recipe” to your exact preference.

Final Touches and Serving Suggestions

  1. Garnish Generously: Once you’re ready to serve, ladle this incredible butter chicken into serving bowls. Garnish generously with fresh chopped cilantro. The bright green of the cilantro adds a beautiful contrast and a fresh herby note that cuts through the richness of the sauce. For an extra touch of indulgence, you can swirl a little more heavy cream or drop a tiny pat of butter on top of each serving. This makes it look even more appetizing and adds another layer of butteriness.

  2. Serve with Your Favorites: “The Ultimate Easy Butter Chicken Recipe” is perfectly complemented by warm, fluffy basmati rice, which soaks up all that glorious sauce. It’s also absolutely divine with fresh, hot naan bread – perfect for scooping up every last bit of the creamy deliciousness. Garlic naan or plain naan both work wonderfully. Don’t forget to have some extra lime wedges on the side for those who like a little extra zest with their meal.

  3. Enjoy and Share: Take a moment to appreciate the incredible aroma filling your kitchen. This dish is a labor of love, but every step is worth it for the incredible flavors. Serve it hot, and get ready for rave reviews! This recipe truly is an easy way to achieve an ultimate butter chicken experience right in your own home.

Easy Butter Chicken Recipe: Ultimate Flavor, Quick Meal

Conclusion:

And there you have it, my friends! We’ve reached the culmination of our culinary journey, and I genuinely hope you’re feeling as inspired and hungry as I am right now. This isn’t just another dinner idea; it’s an invitation to experience a truly special dish in the comfort of your own kitchen. I often tell people that the magic of home cooking isn’t just in the ingredients, but in the love and care you pour into every step, and this recipe absolutely shines with that spirit.

I truly believe that this particular rendition stands out from the crowd. It strikes that perfect balance of being incredibly flavorful, wonderfully aromatic, and surprisingly accessible for cooks of all skill levels. You’ll find yourself effortlessly creating a dish that tastes like it came from your favorite Indian restaurant, but with that undeniable homemade touch that simply can’t be replicated. Imagine that rich, velvety sauce clinging to tender pieces of chicken, infused with warm spices and a hint of sweetness – it’s pure comfort food, elevated. The creamy texture, the vibrant color, the intoxicating aroma that fills your home – these are all reasons why I can confidently say this is a recipe you’ll return to again and again. It’s a guaranteed crowd-pleaser, a weeknight savior, and a weekend treat all rolled into one magnificent pot. The effort-to-reward ratio here is off the charts, making it an absolute must-try for anyone looking to add a show-stopping yet simple dish to their repertoire.

What truly sets this recipe apart, in my humble opinion, is its uncanny ability to deliver authentic, deep flavors without requiring a trip to a specialty store for obscure ingredients or hours of complex preparation. We’ve demystified what might seem like an intricate dish, breaking it down into manageable, enjoyable steps. When you take that first bite, you’ll understand exactly what I mean. The blend of tomatoes, cream, and a carefully selected array of spices creates a symphony on your palate – a harmonious balance of sweet, savory, and just a touch of tang. It’s that perfectly spiced, deeply satisfying warmth that makes you close your eyes and savor every single mouthful. This truly is The Ultimate Easy Butter Chicken Recipe because it delivers on its promise of an incredibly delicious, utterly satisfying meal with minimal fuss. It’s a culinary hug in a bowl, a dish that brings smiles to faces and warmth to hearts, making it an indispensable addition to your cooking rotation.

Serving Suggestions for the Perfect Meal:

Now, let’s talk about making this an unforgettable dining experience. While the butter chicken itself is a star, its supporting cast can elevate the meal to new heights. My go-to pairing, hands down, is fluffy basmati rice – its delicate fragrance and individual grains provide the perfect canvas for soaking up every last drop of that glorious sauce. But don’t stop there! Freshly baked naan bread, especially garlic naan or butter naan, is absolutely essential. Use it to scoop up the chicken and sauce, or simply to wipe your plate clean (no judgment here, we’ve all done it!). For a lighter touch, you could opt for whole wheat roti or paratha. To cut through the richness and add a refreshing contrast, I highly recommend serving a simple cucumber raita (yogurt with grated cucumber and a touch of cumin) on the side. A sprinkle of fresh cilantro, a squeeze of lime juice, and perhaps a few thinly sliced red onions or green chilies for those who enjoy a bit of extra kick, will complete your restaurant-quality spread. Don’t forget a refreshing beverage like a mango lassi or a crisp white wine to complement the flavors beautifully.

Creative Variations and Personal Twists:

One of the joys of cooking is making a recipe your own, and this butter chicken is wonderfully adaptable. Feeling a little adventurous? Here are some ideas: For a vegetarian alternative, swap the chicken for paneer (Indian cheese), chickpeas, or even a mix of your favorite hearty vegetables like cauliflower and potatoes. You could also experiment with the spice level; add more red chili powder or a couple of finely chopped green chilies for a bolder kick, or dial it back for a milder, family-friendly version. If you love a smoky flavor, you can try the “dhungar” method – a quick charcoal smoke – by placing a small, hot piece of charcoal in a bowl within the curry, adding a few drops of ghee, and covering it for a few minutes. To make it extra rich, a dollop of butter or a swirl of extra cream right at the end can do wonders. For a healthier spin, consider using Greek yogurt in place of some of the heavy cream, or lean chicken breast instead of thighs. The possibilities are endless, and I encourage you to play around and discover your own perfect version.

So, there’s nothing left to do but roll up your sleeves and get cooking! I genuinely hope you’ll take the leap and give this incredible recipe a try. I promise you, the look on your family’s faces, the compliments from your friends, and most importantly, the sheer satisfaction you’ll feel after creating such a delicious meal, will make it all worthwhile. Cooking should be an adventure, a source of joy and connection, and this recipe truly embodies that spirit. Once you’ve tasted the magic, I would absolutely love to hear about your experience! Please don’t hesitate to share your thoughts, your photos, your serving suggestions, or any creative variations you came up with in the comments below. Your feedback and culinary adventures inspire me, and I can’t wait to see what deliciousness you bring to life in your own kitchen. Happy cooking!


The Ultimate Easy Butter Chicken Recipe

The Ultimate Easy Butter Chicken Recipe

A quick and easy version of the universally adored Butter Chicken (Murgh Makhani), featuring a silky, rich tomato-based gravy enveloping tender chicken. This recipe is designed for maximum flavor with minimal effort.

Prep Time
45 Minutes

Cook Time
10 Minutes

Total Time
55 Minutes

Servings
6 servings

Ingredients

  • 1 tablespoon oil
  • 1 tablespoon butter
  • 1 medium onion, diced
  • 1 teaspoon fresh ginger, finely minced or grated
  • 2 cloves garlic, minced
  • 1.5 pounds boneless, skinless chicken breasts or thighs, cut into ¾-inch chunks
  • 4 tablespoons tomato purée
  • 1 tablespoon garam masala
  • 1 teaspoon chili powder or paprika
  • 1 teaspoon ground cumin
  • 1 teaspoon salt
  • ¼ teaspoon black pepper
  • 1 cup heavy cream (or half & half or yogurt for lighter version)
  • To taste fresh cilantro, for garnish (optional)

Instructions

  1. Step 1
    Cut 1.5 lbs chicken into ¾-inch chunks. Season with 1 tsp salt and ¼ tsp black pepper.
  2. Step 2
    Heat 1 tbsp oil and 1 tbsp butter in a large pan over medium-high heat. Sear chicken in batches until browned on all sides, then set aside.
  3. Step 3
    In the same pan, add 1 medium diced onion. Cook until softened. Add 1 tsp fresh ginger and 2 cloves minced garlic; sauté for 1 minute until fragrant.
  4. Step 4
    Reduce heat to low. Stir in 1 tbsp garam masala, 1 tsp chili powder or paprika, and 1 tsp ground cumin. Cook for 30-60 seconds until fragrant. Stir in 4 tbsp tomato purée and cook for 2-3 minutes.
  5. Step 5
    Add the seared chicken back to the pan. Stir to coat. Pour in 1 cup heavy cream. Bring to a gentle simmer and cook for 10-15 minutes, or until chicken is cooked through and sauce has thickened slightly.
  6. Step 6
    Taste and adjust seasoning. Garnish with fresh cilantro, if desired. Serve hot with basmati rice or naan bread.

Important Information

Nutrition Facts (Per Serving)

It is important to consider this information as approximate and not to use it as definitive health advice.

Allergy Information

Please check ingredients for potential allergens and consult a health professional if in doubt.

« Previous Post
Quick & Easy Street Corn Chicken Rice Bowl – Flavorful Dinner!
Next Post »
Cheesy Garlic Chicken Wraps: Easy & Flavorful Recipe!

If you enjoyed this…

Creamy Garlic Shrimp

Creamy Garlic Shrimp – A Quick, Flavor-Packed Dinner!

Warm & Cozy Carrot Soup Recipe – Healthy, Simple & Flavorful

Pear and Gorgonzola Flatbread Recipe

Pear and Gorgonzola Flatbread Recipe – A Sweet and Savory Showstopper

Primary Sidebar

Browse by Diet

BreakfastDinnerLunchDessertAppetizer

Sweet Peach Yogurt Parfait Delight

One of my fondest memories is from a lazy summer afternoon spent at my grandmother’s house. The sun filtered through the kitchen window, casting a warm glow over the table where she would create her culinary magic. It was during one of those blissful moments that I first tasted her Peach Yogurt Parfait with Honey and Granola. The sweet aroma of ripe peaches mingling with creamy yogurt and the crunch of granola was nothing short of heavenly. It felt like summer captured in a bowl, and I still remember the joy of diving in with a spoon, each layer revealing a new burst of flavor.

When I think about that parfait, I can almost hear the gentle hum of the bees outside, reminding me of the floral notes that honey brings to every bite. The vibrant yellows and soft oranges of the peaches contrast beautifully with the creamy white yogurt and the golden crunch of granola. It’s a dish that not only looks delightful but also tastes like a celebration of fresh, wholesome ingredients.

What makes my version of this Peach Yogurt Parfait special is the careful balance of flavors and textures. I use ripe, juicy peaches, drizzled with locally sourced honey, and a homemade granola that’s bursting with nuts and seeds for an extra crunch. It’s a simple dish, but every layer is crafted with love and attention.

Let me show you exactly how to make this delightful parfait, so you can bring a bit of that summer magic into your kitchen!

Sweet Peach Yogurt Parfait Delight

Why You’ll Love This Recipe

  • Delightfully creamy texture from the Greek yogurt, paired with the juicy sweetness of fresh peaches.
  • Ready in under 20 minutes, making it a quick and satisfying breakfast or snack option.
  • Budget-friendly, using common ingredients that you may already have in your pantry.
  • Customizable with your favorite granola and nuts, allowing you to tailor each parfait to your taste.
  • Perfectly balanced flavors with the bright acidity of lemon juice and the sweetness of honey enhancing the peaches.

Ingredients

  • For the Parfait:
  • 2 cups plain Greek yogurt (or vanilla yogurt for a sweeter option)
  • 2 large ripe peaches, diced (about 2 cups)
  • 1 tablespoon fresh lemon juice (to prevent browning of peaches)
  • 2 tablespoons honey (plus more for drizzling)
  • 1 teaspoon vanilla extract (optional for extra flavor)
  • For the Granola:
  • 1 cup granola (store-bought or homemade; see notes for a simple granola recipe)
  • 1/4 cup sliced almonds (optional for added crunch)
  • 1/4 cup shredded coconut (optional for added flavor)

Let’s dive into some key ingredients that make this Peach Yogurt Parfait so delightful! First, the Greek yogurt is not only creamy but also packed with protein, making it a satisfying option for breakfast or a snack. If you’re looking for a sweeter option, you can easily substitute it with vanilla yogurt, though it may alter the overall flavor balance. Next, the ripe peaches are the star of the show; their natural sweetness shines through, so I recommend choosing peaches that yield slightly to pressure, indicating they’re perfectly ripe. If peaches aren’t in season, feel free to use nectarines or even frozen peaches—just thaw them before use. Finally, honey adds a lovely floral sweetness that ties everything together. If you prefer, maple syrup can serve as a delicious substitute.

Step-by-Step Instructions

  1. Start by preparing the peaches. Wash them thoroughly, then slice and dice them into bite-sized pieces. In a medium bowl, toss the diced peaches with 1 tablespoon of fresh lemon juice to prevent browning. Set aside for about 5 minutes while the lemon juice works its magic.
  2. In a separate bowl, combine the Greek yogurt, 2 tablespoons of honey, and 1 teaspoon of vanilla extract if using. Stir the mixture until smooth and thoroughly blended. This should take about a minute. Avoid overmixing to maintain the creaminess of the yogurt.
  3. Now it’s time to layer your parfait. Grab a clear glass or bowl to showcase your beautiful creation. Start with a generous spoonful of the yogurt mixture at the bottom—about 1/4 cup will do. Use a spoon to spread it evenly.
  4. Add a layer of the diced peaches over the yogurt, ensuring they cover the yogurt completely. You might want to use about half of what you have prepared—roughly 1 cup. This layer should be visually appealing, so arrange the peaches neatly.
  5. Sprinkle 1/4 cup of granola over the peaches. This adds a delightful crunch. Make sure to distribute it evenly to ensure every bite has that satisfying texture. Avoid packing it down too tightly, as you want it to maintain its crunch.
  6. Repeat the layers: spoon in another 1/4 cup of yogurt, followed by another cup of peaches, and another sprinkle of granola. You should have at least two layers, but feel free to add more depending on your glass size.
  7. Finish off your parfait with a drizzle of honey on top for added sweetness and a touch of elegance. If you’re using sliced almonds or shredded coconut, sprinkle them on top now. It adds a lovely visual contrast and extra flavor.
  8. Serve immediately or refrigerate for up to 30 minutes before serving to allow the flavors to meld together. However, I recommend enjoying it fresh to maintain the granola’s crunch.

Pro Tips for the Best Peach Yogurt Parfait With Honey And Granola

  • Make sure to choose ripe peaches for the best flavor and texture. A common mistake is using unripe fruit, which can lead to a less enjoyable parfait. Look for peaches that are fragrant and slightly soft to the touch.
  • Use a clear glass to assemble your parfait; this not only makes for a beautiful presentation but also allows you to see the colorful layers, which adds to the enjoyment of eating it.
  • For an even creamier texture, consider whipping the Greek yogurt with a hand mixer for a couple of minutes before layering. This small adjustment makes a huge difference in mouthfeel.
  • Be mindful of the granola-to-yogurt ratio. Too much granola can overwhelm the parfait, while too little can make it feel too creamy. Aim for about 1/4 cup of granola per layer for the perfect balance.
  • If you’re making this for a gathering, consider preparing the yogurt and peaches ahead of time and layering them just before serving. This ensures the granola stays crunchy!

Variations & Serving Ideas

There are so many ways to get creative with your Peach Yogurt Parfait! For a tropical twist, swap out the peaches for mangoes or pineapples and top with coconut flakes. If you prefer a berry flavor, mix in some blueberries or strawberries with the peaches for added color and taste. For a nutty version, incorporate chopped walnuts or pecans instead of almonds.

As for serving ideas, this parfait pairs beautifully with a side of scrambled eggs for a hearty breakfast or fresh fruit salad for a light lunch. You might also enjoy it alongside whole grain toast with almond butter for an energizing snack. The contrast of flavors and textures will elevate your meal experience!

Storage, Make-Ahead & Reheating

The Peach Yogurt Parfait is best enjoyed fresh, but you can prepare some components ahead of time. Store the layered parfait in an airtight container in the refrigerator for up to 24 hours. However, be cautious; the granola may lose its crunch if stored too long. You can freeze the yogurt and peach mixture for up to 2 months; just remember to thaw it in the refrigerator overnight before serving.

If you plan to enjoy this dish the next day, it can taste even better as the flavors meld together. Just remember to add the granola right before serving to keep its delightful crunch!

Frequently Asked Questions

Can I make Peach Yogurt Parfait With Honey And Granola ahead of time?

Yes — in fact, it tastes even better the next day as the flavors meld. However, I recommend waiting to add the granola until just before serving to maintain its crunch.

What can I substitute for Greek yogurt?

If you prefer a lighter option, you can substitute Greek yogurt with regular yogurt or a dairy-free alternative like coconut yogurt. Just remember that this may alter the creaminess and flavor profile slightly.

Can I use frozen peaches for this parfait?

Absolutely! Just make sure to thaw the frozen peaches before using them. They will still add great flavor, though the texture may be slightly softer than fresh peaches.

How do I make the parfait vegan?

To make a vegan version, substitute the Greek yogurt with a plant-based yogurt alternative, and replace honey with maple syrup or agave nectar. This keeps the parfait sweet while adhering to a vegan diet.

What other fruits can I use in this recipe?

You can mix and match fruits based on your preference. Try using strawberries, blueberries, raspberries, or even bananas. Just make sure to adjust the lemon juice as needed to prevent browning.

Sweet Peach Yogurt Parfait Delight

Final Thoughts

The Peach Yogurt Parfait with Honey and Granola is a delightful blend of creamy yogurt, sweet peaches, and crunchy granola that creates a satisfying and nourishing treat. Each layer bursts with flavor, making it a perfect choice for breakfast or a light dessert.

This is the kind of recipe I come back to again and again, especially when I want something refreshing and wholesome to start my day. The harmony of sweet and tart flavors, combined with the delightful crunch, never fails to lift my spirits!

I encourage you to give this parfait a try and indulge in its comforting goodness. Feel free to share your results or even add your own twist—perhaps a sprinkle of cinnamon or a handful of nuts. Enjoy creating your perfect parfait!

Print
clock clock iconcutlery cutlery iconflag flag iconfolder folder iconinstagram instagram iconpinterest pinterest iconfacebook facebook iconprint print iconsquares squares iconheart heart iconheart solid heart solid icon

Peach Yogurt Parfait


  • Author: Lily author
  • Total Time: 15 minutes
  • Yield: 4 servings 1x
Pin Recipe
Print Recipe

Description

This Peach Yogurt Parfait combines creamy Greek yogurt, juicy peaches, and crunchy granola for a delightful treat. It’s a perfect breakfast or snack that captures the essence of summer in every bite.


Ingredients

Scale
  • For the Parfait:
  • 2 cups plain Greek yogurt (or vanilla yogurt for a sweeter option)
  • 2 large ripe peaches, diced (about 2 cups)
  • 1 tablespoon fresh lemon juice (to prevent browning of peaches)
  • 2 tablespoons honey (plus more for drizzling)
  • 1 teaspoon vanilla extract (optional for extra flavor)
  • For the Granola:
  • 1 cup granola (store-bought or homemade; see notes for a simple granola recipe)
  • 1/4 cup sliced almonds (optional for added crunch)
  • 1/4 cup shredded coconut (optional for added flavor)

Instructions

  1. Start by preparing the peaches. Wash them thoroughly, then slice and dice them into bite-sized pieces. In a medium bowl, toss the diced peaches with 1 tablespoon of fresh lemon juice to prevent browning. Set aside for about 5 minutes while the lemon juice works its magic.
  2. In a separate bowl, combine the Greek yogurt, 2 tablespoons of honey, and 1 teaspoon of vanilla extract if using. Stir the mixture until smooth and thoroughly blended. This should take about a minute. Avoid overmixing to maintain the creaminess of the yogurt.
  3. Now it’s time to layer your parfait. Grab a clear glass or bowl to showcase your beautiful creation. Start with a generous spoonful of the yogurt mixture at the bottom—about 1/4 cup will do. Use a spoon to spread it evenly.
  4. Add a layer of the diced peaches over the yogurt, ensuring they cover the yogurt completely. You might want to use about half of what you have prepared—roughly 1 cup. This layer should be visually appealing, so arrange the peaches neatly.
  5. Sprinkle 1/4 cup of granola over the peaches. This adds a delightful crunch. Make sure to distribute it evenly to ensure every bite has that satisfying texture. Avoid packing it down too tightly, as you want it to maintain its crunch.
  6. Repeat the layers: spoon in another 1/4 cup of yogurt, followed by another cup of peaches, and another sprinkle of granola. You should have at least two layers, but feel free to add more depending on your glass size.
  7. Finish off your parfait with a drizzle of honey on top for added sweetness and a touch of elegance. If you’re using sliced almonds or shredded coconut, sprinkle them on top now. It adds a lovely visual contrast and extra flavor.
  8. Serve immediately or refrigerate for up to 30 minutes before serving to allow the flavors to meld together. However, I recommend enjoying it fresh to maintain the granola’s crunch.
  • Prep Time: 15 mins
  • Cook Time: 0 mins
  • Category: Breakfast
  • Method: No-cook
  • Cuisine: American

Nutrition

  • Serving Size: 1 parfait
  • Calories: 250
  • Sugar: 20 g
  • Sodium: 50 mg
  • Fat: 5 g
  • Saturated Fat: 2 g
  • Unsaturated Fat: 3 g
  • Trans Fat: 0 g
  • Carbohydrates: 40 g
  • Fiber: 3 g
  • Protein: 10 g
  • Cholesterol: 10 mg

Keywords: Choose ripe peaches for the best flavor and texture. Use a clear glass for a beautiful presentation. For creaminess, consider whipping the yogurt before layering. Be mindful of the granola-to-yogurt ratio. Prepare yogurt and peaches ahead of time for gatherings, layering just before serving.

Did you make this recipe?

Share a photo and tag us — we can't wait to see what you've made!

Sun-Kissed Frozen Orange Cream Slush

As a child, summer days felt like they lasted forever. I remember the sticky heat wrapping around me as I played outside, my laughter mingling with the sounds of the neighborhood. But nothing could cool me down quite like the moment I’d spot my grandmother, laboring over her blender, whipping up her famous Frozen Orange Creamsicle Slush. That vibrant orange treat, with its frosty texture and sweet citrus aroma, was like a burst of sunshine in a cup. Just one sip, and I could feel the coolness wash over me, sparking pure joy.

This Frozen Orange Creamsicle Slush has a way of making you feel like a kid again. Its creamy, dreamy consistency is a delightful balance of bright orange and soft vanilla, inviting you to dive right in. The refreshing tang of orange dances on your tongue, while the smooth creaminess envelops you in a comforting embrace. It’s a nostalgic treat that’s perfect for hot summer afternoons or anytime you need a little pick-me-up.

What makes my version of this slush stand out is the addition of a hint of vanilla bean, which elevates the flavor and adds an extra layer of richness. Plus, it’s super easy to whip up with just a few simple ingredients that you probably already have on hand! So, if you’re ready to relive those sun-soaked memories, let me show you exactly how to make it.

Sun-Kissed Frozen Orange Cream Slush

Why You’ll Love This Recipe

  • Each slush is a perfect blend of creamy vanilla and zesty orange, creating a nostalgic flavor reminiscent of summer days.
  • This refreshing treat is ready in under 15 minutes, making it an ideal quick dessert for unexpected guests or hot afternoons.
  • With just 8 simple ingredients, it’s budget-friendly, ensuring you don’t have to break the bank to enjoy a delicious slush.
  • The slush has a perfectly smooth texture, thanks to the combination of ice and ice cream, providing a delightful contrast to the bright citrus flavors.
  • It’s highly customizable; you can easily adjust the sweetness and add fresh herbs for a unique twist that suits your taste.

Ingredients

  • 2 cups orange juice (freshly squeezed or store-bought)
  • 1 cup vanilla ice cream
  • 1 cup crushed ice
  • 1/2 cup milk (whole or 2%)
  • 1/4 cup granulated sugar (adjust based on sweetness preference)
  • 1 teaspoon vanilla extract
  • Zest of 1 orange (for added flavor)
  • Fresh orange slices and mint leaves (for garnish)

The star of this Frozen Orange Creamsicle Slush is the orange juice, which provides the vibrant, citrusy base. Freshly squeezed juice will yield the brightest flavor, but store-bought options can be just as convenient. If you’re opting for store-bought, choose 100% pure juice with no added sugars for the best results. Another essential ingredient is the vanilla ice cream; it adds creaminess and sweetness. You can substitute it with dairy-free ice cream if you’re looking for a vegan option. Whole or 2% milk complements the ice cream, creating a smooth blend. If you want a lower-calorie version, almond or oat milk can be good alternatives.

Lastly, the granulated sugar can be adjusted based on your sweetness preference. If you prefer a more natural sweetener, consider using honey or agave syrup. The orange zest enhances the flavor profile, providing an aromatic pop that brings the whole slush together. Don’t skip it! It adds an extra layer of brightness that makes this slush truly special.

Step-by-Step Instructions

  1. Start by preparing your ingredients. Gather 2 cups of orange juice, 1 cup of vanilla ice cream, and 1 cup of crushed ice. Make sure the ice is finely crushed, as larger chunks can make blending difficult.
  2. In a blender, combine the orange juice, vanilla ice cream, crushed ice, and 1/2 cup of milk. Add 1/4 cup of granulated sugar and 1 teaspoon of vanilla extract. If you like a sweeter slush, consider adding a bit more sugar at this stage.
  3. Add the zest of 1 orange to the blender. This step is crucial for enhancing the citrus flavor of your slush. Make sure not to include the bitter white pith—only the flavorful zest.
  4. Blend the mixture on medium-high speed for about 30-45 seconds. Stop once the ingredients are fully combined and the slush has a smooth, even consistency. If you notice large chunks of ice, blend for an additional 10-15 seconds. Avoid over-blending, as this can make the slush too liquidy.
  5. Once blended, taste the slush. If it needs more sweetness, add a little more sugar and blend for a few more seconds. If it’s too thick, you can add a splash of milk to reach your desired consistency.
  6. Pour the slush into glasses. This recipe typically serves 4, but you can easily double it for larger gatherings. Use a spoon to help guide the slush into the glasses if needed.
  7. Garnish each serving with fresh orange slices and mint leaves. The mint not only adds a pop of color but also a refreshing aroma that complements the citrus flavors beautifully.
  8. Serve immediately and enjoy! If you’ve made extra, you can refrigerate it for a short time, but it’s best enjoyed fresh.

Pro Tips for the Best Frozen Orange Creamsicle Slush

  • Don’t skip the orange zest! It’s a game-changer for flavor. Always zest before juicing to make it easier.
  • Use a high-powered blender for the best texture. A standard blender may struggle with ice, leading to uneven consistency. If you have a food processor, that can work too, but ensure the ice is finely crushed.
  • Adjust the ice-to-liquid ratio carefully. If your slush is too thick, it won’t blend well. Start with less ice and add more until you reach your preferred texture.
  • Be cautious with the sugar! Always start with the lower amount, as you can easily add more, but it’s hard to fix an overly sweet slush.
  • For a fun twist, consider adding a splash of coconut milk or a handful of fresh fruit like strawberries or pineapple. This not only enhances the flavor but also adds a beautiful color contrast.

Variations & Serving Ideas

There are countless ways to put a spin on your Frozen Orange Creamsicle Slush. Consider making a tropical version by adding in some pineapple juice or coconut milk for a delightful tropical twist. If you’re feeling adventurous, try incorporating a handful of frozen mango or peach slices for added sweetness. For a lighter version, swap out the vanilla ice cream for Greek yogurt for a creamy yet tangy alternative.

As for serving ideas, this refreshing slush pairs wonderfully with light summer dishes like grilled chicken skewers, fish tacos, or a simple salad topped with citrus vinaigrette. The bright, zesty flavors of the slush complement these dishes perfectly, making them an ideal pairing for a sunny day.

Storage, Make-Ahead & Reheating

This Frozen Orange Creamsicle Slush is best enjoyed fresh, but if you have leftovers, you can store them in an airtight container in the fridge for up to 2 days. Just keep in mind that the slush may lose some of its texture over time as the ice melts. It doesn’t freeze well, as the ice will turn into a solid block. If you must freeze it, blend again after thawing to restore the slushy consistency. This treat is best the day you make it, as the flavors meld together beautifully overnight, enhancing its deliciousness.

Frequently Asked Questions

Can I make Frozen Orange Creamsicle Slush ahead of time?

Yes — in fact, it tastes even better the next day as the flavors meld. However, it’s best to enjoy it fresh, as the texture can change if stored for too long. If you need to prepare it ahead, keep it in the fridge and re-blend before serving.

What kind of orange juice should I use?

For the best flavor, use freshly squeezed orange juice. However, if you’re short on time, opt for 100% pure store-bought juice without added sugars. This will ensure that your slush remains flavorful and refreshing.

Can I substitute the vanilla ice cream?

Absolutely! If you’re looking for a dairy-free option, coconut milk ice cream or a non-dairy vanilla ice cream can work wonderfully. They will still provide the creamy texture and sweetness you desire.

How can I adjust the sweetness of my slush?

You can easily adjust the sweetness by modifying the amount of sugar added. Start with 1/4 cup and taste the mixture before blending. If you prefer it sweeter, add more sugar gradually until it reaches your desired level.

What should I do if my slush is too thick?

If your slush is too thick, simply add a splash of milk or orange juice and blend again. This will help achieve a more drinkable consistency while maintaining the slushy texture. Adjust gradually to reach your preferred thickness.

Sun-Kissed Frozen Orange Cream Slush

Final Thoughts

The Frozen Orange Creamsicle Slush is a delightful blend of refreshing citrus and creamy goodness, making it a perfect treat for warm days or any time you crave a taste of nostalgia. The way the bright orange flavor dances with the creamy texture truly elevates this slush, transforming it into a satisfying escape from the everyday.

This is the kind of recipe I come back to again and again, especially when I’m looking to cool down or impress guests at a summer gathering. It’s simple to make and always brings smiles all around! I encourage you to try this recipe for yourself—don’t hesitate to share your results or even put your own spin on it. Happy slushing!

Print
clock clock iconcutlery cutlery iconflag flag iconfolder folder iconinstagram instagram iconpinterest pinterest iconfacebook facebook iconprint print iconsquares squares iconheart heart iconheart solid heart solid icon

Frozen Orange Creamsicle Slush


  • Author: Lily author
  • Total Time: 15 minutes
  • Yield: 4 servings 1x
Pin Recipe
Print Recipe

Description

This Frozen Orange Creamsicle Slush is a refreshing treat that combines creamy vanilla and zesty orange flavors. Perfect for hot summer days, it brings back nostalgic memories with every sip.


Ingredients

Scale
  • 2 cups orange juice (freshly squeezed or store-bought)
  • 1 cup vanilla ice cream
  • 1 cup crushed ice
  • 1/2 cup milk (whole or 2%)
  • 1/4 cup granulated sugar (adjust based on sweetness preference)
  • 1 teaspoon vanilla extract
  • Zest of 1 orange (for added flavor)
  • Fresh orange slices and mint leaves (for garnish)

Instructions

  1. Start by preparing your ingredients. Gather 2 cups of orange juice, 1 cup of vanilla ice cream, and 1 cup of crushed ice. Make sure the ice is finely crushed, as larger chunks can make blending difficult.
  2. In a blender, combine the orange juice, vanilla ice cream, crushed ice, and 1/2 cup of milk. Add 1/4 cup of granulated sugar and 1 teaspoon of vanilla extract. If you like a sweeter slush, consider adding a bit more sugar at this stage.
  3. Add the zest of 1 orange to the blender. This step is crucial for enhancing the citrus flavor of your slush. Make sure not to include the bitter white pith—only the flavorful zest.
  4. Blend the mixture on medium-high speed for about 30-45 seconds. Stop once the ingredients are fully combined and the slush has a smooth, even consistency. If you notice large chunks of ice, blend for an additional 10-15 seconds. Avoid over-blending, as this can make the slush too liquidy.
  5. Once blended, taste the slush. If it needs more sweetness, add a little more sugar and blend for a few more seconds. If it’s too thick, you can add a splash of milk to reach your desired consistency.
  6. Pour the slush into glasses. This recipe typically serves 4, but you can easily double it for larger gatherings. Use a spoon to help guide the slush into the glasses if needed.
  7. Garnish each serving with fresh orange slices and mint leaves. The mint not only adds a pop of color but also a refreshing aroma that complements the citrus flavors beautifully.
  8. Serve immediately and enjoy! If you’ve made extra, you can refrigerate it for a short time, but it's best enjoyed fresh.
  • Prep Time: 15 min
  • Cook Time: 0 min
  • Category: Dessert
  • Method: Blending
  • Cuisine: American

Nutrition

  • Serving Size: 1 serving
  • Calories: 200
  • Sugar: 30 g
  • Sodium: 50 mg
  • Fat: 5 g
  • Saturated Fat: 3 g
  • Unsaturated Fat: 2 g
  • Trans Fat: 0 g
  • Carbohydrates: 40 g
  • Fiber: 1 g
  • Protein: 2 g
  • Cholesterol: 20 mg

Keywords: Don't skip the orange zest! It's a game-changer for flavor. Always zest before juicing to make it easier.

Did you make this recipe?

Share a photo and tag us — we can't wait to see what you've made!

Zesty Lemon Poppy Seed Delight

One rainy afternoon, I found myself in my grandmother’s cozy kitchen, the kind that always smelled like warmth and love. She was whipping up her famous Lemon Poppy Seed Loaf, a recipe that had been passed down through generations. As the batter came together, the zesty aroma of fresh lemons filled the air, mingling perfectly with the nutty fragrance of poppy seeds. I can still picture her, apron-clad, as she expertly drizzled a vibrant citrus icing over the loaf, creating a glossy, sun-kissed finish that beckoned us to dive in. It was a moment that sparked my own passion for baking, and this recipe has become a cherished staple in my home ever since.

When you take a bite of this Lemon Poppy Seed Loaf, it’s like a burst of sunshine on your palate. The loaf is beautifully golden, with a tender crumb that melts in your mouth. Each slice is speckled with tiny poppy seeds, adding a delightful crunch that contrasts beautifully with the tangy sweetness of the lemon. And that citrus icing? It’s the finishing touch that elevates this loaf from ordinary to extraordinary, with its bright, zesty flavor dancing on your taste buds.

This recipe stands out because it embraces simplicity while delivering on flavor. I’ve added a hint of vanilla to the batter, enhancing the overall taste and making it even more indulgent. Trust me, once you make this Lemon Poppy Seed Loaf With Citrus Icing, it’ll become a go-to in your baking repertoire.

So, let me show you exactly how to make it!

Zesty Lemon Poppy Seed Delight

Why You’ll Love This Recipe

  • Moist and tender crumb that melts in your mouth, thanks to the perfect balance of butter and buttermilk.
  • Bright, zesty lemon flavor paired with crunchy poppy seeds, creating a delightful texture and taste experience.
  • Easy to whip up in just about an hour, perfect for last-minute gatherings or a cozy afternoon treat.
  • Budget-friendly with everyday ingredients, making it an accessible option for all home bakers.
  • The citrus icing adds a sweet tang that elevates the loaf, turning a simple recipe into a showstopper!

Ingredients

  • 1 ½ cups (190g) all-purpose flour
  • 1 teaspoon baking powder
  • ½ teaspoon baking soda
  • ½ teaspoon salt
  • 3 tablespoons poppy seeds
  • ½ cup (115g) unsalted butter, softened to room temperature
  • 1 cup (200g) granulated sugar
  • 2 large eggs
  • 1 teaspoon vanilla extract
  • 1 teaspoon lemon zest (from about 1 medium lemon)
  • ½ cup (120ml) buttermilk
  • 2 tablespoons fresh lemon juice

For the Citrus Icing:

  • 1 cup (120g) powdered sugar
  • 2 tablespoons fresh lemon juice
  • 1 tablespoon orange juice
  • 1 teaspoon lemon zest (for garnish, optional)

Let’s dive into the key ingredients that make this Lemon Poppy Seed Loaf so special. The all-purpose flour provides the structure and base for the loaf, while the baking powder and baking soda ensure it rises perfectly, giving the loaf a light texture. For a gluten-free variation, you could substitute the flour with a gluten-free all-purpose blend. Poppy seeds not only add a delightful crunch but also contribute to the unique flavor profile that pairs well with the citrus notes.

Unsalted butter is crucial for achieving the buttery richness that makes this loaf so moist. If you’re looking for a dairy-free option, coconut oil or a vegan butter can be used instead. The buttermilk is another essential component, providing acidity that activates the baking soda for a fluffy texture. If you don’t have buttermilk on hand, you can easily make a substitute by mixing ½ cup of milk with 1 tablespoon of vinegar or lemon juice and letting it sit for about 5 minutes.

Step-by-Step Instructions

  1. Preheat your oven to 350°F (175°C). Grease a 9×5-inch loaf pan or line it with parchment paper for easy removal later.
  2. In a medium mixing bowl, whisk together 1 ½ cups of all-purpose flour, 1 teaspoon of baking powder, ½ teaspoon of baking soda, ½ teaspoon of salt, and 3 tablespoons of poppy seeds. This helps to evenly distribute the baking agents and ensures a uniform rise.
  3. In a large mixing bowl, cream together ½ cup of softened unsalted butter and 1 cup of granulated sugar using an electric mixer on medium speed for about 3-4 minutes, until the mixture is light and fluffy. Make sure to scrape down the sides of the bowl occasionally.
  4. Add 2 large eggs, 1 teaspoon of vanilla extract, and 1 teaspoon of lemon zest to the creamed butter and sugar, mixing until fully combined. You want a smooth consistency, so ensure there are no lumps of butter.
  5. In a small bowl, combine ½ cup of buttermilk and 2 tablespoons of fresh lemon juice. Alternately add the dry ingredients and buttermilk mixture to the butter mixture, starting and ending with the dry ingredients. Mix just until combined; do not overmix, as this can lead to a dense loaf.
  6. Pour the batter into the prepared loaf pan. Smooth the top with a spatula, ensuring it’s even. Bake in the preheated oven for 50-60 minutes, or until a toothpick inserted in the center comes out clean. The edges should be lightly golden brown, and the center should feel just set.
  7. Once baked, remove the loaf from the oven and allow it to cool in the pan for about 10 minutes. Then, transfer it to a wire rack to cool completely. Resist the urge to slice too soon, as it will be crumbly if it’s still warm.
  8. While the loaf is cooling, prepare the citrus icing. In a medium bowl, whisk together 1 cup of powdered sugar, 2 tablespoons of fresh lemon juice, and 1 tablespoon of orange juice until smooth. If the icing is too thick, you can add a little more juice to reach your desired consistency.
  9. Once the loaf is completely cool, drizzle the citrus icing over the top. If you like, sprinkle with an additional teaspoon of lemon zest for an extra pop of flavor and color.

Pro Tips for the Best Lemon Poppy Seed Loaf With Citrus Icing

  • Be careful not to overmix your batter; this is a common mistake that can lead to a dense loaf. Mix just until the dry ingredients are incorporated for a light and fluffy texture.
  • Use room temperature ingredients, especially the butter and eggs. This helps to create a smoother batter and ensures even baking. Take your eggs out of the fridge about 30 minutes before you start.
  • For a more pronounced lemon flavor, consider adding a little lemon extract in addition to the zest and juice. Just a half teaspoon can elevate the citrus notes significantly.
  • When measuring your flour, spoon it into the measuring cup and level it off with a knife instead of scooping directly from the bag. This prevents packing and ensures you don’t end up with a dry loaf.
  • Invest in a good quality loaf pan; it makes a difference in heat distribution, which ensures even baking. If your pan is dark-coated, reduce the oven temperature by 25°F to prevent over-browning.

Variations & Serving Ideas

For a delightful twist, consider adding blueberries or raspberries to the batter for a fruity burst of flavor. You can also experiment with different citrus fruits—try lime or grapefruit zest and juice for a refreshing change. For a healthier option, substitute half of the all-purpose flour with whole wheat flour for added fiber without compromising too much on texture.

This Lemon Poppy Seed Loaf pairs beautifully with a light salad, such as a mixed greens salad with a vinaigrette, or a cup of tea for a cozy afternoon treat. It also complements a creamy cheese platter, as the acidity of the loaf balances rich cheeses perfectly. Lastly, a scoop of vanilla ice cream on the side creates a delightful contrast of temperatures and flavors!

Storage, Make-Ahead & Reheating

This Lemon Poppy Seed Loaf can be stored at room temperature for up to 3 days if wrapped tightly in plastic wrap. If you want to keep it longer, it freezes well for up to 3 months. To freeze, wrap the loaf tightly in plastic wrap and then in aluminum foil to prevent freezer burn.

When you’re ready to enjoy it again, simply thaw it in the fridge overnight. Reheat individual slices in the microwave for 15-20 seconds or in a toaster oven until warmed through. Interestingly, many people find that this loaf tastes even better the next day, as the flavors have time to meld!

Frequently Asked Questions

Can I make Lemon Poppy Seed Loaf With Citrus Icing ahead of time?

Yes — in fact, it tastes even better the next day! You can make the loaf a day in advance, allowing the flavors to develop. Just be sure to store it in an airtight container to maintain its moisture.

Can I substitute the poppy seeds?

Absolutely! If you don’t have poppy seeds on hand or prefer an alternative, you can use sesame seeds for a similar crunch or omit them entirely for a smooth loaf.

What can I use instead of buttermilk?

If you don’t have buttermilk, you can easily create a substitute by mixing ½ cup of milk (dairy or plant-based) with 1 tablespoon of vinegar or lemon juice. Let it sit for 5 minutes before using in the recipe.

How can I make this recipe gluten-free?

To make a gluten-free version of this Lemon Poppy Seed Loaf, substitute the all-purpose flour with a gluten-free all-purpose flour blend. Just ensure that the blend contains a binding agent like xanthan gum for the best results.

What is the best way to store leftover loaf?

Leftover Lemon Poppy Seed Loaf should be stored in an airtight container at room temperature for up to 3 days. For longer storage, wrap it tightly and freeze for up to 3 months. Thaw it before serving for the best texture.

Zesty Lemon Poppy Seed Delight

Final Thoughts

The Lemon Poppy Seed Loaf with Citrus Icing is truly a delightful treat that brings a burst of brightness to any occasion. The zesty lemon flavor combined with the subtle crunch of poppy seeds creates a satisfying balance, while the citrus icing adds a touch of sweetness that perfectly complements the loaf’s tanginess.

This is the kind of recipe I come back to again and again, especially when I want to brighten up a gloomy day or celebrate a small victory. The aroma that fills the kitchen as it bakes is absolutely heavenly! I encourage you to give this recipe a try; you might just find it becoming a beloved staple in your home. Don’t forget to share your results or even add your own unique twist—I can’t wait to see what you create!

Print
clock clock iconcutlery cutlery iconflag flag iconfolder folder iconinstagram instagram iconpinterest pinterest iconfacebook facebook iconprint print iconsquares squares iconheart heart iconheart solid heart solid icon

Lemon Poppy Seed Loaf


  • Author: Lily author
  • Total Time: 23 minute
  • Yield: 1 loaf 1x
Pin Recipe
Print Recipe

Description

This Lemon Poppy Seed Loaf is a delightful treat that combines zesty lemon flavor with crunchy poppy seeds. Topped with a citrus icing, it’s perfect for any occasion.


Ingredients

Scale
  • 1 ½ cups (190g) all-purpose flour
  • 1 teaspoon baking powder
  • ½ teaspoon baking soda
  • ½ teaspoon salt
  • 3 tablespoons poppy seeds
  • ½ cup (115g) unsalted butter, softened to room temperature
  • 1 cup (200g) granulated sugar
  • 2 large eggs
  • 1 teaspoon vanilla extract
  • 1 teaspoon lemon zest (from about 1 medium lemon)
  • ½ cup (120ml) buttermilk
  • 2 tablespoons fresh lemon juice
  • 1 cup (120g) powdered sugar
  • 2 tablespoons fresh lemon juice
  • 1 tablespoon orange juice
  • 1 teaspoon lemon zest (for garnish, optional)

Instructions

  1. Preheat your oven to 350°F (175°C). Grease a 9×5-inch loaf pan or line it with parchment paper for easy removal later.
  2. In a medium mixing bowl, whisk together 1 ½ cups of all-purpose flour, 1 teaspoon of baking powder, ½ teaspoon of baking soda, ½ teaspoon of salt, and 3 tablespoons of poppy seeds. This helps to evenly distribute the baking agents and ensures a uniform rise.
  3. In a large mixing bowl, cream together ½ cup of softened unsalted butter and 1 cup of granulated sugar using an electric mixer on medium speed for about 3-4 minutes, until the mixture is light and fluffy. Make sure to scrape down the sides of the bowl occasionally.
  4. Add 2 large eggs, 1 teaspoon of vanilla extract, and 1 teaspoon of lemon zest to the creamed butter and sugar, mixing until fully combined. You want a smooth consistency, so ensure there are no lumps of butter.
  5. In a small bowl, combine ½ cup of buttermilk and 2 tablespoons of fresh lemon juice. Alternately add the dry ingredients and buttermilk mixture to the butter mixture, starting and ending with the dry ingredients. Mix just until combined; do not overmix, as this can lead to a dense loaf.
  6. Pour the batter into the prepared loaf pan. Smooth the top with a spatula, ensuring it’s even. Bake in the preheated oven for 50-60 minutes, or until a toothpick inserted in the center comes out clean. The edges should be lightly golden brown, and the center should feel just set.
  7. Once baked, remove the loaf from the oven and allow it to cool in the pan for about 10 minutes. Then, transfer it to a wire rack to cool completely. Resist the urge to slice too soon, as it will be crumbly if it’s still warm.
  8. While the loaf is cooling, prepare the citrus icing. In a medium bowl, whisk together 1 cup of powdered sugar, 2 tablespoons of fresh lemon juice, and 1 tablespoon of orange juice until smooth. If the icing is too thick, you can add a little more juice to reach your desired consistency.
  9. Once the loaf is completely cool, drizzle the citrus icing over the top. If you like, sprinkle with an additional teaspoon of lemon zest for an extra pop of flavor and color.
  • Prep Time: 15 mins
  • Cook Time: 50-60 mins
  • Category: Dessert
  • Method: Baking
  • Cuisine: American

Nutrition

  • Serving Size: 1 slice
  • Calories: 200
  • Sugar: 15 g
  • Sodium: 150 mg
  • Fat: 8 g
  • Saturated Fat: 5 g
  • Unsaturated Fat: 3 g
  • Trans Fat: 0 g
  • Carbohydrates: 30 g
  • Fiber: 1 g
  • Protein: 3 g
  • Cholesterol: 40 mg

Keywords: Be careful not to overmix your batter; this is a common mistake that can lead to a dense loaf. Use room temperature ingredients for a smoother batter and even baking.

Did you make this recipe?

Share a photo and tag us — we can't wait to see what you've made!

  • Privacy Policy
  • Terms Of Service
  • Contact
  • About
  • GDPR

Copyright © 2025 Homesmad