• Skip to primary navigation
  • Skip to main content
  • Skip to primary sidebar
Homesmad

Homesmad

  • Home
  • Breakfast & Brunch
  • Appetizers & Snacks
  • Dinner
  • Dessert
  • About
  • Privacy Policy
  • Contact
Homesmad
  • Home
  • Breakfast & Brunch
  • Appetizers & Snacks
  • Dinner
  • Dessert
  • About
  • Privacy Policy
  • Contact

Easy Creme Brulee French Toast Recipe for a Brunch Delight.

November 25, 2025 by Lily author

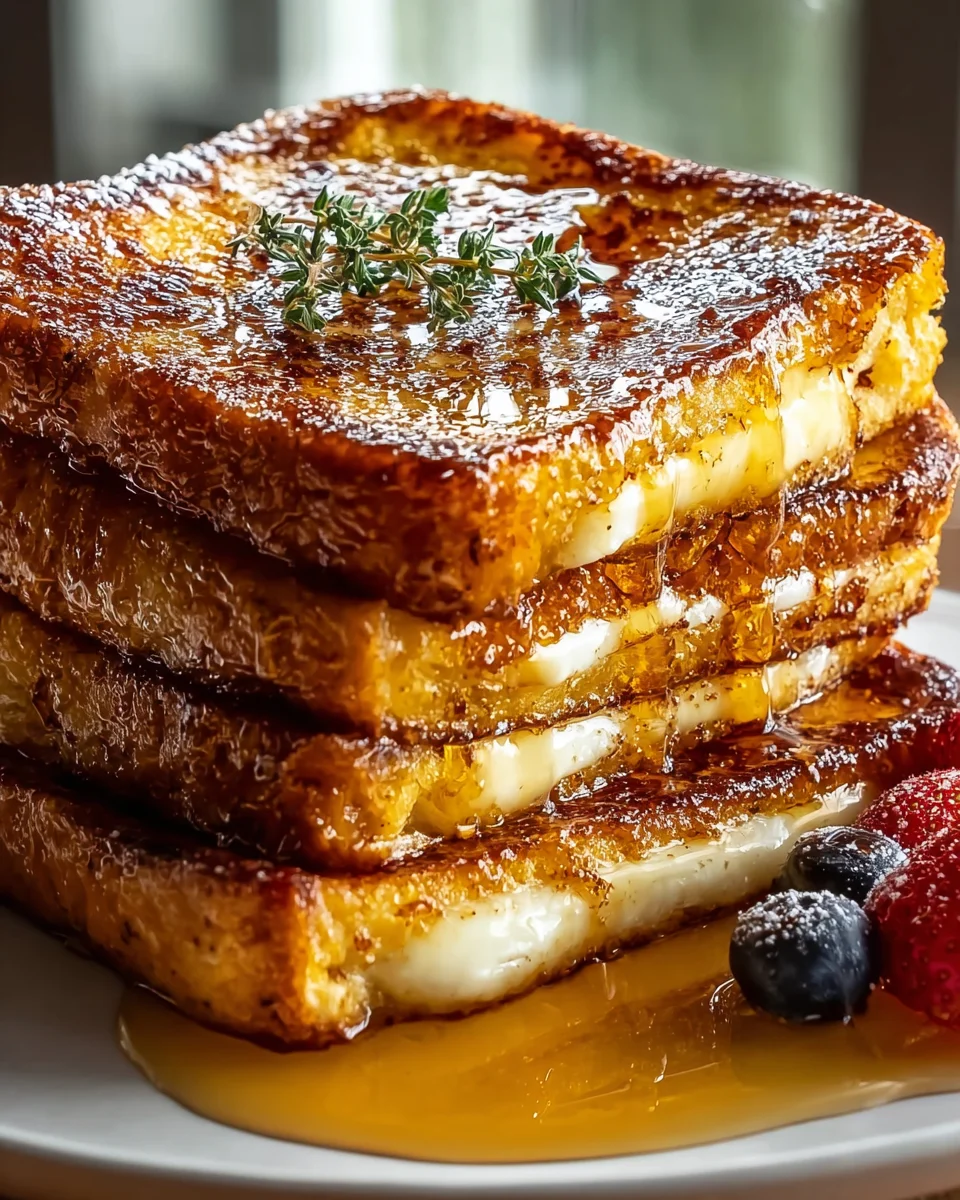
Creme Brulee French Toast is not just a breakfast; it’s an experience. Imagine waking up to the aroma of sweet vanilla and caramelized sugar, knowing that a dish combining two of the most comforting classics awaits you. This isn’t your everyday French toast; it’s an elevated, truly indulgent morning meal that will transform any ordinary weekend into a special occasion. I am absolutely delighted to share this incredible recipe with you.

The inspiration behind this magnificent dish truly comes from a place of culinary brilliance. French toast, or ‘pain perdu’ meaning ‘lost bread,’ has humble origins, transforming stale bread into a delicious treat. Creme Brulee, on the other hand, is a sophisticated French dessert known for its rich, creamy custard topped with a brittle layer of caramelized sugar. The magic happens when these two concepts merge, creating a breakfast masterpiece. People adore this dish not only for its impressive presentation but for the symphony of textures and flavors it delivers.

From the satisfying crack of the caramelized crust to the soft, custardy interior that melts in your mouth, every bite is pure bliss. It’s a dish that feels incredibly gourmet yet is surprisingly simple to prepare, especially since much of the prep can be done the night before. This convenience, combined with its extraordinary taste and delightful crunch, is precisely why Creme Brulee French Toast has garnered such a passionate following among breakfast lovers worldwide. Get ready to elevate your breakfast game!

Easy Creme Brulee French Toast Recipe for a Brunch Delight. this RECIPE

Ingredients:

Creating the perfect Creme Brulee French Toast is an act of love, and it all starts with selecting the right components. Here’s everything you’ll need to embark on this delicious journey with me.

  • For the Creme Brulee Custard Base:
    • 2 cups (480ml) heavy cream: I always reach for full-fat heavy cream because it’s the secret to that incredibly rich, velvety custard texture, crucial for a truly authentic creme brulee experience. It’s the backbone of our luxurious soaking liquid for the French toast.
    • 1/2 cup (100g) granulated sugar: This is for sweetening our custard. It melts beautifully into the cream and yolks, providing the perfect level of sweetness without being cloying.
    • 1 vanilla bean: Trust me, a real vanilla bean makes all the difference here. Split it lengthwise and scrape out those tiny, fragrant seeds. They infuse the custard with an unparalleled depth of vanilla flavor that extract simply can’t match. If you absolutely can’t find one, 2 teaspoons of high-quality vanilla extract can be substituted, but aim for the bean!
    • 6 large egg yolks: These are the emulsifiers and thickeners that give our custard its luscious, creamy body. Separating them from the whites might seem like an extra step, but it’s essential for that smooth, rich finish.
    • 1/4 teaspoon salt: Just a pinch! This might seem counterintuitive for a sweet dish, but salt is a flavor enhancer that balances the sweetness and brings out the complexity of the vanilla and cream. Don’t skip it.
  • For the French Toast:
    • 8 slices thick-cut brioche or challah bread: This is non-negotiable for Creme Brulee French Toast! Brioche or challah are my top choices because their rich, eggy, and slightly sweet nature makes them incredibly absorbent and sturdy enough to hold up to the luxurious custard without falling apart. Aim for slices that are about 1 inch (2.5 cm) thick. Stale bread (day-old) works even better as it absorbs the custard without becoming soggy.
    • 2 tablespoons unsalted butter: For cooking the French toast. Unsalted butter allows us to control the salt content in the dish and provides that beautiful golden-brown crust and rich flavor.
    • Vegetable oil (optional, for frying): Sometimes, I like to add a splash of high-smoke-point oil (like canola or grapeseed) alongside the butter in the pan. This helps prevent the butter from burning too quickly and ensures an even, golden cook on the French toast.
  • For the Brulee Topping and Garnish:
    • 1/4 cup (50g) granulated sugar: This is for the iconic caramelized crust. You’ll sprinkle this directly onto the cooked French toast slices before torching.
    • Fresh berries (strawberries, blueberries, raspberries): A colorful and fresh counterpoint to the richness of the French toast. They add a lovely tartness and vibrant presentation.
    • Powdered sugar: For a delicate dusting just before serving, adding an extra touch of elegance.
    • Maple syrup or créme anglaise (optional): While the French toast is incredibly rich on its own, a drizzle of warm maple syrup or a side of light créme anglaise can elevate it even further for those who desire more sweetness or a sauce.

Preparing the Creme Brulee Custard Base

This is where the magic truly begins for our Creme Brulee French Toast. Creating a flawless custard is key to the dish’s success.

  1. Infuse the Cream with Vanilla: First, grab a medium saucepan. Pour in your 2 cups of heavy cream. Now, take your vanilla bean, slice it lengthwise right down the middle with a small, sharp knife, and use the back of the knife to scrape out all those tiny, aromatic black seeds. Add both the seeds and the empty vanilla bean pod to the heavy cream in the saucepan. Gently heat the cream over medium-low heat, stirring occasionally, until it just begins to simmer around the edges – you’ll see tiny bubbles forming. Be careful not to let it boil vigorously; we’re just aiming to warm it up and let the vanilla really infuse. Once it’s simmering, remove the pan from the heat, cover it, and let it steep for about 15-20 minutes. This allows the vanilla to fully release its complex flavors into the cream, making our custard incredibly fragrant. After steeping, remove and discard the vanilla bean pod.

  2. Whisk the Yolks and Sugar: While your vanilla cream is steeping, grab a large mixing bowl. Add your 6 large egg yolks, 1/2 cup of granulated sugar, and 1/4 teaspoon of salt. Using a whisk, beat these ingredients together vigorously until the mixture becomes pale yellow, thick, and creamy. It should lighten in color and increase slightly in volume, indicating that the sugar has started to dissolve and the yolks are well-emulsified. This usually takes about 2-3 minutes of continuous whisking. The better you whisk them now, the smoother your final custard will be.

  3. Temper the Egg Yolks: This is a crucial step to prevent scrambling your eggs! Once your vanilla-infused cream has steeped and is still warm, slowly drizzle about a quarter of the warm cream mixture into your whisked egg yolk mixture, whisking constantly and vigorously as you pour. The goal here is to gradually raise the temperature of the egg yolks without cooking them. Continue to whisk for about 30 seconds to ensure everything is thoroughly combined and warmed. This process is called tempering.

  4. Combine and Strain the Custard: Now that the yolks are tempered, pour the entire tempered egg yolk mixture back into the saucepan with the remaining warm cream. Place the saucepan back over low heat. Cook the custard gently, stirring constantly with a wooden spoon or a heatproof spatula, for about 5-7 minutes. You’ll know it’s ready when the custard thickens just enough to coat the back of your spoon, and when you run your finger across the spoon, it leaves a clean line. Again, do not let it boil, or the eggs will scramble! Immediately remove the saucepan from the heat. For an extra silky-smooth custard, I highly recommend pouring the custard through a fine-mesh sieve into a shallow dish or a wide, shallow bowl. This removes any tiny bits of cooked egg that might have formed and ensures a perfectly smooth base for our Creme Brulee French Toast. Let the custard cool slightly, then cover it and refrigerate for at least 1 hour, or preferably overnight, to allow it to chill completely and fully develop its flavors. A cold custard soaks into the bread more effectively.

Preparing and Soaking the Bread

With our luxurious custard chilling, it’s time to prepare our bread for its transformation into exquisite Creme Brulee French Toast.

  1. Slice the Bread: If you bought an unsliced loaf of brioche or challah, slice it into eight generous, 1-inch thick pieces. The thickness is important because it allows the bread to absorb plenty of the rich custard without becoming overly saturated or mushy. Thinner slices would likely fall apart. If your bread is fresh, leaving it out uncovered for an hour or two, or gently toasting it in a low oven for 5-10 minutes, can help it dry out slightly, which paradoxically makes it soak up the custard even better.

  2. Prepare the Soaking Dish: Retrieve your chilled custard base. Give it a quick whisk to ensure it’s perfectly smooth and uniform. Pour the custard into a large, shallow dish or baking pan that is wide enough to comfortably fit 2-3 slices of bread at a time without overcrowding. The larger surface area will make soaking much easier and more efficient.

  3. Soak the Bread in Custard: Carefully place each slice of thick-cut brioche or challah into the custard, ensuring it’s fully submerged. Let each side soak for at least 30 seconds to 1 minute, or even longer if your bread is particularly dense or dry. You want the bread to absorb a good amount of the custard, becoming heavy and saturated but still holding its shape. Don’t rush this step; proper soaking is crucial for that custardy interior in your Creme Brulee French Toast. If you’re planning ahead, you can even soak the bread overnight in the refrigerator for an even deeper flavor and texture, turning it once or twice. However, if soaking for an extended period, ensure your bread is day-old or slightly stale, as fresh bread can become too mushy.

  4. Prepare for Cooking: As you finish soaking each slice, lift it gently from the custard, allowing any excess to drip back into the dish. Place the soaked slices on a wire rack set over a baking sheet. This allows for any further dripping and ensures the bread isn’t sitting in a pool of custard, which can lead to sogginess. This also keeps your cooking area tidy.

Cooking Your Creme Brulee French Toast

Now comes the exciting part: transforming the soaked bread into golden, crispy-edged Creme Brulee French Toast.

  1. Heat the Pan: Place a large non-stick skillet or a heavy-bottomed cast-iron pan over medium heat. Allow it to heat up for a good 2-3 minutes. This ensures an even cooking temperature. Once hot, add about 1 tablespoon of unsalted butter to the pan. If you’re using oil, add a splash of vegetable oil alongside the butter. Swirl the pan to coat the bottom with the melted butter and oil mixture. You want a consistent, moderately hot surface for browning.

  2. Cook the French Toast: Carefully transfer 2-3 soaked bread slices to the hot pan, making sure not to overcrowd it. Overcrowding will lower the pan’s temperature and steam the French toast instead of browning it, leading to a less desirable texture. Cook for 3-4 minutes per side, or until each side is beautifully golden brown and caramelized. The edges should be slightly crisp, and the center should feel puffy and cooked through. You’ll notice a delightful aroma of toasted bread and vanilla filling your kitchen. Adjust the heat as needed; if the French toast is browning too quickly, lower the heat slightly. We want a deep, rich golden color, not burnt. Repeat with the remaining butter (and oil, if using) and bread slices, cooking in batches as necessary.

  3. Keep Warm (Optional): As each batch of Creme Brulee French Toast is cooked, you can transfer them to a baking sheet and keep them warm in a preheated oven at a low temperature (around 200°F or 95°C) while you finish cooking the rest. This ensures every slice is warm and ready for the final brulee step.

The Brulee Finish

This is the iconic moment – turning delicious French toast into true Creme Brulee French Toast with that signature crackling sugar crust.

  1. Prepare for Brulee: Arrange your warm, cooked French toast slices on a heatproof surface, such as a wire rack set over a baking sheet, or directly on an oven-safe plate. Ensure they are in a single layer with a little space between each slice. This makes the torching process easier and safer. Have your culinary torch ready and a small bowl of granulated sugar nearby.

  2. Sugar and Torch: Take a cooked slice of French toast. Sprinkle about 1 to 2 teaspoons of granulated sugar evenly over the entire top surface of the French toast. You want a thin, even layer, not a thick pile, otherwise, it will be harder to caramelize properly. Now, with your culinary torch, ignite it and hold the flame about 2-3 inches above the sugared surface. Move the flame slowly and continuously in a circular motion over the sugar. You’ll watch in awe as the sugar melts, bubbles, and then transforms into a beautiful, amber-colored, glassy caramel crust. This process takes about 30 seconds to 1 minute per slice, depending on your torch’s power. Be careful not to hold the flame in one spot for too long, as it can burn the sugar or the French toast underneath. A perfectly bruleed crust should be even in color and make a satisfying crack when gently tapped.

  3. Safety First: Always use your culinary torch in a well-ventilated area and away from any flammable materials. Keep your fingers clear of the flame, and ensure children are supervised or at a safe distance. Allow the caramelized sugar to cool and harden for a minute or two before serving. This cooling time is essential for the crust to become firm and brittle, giving you that delightful crack.

Serving Your Luxurious Creme Brulee French Toast

The final flourish for your masterpiece: presenting and garnishing your incredible Creme Brulee French Toast.

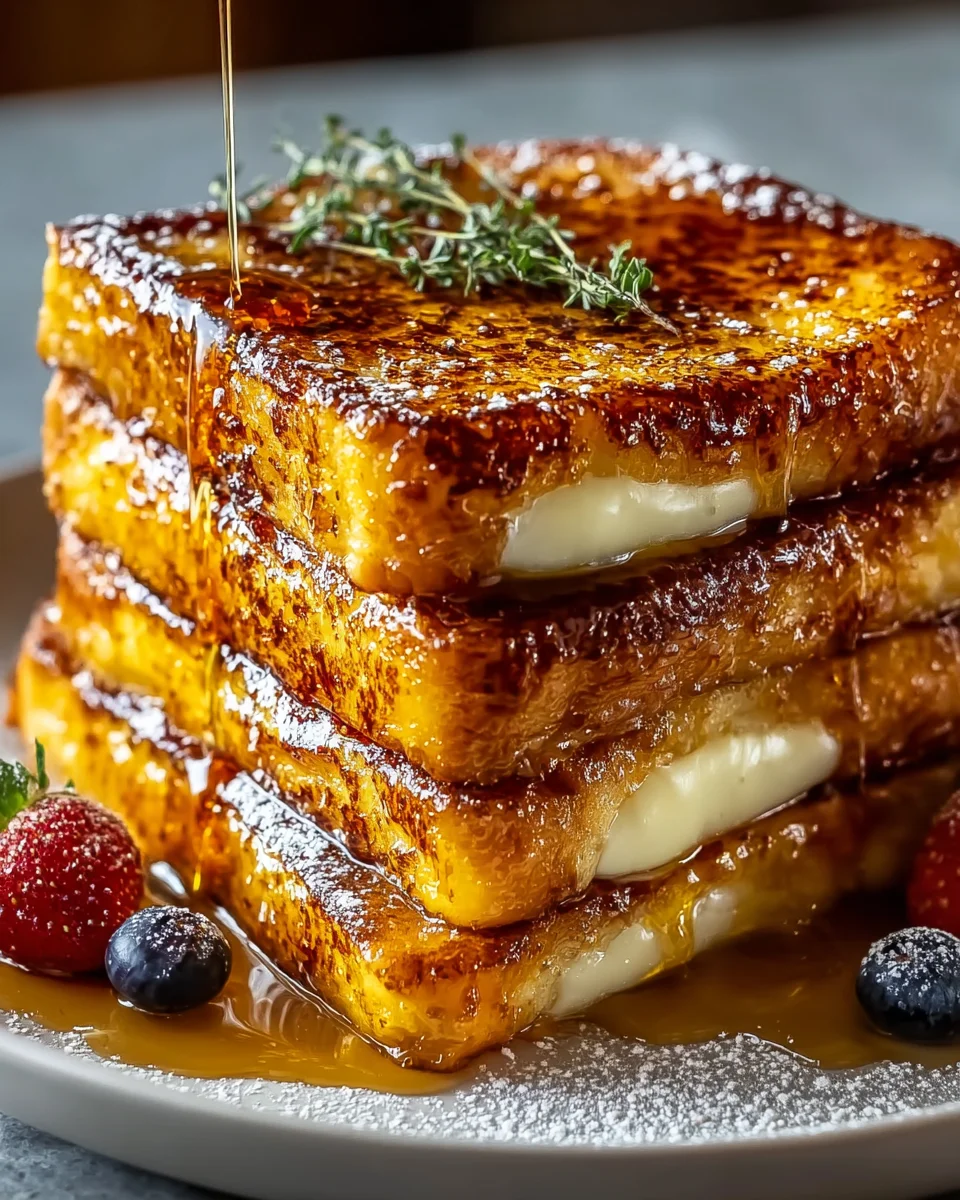
  1. Garnish and Serve Immediately: Once the caramelized sugar crust has hardened on all your French toast slices, it’s time to serve them without delay. The crunchy brulee topping is at its best when fresh. Arrange 1-2 slices on each serving plate. Dust lightly with a generous sprinkle of powdered sugar through a small sieve – this adds a delicate, snowy finish and a touch more sweetness. Then, artfully scatter a handful of fresh berries (strawberries, blueberries, and raspberries create a beautiful contrast of colors and flavors) around and on top of the French toast. The tartness of the berries provides a wonderful counterpoint to the rich sweetness of the dish. For an extra indulgent touch, you can offer a small pitcher of warm maple syrup or a side of light créme anglaise for drizzling, though I often find this dish so rich and flavorful on its own that it doesn’t need much more. This Creme Brulee French Toast is truly a showstopper, perfect for a special brunch or a luxurious weekend treat. Enjoy every decadent bite!

Easy Creme Brulee French Toast Recipe for a Brunch Delight.

Conclusion:

And there you have it, friends! We’ve reached the end of our journey, but truly, it’s just the beginning of your own delicious adventure. If there’s one recipe I could implore you to try this weekend, it would undoubtedly be this incredible creation. I’m genuinely confident that once you experience the pure joy and luxurious taste of what I affectionately call my signature Creme Brulee French Toast, your perception of breakfast will be forever changed. This isn’t just another French toast recipe; it’s an experience, a masterpiece of textures and flavors designed to transform any ordinary morning into something truly extraordinary. Imagine biting through that perfectly caramelized, slightly crisp sugar crust, revealing a custardy, rich interior infused with vanilla and a hint of warmth – it’s simply divine. The genius of this recipe lies in its elegant simplicity coupled with an utterly decadent result. It’s impressive enough to serve to guests at your most elegant brunch, yet straightforward enough for a lazy Saturday morning treat for yourself and your loved ones. The ease with which you can achieve such a gourmet outcome is, frankly, part of its charm and why it has become such a beloved staple in my kitchen. It truly is a breakfast game-changer that promises to deliver smiles and satisfied sighs with every single bite.

Now, let’s talk about making this already phenomenal dish even more spectacular, or perhaps tailoring it to your unique preferences. While the core recipe for this Creme Brulee French Toast is perfection in itself, there are so many delightful ways to serve and personalize it. For a classic presentation, a light dusting of powdered sugar and a vibrant scattering of fresh berries – think plump blueberries, ripe raspberries, or sliced strawberries – add a beautiful visual appeal and a refreshing tartness that cuts through the richness. If you’re feeling extra indulgent, a dollop of freshly whipped cream or a scoop of premium vanilla bean ice cream could elevate it to a dessert-like status, perfect for a special occasion. And of course, a drizzle of high-quality maple syrup is always welcome, or for an even more pronounced caramel note, a homemade salted caramel sauce would be an absolute dream. Don’t be afraid to experiment with the bread either! While brioche or challah provide that essential rich, fluffy base, you could try using day-old sourdough for a slight tang, or even panettone during the holidays for a festive twist. For those who love a hint of spice, a pinch of cinnamon or nutmeg in the custard mixture can add another layer of warmth. You could also infuse the custard with citrus zest, like orange or lemon, for a bright, aromatic lift. The beauty of this recipe is its versatility, allowing you to truly make it your own.

Make It Your Own!

One of my favorite aspects of cooking is the personal touch, and I wholeheartedly encourage you to embrace that spirit with this recipe. Don’t be shy about adding your own flair! Perhaps a dash of almond extract in the custard, or a sprinkle of toasted pecans or slivered almonds over the top before serving for an added crunch. This recipe is also incredibly friendly for making ahead. Imagine waking up on a busy morning, knowing your glorious French toast is already prepped and waiting for a quick bake and torch. This makes it an ideal candidate for entertaining, allowing you to spend more time with your guests and less time scrambling in the kitchen. Just assemble and soak the bread the night before, cover it, and refrigerate. In the morning, simply pull it out, let it come to room temperature while your oven preheats, and then proceed with the baking and caramelizing. The satisfaction of pulling this stunning dish from the oven, with its glistening, crisp sugar crust, is truly one of life’s little pleasures.

So, now it’s your turn! I’ve shared my secrets, my tips, and my enthusiasm for this truly remarkable breakfast creation. I truly hope you feel inspired to dive into your kitchen and give this a try. Don’t hesitate; gather your ingredients, follow the steps, and prepare to be amazed by the results. I promise you, the aroma filling your kitchen as it bakes, and the look on the faces of those you share it with, will be reward enough. But the taste… oh, the taste will be unforgettable! I would absolutely love to hear about your experience. Did you add a unique twist? What was your favorite part? Did it become your new go-to special occasion breakfast? Please, feel free to share your thoughts, your successes, and even your culinary experiments in the comments below. Your feedback and stories inspire not just me, but our entire community of food lovers. Happy cooking, and get ready to fall in love with your new favorite breakfast masterpiece!


Easy Creme Brulee French Toast

An elevated, indulgent morning meal combining classic French toast with the sophisticated caramelized sugar crust of creme brulee. This recipe is perfect for a special brunch, offering a symphony of textures from the satisfying crack of the caramelized crust to the soft, custardy interior.

Prep Time
20 Minutes
Cook Time
20 Minutes
Total Time
40 Minutes
Servings
12-14 slices

Ingredients


Instructions


Important Information

Nutrition Facts (Per Serving)

It is important to consider this information as approximate and not to use it as definitive health advice.

Allergy Information

Please check ingredients for potential allergens and consult a health professional if in doubt.

« Previous Post
Dill Pickle Parmesan Chicken: Exciting Recipe You'll Love
Next Post »
Spicy Korean Ramen with Grilled Beef Creamy Sauce

If you enjoyed this…

Southern Breakfast Enchiladas with Beef Sausage Gravy

Cannoli French Toast: The Ultimate Italian-Inspired Breakfast Recipe

Strawberry Oatmeal Bars: Easy Recipe & Baking Tips

Primary Sidebar

Browse by Diet

BreakfastDinnerLunchDessertAppetizer

Sweet Peach Yogurt Parfait Delight

One of my fondest memories is from a lazy summer afternoon spent at my grandmother’s house. The sun filtered through the kitchen window, casting a warm glow over the table where she would create her culinary magic. It was during one of those blissful moments that I first tasted her Peach Yogurt Parfait with Honey and Granola. The sweet aroma of ripe peaches mingling with creamy yogurt and the crunch of granola was nothing short of heavenly. It felt like summer captured in a bowl, and I still remember the joy of diving in with a spoon, each layer revealing a new burst of flavor.

When I think about that parfait, I can almost hear the gentle hum of the bees outside, reminding me of the floral notes that honey brings to every bite. The vibrant yellows and soft oranges of the peaches contrast beautifully with the creamy white yogurt and the golden crunch of granola. It’s a dish that not only looks delightful but also tastes like a celebration of fresh, wholesome ingredients.

What makes my version of this Peach Yogurt Parfait special is the careful balance of flavors and textures. I use ripe, juicy peaches, drizzled with locally sourced honey, and a homemade granola that’s bursting with nuts and seeds for an extra crunch. It’s a simple dish, but every layer is crafted with love and attention.

Let me show you exactly how to make this delightful parfait, so you can bring a bit of that summer magic into your kitchen!

Sweet Peach Yogurt Parfait Delight

Why You’ll Love This Recipe

  • Delightfully creamy texture from the Greek yogurt, paired with the juicy sweetness of fresh peaches.
  • Ready in under 20 minutes, making it a quick and satisfying breakfast or snack option.
  • Budget-friendly, using common ingredients that you may already have in your pantry.
  • Customizable with your favorite granola and nuts, allowing you to tailor each parfait to your taste.
  • Perfectly balanced flavors with the bright acidity of lemon juice and the sweetness of honey enhancing the peaches.

Ingredients

  • For the Parfait:
  • 2 cups plain Greek yogurt (or vanilla yogurt for a sweeter option)
  • 2 large ripe peaches, diced (about 2 cups)
  • 1 tablespoon fresh lemon juice (to prevent browning of peaches)
  • 2 tablespoons honey (plus more for drizzling)
  • 1 teaspoon vanilla extract (optional for extra flavor)
  • For the Granola:
  • 1 cup granola (store-bought or homemade; see notes for a simple granola recipe)
  • 1/4 cup sliced almonds (optional for added crunch)
  • 1/4 cup shredded coconut (optional for added flavor)

Let’s dive into some key ingredients that make this Peach Yogurt Parfait so delightful! First, the Greek yogurt is not only creamy but also packed with protein, making it a satisfying option for breakfast or a snack. If you’re looking for a sweeter option, you can easily substitute it with vanilla yogurt, though it may alter the overall flavor balance. Next, the ripe peaches are the star of the show; their natural sweetness shines through, so I recommend choosing peaches that yield slightly to pressure, indicating they’re perfectly ripe. If peaches aren’t in season, feel free to use nectarines or even frozen peaches—just thaw them before use. Finally, honey adds a lovely floral sweetness that ties everything together. If you prefer, maple syrup can serve as a delicious substitute.

Step-by-Step Instructions

  1. Start by preparing the peaches. Wash them thoroughly, then slice and dice them into bite-sized pieces. In a medium bowl, toss the diced peaches with 1 tablespoon of fresh lemon juice to prevent browning. Set aside for about 5 minutes while the lemon juice works its magic.
  2. In a separate bowl, combine the Greek yogurt, 2 tablespoons of honey, and 1 teaspoon of vanilla extract if using. Stir the mixture until smooth and thoroughly blended. This should take about a minute. Avoid overmixing to maintain the creaminess of the yogurt.
  3. Now it’s time to layer your parfait. Grab a clear glass or bowl to showcase your beautiful creation. Start with a generous spoonful of the yogurt mixture at the bottom—about 1/4 cup will do. Use a spoon to spread it evenly.
  4. Add a layer of the diced peaches over the yogurt, ensuring they cover the yogurt completely. You might want to use about half of what you have prepared—roughly 1 cup. This layer should be visually appealing, so arrange the peaches neatly.
  5. Sprinkle 1/4 cup of granola over the peaches. This adds a delightful crunch. Make sure to distribute it evenly to ensure every bite has that satisfying texture. Avoid packing it down too tightly, as you want it to maintain its crunch.
  6. Repeat the layers: spoon in another 1/4 cup of yogurt, followed by another cup of peaches, and another sprinkle of granola. You should have at least two layers, but feel free to add more depending on your glass size.
  7. Finish off your parfait with a drizzle of honey on top for added sweetness and a touch of elegance. If you’re using sliced almonds or shredded coconut, sprinkle them on top now. It adds a lovely visual contrast and extra flavor.
  8. Serve immediately or refrigerate for up to 30 minutes before serving to allow the flavors to meld together. However, I recommend enjoying it fresh to maintain the granola’s crunch.

Pro Tips for the Best Peach Yogurt Parfait With Honey And Granola

  • Make sure to choose ripe peaches for the best flavor and texture. A common mistake is using unripe fruit, which can lead to a less enjoyable parfait. Look for peaches that are fragrant and slightly soft to the touch.
  • Use a clear glass to assemble your parfait; this not only makes for a beautiful presentation but also allows you to see the colorful layers, which adds to the enjoyment of eating it.
  • For an even creamier texture, consider whipping the Greek yogurt with a hand mixer for a couple of minutes before layering. This small adjustment makes a huge difference in mouthfeel.
  • Be mindful of the granola-to-yogurt ratio. Too much granola can overwhelm the parfait, while too little can make it feel too creamy. Aim for about 1/4 cup of granola per layer for the perfect balance.
  • If you’re making this for a gathering, consider preparing the yogurt and peaches ahead of time and layering them just before serving. This ensures the granola stays crunchy!

Variations & Serving Ideas

There are so many ways to get creative with your Peach Yogurt Parfait! For a tropical twist, swap out the peaches for mangoes or pineapples and top with coconut flakes. If you prefer a berry flavor, mix in some blueberries or strawberries with the peaches for added color and taste. For a nutty version, incorporate chopped walnuts or pecans instead of almonds.

As for serving ideas, this parfait pairs beautifully with a side of scrambled eggs for a hearty breakfast or fresh fruit salad for a light lunch. You might also enjoy it alongside whole grain toast with almond butter for an energizing snack. The contrast of flavors and textures will elevate your meal experience!

Storage, Make-Ahead & Reheating

The Peach Yogurt Parfait is best enjoyed fresh, but you can prepare some components ahead of time. Store the layered parfait in an airtight container in the refrigerator for up to 24 hours. However, be cautious; the granola may lose its crunch if stored too long. You can freeze the yogurt and peach mixture for up to 2 months; just remember to thaw it in the refrigerator overnight before serving.

If you plan to enjoy this dish the next day, it can taste even better as the flavors meld together. Just remember to add the granola right before serving to keep its delightful crunch!

Frequently Asked Questions

Can I make Peach Yogurt Parfait With Honey And Granola ahead of time?

Yes — in fact, it tastes even better the next day as the flavors meld. However, I recommend waiting to add the granola until just before serving to maintain its crunch.

What can I substitute for Greek yogurt?

If you prefer a lighter option, you can substitute Greek yogurt with regular yogurt or a dairy-free alternative like coconut yogurt. Just remember that this may alter the creaminess and flavor profile slightly.

Can I use frozen peaches for this parfait?

Absolutely! Just make sure to thaw the frozen peaches before using them. They will still add great flavor, though the texture may be slightly softer than fresh peaches.

How do I make the parfait vegan?

To make a vegan version, substitute the Greek yogurt with a plant-based yogurt alternative, and replace honey with maple syrup or agave nectar. This keeps the parfait sweet while adhering to a vegan diet.

What other fruits can I use in this recipe?

You can mix and match fruits based on your preference. Try using strawberries, blueberries, raspberries, or even bananas. Just make sure to adjust the lemon juice as needed to prevent browning.

Sweet Peach Yogurt Parfait Delight

Final Thoughts

The Peach Yogurt Parfait with Honey and Granola is a delightful blend of creamy yogurt, sweet peaches, and crunchy granola that creates a satisfying and nourishing treat. Each layer bursts with flavor, making it a perfect choice for breakfast or a light dessert.

This is the kind of recipe I come back to again and again, especially when I want something refreshing and wholesome to start my day. The harmony of sweet and tart flavors, combined with the delightful crunch, never fails to lift my spirits!

I encourage you to give this parfait a try and indulge in its comforting goodness. Feel free to share your results or even add your own twist—perhaps a sprinkle of cinnamon or a handful of nuts. Enjoy creating your perfect parfait!

Print
clock clock iconcutlery cutlery iconflag flag iconfolder folder iconinstagram instagram iconpinterest pinterest iconfacebook facebook iconprint print iconsquares squares iconheart heart iconheart solid heart solid icon

Peach Yogurt Parfait


  • Author: Lily author
  • Total Time: 15 minutes
  • Yield: 4 servings 1x
Pin Recipe
Print Recipe

Description

This Peach Yogurt Parfait combines creamy Greek yogurt, juicy peaches, and crunchy granola for a delightful treat. It’s a perfect breakfast or snack that captures the essence of summer in every bite.


Ingredients

Scale
  • For the Parfait:
  • 2 cups plain Greek yogurt (or vanilla yogurt for a sweeter option)
  • 2 large ripe peaches, diced (about 2 cups)
  • 1 tablespoon fresh lemon juice (to prevent browning of peaches)
  • 2 tablespoons honey (plus more for drizzling)
  • 1 teaspoon vanilla extract (optional for extra flavor)
  • For the Granola:
  • 1 cup granola (store-bought or homemade; see notes for a simple granola recipe)
  • 1/4 cup sliced almonds (optional for added crunch)
  • 1/4 cup shredded coconut (optional for added flavor)

Instructions

  1. Start by preparing the peaches. Wash them thoroughly, then slice and dice them into bite-sized pieces. In a medium bowl, toss the diced peaches with 1 tablespoon of fresh lemon juice to prevent browning. Set aside for about 5 minutes while the lemon juice works its magic.
  2. In a separate bowl, combine the Greek yogurt, 2 tablespoons of honey, and 1 teaspoon of vanilla extract if using. Stir the mixture until smooth and thoroughly blended. This should take about a minute. Avoid overmixing to maintain the creaminess of the yogurt.
  3. Now it’s time to layer your parfait. Grab a clear glass or bowl to showcase your beautiful creation. Start with a generous spoonful of the yogurt mixture at the bottom—about 1/4 cup will do. Use a spoon to spread it evenly.
  4. Add a layer of the diced peaches over the yogurt, ensuring they cover the yogurt completely. You might want to use about half of what you have prepared—roughly 1 cup. This layer should be visually appealing, so arrange the peaches neatly.
  5. Sprinkle 1/4 cup of granola over the peaches. This adds a delightful crunch. Make sure to distribute it evenly to ensure every bite has that satisfying texture. Avoid packing it down too tightly, as you want it to maintain its crunch.
  6. Repeat the layers: spoon in another 1/4 cup of yogurt, followed by another cup of peaches, and another sprinkle of granola. You should have at least two layers, but feel free to add more depending on your glass size.
  7. Finish off your parfait with a drizzle of honey on top for added sweetness and a touch of elegance. If you’re using sliced almonds or shredded coconut, sprinkle them on top now. It adds a lovely visual contrast and extra flavor.
  8. Serve immediately or refrigerate for up to 30 minutes before serving to allow the flavors to meld together. However, I recommend enjoying it fresh to maintain the granola’s crunch.
  • Prep Time: 15 mins
  • Cook Time: 0 mins
  • Category: Breakfast
  • Method: No-cook
  • Cuisine: American

Nutrition

  • Serving Size: 1 parfait
  • Calories: 250
  • Sugar: 20 g
  • Sodium: 50 mg
  • Fat: 5 g
  • Saturated Fat: 2 g
  • Unsaturated Fat: 3 g
  • Trans Fat: 0 g
  • Carbohydrates: 40 g
  • Fiber: 3 g
  • Protein: 10 g
  • Cholesterol: 10 mg

Keywords: Choose ripe peaches for the best flavor and texture. Use a clear glass for a beautiful presentation. For creaminess, consider whipping the yogurt before layering. Be mindful of the granola-to-yogurt ratio. Prepare yogurt and peaches ahead of time for gatherings, layering just before serving.

Did you make this recipe?

Share a photo and tag us — we can't wait to see what you've made!

Sun-Kissed Frozen Orange Cream Slush

As a child, summer days felt like they lasted forever. I remember the sticky heat wrapping around me as I played outside, my laughter mingling with the sounds of the neighborhood. But nothing could cool me down quite like the moment I’d spot my grandmother, laboring over her blender, whipping up her famous Frozen Orange Creamsicle Slush. That vibrant orange treat, with its frosty texture and sweet citrus aroma, was like a burst of sunshine in a cup. Just one sip, and I could feel the coolness wash over me, sparking pure joy.

This Frozen Orange Creamsicle Slush has a way of making you feel like a kid again. Its creamy, dreamy consistency is a delightful balance of bright orange and soft vanilla, inviting you to dive right in. The refreshing tang of orange dances on your tongue, while the smooth creaminess envelops you in a comforting embrace. It’s a nostalgic treat that’s perfect for hot summer afternoons or anytime you need a little pick-me-up.

What makes my version of this slush stand out is the addition of a hint of vanilla bean, which elevates the flavor and adds an extra layer of richness. Plus, it’s super easy to whip up with just a few simple ingredients that you probably already have on hand! So, if you’re ready to relive those sun-soaked memories, let me show you exactly how to make it.

Sun-Kissed Frozen Orange Cream Slush

Why You’ll Love This Recipe

  • Each slush is a perfect blend of creamy vanilla and zesty orange, creating a nostalgic flavor reminiscent of summer days.
  • This refreshing treat is ready in under 15 minutes, making it an ideal quick dessert for unexpected guests or hot afternoons.
  • With just 8 simple ingredients, it’s budget-friendly, ensuring you don’t have to break the bank to enjoy a delicious slush.
  • The slush has a perfectly smooth texture, thanks to the combination of ice and ice cream, providing a delightful contrast to the bright citrus flavors.
  • It’s highly customizable; you can easily adjust the sweetness and add fresh herbs for a unique twist that suits your taste.

Ingredients

  • 2 cups orange juice (freshly squeezed or store-bought)
  • 1 cup vanilla ice cream
  • 1 cup crushed ice
  • 1/2 cup milk (whole or 2%)
  • 1/4 cup granulated sugar (adjust based on sweetness preference)
  • 1 teaspoon vanilla extract
  • Zest of 1 orange (for added flavor)
  • Fresh orange slices and mint leaves (for garnish)

The star of this Frozen Orange Creamsicle Slush is the orange juice, which provides the vibrant, citrusy base. Freshly squeezed juice will yield the brightest flavor, but store-bought options can be just as convenient. If you’re opting for store-bought, choose 100% pure juice with no added sugars for the best results. Another essential ingredient is the vanilla ice cream; it adds creaminess and sweetness. You can substitute it with dairy-free ice cream if you’re looking for a vegan option. Whole or 2% milk complements the ice cream, creating a smooth blend. If you want a lower-calorie version, almond or oat milk can be good alternatives.

Lastly, the granulated sugar can be adjusted based on your sweetness preference. If you prefer a more natural sweetener, consider using honey or agave syrup. The orange zest enhances the flavor profile, providing an aromatic pop that brings the whole slush together. Don’t skip it! It adds an extra layer of brightness that makes this slush truly special.

Step-by-Step Instructions

  1. Start by preparing your ingredients. Gather 2 cups of orange juice, 1 cup of vanilla ice cream, and 1 cup of crushed ice. Make sure the ice is finely crushed, as larger chunks can make blending difficult.
  2. In a blender, combine the orange juice, vanilla ice cream, crushed ice, and 1/2 cup of milk. Add 1/4 cup of granulated sugar and 1 teaspoon of vanilla extract. If you like a sweeter slush, consider adding a bit more sugar at this stage.
  3. Add the zest of 1 orange to the blender. This step is crucial for enhancing the citrus flavor of your slush. Make sure not to include the bitter white pith—only the flavorful zest.
  4. Blend the mixture on medium-high speed for about 30-45 seconds. Stop once the ingredients are fully combined and the slush has a smooth, even consistency. If you notice large chunks of ice, blend for an additional 10-15 seconds. Avoid over-blending, as this can make the slush too liquidy.
  5. Once blended, taste the slush. If it needs more sweetness, add a little more sugar and blend for a few more seconds. If it’s too thick, you can add a splash of milk to reach your desired consistency.
  6. Pour the slush into glasses. This recipe typically serves 4, but you can easily double it for larger gatherings. Use a spoon to help guide the slush into the glasses if needed.
  7. Garnish each serving with fresh orange slices and mint leaves. The mint not only adds a pop of color but also a refreshing aroma that complements the citrus flavors beautifully.
  8. Serve immediately and enjoy! If you’ve made extra, you can refrigerate it for a short time, but it’s best enjoyed fresh.

Pro Tips for the Best Frozen Orange Creamsicle Slush

  • Don’t skip the orange zest! It’s a game-changer for flavor. Always zest before juicing to make it easier.
  • Use a high-powered blender for the best texture. A standard blender may struggle with ice, leading to uneven consistency. If you have a food processor, that can work too, but ensure the ice is finely crushed.
  • Adjust the ice-to-liquid ratio carefully. If your slush is too thick, it won’t blend well. Start with less ice and add more until you reach your preferred texture.
  • Be cautious with the sugar! Always start with the lower amount, as you can easily add more, but it’s hard to fix an overly sweet slush.
  • For a fun twist, consider adding a splash of coconut milk or a handful of fresh fruit like strawberries or pineapple. This not only enhances the flavor but also adds a beautiful color contrast.

Variations & Serving Ideas

There are countless ways to put a spin on your Frozen Orange Creamsicle Slush. Consider making a tropical version by adding in some pineapple juice or coconut milk for a delightful tropical twist. If you’re feeling adventurous, try incorporating a handful of frozen mango or peach slices for added sweetness. For a lighter version, swap out the vanilla ice cream for Greek yogurt for a creamy yet tangy alternative.

As for serving ideas, this refreshing slush pairs wonderfully with light summer dishes like grilled chicken skewers, fish tacos, or a simple salad topped with citrus vinaigrette. The bright, zesty flavors of the slush complement these dishes perfectly, making them an ideal pairing for a sunny day.

Storage, Make-Ahead & Reheating

This Frozen Orange Creamsicle Slush is best enjoyed fresh, but if you have leftovers, you can store them in an airtight container in the fridge for up to 2 days. Just keep in mind that the slush may lose some of its texture over time as the ice melts. It doesn’t freeze well, as the ice will turn into a solid block. If you must freeze it, blend again after thawing to restore the slushy consistency. This treat is best the day you make it, as the flavors meld together beautifully overnight, enhancing its deliciousness.

Frequently Asked Questions

Can I make Frozen Orange Creamsicle Slush ahead of time?

Yes — in fact, it tastes even better the next day as the flavors meld. However, it’s best to enjoy it fresh, as the texture can change if stored for too long. If you need to prepare it ahead, keep it in the fridge and re-blend before serving.

What kind of orange juice should I use?

For the best flavor, use freshly squeezed orange juice. However, if you’re short on time, opt for 100% pure store-bought juice without added sugars. This will ensure that your slush remains flavorful and refreshing.

Can I substitute the vanilla ice cream?

Absolutely! If you’re looking for a dairy-free option, coconut milk ice cream or a non-dairy vanilla ice cream can work wonderfully. They will still provide the creamy texture and sweetness you desire.

How can I adjust the sweetness of my slush?

You can easily adjust the sweetness by modifying the amount of sugar added. Start with 1/4 cup and taste the mixture before blending. If you prefer it sweeter, add more sugar gradually until it reaches your desired level.

What should I do if my slush is too thick?

If your slush is too thick, simply add a splash of milk or orange juice and blend again. This will help achieve a more drinkable consistency while maintaining the slushy texture. Adjust gradually to reach your preferred thickness.

Sun-Kissed Frozen Orange Cream Slush

Final Thoughts

The Frozen Orange Creamsicle Slush is a delightful blend of refreshing citrus and creamy goodness, making it a perfect treat for warm days or any time you crave a taste of nostalgia. The way the bright orange flavor dances with the creamy texture truly elevates this slush, transforming it into a satisfying escape from the everyday.

This is the kind of recipe I come back to again and again, especially when I’m looking to cool down or impress guests at a summer gathering. It’s simple to make and always brings smiles all around! I encourage you to try this recipe for yourself—don’t hesitate to share your results or even put your own spin on it. Happy slushing!

Print
clock clock iconcutlery cutlery iconflag flag iconfolder folder iconinstagram instagram iconpinterest pinterest iconfacebook facebook iconprint print iconsquares squares iconheart heart iconheart solid heart solid icon

Frozen Orange Creamsicle Slush


  • Author: Lily author
  • Total Time: 15 minutes
  • Yield: 4 servings 1x
Pin Recipe
Print Recipe

Description

This Frozen Orange Creamsicle Slush is a refreshing treat that combines creamy vanilla and zesty orange flavors. Perfect for hot summer days, it brings back nostalgic memories with every sip.


Ingredients

Scale
  • 2 cups orange juice (freshly squeezed or store-bought)
  • 1 cup vanilla ice cream
  • 1 cup crushed ice
  • 1/2 cup milk (whole or 2%)
  • 1/4 cup granulated sugar (adjust based on sweetness preference)
  • 1 teaspoon vanilla extract
  • Zest of 1 orange (for added flavor)
  • Fresh orange slices and mint leaves (for garnish)

Instructions

  1. Start by preparing your ingredients. Gather 2 cups of orange juice, 1 cup of vanilla ice cream, and 1 cup of crushed ice. Make sure the ice is finely crushed, as larger chunks can make blending difficult.
  2. In a blender, combine the orange juice, vanilla ice cream, crushed ice, and 1/2 cup of milk. Add 1/4 cup of granulated sugar and 1 teaspoon of vanilla extract. If you like a sweeter slush, consider adding a bit more sugar at this stage.
  3. Add the zest of 1 orange to the blender. This step is crucial for enhancing the citrus flavor of your slush. Make sure not to include the bitter white pith—only the flavorful zest.
  4. Blend the mixture on medium-high speed for about 30-45 seconds. Stop once the ingredients are fully combined and the slush has a smooth, even consistency. If you notice large chunks of ice, blend for an additional 10-15 seconds. Avoid over-blending, as this can make the slush too liquidy.
  5. Once blended, taste the slush. If it needs more sweetness, add a little more sugar and blend for a few more seconds. If it’s too thick, you can add a splash of milk to reach your desired consistency.
  6. Pour the slush into glasses. This recipe typically serves 4, but you can easily double it for larger gatherings. Use a spoon to help guide the slush into the glasses if needed.
  7. Garnish each serving with fresh orange slices and mint leaves. The mint not only adds a pop of color but also a refreshing aroma that complements the citrus flavors beautifully.
  8. Serve immediately and enjoy! If you’ve made extra, you can refrigerate it for a short time, but it's best enjoyed fresh.
  • Prep Time: 15 min
  • Cook Time: 0 min
  • Category: Dessert
  • Method: Blending
  • Cuisine: American

Nutrition

  • Serving Size: 1 serving
  • Calories: 200
  • Sugar: 30 g
  • Sodium: 50 mg
  • Fat: 5 g
  • Saturated Fat: 3 g
  • Unsaturated Fat: 2 g
  • Trans Fat: 0 g
  • Carbohydrates: 40 g
  • Fiber: 1 g
  • Protein: 2 g
  • Cholesterol: 20 mg

Keywords: Don't skip the orange zest! It's a game-changer for flavor. Always zest before juicing to make it easier.

Did you make this recipe?

Share a photo and tag us — we can't wait to see what you've made!

Zesty Lemon Poppy Seed Delight

One rainy afternoon, I found myself in my grandmother’s cozy kitchen, the kind that always smelled like warmth and love. She was whipping up her famous Lemon Poppy Seed Loaf, a recipe that had been passed down through generations. As the batter came together, the zesty aroma of fresh lemons filled the air, mingling perfectly with the nutty fragrance of poppy seeds. I can still picture her, apron-clad, as she expertly drizzled a vibrant citrus icing over the loaf, creating a glossy, sun-kissed finish that beckoned us to dive in. It was a moment that sparked my own passion for baking, and this recipe has become a cherished staple in my home ever since.

When you take a bite of this Lemon Poppy Seed Loaf, it’s like a burst of sunshine on your palate. The loaf is beautifully golden, with a tender crumb that melts in your mouth. Each slice is speckled with tiny poppy seeds, adding a delightful crunch that contrasts beautifully with the tangy sweetness of the lemon. And that citrus icing? It’s the finishing touch that elevates this loaf from ordinary to extraordinary, with its bright, zesty flavor dancing on your taste buds.

This recipe stands out because it embraces simplicity while delivering on flavor. I’ve added a hint of vanilla to the batter, enhancing the overall taste and making it even more indulgent. Trust me, once you make this Lemon Poppy Seed Loaf With Citrus Icing, it’ll become a go-to in your baking repertoire.

So, let me show you exactly how to make it!

Zesty Lemon Poppy Seed Delight

Why You’ll Love This Recipe

  • Moist and tender crumb that melts in your mouth, thanks to the perfect balance of butter and buttermilk.
  • Bright, zesty lemon flavor paired with crunchy poppy seeds, creating a delightful texture and taste experience.
  • Easy to whip up in just about an hour, perfect for last-minute gatherings or a cozy afternoon treat.
  • Budget-friendly with everyday ingredients, making it an accessible option for all home bakers.
  • The citrus icing adds a sweet tang that elevates the loaf, turning a simple recipe into a showstopper!

Ingredients

  • 1 ½ cups (190g) all-purpose flour
  • 1 teaspoon baking powder
  • ½ teaspoon baking soda
  • ½ teaspoon salt
  • 3 tablespoons poppy seeds
  • ½ cup (115g) unsalted butter, softened to room temperature
  • 1 cup (200g) granulated sugar
  • 2 large eggs
  • 1 teaspoon vanilla extract
  • 1 teaspoon lemon zest (from about 1 medium lemon)
  • ½ cup (120ml) buttermilk
  • 2 tablespoons fresh lemon juice

For the Citrus Icing:

  • 1 cup (120g) powdered sugar
  • 2 tablespoons fresh lemon juice
  • 1 tablespoon orange juice
  • 1 teaspoon lemon zest (for garnish, optional)

Let’s dive into the key ingredients that make this Lemon Poppy Seed Loaf so special. The all-purpose flour provides the structure and base for the loaf, while the baking powder and baking soda ensure it rises perfectly, giving the loaf a light texture. For a gluten-free variation, you could substitute the flour with a gluten-free all-purpose blend. Poppy seeds not only add a delightful crunch but also contribute to the unique flavor profile that pairs well with the citrus notes.

Unsalted butter is crucial for achieving the buttery richness that makes this loaf so moist. If you’re looking for a dairy-free option, coconut oil or a vegan butter can be used instead. The buttermilk is another essential component, providing acidity that activates the baking soda for a fluffy texture. If you don’t have buttermilk on hand, you can easily make a substitute by mixing ½ cup of milk with 1 tablespoon of vinegar or lemon juice and letting it sit for about 5 minutes.

Step-by-Step Instructions

  1. Preheat your oven to 350°F (175°C). Grease a 9×5-inch loaf pan or line it with parchment paper for easy removal later.
  2. In a medium mixing bowl, whisk together 1 ½ cups of all-purpose flour, 1 teaspoon of baking powder, ½ teaspoon of baking soda, ½ teaspoon of salt, and 3 tablespoons of poppy seeds. This helps to evenly distribute the baking agents and ensures a uniform rise.
  3. In a large mixing bowl, cream together ½ cup of softened unsalted butter and 1 cup of granulated sugar using an electric mixer on medium speed for about 3-4 minutes, until the mixture is light and fluffy. Make sure to scrape down the sides of the bowl occasionally.
  4. Add 2 large eggs, 1 teaspoon of vanilla extract, and 1 teaspoon of lemon zest to the creamed butter and sugar, mixing until fully combined. You want a smooth consistency, so ensure there are no lumps of butter.
  5. In a small bowl, combine ½ cup of buttermilk and 2 tablespoons of fresh lemon juice. Alternately add the dry ingredients and buttermilk mixture to the butter mixture, starting and ending with the dry ingredients. Mix just until combined; do not overmix, as this can lead to a dense loaf.
  6. Pour the batter into the prepared loaf pan. Smooth the top with a spatula, ensuring it’s even. Bake in the preheated oven for 50-60 minutes, or until a toothpick inserted in the center comes out clean. The edges should be lightly golden brown, and the center should feel just set.
  7. Once baked, remove the loaf from the oven and allow it to cool in the pan for about 10 minutes. Then, transfer it to a wire rack to cool completely. Resist the urge to slice too soon, as it will be crumbly if it’s still warm.
  8. While the loaf is cooling, prepare the citrus icing. In a medium bowl, whisk together 1 cup of powdered sugar, 2 tablespoons of fresh lemon juice, and 1 tablespoon of orange juice until smooth. If the icing is too thick, you can add a little more juice to reach your desired consistency.
  9. Once the loaf is completely cool, drizzle the citrus icing over the top. If you like, sprinkle with an additional teaspoon of lemon zest for an extra pop of flavor and color.

Pro Tips for the Best Lemon Poppy Seed Loaf With Citrus Icing

  • Be careful not to overmix your batter; this is a common mistake that can lead to a dense loaf. Mix just until the dry ingredients are incorporated for a light and fluffy texture.
  • Use room temperature ingredients, especially the butter and eggs. This helps to create a smoother batter and ensures even baking. Take your eggs out of the fridge about 30 minutes before you start.
  • For a more pronounced lemon flavor, consider adding a little lemon extract in addition to the zest and juice. Just a half teaspoon can elevate the citrus notes significantly.
  • When measuring your flour, spoon it into the measuring cup and level it off with a knife instead of scooping directly from the bag. This prevents packing and ensures you don’t end up with a dry loaf.
  • Invest in a good quality loaf pan; it makes a difference in heat distribution, which ensures even baking. If your pan is dark-coated, reduce the oven temperature by 25°F to prevent over-browning.

Variations & Serving Ideas

For a delightful twist, consider adding blueberries or raspberries to the batter for a fruity burst of flavor. You can also experiment with different citrus fruits—try lime or grapefruit zest and juice for a refreshing change. For a healthier option, substitute half of the all-purpose flour with whole wheat flour for added fiber without compromising too much on texture.

This Lemon Poppy Seed Loaf pairs beautifully with a light salad, such as a mixed greens salad with a vinaigrette, or a cup of tea for a cozy afternoon treat. It also complements a creamy cheese platter, as the acidity of the loaf balances rich cheeses perfectly. Lastly, a scoop of vanilla ice cream on the side creates a delightful contrast of temperatures and flavors!

Storage, Make-Ahead & Reheating

This Lemon Poppy Seed Loaf can be stored at room temperature for up to 3 days if wrapped tightly in plastic wrap. If you want to keep it longer, it freezes well for up to 3 months. To freeze, wrap the loaf tightly in plastic wrap and then in aluminum foil to prevent freezer burn.

When you’re ready to enjoy it again, simply thaw it in the fridge overnight. Reheat individual slices in the microwave for 15-20 seconds or in a toaster oven until warmed through. Interestingly, many people find that this loaf tastes even better the next day, as the flavors have time to meld!

Frequently Asked Questions

Can I make Lemon Poppy Seed Loaf With Citrus Icing ahead of time?

Yes — in fact, it tastes even better the next day! You can make the loaf a day in advance, allowing the flavors to develop. Just be sure to store it in an airtight container to maintain its moisture.

Can I substitute the poppy seeds?

Absolutely! If you don’t have poppy seeds on hand or prefer an alternative, you can use sesame seeds for a similar crunch or omit them entirely for a smooth loaf.

What can I use instead of buttermilk?

If you don’t have buttermilk, you can easily create a substitute by mixing ½ cup of milk (dairy or plant-based) with 1 tablespoon of vinegar or lemon juice. Let it sit for 5 minutes before using in the recipe.

How can I make this recipe gluten-free?

To make a gluten-free version of this Lemon Poppy Seed Loaf, substitute the all-purpose flour with a gluten-free all-purpose flour blend. Just ensure that the blend contains a binding agent like xanthan gum for the best results.

What is the best way to store leftover loaf?

Leftover Lemon Poppy Seed Loaf should be stored in an airtight container at room temperature for up to 3 days. For longer storage, wrap it tightly and freeze for up to 3 months. Thaw it before serving for the best texture.

Zesty Lemon Poppy Seed Delight

Final Thoughts

The Lemon Poppy Seed Loaf with Citrus Icing is truly a delightful treat that brings a burst of brightness to any occasion. The zesty lemon flavor combined with the subtle crunch of poppy seeds creates a satisfying balance, while the citrus icing adds a touch of sweetness that perfectly complements the loaf’s tanginess.

This is the kind of recipe I come back to again and again, especially when I want to brighten up a gloomy day or celebrate a small victory. The aroma that fills the kitchen as it bakes is absolutely heavenly! I encourage you to give this recipe a try; you might just find it becoming a beloved staple in your home. Don’t forget to share your results or even add your own unique twist—I can’t wait to see what you create!

Print
clock clock iconcutlery cutlery iconflag flag iconfolder folder iconinstagram instagram iconpinterest pinterest iconfacebook facebook iconprint print iconsquares squares iconheart heart iconheart solid heart solid icon

Lemon Poppy Seed Loaf


  • Author: Lily author
  • Total Time: 25 minute
  • Yield: 1 loaf 1x
Pin Recipe
Print Recipe

Description

This Lemon Poppy Seed Loaf is a delightful treat that combines zesty lemon flavor with crunchy poppy seeds. Topped with a citrus icing, it’s perfect for any occasion.


Ingredients

Scale
  • 1 ½ cups (190g) all-purpose flour
  • 1 teaspoon baking powder
  • ½ teaspoon baking soda
  • ½ teaspoon salt
  • 3 tablespoons poppy seeds
  • ½ cup (115g) unsalted butter, softened to room temperature
  • 1 cup (200g) granulated sugar
  • 2 large eggs
  • 1 teaspoon vanilla extract
  • 1 teaspoon lemon zest (from about 1 medium lemon)
  • ½ cup (120ml) buttermilk
  • 2 tablespoons fresh lemon juice
  • 1 cup (120g) powdered sugar
  • 2 tablespoons fresh lemon juice
  • 1 tablespoon orange juice
  • 1 teaspoon lemon zest (for garnish, optional)

Instructions

  1. Preheat your oven to 350°F (175°C). Grease a 9×5-inch loaf pan or line it with parchment paper for easy removal later.
  2. In a medium mixing bowl, whisk together 1 ½ cups of all-purpose flour, 1 teaspoon of baking powder, ½ teaspoon of baking soda, ½ teaspoon of salt, and 3 tablespoons of poppy seeds. This helps to evenly distribute the baking agents and ensures a uniform rise.
  3. In a large mixing bowl, cream together ½ cup of softened unsalted butter and 1 cup of granulated sugar using an electric mixer on medium speed for about 3-4 minutes, until the mixture is light and fluffy. Make sure to scrape down the sides of the bowl occasionally.
  4. Add 2 large eggs, 1 teaspoon of vanilla extract, and 1 teaspoon of lemon zest to the creamed butter and sugar, mixing until fully combined. You want a smooth consistency, so ensure there are no lumps of butter.
  5. In a small bowl, combine ½ cup of buttermilk and 2 tablespoons of fresh lemon juice. Alternately add the dry ingredients and buttermilk mixture to the butter mixture, starting and ending with the dry ingredients. Mix just until combined; do not overmix, as this can lead to a dense loaf.
  6. Pour the batter into the prepared loaf pan. Smooth the top with a spatula, ensuring it’s even. Bake in the preheated oven for 50-60 minutes, or until a toothpick inserted in the center comes out clean. The edges should be lightly golden brown, and the center should feel just set.
  7. Once baked, remove the loaf from the oven and allow it to cool in the pan for about 10 minutes. Then, transfer it to a wire rack to cool completely. Resist the urge to slice too soon, as it will be crumbly if it’s still warm.
  8. While the loaf is cooling, prepare the citrus icing. In a medium bowl, whisk together 1 cup of powdered sugar, 2 tablespoons of fresh lemon juice, and 1 tablespoon of orange juice until smooth. If the icing is too thick, you can add a little more juice to reach your desired consistency.
  9. Once the loaf is completely cool, drizzle the citrus icing over the top. If you like, sprinkle with an additional teaspoon of lemon zest for an extra pop of flavor and color.
  • Prep Time: 15 mins
  • Cook Time: 50-60 mins
  • Category: Dessert
  • Method: Baking
  • Cuisine: American

Nutrition

  • Serving Size: 1 slice
  • Calories: 200
  • Sugar: 15 g
  • Sodium: 150 mg
  • Fat: 8 g
  • Saturated Fat: 5 g
  • Unsaturated Fat: 3 g
  • Trans Fat: 0 g
  • Carbohydrates: 30 g
  • Fiber: 1 g
  • Protein: 3 g
  • Cholesterol: 40 mg

Keywords: Be careful not to overmix your batter; this is a common mistake that can lead to a dense loaf. Use room temperature ingredients for a smoother batter and even baking.

Did you make this recipe?

Share a photo and tag us — we can't wait to see what you've made!

  • Privacy Policy
  • Terms Of Service
  • Contact
  • About
  • GDPR

Copyright © 2025 Homesmad