Easy Homemade Cereal Bars: who doesn’t love a chewy, sweet, and satisfying treat that’s also incredibly simple to make? Forget those store-bought bars packed with artificial ingredients and questionable preservatives. We’re diving headfirst into a world of customizable goodness where you control every ingredient and create the perfect snack for your family.
Cereal bars, in their modern form, are a relatively recent invention, born from the desire for convenient and portable breakfast and snack options. While their history isn’t steeped in ancient tradition, their appeal is undeniable. They represent a quick and easy way to fuel up on the go, a concept that resonates deeply with our busy lifestyles.
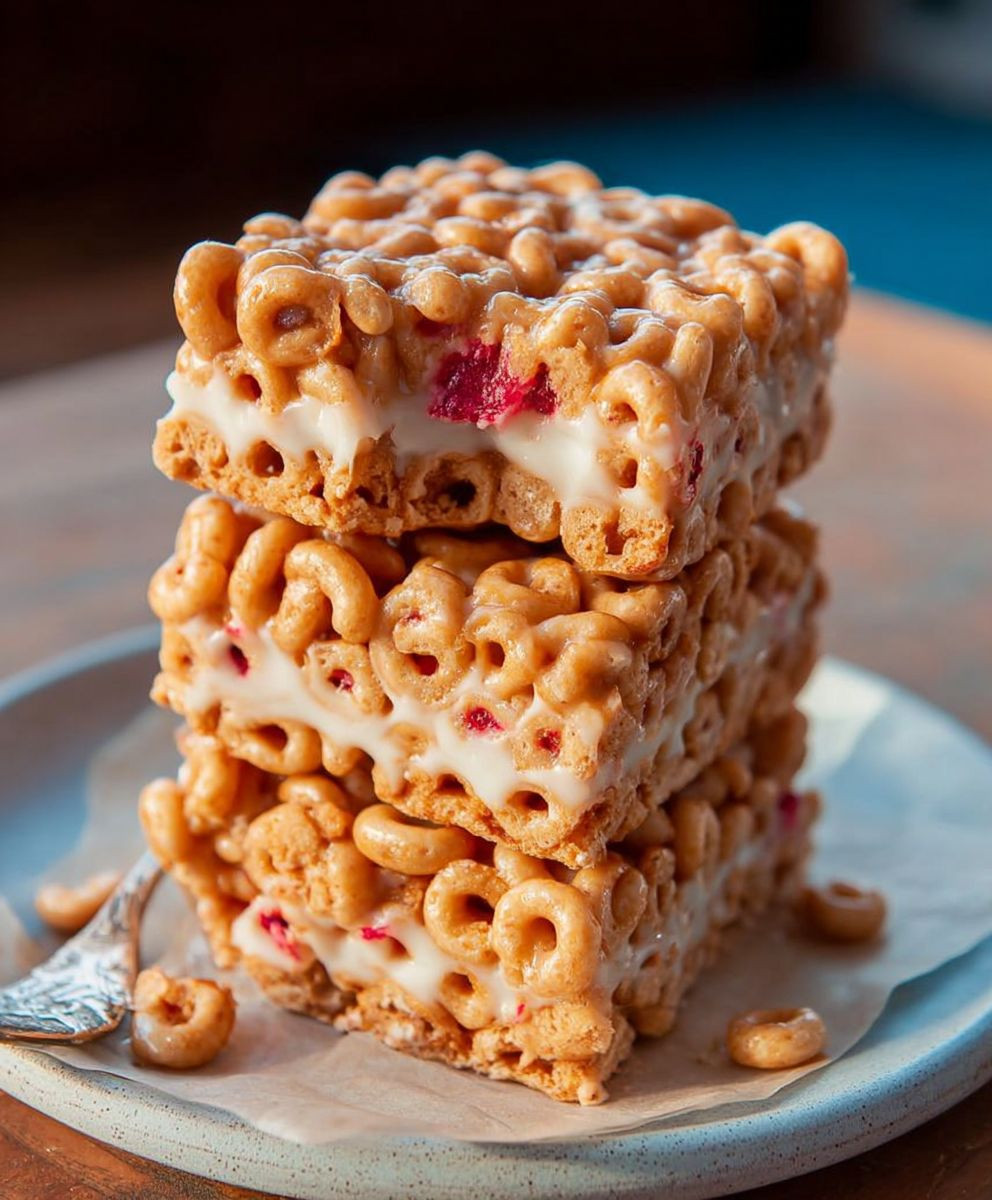
What makes easy homemade cereal bars so irresistible? It’s the delightful combination of textures – the satisfying crunch of the cereal, the chewy binding agent (think marshmallows, honey, or peanut butter!), and the potential for endless flavor combinations. From classic rice cereal treats to bars bursting with chocolate chips, dried fruit, and nuts, the possibilities are truly limitless. Plus, they’re incredibly convenient. Whip up a batch on Sunday, and you’ve got grab-and-go snacks for the entire week. Join me as we unlock the secrets to creating the perfect batch of these delightful treats!

Ingredients:
- 6 cups Rice Krispies cereal (or your favorite crispy rice cereal)
- 1 cup rolled oats (old-fashioned)
- 1/2 cup chopped nuts (almonds, walnuts, or pecans work well)
- 1/4 cup shredded coconut (optional)
- 1/2 cup butter (salted or unsalted, your preference)
- 1 cup packed brown sugar
- 1/2 cup corn syrup (light or dark)
- 1 teaspoon vanilla extract
- 1/4 teaspoon salt
- 1/2 cup peanut butter chips (or chocolate chips, butterscotch chips)
Preparing the Cereal Mixture:
- First, let’s get our dry ingredients ready. In a large bowl, combine the 6 cups of Rice Krispies cereal, 1 cup of rolled oats, 1/2 cup of chopped nuts, and 1/4 cup of shredded coconut (if you’re using it). Make sure everything is evenly distributed. This ensures that each bar will have a good mix of textures and flavors.
- Give the dry ingredients a good toss with a large spoon or your hands. This helps to evenly distribute the nuts and coconut throughout the cereal, preventing clumps and ensuring a consistent texture in every bite.
- Set the bowl aside for now. We’ll come back to it once the syrup mixture is ready. It’s important to have the cereal mixture prepared beforehand so that you can quickly combine it with the hot syrup, preventing the syrup from hardening too quickly.
Making the Syrup Base:
- Now, let’s move on to the syrup. In a medium-sized saucepan, melt 1/2 cup of butter over medium heat. Keep a close eye on it to prevent it from burning. Burnt butter will give the bars an unpleasant taste.
- Once the butter is melted, add 1 cup of packed brown sugar and 1/2 cup of corn syrup to the saucepan. Stir constantly until the brown sugar is completely dissolved and the mixture is smooth. This usually takes about 3-5 minutes.
- Continue to cook the mixture, stirring occasionally, until it comes to a gentle boil. Let it boil for 1 minute, stirring constantly. This step is crucial for achieving the right consistency. Boiling the syrup helps to thicken it, which will ensure that the bars hold their shape properly.
- Remove the saucepan from the heat and stir in 1 teaspoon of vanilla extract and 1/4 teaspoon of salt. The vanilla extract adds a lovely aroma and enhances the overall flavor of the bars, while the salt balances the sweetness.
Combining and Setting:
- Pour the hot syrup mixture over the cereal mixture in the large bowl. Be careful, as the syrup will be very hot.
- Using a large spoon or spatula, gently but thoroughly combine the syrup and cereal mixture. Make sure that all of the cereal is coated evenly with the syrup. This is important for ensuring that the bars stick together properly.
- Once the cereal is evenly coated, add 1/2 cup of peanut butter chips (or your choice of chips) to the mixture. Gently fold them in until they are evenly distributed. Avoid over-mixing, as this can cause the chips to melt.
- Prepare an 8×8 inch baking pan by lining it with parchment paper. This will make it easier to remove the bars later. Make sure the parchment paper overhangs the sides of the pan, creating handles for lifting the bars out.
- Pour the cereal mixture into the prepared baking pan and spread it out evenly.
- Using a piece of parchment paper or the back of a spoon, firmly press the mixture into the pan. The firmer you press, the more compact and less crumbly the bars will be.
- Let the bars cool completely at room temperature for at least 2 hours, or until they are firm to the touch. This allows the syrup to set properly and the bars to hold their shape.
Cutting and Serving:
- Once the bars are completely cooled and set, lift them out of the pan using the parchment paper handles.
- Place the bars on a cutting board and use a sharp knife to cut them into squares or rectangles. The size of the bars is up to you!
- Store the cereal bars in an airtight container at room temperature for up to 3 days. They can also be stored in the refrigerator for longer storage, but they may become slightly harder.
Tips and Variations:
Nut Butter Swirl:
For an extra layer of flavor, try swirling a tablespoon or two of peanut butter (or any nut butter) over the top of the bars before they cool completely. This adds a beautiful visual appeal and a delicious nutty taste.
Chocolate Drizzle:
Once the bars are cut, melt some chocolate chips and drizzle them over the top for a decadent treat. You can use milk chocolate, dark chocolate, or white chocolate, depending on your preference.
Dried Fruit Addition:
Add 1/2 cup of chopped dried fruit, such as cranberries, raisins, or apricots, to the cereal mixture for a chewy and flavorful addition.
Spice It Up:
Add a pinch of cinnamon or nutmeg to the syrup mixture for a warm and comforting flavor.
Seed Power:
Include 2 tablespoons of chia seeds, flax seeds, or hemp seeds to the dry mixture for added nutrition and texture.
Marshmallow Magic:
For a softer, gooier bar, add 1 cup of mini marshmallows to the cereal mixture after you’ve coated it with the syrup. The marshmallows will melt slightly and create a delicious, sticky texture.
Double Chocolate Delight:
Use chocolate Rice Krispies and add 1/2 cup of cocoa powder to the syrup mixture for an intensely chocolatey experience.
No-Nut Option:
If you have nut allergies, simply omit the nuts from the recipe. You can replace them with more cereal, seeds, or dried fruit.
Vegan Variation:
To make these bars vegan, use vegan butter, maple syrup instead of corn syrup, and dairy-free chocolate chips.
Gluten-Free Option:
Ensure that your Rice Krispies and rolled oats are certified gluten-free to make these bars suitable for those with gluten sensitivities.
Storage Tips:
To prevent the bars from sticking together, place a sheet of parchment paper between layers when storing them in an airtight container.
Freezing Instructions:
These cereal bars can be frozen for up to 2 months. Wrap them individually in plastic wrap and then place them in a freezer-safe bag or container. Thaw them at room temperature before serving.
Troubleshooting:
If your bars are too hard: You may have overcooked the syrup. Next time, reduce the boiling time by 30 seconds.
If your bars are too crumbly: You may not have pressed the mixture firmly enough into the pan. Make sure to press down firmly and evenly.
If your bars are too sticky: You may have undercooked the syrup. Next time, increase the boiling time by 30 seconds.
Serving Suggestions:
These cereal bars are perfect for a quick breakfast, a mid-afternoon snack, or a lunchbox treat. They’re also great for taking on hikes, picnics, or road trips.
Kid-Friendly Activity:
Making these cereal bars is a fun and easy activity to do with kids. They can help with measuring ingredients, mixing, and pressing the mixture into the pan.
Gift Giving:
These homemade cereal bars make a thoughtful and delicious gift for friends, family, and neighbors. Package them in a pretty box or tin for a special touch.
Cost-Effective Treat:
Making your own cereal bars is much more cost-effective than buying them pre-made from the store. Plus, you can customize them to your liking!
Healthier Options:
To make these bars healthier, use whole wheat flour instead of rolled oats, reduce the amount of sugar, and add more nuts and seeds.
Experiment with Flavors:
Don’t be afraid to experiment with different flavors and ingredients. Try adding different types of cereal, nuts, seeds, dried fruit, or chocolate chips to create your own unique cereal bar recipe.
Conclusion:
These Easy Homemade Cereal Bars are more than just a snack; they’re a delightful experience waiting to happen! If you’re searching for a quick, customizable, and utterly delicious treat that both kids and adults will adore, then look no further. The simplicity of this recipe is truly its strength. Forget complicated baking processes and long ingredient lists. With just a handful of pantry staples and a few minutes of your time, you can whip up a batch of these bars that are far superior to anything you’ll find on a store shelf.
Why are these a must-try? Well, beyond the ease of preparation, the flavor is simply irresistible. The combination of the crunchy cereal, the chewy marshmallows, and the creamy butter creates a symphony of textures and tastes that will have you reaching for another bar before you even realize it. Plus, you have complete control over the ingredients, allowing you to tailor the recipe to your specific dietary needs and preferences. Need a gluten-free option? Simply swap out the regular cereal for a gluten-free variety. Want to add a boost of protein? Throw in some chopped nuts or seeds. The possibilities are truly endless!
But the real magic lies in the customization. Feel free to experiment with different types of cereal. Fruity pebbles? Cocoa puffs? Rice Krispies? The choice is yours! You can also add in other goodies like chocolate chips, dried fruit, sprinkles, or even a swirl of peanut butter for an extra layer of indulgence. For a festive touch, consider using holiday-themed sprinkles or candies. Imagine these bars decorated for Halloween, Christmas, or even a birthday party! They’re guaranteed to be a hit.
Serving suggestions are just as versatile. These bars are perfect as an on-the-go breakfast, a midday snack, or even a dessert. Pack them in lunchboxes, take them on hikes, or enjoy them with a cup of coffee or tea. For a more decadent treat, try drizzling them with melted chocolate or serving them with a scoop of ice cream. You can even crumble them over yogurt or oatmeal for a crunchy topping.
And speaking of variations, don’t be afraid to get creative! Try using different types of marshmallows, such as flavored marshmallows or mini marshmallows. You can also experiment with different types of butter, such as brown butter for a richer, nuttier flavor. For a vegan option, use vegan marshmallows and a plant-based butter substitute. The key is to have fun and experiment until you find the perfect combination that suits your taste.
I truly believe that these Easy Homemade Cereal Bars will become a staple in your household. They’re a simple, satisfying, and endlessly customizable treat that everyone will love. So, what are you waiting for? Gather your ingredients, preheat your oven (just kidding, no oven needed!), and get ready to create some delicious memories.
I’m so excited for you to try this recipe! Once you do, please come back and share your experience in the comments below. I’d love to hear what variations you tried, what your family thought, and any tips or tricks you discovered along the way. Happy baking (or rather, no-baking)! I can’t wait to hear all about your Easy Homemade Cereal Bars adventures! Let me know if you have any questions, and happy snacking!
Easy Homemade Cereal Bars: The Best Recipe for Quick Snacks
Classic crispy rice cereal bars with oats, nuts, and a hint of peanut butter. A quick, easy, and customizable treat!
Ingredients
Instructions
Recipe Notes
- Nut Butter Swirl: Swirl a tablespoon or two of peanut butter over the top before cooling.
- Chocolate Drizzle: Drizzle melted chocolate over the cut bars.
- Dried Fruit Addition: Add 1/2 cup of chopped dried fruit to the cereal mixture.
- Spice It Up: Add a pinch of cinnamon or nutmeg to the syrup mixture.
- Seed Power: Include 2 tablespoons of chia seeds, flax seeds, or hemp seeds to the dry mixture.
- Marshmallow Magic: Add 1 cup of mini marshmallows to the cereal mixture after coating with syrup.
- Double Chocolate Delight: Use chocolate Rice Krispies and add 1/2 cup of cocoa powder to the syrup mixture.
- No-Nut Option: Omit nuts and replace with more cereal, seeds, or dried fruit.
- Vegan Variation: Use vegan butter, maple syrup, and dairy-free chocolate chips.
- Gluten-Free Option: Use certified gluten-free Rice Krispies and rolled oats.
- Storage Tips: Place parchment paper between layers to prevent sticking.
- Freezing Instructions: Wrap individually and freeze for up to 2 months. Thaw at room temperature.
- Troubleshooting:
- Too Hard: Reduce boiling time next time.
- Too Crumbly: Press mixture more firmly.
- Too Sticky: Increase boiling time.
- Serving Suggestions: Quick breakfast, snack, lunchbox treat, hikes, picnics, road trips.
- Kid-Friendly Activity: Fun and easy to make with kids.
- Gift Giving: Thoughtful and delicious gift.
- Cost-Effective Treat: Cheaper than store-bought.
- Healthier Options: Use whole wheat flour, reduce sugar, add more nuts and seeds.
- Experiment with Flavors: Customize with different cereals, nuts, seeds, dried fruit, or chocolate chips.