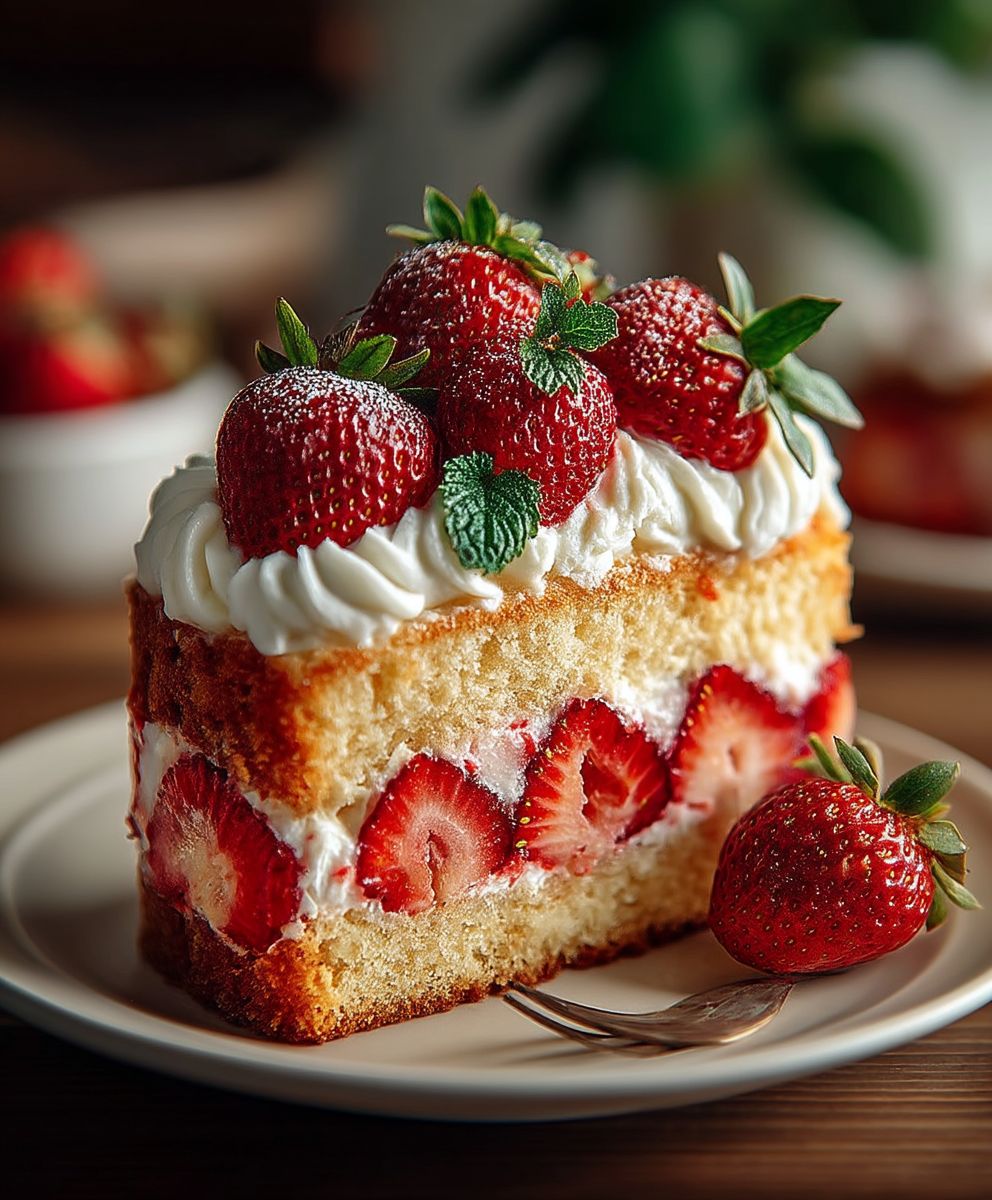
Easy Strawberry Shortcake, a dessert that whispers of sunshine and summer days, is a timeless classic for a reason. Imagine sinking your teeth into a cloud of tender, buttery biscuit, its warmth embracing a generous mound of sweet, juicy strawberries, all crowned with a dollop of freshly whipped cream. Is your mouth watering yet? Mine is!
While the exact origins of shortcake are debated, similar versions have graced tables for centuries. Some trace its roots back to Scotland, while others point to England. Regardless of its precise birthplace, this delightful treat quickly found its way across the Atlantic, becoming a beloved staple in American cuisine, particularly during strawberry season. It’s a dessert that evokes memories of family gatherings, picnics in the park, and the simple joys of life.
What makes easy strawberry shortcake so universally adored? It’s the perfect trifecta of textures and flavors: the crumbly, slightly sweet biscuit, the burst of fresh, tangy strawberries, and the rich, velvety cream. Plus, it’s incredibly easy to make! Forget complicated pastry techniques; this recipe is designed for simplicity, ensuring that anyone, regardless of their baking skills, can whip up a batch of this delightful dessert in no time. It’s the perfect way to celebrate the season and create lasting memories with loved ones.

Ingredients:
- For the Biscuits:
- 2 cups all-purpose flour, plus more for dusting
- 1/4 cup granulated sugar
- 1 tablespoon baking powder
- 1/2 teaspoon baking soda
- 1/2 teaspoon salt
- 1/2 cup (1 stick) cold unsalted butter, cut into small cubes
- 3/4 cup cold buttermilk
- 2 tablespoons melted butter, for brushing
- For the Strawberries:
- 1 quart fresh strawberries, hulled and sliced
- 1/2 cup granulated sugar
- 1 tablespoon lemon juice
- For the Whipped Cream:
- 1 1/2 cups heavy cream, cold
- 1/4 cup powdered sugar
- 1 teaspoon vanilla extract
Preparing the Strawberries:
Okay, let’s start with the strawberries. This is super easy and gives them time to macerate and get all juicy and delicious while we work on the biscuits.
- Hull and Slice: First, wash your strawberries really well. Then, hull them (that means removing the green tops) and slice them into about 1/4-inch thick slices. I like to leave a few whole for garnish, but that’s totally optional.
- Macerate: In a medium bowl, combine the sliced strawberries, granulated sugar, and lemon juice. Gently stir everything together until the strawberries are evenly coated.
- Let it Sit: Cover the bowl with plastic wrap and let it sit at room temperature for at least 30 minutes, or even up to an hour. The sugar will draw out the natural juices from the strawberries, creating a lovely, sweet syrup. Give it a stir occasionally. You’ll notice a beautiful, syrupy liquid forming at the bottom of the bowl. That’s exactly what we want!
Making the Biscuit Dough:
Now for the biscuits! Don’t be intimidated; they’re much easier than you think. The key is to keep everything cold, cold, cold. That’s what gives them that lovely, flaky texture.
- Combine Dry Ingredients: In a large bowl, whisk together the flour, sugar, baking powder, baking soda, and salt. Make sure everything is well combined. This ensures that the baking powder and soda are evenly distributed, which is crucial for a good rise.
- Cut in the Butter: Add the cold, cubed butter to the dry ingredients. Using a pastry blender (or your fingertips, if you’re feeling brave!), cut the butter into the flour mixture until it resembles coarse crumbs. You should still see small pieces of butter throughout – that’s what creates those flaky layers. Don’t overmix! Overmixing will develop the gluten in the flour and result in tough biscuits.
- Add the Buttermilk: Gradually add the cold buttermilk to the flour mixture, stirring gently with a fork until just combined. The dough will be slightly shaggy and sticky. Don’t overmix! Again, overmixing is the enemy of tender biscuits.
- Turn Out and Pat Down: Lightly flour a clean work surface. Turn the dough out onto the floured surface and gently pat it down into a 3/4-inch thick rectangle.
- Cut the Biscuits: Use a 2 1/2-inch biscuit cutter (or a sharp knife) to cut out the biscuits. Try to cut straight down without twisting the cutter, as twisting can seal the edges and prevent them from rising properly. If you don’t have a biscuit cutter, you can use a drinking glass or even just cut the dough into squares.
- Re-roll Scraps (Optional): Gently gather the scraps of dough, pat them down again, and cut out more biscuits. Keep in mind that these biscuits may not be as tender as the first batch, as the dough has been worked more.
- Arrange on Baking Sheet: Place the biscuits on an ungreased baking sheet, leaving about 1 inch of space between each biscuit.
- Brush with Butter: Brush the tops of the biscuits with the melted butter. This will give them a beautiful golden-brown color and a slightly crisp crust.
- Chill (Optional but Recommended): For even better results, chill the biscuits in the refrigerator for at least 30 minutes before baking. This helps the butter stay cold and prevents the biscuits from spreading too much in the oven.
Baking the Biscuits:
Now it’s time to bake these beauties! The oven temperature is key here, so make sure yours is accurate.
- Preheat Oven: Preheat your oven to 425°F (220°C).
- Bake: Bake the biscuits for 15-20 minutes, or until they are golden brown and have risen nicely. Keep an eye on them, as oven temperatures can vary.
- Cool Slightly: Remove the biscuits from the oven and let them cool on the baking sheet for a few minutes before transferring them to a wire rack to cool completely.
Making the Whipped Cream:
While the biscuits are cooling, let’s whip up some cream! Homemade whipped cream is so much better than store-bought, and it’s incredibly easy to make.
- Chill Bowl and Whisk: Make sure your mixing bowl and whisk (or beaters) are well chilled. This helps the cream whip up faster and hold its shape better. I like to put them in the freezer for about 15 minutes before I start.
- Combine Ingredients: In the chilled bowl, combine the heavy cream, powdered sugar, and vanilla extract.
- Whip: Using a whisk or an electric mixer, whip the cream until stiff peaks form. Be careful not to overwhip, or you’ll end up with butter! You’ll know it’s ready when the cream holds its shape and forms stiff peaks when you lift the whisk or beaters.
Assembling the Strawberry Shortcakes:
Finally, the best part – putting it all together! This is where the magic happens.
- Split the Biscuits: Gently split each biscuit in half horizontally.
- Layer with Strawberries: Spoon a generous amount of the macerated strawberries and their juices over the bottom half of each biscuit.
- Top with Whipped Cream: Dollop a generous amount of whipped cream on top of the strawberries.
- Add the Top Biscuit: Place the top half of the biscuit on top of the whipped cream.
- Garnish (Optional): Garnish with a few extra strawberry slices and a dusting of powdered sugar, if desired.
- Serve Immediately: Serve immediately and enjoy! These are best enjoyed fresh, as the biscuits will soften over time.
Conclusion:
And there you have it! This Easy Strawberry Shortcake recipe is truly a must-try, and I’m not just saying that because I wrote it. The combination of the tender, slightly sweet biscuits, the juicy, macerated strawberries, and the dollop of freshly whipped cream is simply divine. It’s the kind of dessert that evokes feelings of warmth, nostalgia, and pure, unadulterated happiness. Seriously, what’s not to love?
But beyond the deliciousness, what makes this recipe so special is its simplicity. You don’t need to be a seasoned baker to whip up a batch of these beauties. The ingredients are readily available, the steps are straightforward, and the results are consistently amazing. It’s the perfect recipe for a weeknight treat, a weekend brunch, or a special occasion. Plus, it’s a fantastic way to showcase those gorgeous, ripe strawberries you’ve been eyeing at the farmer’s market.
Now, let’s talk serving suggestions and variations because, let’s be honest, who doesn’t love options? While the classic combination of biscuits, strawberries, and whipped cream is hard to beat, feel free to get creative!
For a richer flavor, try using buttermilk in the biscuit dough. It adds a subtle tang and makes the biscuits even more tender. You could also add a touch of lemon zest to the dough for a bright, citrusy note.
If you’re feeling adventurous, experiment with different fruits. Blueberries, raspberries, peaches, or even a combination of berries would be delicious. Just be sure to adjust the amount of sugar in the macerated fruit depending on their sweetness.
And speaking of whipped cream, don’t be afraid to get fancy! A splash of vanilla extract, a hint of almond extract, or even a tablespoon of your favorite liqueur can elevate your whipped cream to the next level. For a vegan option, use coconut whipped cream – it’s surprisingly delicious!
Another fun variation is to grill the shortcakes! Brush them with melted butter and grill them for a few minutes per side until they’re golden brown and slightly crispy. The smoky flavor pairs perfectly with the sweet strawberries.
You can also assemble these into individual parfaits for a more elegant presentation. Layer crumbled biscuits, macerated strawberries, and whipped cream in glasses or jars. This is a great option for parties or when you want to make the dessert ahead of time.
Ultimately, the possibilities are endless! The beauty of this Easy Strawberry Shortcake recipe is that it’s a blank canvas for your culinary creativity. So, don’t be afraid to experiment and make it your own.
I truly hope you give this recipe a try. I’m confident that you’ll love it as much as I do. And when you do, please, please, please share your experience! Leave a comment below, tag me in your photos on social media, or simply tell a friend about it. I’m always eager to hear how my recipes turn out for others and to see your creative variations. Happy baking, and enjoy every delicious bite! I can’t wait to see your strawberry shortcake creations!
Easy Strawberry Shortcake: The Perfect Summer Dessert
Flaky, homemade biscuits layered with sweet, macerated strawberries and freshly whipped cream. A classic summer dessert!
Ingredients
Instructions
Recipe Notes
- Keeping the butter and buttermilk cold is crucial for flaky biscuits.
- Don’t overmix the biscuit dough, as this will result in tough biscuits.
- Chilling the biscuits before baking helps prevent them from spreading too much in the oven.
- Be careful not to overwhip the cream, or it will turn into butter.
- Strawberry shortcakes are best enjoyed fresh, as the biscuits will soften over time.