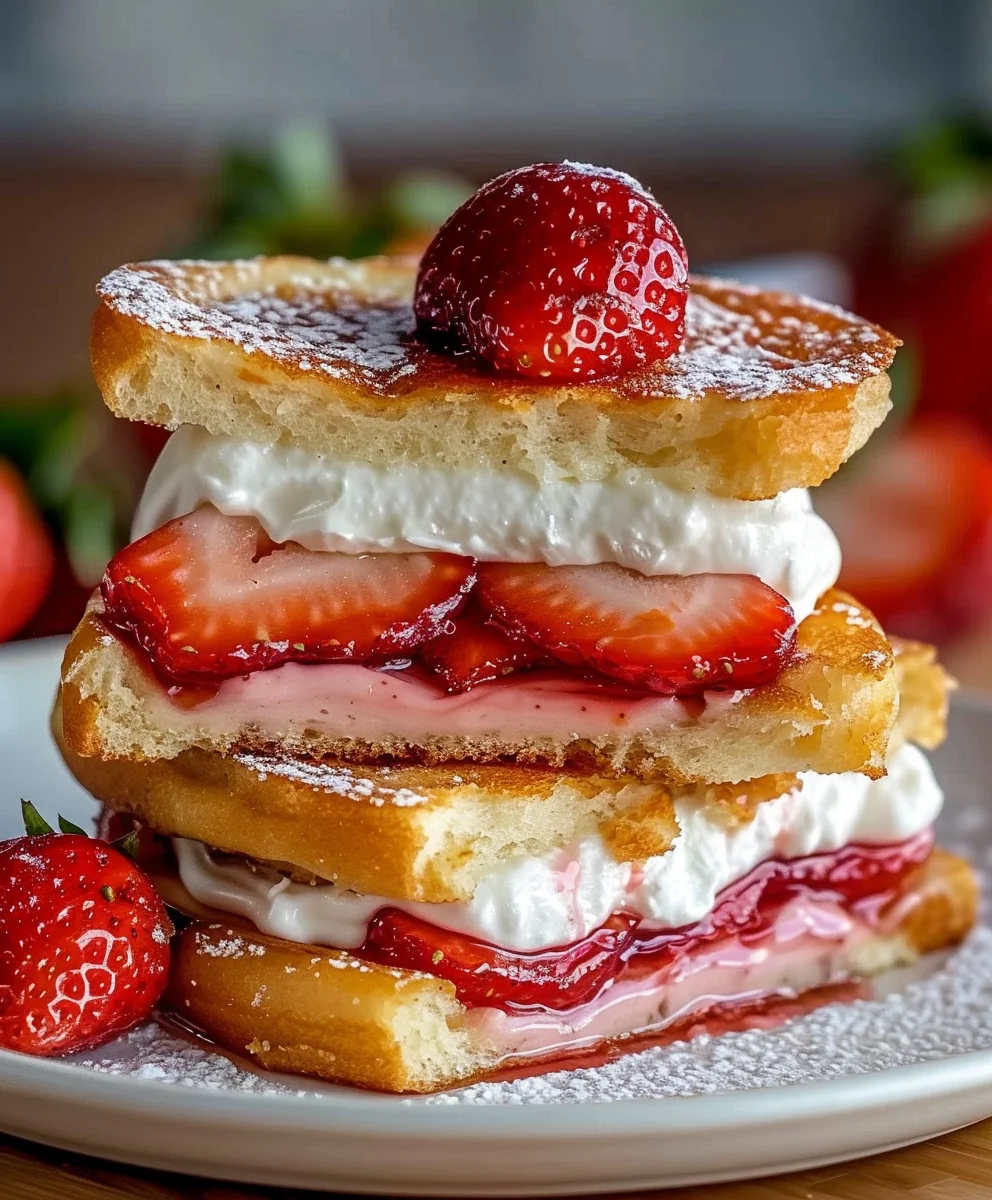
Fried Strawberry Cheesecake Sandwiches represent a truly innovative and decadent approach to dessert that I am incredibly excited to share with you. Imagine biting into a warm, golden-fried exterior, perfectly crisp and subtly sweet, only to discover a creamy, luscious strawberry cheesecake filling melting in your mouth. This isn’t just a dessert; it’s an experience, a symphony of textures and flavors that promises to delight even the most discerning palate. I believe this delightful creation bridges the gap between comforting familiarity and exciting newness.
While the concept of frying desserts has a rich, global history—think churros, zeppole, or even tempura fruits—and cheesecake itself dates back to ancient Greece, the brilliant fusion of these elements into
Fried Strawberry Cheesecake Sandwiches
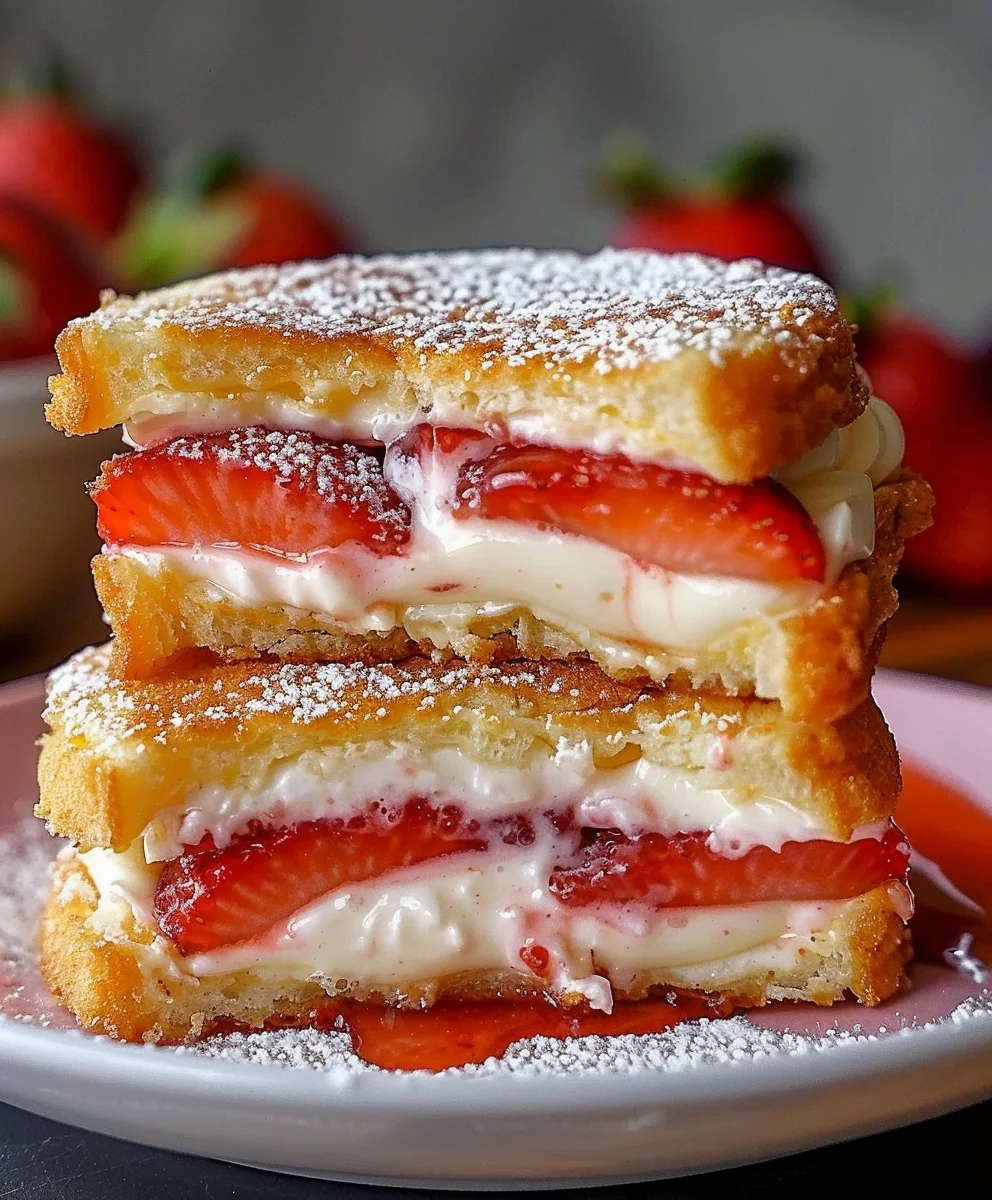
is a modern culinary marvel. It’s a testament to how classic comfort foods can be reimagined, borrowing the nostalgic warmth of a fried pastry and combining it with the elegant indulgence of a perfectly crafted cheesecake. People absolutely adore this dish not only for its novelty but primarily for its incredible taste and textural contrasts. The delightful crunch gives way to a smooth, tangy, and sweet center, where the brightness of fresh strawberries beautifully cuts through the richness of the cream cheese. It’s a comforting yet sophisticated treat, making it an irresistible choice for any occasion.
Ingredients:
- For the Strawberry Cheesecake Filling:
- 8 ounces (226g) full-fat cream cheese, softened to room temperature: This is absolutely crucial for a smooth, lump-free filling. Don’t rush this step; take it out of the fridge at least an hour before you plan to start.
- 1/4 cup (50g) granulated sugar: Just enough sweetness to complement the natural tartness of the cream cheese and strawberries without being overly cloying.
- 1 teaspoon pure vanilla extract: A classic pairing with cream cheese, it adds warmth and depth to our filling.
- 1/2 teaspoon fresh lemon zest (optional, but highly recommended): This brightens the flavor profile immensely, cutting through the richness of the cream cheese and enhancing the strawberries.
- 1/2 cup (about 4-5 large) fresh strawberries, finely diced: Choose ripe, fragrant berries. Finely dicing ensures an even distribution of strawberry flavor and texture in every bite. We’ll be folding these in gently.
- For the Sandwiches:
- 12 slices of soft white sandwich bread: The softer, the better! This type of bread flattens easily and seals beautifully, creating the perfect pocket for our filling. Avoid overly dense or artisanal breads for this specific recipe.
- 2 large eggs: These will be whisked to create an egg wash, helping to seal the bread and achieve that beautiful golden-brown crust during frying.
- 2 tablespoons milk (any kind): Added to the eggs, it thins the wash slightly, making it easier to work with and ensuring a lighter coating.
- For Frying:
- 3-4 cups neutral oil, such as canola, vegetable, or sunflower oil: We need enough oil for shallow frying, ensuring the sandwiches are submerged about halfway for even cooking. Choose an oil with a high smoke point.
- For Serving and Garnish:
- 1/4 cup powdered sugar, for dusting: A delicate finish that adds an extra touch of sweetness and a beautiful presentation.
- Fresh strawberries, sliced or halved: For a vibrant garnish and an extra burst of fresh fruit flavor.
- Fresh mint leaves (optional): Adds a pop of color and a refreshing aroma.
- Whipped cream or a drizzle of chocolate sauce (optional): For an extra decadent treat.
Preparing the Irresistible Strawberry Cheesecake Filling
This is where the magic begins! Creating a smooth, creamy, and flavorful filling is the first vital step to our amazing Fried Strawberry Cheesecake Sandwiches. Trust me, paying attention to these details will make all the difference in the final taste and texture.
- Soften the Cream Cheese: First things first, ensure your full-fat cream cheese is at true room temperature. I usually take mine out of the fridge at least an hour, sometimes even two, before I plan to start. If you’re short on time, you can cut the cream cheese into smaller cubes and let it sit for about 20-30 minutes, or use a microwave on low power for 10-15 seconds at a time until just softened, but never melted. This is non-negotiable for a lump-free filling.
- Cream the Base: In a medium-sized mixing bowl, combine the softened cream cheese, granulated sugar, pure vanilla extract, and the optional (but highly recommended!) fresh lemon zest. Using an electric mixer (handheld or stand mixer with a paddle attachment) on medium speed, beat these ingredients together. Start on low speed to prevent a cloud of powdered sugar, then increase to medium. I beat it for about 2-3 minutes, or until the mixture is incredibly light, fluffy, and completely smooth. You want to see no specks of sugar and definitely no lumps of cream cheese. Scrape down the sides of the bowl frequently with a spatula to ensure everything is incorporated evenly. This aeration process also helps to make the filling wonderfully creamy.
- Prepare the Strawberries: While your cream cheese mixture is coming together beautifully, take your fresh strawberries. Wash them thoroughly under cool running water, then pat them completely dry with a paper towel. Hull the strawberries (remove the green tops), and then very finely dice them. We’re aiming for pieces no larger than a pea, and ideally a little smaller, so they integrate well into the filling and don’t create overly large bumps in our sandwiches. You can even give them a quick chop with a knife if you prefer.
- Gently Fold in the Strawberries: Once your cream cheese mixture is perfectly smooth and your strawberries are finely diced, it’s time to combine them. Using a rubber spatula, gently fold the diced fresh strawberries into the cream cheese mixture. The key here is gentle folding. You don’t want to beat them in, as this could crush the strawberries too much and release too much moisture, potentially making your filling watery. Just fold until the strawberries are evenly distributed throughout the creamy cheesecake base.
- Chill for Stability (Optional but Recommended): For an even easier assembly process, I sometimes cover the bowl with plastic wrap and pop the filling into the refrigerator for about 15-20 minutes. This helps the filling firm up slightly, making it less messy to spread onto the bread. It’s not strictly necessary if you’re working quickly, but it definitely helps if your kitchen is warm or if you’re taking your time.
Crafting the Perfect Fried Strawberry Cheesecake Sandwiches
Now that our luscious strawberry cheesecake filling is ready, it’s time to transform plain bread into pockets of pure joy. This phase requires a bit of finesse, but I promise, the reward of a perfectly sealed, golden-brown sandwich is absolutely worth it!
- Prepare Your Bread: Take your 12 slices of soft white sandwich bread. Using a sharp knife or a serrated bread knife, carefully trim off all the crusts from each slice. While you might be tempted to skip this, I find that crust-free bread flattens more evenly and seals much better, preventing any dreaded filling leakage during frying. Plus, it gives a much softer, more uniform texture to the finished sandwich.
- Flatten the Bread: Lay each crust-free slice of bread on a clean work surface. Using a rolling pin, firmly roll each slice of bread until it’s thin and flat, about half its original thickness. You want to press out as much air as possible, making the bread more pliable and creating a larger surface area for sealing. This step is crucial for making our “sandwich” strong enough to hold the filling without tearing. I usually roll in one direction, then rotate the bread 90 degrees and roll again, ensuring it’s evenly thin.
- Prepare the Egg Wash: In a shallow dish or a wide, flat bowl (something that can easily accommodate dipping a sandwich), whisk together the 2 large eggs and 2 tablespoons of milk. Whisk vigorously until the egg yolks and whites are fully combined and the mixture is uniform. This is our “glue” and our browning agent.
- Assemble the Sandwiches:
- Take one flattened slice of bread and place it on your clean work surface.
- Spoon about 1 to 1.5 tablespoons of the strawberry cheesecake filling onto one half of the bread slice. Make sure to leave a clear border of about 1/2 inch around the edges of that half. Do not overfill! This is one of the most common mistakes and will lead to leaky sandwiches. It’s better to use slightly less filling than too much.
- Carefully fold the other half of the bread slice over the filling, creating a half-moon shape or a triangle, depending on how you fold it. Gently align the edges.
- Now, here’s a critical step: use the tines of a fork to press firmly along all the open edges of the bread. This creates a strong seal, effectively crimping the bread together and locking in that delicious filling. Go all the way around, pressing down with consistent pressure. You’ll see the bread fuse together. This crimping also adds a lovely decorative touch to your “Fried Strawberry Cheesecake Sandwiches.”
- Repeat this process with the remaining bread slices and filling until you have all 6 sandwiches (if using 12 slices to make 6 total). As you assemble them, place them gently on a plate or baking sheet.
- Brief Chill (Highly Recommended): Once all your sandwiches are assembled and sealed, I strongly recommend placing them in the refrigerator for about 15-20 minutes. This helps the bread firm up slightly, further securing the seal, and makes them easier to handle when dipping into the egg wash and frying. It also helps the filling stay cohesive inside.
Frying Your Delicious Strawberry Cheesecake Sandwiches to Golden Perfection
This is where our sandwiches get their signature crispy, golden exterior. Frying can seem intimidating, but with the right temperature control and a little patience, you’ll achieve perfectly cooked Fried Strawberry Cheesecake Sandwiches every time. Safety first, so keep your eyes on the oil!
- Heat the Oil: In a large, heavy-bottomed skillet or a shallow Dutch oven, pour in your neutral oil. You’ll need enough oil to come up about 1/2 to 3/4 inch high. Place the skillet over medium heat. Now, this next part is vital: we need to get the oil to the right temperature, which is ideally around 350-375°F (175-190°C). If you have a deep-fry thermometer, this is the perfect time to use it. If not, you can test the oil by dropping a tiny piece of bread into it. If it sizzles gently and turns golden brown in about 30-45 seconds, your oil is ready. If it immediately turns dark, your oil is too hot; turn down the heat and let it cool slightly. If nothing happens, it’s not hot enough. Getting the temperature right ensures a crispy exterior without burning and cooks the sandwich evenly.
- Prepare for Frying: While the oil is heating, retrieve your chilled strawberry cheesecake sandwiches. Place your shallow dish with the egg wash next to your skillet. Have a plate lined with paper towels ready nearby to drain the fried sandwiches.
- Dip in Egg Wash: One by one, carefully take each assembled sandwich and gently dip it into the egg wash. Ensure both sides are thoroughly coated, but allow any excess egg wash to drip off. You want a thin, even coating, not a thick, gooey layer.
- Fry the Sandwiches:
- Carefully place 2-3 of the egg-washed sandwiches into the hot oil. Do not overcrowd the pan! Overcrowding will lower the oil temperature significantly, resulting in greasy, soggy sandwiches instead of crispy ones. Give them enough space to cook evenly.
- Let them fry for about 2-3 minutes per side, or until they are beautifully golden brown and crispy. Keep a close eye on them; bread can brown quickly in hot oil. The rich aroma of frying bread and sweet strawberry filling will begin to fill your kitchen, a delightful preview of what’s to come.
- Using tongs or a slotted spatula, carefully flip each sandwich to cook the other side until it also reaches that perfect golden hue.
- Throughout the frying process, monitor your oil temperature. If it seems to be getting too hot and the sandwiches are browning too quickly, slightly reduce the heat. If they’re taking too long to brown, increase the heat a touch. Consistency is key here.
- Drain and Repeat: Once both sides are perfectly golden brown, carefully remove the Fried Strawberry Cheesecake Sandwiches from the oil using tongs or a slotted spatula. Hold them over the pan for a moment to allow any excess oil to drip back into the skillet. Transfer the fried sandwiches to the plate lined with paper towels to drain further. The paper towels will absorb any remaining surface oil, ensuring your sandwiches are delightfully crispy, not greasy.
- Continue Frying: Repeat the dipping and frying process with the remaining sandwiches, working in batches as needed. Make sure to maintain your oil temperature between batches.
The Grand Finale: Finishing Touches and Serving Your Fried Strawberry Cheesecake Sandwiches
You’ve done the hard work, and now it’s time to enjoy the fruits (and cheese!) of your labor. These Fried Strawberry Cheesecake Sandwiches are a treat in themselves, but a few simple garnishes can elevate them from delicious to absolutely unforgettable. Get ready for some serious compliments!
- A Dusting of Sweetness: As soon as your Fried Strawberry Cheesecake Sandwiches have drained for a minute or two on the paper towels (they’re best served warm!), transfer them to a serving platter. While they are still warm, take a fine-mesh sieve or a small strainer and generously dust them with powdered sugar. The warmth of the sandwiches will help the powdered sugar adhere beautifully, creating a snowy, inviting finish. This isn’t just for looks; it adds a delicate layer of sweetness that perfectly complements the rich filling. I find that a good dusting makes them look like they just stepped out of a fancy cafe!
- Garnish with Freshness: Arrange some fresh strawberry slices or halves around and on top of your dusted sandwiches. The vibrant red of the fresh berries offers a lovely contrast to the golden-brown sandwiches and reinforces the delicious strawberry flavor within. If you have fresh mint leaves, a few strategically placed sprigs will add a beautiful pop of green and a refreshing aroma. It’s amazing how a little fresh garnish can make a dish look incredibly appealing.
- Optional Decadence: For those who love an extra touch of indulgence, consider serving your Fried Strawberry Cheesecake Sandwiches with a dollop of freshly whipped cream on the side, or a decadent drizzle of chocolate sauce. A small bowl of extra diced strawberries or a simple strawberry compote can also be a wonderful accompaniment, allowing guests to add even more fruity goodness.
- Serve Immediately: These Fried Strawberry Cheesecake Sandwiches are truly best served warm, right after frying. The exterior will be wonderfully crispy, and the cheesecake filling will be warm and soft, almost melting in your mouth with every bite. The contrast of textures and temperatures is simply divine.
- Leftovers (if any!): While best fresh, if you happen to have any leftovers (which is rare in my house!), you can store them in an airtight container in the refrigerator for up to 2 days. To reheat, I recommend popping them back into a toaster oven or a regular oven at 350°F (175°C) for about 5-10 minutes, or until warmed through and the exterior crisps up again. A microwave will warm them, but you’ll lose that lovely crispy texture.
- Enjoy Your Creation: Take a moment to admire your handiwork, and then dive into these incredible Fried Strawberry Cheesecake Sandwiches. They are truly a unique and satisfying dessert, perfect for a special brunch, a decadent dessert, or simply as a delightful homemade treat to brighten any day. The combination of the warm, crispy exterior, the creamy, tangy cheesecake, and the bursts of fresh strawberry is an absolute dream come true. You’ve created something truly special, and I hope you savor every single bite!
Conclusion:
Well, my friends, we’ve reached the grand finale of our culinary adventure, and I truly hope you’re as excited as I am about the masterpiece we’ve just explored. If there’s one recipe I could implore you to try, it’s this one. Why, you ask? Because it’s not just a dessert; it’s an experience, a symphony of textures and flavors that dances on your palate and leaves an indelible mark. Imagine sinking your teeth through a crispy, golden-brown exterior, giving way to warm, luscious cream cheese filling, punctuated by bursts of sweet, tender strawberries. It’s the perfect marriage of a classic comfort food dessert with a playful, innovative twist. This isn’t merely about combining ingredients; it’s about crafting moments, about transforming simple components into something truly extraordinary that will have everyone asking for more. I’ve found that these delightful creations manage to capture the nostalgic warmth of a beloved treat while simultaneously offering something fresh and exciting. They’re impressive enough for a special occasion, yet surprisingly straightforward to whip up when that irresistible craving strikes. Get ready to impress yourself and everyone lucky enough to share a bite!
Elevating Your Fried Strawberry Cheesecake Sandwiches: Serving and Variation Ideas
Now that you’re armed with the knowledge and inspiration to create these delightful treats, let’s talk about making them truly your own. While these Fried Strawberry Cheesecake Sandwiches are absolutely divine on their own, a little embellishment can elevate them to new heights. For a classic presentation, a simple dusting of powdered sugar is always elegant and adds a subtle sweetness. But why stop there? Think about a vibrant strawberry coulis, made by pureeing fresh strawberries with a touch of sugar and a squeeze of lemon, drizzled artfully over the top, intensifying that wonderful berry flavor. Or, for the chocolate lovers among us, a warm chocolate fudge sauce or a rich ganache would be an absolutely decadent addition, creating a beautiful contrast. A swirl of salted caramel sauce could also introduce a sophisticated layer of flavor that complements the creamy cheesecake beautifully, adding a salty-sweet complexity that’s hard to resist. The possibilities for a simple drizzle are truly endless, allowing you to tailor each serving to individual preferences.
When it comes to serving, a scoop of premium vanilla bean ice cream melting alongside your warm sandwich is pure bliss, creating a delightful temperature and textural contrast. But don’t be afraid to experiment! A scoop of strawberry ice cream would double down on the berry goodness, enhancing the fruit component, while a cream cheese swirl ice cream could truly amplify the cheesecake aspect, making it even more decadent. Consider a dollop of freshly whipped cream, perhaps infused with a hint of vanilla or almond extract, for an airy, luxurious topping that lightens the richness. For those looking to turn this into a truly memorable event, consider a light beverage pairing. A cold glass of milk is always a comforting classic, especially with a warm, sweet treat like this. However, for something a little more sophisticated, a sparkling rosé or a crisp dry cider could offer a refreshing counterpoint to the richness of the dessert, cutting through the sweetness beautifully. Even a perfectly brewed cup of coffee or a luxurious hot chocolate would make for an exquisite accompaniment, especially on a cooler evening.
Beyond toppings and pairings, think about variations within the sandwich itself. While strawberries are undeniably perfect for this recipe, don’t hesitate to play with other fruits in your cream cheese mixture. Raspberries, blueberries, or even a mixed berry compote could offer their own unique charm, allowing you to adapt the recipe to different seasons or preferences. A touch of lemon zest or orange zest in the cream cheese filling can brighten the entire flavor profile, adding a subtle tang that cuts through the sweetness beautifully and awakens the palate. For those who love a textural contrast, a sprinkle of finely chopped nuts – pecans or walnuts – folded into the filling or even toasted lightly and sprinkled over the top, could provide a wonderful crunch and a hint of earthy flavor. You could also experiment with different types of bread; brioche would make for an even richer, softer interior, soaking up the egg mixture beautifully, while challah bread could offer a slightly different texture and flavor profile. Even a hint of cinnamon, nutmeg, or a dash of cardamom in your egg wash can impart an extra layer of warmth and spice that will surprise and delight your taste buds, truly making this dish your own signature creation. The possibilities for customization are genuinely endless, limited only by your imagination and what delights your personal palate.
So, what are you waiting for? This is your invitation, your friendly nudge, to step into your kitchen and create some magic. Trust me when I say that the effort, which is surprisingly minimal for such an impressive result, will be incredibly rewarding. There’s a special kind of joy that comes from making something delicious from scratch, especially when it’s met with oohs and aahs from those you share it with. I absolutely cannot wait to hear about your culinary adventures. Please, don’t keep your successes (or even your humorous learning experiences!) to yourself. Share your photos, your serving suggestions, and your delightful variations with me and with our community. Tag me on social media, leave a comment below, or send me an email. I love seeing how you bring these recipes to life in your own unique way, how you interpret the flavors and make them your own. Let’s spread the joy of these incredible, decadent, and utterly irresistible treats far and wide. Go forth, fry up some deliciousness, and share the love! Happy cooking!
Fried Strawberry Cheesecake Sandwiches: Crispy & Sweet Treat!
Fried Strawberry Cheesecake Sandwiches offer a decadent blend of warm, crispy exterior and creamy, luscious strawberry cheesecake filling. This innovative dessert combines comforting familiarity with exciting newness, delighting with its incredible taste and textural contrasts, promising a symphony of textures and flavors.
Ingredients
-
8 slices brioche or challah bread
-
4 oz full-fat cream cheese, softened
-
2 tbsp powdered sugar (for filling)
-
1/2 cup fresh strawberries, sliced
-
1/4 cup strawberry jam
-
2 large eggs
-
3 tbsp milk
-
2 tbsp butter, for frying
-
Powdered sugar, for dusting
-
Fresh strawberries, sliced (for garnish)
-
Optional: Fresh mint leaves, whipped cream, or chocolate sauce
Instructions
-
Step 1
In a medium bowl, beat softened cream cheese with 2 tbsp powdered sugar until smooth. Gently fold in 1/2 cup sliced fresh strawberries and 1/4 cup strawberry jam. Cover and chill for 15-20 minutes to firm up. -
Step 2
Trim the crusts from all 8 bread slices. Lay each slice on a clean surface and, using a rolling pin, flatten each piece until thin, about half its original thickness. -
Step 3
Spoon about 1 to 1.5 tablespoons of the chilled filling onto one half of a flattened bread slice, leaving a 1/2-inch border. Fold the other half of the bread over the filling to create a half-moon or triangle shape. Use a fork to firmly press and seal all open edges. Repeat for the remaining bread slices and filling (making 4 sandwiches total). Chill assembled sandwiches for 15-20 minutes. -
Step 4
In a shallow dish, whisk together the 2 large eggs and 3 tablespoons of milk until fully combined. -
Step 5
In a large, heavy-bottomed skillet, melt 2 tablespoons of butter over medium heat until shimmering. Ensure the butter is hot enough (a tiny piece of bread should sizzle gently and turn golden in 30-45 seconds). -
Step 6
One by one, gently dip each chilled sandwich into the egg wash, ensuring both sides are coated, and let any excess drip off. Carefully place 2-3 sandwiches into the hot butter, avoiding overcrowding. Fry for 2-3 minutes per side, or until beautifully golden brown and crispy. Flip carefully with tongs or a slotted spatula. -
Step 7
Once golden, remove the fried sandwiches from the skillet and place them on a plate lined with paper towels to drain excess butter. Immediately transfer to a serving platter. Dust generously with powdered sugar using a fine-mesh sieve. Garnish with fresh strawberry slices and optional fresh mint leaves. Serve warm for the best taste and texture.
Important Information
Nutrition Facts (Per Serving)
It is important to consider this information as approximate and not to use it as definitive health advice.
Allergy Information
Please check ingredients for potential allergens and consult a health professional if in doubt.