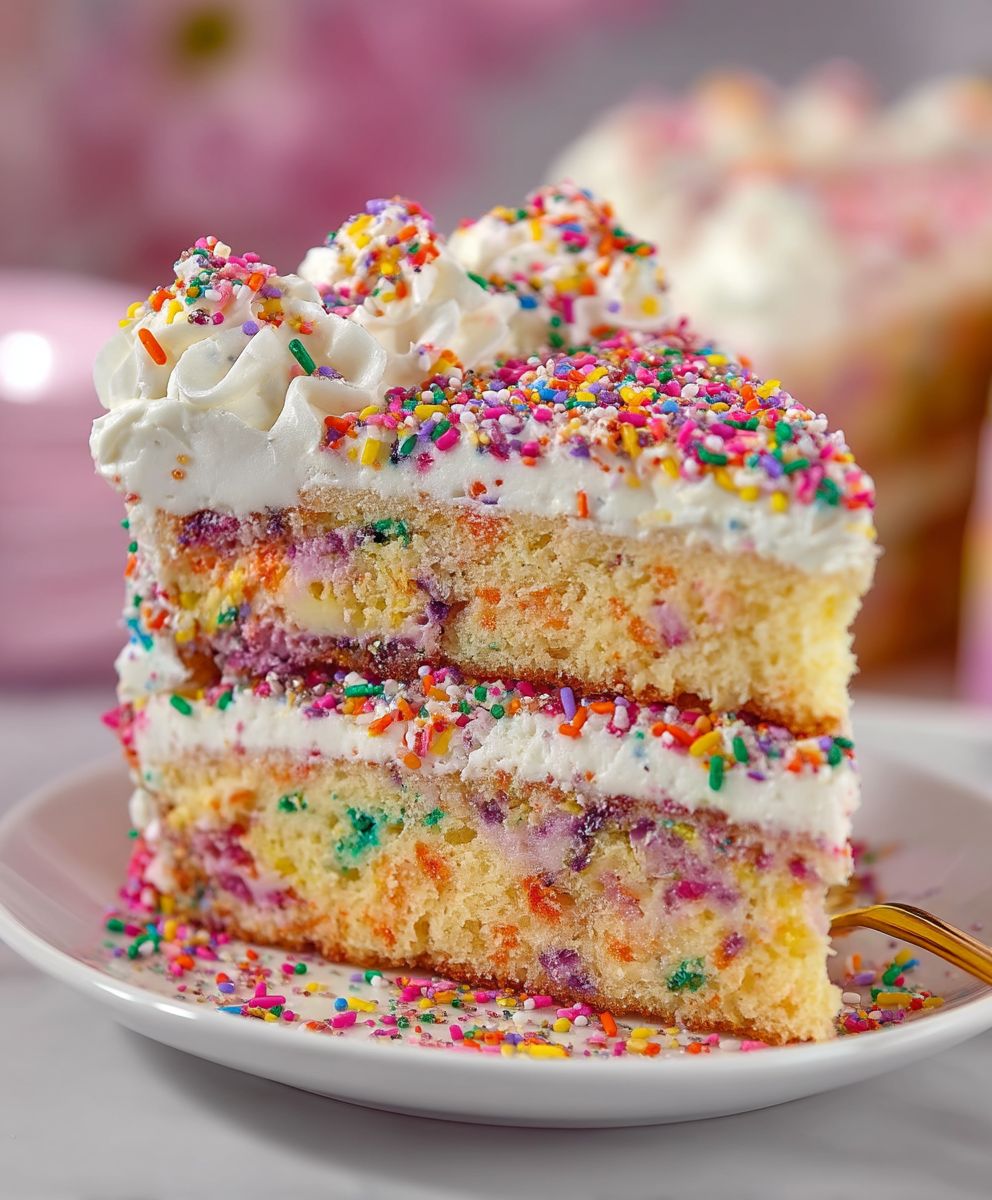
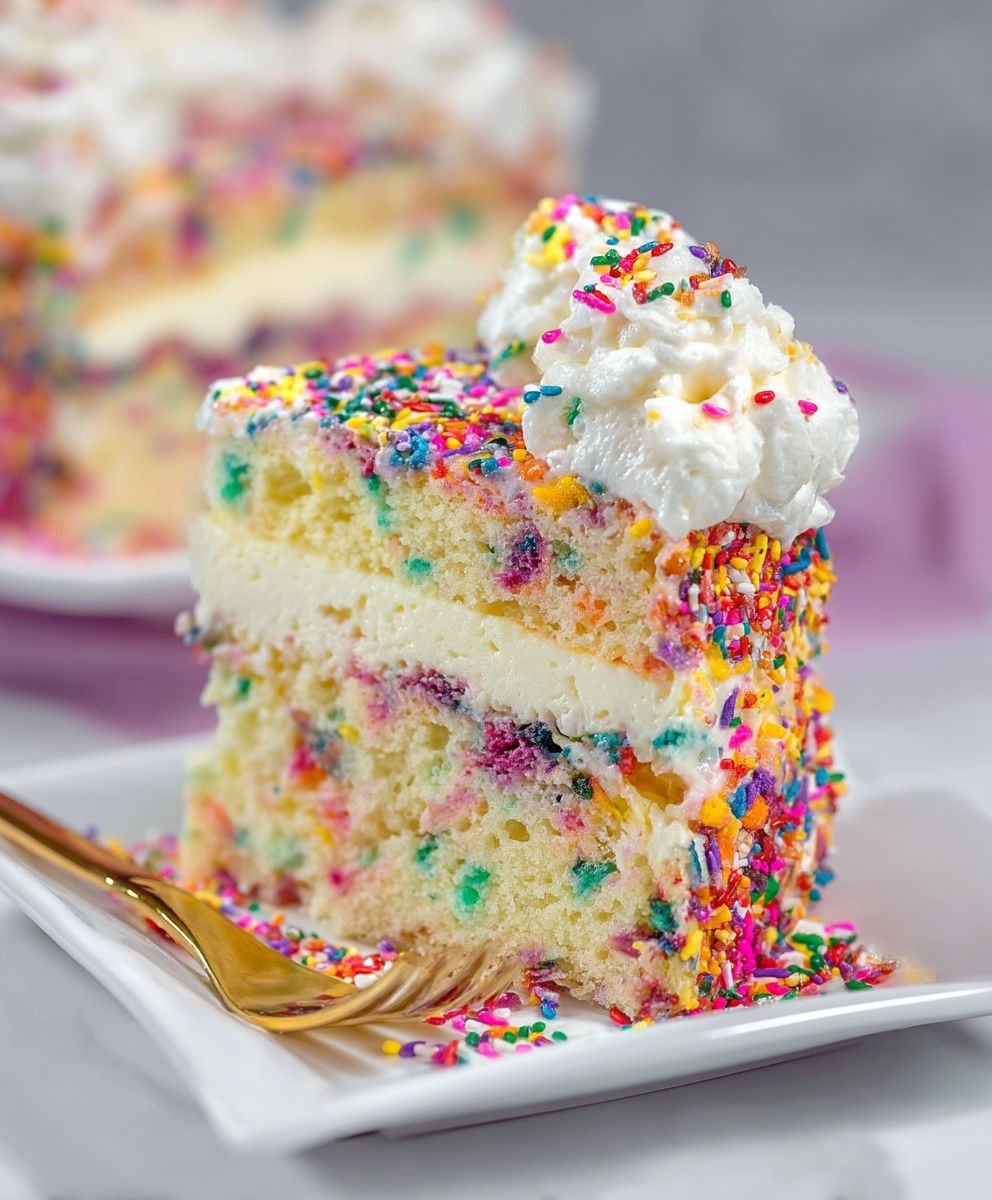
Funfetti Cheesecake Cake: Prepare to be amazed! Imagine the joyous burst of sprinkles from a classic Funfetti cake, swirled together with the creamy, decadent richness of a New York-style cheesecake. Sounds like a dream, right? Well, stop dreaming and start baking because this recipe brings that fantasy to life!
While the exact origins of combining cake and cheesecake are somewhat shrouded in delicious mystery, the concept has captured hearts (and stomachs!) worldwide. The beauty of a cheesecake cake lies in its ability to offer the best of both worlds. It’s a celebration of textures and flavors, a delightful marriage that elevates dessert to a whole new level.
People adore this Funfetti Cheesecake Cake for so many reasons. First, there’s the visual appeal – the vibrant sprinkles embedded in the moist cake layers are simply irresistible. Then, there’s the taste: the tangy cheesecake filling perfectly complements the sweet, vanilla-infused cake. And let’s not forget the texture! The smooth, creamy cheesecake against the soft, fluffy cake creates a symphony of sensations in every bite. Whether you’re celebrating a birthday, a holiday, or simply a Tuesday, this cake is guaranteed to bring a smile to everyone’s face. So, grab your mixing bowls and let’s get baking this show-stopping dessert!
Ingredients:
- For the Funfetti Cake Layers:
- 2 ¼ cups all-purpose flour
- 1 ½ cups granulated sugar
- 3 ½ teaspoons baking powder
- 1 teaspoon salt
- ¾ cup (1 ½ sticks) unsalted butter, softened
- 1 ¼ cups milk
- 2 large eggs
- 2 teaspoons vanilla extract
- ½ cup rainbow sprinkles, plus more for decorating
- For the Cheesecake Layer:
- 24 ounces cream cheese, softened
- ¾ cup granulated sugar
- 2 large eggs
- 1 teaspoon vanilla extract
- For the Vanilla Buttercream Frosting:
- 1 ½ cups (3 sticks) unsalted butter, softened
- 4 ½ cups powdered sugar
- ½ cup heavy cream
- 3 teaspoons vanilla extract
- Pinch of salt
Preparing the Funfetti Cake Layers:
- Preheat your oven to 350°F (175°C). Grease and flour two 9-inch round cake pans. I like to use baking spray with flour already in it for extra insurance against sticking.
- In a large bowl, whisk together the flour, sugar, baking powder, and salt. Make sure everything is evenly distributed for a consistent rise.
- Add the softened butter and milk to the dry ingredients. Beat with an electric mixer on low speed until just combined. Then, increase the speed to medium and beat for 2 minutes until the batter is smooth and creamy. Don’t overmix!
- Add the eggs and vanilla extract to the batter. Beat on medium speed until well combined.
- Gently fold in the rainbow sprinkles. Be careful not to overmix, as this can cause the sprinkles to bleed their color into the batter. You want those vibrant pops of color!
- Divide the batter evenly between the prepared cake pans. I use a kitchen scale to ensure they’re perfectly even, but you can also eyeball it.
- Bake for 25-30 minutes, or until a wooden skewer inserted into the center comes out clean. The cakes should be golden brown and spring back lightly when touched.
- Let the cakes cool in the pans for 10 minutes before inverting them onto a wire rack to cool completely. This prevents them from sticking and allows them to cool evenly.
Making the Cheesecake Layer:
- While the cake layers are baking (or after they’ve cooled), prepare the cheesecake layer. In a large bowl, beat the softened cream cheese with an electric mixer until smooth and creamy. It’s crucial that the cream cheese is softened to avoid lumps.
- Add the sugar to the cream cheese and beat until well combined. Scrape down the sides of the bowl to ensure everything is incorporated.
- Add the eggs one at a time, beating well after each addition. Again, scrape down the sides of the bowl as needed.
- Stir in the vanilla extract.
- Pour the cheesecake batter into a greased and parchment-lined 9-inch springform pan. The parchment paper makes it easier to remove the cheesecake later.
- Bake in a preheated oven at 325°F (160°C) for 55-65 minutes, or until the edges are set but the center still has a slight jiggle.
- Turn off the oven and let the cheesecake cool in the oven with the door slightly ajar for 1 hour. This helps prevent cracking.
- Remove the cheesecake from the oven and let it cool completely at room temperature. Then, cover it with plastic wrap and refrigerate for at least 4 hours, or preferably overnight. This allows the cheesecake to set completely.
Preparing the Vanilla Buttercream Frosting:
- In a large bowl, beat the softened butter with an electric mixer until light and fluffy. This usually takes about 3-5 minutes. The butter should be pale and airy.
- Gradually add the powdered sugar, one cup at a time, beating on low speed until combined. This prevents a powdered sugar cloud from erupting in your kitchen.
- Add the heavy cream, vanilla extract, and salt. Beat on medium speed until the frosting is smooth and creamy. If the frosting is too thick, add a little more heavy cream, one tablespoon at a time. If it’s too thin, add a little more powdered sugar.
Assembling the Funfetti Cheesecake Cake:
- Level the cake layers. Use a serrated knife to trim the tops of the cake layers so they are flat. This ensures a stable and even cake.
- Place one cake layer on a serving plate or cake stand.
- Spread a generous layer of vanilla buttercream frosting over the cake layer.
- Carefully remove the cheesecake from the springform pan. Run a thin knife around the edge of the pan to loosen the cheesecake before releasing the sides.
- Place the cheesecake layer on top of the frosted cake layer.
- Spread another generous layer of vanilla buttercream frosting over the cheesecake layer.
- Place the second cake layer on top of the frosted cheesecake layer.
- Frost the entire cake with the remaining vanilla buttercream frosting. You can create a smooth finish or a textured look, depending on your preference.
- Decorate the cake with rainbow sprinkles. I like to press the sprinkles gently into the frosting so they adhere well.
- Refrigerate the cake for at least 30 minutes before serving. This allows the frosting to set and the flavors to meld together.
Tips for Success:
- Softened Ingredients are Key: Make sure your butter and cream cheese are properly softened. This will ensure a smooth and creamy batter and frosting.
- Don’t Overmix: Overmixing the cake batter can result in a tough cake. Mix until just combined.
- Cooling is Crucial: Allow the cake layers and cheesecake to cool completely before assembling. This will prevent the frosting from melting.
- Chill Time Matters: Refrigerating the assembled cake allows the frosting to set and the flavors to meld together, resulting in a more delicious cake.
- Get Creative with Sprinkles: Don’t be afraid to use different types of sprinkles or create a fun sprinkle pattern on your cake.
Variations:
- Chocolate Cake Layers: Substitute some of the flour in the cake layers with cocoa powder for a chocolatey twist.
- Different Frosting Flavors: Experiment with different frosting flavors, such as chocolate, strawberry, or cream cheese frosting.
- Add Fruit: Add fresh berries or other fruits to the cake layers or frosting for a burst of flavor.
- Make it Gluten-Free: Use a gluten-free flour blend to make this cake gluten-free.
Storage Instructions:
- Store leftover cake in an airtight container in the refrigerator for up to 3 days.
- You can also freeze the cake for up to 2 months. Wrap it tightly in plastic wrap and then in aluminum foil. Thaw in the refrigerator overnight before serving.
Troubleshooting:
- Cake is Dry: Make sure you’re not overbaking the cake. Also, ensure you’re using the correct amount of liquid in the batter.
- Cheesecake is Cracked: Cooling the cheesecake slowly in the oven with the door ajar helps prevent cracking.
- Frosting is Too Thin: Add more powdered sugar to thicken the frosting.
- Frosting is Too Thick: Add more heavy cream to thin the frosting.
Equipment You’ll Need:
- Two 9-inch round cake pans
- 9-inch springform pan
- Electric mixer
- Mixing bowls
- Measuring cups and spoons
- Serrated knife
- Wire rack
- Spatula
Why This Recipe Works:
This Funfetti Cheesecake Cake is a showstopper that combines the best of both worlds: moist and fluffy Funfetti cake layers and a creamy, decadent cheesecake layer. The vanilla buttercream frosting adds the perfect touch of sweetness and ties everything together. The recipe is detailed and easy to follow, ensuring a successful baking experience. The tips and variations provide helpful guidance and inspiration for customizing the cake to your liking. The combination of textures and flavors is simply irresistible, making this cake a crowd-pleaser for any occasion. The sprinkles add a festive touch that makes it perfect for birthdays, celebrations, or any time you want to add a little fun to your day

Conclusion:
This Funfetti Cheesecake Cake isn’t just a dessert; it’s a celebration on a plate! From the moist, tender cake layers bursting with colorful sprinkles to the creamy, tangy cheesecake nestled in between, every bite is a symphony of textures and flavors that will leave you wanting more. It’s the perfect showstopper for birthdays, holidays, or any occasion that calls for a little extra joy. Trust me, the combination of the familiar funfetti cake and the decadent cheesecake is a match made in dessert heaven.
But why is this recipe a must-try? It’s more than just the taste (though that’s a pretty big reason!). It’s about the experience of creating something truly special. It’s about the smiles on the faces of your loved ones when they take their first bite. It’s about the satisfaction of knowing you made something from scratch that’s even better than anything you could buy in a store. This cake is surprisingly easy to make, even though it looks incredibly impressive. I’ve broken down each step to ensure success, even for beginner bakers. The recipe is designed to be foolproof, so you can focus on the fun part: decorating and enjoying!
Now, let’s talk about serving suggestions and variations. While this Funfetti Cheesecake Cake is absolutely divine on its own, there are plenty of ways to customize it to your liking. For a truly decadent experience, try serving it with a scoop of vanilla ice cream or a dollop of whipped cream. A drizzle of chocolate sauce or a sprinkle of extra sprinkles never hurts either!
If you’re feeling adventurous, you can experiment with different flavor combinations. Try adding a layer of raspberry jam between the cake and cheesecake for a fruity twist. Or, incorporate some chopped nuts into the cake batter for added texture. You could even use different colors of sprinkles to match a specific theme or holiday. The possibilities are endless!
Another fun variation is to make mini Funfetti Cheesecake Cakes in cupcake tins. This is a great option for parties or when you want individual servings. Simply adjust the baking time accordingly. You can also make a gluten-free version by using a gluten-free cake mix and gluten-free flour for the cheesecake layer.
I truly believe that this recipe will become a new favorite in your household. It’s a guaranteed crowd-pleaser that’s sure to impress. So, what are you waiting for? Gather your ingredients, preheat your oven, and get ready to bake up some magic!
I’m so excited for you to try this recipe and experience the joy of creating this incredible dessert. Once you’ve made it, I would absolutely love to hear about your experience! Please share your photos and comments on my social media pages. Let me know what you thought of the recipe, what variations you tried, and any tips or tricks you discovered along the way. Your feedback is invaluable, and it helps me to continue creating recipes that you’ll love. Happy baking, and enjoy every delicious bite of your Funfetti Cheesecake Cake! I can’t wait to see your creations!
Funfetti Cheesecake Cake: The Ultimate Party Dessert Recipe
Moist Funfetti cake layers with a creamy cheesecake center, vanilla buttercream frosting, and rainbow sprinkles!
Ingredients
Instructions
Recipe Notes
- Tips for Success:
- Softened Ingredients are Key: Make sure your butter and cream cheese are properly softened. This will ensure a smooth and creamy batter and frosting.
- Don’t Overmix: Overmixing the cake batter can result in a tough cake. Mix until just combined.
- Cooling is Crucial: Allow the cake layers and cheesecake to cool completely before assembling. This will prevent the frosting from melting.
- Chill Time Matters: Refrigerating the assembled cake allows the frosting to set and the flavors to meld together, resulting in a more delicious cake.
- Get Creative with Sprinkles: Don’t be afraid to use different types of sprinkles or create a fun sprinkle pattern on your cake.
- Variations:
- Chocolate Cake Layers: Substitute some of the flour in the cake layers with cocoa powder for a chocolatey twist.
- Different Frosting Flavors: Experiment with different frosting flavors, such as chocolate, strawberry, or cream cheese frosting.
- Add Fruit: Add fresh berries or other fruits to the cake layers or frosting for a burst of flavor.
- Make it Gluten-Free: Use a gluten-free flour blend to make this cake gluten-free.
- Storage Instructions:
- Store leftover cake in an airtight container in the refrigerator for up to 3 days.
- You can also freeze the cake for up to 2 months. Wrap it tightly in plastic wrap and then in aluminum foil. Thaw in the refrigerator overnight before serving.
- Troubleshooting:
- Cake is Dry: Make sure you’re not overbaking the cake. Also, ensure you’re using the correct amount of liquid in the batter.
- Cheesecake is Cracked: Cooling the cheesecake slowly in the oven with the door ajar helps prevent cracking.
- Frosting is Too Thin: Add more powdered sugar to thicken the frosting.
- Frosting is Too Thick: Add more heavy cream to thin the frosting.
- Equipment You’ll Need:
- Two 9-inch round cake pans
- 9-inch springform pan
- Electric mixer
- Mixing bowls
- Measuring cups and spoons
- Serrated knife
- Wire rack
- Spatula


